
20 Artist Bedroom Ideas for Creative Expression
Imagine waking up every day in a space that fuels your creativity and truly feels like your personal art sanctuary. Artist bedroom ideas are more than just stylish—they’re a reflection of passion, imagination, and individuality, making them incredibly popular among creatives and design enthusiasts alike. These spaces blend functionality with inspiring aesthetics, turning ordinary bedrooms into vibrant studios or muse-filled retreats.
In this article, you’ll discover a diverse range of ideas that cater to different tastes and artistic styles. From colorful mural walls to clever storage solutions for your supplies, each concept is designed to help you craft a space where your creativity can flourish. Get ready to transform your bedroom into the ultimate artist’s haven and let your imagination run wild!
1. Gallery Wall of Personal Masterpieces
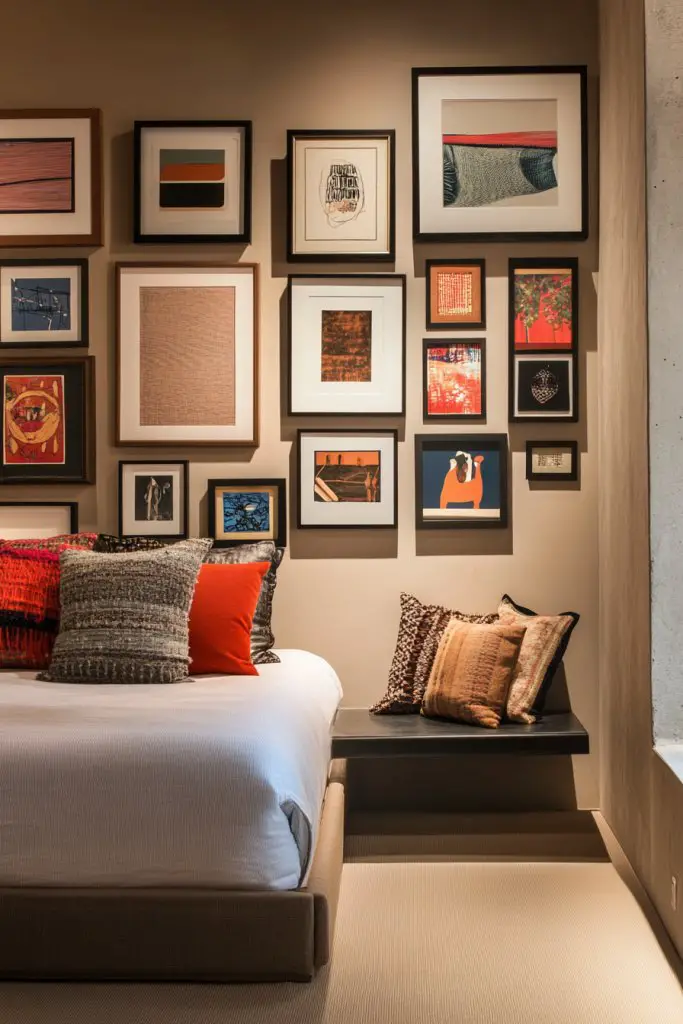
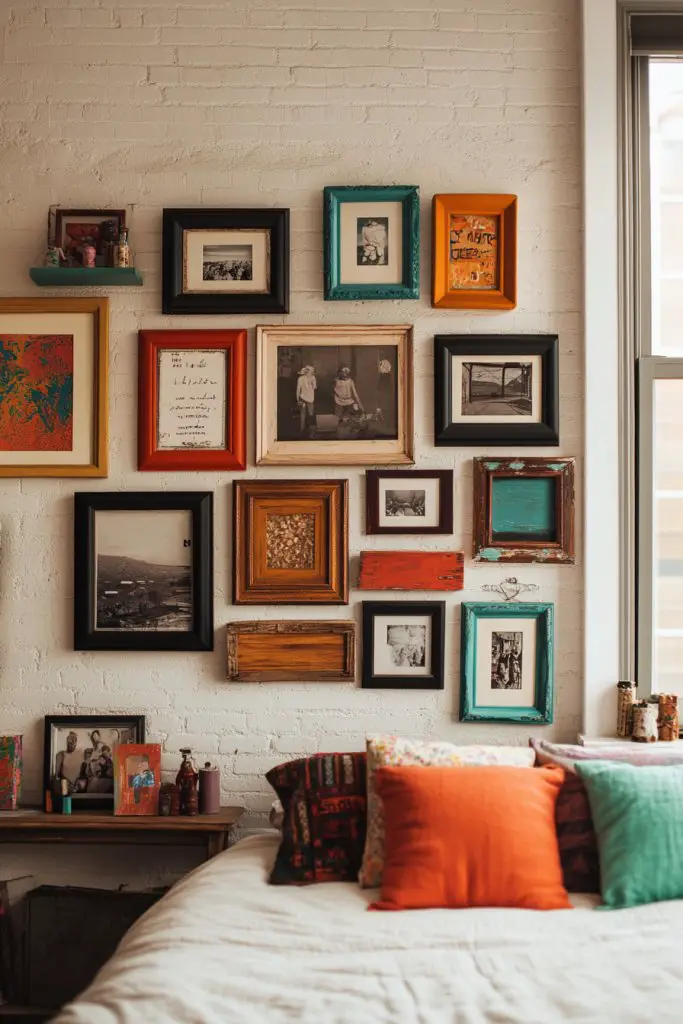
Ever wonder how to make your bedroom feel more like your personal art gallery? Want a space that screams your style without being cluttered? A gallery wall of your own masterpieces can turn a boring wall into a statement piece. It’s a fun way to showcase your creativity and boost your mood every day.
Recommended Products to replicate this idea
| # | Preview | Product | |
|---|---|---|---|
| 1 |

|
Mr. Pen- Double Headed Picture Hanging Nails, 50 Pack, Black, Push Pins for Wall | Check Latest Price |
| # | Preview | Product | |
|---|---|---|---|
| 1 |

|
NIORSUN Battery Operated Wall Sconce Set of 2,Gold Rechargeable Wall Lights with 5200mAh Dimmable... | Check Latest Price |
Picture a large wall filled with an eclectic mix of sketches, paintings, and mixed media pieces. Bright colors, textured frames, and varied sizes create visual interest. Your art hangs in a seemingly casual yet curated way, drawing the eye and sparking conversations. The space feels vibrant, inspiring, and uniquely yours.
You can keep it minimal with black-and-white photos or go full color with vibrant paintings. Mix framed art with unframed prints for an eclectic vibe. Change the theme seasonally, like botanical prints in spring or abstract art in winter. Use floating shelves or washi tape for a no-damage, flexible display.
Start by selecting your favorite artworks or sketches. Use painter’s tape or washi tape to plan your layout on the wall. Choose mismatched frames for a casual look or uniform ones for a more polished feel. Hang art at eye level, balancing sizes and colors. Use hooks, picture ledges, or adhesive strips for easy rearrangement. Keep a level handy to maintain symmetry.
Add personal touches like handwritten notes, quotes, or small souvenirs alongside your art. Incorporate different textures—like fabric swatches or textured paper—to add depth. Rotate pieces periodically to keep the display fresh. Use lighting, such as adjustable wall sconces, to highlight your favorites.
Creating your own gallery wall makes your space truly yours and inspires daily creativity. It’s a low-cost way to transform your bedroom into an artful retreat. Plus, it’s a great conversation starter and confidence booster to see your work displayed proudly.
2. DIY Colorful Wall Mural
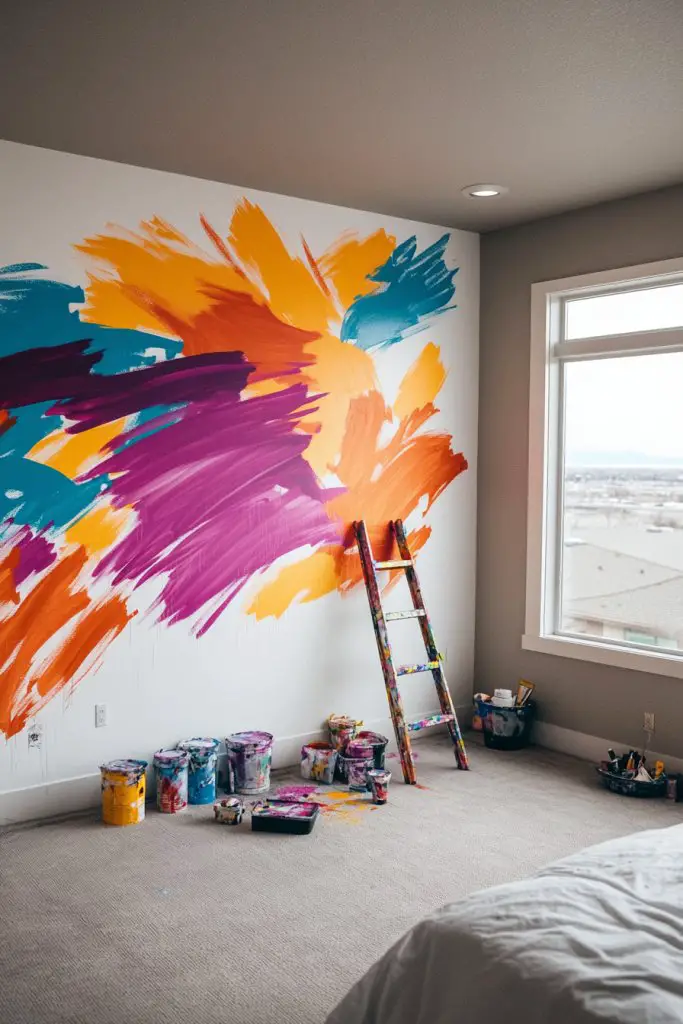
Tired of blank, boring walls? Craving a bold statement that energizes your space? A DIY colorful wall mural can turn plain walls into vibrant works of art. It’s a project that lets you unleash your creativity and make a room uniquely yours.
Recommended Products to replicate this idea
| # | Preview | Product | |
|---|---|---|---|
| 1 |

|
1 Quart Bulls Eye 1-2-3 Primer Sealer Stain Killer | Check Latest Price |
| # | Preview | Product | |
|---|---|---|---|
| 1 |

|
Apple Barrel, Vibrant Spectrum Collection Acrylic Craft Paint, PROMOABIII, 2 fl oz each, 16 assorted... | Check Latest Price |
Imagine a wall awash with swirling abstracts, geometric shapes, or playful patterns in bright hues. The mural covers the entire surface, creating an immersive backdrop. Textured paint strokes and layered colors add depth, making the room feel alive and dynamic. It’s like bringing a piece of street art or modern design into your sanctuary.
Choose a theme that matches your personality—bold geometrics, soft pastels, or nature-inspired motifs. Use painter’s tape or stencils for clean lines, or go freehand for an organic look. Seasonal colors or themes can refresh the room periodically. Small murals can be added to accent walls or entire rooms for maximum impact.
Begin by prepping the wall—clean and patch any imperfections. Sketch your design lightly with a pencil or chalk. Pick quality acrylic or latex paints in your chosen palette. Use stencils for crisp shapes, or tape for sharp geometric edges. Layer colors gradually, allowing drying time. Seal with a clear matte finish for durability.
Add metallic or glow-in-the-dark accents for extra flair. Incorporate your favorite colors or motifs, like musical notes or celestial themes. Incorporate textured techniques like sponging or palette knives for variety. Change the mural’s focal point seasonally for ongoing freshness.
A DIY mural transforms your space into an artistic haven and boosts your confidence in your artistic skills. It’s a fun and affordable way to express your personality boldly. Once finished, you’ll feel a new sense of pride every time you see your masterpiece.
3. Repurposed Art Supplies as Decor
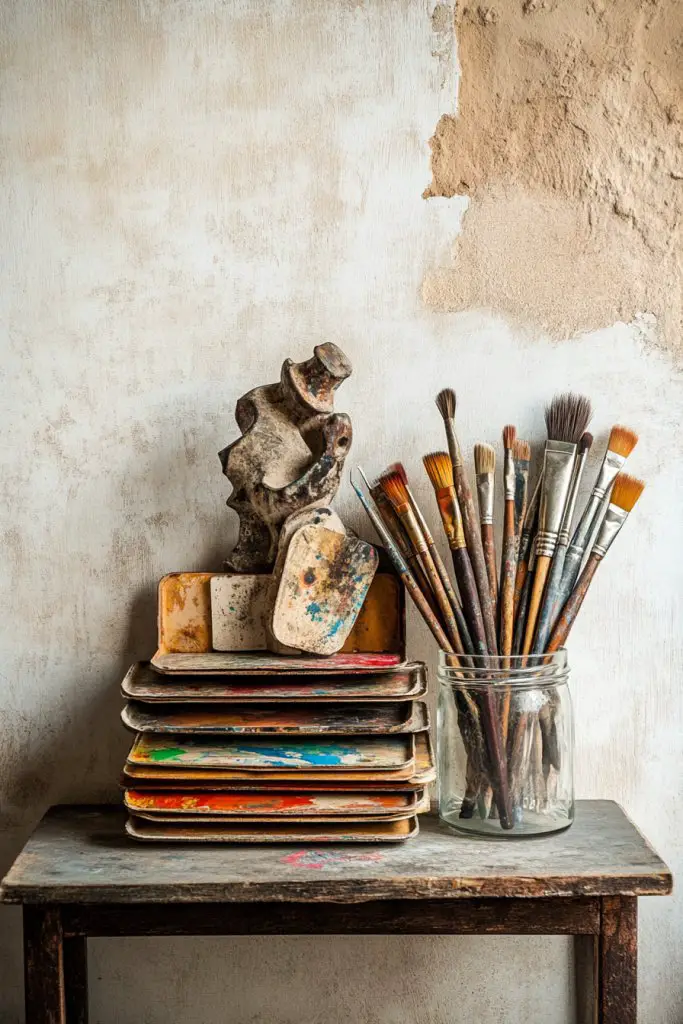
Looking to add a quirky, personal touch to your bedroom without breaking the bank? Why not turn your old art supplies into decorative elements? Repurposing vintage paint palettes, brushes, or sculpting tools makes your space both stylish and meaningful. Plus, it’s a great way to showcase your artistic journey.
Recommended Products to replicate this idea
| # | Preview | Product | |
|---|---|---|---|
| 1 |

|
Dxlam Palette Wooden Paint Palette, 2PCS Painting Palette Paint Tray Palettes for Acrylic Watercolor... | Check Latest Price |
| # | Preview | Product | |
|---|---|---|---|
| 1 |

|
Soucolor Acrylic Paint Brushes Set, 20Pcs Round Pointed Tip Artist Paintbrushes for Acrylic Oil... | Check Latest Price |
Visualize a shadow box filled with vintage brushes, a dried palette with leftover paint, or sculpting tools arranged artfully. Displayed on shelves or in glass jars, these items add texture and a nostalgic vibe. It’s like having a mini art museum right in your room, reminding you of your creative process.
Mix old art supplies with modern decor—think sleek acrylic frames or minimalist shelves. Use vintage containers or geometric shadow boxes to create contrast. Incorporate color-coordinated setups or keep it eclectic. Seasonal swaps of supplies or tools keep the display fresh and engaging.
Gather your vintage or unused art supplies. Clean and condition them if necessary. Use shadow boxes or floating shelves to display larger items, or arrange smaller tools in decorative jars or bowls. Label or add small plaques for a museum-like feel. Experiment with asymmetrical layouts for a casual vibe or grid for order.
Add personalized tags, quotes, or stories about each piece for a deeper connection. Incorporate small LED lights or spotlights to highlight your collection. Change the arrangement periodically to showcase different supplies. Integrate other art-related collectibles like vintage easels or sketchbooks.
Turning art supplies into decor celebrates your creative evolution and adds a unique story element. It’s a fantastic conversation starter and makes your room feel authentic. Plus, it motivates you to keep experimenting with new mediums and ideas.
4. Customizable Chalkboard or Whiteboard Wall

Ever wish your bedroom had a dedicated space for brainstorming, doodling, or planning? A chalkboard or whiteboard wall is perfect for those who crave a flexible, creative surface. It turns a plain wall into a dynamic canvas that adapts to your mood and projects.
Recommended Products to replicate this idea
| # | Preview | Product | |
|---|---|---|---|
| 1 |

|
Rust-Oleum 241140 Specialty Dry Erase Brush-On Paint Kit, White | Check Latest Price |
| # | Preview | Product | |
|---|---|---|---|
| 1 |

|
Post-it Dry Erase Whiteboard Film Surface for Walls, Doors, Tables, Chalkboards, Whiteboards, and... | Check Latest Price |
Picture a large wall filled with colorful doodles, inspirational quotes, and sketches in progress. The surface is a playground of ideas, constantly changing. You might see a grid of schedules one day and an abstract masterpiece the next. It’s a lively, interactive backdrop that fuels your creativity.
Choose between chalkboard paint for a matte, vintage feel or sleek whiteboard surfaces for a modern look. Frame the area with decorative molding or keep it minimal with clean edges. Use different colors of chalk or markers to organize and decorate. Consider a partial wall for a versatile workspace that doesn’t overwhelm the room.
Start by cleaning and priming the wall surface thoroughly. Apply high-quality chalkboard or whiteboard paint in multiple coats for a smooth finish. Use painter’s tape to create defined edges. Once dry, decorate the borders or add labels for organization. Keep chalk and markers handy in stylish holders or baskets.
Personalize your board with decorative washi tape or stickers. Add inspirational quotes or thematic decals that match your style. Use different colored chalk or markers to categorize your notes. Regularly update the doodles or messages to keep the space lively.
Transforming a wall into a creative hub can make your bedroom a lively, inspiring space. It encourages daily expression and reduces clutter on desks or tables. Seeing your ideas grow on the wall boosts confidence and sparks new projects.
5. Artistic Lighting with Sculptural Lamps
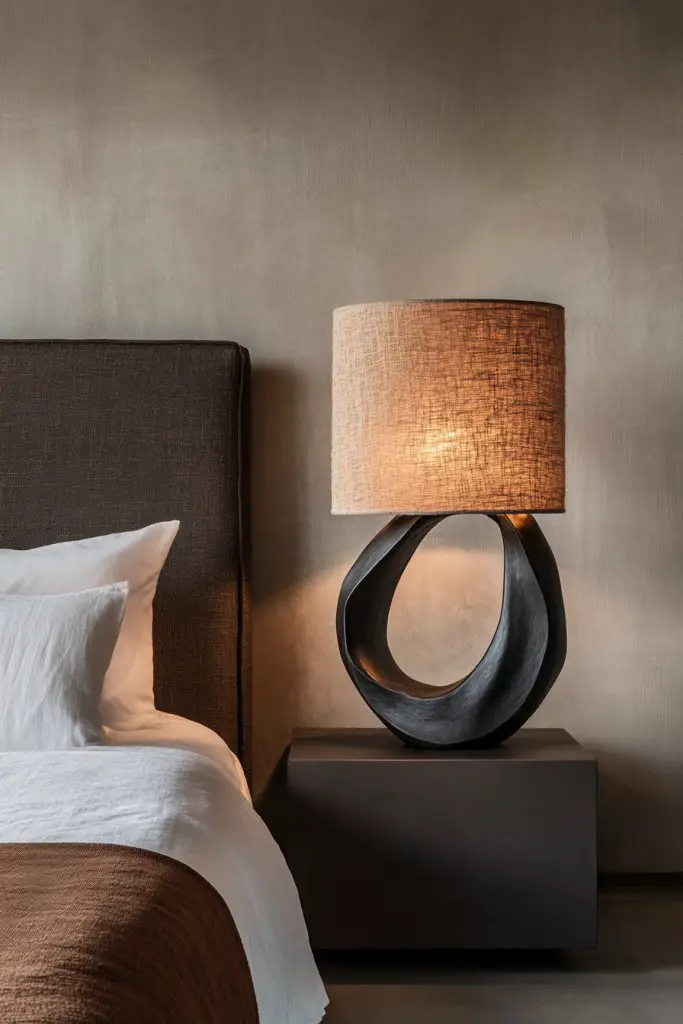
Looking to add an artistic flair to your bedroom lighting? Tired of boring, utilitarian lamps that do nothing for your decor? Sculptural lamps can serve as functional art pieces that elevate your space’s style while providing warm, inviting light. It’s a win-win for ambiance and aesthetics.
Recommended Products to replicate this idea
| # | Preview | Product | |
|---|---|---|---|
| 1 |

|
Sculptural Table Lamp Set of 2 with USB Ports For Living Room, Gold Leaf Finish Farmhouse Bedside... | Check Latest Price |
| # | Preview | Product | |
|---|---|---|---|
| 1 |

|
MXhme A19 LED Light Bulbs with Remote Control, 800LM 9W, 60W Equivalent LED Bulbs,Stepless Dimmable... | Check Latest Price |
Imagine a statement lamp with an abstract, handcrafted base that doubles as a sculpture. The soft glow highlights its unique shape, casting interesting shadows across the room. The texture of the material and the design become focal points, adding depth and character to your space. It’s like having a piece of art illuminating your night.
Choose sculptural lamps that match your decor style—sleek and modern, rustic, or bohemian. Use them as bedside lamps, accent lighting on shelves, or as centerpiece pieces. Play with different materials—ceramic, metal, or wood—to suit your taste. Incorporate dimmers to control mood lighting for any occasion.
Select a sculptural lamp that complements your room’s overall vibe. Place it where it can be appreciated from various angles. Ensure it has a compatible bulb type—LED for energy efficiency. Pair it with minimalist furniture or textured textiles for balance. Regularly dust and clean the sculpture to keep it looking pristine. Consider DIY options if you’re handy with sculpting materials.
Paint or customize the sculpture with metallic finishes, patinas, or vibrant colors. Add decorative elements like beads or fabric wraps for extra personality. Use the lamp to highlight specific wall textures or architectural features. Rotate different sculptural pieces seasonally for ongoing freshness.
A sculptural lamp transforms lighting from purely functional to an artful statement. It shows off your personality and design sensibility. With such a piece, your bedroom becomes a showcase of creativity and style, inspiring you daily.
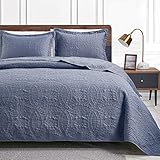
6. Textile Art with Colorful Tapestry or Quilt

Want to add warmth, texture, and color to your bedroom? A vibrant tapestry or quilt can instantly transform a plain wall or bed into a cozy, artistic focal point. It’s an easy way to introduce personality without complicated DIY projects or expensive decor.
Recommended Products to replicate this idea
| # | Preview | Product | |
|---|---|---|---|
| 1 |

|
Wonrizon Sun and Moon Tapestry, Aesthetic Black Dark Spiritual Tapestries Mystic Burning Sun with... | Check Latest Price |
| # | Preview | Product | |
|---|---|---|---|
| 1 |
|
Love's cabin Quilts for Queen Bed Blue Bedspreads - Soft Bed Summer Lightweight Bedspread Comforter... | Check Latest Price |
Imagine a large, handwoven tapestry hung above your bed, bursting with bold patterns and rich textures. Or picture a colorful quilt draped over your bed, inviting you to touch it. The fabric’s intricate stitching and vibrant hues create a layered, inviting atmosphere. It feels both artistic and comforting, perfect for relaxing.
Choose textiles that match your aesthetic—boho, modern, or vintage. Mix and match patterns and textures for an eclectic look, or keep it simple with monochrome tones. Use wall hangings, throw blankets, or bedspreads to add color and texture. Seasonal swaps keep your room feeling fresh and aligned with your mood.
Select a tapestry or quilt that complements your room’s color scheme. Hang it securely with wall hooks, rods, or sleeves—whichever suits your fabric and style. Layer different textiles for depth. Add decorative pillows or throws for extra comfort and visual interest. Wash and care for textiles according to their labels to keep them vibrant.
Create custom designs by sewing or embellishing your own textiles. Incorporate personal motifs, embroidery, or appliqué for a one-of-a-kind piece. Add tassels, fringe, or pom-poms for playful details. Use textiles to frame or mask imperfections on walls or furniture.
Textile art adds tactile richness and warmth, making your bedroom feel truly yours. It’s an accessible way to introduce color, pattern, and personality. Seeing your chosen textiles displayed beautifully can boost your confidence in your decorating style.
7. Creative Storage Solutions with Artistic Containers
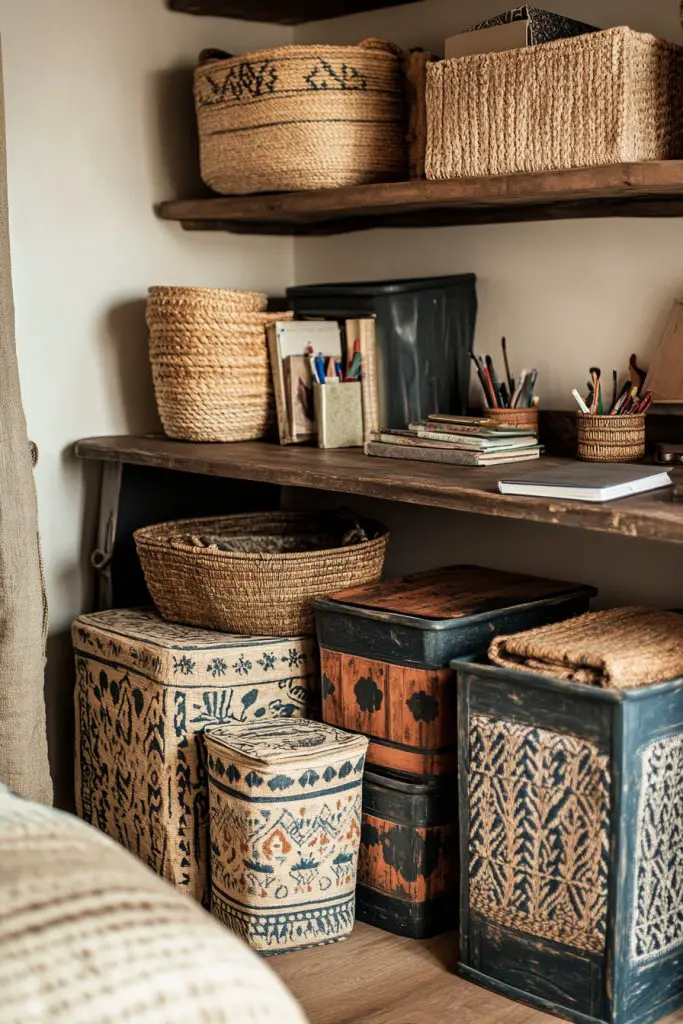
Is your clutter taking over your creative space? Want stylish storage that doesn’t compromise your bedroom’s vibe? Artistic containers like decorative bins, baskets, or boxes can organize your supplies beautifully. They turn storage into a design statement and keep everything within reach.
Recommended Products to replicate this idea
| # | Preview | Product | |
|---|---|---|---|
| 1 |

|
4 Pack Large Closet Storage Baskets Bins for Shelves | Fabric Closet Organizers and Storage with... | Check Latest Price |
| # | Preview | Product | |
|---|---|---|---|
| 1 |

|
Yilobi 5 Pack Woven Storage Baskets for Shelves, Decorative Basket Organizer Storage Bins for Toys,... | Check Latest Price |
Envision colorful woven baskets stacked neatly in a corner or sleek painted boxes on open shelves. Each container adds a splash of color or texture, making organization look intentional. When you open a decorative bin, you’re welcomed by neatly folded art papers, tools, or supplies—everything looks curated, not chaotic.
Pick containers that match your decor—metal, wood, woven, or painted. Use matching sets for a cohesive look or mix different styles for an eclectic vibe. Seasonal colors or patterns can be swapped in and out easily. Incorporate labels or tags for quick identification.
Assess your storage needs and choose containers accordingly. Use open baskets for easy access or closed boxes for a cleaner look. Place them on shelves, under beds, or inside closets. Decorate plain containers with paint, fabric, or decoupage for a customized feel. Regularly declutter and rotate your supplies for efficiency.
Add personal touches like painted patterns, decals, or stencils. Incorporate decorative hardware or handles. Use colorful liners or fabric inserts to add flair. Label containers with stylish tags or handwritten labels for a personal touch.
Smart, artistic storage solutions keep your creative space tidy and inspiring. They make organization feel effortless and stylish. Seeing everything in its place can motivate you to stay productive and creative daily.
8. Collage-Inspired Headboard Design
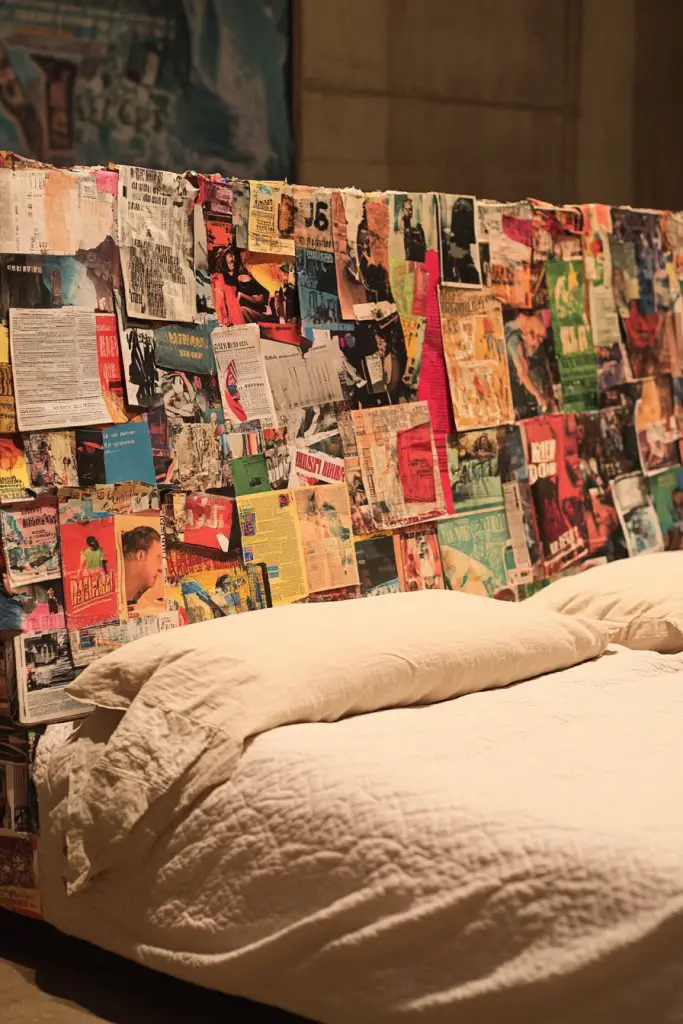
Looking for a headboard that’s more than just functional? Want to add personality and artistic flair to your bed? A collage-inspired headboard made of magazine cutouts, fabric scraps, or printed images can be a stunning focal point. It’s a creative way to express your visual taste.
Recommended Products to replicate this idea
| # | Preview | Product | |
|---|---|---|---|
| 1 |

|
Vittanly 15 Pack Picture Frames Collage Wall Decor for Mounting or Tabletop Display, Gallery Frame... | Check Latest Price |
| # | Preview | Product | |
|---|---|---|---|
| 1 |

|
BENECREAT 5 Sheets 3mm White Foam Boards 11.8x7.8inch Rectangle Foam PVC Sheet Poster Board Mount... | Check Latest Price |
Visualize a headboard covered with a mix of colorful magazine clippings, fabric swatches, and printed photos arranged in a layered collage. The textures and patterns create depth, inviting you to touch and explore. The eclectic mix tells your story—whether it’s your favorite art, travels, or personal symbols—every piece adds meaning.
Use different materials—magazine pages, fabric, or printed art—for a variety of textures. Keep it monochrome for a sophisticated look or wildly colorful for a playful vibe. Change the collage periodically for fresh inspiration. Frame some pieces or let them extend over the edges for a relaxed, artsy look.
Start by selecting a sturdy backing—wood, foam board, or fabric-covered plywood. Arrange your images before gluing or attaching to plan your design. Use mod podge, spray adhesive, or staples for a secure finish. Seal with a clear spray for protection. Mount the headboard securely to your bed frame or wall.
Add personal touches like handwritten notes, quotes, or small objects glued into the collage. Incorporate different textures—glossy, matte, or textured papers—for visual interest. Change sections seasonally or on a whim. Use decorative nails or trim to give it a finished look.
A collage headboard makes your bed a true expression of your personality. It’s a creative project that boosts your confidence and decor skills. Every time you see it, you’re reminded that your space can be as unique as you are.
9. DIY Art-Inspired Bedding and Pillows
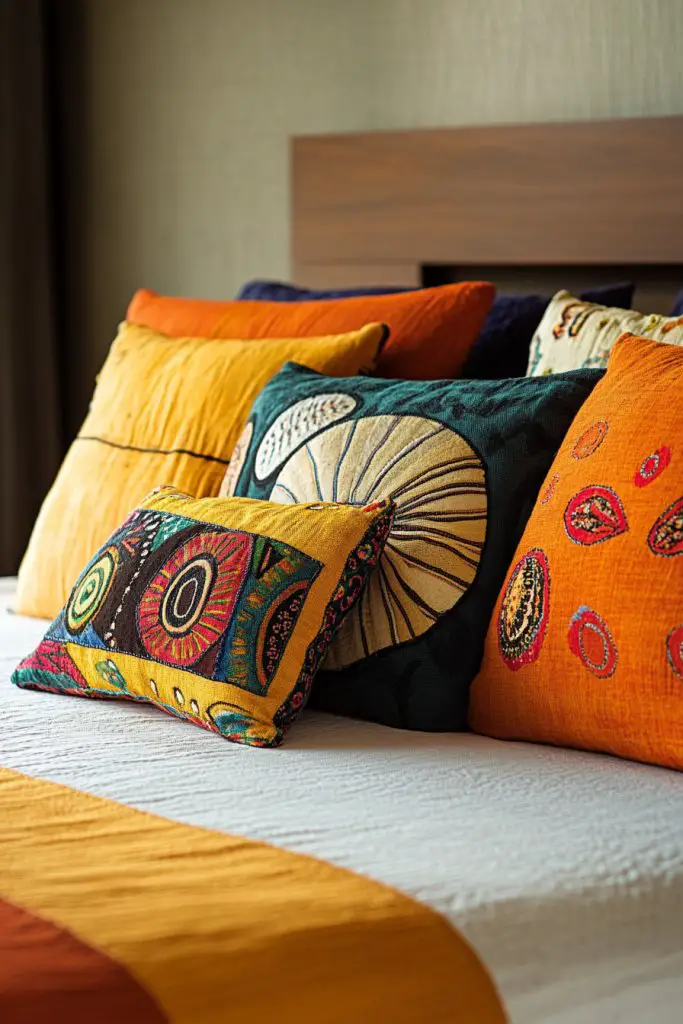
Want your bed to be more than just a place to sleep? Dream of bedding that reflects your artistic side? DIY art-inspired pillows and bedding let you showcase your creativity while adding comfort. It’s your chance to turn functional items into mini canvases.
Recommended Products to replicate this idea
| # | Preview | Product | |
|---|---|---|---|
| 1 |

|
Emvency Set of 2 Throw Pillow Covers Modern Abstract Painting Blue White and Gray Decorative Sofa... | Check Latest Price |
| # | Preview | Product | |
|---|---|---|---|
| 1 |

|
Bedsure Duvet Cover King Size - 3 Pieces Prewashed Cotton-Like Extra Soft Bedding Set, Includes 1... | Check Latest Price |
Imagine pillows painted with abstract designs, embroidered motifs, or collaged images that tell a story. A duvet cover with hand-painted or stenciled patterns can transform your bed into an art piece. Textures like embroidered details or appliqué add depth, making your bed both cozy and visually captivating.
Use fabric paints, stencils, or embroidery for different effects. Mix and match patterns, textures, and colors for a layered look. Seasonal themes—like floral in spring or geometric in fall—keep your decor fresh. Personalize with initials or symbols that hold meaning for you.
Choose high-quality, washable fabrics for durability. Sketch your designs lightly before painting or stitching. Use stencils or freehand for a personal touch. Seal painted pillows with fabric medium or clear spray to prevent fading. Sew or glue embellishments securely. Wash carefully to preserve your artwork.
Add trims, tassels, or decorative buttons for extra flair. Incorporate your favorite colors or motifs to match your style. Swap out pillow covers seasonally or when you need a fresh look. Use embroidery hoops or fabric markers for easy updates.
Creating your own art-inspired bedding boosts your confidence and makes your space truly yours. It’s a fun way to practice new techniques and display your personality. Every night, you sleep surrounded by your own creativity, fueling inspiration for days ahead.
10. Upcycled Art Frame Gallery
Looking for a budget-friendly way to display your artwork and inspiration? Upcycling old or thrifted picture frames into a gallery wall is both eco-friendly and stylish. It’s a creative challenge that results in a personalized, eclectic display that’s full of character.
Recommended Products to replicate this idea
| # | Preview | Product | |
|---|---|---|---|
| 1 |

|
upsimples 10 Pack Picture Frames Collage Wall Decor for Mounting or Tabletop Display, Photo Gallery... | Check Latest Price |
| # | Preview | Product | |
|---|---|---|---|
| 1 |

|
ZESLMG Adhesive Wall Hooks for Hanging, 16 Pack Self Sticky Hooks Heavy Duty 22lb Clear, Removable... | Check Latest Price |
Visualize mismatched frames painted in bright colors or distressed finishes, arranged in a grid or organic pattern. Inside, you might have mini paintings, sketches, or inspirational quotes. The varied frames add texture and depth, turning a simple wall into a curated art collection. It’s playful, charming, and uniquely you.
Mix different frame styles—vintage, modern, ornate—to create visual interest. Paint or decorate frames with washi tape, fabric, or metallic accents. Use the frames to showcase small pieces or layered prints for a rich, dynamic look. Change what’s inside periodically to keep it fresh.
Source old frames from thrift stores, flea markets, or your attic. Clean and repair damaged parts, then paint or decorate as desired. Mount your artwork or quotes inside using clips, mats, or adhesive mounting strips. Arrange frames on the wall before hanging to plan your layout. Secure with appropriate hooks or nails. Consider adding small shelves or ledges for extra flexibility.
Personalize with hand-painted borders, faux finishes, or decorative accents. Incorporate mementos or small objects within frames for a layered effect. Mix in different sizes and orientations for a playful vibe. Rotate artwork seasonally or for special occasions.
Creating a gallery of upcycled frames shows your creativity and resourcefulness. It’s a cost-effective way to decorate and a satisfying project. Seeing your mini art collection grow boosts your decor confidence and sparks ongoing inspiration.
11. Hand-Painted Furniture Pieces
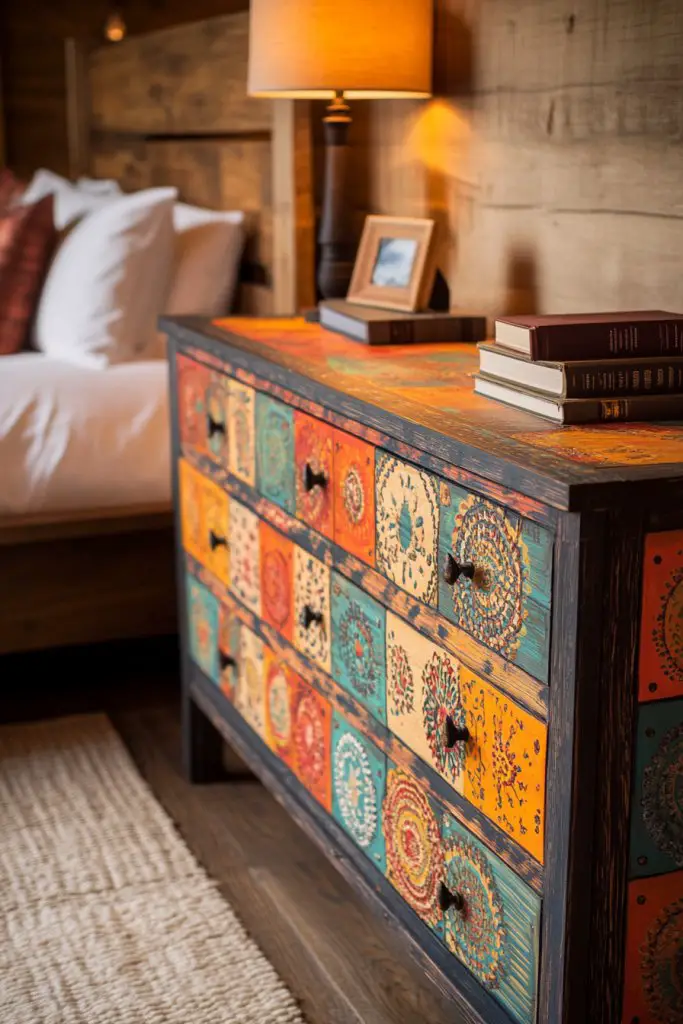
Tired of looking at plain, generic furniture? Want to add a personal, artistic touch to your bedroom? Hand-painting furniture is a fun way to customize your space and showcase your style. It’s a creative project that can give old pieces new life.
Recommended Products to replicate this idea
| # | Preview | Product | |
|---|---|---|---|
| 1 |

|
Jolie Finishing Wax - Protective topcoat Paint - Use on interior furniture, cabinets, walls, home... | Check Latest Price |
| # | Preview | Product | |
|---|---|---|---|
| 1 |
|
Jolie Finishing Wax - Protective topcoat Paint - Use on interior furniture, cabinets, walls, home... | Check Latest Price |
Imagine a vintage dresser with bold, hand-painted motifs or a side table with abstract strokes in your favorite colors. The painted patterns add personality and become focal points in your room. Textural brushstrokes and detailed designs make the furniture feel like art pieces, not just functional items.
Use stencils, freehand painting, or decals to create different effects. Match your decor theme—boho, modern, rustic—or go eclectic with mixed patterns. Incorporate metallic or matte finishes for different moods. Repaint or touch up periodically to keep it fresh.
Select furniture with smooth surfaces and sturdy construction. Sand lightly to prep and prime the surface. Choose high-quality acrylic or chalk paint suitable for furniture. Use fine brushes for detail work and larger brushes or rollers for broad areas. Seal with a clear protective topcoat to prevent chipping. Allow drying time between coats.
Add gold or silver leaf accents, decals, or stenciled motifs for extra detail. Incorporate your favorite colors or symbols that hold personal meaning. Mix painted pieces with natural textures like wood or linen for contrast. Regular touch-ups help maintain the design.
Hand-painted furniture reflects your artistic flair and makes your bedroom one-of-a-kind. It’s a rewarding project that boosts your confidence in your decorating skills. Every time you see your painted piece, you’re reminded of your creativity and effort.
12. Mixed Media Art Corner
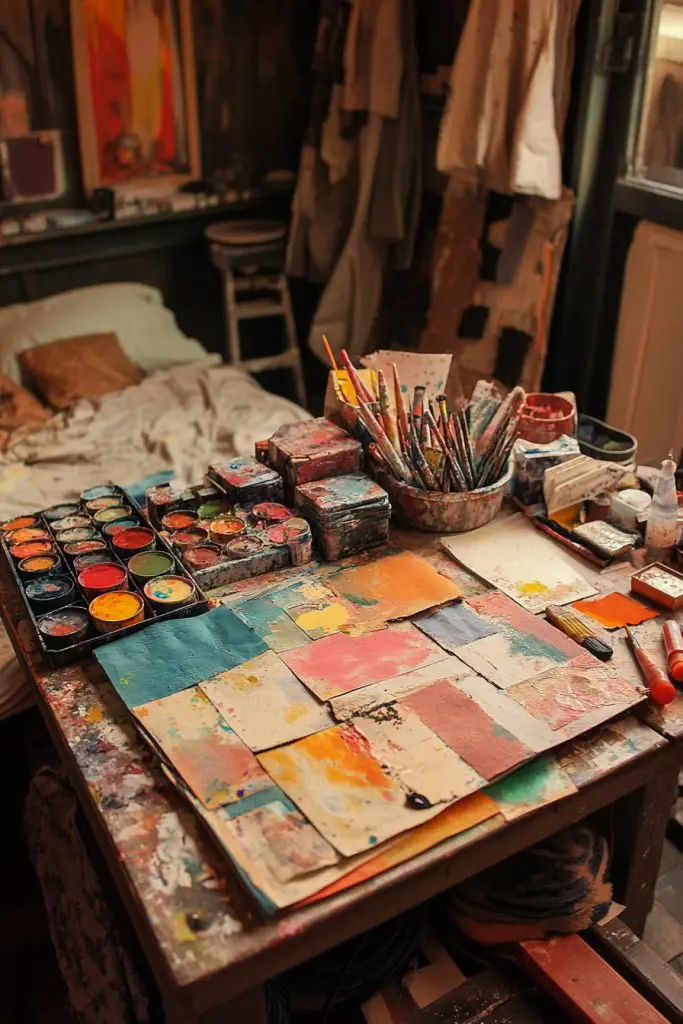
Craving a dedicated space to experiment with different art forms? A mixed media art corner is perfect for combining paint, fabric, paper, and found objects. It’s a tactile, inspiring zone that fuels your creativity and adds a unique vibe to your bedroom.
Recommended Products to replicate this idea
| # | Preview | Product | |
|---|---|---|---|
| 1 |

|
7 Elements 6 Drawer Wooden Artist Storage Supply Box for Pastels, Pencils, Pens, Markers, Brushes... | Check Latest Price |
| # | Preview | Product | |
|---|---|---|---|
| 1 |

|
Yaheetech Height Adjustable Drafting Table Drawing Table Artist Desk Tilting Tabletop Art Craft Desk... | Check Latest Price |
Envision a small corner with a sturdy table or easel, cluttered with layers of textured materials. You might see collaged papers, painted surfaces, and fabric elements blending seamlessly. The space feels dynamic, inviting you to touch and explore your art in progress. It’s an eclectic, inspiring environment.
Set up with a variety of supplies—acrylics, textiles, papers, and sculpting tools. Use open shelving, pegboards, or portable carts for easy access. Incorporate personal mementos or natural elements. Adapt the setup for your preferred mediums—more paint, more fabric, or both.
Choose a well-lit corner with a sturdy workspace. Gather a variety of textures and materials. Prepare surfaces with primers or bases if needed. Start layering different media—paint, paper, fabric—building depth and texture. Use glue, gel mediums, or stitching to attach elements securely. Protect finished pieces with sealants or varnishes.
Add personal touches like meaningful objects, small sculptures, or photo transfers. Incorporate your favorite colors or themes to inspire ongoing projects. Use storage solutions that keep supplies organized but accessible. Change layouts and projects often to maintain enthusiasm.
A mixed media corner celebrates experimentation and creativity. It’s a space where you can develop your skills and produce truly original work. Watching your ideas come together here boosts your confidence and motivates continuous artistic growth.
13. String Art or Wire Wall Installations
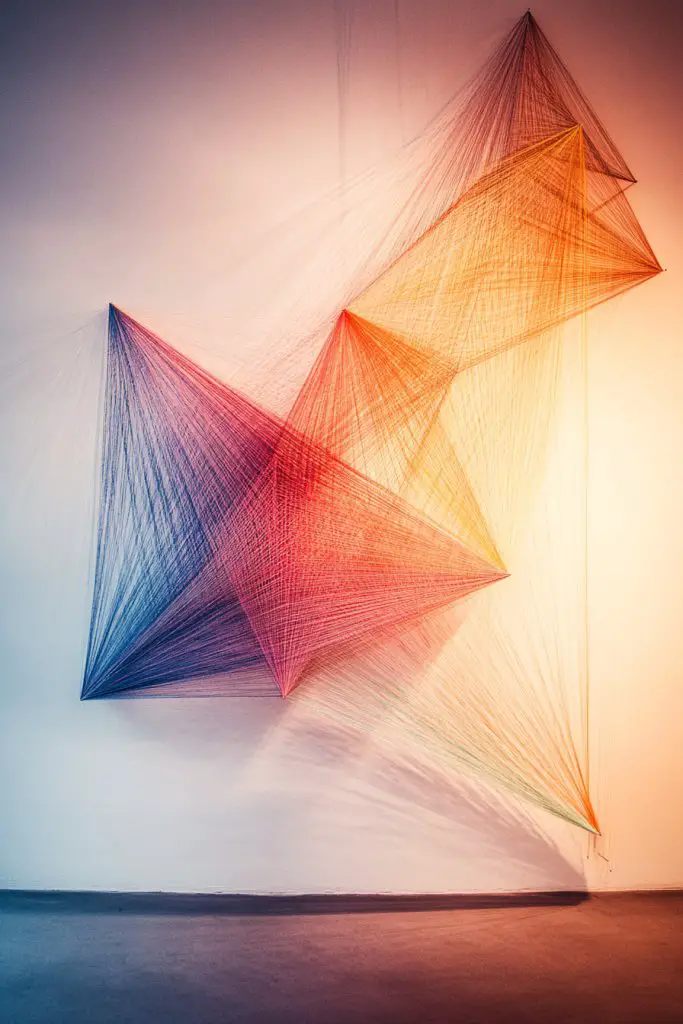
Want a DIY art project that’s both engaging and visually striking? String art or wire installations are perfect for creating textured, geometric, or organic shapes on your wall. They add depth and a modern, handcrafted feel to your bedroom decor.
Recommended Products to replicate this idea
| # | Preview | Product | |
|---|---|---|---|
| 1 |

|
Klever Kits 3D String Art Kit for Kids, Light Up String Light Toy with 30 Multi-Colored LED Bulbs,... | Check Latest Price |
| # | Preview | Product | |
|---|---|---|---|
| 1 |

|
Deco 79 Metal Floral Home Wall Decor 3D Wire Wall Sculpture with Crystal Embellishments, Wall Art... | Check Latest Price |
Imagine a wall adorned with intricate string patterns forming abstract shapes or meaningful symbols. The raised lines catch light and cast shadows, creating a tactile and visual focal point. Combining different colors or wire thicknesses adds complexity and sophistication. It’s a unique mix of art and craftsmanship.
Use colorful embroidery threads, metallic wires, or natural jute for different effects. Shape designs with nails, hooks, or pins on a wooden backing or directly on the wall. Keep it minimal with simple lines or build complex patterns for impact. Seasonal themes or personal symbols can be incorporated.
Sketch your design on paper first. Hammer nails or hooks into your chosen surface following the pattern. Tie or staple the string or wire to the starting point, then follow your design, keeping tension even. Secure ends tightly. Use different colors to add vibrancy. Finish with a clear sealant if needed.
Mix materials—metal, colored thread, or textured wire—for variety. Incorporate beads or small embellishments along the lines for extra detail. Frame the installation or leave it free-floating for a contemporary look. Change designs seasonally for ongoing inspiration.
String and wire art is an accessible way to craft eye-catching decor that also develops your skills. It’s a rewarding project that showcases your patience and precision. Your wall becomes a conversation piece that reflects your artistic spirit.
14. Inspirational Quote Wall Art with Hand Lettering
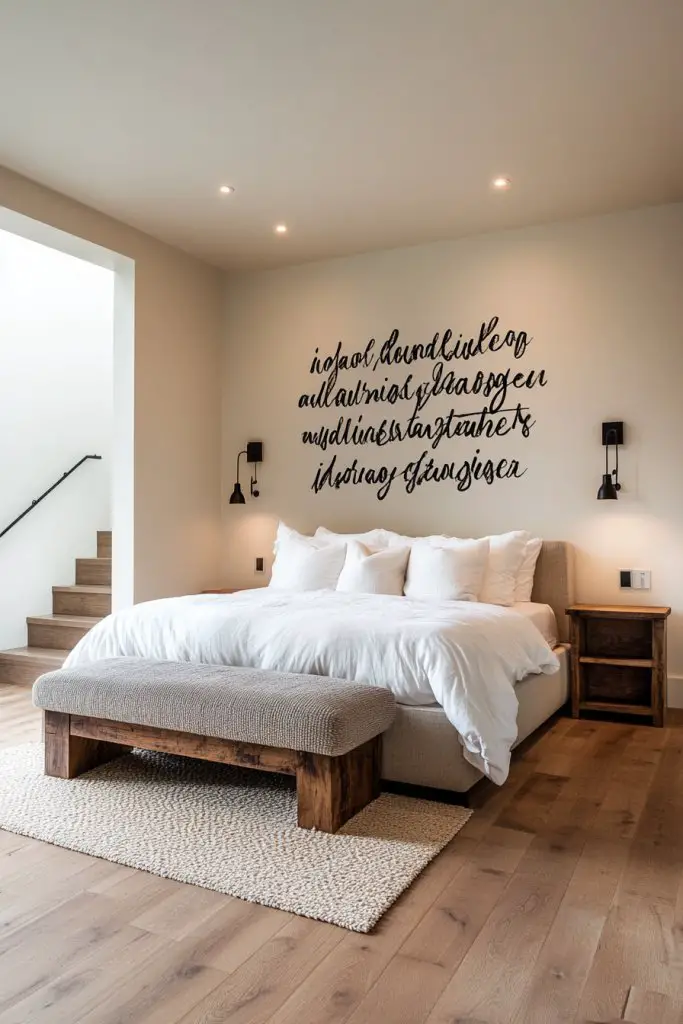
Looking for a way to motivate yourself every day? Want to add a personal, artistic touch to your bedroom walls? Hand-lettered quotes or affirmations can transform your space into an inspiring sanctuary. It’s a simple project that packs a powerful punch.
Recommended Products to replicate this idea
| # | Preview | Product | |
|---|---|---|---|
| 1 |

|
upsimples 11x14 Picture Frame, Display Pictures 8x10 with Mat or 11x14 Without Mat, Wall Hanging... | Check Latest Price |
| # | Preview | Product | |
|---|---|---|---|
| 1 |
![Fantastory Metallic Iridescent Acrylic Paint Set with 12 Brushes, 20 x 2oz Metallic Colors, Color-Shifting, Craft Paint Kit, Metal/Canvas/Rock/Stone/Ceramic/Model/Wood Painting [Professional Series]](https://m.media-amazon.com/images/I/51Lc1-TClgL._SL160_.jpg)
|
Fantastory Metallic Iridescent Acrylic Paint Set with 12 Brushes, 20 x 2oz Metallic Colors,... | Check Latest Price |
Visualize a large canvas or section of your wall with beautifully hand-lettered quotes in artistic fonts. Use watercolor backgrounds, decorative borders, or metallic accents to make the words pop. The typography itself becomes a piece of art, setting the tone and mood of the room.
Experiment with different lettering styles—calligraphy, brush lettering, or modern fonts. Incorporate color gradients or metallic inks for extra richness. Use stencils or freehand techniques depending on your skill level. Frame completed pieces for a polished look or display directly on the wall.
Begin by choosing meaningful quotes or affirmations. Sketch your design lightly with pencil or transfer with tracing paper. Use high-quality markers, paint pens, or brushes to create your lettering. Add decorative flourishes or backgrounds as desired. Seal with a clear spray for longevity. Mount on the wall with clips or adhesive strips.
Incorporate your favorite colors, patterns, or motifs around the quotes. Combine different fonts or styles within one piece for variety. Change or add quotes seasonally to keep motivation fresh. Use metallic or glitter pens for a touch of glam.
Creating your own quote art builds confidence and centers your mindset. It’s a daily reminder of what matters most to you. Plus, it’s a creative process that sharpens your lettering and design skills, making your space truly yours.
15. Artistic Window Treatments with Painted or Fabric Curtains
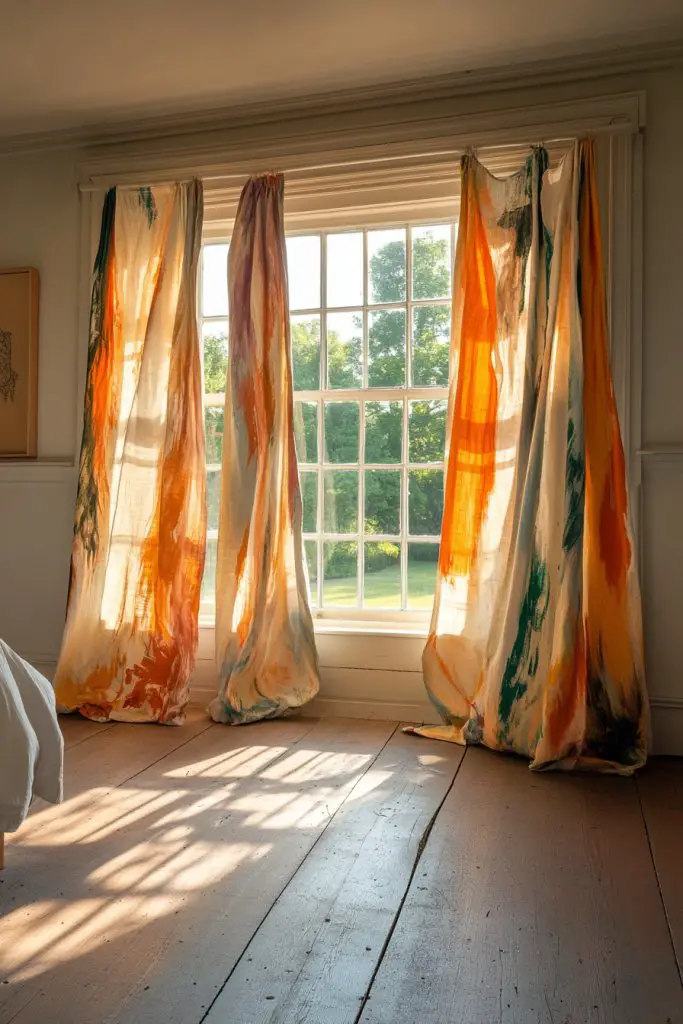
Ever wondered how to add a splash of personality to your bedroom windows without resorting to the usual boring blinds or standard curtains? Artistic window treatments are the answer, allowing you to turn a functional element into a focal point of your space. Instead of plain fabrics, you can choose bold, painterly patterns or textured textiles that complement your overall aesthetic. Plus, they help set the mood—whether you want a cozy, intimate feel or something more vibrant and energetic—without adding clutter or unnecessary accessories.
Recommended Products to replicate this idea
| # | Preview | Product | |
|---|---|---|---|
| 1 |

|
HPD Half Price Drapes - Faux Linen Curtains for Living Room (1 Panel) - 50W X 84L - Textured Room... | Check Latest Price |
| # | Preview | Product | |
|---|---|---|---|
| 1 |

|
Anytime Home Curtains Blackout and Sheer Layered Solid Window Curtain Panel Pair with Grommet Top,... | Check Latest Price |
Imagine fabric curtains with hand-painted designs in swirling abstract motifs or gentle watercolor washes that evoke calmness. Alternatively, opt for textured textiles like woven, embroidered, or even quilted panels that add depth and tactile interest. You can also layer sheer fabrics with heavier drapes for a versatile look, giving you control over light and privacy while maintaining an artistic vibe. The key here is choosing materials and patterns that resonate with your creative style, making your windows a canvas or a textile masterpiece.
Styling variations are endless—think about seasonal adaptations like lightweight linen for summer, with bright, cheerful hues, or cozy velvet and deep jewel tones for winter. For a boho look, add tassels or fringe trims, while for a more modern aesthetic, go for sleek, geometric patterns in monochrome. If you’re into vintage vibes, consider patchwork or reclaimed fabric curtains that tell a story. The beauty of this idea is that it can be tailored to any space or personality, making your window dressing both functional and highly personalized.
Implementation involves selecting the right fabrics and designs, then hanging them creatively. You can use decorative rods, tiebacks, or even install a tension wire system for a minimalist look. If painting your own fabric sounds intimidating, consider using fabric dye or stencils to add your own artistic touches, or even sewing your custom patterns. Remember, the goal is to craft curtains that enhance your room’s vibe without tying you down to expensive or complicated installations. The trick is balancing style with practicality, ensuring your window treatments are both beautiful and easy to maintain.
Personalization is where this idea really shines. Mix and match fabrics, incorporate your favorite colors or motifs, and even add embroidery or appliqué for extra detail. You can also create a gallery of small fabric swatches or patches on a curtain panel, turning it into a mixed-media textile art piece. For a more practical approach, attach decorative trims or painted accents that match your room’s theme. This way, your window treatments become a reflection of your artistic personality, continuously inspiring you every time you glance toward the window.
Looking for inspiration? Think of a bedroom where the curtains feature hand-painted botanical designs or abstract splashes of color that echo your mood. Or imagine layered textiles with textured weaves and subtle patterns that invite you to touch and explore. Whatever your style, customizing your window treatments with painted or unique fabric curtains transforms a simple necessity into a stunning visual statement. It’s a small change that can make a big impact, boosting your confidence in creating a truly personalized space you’ll love waking up in.
16. DIY Canvas Art with Personal Motifs
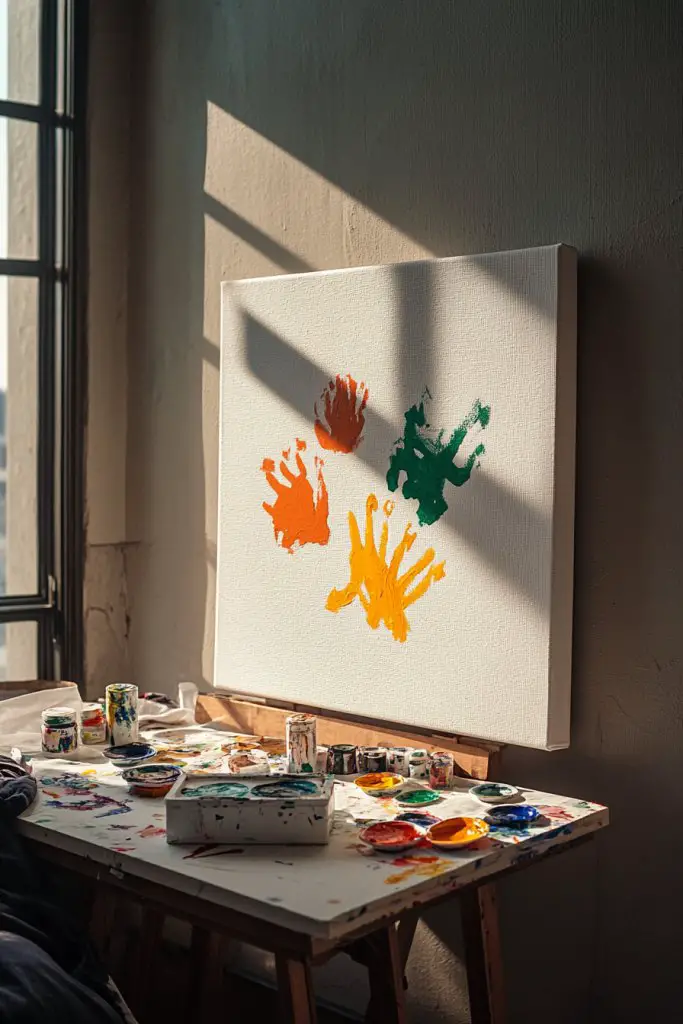
Who says wall art has to be expensive or boring? DIY canvas art is a fantastic way to infuse your bedroom with your own creative flair, especially when you design with personal motifs that speak directly to you. Whether it’s abstract shapes, meaningful symbols, or even minimalist line drawings, creating your own artwork adds authenticity and a sense of ownership that store-bought prints just can’t match. Plus, it’s surprisingly easy and budget-friendly—no art degree required!
Recommended Products to replicate this idea
| # | Preview | Product | |
|---|---|---|---|
| 1 |

|
ESRICH Stretched Canvas for Painting, 5 Pack 8x10 Canvas Value Pack, Primed Acid-Free Cotton Blank... | Check Latest Price |
| # | Preview | Product | |
|---|---|---|---|
| 1 |

|
Pagather 72 Colors Acrylic Paint Markers, Dual Tip with Fine Tip and Brush Tip Pens for Stone, Wood,... | Check Latest Price |
Start with a blank canvas, some acrylic paints, and your favorite brushes, or even experiment with mixed media like collage, fabric, or textured mediums. Think about motifs that inspire you—perhaps a favorite quote, a geometric pattern, or a symbolic image that resonates with your artistic journey. If you’re not confident with freehand drawing, use stencils or transfer techniques to get clean lines and shapes. The key is to keep it personal, whether that means incorporating your own sketches, doodles, or even abstract color washes that evoke your mood and style.
Variations are endless—try bold, graphic designs for a modern look or soft, blended hues for a calming vibe. You can also group multiple canvases with different motifs for a gallery wall effect, or keep it minimal with a single, striking piece. For seasonal updates, swap out motifs or colors to reflect your current inspiration, ensuring your art always feels fresh and relevant. The flexibility of DIY canvas art means you can adapt it to small nooks or large focal walls alike, making it perfect for any room size or style.
To implement, gather some inexpensive canvases, paints, and brushes, then sketch out your ideas lightly with a pencil before diving into color. Layer colors gradually, allowing each to dry before adding new details, and don’t be afraid to experiment—sometimes happy accidents turn into your favorite pieces. If you’re feeling adventurous, add textured elements like modeling paste or metallic accents to make your artwork pop. Hang your creations using simple picture hooks or clips, and consider framing them for a polished look or leaving the edges raw for a more casual, artistic feel.
Personalization is the secret sauce here. Embellish your canvas with motifs that have special meaning—like a skyline from your hometown, a symbol of a personal mantra, or a pattern inspired by your favorite artist. This isn’t just decoration; it’s a reflection of your creative identity. Plus, creating your own art can be incredibly therapeutic and empowering, giving you confidence to try more ambitious projects down the line. Remember, the goal is to make art that energizes and inspires you every day, turning your bedroom into a true sanctuary of self-expression.
Looking for ideas? Picture a canvas featuring a minimalist line drawing of a mountain range in soft earth tones, or a vibrant, abstract swirl of your favorite colors that sparks joy. Or imagine combining tiny sketches, quotes, and patterns into a collage-style piece that feels both personal and artistic. Whatever your style, DIY canvas art with personal motifs is a simple yet powerful way to showcase your creativity and make your bedroom uniquely yours. Trust me, once you hang your own artwork, you’ll never want to go back to generic prints again!
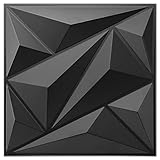
17. Minimalist Art with Neutral Tones and Textures

Sometimes less really is more, especially when it comes to creating a calming, artistic bedroom. Minimalist art with neutral tones and textures allows you to craft a serene space that feels both sophisticated and inviting. Think soft, muted colors like creams, beiges, and gentle grays paired with tactile surfaces such as textured wall finishes or subtle textiles. This approach emphasizes quality over quantity, letting your room breathe while still feeling thoughtfully curated.
Recommended Products to replicate this idea
| # | Preview | Product | |
|---|---|---|---|
| 1 |

|
LANCHI95 15 Pcs Vintage Wall Art Decor, Vintage Posters for Room, Vintage Art Prints, Moody gallery... | Check Latest Price |
| # | Preview | Product | |
|---|---|---|---|
| 1 |
|
Art3dwallpanels 33 Pack 3D Wall Panel Diamond for Interior Wall Décor, PVC Flower Textured Wall... | Check Latest Price |
Visualize a wall painted with a smooth, matte finish in a warm neutral hue, accented by a few carefully chosen textured elements like a linen-covered headboard or a woven wall panel. Instead of busy prints or bold colors, opt for understated artwork—perhaps a series of monochrome prints, abstract line drawings, or soft-toned photographs. These pieces foster a sense of calm and create a cohesive, harmonious environment that encourages relaxation and reflection.
Styling variations include incorporating natural materials like wood, stone, or rattan to add warmth and depth. You can also experiment with subtle patterns or embossed textures on wallpaper or textiles, creating visual interest without overwhelming the senses. Seasonal adaptability is straightforward—layer with cozy throws and cushions in similar neutral shades or swap out textured wall panels for lighter, airier options during warmer months. Minimalist art works especially well in smaller spaces, making them appear larger and more open.
Implementation involves choosing a neutral color palette, selecting textured finishes, and balancing elements carefully. Keep wall art simple by framing single, understated pieces or creating a gallery of small, monochrome images. Use accent materials like a soft cream throw blanket with chunky knit texture or a woven basket for storage, avoiding clutter and focusing on quality. This approach encourages you to curate your space thoughtfully, emphasizing the beauty of subtle details and textures over bright colors or busy patterns.
Personalization comes through selecting textures and tones that evoke your mood and style. Maybe you prefer a Scandinavian-inspired look with light woods and soft textiles, or a Zen-inspired vibe with smooth stones and muted fabrics. The aim is to craft a space that feels timeless, peaceful, and artistically refined without relying on flashy decor. Once done, you’ll notice how this minimalist aesthetic creates a sanctuary where your creativity can flourish in a calm, clutter-free environment.
Feeling inspired? Picture a bedroom where textured plaster walls combine with a soft, linen-covered headboard and simple monochrome artwork. Or imagine a space with layered neutral textiles—like a plush rug, a cozy throw, and woven baskets—creating a tactile, inviting atmosphere. Minimalist art with neutral tones isn’t just trendy; it’s a smart way to build confidence in your ability to curate a sophisticated, timeless space that truly reflects your artistic sensibility.
18. Artistic Bookshelf Styling with Color and Art Objects
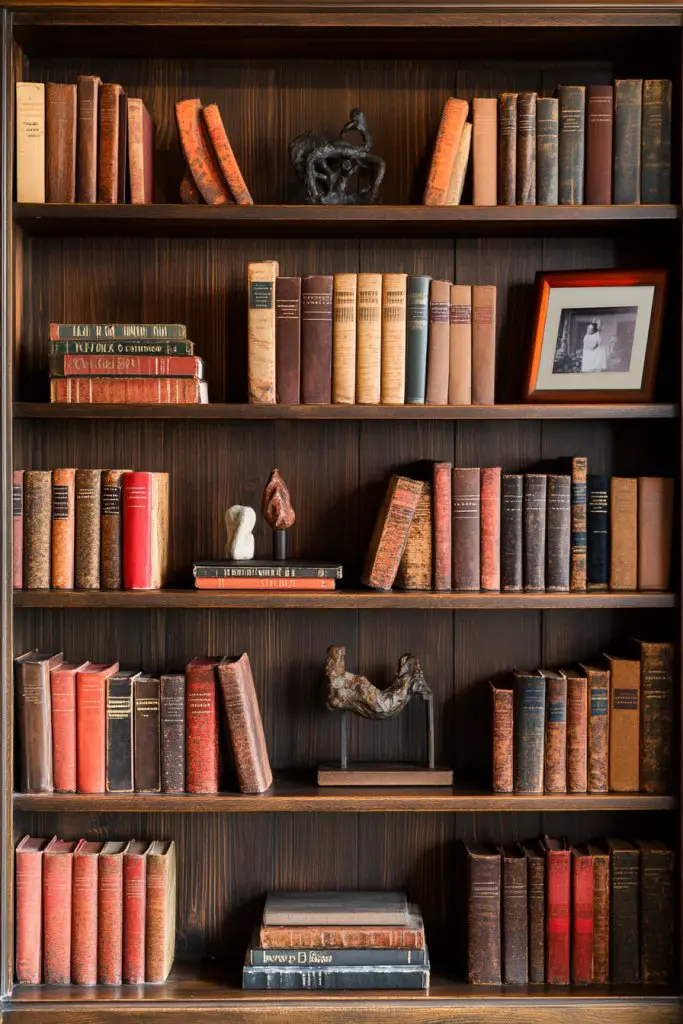
Ever feel like your bookshelf is just a boring storage spot instead of a showcase of your personality? A cluttered shelf can look chaotic rather than inspiring. You want your books and decor to tell a story, not just fill space. Turning your bookshelf into a curated art display lets you express your style while staying organized.
Recommended Products to replicate this idea
| # | Preview | Product | |
|---|---|---|---|
| 1 |

|
Modern Ceramic Vase Set, Neutral Colors, Decorative Vases for Home Decor, 4 Piece Collection (Beige) | Check Latest Price |
| # | Preview | Product | |
|---|---|---|---|
| 1 |
|
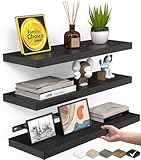
BAYKA Floating Shelves for Wall, Wall Mounted Rustic Wood Shelves for Bathroom, Bedroom, Living... | Check Latest Price |
Picture a tall wooden shelf filled with colorful books arranged by hue, creating a rainbow effect. Interspersed are sculptural ceramics, quirky figurines, and textured objects that add depth. Think of layers of textiles draped over the edges or nestled among the books, adding softness. The overall look feels lively yet thoughtfully curated, with each item sparking curiosity.
Adjust the arrangement based on your vibe—minimalist with monochrome tones or maximalist with bold colors and eclectic objects. For small spaces, stack books vertically with small sculptures on top. In larger rooms, add floating shelves or corner units for more display options. Change the arrangement seasonally by swapping out objects or adjusting colors for a fresh look.
Start by sorting your books and choosing a color scheme or theme. Incorporate decorative objects like small sculptures, vintage cameras, or ceramic pieces to break up the books. Use varied heights and sizes for visual interest, and place taller items at the back or sides. Consider adding textured elements like woven baskets or fabric-covered boxes for extra flair. Keep some space open to avoid overcrowding and maintain balance. Regularly rotate objects to keep the display fresh.
Personalize with items that hold meaning—travel souvenirs, handmade crafts, or family heirlooms. Incorporate metallic accents like gold or silver trays or frames for a touch of glam. Use customized bookplates or painted titles for a bespoke feel. Add small plants or candles on the shelves if you want to soften the look, but avoid cluttering the space. The goal is a balanced, reflective display of your personality.
A beautifully styled bookshelf transforms a simple storage spot into a personal gallery. It boosts your confidence by showcasing your interests and creativity. Plus, a well-organized shelf makes it easier to find your favorite reads or display your latest finds. Ready to turn your books into a visual masterpiece? The possibilities are endless, and your space will thank you.
19. Handmade Mobile or Hanging Art Installations
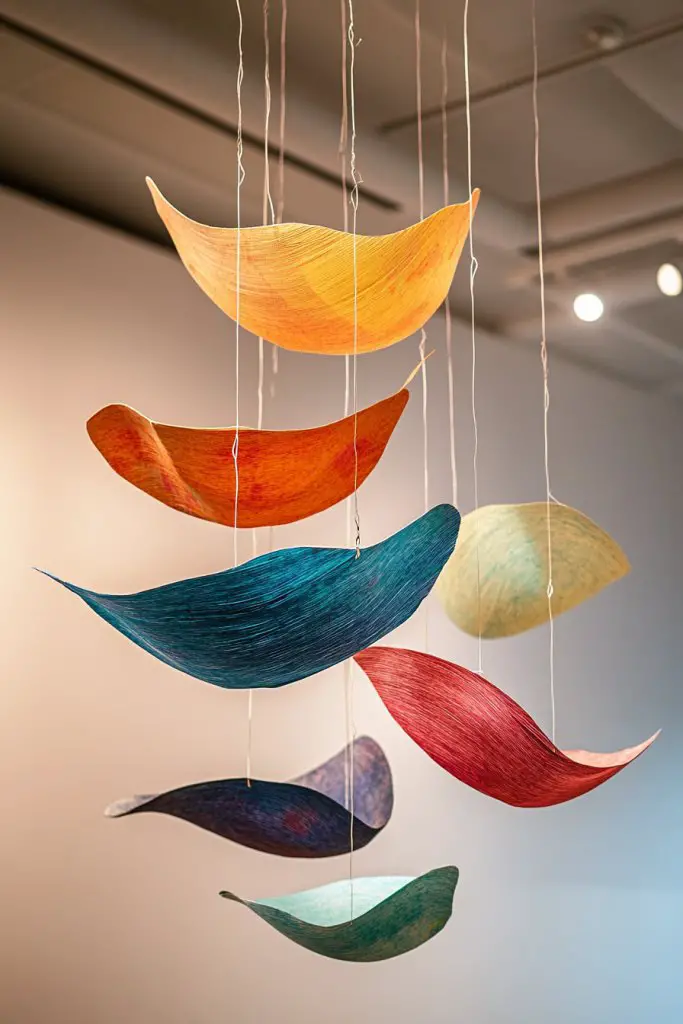
Tired of static decor that feels so… predictable? Hanging art installations breathe life into your space with movement and personality. They add a whimsical or sophisticated touch without taking up valuable surface area. Plus, DIY mobiles are a fun project that can turn your room into a mini art gallery.
Recommended Products to replicate this idea
| # | Preview | Product | |
|---|---|---|---|
| 1 |

|
Hollowfly 3D Solar System Mobile Hanging Planets Solar System Decor Educational Planets Model Large... | Check Latest Price |
| # | Preview | Product | |
|---|---|---|---|
| 1 |
|
12 Pack Vinyl Coated Ceiling Hooks,Screw-in Mug Hooks,Multi-Function Wall Hooks Kitchen Hooks Cup... | Check Latest Price |
Imagine a cluster of painted paper or fabric elements suspended from the ceiling, gently swaying with each breeze. Metallic or wooden elements catch the light, casting playful shadows. Some mobiles feature sculpted shapes or abstract forms, creating a layered visual effect. They add a dynamic focal point that invites the eye upward and around the room.
Choose lightweight materials like painted paper, fabric, or thin wood for easy hanging. For a boho vibe, incorporate feathers, beads, or natural fibers. Minimalist styles might use simple geometric shapes in monochrome tones. Adjust length and density based on ceiling height or room size. For seasonal updates, swap out elements or add new layers for freshness.
Begin by sketching your design or gathering inspiration online. Use sturdy fishing line or thin wire to attach elements, ensuring they hang evenly. Hang from ceiling hooks or a decorative rod, balancing the mobile carefully. Consider using a ceiling medallion or decorative canopy to hide hardware. For added stability, attach small weights at the bottom of each element. Test the sway and adjust lengths for optimal visual flow.
Create themed mobiles—like celestial, botanical, or abstract—to match your room style. Paint or decorate each piece with metallic accents or bold patterns. Incorporate meaningful symbols or initials for a personal touch. Mix textures—soft fabrics with smooth wood or shiny metal—to add tactile interest. The key is to make it uniquely yours while keeping it balanced.
These hanging art pieces inject a playful, creative energy into your space. They demonstrate that art doesn’t have to be confined to walls—movement makes it more lively. Plus, crafting your own mobile boosts your confidence in DIY projects. Why not give it a try and watch your room come alive with motion?
20. Personal Art Journal or Sketchbook Display
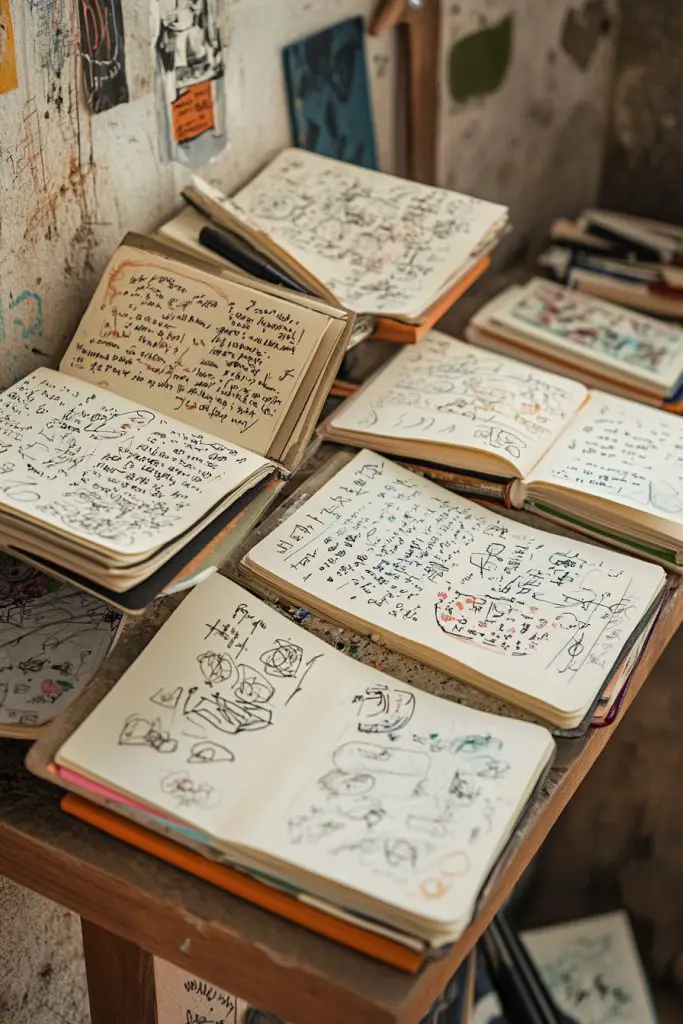
Ever wanted to show off your creative process without turning your room into a cluttered studio? Displaying your art journals or sketchbooks makes your space uniquely yours and keeps your inspiration close. It’s like inviting friends into your personal creative universe. Plus, it reminds you of your growth and ideas, fueling your motivation.
Recommended Products to replicate this idea
| # | Preview | Product | |
|---|---|---|---|
| 1 |
|
upsimples 11x14 Picture Frame, Display Pictures 8x10 with Mat or 11x14 Without Mat, Wall Hanging... | Check Latest Price |
| # | Preview | Product | |
|---|---|---|---|
| 1 |
|
BAYKA Floating Shelves for Wall, Wall Mounted Rustic Wood Shelves for Bathroom, Bedroom, Living... | Check Latest Price |
Picture a sleek wall-mounted shelf or a set of open-top frames showcasing your favorite pages. The pages feature sketches, color experiments, or handwritten notes, adding a raw, authentic vibe. The display might include a few small clips or clips with decorative cords to hold open pages. The overall effect is an intimate, evolving gallery that highlights your artistic journey.
Use stylish clipboards or wire hangers for a casual look, or opt for floating shelves for a cleaner appearance. Mix framed pages with loose pages pinned on a corkboard or a fabric grid. Change the display regularly—swap out pages or add new sketches to keep it fresh. In small rooms, keep it simple with one or two framed pages; in larger spaces, create a dedicated art wall.
Gather your favorite pages and choose a display method—frames, clips, or mounts. For framed pages, select simple black or white frames that complement your decor. Use washi tape or decorative clips for a casual, artsy look. Install the shelves or hooks at eye level for easy viewing. Rotate pages periodically to showcase new work and keep the display engaging. Keep your art journals handy nearby for spontaneous inspiration.
Add decorative elements such as small sculptures or textured fabrics around the display. Incorporate a few favorite tools—colored pencils, pens, or brushes—in decorative containers nearby. Use themed or colored mats inside frames for consistency. Highlight particular milestones or projects by enlarging and framing those pages. This display becomes a visual roadmap of your creative evolution.
Showing your art journals openly celebrates your talent and progress, encouraging you to keep creating. It also sparks conversations with fellow artists or friends, turning your space into an inspiring hub. Plus, it’s a constant reminder that your creative process is valuable—no matter the outcome. Ready to proudly showcase your work and keep the ideas flowing?
Conclusion
With a wide variety of artist bedroom ideas—from bold wall art to inspiring organization tips—there’s something to suit every creative soul. These ideas can help you turn your bedroom into a vibrant, functional space that sparks inspiration daily. Don’t hesitate to experiment and personalize these concepts to make your artistic sanctuary truly your own. Embark on this creative journey and transform your space into a masterpiece of your own making!
Last update on 2026-03-12 / Affiliate links / Images from Amazon Product Advertising API