
14 Bathroom Staging Ideas for Functional Style
Ever wondered how to turn your bathroom into a stylish oasis that’s both functional and inviting? Bathroom staging ideas have become a popular trend because they effortlessly combine practicality with aesthetic appeal, making your space feel more spacious, organized, and beautiful.
In this article, you’ll discover a variety of creative and practical staging tips that can elevate your bathroom’s look and feel. From clever storage solutions to charming decor accents, each idea is designed to help you transform your bathroom into a stunning, well-organized retreat that reflects your personal style and enhances everyday routines.
1. Maximize Storage with Sleek Floating Shelves
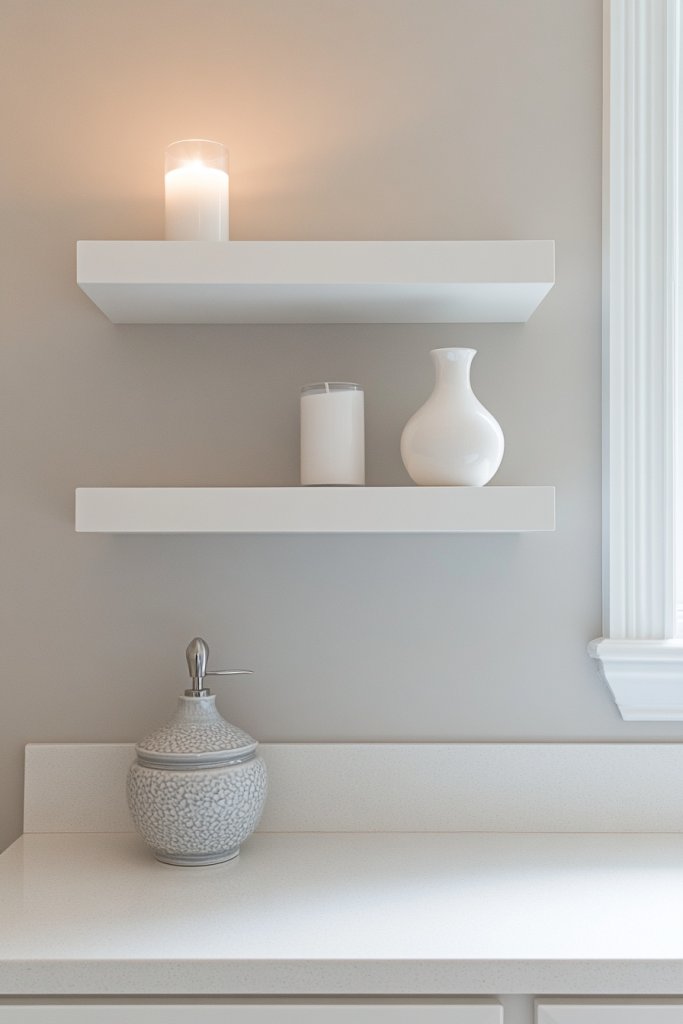
Ever feel like your bathroom is bursting at the seams with toiletries, towels, and random knick-knacks? It’s a common struggle—clutter makes a small space feel even tinier and more chaotic. You want a bathroom that feels calm, organized, and stylish without sacrificing functionality. The good news? Floating shelves are your secret weapon to reclaim that precious space.
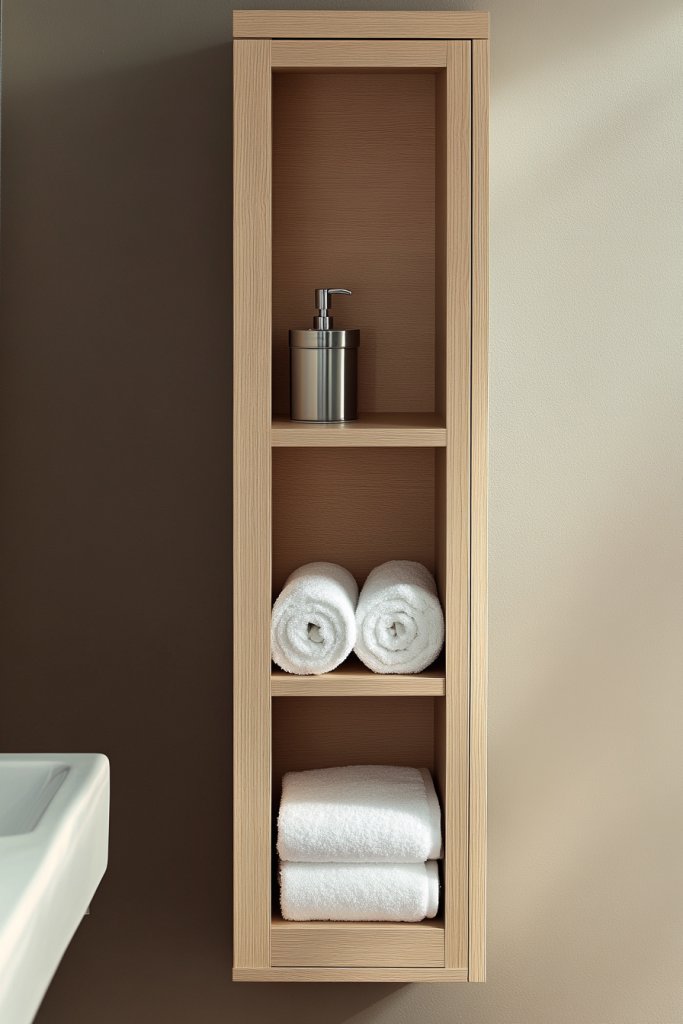
Picture wall-mounted shelves in a matte black finish, lined with neatly folded towels, attractive containers, and minimal decorative accents. The open design makes everything accessible while adding a modern edge. Soft natural light hits the shelves, highlighting textures like woven baskets and ceramic containers. The overall look is airy, tidy, and effortlessly chic—no more cluttered countertops.
Adjust shelf styles to match your vibe—think rustic wood for a cozy farmhouse feel or sleek glass for a contemporary look. Use floating shelves above the toilet or beside the vanity to maximize vertical space. Seasonal updates might include swapping out baskets or adding decorative accents like candles or fabric liners. For smaller bathrooms, opt for narrow shelves that don’t overpower the room.
Start by measuring your wall space to determine shelf length. Choose sturdy brackets and durable materials, especially in humid environments—metal or treated wood work well. Install with a level to keep everything straight, and use anchors for drywall if needed. Organize items by frequency of use or color for visual harmony. Keep heavier items on lower shelves to ensure stability and safety.
Personalize shelves with decorative containers that match your style—think textured ceramics or woven baskets. Add small trays for jewelry or accessories to keep everything tidy. Incorporate labels for a minimalist look or keep it all open for a more relaxed vibe. Change out decor seasonally or whenever you redecorate to keep the space fresh.
Floating shelves transform cluttered chaos into streamlined elegance. They make your bathroom feel bigger and more organized without a major overhaul. Once set up, you’ll wonder how you ever lived without them. Ready to give your space that fresh, modern edge? It’s easier than you think—and totally worth it!
2. Incorporate a Minimalist Vanity with Hidden Storage
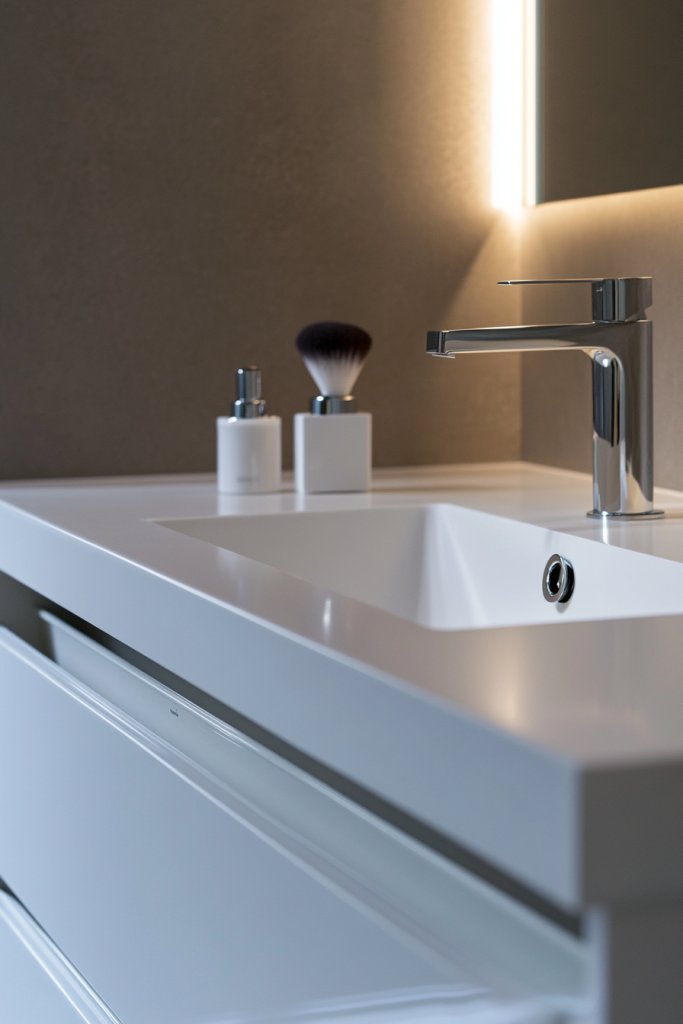
Does your bathroom vanity look like a tornado hit it? Cluttered counters with toiletries and makeup make mornings stressful and make the space feel cramped. You crave a sleek, organized look that feels spacious and calming. Incorporating a minimalist vanity with hidden storage is the smart fix for this common bathroom headache.
Imagine a streamlined, wall-hung vanity with a smooth, matte finish in a neutral tone. The front features push-to-open drawers that conceal all your essentials—no knobs or handles disrupting the clean lines. Soft LED lighting beneath the vanity creates a floating effect, emphasizing the minimalist aesthetic. Open the drawers to reveal neatly divided compartments for toiletries, brushes, and skincare.
Choose vanities that suit your style—wood veneer for warmth, concrete for industrial chic, or lacquered surfaces for ultra-modern vibes. For small bathrooms, opt for compact wall-mounted units to maximize floor space. Seasonal tweaks might include swapping hardware or adding decorative trims that match your decor. You can also incorporate a small, matching mirror with built-in storage.
Select a vanity with well-crafted, soft-close drawers and durable, moisture-resistant finishes. Mount it securely to the wall, ensuring proper support for your weight and daily use. Install the plumbing and electrical connections before sealing everything up. Use organizers inside drawers—like trays or small boxes—to keep everything tidy. Finish with a countertop that’s stain-resistant and easy to clean, such as quartz or solid surface.
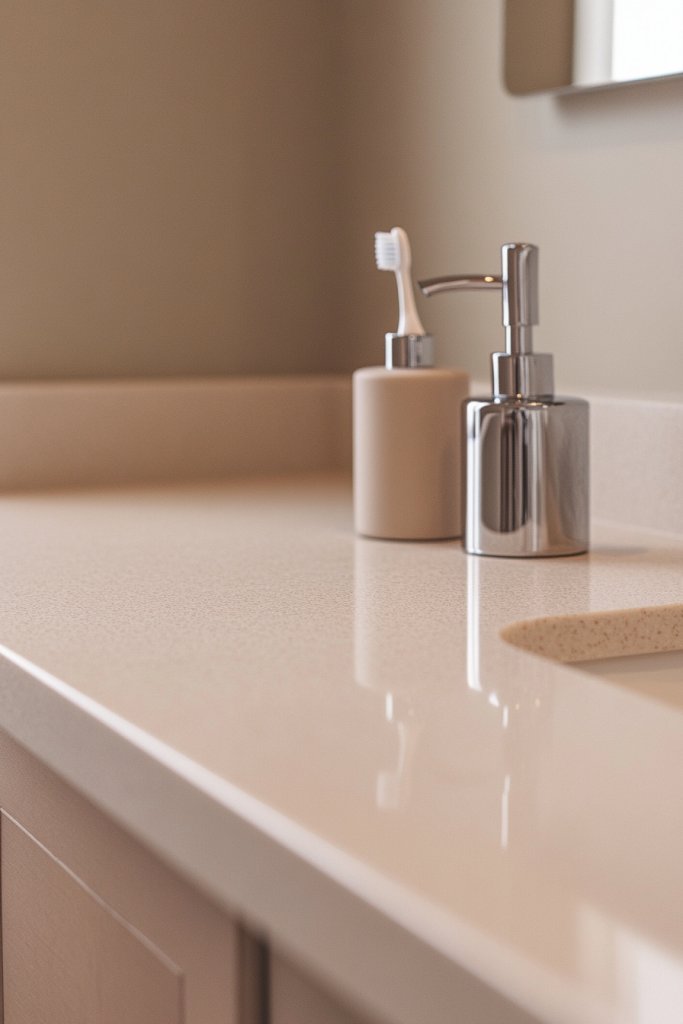
Add a pop of personality with a textured countertop or a sleek soap dispenser that matches your hardware. Decorate with a soft, plush towel in a color that complements your overall palette. Consider installing a subtle backsplash in a neutral tile or textured panel to add depth without clutter. Personal touches make the space uniquely yours while maintaining simplicity.
A minimalist vanity with hidden storage elevates your bathroom’s style and keeps daily routines hassle-free. It makes your space look larger and more organized, boosting your mood each morning. With a little planning, you can achieve this sleek look without breaking the bank. Your bathroom will look modern, functional, and effortlessly stylish—trust me, it’s a game changer!
3. Opt for Neutral Color Palettes to Enhance Calmness
Ever notice how a cluttered or overly colorful bathroom can feel chaotic rather than relaxing? Bright hues and busy patterns might energize some, but often they just add to the stress. If you crave a serene, spa-like retreat, adopting a neutral color palette can turn your bathroom into a calming oasis. It’s about creating a space that soothes your mind every time you step in.
Visualize soft beige walls paired with creamy tiles and subtle taupe accents. Textured towels, plush rugs, and minimal accessories in shades of white and gray keep the look cohesive. Natural light filters through frosted glass, enhancing the gentle, calming hues. The overall effect is a peaceful environment that invites relaxation, with every element working in harmony to reduce visual noise.
Neutral palettes are incredibly versatile—add warmth with wood-tone cabinetry or coolness with sleek, matte finishes. Change the mood seasonally by swapping out textiles or decorative accents—think warm throws in winter or light, airy fabrics in summer. You can also introduce subtle patterns through textured tiles or embossed wall panels for visual interest without disrupting the calm.
Start with choosing a base color—think soft taupe, warm beige, or cool gray—and plan your wall, tile, and fixture colors accordingly. Opt for matte or satin finishes to avoid glare and keep everything understated. Use neutral-toned paint and select fixtures in brushed nickel, matte black, or warm brass to complement the palette. Keep accessories minimal and in harmonious shades to maintain the tranquil vibe.
Introduce tactile variety with woven baskets, textured towels, or fabric shower curtains in similar hues. Add visual depth with layered textiles and small decorative elements in complementary shades. Personalize by selecting subtle art pieces or textured wall panels that blend seamlessly into the neutral theme. The goal is to evoke calm and create a cohesive, clutter-free look.
A neutral color palette transforms your bathroom into a peaceful sanctuary that encourages unwinding. It’s a timeless choice—easy to update with small accessories or textiles when your style evolves. Plus, it makes your space look larger and more luxurious. Ready to embrace calmness and create a soothing retreat? It’s simpler than you think—and totally worth it!
4. Use Durable, Non-Slip Flooring for Safety and Style

Slippery bathroom floors are more than just an annoyance—they’re a safety hazard. Especially in wet areas, the risk of slips and falls is real. Choosing durable, non-slip flooring not only keeps everyone safe but also adds a layer of style. It’s a practical upgrade that pays off every day.
Visualize textured porcelain tiles in a subtle geometric pattern, or luxury vinyl planks mimicking natural wood. The textured surface provides grip underfoot, even when wet. A neutral palette in shades of gray or beige keeps the look modern and versatile. Small details like matte finishes and slip-resistant textures make the floor both beautiful and functional.
Select flooring that complements your overall design—think warm wood tones for cozy vibes or sleek stone-look tiles for contemporary spaces. For a spa-like feel, opt for large-format tiles with minimal grout lines. Seasonal updates are easy—add colorful rugs or mats that can be swapped out without changing the entire floor.
Start by assessing your space and choosing a slip-resistant material rated for wet areas. Professional installation is recommended for large tiles to ensure even grout lines and proper sealing. Consider underlayment options to reduce noise and add insulation. Regular cleaning with non-abrasive solutions keeps the surface safe and looking new. Replace worn or damaged tiles immediately to prevent accidents.
Incorporate textured rugs or mats that match your decor for comfort and style. Use contrasting grout colors to highlight the pattern or keep everything seamless for a minimalist feel. Add decorative accents like pebble tiles or mosaics in small areas for visual interest. Focus on safety without sacrificing design.
Choosing the right flooring improves both safety and style in your bathroom. It’s an investment in your daily comfort and peace of mind. Once installed, these floors require minimal maintenance and stand up to moisture and wear. Your bathroom will look modern, feel safer, and last longer—what’s not to love?
5. Add a Compact, Multi-Functional Mirror with Storage
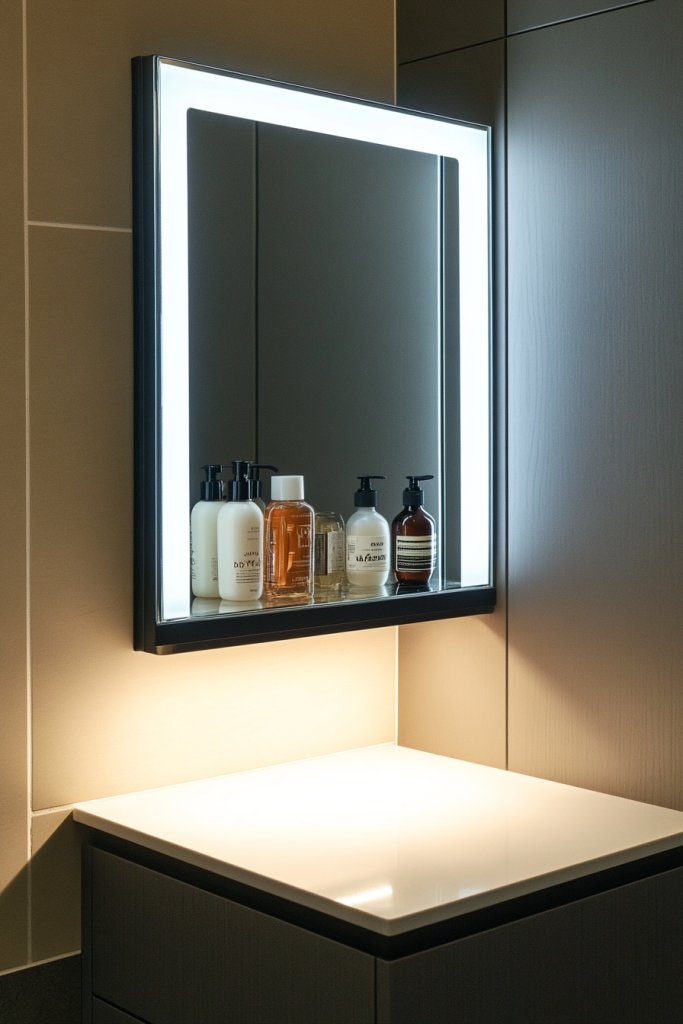
Cluttered countertops and tiny spaces make grooming a chore. Mirrors are essential, but they often just add to the mess. A compact, multi-functional mirror with built-in storage solves both problems—giving you a practical, stylish focal point that keeps essentials handy and your surface clear.
Imagine a sleek mirror with a slim, wall-mounted cabinet behind it, featuring small shelves and hidden compartments. The mirror’s frame matches your hardware—matte black or brushed nickel—for a cohesive look. Soft LED lighting around the edges provides functional illumination, while the storage keeps your skincare and makeup within arm’s reach. The overall aesthetic is clean, modern, and clutter-free.
Choose a mirror with a simple, frameless design for minimalist spaces or a decorative frame for more personality. Add a few decorative trays or organizers inside the cabinet for small items. You can also select mirrors with anti-fog features or magnification options for different needs. Position it above your sink or vanity, depending on your layout.
Select a mirror with integrated storage that fits your space and style. Install it securely on a stud or wall anchor, making sure it’s level. Connect any electrical components for lighting, or choose battery-operated options for simplicity. Organize your toiletries inside the compartments—small baskets, clear containers, or labeled trays work well. Regularly clean the mirror and check the hardware for stability.
Personalize your mirror setup with stylish containers, colorful liners, or decorative accents inside the storage area. Add a small plant or decorative item outside for a touch of personality—just kidding, no plants here! Keep it functional yet fun with accessories that match your overall decor theme. Rotate items seasonally for a fresh look.
A multi-functional mirror with storage keeps your space tidy and elevates your daily routine. It’s a sleek, practical solution that makes a small bathroom feel more organized and larger. Once installed, it’s easy to maintain, and you’ll love how it simplifies your mornings. Your bathroom will look polished, efficient, and ready for anything!
6. Incorporate Vertical Storage Solutions
Counter space is precious, especially in small bathrooms, yet it always seems cluttered with toiletries and towels. Vertical storage solutions help you maximize every inch of your room without cramping your style. They keep essentials within reach and free up valuable countertop real estate. Who wouldn’t want a cleaner, more organized bathroom?
Visualize tall, slim cabinets reaching from floor to ceiling, painted in a neutral tone to blend seamlessly. Wall-mounted racks or open shelving in a matching finish add extra storage for items like folded towels or decorative containers. The height draws the eye upward, making the space feel larger and more open. Soft lighting highlights the vertical elements, creating a sense of depth and order.
Choose sleek, modern cabinets with closed doors for a tidy look or open shelving for easy access and display. Use hooks or racks to hang towels or robes vertically, saving space. For seasonal updates, switch out decorative baskets or change shelf liners to keep the look fresh. In very small bathrooms, stacking storage units or narrow cabinets are ideal.
Measure available wall space carefully before selecting your storage units. Install tall cabinets securely to prevent tipping, anchoring into wall studs when possible. Use adjustable shelving to customize the height for different items. Organize with baskets, bins, or dividers to keep everything neat and accessible. Regularly review your storage to remove unused items.
Add decorative elements like textured baskets or fabric-lined shelves that match your decor. Incorporate hooks in matching colors for towels or accessories. Change shelf liners seasonally or add small decorative accents that complement your overall theme. Keep everything functional but stylish.
Vertical storage solutions free up space and make your bathroom look organized and modern. They’re perfect for small rooms that need to maximize every inch. Once in place, they require minimal maintenance and keep clutter out of sight. Your bathroom will look spacious, tidy, and inviting—ready for your next makeover!
7. Implement Soft, Layered Lighting for Ambiance and Functionality
A bathroom with harsh, single-source lighting feels cold and uninviting. It can also make grooming difficult and unflattering. Soft, layered lighting creates a warm, welcoming atmosphere while providing the right light for tasks. It’s the secret to transforming your bathroom into a cozy, functional retreat.
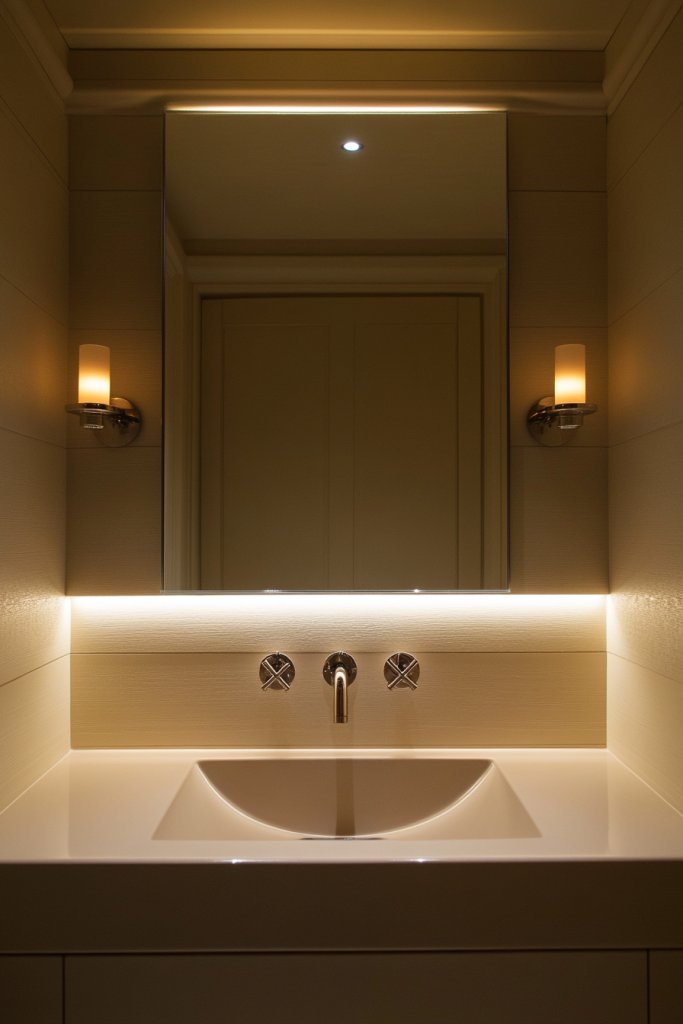
Imagine a combination of recessed ceiling lights, wall sconces, and LED strip lights around mirrors or niches. The layered setup offers adjustable brightness, allowing you to switch from bright for makeup to dim for relaxing baths. Warm white tones in the lighting cast a gentle glow, softening shadows and highlighting textures. The overall effect is inviting and versatile.
Mix and match fixtures based on your decor—industrial sconces, minimalist LEDs, or vintage-inspired fixtures. Control lighting with dimmer switches for added ambiance. Use indirect lighting behind mirrors or in coves to add depth. Seasonal changes may include swapping out bulbs for different color temperatures.
Plan your lighting layout carefully—layer ambient, task, and accent lights to avoid shadows and dark corners. Choose fixtures rated for damp or wet locations. Install dimmers to control brightness easily. Position lights at eye level or above mirrors for optimal grooming lighting. Regularly clean fixtures to maintain brightness.
Add decorative dimmable fixtures that match your style—think matte black or brass sconces. Incorporate candles or flameless LED candles for added ambiance when relaxing. Use textured or patterned shades to introduce subtle visual interest. Personalize by adjusting the lighting to suit different moods or times of day.
Layered lighting elevates your bathroom from ordinary to extraordinary. It enhances functionality and creates a cozy atmosphere perfect for unwinding. Once set up, you’ll enjoy a spa-like experience every day. It’s an easy upgrade that pays off in comfort and style.
8. Use Stylish, Non-Complicated Hardware and Fixtures
Clunky, complicated fixtures clutter your bathroom’s clean lines and distract from the overall design. Overly ornate hardware can make a space feel busy and outdated. Opting for stylish, minimal fixtures keeps your bathroom looking modern, sleek, and effortless. It’s a small change with a big visual impact.
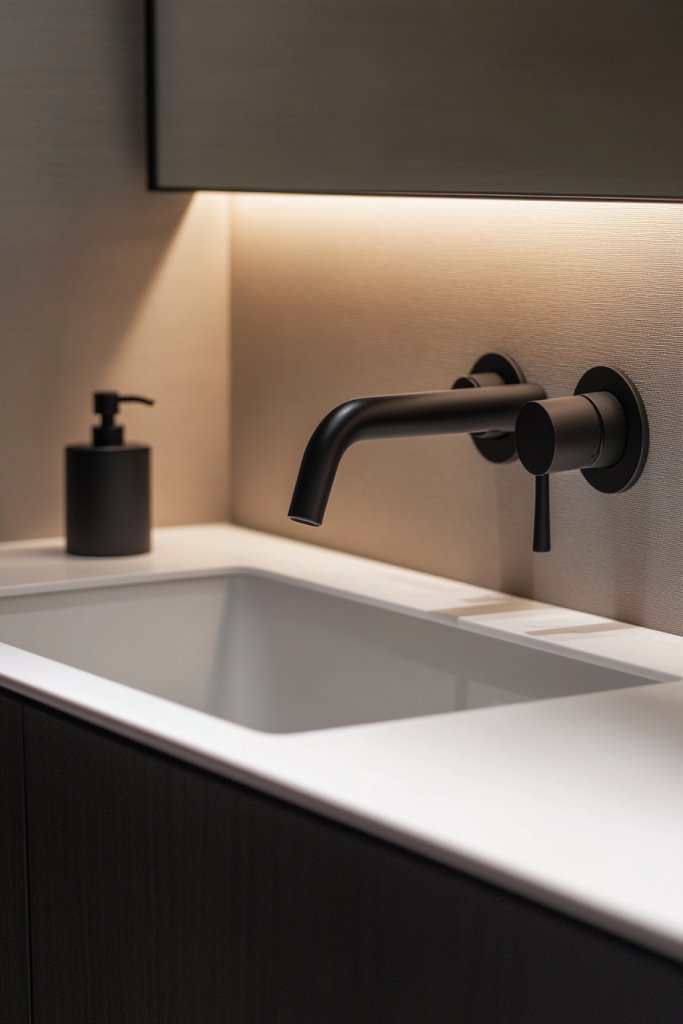
Picture matte black or brushed nickel handles, faucets, and towel hooks with simple, clean lines. The hardware’s subtle elegance complements neutral tones and textured surfaces. Minimalist fixtures blend seamlessly into the space, drawing attention to the overall design rather than individual parts. The result is a cohesive, sophisticated aesthetic.
Choose fixtures with geometric shapes or soft curves depending on your style—industrial, Scandinavian, or modern. Keep hardware consistent throughout for a unified look. Seasonal updates might include changing knobs or handles to reflect trends or personal taste. Focus on quality finishes that resist corrosion and tarnish.
Select fixtures that match your overall theme—matte black, brushed nickel, or matte brass. Install with precision, ensuring proper alignment and secure mounting. Use appropriate tools and sealant to prevent leaks around faucets. Regularly clean and inspect hardware for signs of wear, replacing as needed. Keep spare parts handy for quick fixes.
Add unique touches like vintage-style handles or geometric knobs for visual interest. Incorporate matching towel bars or robe hooks to tie the look together. Opt for hardware with built-in features like integrated soap dispensers or storage compartments. Personalize your fixtures to reflect your style—sleek, rustic, or minimalist.
Stylish fixtures elevate the overall aesthetic and make daily routines more enjoyable. They’re an easy, cost-effective way to update your bathroom’s look. Once installed, they demand minimal maintenance and stand up to moisture and use. Your space will look fresh, modern, and thoughtfully designed—ready to impress.
9. Incorporate a Compact Laundry Nook or Hidden Hampers
Laundry baskets and hampers often become eyesores, cluttering your bathroom and disrupting its style. Finding a discreet, efficient way to hide laundry essentials can make your space look cleaner and more organized. A compact laundry nook or hidden hamper is the perfect solution for busy households.
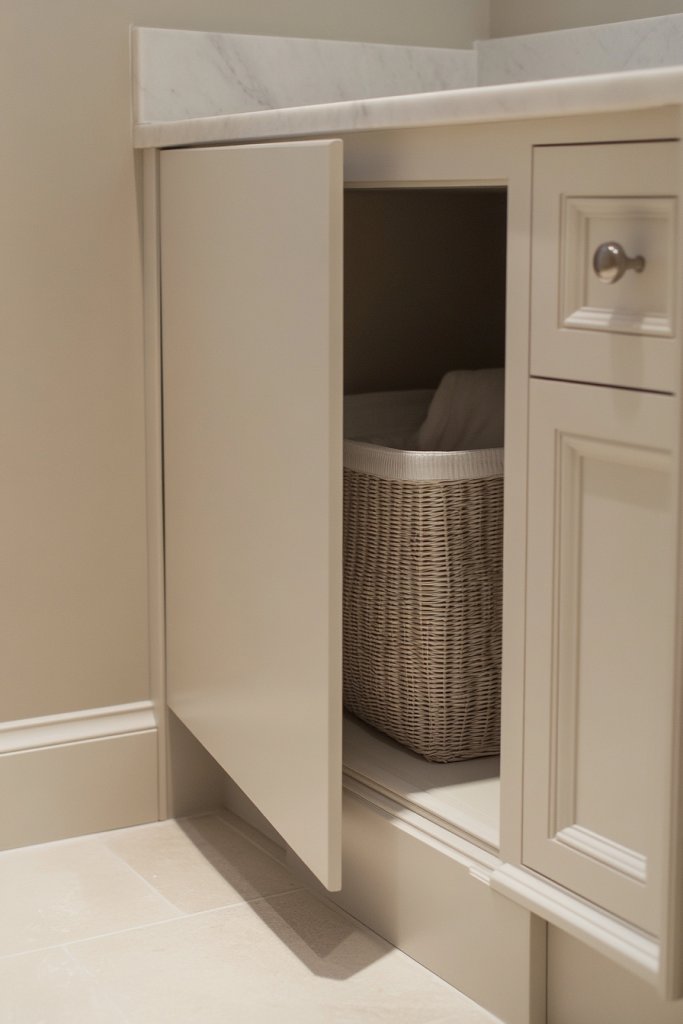
Visualize a custom-built cabinet with a discreet door that blends seamlessly into your bathroom cabinetry. Inside, a pull-out hamper keeps dirty clothes out of sight, while a top surface provides space for folded laundry or baskets. Light-colored finishes and simple hardware keep the look clean and unobtrusive. When closed, it’s invisible, maintaining the room’s sleek aesthetic.
Opt for sliding or bi-fold doors to maximize space in tight areas. Use moisture-resistant materials and finishes that match your overall decor—think painted MDF, laminate, or thermally fused veneer. For larger bathrooms, incorporate separate compartments for whites, colors, or delicate laundry. Seasonal updates include changing hardware or door styles.
Plan your layout carefully—measure space and consider door swing or sliding options. Build or buy a cabinet that fits your dimensions and install securely. Incorporate ventilation if needed, especially for enclosed hampers. Organize with removable bins or bags for easy laundry sorting. Regularly clean and maintain the enclosure for hygiene.
Add decorative touches like a patterned or colorful hamper liner, or a small plant outside the cabinet for a touch of nature—just kidding about the plant! Use labels or tags for laundry types to simplify sorting. Personalize with hardware or paint finishes that match your bathroom theme. Keep it functional but stylish.
A hidden laundry nook keeps your bathroom tidy and clutter-free, boosting your daily efficiency. It’s a clever way to hide chores while maintaining a polished look. Once installed, it requires minimal upkeep and makes laundry less of a hassle. Your bathroom will look cleaner, more organized, and ready for anything—just like a pro!
10. Select Practical, Easy-to-Maintain Countertop Materials
Ever tried cleaning a countertop only to struggle with stubborn stains or scratches? A durable, low-maintenance surface makes all the difference in a busy bathroom. No one wants to spend hours scrubbing or worrying about daily wear and tear, right? Choosing the right material can transform your routine from a chore into a breeze.
Picture a sleek quartz countertop with a smooth, matte finish that resists fingerprints and water spots. Its clean lines reflect light, making the space feel larger and more inviting. Think of a solid surface with a subtle marbled pattern that adds depth without cluttering the visual flow. The surface looks polished yet practical, perfect for a modern, clutter-free bathroom.
For a rustic vibe, opt for textured concrete or laminate that mimics stone without the hefty price tag. During winter, warm tones like creamy beige or soft gray can make the space feel cozy, while bright whites are ideal for summer refreshes. Small bathrooms benefit from lighter shades to visually expand the area, while larger spaces can handle darker, richer hues.
Start by assessing your budget and daily usage needs. Quartz and solid surface options are popular for their stain and scratch resistance, but laminate can be a budget-friendly alternative. Look for materials with non-porous surfaces to prevent mold and mildew buildup. Measure your countertop carefully and select slabs or sheets that fit with an overhang for a seamless look. Some materials require sealing, so check maintenance requirements before buying. DIY installation is possible for small areas, but professional help ensures perfect fit and finish.
Add a touch of personality with edge profiles—beveled, bullnose, or ogee—to match your style. Incorporate subtle color variations or flecks that complement your overall palette. Consider installing a decorative backsplash made of textured tiles or ceramic for visual interest without cluttering the surface. You can also layer in accessories like soap dishes or toothbrush holders made of ceramics or silicone to keep things functional.
Choosing the right countertop material boosts your confidence that your bathroom will stay pristine longer. It’s all about combining style with practicality to simplify your routine. A smart choice here can inspire you to keep the space tidy and inviting for years to come. Remember, a durable countertop is an investment in both form and function, making daily chores less of a hassle.
11. Add a Narrow, Wall-Mounted Towel Rack or Bar
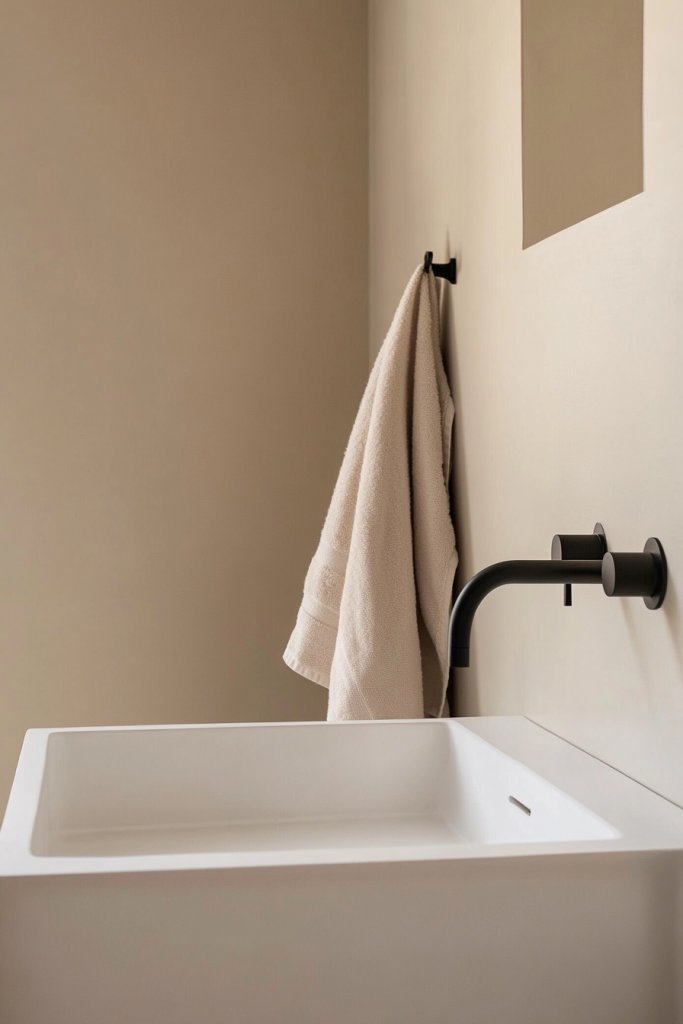
Tired of towels cluttering your countertop or taking up precious floor space? A slim, wall-mounted towel rack is the simplest fix that keeps your bathroom tidy and towels within easy reach. It’s amazing how such a small change can make a huge difference in organization. Plus, it adds a sleek, modern touch to your decor.
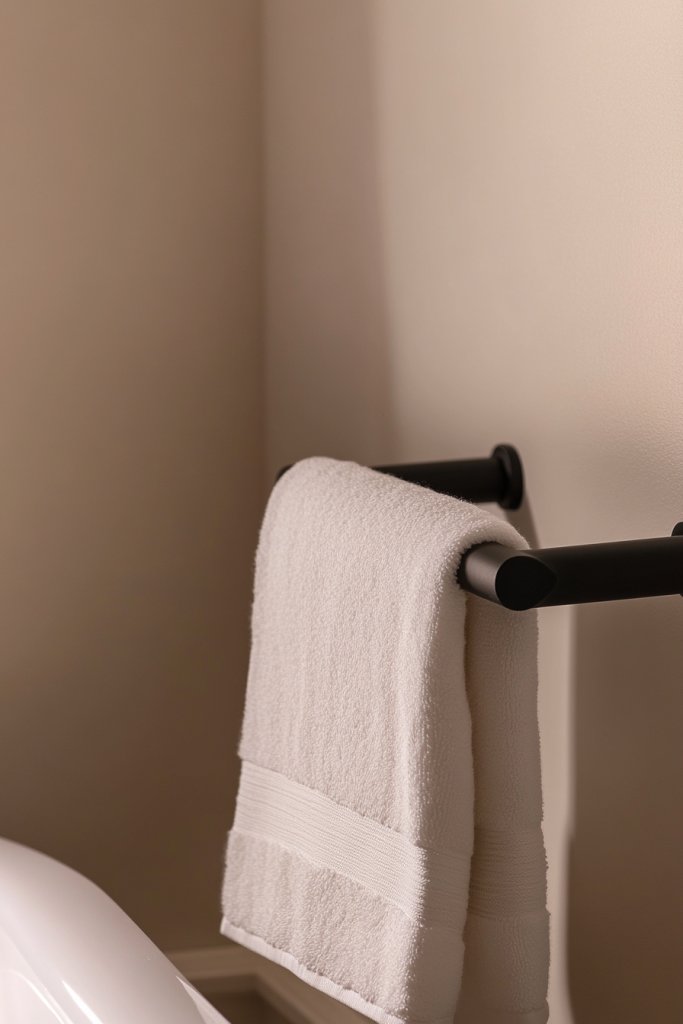
Imagine a thin, matte black bar mounted just above your sink, holding a neatly folded towel. The bar’s minimalist design blends seamlessly with your walls, creating a streamlined look. Soft towels in neutral shades hang effortlessly, adding a touch of softness to the space. The smooth metal finish reflects light, making the room feel cleaner and more open.
Choose from various finishes like brushed nickel, matte brass, or chrome to match your fixtures. For a rustic look, opt for wrought iron, while a high-gloss lacquer can add a pop of color. In small bathrooms, install multiple narrow bars vertically or horizontally to maximize storage without crowding. You can also add hooks underneath for smaller accessories or robes.
Measure your available wall space carefully and select a bar length that fits proportionally. Use a level to ensure perfect alignment, and anchor the rack securely into wall studs or with appropriate wall anchors. Consider installing two or more bars at different heights for various towel sizes or to designate towels for different users. Materials like stainless steel or aluminum resist corrosion from humidity. Clean regularly with a damp cloth to keep the finish looking fresh.
Personalize your towel rack with engraved or painted initials. Add decorative grips or hooks underneath for hanging small accessories. You can also pair it with a matching robe hook or a small shelf for extra functionality. Experiment with different textures—like woven fabrics or plush towels—to complement your overall aesthetic. Mixing finishes, such as matte with shiny, adds visual interest.
A simple towel bar can elevate your space and reduce clutter, making your bathroom feel more organized and inviting. It’s a small upgrade that offers big benefits, giving you a tidy, stylish retreat. Once you see how easy it is to install and maintain, you’ll wonder why you waited so long to make the switch. Your future self will thank you for this little touch of sophistication.
12. Use Clear, Labelled Bins for Organizing Toiletries
Cluttered countertops and overflowing cabinets make your bathroom look chaotic and stressful. Clear, labeled bins help you organize toiletries effortlessly and reduce visual noise. It’s like giving your space a mini makeover without much effort. Who doesn’t love a tidy, calm environment to start and end their day?
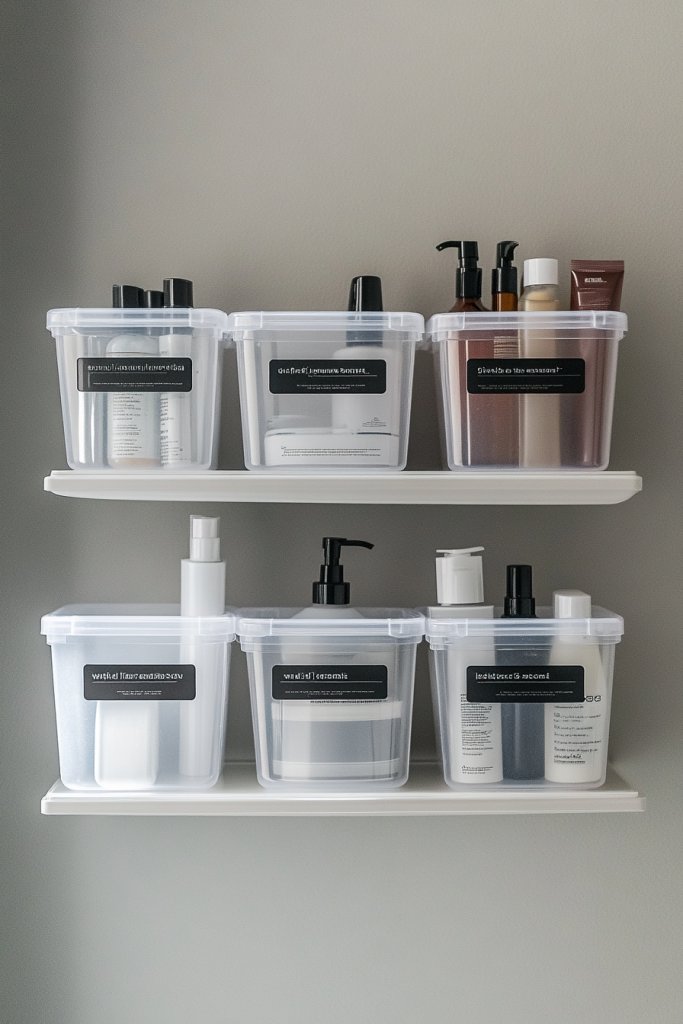
Imagine a set of transparent acrylic containers neatly stacked or lined up on your shelves. Each bin is labeled with simple tags like ‘Skincare’ or ‘Haircare,’ making it easy to find what you need. The clear plastic allows you to see contents at a glance, while the labels keep everything in its place. This setup creates a streamlined look that’s both functional and modern.
Use different sizes and shapes to accommodate various items—small for jewelry or brushes, larger for bottles and tubes. Color-coded labels can add a pop of color or match your decor palette. In shared bathrooms, assign different bins to each person for quick access. For seasonal changes, swap out labels or contents to keep everything fresh and relevant. Stackable bins maximize vertical space, perfect for tiny bathrooms.
Choose durable, scratch-proof containers made of acrylic or BPA-free plastic. Label each bin with a label maker, or use chalkboard labels for easy updates. Group similar items together and place frequently used items at the front for quick grabs. Position the bins on open shelves or inside cabinets, depending on your layout. Regularly declutter and reorganize to maintain order and prevent buildup.
Decorate labels with stickers or washi tape for a fun touch. Incorporate small trays or risers inside bins to elevate some items for easier access. Use decorative fabric liners or foam inserts to protect delicate contents. You can also add small, decorative signs or icons to make the organization system more playful and personalized.
Using labeled bins makes your daily routine smoother and less stressful. It boosts your confidence knowing everything has a designated place. Plus, it’s easy to maintain—just a quick weekly tidy-up keeps your space looking polished. Small changes like this can turn bathroom chaos into a zen zone.
13. Incorporate a Chic, Wall-Mounted Toothbrush and Soap Dispenser Set
Messy countertops with toothpaste tubes and soap bottles clutter your space and make cleaning a chore. A sleek, wall-mounted dispenser system declutters your sink area and adds a touch of sophistication. It’s a simple upgrade that elevates your daily routine and keeps things looking sharp. Who knew organization could be so stylish?
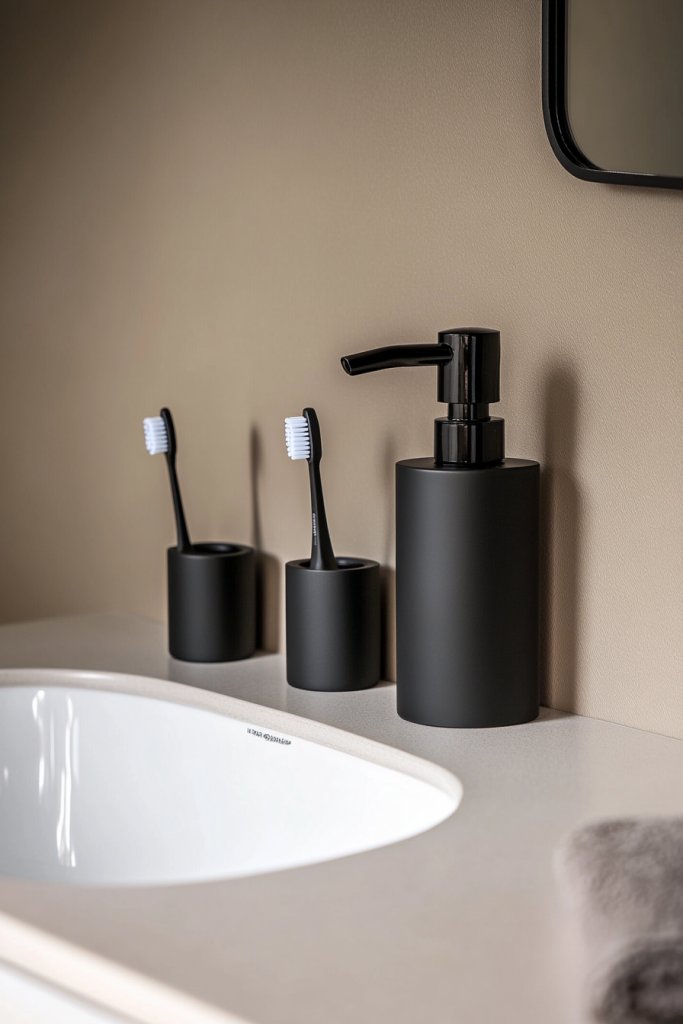
Visualize a matte black wall-mounted toothbrush holder with slots for multiple brushes and a matching soap dispenser with a minimalist design. The fixtures sit flush against the wall, freeing up counter space. Soft, neutral-colored towels hang nearby, creating a balanced, elegant look. The unified set ties the space together, making it appear curated and intentional.
Choose from finishes like matte brass, brushed nickel, or matte black to match your fixtures. For a more playful vibe, incorporate colorful silicone holders or patterned ceramic bases. Install multiple dispensers for different needs—hand soap, moisturizer, or mouthwash—to streamline your routine. For small spaces, opt for compact, dual-purpose units that combine toothbrush and soap storage.
Select wall-mount units with strong adhesive backing or secure them with screws for stability. Position them at eye level for easy access and to keep the countertop clear. Fill the dispensers with your preferred liquids, and label them clearly if needed. Regularly refill and clean to prevent buildup of mold or soap scum. Consider using silicone sleeves or covers for extra grip and style.
Add personalized labels or icons to differentiate products. Incorporate a matching mirror frame or decorative tiles to tie the look together. Use refillable, eco-friendly bottles to reduce waste, and choose scents or colors that suit your mood. Pair with a coordinating toothbrush holder tray for a cohesive aesthetic. Small decorative touches make everyday essentials feel special.
A coordinated dispenser set not only looks chic but also helps keep your space hygienic and clutter-free. It’s a small change that makes your morning routine feel more luxurious. Once installed, you’ll wonder why you didn’t do it sooner. Stylish, functional accessories like these turn ordinary routines into daily moments of self-care.
14. Add a Touch of Texture with Textured Wall Tiles or Backsplashes
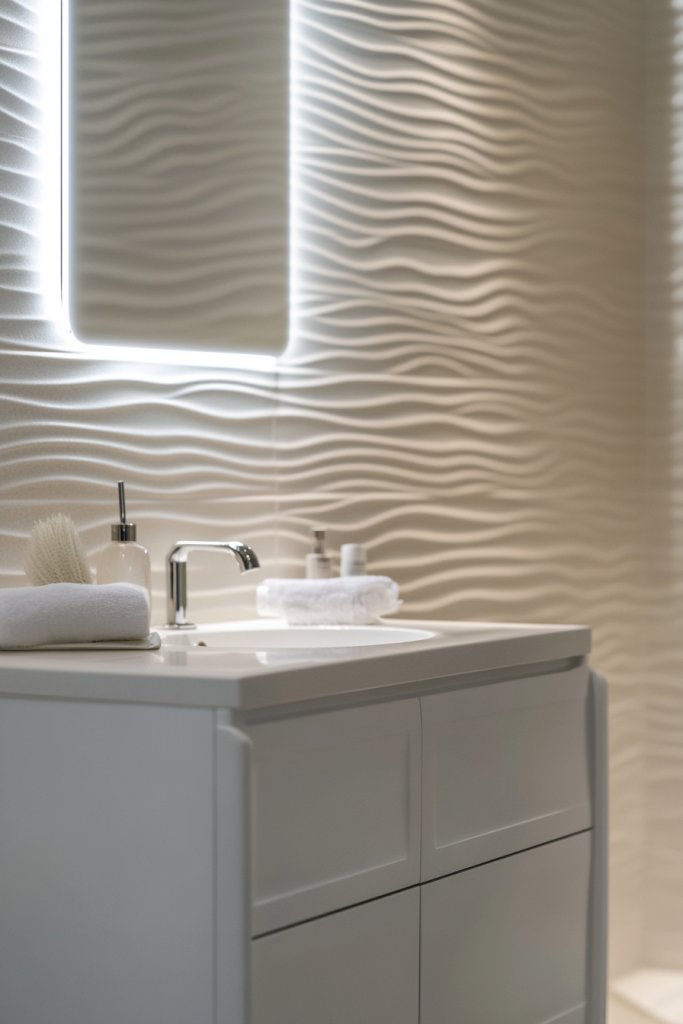
Flat, bland walls can make your bathroom feel uninspired and dull. Adding textured tiles or backsplashes brings visual interest and depth, elevating the entire space. It’s an easy way to incorporate personality without clutter or excess decor. Who doesn’t love a little touch of luxury?
Imagine a wall covered in herringbone-patterned ceramic tiles with a subtle sheen that catches the light. The textured surface adds dimension and creates a focal point behind your vanity or shower area. Soft shadows dance across the surface, making the space feel more dynamic and inviting. The tactile quality invites touching, adding a sensory layer to your bathroom experience.
Use textured tiles in a monochrome palette for a sophisticated look, or mix different textures for an eclectic vibe. Seasonal updates can include warmer tones or matte finishes for winter, while glossy and bright tiles suit summer refreshes. Apply textured tiles selectively—such as just behind the vanity or shower— to keep the design balanced and prevent visual clutter. Combining textures with smooth surfaces creates a harmonious and layered aesthetic.
Select tiles with textured surfaces that are easy to clean and maintain. Prepare the wall with a smooth base, then apply a high-quality adhesive suitable for textured tiles. Use spacers to ensure even joints, and grout carefully to highlight the textures. Seal the tiles with a grout sealer to prevent stains and moisture penetration. Professional installation guarantees a seamless finish, especially for intricate patterns.
Choose tiles with unique textures—like embossed floral or geometric patterns—to add a personalized touch. Combine different shapes and finishes to create a custom mosaic effect. Incorporate lighting that accentuates the textures, such as LED strip lights or spotlights. Personalize further with colored grout or metallic accents to match your overall decor theme.
Textured tiles elevate your bathroom’s style quotient effortlessly. They add warmth, depth, and a sense of craftsmanship you can admire daily. Once installed, they remain stylish and durable for years. This simple upgrade transforms your bathroom into a sophisticated retreat, inspiring confidence in your design choices and making every visit feel special.
Conclusion
Exploring these diverse bathroom staging ideas can inspire you to refresh your space with ease and confidence. Whether you prefer minimalist elegance or cozy charm, there’s a staging technique here to suit your taste. Don’t hesitate to implement these ideas and watch your bathroom become a beautiful, functional haven—your perfect retreat awaits!