
17 Bathroom Tile Wainscoting Ideas for Functional Elegance
A beautifully tiled bathroom can instantly elevate the space, combining practicality with stunning aesthetics. Bathroom tile wainscoting has surged in popularity because it offers a perfect blend of durability, easy maintenance, and timeless charm, making it a favorite choice for homeowners looking to add a touch of sophistication.
In this article, you’ll explore a variety of creative wainscoting ideas that cater to different styles, from classic to contemporary. Whether you’re aiming for a subtle upgrade or a bold statement, these ideas will inspire you to transform your bathroom into a functional yet elegant retreat that reflects your personal taste.
1. Classic Subway Tile Wainscoting with a Modern Twist

Ever wish your bathroom felt more timeless but with a fresh edge? Classic subway tiles offer that nostalgic charm, yet sometimes they can look a little too traditional. If you’re craving a look that blends the old with the new, this idea is your ticket. It’s all about balancing classic appeal with modern finesse.
Recommended Products to replicate this idea
| # | Preview | Product | |
|---|---|---|---|
| 1 |

|
STICKGOO 10-Sheet Peel and Stick Subway Tile, Stick on Tiles Backsplash for Kitchen & Bathroom in... | Check Latest Price |
| # | Preview | Product | |
|---|---|---|---|
| 1 |

|
Red Devil 0422 Pre-Mixed Tile Grout - Professional Quality, Excellent Adhesion, Ideal for Wall &... | Check Latest Price |
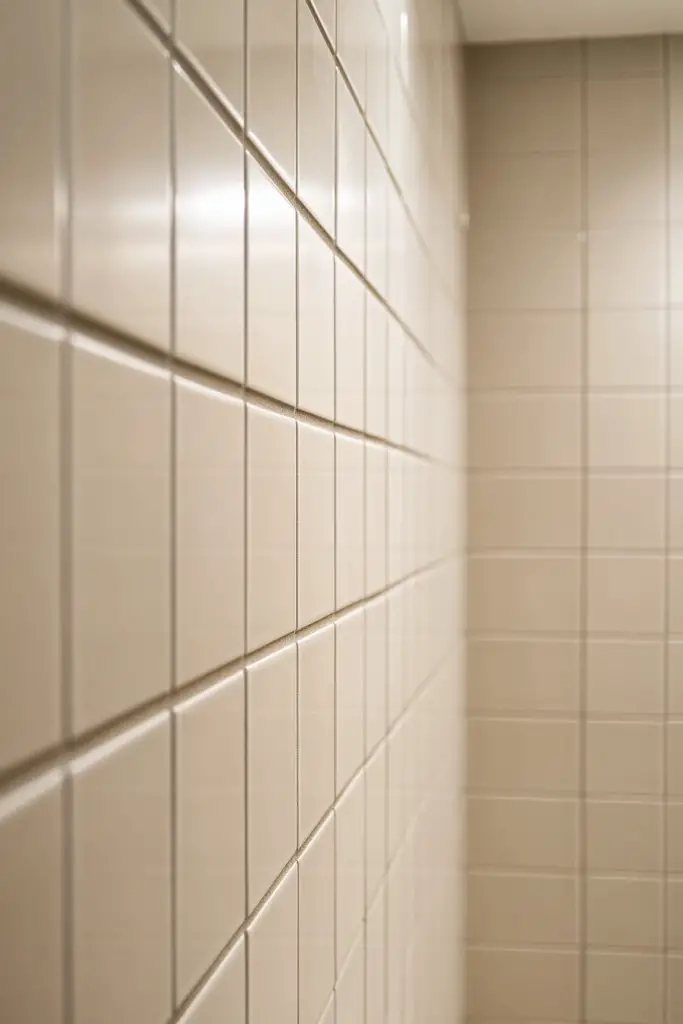
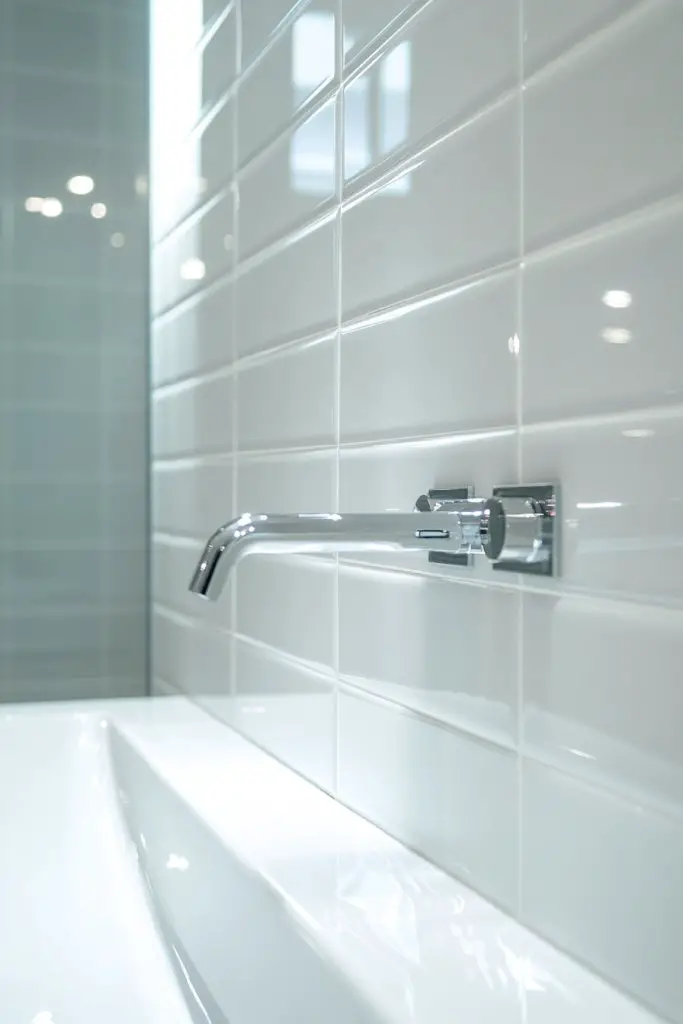
Imagine crisp white subway tiles laid in a clean grid, but with beveled edges that catch the light just right. The grout, contrasting sharply with the tiles, adds a contemporary punch. Soft shadows play along the angled edges, giving depth and texture. Think of a sleek bathroom with a subtle yet impactful focal wall that invites you in.
You can play with color by using dark grout for a bold look or soft pastel shades for a vintage vibe. Large-format tiles give a minimalist feel, while smaller mosaics can introduce intricate patterns. Seasonal accents like plush towels or textured rugs can change the mood without altering the tiles. Plus, mixing matte and glossy finishes can refresh the style anytime.
Start by selecting high-quality, durable subway tiles suited for wet environments. Use a level to ensure perfect alignment and a notched trowel for even adhesive application. For the modern twist, opt for contrasting grout—black or gray works well with white. Lay tiles in a running bond pattern for a timeless look, and allow proper curing time before grouting. Seal the tiles for extra protection against moisture.
Add a touch of personality by customizing with decorative trim or painted accents. Incorporate textured textiles or metallic fixtures for contrast. Installing a narrow shelf above the wainscoting can display candles or decorative jars, avoiding wall art that might clash with the clean look. Personal touches make the space uniquely yours.
This classic style proves that simplicity never goes out of fashion. With a modern twist, it becomes a statement of timeless elegance that adapts to any decor. Ready to upgrade your bathroom with this versatile look? It’s easier than you think and offers a stylish upgrade that lasts for years.
2. Bold Geometric Patterns for Visual Impact
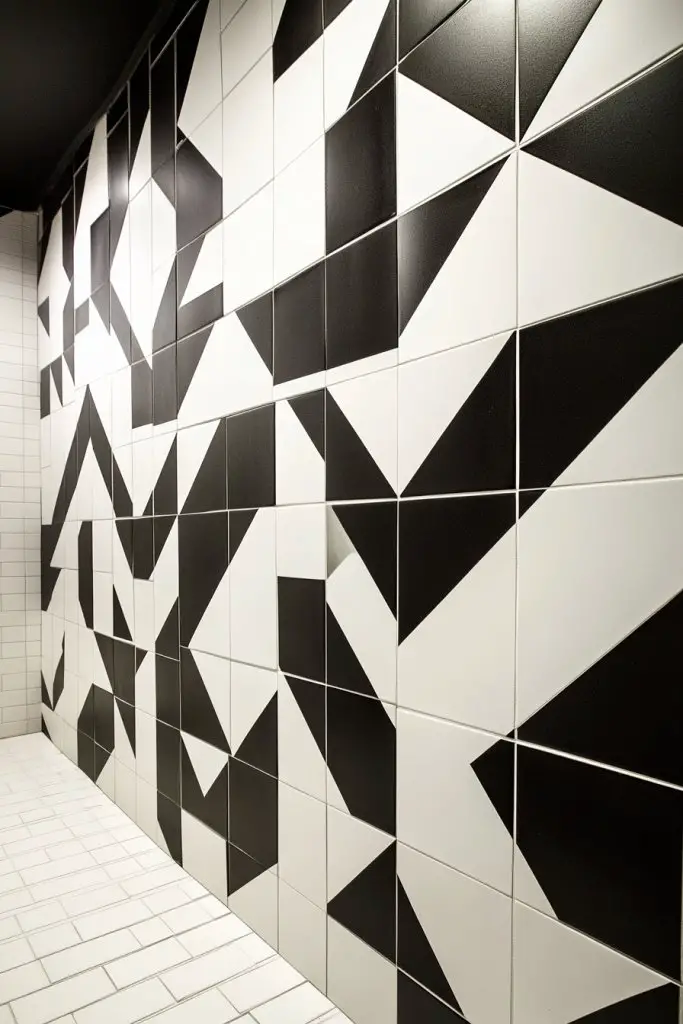
Tired of bland walls that lack personality? Geometric tile patterns inject energy and a modern vibe, transforming your bathroom from dull to dynamic. If you crave a statement wall that commands attention without overwhelming, this idea hits the sweet spot. It’s all about creating visual drama with minimal effort.
Recommended Products to replicate this idea
| # | Preview | Product | |
|---|---|---|---|
| 1 |

|
The Tiles Plaza Encaustic Peel and Stick Backsplash, Black Star Patterned Vintage Stick on Tiles,... | Check Latest Price |
| # | Preview | Product | |
|---|---|---|---|
| 1 |

|
Nuxovilar Peel and Stick Vinyl Floor Tiles, 12x12 Inch Retro Geometric Floral Pattern, Self-Adhesive... | Check Latest Price |
Picture encaustic tiles with bold, repeating patterns—triangles, diamonds, or hexagons—laid out in striking arrangements. Bright colors like navy, ochre, or emerald pop against neutral backgrounds, adding vibrancy. The textured surface catches the light differently from various angles, bringing depth. Think of walking into a space that feels lively yet curated.
You can opt for a full feature wall or a smaller inset to add a splash of pattern. Mixing matte and gloss finishes enhances the visual interest. Seasonal accents like citrus-colored towels or textured rugs can change the vibe. For smaller bathrooms, vertical or diagonal layouts can make the space feel larger and more energetic.
Select patterned tiles that are frost-resistant and suitable for wet areas. Use a tile cutter or wet saw for precision cuts around corners and fixtures. Lay out your pattern before fixing tiles to avoid surprises. Use spacers to ensure even gaps, and consider hiring a pro if you’re new to complex layouts. Grout in a contrasting color to make the pattern pop, then seal for longevity.
Layer the look with textured towels, sculptural shelving, or metallic fixtures to amplify the bold pattern. Incorporate subtle lighting to highlight the geometric design’s intricacies. Adding a border in a complementary color frames the pattern beautifully. Personal touches like decorative stones or fabric accents can soften the intensity.
Bold geometric patterns turn your bathroom into a modern art piece. They reflect a confident style that embraces vibrancy and visual interest. If you’re ready to make a statement, this approach is both fun and timeless. Go ahead—dare to be bold.
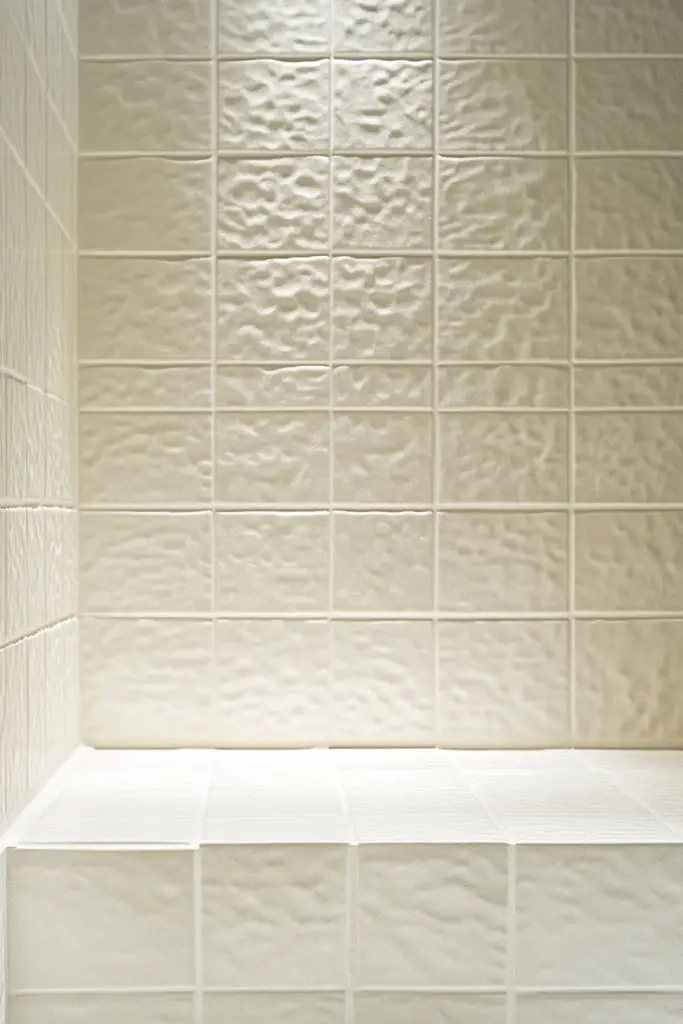
3. Textured 3D Tile Panels for Subtle Sophistication
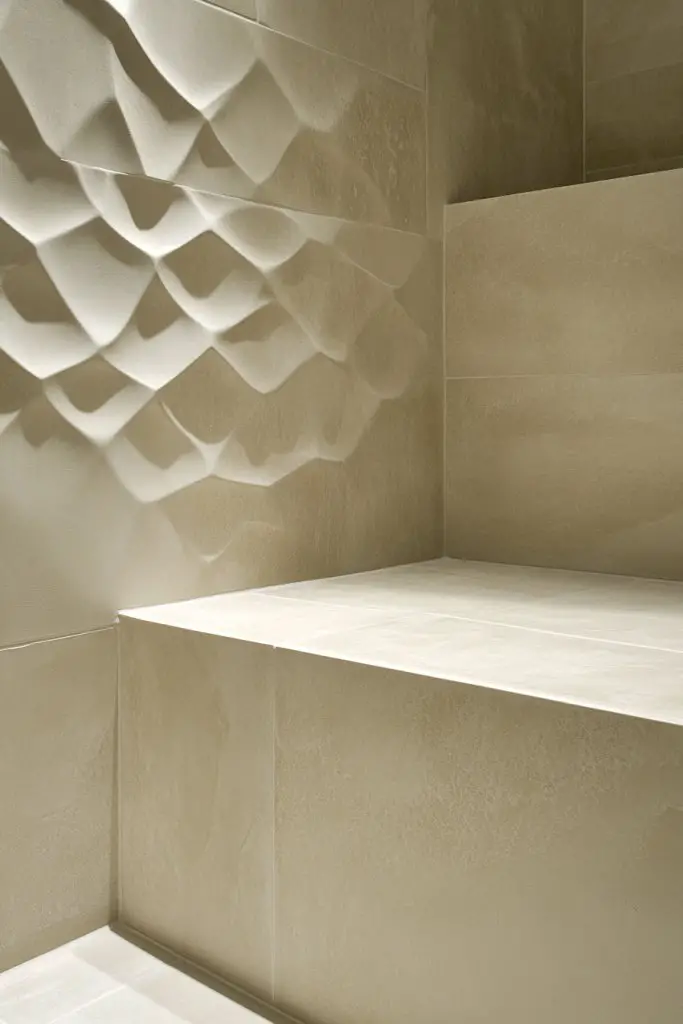
Looking for a way to add depth without overwhelming your space? 3D tiles offer a subtle sophistication that elevates your bathroom’s aesthetic. If flat surfaces bore you, textured panels provide tactile interest and a sense of artistry. It’s a clever way to create a luxurious feel with minimal fuss.
Recommended Products to replicate this idea
| # | Preview | Product | |
|---|---|---|---|
| 1 |

|
Armstrong Ceiling Tiles; 2x4 Ceiling Tiles - 10 pc White; Acoustic Ceilings for Suspended Grid;... | Check Latest Price |
| # | Preview | Product | |
|---|---|---|---|
| 1 |

|
COYMOS 24 Pcs Ceramic Tiles for Crafts Ceramic Coasters for Crafts Blank White Unglazed Ceramic Tile... | Check Latest Price |
Visualize ripples, waves, or geometric ripples in ceramic or stone tiles that catch the light at different angles. The textured patterns can be soft and flowing or sharp and angular, depending on your style. Imagine a wall that invites touch and offers visual intrigue, transforming plain surfaces into sculptural statements. The play of shadows creates a dynamic environment.
Choose from a variety of textures—ripple, wave, honeycomb, or geometric shapes—to match your decor. These panels work well as a feature wall or as a backdrop for a minimalist vanity. Seasonal accessories like textured towels or plush mats can enhance the tactile vibe. For smaller spaces, use textured panels sparingly to avoid visual clutter.
Select high-quality 3D tiles made for bathrooms—moisture-resistant and easy to clean. Use a level and spacers for precise placement, especially for intricate patterns. Prepare the wall with a smooth, clean surface. Apply adhesive evenly and press tiles firmly, ensuring they align properly. Seal the tiles with a waterproof grout or sealant to maintain their appearance.
Complement the textured wall with smooth, matte fixtures and soft textiles to balance tactile elements. Adding indirect lighting enhances the shadows and highlights the 3D design. Consider custom shapes or layered patterns for a personalized touch. Keep accessories minimal to allow the textures to shine.
3D tile panels add a refined, artistic touch to any bathroom. They are perfect for those who love subtle luxury and tactile experiences. With the right choice, your space will feel both modern and sophisticated. Ready to turn flat walls into works of art? It’s easier than you think.
4. Marble Tile Wainscoting for Luxurious Appeal
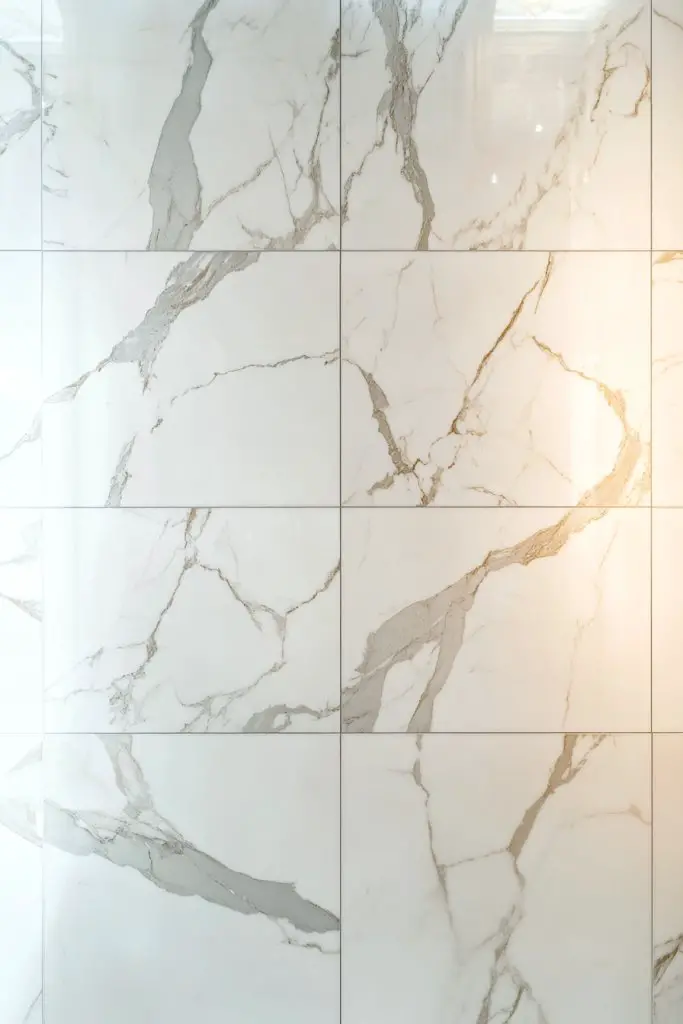
Craving a bathroom that screams luxury without the price tag of a spa? Marble tiles instantly elevate any space, adding elegance and timeless charm. If you want a look that’s both opulent and resilient, this idea is your best bet. It’s all about creating a sense of indulgence in everyday routines.
Recommended Products to replicate this idea
| # | Preview | Product | |
|---|---|---|---|
| 1 |

|
KASARO 3D Faux Stone Wall Panels, 4 PCS PU Wainscoting Panel - Cement Texture Thicker Design for... | Check Latest Price |
| # | Preview | Product | |
|---|---|---|---|
| 1 |
|
Giani Marble Easy Epoxy Countertop Paint Kit (Carrara White) | Check Latest Price |
Imagine polished marble in soft whites with dramatic veining, catching the light with every movement. The natural patterns and glossy finish create a sense of depth and richness. Think of a bathroom where the wainscoting appears to flow seamlessly into the countertops, unifying the space with natural beauty. The cool surface invites touch and admiration.
Opt for classic white marble for a clean, fresh look or go for darker tones like nero marquina for a dramatic effect. Mix with brass or gold fixtures for a luxe contrast. Seasonal accents like plush towels or warm lighting can soften the cool marble tone. Smaller bathrooms benefit from vertical marble panels to visually heighten the space.
Choose high-quality marble tiles with a polished finish, suitable for wet environments. Use a wet saw and level for precise cuts around fixtures. Prepare the wall with a smooth, waterproof surface. Apply a strong adhesive, press tiles firmly, and maintain consistent grout lines. Seal the marble with a penetrating sealant to prevent staining and enhance durability.
Add warm metallic fixtures or textured textiles to balance the cool marble. Consider corner shelves or niches carved into the marble for functional elegance. Incorporate personalized touches like monogrammed towels or custom lighting to enhance the luxurious vibe. Keep the space minimal to allow the marble’s natural beauty to shine.
Marble wainscoting transforms your bathroom into a high-end retreat. It’s a classic choice that never goes out of style, perfect for those who love timeless elegance. With proper care, marble offers a durable, stunning focal point. Embrace luxury in your daily routine—your bathroom deserves it.
5. Matte Finish Tiles for a Modern Minimalist Look

Fed up with shiny, high-maintenance surfaces that show every fingerprint? Matte tiles provide a sleek, understated alternative that’s both stylish and easy to care for. If minimalism is your vibe but you still want a polished look, this idea is perfect. It’s all about subtle sophistication.
Recommended Products to replicate this idea
| # | Preview | Product | |
|---|---|---|---|
| 1 |

|
Commomy 10 Pcs Matte 3D Peel and Stick Tile 11.8"x11.8" Ultralight PVC Square Peel and Stick... | Check Latest Price |
| # | Preview | Product | |
|---|---|---|---|
| 1 |

|
FloorPops x Chris Loves Julia 12-in by 12-in Bonneville Grey & White Marble Peel & Stick Floor... | Check Latest Price |
Visualize large, neutral-colored matte tiles laid out in a simple grid, creating a calm, cohesive backdrop. The absence of shine means the surface absorbs light rather than reflects it, softening the overall aesthetic. Think of a space that feels calm and uncluttered, where textures and shapes take center stage. The muted tones invite relaxation and focus.
Choose from shades of gray, beige, or taupe to match your decor. Combining matte and gloss finishes in small accents can add visual interest without breaking the minimalism. Seasonal changes like textured throws or monochrome accessories can refresh the look. For small bathrooms, large-format tiles minimize grout lines and enhance the sense of space.
Select high-quality, slip-resistant matte tiles suited for wet areas. Use a flat trowel and precise measurements to ensure even installation. Prepare the wall with a smooth, clean surface. Apply adhesive evenly, and set tiles with spacers for uniform gaps. Grout with a matching or slightly contrasting color, then seal to prevent staining and moisture entry.
Introduce textures through layered textiles like a soft cream throw blanket with chunky knit texture. Keep fixtures sleek and simple—think brushed nickel or matte black. Incorporate functional storage solutions like floating shelves or built-in niches. These details enhance the minimalist aesthetic while adding practicality.
Matte tiles make a bold statement about understated elegance. They suit modern lifestyles and are easy to maintain, making them a practical choice. Achieve a high-end look with minimal effort and maximum sophistication. It’s a no-brainer for anyone craving clean lines and calm vibes.
6. Mosaic Tile Accents for a Pop of Color
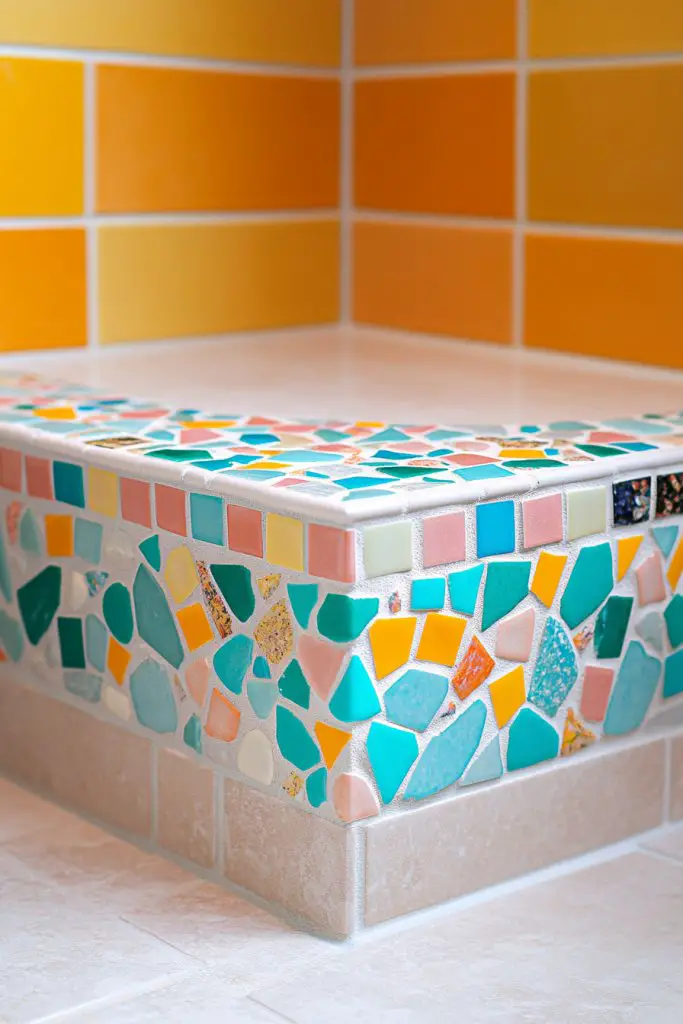
Want to add a splash of personality without overhauling your entire bathroom? Mosaic tiles offer a flexible way to introduce color and texture. If your style leans toward playful yet polished, these accents will make your space pop. It’s all about creating focal points with flair.
Recommended Products to replicate this idea
| # | Preview | Product | |
|---|---|---|---|
| 1 |
|
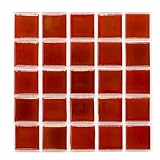
URBN Contemporary Glossy Burgundy Red Iridescent Glass Mosaic Tile for Indoor and Outdoor - Sample... | Check Latest Price |
| # | Preview | Product | |
|---|---|---|---|
| 1 |
|
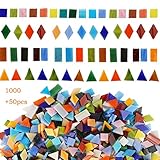
Lanyani 1050 Pieces Mixed Shapes Glass Mosaic Tiles for Crafts, Colorful Stained Glass Pieces for... | Check Latest Price |
Picture small, vibrant mosaic tiles in shades of turquoise, coral, or emerald arranged as a border or inset. Their glossy surface reflects light, adding sparkle and energy. Imagine a quiet corner transformed into a lively feature with intricate patterns or simple color blocks. The varied textures and colors create a lively, inviting atmosphere.
Use mosaic accents around mirrors, shower niches, or as a border along wainscoting. Mix and match colors to reflect your personality or seasonal themes. Complement with neutral walls and textiles to let the mosaics shine. For a more subdued look, opt for monochrome or metallic-toned mosaics.
Choose water-resistant mosaic tiles suitable for wet environments. Use a tile adhesive suitable for small pieces and carefully lay out your pattern before fixing. Use a fine-tipped trowel for precise application, and work methodically to avoid gaps. Grout in a matching or contrasting color to emphasize the pattern, then seal for protection.
Frame the mosaics with sleek trim or add decorative shelving nearby for functional decor. Incorporate textiles in complementary shades for a cohesive look. Use lighting to accentuate the sparkle and color vibrancy. Personalize further with custom designs or initials embedded in the mosaic.
Mosaic accents are a fun way to showcase your personality and taste. They’re versatile enough to suit both modern and traditional styles. With a little planning, you can create a stunning visual centerpiece that feels uniquely yours. Ready to add some color to your bathroom? Go for it!
7. Two-Tone Tile Wainscoting for Dynamic Contrast
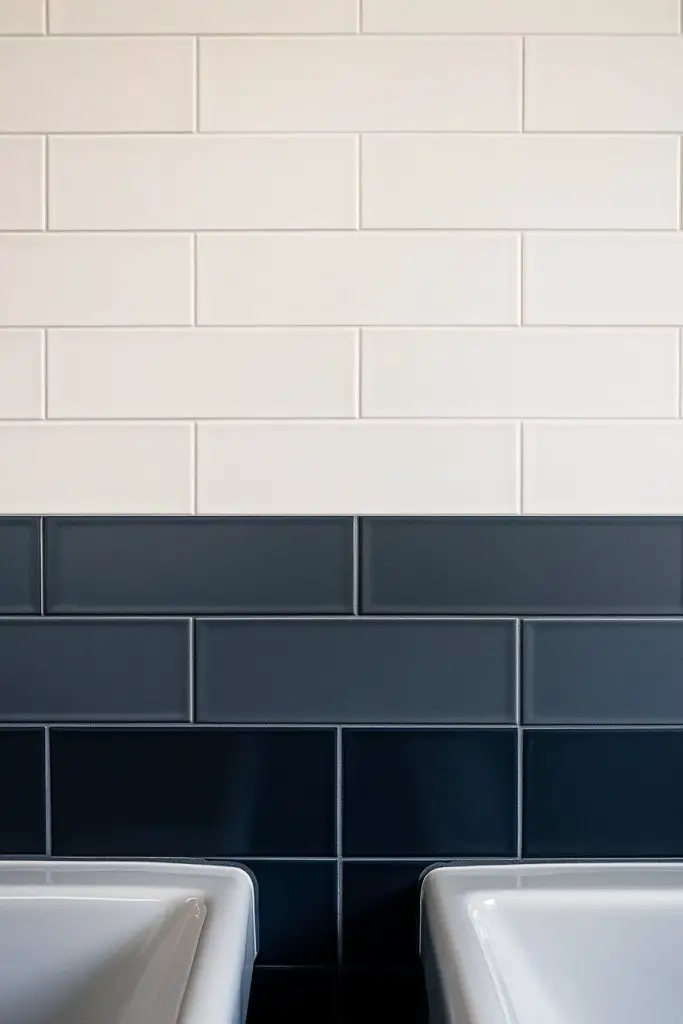
Looking to elevate your bathroom with striking visual contrast? Two-tone tile wainscoting offers a bold way to break the monotony and add depth. If you love a bit of drama but want it to stay classy, this idea is your go-to. It’s all about balancing two complementary tones for maximum impact.
Recommended Products to replicate this idea
| # | Preview | Product | |
|---|---|---|---|
| 1 |

|
Art3d 102-Piece Peel and Stick Wall Tile for Kitchen Backsplash, Bathroom, Fireplace, 3in. × 6in.... | Check Latest Price |
| # | Preview | Product | |
|---|---|---|---|
| 1 |

|
Vamos Tile Glossy Dolomite White Backsplash Tile Peel and Stick, 12.8 x 12.8 Inch 10 Sheets Long... | Check Latest Price |
Imagine crisp white tiles on the upper half of the wall contrasted with deep navy or charcoal below. The split creates a visual line that guides the eye and adds architectural interest. The two tones highlight textures and patterns, making the space feel layered and intentional. Think of a bathroom where color divides and defines the space beautifully.
Experiment with different color combinations—matte black with warm beige, or gloss white with muted gray. Use different textures or finishes to add subtle variation. Seasonal accents like cozy towels or textured mats can soften or intensify the contrast. For smaller rooms, vertical or diagonal dividing lines can enhance height and width.
Select tiles in two contrasting colors and finishes. Use painter’s tape or a level to mark your dividing line precisely. Start from the bottom, working your way up, ensuring grout lines are straight. Apply adhesive evenly, press tiles firmly, and grout in matching or contrasting shades. Seal the tiles afterward for durability.
Add decorative trim or metallic accents along the division line for a luxe finish. Incorporate textiles, such as towels or shower curtains, that echo one of your chosen tones. Use lighting strategically to emphasize the contrast or create mood lighting. Personal touches like custom hooks or handles complete the look.
Two-tone tile wainscoting is a statement of style and confidence. It’s a simple way to make your bathroom look more curated and polished. With minimal effort, you can achieve maximum visual interest. Want to stand out? This technique is your secret weapon.
8. Vertical Tile Pattern for Height Enhancement
Does your bathroom feel cramped or low-ceilinged? Vertical tile patterns can create an illusion of height, making the space feel more open and airy. If you’re tired of feeling boxed in, this trick instantly adds a sense of grandeur. It’s a simple update with a big visual payoff.
Recommended Products to replicate this idea
| # | Preview | Product | |
|---|---|---|---|
| 1 |

|
Vamos Peel and Stick Backsplash Seamless Tile for Kitchen and Bathroom,White and Beige Slate PVC... | Check Latest Price |
| # | Preview | Product | |
|---|---|---|---|
| 1 |

|
Custom Building Products 4000 Acrylic Ceramic Tile Mastic, 1-Gallon | Check Latest Price |
Visualize elongated tiles or arranged rectangular tiles stacked vertically, drawing the eye upward. The pattern emphasizes height and lends a streamlined look that’s both modern and elegant. Imagine a wall that guides your gaze from floor to ceiling, subtly expanding the room’s dimensions. The uniform lines create a sleek, cohesive effect.
Use large-format tiles to maximize the vertical effect or mix different shades of the same color for added depth. Vertical stripes work well in narrow or small bathrooms, visually widening the space. Pair with minimal fixtures and neutral palettes for a clean, contemporary look.
Select slim, rectangular tiles or narrow planks suited for wet areas. Use a level and spacers to align tiles precisely. Start from the bottom or top, depending on your preference, and work steadily to maintain straight lines. Use a waterproof adhesive, and set tiles carefully to keep pattern consistent. Seal grout lines thoroughly.
Complement the vertical pattern with tall, slim storage cabinets or shelves. Incorporate textured textiles or monochrome accessories to keep focus on the pattern. Use lighting to highlight the vertical lines, creating shadows that enhance the illusion of height. Personalize with decorative trims or inlays for extra flair.
Vertical tile patterns transform the perception of space, making small bathrooms feel larger. They’re a smart and stylish choice for maximizing limited square footage. With a simple layout, you can achieve a dramatic, high-end look. Ready to stretch your space visually? This is your move.
9. Classic Beadboard-Inspired Tile with Intricate Details
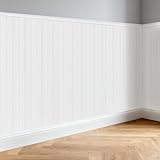
Want that charming, traditional look but with a modern twist? Beadboard-inspired tiles mimic the classic tongue-and-groove style with intricate patterns. If you love vintage charm but dislike the maintenance of wood, this idea is a perfect compromise. It combines timeless appeal with low upkeep.
Recommended Products to replicate this idea
| # | Preview | Product | |
|---|---|---|---|
| 1 |
|
Pre-Cut Wainscoting Panels Kit, WPC Slats Accent Wall Panel for Home Decor Covers 39 x 79 in, Ready... | Check Latest Price |
| # | Preview | Product | |
|---|---|---|---|
| 1 |
|
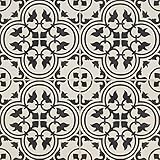
12x12 Flora Black White Encaustic Ceramic Tile (10 Piece 10SF Pack) | Check Latest Price |
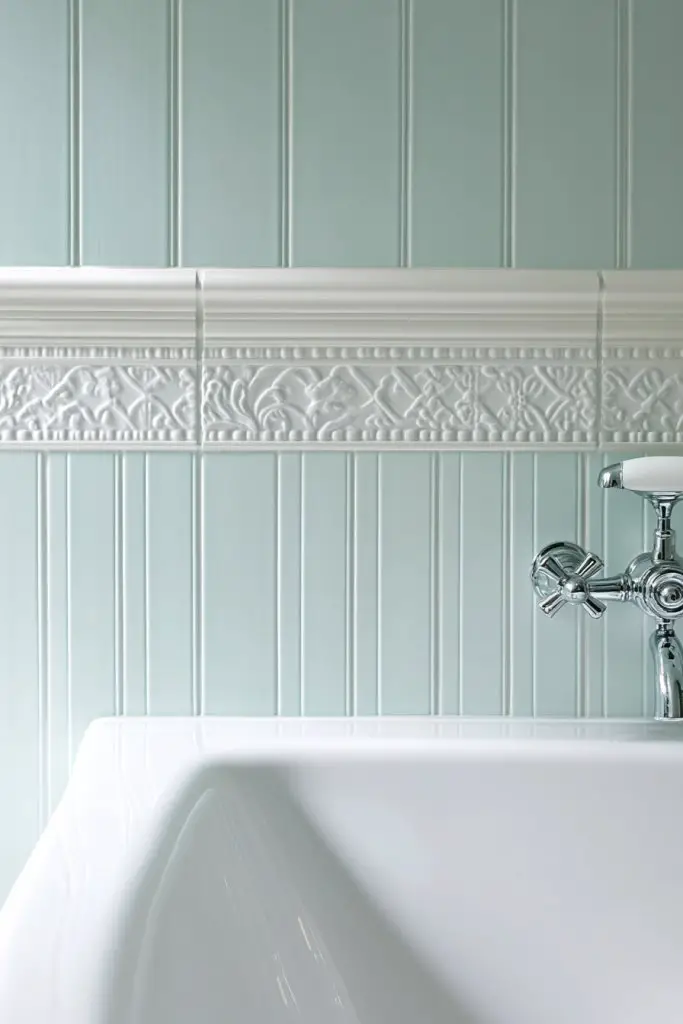
Picture tiny penny rounds or decorative encaustic tiles arranged in a beadboard pattern. The tiles add texture and detail, creating a cozy, cottage-like atmosphere. Visualize a wall that feels handcrafted but remains sleek and easy to clean. The pattern offers a tactile experience while adding visual warmth.
Mix different shapes and sizes for a personalized look. Use neutral tones for a calm feel or vibrant colors for a lively vibe. Incorporate decorative insets or borders for a more elaborate design. Seasonal accents like textured towels or warm lighting enhance the nostalgic appeal.
Choose small, detailed tiles made for bathrooms—preferably glazed for moisture resistance. Prepare the wall with a smooth, clean surface. Lay out your pattern beforehand, and use spacers to ensure consistent gaps. Apply adhesive and press tiles firmly, especially around intricate details. Seal with a waterproof grout for longevity.
Add decorative trims or painted accents to highlight the beadboard pattern. Use textured textiles or layered accessories to complement the intricate tiles. Incorporate functional shelving or niches that echo the vintage style. Personal touches like monograms or painted motifs complete the look.
This classic pattern evokes nostalgia and charm while maintaining a contemporary edge. It’s perfect for creating a warm, inviting space that feels handcrafted. With thoughtful details, your bathroom becomes a cozy retreat. Ready to channel vintage elegance with modern ease? Go for it!
10. Frameless Tile Panels for Seamless Elegance
Craving a bathroom that feels sleek and uncluttered? Frameless tile panels deliver a seamless, modern look with no visible grout lines. If you dislike the busy feel of grid-like tiling, this approach offers pure elegance. It’s about letting the tiles speak for themselves.
Recommended Products to replicate this idea
| # | Preview | Product | |
|---|---|---|---|
| 1 |

|
FF Systems | System F3 - Access Panel | Removable | Tile Application | 5/8" Drywall (8" X 8") | Check Latest Price |
| # | Preview | Product | |
|---|---|---|---|
| 1 |
|
Custom Building Products 4000 Acrylic Ceramic Tile Mastic, 1-Gallon | Check Latest Price |
Imagine large tiles, perhaps in a neutral tone, installed with minimal grout or none at all. The result is a smooth, continuous surface that resembles a sculptural wall. Light reflects evenly across the panels, creating a calm, sophisticated environment. Think of a space where the wall appears to flow effortlessly, unbroken and pristine.
Choose large-format tiles in stone, porcelain, or glass for a high-end feel. Use subtle color palettes or monochrome schemes to emphasize simplicity. Incorporate hidden lighting behind the panels for a soft glow. For tighter spaces, this approach visually expands the room.
Select large, flat tiles with a uniform thickness. Use a high-precision adhesive suitable for large panels, applying it evenly with a notched trowel. Carefully align each tile, ensuring no gaps or misalignments. Use spacers only during initial placement, then remove before grouting or sealing. Finish with a waterproof sealant to protect against moisture.
Add sleek fixtures or metallic accents to enhance the seamless look. Incorporate indirect lighting or LED strips to highlight the uninterrupted surface. Keep accessories minimal and modern—think floating shelves or hidden storage. Personalize with textured textiles or soft lighting for ambiance.
Frameless panels create a luxurious, spa-like environment. They showcase craftsmanship and precision, making your bathroom feel high-end. It’s a bold choice that pays off visually and functionally. Ready for a sleek upgrade? This minimalist style is timeless.
11. Industrial Style with Brick-Effect Tiles
Looking to add an edgy, urban vibe to your bathroom? Brick-effect tiles bring that raw, industrial charm right into your home. If you love the look of exposed brick but want the practicality of tiles, this idea is your best bet. It’s all about blending rugged style with modern convenience.
Recommended Products to replicate this idea
| # | Preview | Product | |
|---|---|---|---|
| 1 |

|
Tinlade 30 Pcs 28.81 Sq ft 3D Wall Panels Peel and Stick Foam Brick Wallpaper Printable Faux Brick... | Check Latest Price |
| # | Preview | Product | |
|---|---|---|---|
| 1 |
|
Custom Building Products 4000 Acrylic Ceramic Tile Mastic, 1-Gallon | Check Latest Price |
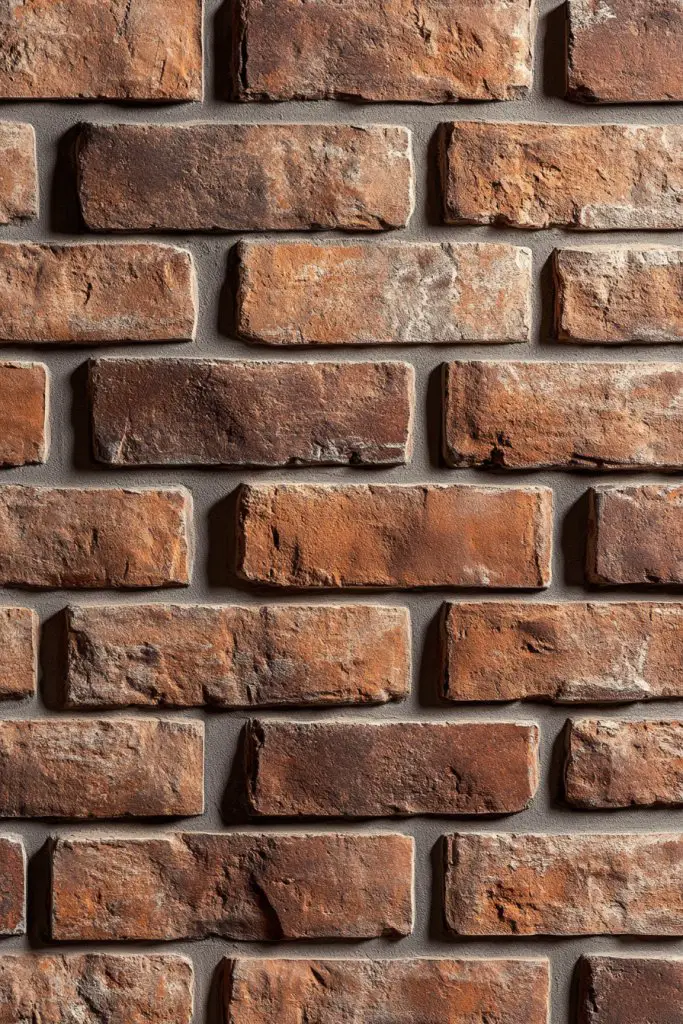
Picture textured tiles mimicking distressed brick, in dark tones like charcoal or deep red. The rough surface and uneven edges evoke a warehouse or loft aesthetic. Imagine a wall that feels tactile and bold, with the rich texture creating shadows and depth. It’s a statement that commands attention.
Mix brick-effect tiles with smooth concrete or metal accents for a layered look. Use open shelving or industrial fixtures to amplify the style. Seasonal updates like soft textiles or warm lighting soften the rawness. For small bathrooms, a single feature wall can make a big impact without overwhelming the space.
Choose textured, weathered-look tiles designed for wet areas. Prepare a sturdy wall surface and use a high-quality adhesive. Lay tiles in a running bond pattern, ensuring joints are staggered for authenticity. Use a grout color that enhances the brick effect—dark gray or black works well. Seal thoroughly to prevent moisture damage.
Incorporate vintage fixtures or distressed metal accents. Add functional elements like pipe shelving or industrial lighting. Use warm-toned textiles or rugs to contrast the cool, hard surfaces. Personal touches like metal hooks or storage options finish the look.
This industrial style creates a bold, trendy atmosphere that feels both rugged and refined. It suits modern lofts or city dwellers craving an urban retreat. With the right details, your bathroom becomes a statement space that’s both functional and stylish. Dare to be different.
12. Coastal-Inspired Blue and White Tile Combinations
Dreaming of a relaxing beach retreat? Coastal-inspired tiles with blue and white hues bring seaside serenity right into your bathroom. If you crave a calming, fresh environment, this idea is your ticket. It’s about capturing the essence of the coast in your daily routine.
Recommended Products to replicate this idea
| # | Preview | Product | |
|---|---|---|---|
| 1 |
|
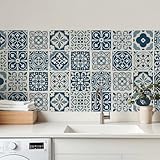
MEIHEA 30 Pack Blue and White Peel and Stick Backsplash, 4x4 Inch Mediterranean Tile Stickers,... | Check Latest Price |
| # | Preview | Product | |
|---|---|---|---|
| 1 |

|
Peel and Stick Backsplash Tiles 11.4"×9" Chevron Design Stick on Backsplash Adhesive Wall Tile for... | Check Latest Price |
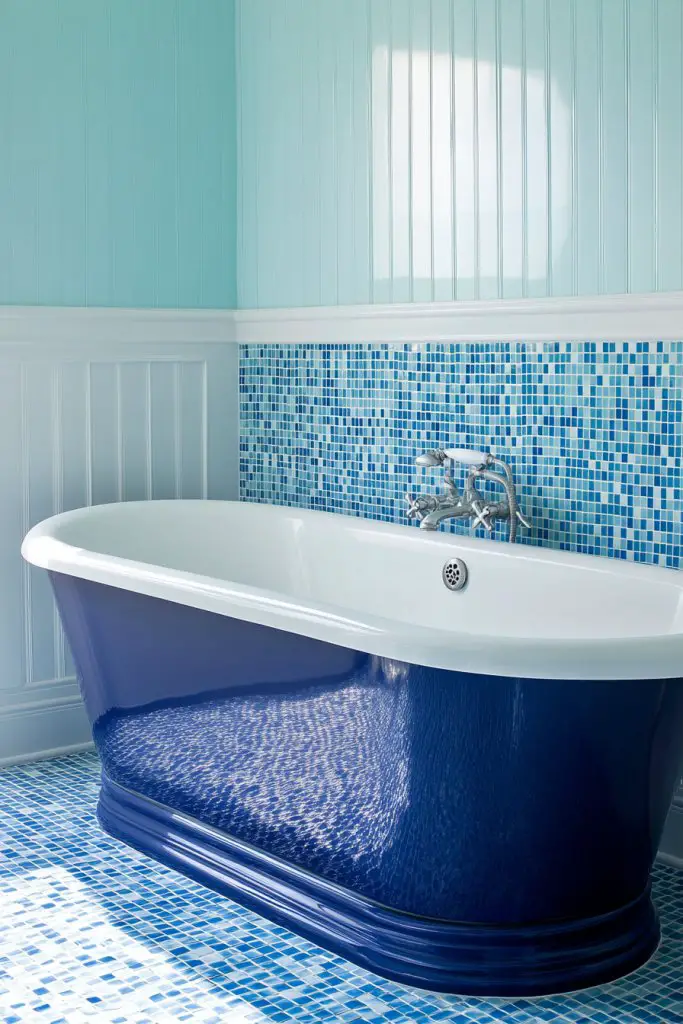
Visualize crisp white tiles paired with navy or sky blue accents in stripes or chevron patterns. The glossy surfaces reflect light, mimicking the shimmer of water. Think of a space that feels breezy, open, and inviting, with patterns reminiscent of waves or coastal motifs. The overall effect is soothing and rejuvenating.
Use different shades of blue for depth, from pale aqua to deep navy. Incorporate natural textures like woven baskets or wood accents to enhance the coastal vibe. Seasonal updates could include sandy-colored textiles or nautical-themed decor. Keep the overall palette light to maintain a fresh, airy feel.
Choose glazed ceramic or porcelain tiles in blue and white. Use a level and spacers to ensure even lines, especially with striped or chevron layouts. Grout in white or matching shades to keep the look clean. Seal tiles to protect against moisture and maintain their vibrant colors. Consider a waterproof adhesive suitable for bathrooms.
Add decorative elements like seashell-inspired fixtures or soft textiles in sandy tones. Incorporate subtle lighting that mimics natural sunlight. Use accessories such as nautical-themed towels or beach-inspired artwork to personalize the space. Keep clutter minimal to preserve the peaceful atmosphere.
A coastal theme provides a timeless, calming environment that’s perfect for unwinding. It’s a versatile look that works well in both modern and traditional bathrooms. With simple updates, you can create a sanctuary that feels like a vacation every day. Ready to bring the beach home? Dive in!
13. Rustic Rustic with Aged or Reclaimed-Look Tiles
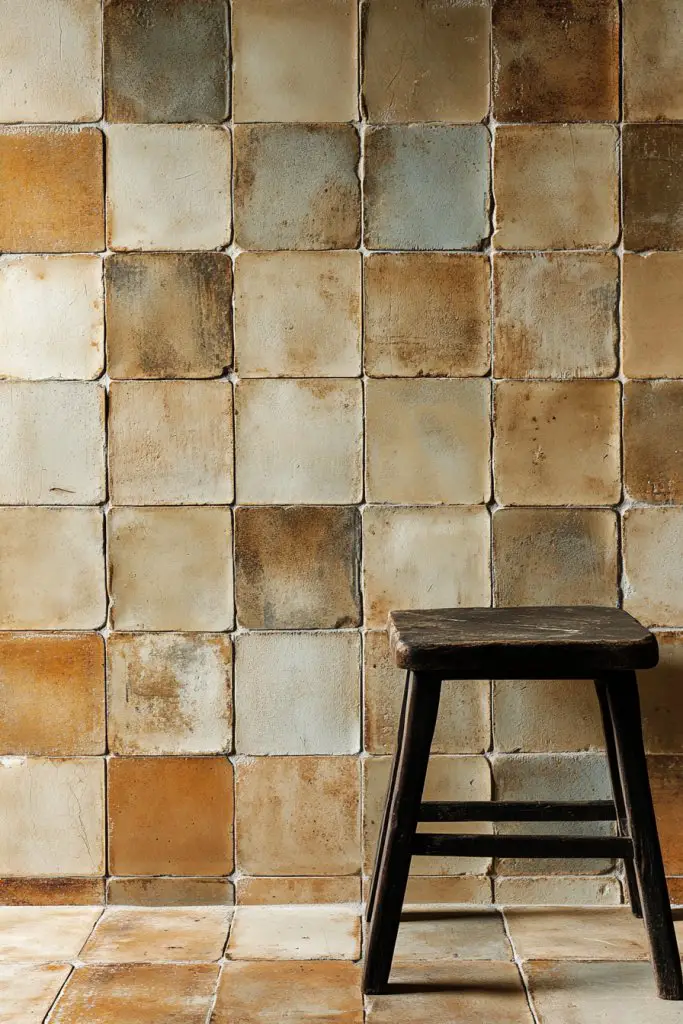
Want your bathroom to feel warm and inviting, like a cozy farmhouse? Rustic tiles with aged or reclaimed appearances add instant charm and character. If you love the look of weathered wood or vintage stone but prefer the durability of tile, this idea is perfect. It’s about embracing imperfection with style.
Recommended Products to replicate this idea
| # | Preview | Product | |
|---|---|---|---|
| 1 |

|
Rockin' Wood Real Wood Nail Up Application Rustic Reclaimed Naturally Weathered Barn Wood Accent... | Check Latest Price |
| # | Preview | Product | |
|---|---|---|---|
| 1 |

|
EverStone Aged Brick Faux Brick Panel, 46 7/8"W x 27"H x 1 1/4"D, Burnished Red Color | Check Latest Price |
Imagine tiles with a distressed finish, resembling reclaimed wood or aged brick. The earthy tones—warm browns, muted grays, and soft creams—create a natural, lived-in vibe. Visualize a wall that looks like it has history, with textured surfaces that invite touch. It feels authentic and cozy, perfect for a relaxed atmosphere.
Pair rustic tiles with industrial fixtures or vintage hardware to amplify the look. Use textiles like burlap or woven rugs to add texture. Seasonal updates could include warm throws or soft lighting. Keep the rest of the decor simple to let the tiles shine and maintain a balanced, inviting space.
Select tiles that mimic reclaimed wood or aged stone, with matte, textured finishes. Prepare a wall free of imperfections for easy installation. Use a suitable adhesive and carefully align tiles to preserve the rustic pattern. Grout in neutral shades to enhance the aged look, and seal tiles to withstand moisture and wear.
Incorporate vintage-inspired fixtures or handcrafted accessories. Add functional touches like open shelving or rustic wood accents. Use textiles with natural fibers and earthy tones. Personalize with artwork or decorative items that evoke a cozy, country ambiance.
Rustic tiles create a warm retreat that feels both timeless and authentic. They suit homes aiming for a farmhouse or cottage aesthetic. With the right decor, your bathroom becomes a haven of comfort and charm. Ready to embrace rustic elegance? It’s easier than you think.
14. Metallic Accents within Tile Designs for a Touch of Glamour
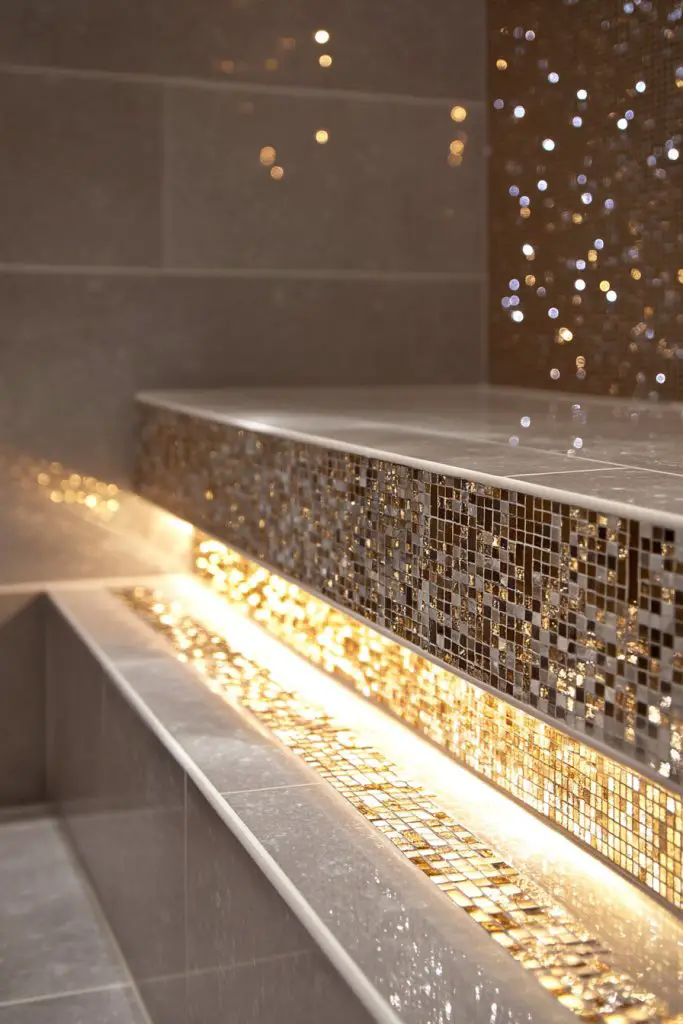
Looking to add a little sparkle and sophistication? Metallic accents within tiles instantly elevate your bathroom decor with a touch of glamour. If you love a luxe vibe but prefer subtlety over bling, this idea strikes the perfect balance. It’s about shimmering details that catch the eye.
Recommended Products to replicate this idea
| # | Preview | Product | |
|---|---|---|---|
| 1 |

|
STICKGOO Peel and Stick Backsplash Tiles, Stick on Mosaic Self Adhesive Tiles, 3D Hexagon Backsplash... | Check Latest Price |
| # | Preview | Product | |
|---|---|---|---|
| 1 |
|
LITMIND Gold Mixed Irregular Glass Mosaic Tiles for Art Crafts, 9oz Value Pack Mosaic Making... | Check Latest Price |
Picture tiles with metallic glazes, in shades of gold, bronze, or silver, embedded into geometric or mosaic patterns. The reflective surfaces bounce light around the room, creating a luminous atmosphere. Imagine a wall that shimmers softly, adding depth and richness without overwhelming the senses. It’s a subtle statement of opulence.
Use metallic tiles as accents or borders within larger tile layouts. Pair with matte or gloss finishes to enhance the shimmer. Incorporate fixtures or hardware in matching metals for a cohesive look. Seasonal touches like plush textiles or soft lighting can amplify the glamour. Keep the overall palette neutral to let metallic accents stand out.
Select tiles with metallic inlays or glazes designed for bathrooms. Use precise measurements and a level to ensure alignment. Apply adhesive carefully to avoid smudges or uneven surfaces. Grout in neutral tones to highlight the metallic details, then seal the tiles thoroughly. Consider a mix of matte and shiny finishes for added texture.
Complement metallic tiles with fixtures in matching tones. Use soft textiles or lighting to create a warm, inviting glow. Incorporate decorative accessories like sculptural objects or metallic frames. Personalize with monogrammed towels or custom lighting setups for a bespoke feel.
Metallic accents add a contemporary touch that feels luxurious yet approachable. They work beautifully in modern, glam, or eclectic styles. With the right balance, your bathroom exudes elegance and confidence. Ready to shimmer your way to a stunning space? Go for it!
15. Narrow Tile Borders for a Refined Frame Effect
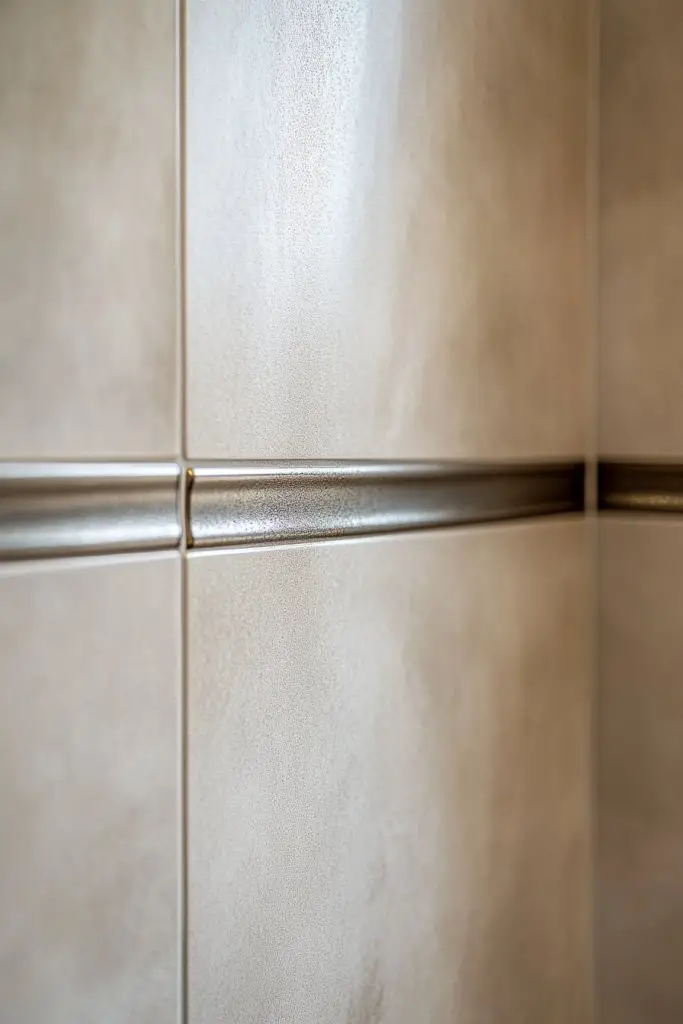
Want to add a polished, gallery-like finish to your bathroom walls? Narrow tile borders create a refined frame effect that elevates any tile design. If you love clean lines and subtle details, this idea is your secret weapon. It’s about framing your space with understated elegance.
Recommended Products to replicate this idea
| # | Preview | Product | |
|---|---|---|---|
| 1 |

|
Art3d Self Adhesive Vinyl Floor Transition Strip, Laminate Floor Strip Floor Flat Divider Strip for... | Check Latest Price |
| # | Preview | Product | |
|---|---|---|---|
| 1 |

|
Art3d 10 Ft Peel and Stick Flexible Vinyl Molding Trim for Wall Tile Edges, Kitchen backsplash,... | Check Latest Price |
Visualize thin, contrasting border tiles that outline larger panels or feature walls. The borders define sections and create a visual hierarchy, much like a picture frame. The effect adds depth and sophistication, drawing the eye inward and highlighting your tile choices. Think of a gallery wall but in your bathroom.
Experiment with different colors, textures, or finishes for the borders—glossy, matte, metallic, or textured. Use them to emphasize certain areas, such as around mirrors or shower niches. Seasonal updates like colorful or metallic borders can refresh the space. Keep the borders slim to maintain a delicate, elegant look.
Choose narrow tiles that complement or contrast with your main tiles. Use a level and spacers for precise alignment. Install borders first or after the main panels, depending on your pattern. Carefully grout to avoid smudging onto adjacent tiles. Seal all edges thoroughly to prevent moisture penetration.
Add metallic or textured border tiles for extra flair. Incorporate small decorative elements like corner accents or corner trims. Use lighting to accentuate the borders and create shadows that enhance the framed effect. Personalize with color themes or custom shapes for a unique touch.
Narrow borders give your bathroom a gallery-like, curated appearance. They add subtle sophistication without overwhelming the design. It’s a detail that transforms ordinary tiling into an artful statement. Want a refined, finished look? This technique makes it happen.
16. Practical Waterproof Tile Wainscoting with Slip-Resistant Surfaces
Safety and durability are top concerns in wet environments. Practical waterproof tile wainscoting ensures your bathroom stays beautiful and slip-free. If you’re tired of worries about slips or water damage, this idea provides peace of mind. It’s about combining function with style effortlessly.
Recommended Products to replicate this idea
| # | Preview | Product | |
|---|---|---|---|
| 1 |

|
Dumawall+ Waterproof Wall Tiles, Easy-to-Install, Tongue & Groove System, UV Resistant, Strong &... | Check Latest Price |
| # | Preview | Product | |
|---|---|---|---|
| 1 |

|
Marble Peel and Stick Waterproof Wall Paneling, 118" x 47" Calacatta Gold Glossy Finish... | Check Latest Price |
Imagine textured, slip-resistant tiles with a matte or rough finish—like textured stone or engineered ceramic. The surfaces are designed to prevent slips while still looking sleek. Visualize a wall that combines safety with aesthetic appeal, giving you confidence in every step. It’s a smart upgrade for busy households or families.
Choose from various textures and patterns that enhance grip—such as basketweave or pebble-like surfaces. Pair with neutral tones or subtle colors to keep the focus on safety features. Seasonal updates could include textured textiles or anti-slip rugs. Use in showers, baths, or around wet zones for maximum practicality.
Select tiles specifically rated for slip resistance—check slip-resistance ratings before purchasing. Prepare a sturdy, even wall surface and use appropriate waterproof adhesive. Install tiles with spacers and ensure good alignment. Apply a waterproof grout or sealant to protect against moisture and prevent mold.
Add safety features like grab bars or textured niches that blend seamlessly with the tile design. Incorporate color-coded zones or visual cues with contrasting textures for added safety. Use lighting to enhance visibility and avoid shadows or dark spots. Keep the decor simple to focus on safety and function.
Practical waterproof and slip-resistant tiles make your bathroom safer without sacrificing style. They are ideal for families, seniors, or anyone prioritizing safety. With the right choices, your space becomes both beautiful and secure. Ready to upgrade? Safety never looked so good.
17. Customizable Patterned Tile Insert Panels for Unique Flair
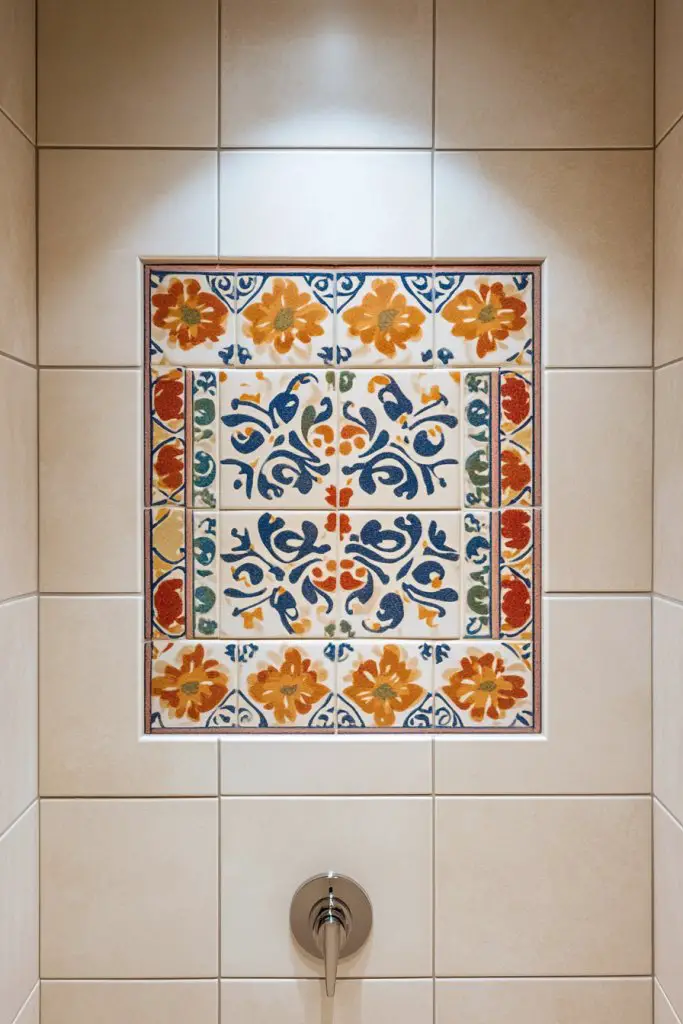
Want your bathroom to stand out with a one-of-a-kind feature? Customizable patterned tile insert panels allow you to showcase your personality and creativity. If you love personalized touches that make your space truly yours, this idea is ideal. It’s about creating focal points that tell a story.
Recommended Products to replicate this idea
| # | Preview | Product | |
|---|---|---|---|
| 1 |

|
Gordion 2x2 Silver Metallic Resin Decorative Insert Accent Piece Art Craft Tile | Check Latest Price |
| # | Preview | Product | |
|---|---|---|---|
| 1 |

|
Tilingview 10 Pcs Vinyl Leaf Peel and Stick Tile for Kitchen Backsplash, Premium Self-Adhesive Tiles... | Check Latest Price |
Imagine decorative tiles with intricate patterns, motifs, or initials inset into a larger plain tile field. These panels can feature traditional, modern, or abstract designs, depending on your style. Visualize a space where the inset adds a splash of color or a detailed pattern, drawing the eye and adding depth.
Design your own patterns or choose from a wide range of premade options. Use inset panels around mirrors, doors, or shower niches to create visual interest. Mix different styles or textures for a personalized collage. Seasonal or thematic updates can be achieved with changing inserts.
Select tiles with patterned inserts designed for easy installation. Prepare a smooth wall surface and plan your layout beforehand. Use a level and spacers for precise placement. Carefully set the inset panels, ensuring alignment and grout joints match surrounding tiles. Seal with waterproof grout or sealant for durability.
Add personal touches with monograms, symbols, or custom motifs. Incorporate colors that match your decor or reflect seasonal themes. Use lighting to highlight the inset details. Combine with complementary fixtures or textiles for a cohesive, personalized look.
Custom patterned panels turn ordinary walls into personalized art. They showcase your style and add a unique flair to your bathroom. With a little planning, you create a space that’s both functional and reflective of your personality. Ready to make your mark? Start designing!
Conclusion
With a diverse range of bathroom tile wainscoting ideas covered, you’re equipped to enhance your space with style and practicality. Don’t hesitate to experiment with different patterns, textures, and colors to find the perfect fit for your home. Embrace the opportunity to create a bathroom that is both beautiful and functional—your perfect sanctuary awaits!
Last update on 2026-02-15 / Affiliate links / Images from Amazon Product Advertising API