
13 Bedroom Snap Ideas for Picture-Perfect Moments
Imagine capturing the cozy, stylish vibe of your bedroom in a single shot—sounds irresistible, right? Bedroom snap ideas have skyrocketed in popularity because they let us showcase our personal style, create mood boards, or simply share our favorite spaces with friends. Whether you’re into minimalist chic, boho charm, or luxurious elegance, there’s a perfect pose or setup to highlight your unique vibe and make those moments picture-perfect.
In this article, you’ll discover a variety of creative and easy-to-try bedroom snap ideas that can elevate your photo game. From playful angles and cozy corner setups to stunning lighting tricks, these tips will inspire you to transform any bedroom into a visual masterpiece. Get ready to turn your space into a captivating backdrop for your next social media post or personal keepsake!
1. Cozy Bed Nook with Layered Textiles and Ambient Lighting
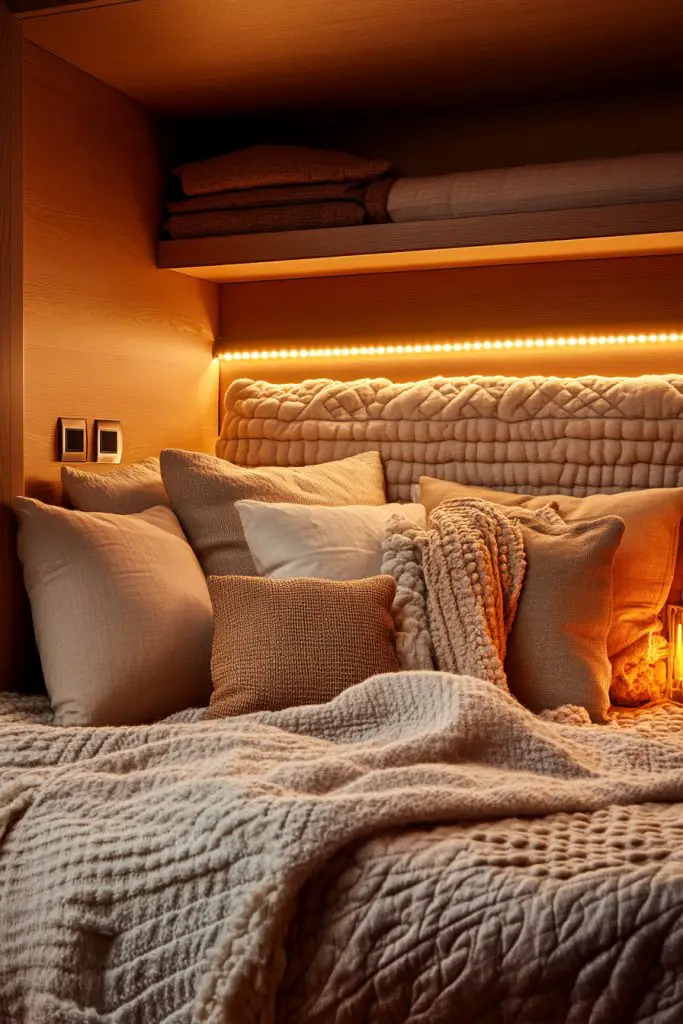
Ever feel like your bedroom lacks that warm, inviting vibe where you just want to curl up and relax? A cozy bed nook can transform your space into a personal retreat. It’s all about creating an environment that feels like a hug every time you step in. If your current setup doesn’t quite hit those comfort notes, this idea might be your new best friend.
Recommended Products to replicate this idea
| # | Preview | Product | |
|---|---|---|---|
| 1 |

|
Brightown 12 Pack LED Fairy Lights Battery Operated String Lights - 7ft 20LED Waterproof Silver Wire... | Check Latest Price |
| # | Preview | Product | |
|---|---|---|---|
| 1 |

|
100% Cotton Blanket Large 50"x 70", 6 Layers Muslin Blankets, Cooling and Soft Throw Blanket for Bed... | Check Latest Price |
Imagine plush bedding layered with soft throws, a variety of textured pillows, and gentle fairy lights draping overhead. The glow from the lights casts a warm ambiance, while the textiles invite you to sink into softness. The space feels intimate and inviting, with a subtle play of shadows and textures that make it perfect for photos or just unwinding after a long day. It’s like having a secret hideaway right in your room.
You can tweak the textiles to suit any season—think lightweight linen for summer, cozy knits for winter. Add a small, vintage stool or a basket for extra layers of comfort. If space is tight, opt for a corner with a compact headboard and layered blankets. For a boho vibe, incorporate tassels and macramé accents around your lighting. The key is mixing textures and creating a layered look that feels personal.
Start by selecting a cozy corner or creating a small alcove near your bed. Use a combination of plush blankets, a variety of pillows in different sizes, and a soft rug underneath. Hang fairy lights or soft LED strips overhead—these are inexpensive and easy to install. Add a few decorative pillows with different textures to enhance visual interest. Make sure the lighting is soft and warm for that inviting glow. Keep clutter minimal to maintain the serene vibe.
Personalize your nook with a favorite throw blanket, or add a few sentimental pillows. Consider a small shelf nearby for your favorite books or keepsakes, but avoid cluttering the space. Incorporate scents with a diffuser or scented candles (safely placed). You could also add a small portable speaker for music or relaxing sounds. The goal is to make this space uniquely yours, a true reflection of your comfort style.
Creating a cozy bed nook can significantly boost your mood and encourage more restful nights. It’s a simple upgrade that adds a lot of personality and charm. Plus, you’ll love snapping photos of your dreamy corner—perfect for social media or just for fun. Go ahead, transform your bedroom into your personal sanctuary and enjoy every moment of it.
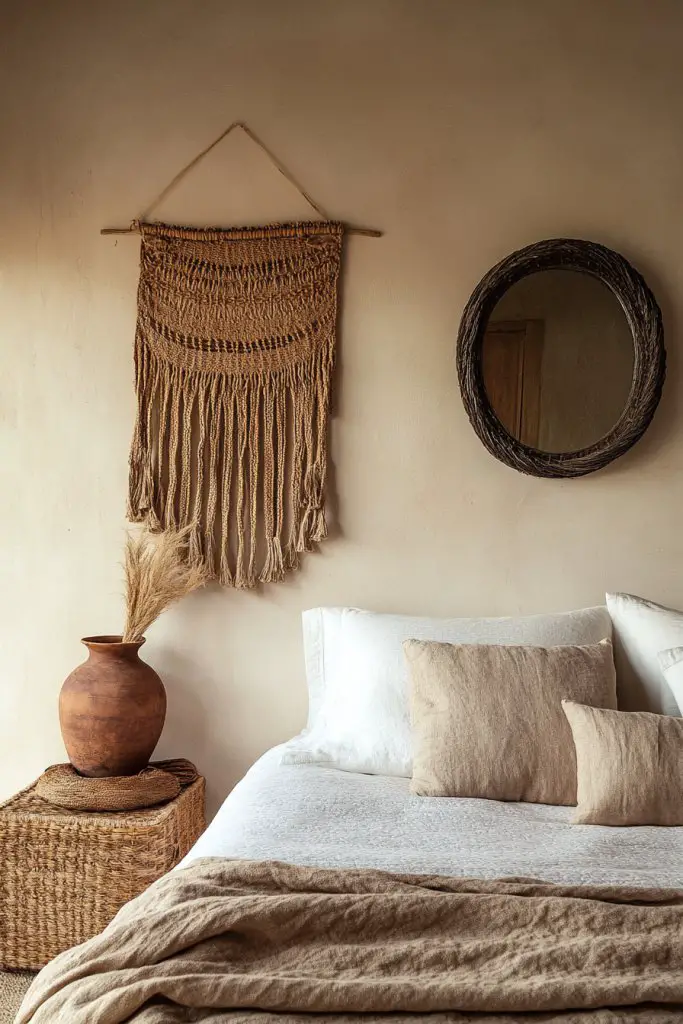
2. Boho Dreamcatcher Wall Display
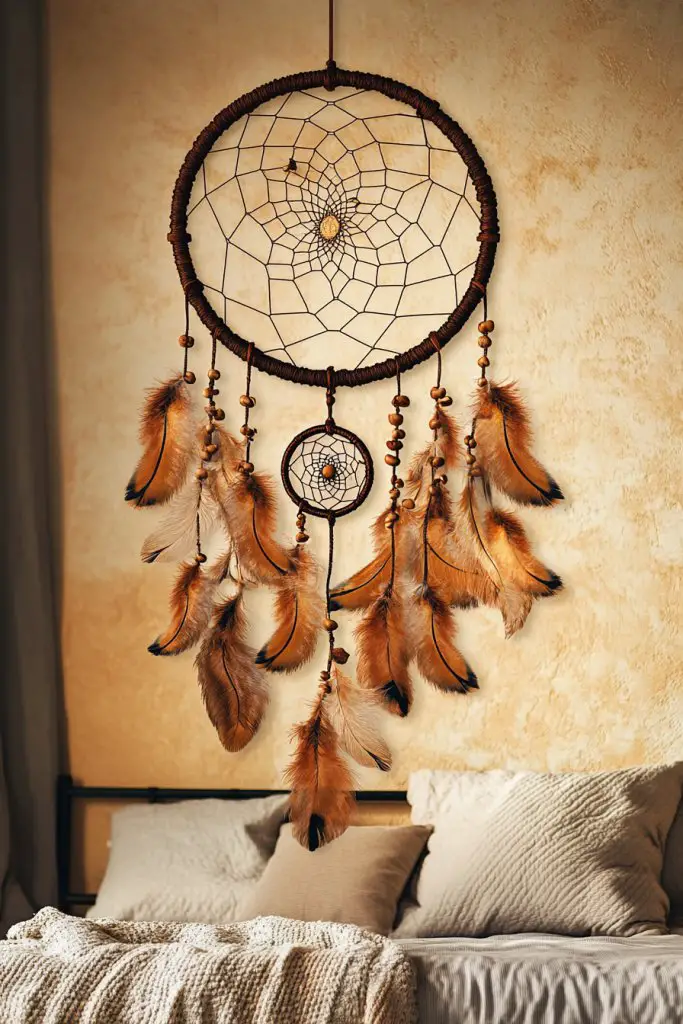
Ever wanted to add a touch of free-spirited charm to your bedroom? A boho dreamcatcher wall display instantly injects personality and texture into any space. It’s the kind of detail that makes your room feel thoughtfully curated without much effort. If your walls feel a little bare or bland, this might be just what you need.
Recommended Products to replicate this idea
| # | Preview | Product | |
|---|---|---|---|
| 1 |

|
Large Tree of Life Dream Catchers, Macrame Wall Hanging Boho Handmade Woven Dream Catcher Macrame... | Check Latest Price |
| # | Preview | Product | |
|---|---|---|---|
| 1 |
|
Brightown 12 Pack LED Fairy Lights Battery Operated String Lights - 7ft 20LED Waterproof Silver Wire... | Check Latest Price |
Picture an oversized, handcrafted dreamcatcher with intricate webbing, fringed tassels, and delicate feathers hanging against a neutral wall. The soft, earthy tones complement a variety of decor styles, adding an organic, artistic vibe. The detailed weaving and flowing tassels create movement and depth in photos, making your bedroom look effortlessly styled. It’s a statement piece that’s both eye-catching and calming.
Choose dreamcatchers with different materials—wood, metal, or even fabric—to match your style. Incorporate smaller dreamcatchers or woven wall hangings for a layered look. For seasons, swap out the feathers or add decorative elements like beads or shells. Hang it above a bed, dresser, or seating area depending on your space. You can also DIY your own for a personalized touch.
Begin by selecting a large, statement dreamcatcher or creating one yourself with a metal hoop and various cords. Use wall hooks or nails to hang it securely. Consider positioning it at eye level or slightly above for maximum impact. If you want to add depth, layer smaller woven pieces nearby or incorporate other textile accents. Keep the surrounding wall simple to let the dreamcatcher stand out. Make sure it’s hung straight for a polished look.
Customize your dreamcatcher with colors that match your room’s palette—muted earth tones or vibrant hues. Add small charms, beads, or feathers that hold personal significance. Incorporate fairy lights or LED strips around the display for subtle illumination at night. For a more eclectic look, combine with woven baskets or macramé accents nearby. This personal touch makes your wall a true reflection of your personality.
Inserting a boho dreamcatcher into your decor elevates your space with minimal effort and maximum style. It’s a fun DIY project that adds a layer of authenticity and warmth. Plus, it’s a great conversation starter and perfect for photo ops. Embrace your inner free spirit and let your walls tell your story with this charming touch.
3. Minimalist Floating Nightstand with Chic Accessories

Does your bedroom feel cluttered or overly busy? A sleek, minimalist floating nightstand can clear up space and make your room look more spacious and modern. It’s perfect for those who love clean lines and clutter-free surfaces. If your current setup feels like a jumble of furniture, this idea might be your ticket to serenity.
Recommended Products to replicate this idea
| # | Preview | Product | |
|---|---|---|---|
| 1 |

|
BAYKA Floating Shelves for Wall, Wall Mounted Rustic Wood Shelves for Bathroom, Bedroom, Living... | Check Latest Price |
| # | Preview | Product | |
|---|---|---|---|
| 1 |

|
KSIPZE 100ft Led Strip Lights RGB Music Sync Color Changing Led Lights with Smart App Control Remote... | Check Latest Price |
Imagine a simple, wall-mounted shelf in a matte finish, holding a few carefully curated accessories like a small decorative dish, a sleek clock, or a tiny sculpture. The floating design creates a sense of openness, making the room appear larger. With soft ambient lighting reflecting off its smooth surface, the space feels sophisticated yet inviting. It’s the kind of setup that makes your room appear effortlessly styled and organized.
Choose shelves in neutral tones—white, black, or wood finish—to match your decor. For a warmer look, add a small, textured fabric pouch or a decorative tray. Incorporate seasonal touches like a cozy candle in winter or a decorative stone in summer. In smaller rooms, opt for a narrow shelf to maximize space. For a more personalized touch, mount multiple shelves at different heights for a dynamic look.
Start by selecting a sturdy wall-mounted shelf that can support your accessories. Use a level to ensure it hangs straight. Keep the surface clear of clutter and only display a few select items—less is more. Consider adding LED strip lighting underneath for a subtle glow. Install with appropriate anchors for stability, especially if you plan to hold heavier items. Position it near your bed for easy access without overcrowding your night area.
Personalize your shelf with items that reflect your style—minimalist ceramics, small plants (if you’re allowed), or meaningful keepsakes. Use decorative boxes or trays to keep smaller items organized. Swap accessories seasonally to keep the look fresh. Add a ceramic dish or a sculptural object for a touch of elegance. The goal is creating a functional yet stylish space that feels uniquely yours.
A floating nightstand elevates your bedroom’s aesthetic and makes cleaning a breeze. It proves that simple design can be both functional and gorgeous. Your space instantly looks more modern and intentional. Ready to enjoy a clutter-free, chic bedroom? Just hang it up and start styling!
4. Layered Rugs for Depth and Texture
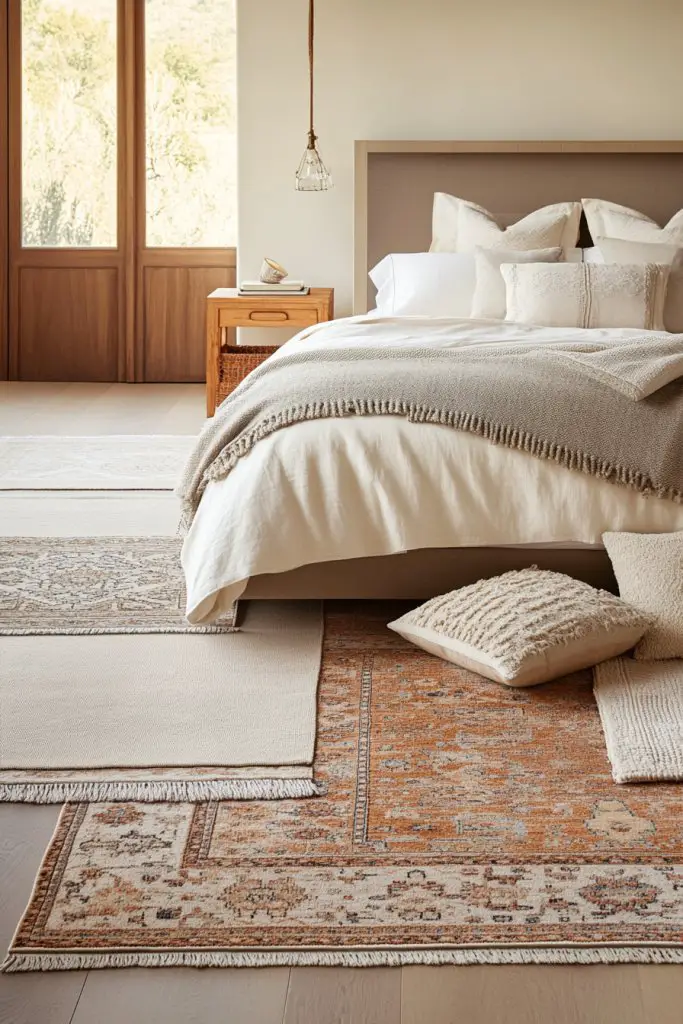
Feeling like your bedroom’s missing that cozy, layered look? A collection of layered rugs can add warmth, texture, and visual interest to any space. It’s an easy way to break up large floors and create distinct zones within your room. If your flooring feels too plain or cold, this idea might just be your new favorite trick.
Recommended Products to replicate this idea
| # | Preview | Product | |
|---|---|---|---|
| 1 |

|
Deerhoo Large Shag Area Rugs 6 x 9, Tie-Dyed Plush Fuzzy Rug for Living Room, Ultra Soft Fluffy... | Check Latest Price |
| # | Preview | Product | |
|---|---|---|---|
| 1 |

|
KILOCOCO Beige Striped Rug 2.3'x3.6' Indoor Outdoor Rugs Front Door Mat Hand Woven Cotton Washable... | Check Latest Price |
Imagine a soft cream rug layered over a darker, patterned one, with a smaller pop of color or texture in between. The different textures—shaggy, woven, or flatweave—create a tactile experience that invites you to kick off your shoes and stay awhile. The varied patterns and tones add depth and personality, making your room feel layered and curated. When paired with warm lighting, the rugs amplify the inviting atmosphere.
Mix and match different rug textures and sizes to suit your style—think a large neutral base with smaller accent rugs. For a boho vibe, layer with kilims, dhurries, or shag rugs. In minimalist spaces, stick to monochrome or subtle patterns. Seasonal changes can be as simple as swapping out a plush winter rug for a lighter, woven summer one. Play with asymmetry or symmetry depending on your aesthetic.
Start by measuring your space to determine rug sizes. Lay down your largest rug first, then layer smaller ones on top, adjusting for balance and visual flow. Use non-slip pads underneath to keep everything in place. Focus on creating natural overlaps without cluttering the space. Position your rugs strategically to define different zones like sleeping and lounging areas. Clean and vacuum regularly to keep the textures looking fresh and inviting.
Incorporate rugs with patterns, textures, or colors that reflect your personality. Add a few small decorative cushions or throws that match the layered rugs for a cohesive look. For a touch of luxury, choose high-pile shag or textured woven pieces. Change out rugs seasonally to keep the look fresh and interesting. This layering technique turns your bedroom into a tactile paradise.
Layered rugs instantly boost the coziness and style of your bedroom. They show that a little effort in styling can go a long way. Plus, they make your space look more intentional and curated. Ready to add depth and warmth? Just start layering and enjoy the transformation!
5. DIY String Light Backdrop for Focused Shots
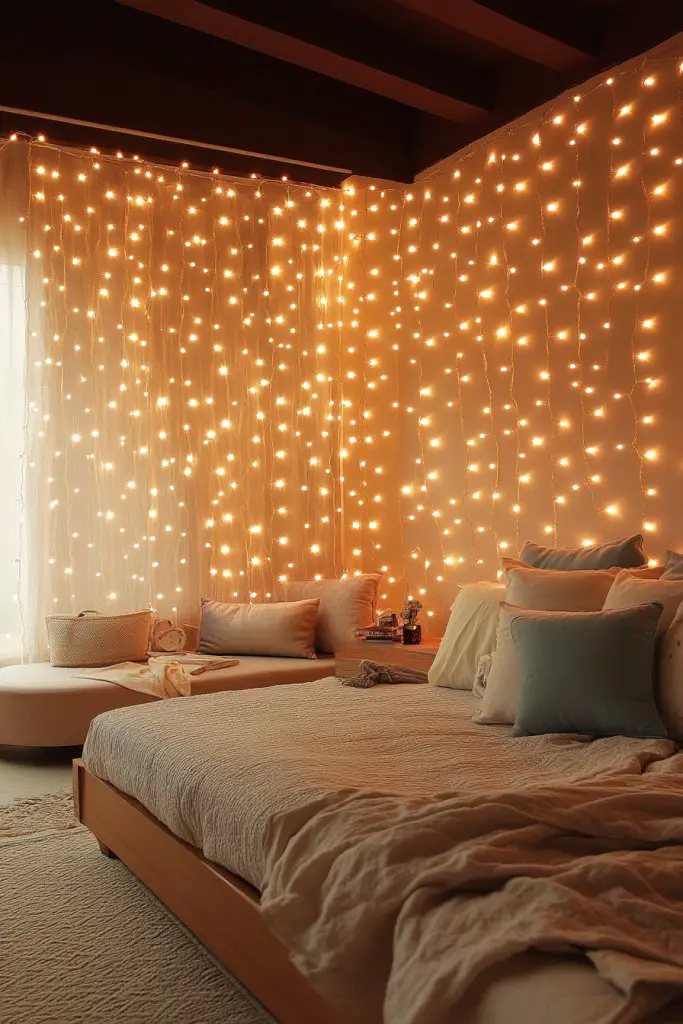
Ever wish your bedroom photos looked more magical or Instagram-worthy? A DIY string light backdrop is an inexpensive way to create a dreamy, focused background for selfies and portraits. It adds a glow that elevates any shot without the need for expensive lighting setups. If your current photo spots are dull, this simple hack might be your new secret weapon.
Picture a wall softly illuminated by a cascade of warm fairy lights, with the lights creating a bokeh effect in the background. The gentle glow enhances your face and adds a cozy vibe to every shot. The backdrop can be as simple as a plain wall or a textured fabric panel, giving your photos a warm, inviting aura. The twinkle of the lights adds a touch of whimsy and magic, perfect for capturing special moments.
Use different colored string lights or bulbs for seasonal themes or mood changes. For a more polished look, hang the lights in a grid or zigzag pattern. Incorporate fabric drapes or textured tapestries behind the lights for added depth. For small spaces, hang the string lights on a narrow wall or near a window. You can also DIY a frame or arch for a more structured look.
Start by choosing a blank wall or corner in your bedroom. Hang string lights using hooks, nails, or removable adhesive strips—whatever works best for your wall type. Arrange the lights in a pattern that’s pleasing and fills the space without clutter. Secure the power source nearby but out of sight. Add optional elements like paper lanterns or small decorative accents for extra flair. Turn on the lights during your photoshoots for that perfect glow.
Customize your backdrop with colored bulbs or fairy lights with unique shapes. Integrate subtle textiles or fabric backdrops to soften the background further. Use dimmer switches or smart plugs to control brightness and mood. For special occasions, add hanging ornaments or paper stars to make it more festive. It’s a flexible setup that can be tailored to your personality and style.
A DIY string light backdrop makes every photo feel more special and personal. It’s a quick project that instantly upgrades your space and your photo game. Plus, it’s a fun way to experiment with lighting and mood. Ready to capture magical moments? Just hang, turn on, and strike your best pose!
6. Vertical Plant Wall with Faux or Real Greenery
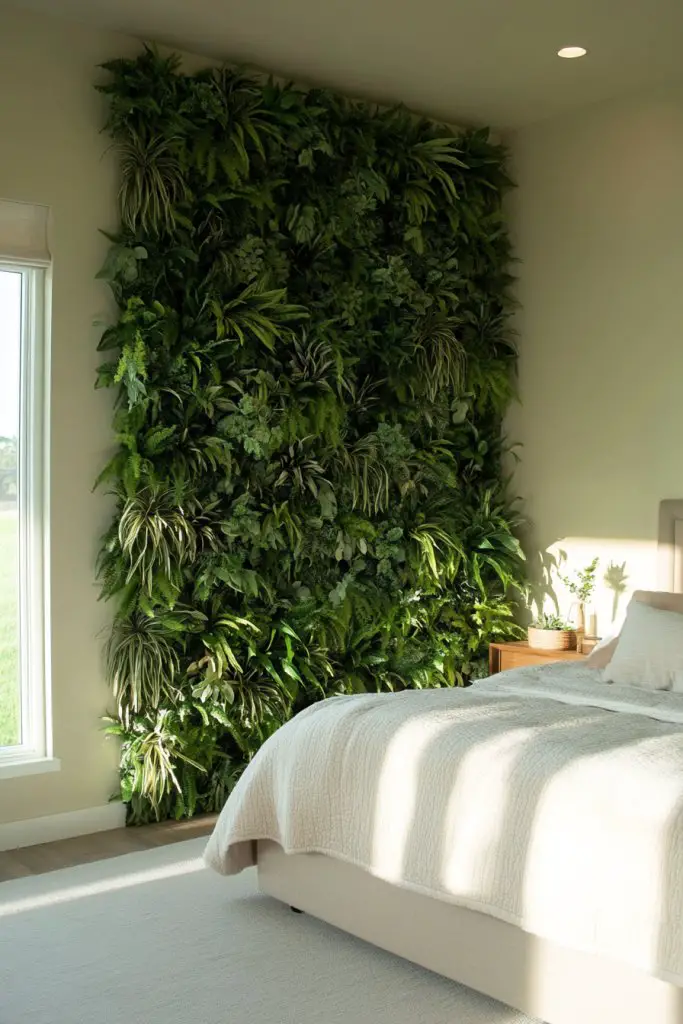
Want to add a fresh, lively vibe to your bedroom without the hassle of taking care of real plants? A vertical faux plant wall offers the lush look of greenery with none of the upkeep. It’s perfect for those who love the look but dislike watering or soil mess. If your room feels a little sterile, this idea adds instant vibrancy.
Recommended Products to replicate this idea
| # | Preview | Product | |
|---|---|---|---|
| 1 |

|
ODTORY Artificial Grass Wall Panel Backdrop,10" X 10" 12P(8.4 sqft) UV-Anti Greenery Boxwood Panels... | Check Latest Price |
| # | Preview | Product | |
|---|---|---|---|
| 1 |
|
KSIPZE 100ft Led Strip Lights RGB Music Sync Color Changing Led Lights with Smart App Control Remote... | Check Latest Price |
Imagine a grid of small faux succulents or minimalist planters arranged artfully on the wall. The green hues brighten the space, while the varied textures add depth. The arrangement creates a focal point that feels both modern and natural, even in a room with limited space. When lit with soft ambient lighting, it feels like a mini indoor garden, perfect for photos or just relaxing.
Opt for uniform planters for a sleek look, or mix different styles and sizes for a more eclectic vibe. Use minimalist pots, woven baskets, or geometric shelves to hold the faux plants. For a seasonal update, swap in different plant types or colors. Combine with wall-mounted art or decorative panels for layered visual interest. The key is balancing greenery with other decorative elements.
Start by selecting a wall that gets good light or is a focal point. Use adhesive hooks or small brackets to mount shelves or frames. Arrange faux plants in a grid or organic pattern, spacing them evenly. Secure each piece firmly to prevent shifting. Use LED strip lighting or directional spotlights to highlight the greenery. Maintain the arrangement periodically to keep it looking fresh and intentional.
Personalize with different faux plant types—succulents, ferns, or flowering varieties—based on your style. Add decorative stones, small sculptures, or themed planters to enhance the aesthetic. Incorporate textured wall panels or geometric backdrops to frame the greenery. Mix in other wall decor for a curated, lively space that reflects your personality.
A faux plant wall is a stunning way to bring nature-inspired beauty into your bedroom without extra work. It’s an easy upgrade that looks sophisticated and fresh. Plus, it creates a calming atmosphere that’s perfect for unwinding or snapping stylish photos. Embrace the green vibe and enjoy a lively, lush bedroom.
7. Gallery Wall of Framed Prints and Personal Photos
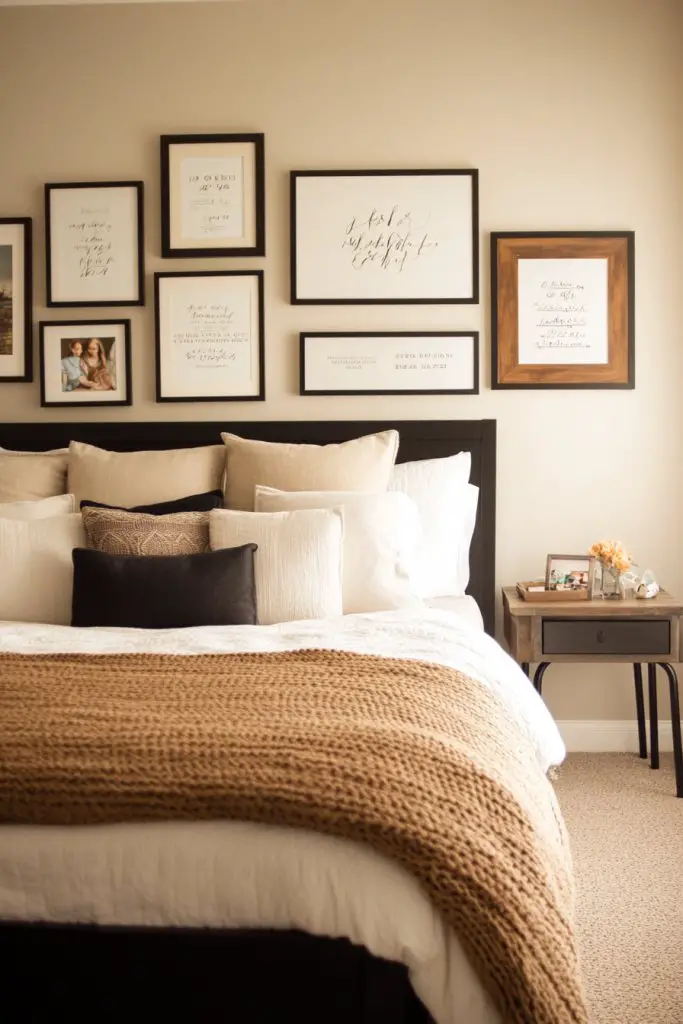
Are your walls feeling empty or uninspired? A gallery wall filled with framed prints, quotes, or personal photos adds character and warmth. It’s a simple way to showcase your personality and make your bedroom feel truly yours. If you’re tired of blank walls, this idea turns bland into beautiful.
Recommended Products to replicate this idea
| # | Preview | Product | |
|---|---|---|---|
| 1 |

|
30 PCS Push Pins Picture Hangers Wall Hooks, Double Headed Thumb Tacks for Wall Hangings, Renter... | Check Latest Price |
| # | Preview | Product | |
|---|---|---|---|
| 1 |

|
upsimples 8x10 Picture Frame Set of 5, Display Pictures 5x7 with Mat or 8 x 10 Without, Wall Gallery... | Check Latest Price |
Visualize a carefully curated collection of framed images arranged in a balanced layout. Mix personal photos with art prints, inspirational quotes, or vintage postcards. Use frames in different sizes and finishes—black, white, or metallic—to add variety. The arrangement creates a focal point that’s both personal and stylish, perfect for cozy mornings or stylish snapshots.
Arrange the frames in a grid, salon style, or asymmetrical layout depending on your taste. Use matte or glossy finishes for variety. Incorporate a mix of black-and-white or color photos for visual interest. Change out images seasonally or for special occasions to refresh the look. You can also add small decorative shelves or ledges for a layered effect.
Start by selecting your photos and prints, then choose frames that complement your decor style. Lay out the arrangement on the floor first to find the perfect composition. Use painter’s tape or paper templates to plan placement on the wall. Mount each frame securely with appropriate hooks or nails. Keep the spacing consistent for a tidy, professional look. Consider adding a small ledge or shelf for rotating displays.
Personalize by including favorite memories, artwork, or motivational quotes. Use frames with unique textures or colors to add depth. Incorporate a few vintage or handcrafted frames for an eclectic touch. Change images periodically to keep the gallery fresh and engaging. Make it a reflection of your life and style—your personal museum.
A gallery wall makes your bedroom instantly more inviting and personal. It’s an affordable way to upgrade your decor while showcasing what matters most to you. Plus, it’s a creative project that can be endlessly customized. Start arranging and enjoy seeing your space come alive with stories and memories.
8. Chic Vanity Corner with Stylish Mirrors and Accessories
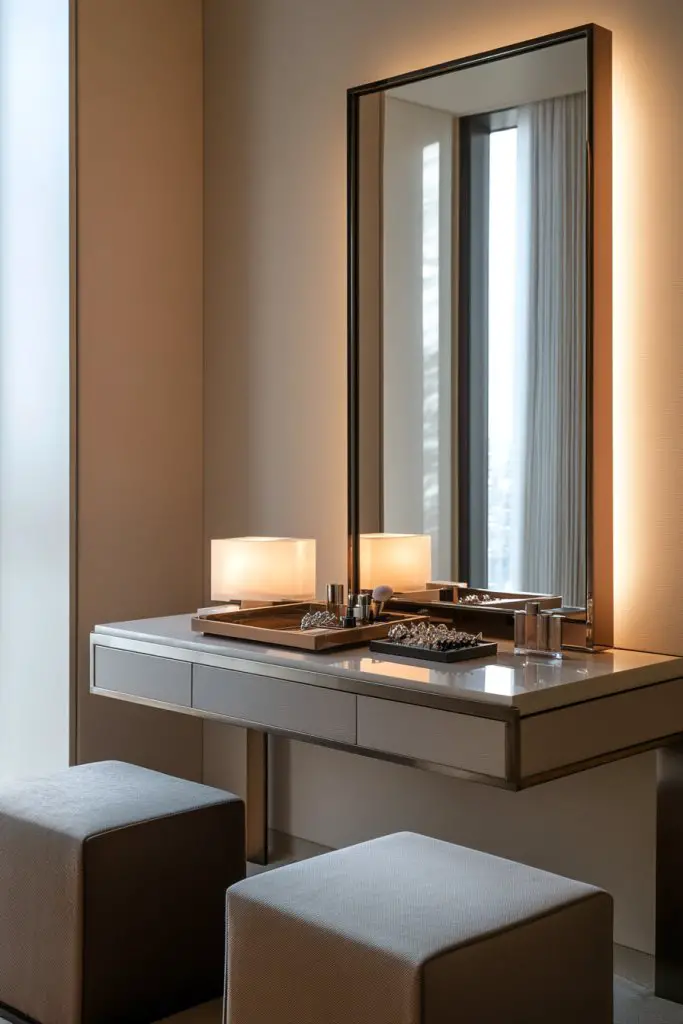
Ever find yourself scrambling for good lighting or a tidy space to do makeup and skincare? A dedicated vanity corner can make your routine feel glamorous and organized. It’s the perfect blend of function and style, giving you a dedicated spot to get ready. If your current setup is cluttered or dull, this could be your upgrade.
Recommended Products to replicate this idea
| # | Preview | Product | |
|---|---|---|---|
| 1 |

|
M MIVONDA Vanity Mirror with Lights, Lighted Makeup Hollywood Mirror with Dimmable 3 Color Lights... | Check Latest Price |
| # | Preview | Product | |
|---|---|---|---|
| 1 |
|
KSIPZE 100ft Led Strip Lights RGB Music Sync Color Changing Led Lights with Smart App Control Remote... | Check Latest Price |
Picture a sleek table with a large, stylish mirror mounted on the wall or propped up on the surface. Surround it with chic accessories like trays, storage jars, or decorative brushes. Use lighting—think sconces or LED strips—to cast a flattering glow. The space feels polished and inviting, ideal for selfies and getting ready with confidence. It’s a small area that makes a big impact visually.
Choose a vanity table in a style that matches your decor—modern, vintage, or boho. Incorporate textured or patterned textiles for a cozy vibe. For seasonal updates, swap out accessories or add decorative elements like faux flowers or decorative boxes. Use different mirror shapes—round, oval, or rectangular—to add variety. Keep the setup minimal but personalized.
Start with a small table or a repurposed desk, ensuring it has enough space for your essentials. Mount a large mirror above or lean it against the wall for flexibility. Add good lighting—either mounted sconces or clip-on LEDs—focused on your face. Organize your accessories in trays or jars, but keep the surface uncluttered. Secure the mirror properly to prevent accidents. Keep cords hidden and extend the setup with wall-mounted shelves if needed.
Personalize with favorite skincare or makeup products, decorative trays, or vintage finds. Use decorative containers or jars to organize brushes and tools. Incorporate a small stool or comfortable chair that complements the style. Add a few framed quotes or decorative accents nearby for extra charm. Make your vanity a reflection of your personality and beauty routine.
A dedicated vanity corner boosts your confidence and makes your routine feel special. It turns everyday grooming into a mini spa experience. Plus, it’s a stylish element that elevates your bedroom decor instantly. Ready to feel fabulous every time you get ready? Just set it up and enjoy the glow.
9. Seasonal Decor Swaps for Fresh Vibe Changes
Feeling like your bedroom decor is stuck in the same rut? Seasonal swaps are an easy way to refresh your space and keep things feeling new. A few simple updates can dramatically change the mood from cozy winter to breezy summer. If you love switching things up but don’t want to overhaul everything, this is your perfect solution.
Recommended Products to replicate this idea
| # | Preview | Product | |
|---|---|---|---|
| 1 |

|
BEDELITE Fleece Throw Blanket for Couch - 300GSM Soft & Warm Fluffy Cream White Blanket, Decorative... | Check Latest Price |
| # | Preview | Product | |
|---|---|---|---|
| 1 |

|
Cream Linen Back Tab Curtains 84 Inch Length for Living Room 2 Panel Set Neutral Modern Farmhouse... | Check Latest Price |
Imagine swapping heavy, textured throws for light, airy fabrics, or replacing dark curtains with bright, patterned ones. Add seasonal accents like faux pumpkins or lanterns in fall, or lightweight linens and pastel accents in summer. These small changes create a fresh vibe, making your room feel updated and lively. Photos of this transformation show a space that’s both cozy and stylish, ready for any season.
Rotate textiles, decor accessories, and color schemes with the seasons. For winter, opt for plush throws, thick rugs, and warm-toned accents. For summer, go for light fabrics, floral patterns, and bright colors. Incorporate seasonal scents with diffusers or candles (if safe). Change curtain fabrics or add a new piece of wall art for a quick refresh. Keep the core decor minimal so swaps are seamless.
Create a rotation plan—store seasonal decor in labeled bins to keep things organized. Swap out textiles, accessories, or small decor items monthly or bi-monthly. Use hooks or storage bins to keep extras accessible. When changing decor, consider the overall color palette and mood you want to evoke. Keep a few versatile pieces that work year-round and change only accents. This keeps your room feeling fresh without a full redesign.
Add seasonal accents that reflect your personality—vintage finds, handmade crafts, or themed textiles. Use color-coordinated decor for a cohesive look. Incorporate new textures or patterns to keep things interesting. Mix and match seasonal items with your everyday decor for a personalized, curated feel. It’s about making your space feel alive and reflective of the current season.
Seasonal decor swaps keep your bedroom dynamic and engaging, preventing decor fatigue. They’re quick, budget-friendly updates that make your space feel fresh and intentional. Plus, you’ll enjoy the process of curating and experimenting with different looks. Ready for a constantly evolving bedroom? Just swap, style, and enjoy the vibe!
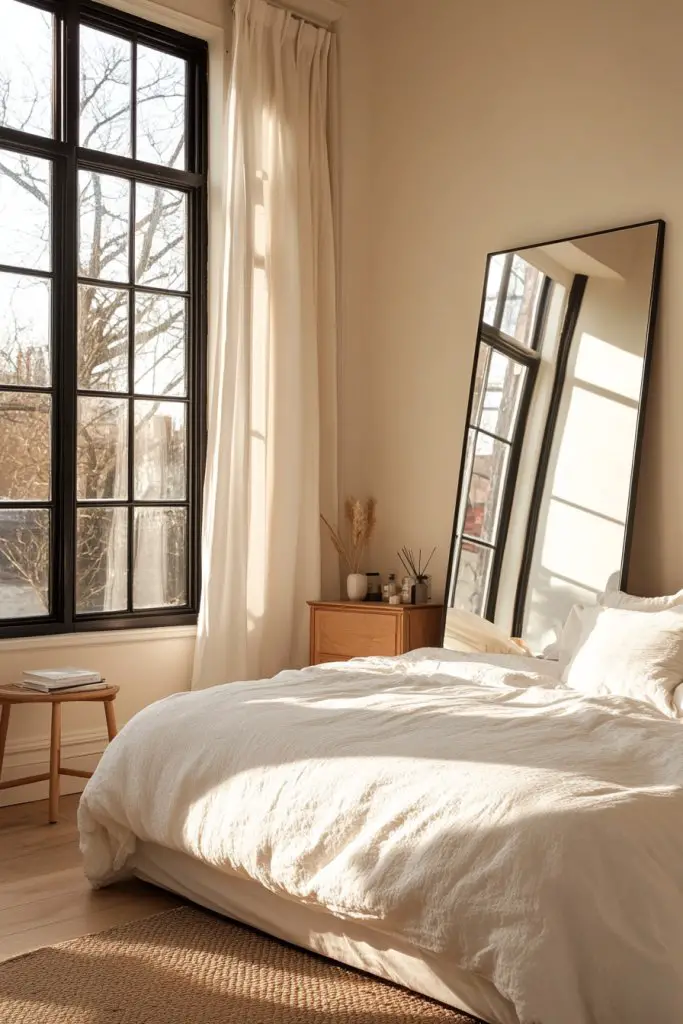
10. Creative Use of Mirrors to Enhance Space and Light
Do your rooms feel smaller or darker than you’d like? Mirrors are the ultimate hack to make any space seem larger and brighter. They reflect light and create an illusion of depth—perfect for small bedrooms or spaces with limited natural light. If your bedroom needs a visual boost, this trick is a game-changer.
Recommended Products to replicate this idea
| # | Preview | Product | |
|---|---|---|---|
| 1 |

|
DUMOS Black Metal Framed Vanity Rounded Rectangle Bathroom Mirrors for Over Sink Wall, 30x22 Inch... | Check Latest Price |
| # | Preview | Product | |
|---|---|---|---|
| 1 |

|
Califortree 5x7 Picture Frame - Can Display Photo 4x6 with Mat, Wood Frame with Shatterproof... | Check Latest Price |
Visualize a large decorative mirror hung strategically across from a window, bouncing sunlight into the room. Or a series of smaller mirrors arranged in a grid for an eye-catching gallery effect. The reflective surfaces add a layer of sophistication and create a sense of more space. When lit with soft ambient lighting, the mirrors amplify your room’s brightness and style, perfect for both day and night photos.
Choose mirrors with ornate frames for a vintage look or sleek, frameless designs for modern appeal. Position large mirrors to reflect your favorite view or focal point. Hang multiple small mirrors in interesting patterns for a more eclectic vibe. Use wall-mounted or leaning styles depending on your decor and space constraints. Incorporate mirror decals or geometric shapes for a creative twist.
Start by selecting a mirror size that fits your space—consider full-length or decorative wall mirrors. Hang securely with appropriate fixtures, ensuring stability and safety. Place larger mirrors opposite windows or light sources to maximize reflection. Arrange multiple small mirrors in a pattern that balances the room’s layout. Keep the surrounding walls uncluttered to let the mirrors shine. Regularly clean and adjust for the best visual effect.
Frame your mirrors with decorative trim, LED lighting, or paint to match your decor. Create a gallery wall of small mirrors with different shapes and sizes. Use mirrors to highlight artwork, architectural features, or interesting wall textures. Incorporate functional mirrors into dressing areas or as part of a vanity setup. Play with angles and arrangements for a personalized, artistic display.
Mirrors are versatile tools that elevate your decor while enhancing space and light. They make your room look more open and inviting, boosting your mood and confidence. Plus, they’re perfect for selfies or decorating with style. Ready to reflect your best self? Just choose the right mirrors and place them thoughtfully.
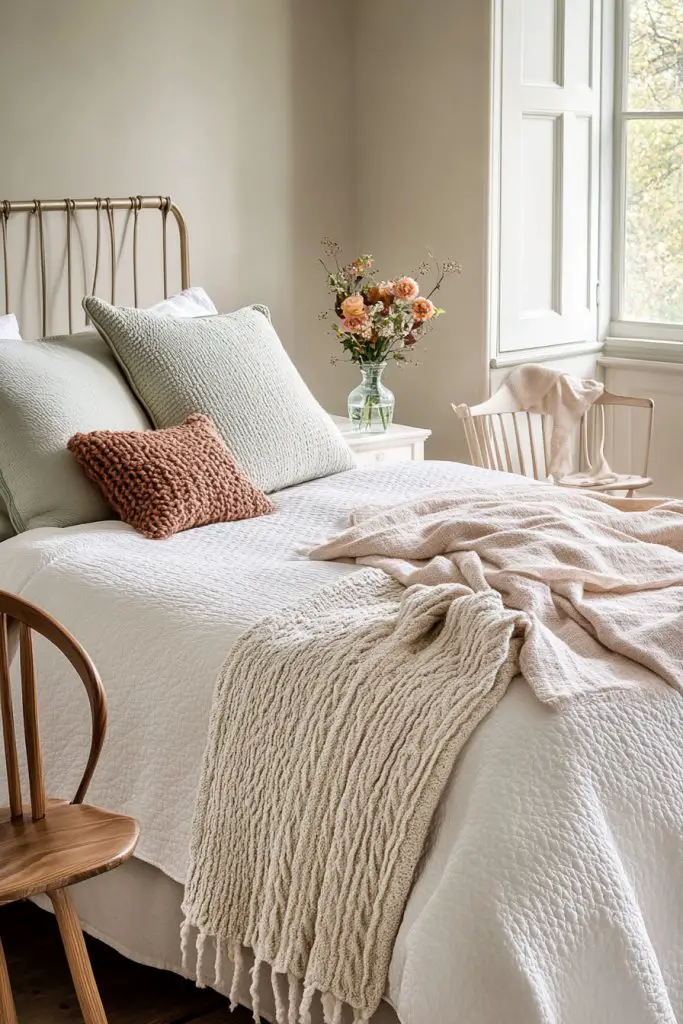
11. Personal Touch with Handmade or Vintage Decor
Tired of mass-produced decor making your bedroom feel generic? Personal touches like handmade or vintage pieces add character and authenticity. They tell a story and create a cozy, lived-in vibe that can’t be replicated with store-bought items. If you crave a space that feels truly yours, this idea will resonate.
Recommended Products to replicate this idea
| # | Preview | Product | |
|---|---|---|---|
| 1 |

|
MaxSmeo Side Table, 3-Tier Small End Table, Modern Oval Night Stand Accent Table for Living Room,... | Check Latest Price |
| # | Preview | Product | |
|---|---|---|---|
| 1 |

|
Greenland Home Blooming Prairie Quilted Patchwork Throw | Check Latest Price |
Imagine a vintage nightstand with patinaed paint, or a handmade quilt draped over your bed. Incorporate antique lamps, handcrafted wall hangings, or quirky trinkets that reflect your personality. These items add layers of history and charm, making your space inviting and unique. When styled thoughtfully, they create a curated look that’s rich in character and warmth.
Mix vintage with modern decor for an eclectic vibe, or keep it strictly nostalgic with all antique pieces. Look for handcrafted items at flea markets, thrift stores, or craft fairs—each piece holds a story. Incorporate personal memorabilia, family heirlooms, or DIY crafts to deepen the personal touch. Use a variety of textures and metals to keep the look layered and interesting.
Start by hunting for vintage or handmade pieces that speak to you—don’t rush this part. Clean and restore items as needed to keep them looking their best. Mix and match different styles and eras to create a collected-over-time feel. Place these items thoughtfully—use open shelving, small tables, or wall hooks. Balance old and new to avoid clutter and create a harmonious aesthetic. Regularly refresh and rotate pieces to keep your space feeling fresh.
Add personal engravings, custom paint, or small DIY touches to vintage finds. Incorporate textiles like handmade pillowcases or curtains. Mix in your favorite colors or patterns to tie everything together. Personalize with framed handwritten notes or small art pieces that have sentimental value. Your bedroom becomes a showcase of your history, tastes, and personality.
Personalized vintage or handmade decor projects a sense of authenticity and comfort. It’s a space that truly feels like you, filled with stories and memories. Plus, sourcing or creating these pieces is a rewarding experience that adds depth to your decor. Embrace your unique style and let your space reflect your story.
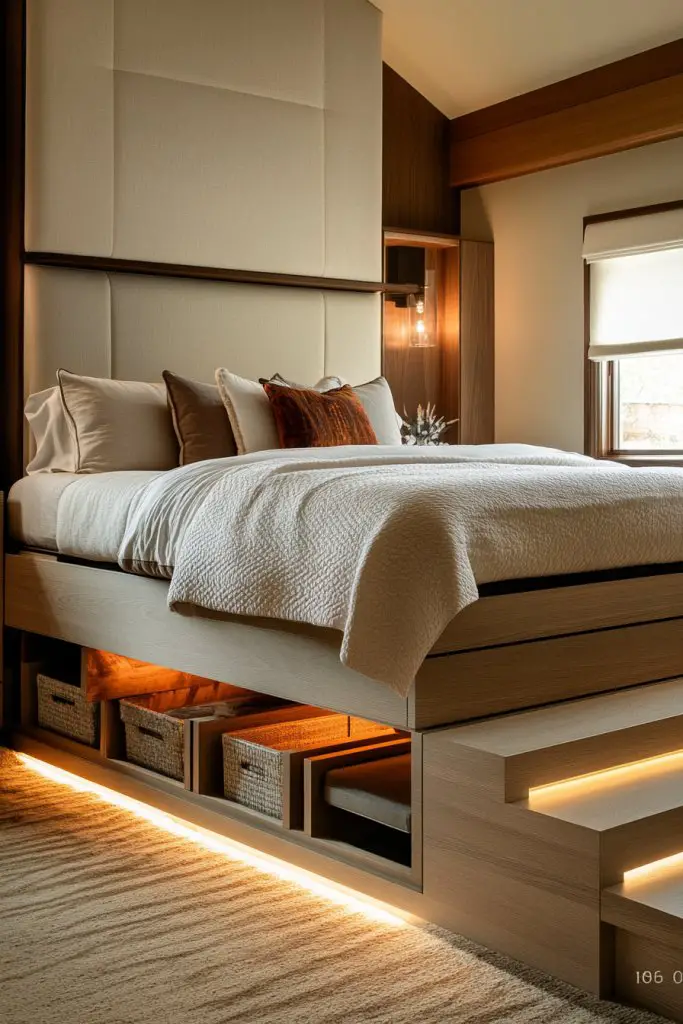
12. Elevated Bed Frame with Under-bed Storage and Decor
Is your bedroom feeling cluttered or lacking visual interest? An elevated bed frame not only adds style but can also provide hidden storage to free up space. It elevates the entire look of your room, making it feel more sophisticated and organized. If your current bed feels flat or uninspired, this upgrade might be just what you need.
Recommended Products to replicate this idea
| # | Preview | Product | |
|---|---|---|---|
| 1 |

|
NEW JETO Metal Bed Frame,Queen Size Bed Frame with Storage Space,Heavy Duty Sturdy Mattress... | Check Latest Price |
| # | Preview | Product | |
|---|---|---|---|
| 1 |

|
StorageWorks Fabric Storage Bins, Large Storage Baskets for Shelves, Closet Organizers and Storage... | Check Latest Price |
Picture a sleek, modern bed frame with a tall headboard and clean lines, raised above the floor to reveal under-bed storage baskets or decorative boxes. The elevated design creates a sense of grandeur and makes your room look more spacious. When styled with layered bedding and plush pillows, it becomes a luxurious centerpiece. The hidden storage keeps clutter out of sight, maintaining a tidy, curated vibe.
Choose a bed frame in wood, metal, or upholstered fabric depending on your aesthetic—industrial, modern, or cozy. Use decorative baskets or labeled boxes underneath for organization. For a softer look, add a fabric skirt or drape. Incorporate LED strip lighting under the frame for a subtle glow. Adjust height and storage options based on your room’s needs and ceiling height.
Select a sturdy, stylish bed frame that fits your mattress size and desired height. Assemble according to the manufacturer’s instructions, ensuring stability. Use baskets, bins, or decorative boxes that match your decor for under-bed storage. Add a plush mattress and layered bedding to enhance the luxurious feel. Install optional lighting or decorative trims to personalize the setup. Keep the space underneath clean and organized for maximum impact.
Personalize with decorative bedding, throws, and pillows that complement your room’s color scheme. Use labeled containers or baskets to organize seasonal clothing or accessories. Add a small rug or decorative tray nearby. Consider a headboard that matches or contrasts with your bed frame for added style. Your bed becomes a statement piece that combines function and elegance.
An elevated bed frame with smart storage elevates your bedroom’s style while keeping clutter at bay. It’s a practical upgrade that makes your space look more polished and intentional. Plus, it adds a sense of luxury and importance to your personal sanctuary. Ready to step up your bedroom game? Just choose your frame, style it, and enjoy the transformation.
13. Customized Wall Art with DIY Prints or Typography

Tired of generic wall art that everyone else has? Customized DIY prints or typography pieces let you create truly unique decor that reflects your personality. They’re affordable, fun to make, and add a personal touch that turns your bedroom into a one-of-a-kind space. If your walls feel uninspired, this is your chance to express yourself.
Recommended Products to replicate this idea
| # | Preview | Product | |
|---|---|---|---|
| 1 |
|
30 PCS Push Pins Picture Hangers Wall Hooks, Double Headed Thumb Tacks for Wall Hangings, Renter... | Check Latest Price |
| # | Preview | Product | |
|---|---|---|---|
| 1 |

|
Digital Print, The: Preparing Images in Lightroom and Photoshop for Printing | Check Latest Price |
Imagine a large canvas with your favorite quote in bold, stylish typography or a series of smaller prints that showcase your passions and interests. Use contrasting colors and fonts that match your decor style—minimalist, boho, or eclectic. Incorporate your own handwriting or design digital prints to make them more personal. These pieces become focal points and conversation starters, adding depth and meaning.
Create a gallery wall with a mix of quotes, abstract designs, or personal photos, all customized. Use printable vinyl, watercolor, or digital art to craft your prints. Frame them in inexpensive or ornate frames depending on your aesthetic. Change out or rotate prints seasonally or for special occasions. Combine with other wall decor for a layered, curated look.
Design your prints using free online tools or professional software, then print at home or via a print shop. Choose frames that match your decor—wood, metal, or colorful options. Arrange the prints on the floor first, then hang using level and appropriate hooks. Keep spacing even for a balanced gallery. Consider adding decorative elements like washi tape or stickers for extra flair. Regularly update your art to keep the space fresh.
Incorporate your own handwriting or favorite fonts for a truly personal touch. Use mixed media—watercolors, collages, or hand-drawn elements—to add texture. Customize with metallic accents or gloss finishes for a luxe feel. Design themed collections for different seasons or moods. Your wall art becomes a visual expression of your story and style.
DIY wall art empowers you to make your space uniquely yours and boosts your creative confidence. It’s a budget-friendly way to refresh your decor regularly. Plus, it feels incredibly satisfying to see your own designs on display. Ready to create? Just print, frame, and style your personalized masterpieces!
Conclusion
By exploring these diverse bedroom snap ideas, you’ll find countless ways to showcase your space and personality—whether through natural light, unique angles, or stylish details. Don’t be afraid to experiment and make these ideas your own; your perfect shot is just waiting to be captured. So go ahead, try them out, and turn your bedroom into a gallery of beautiful, memorable moments!