
20 Black Grout on White Tiles Ideas for Bold Contrast
Imagine transforming your space with a simple yet striking detail—black grout on white tiles. This bold contrast has gained immense popularity for its ability to create a clean, modern, and sophisticated look that instantly elevates any room. The deep black grout anchors the bright white tiles, adding depth and a touch of drama that catches the eye.
In this article, you’ll discover a variety of inspiring ideas to incorporate black grout into your tile projects. Whether you’re aiming for a sleek contemporary vibe or a unique textured pattern, these ideas will spark your creativity and help you achieve stunning results in your home decor.
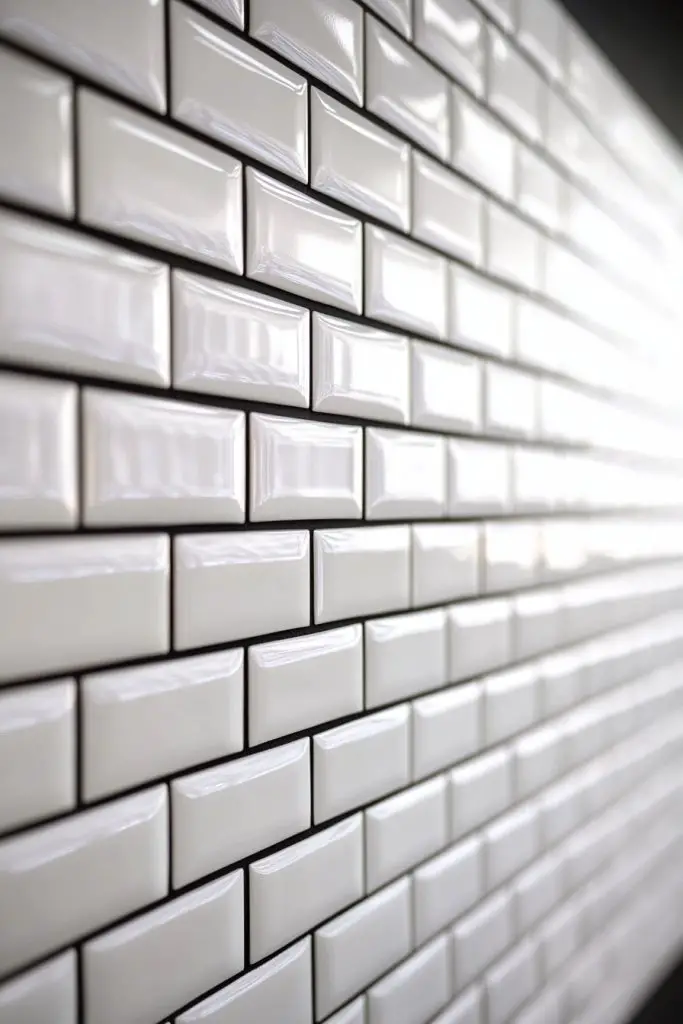
1. Classic Subway Tiles with Black Grout for a Timeless Look
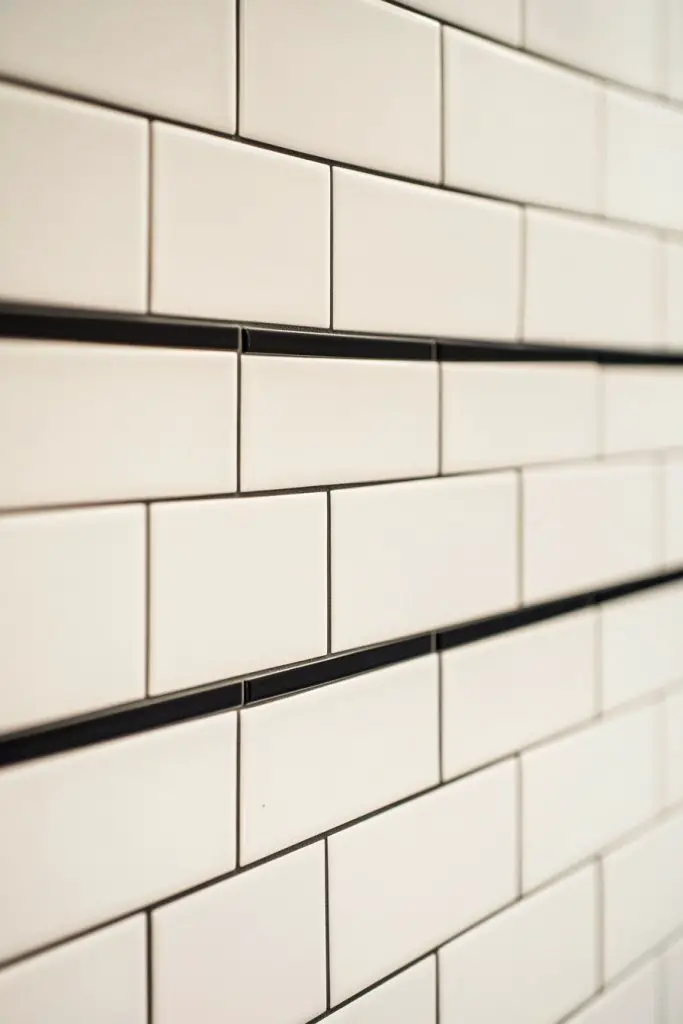
Ever wanted your kitchen or bathroom to feel both classic and fresh? Subway tiles with black grout strike that perfect balance, giving your space a timeless vibe that never goes out of style. Sometimes, all it takes is a simple change in grout color to completely transform the look. Are you tired of bland, cookie-cutter designs? This bold contrast might just be what your space needs.
Recommended Products to replicate this idea
| # | Preview | Product | |
|---|---|---|---|
| 1 |

|
STICKGOO 10-Sheet Peel and Stick Subway Tile, Stick on Tiles Backsplash for Kitchen & Bathroom in... | Check Latest Price |
| # | Preview | Product | |
|---|---|---|---|
| 1 |

|
Mapei Keracaulk S Premium, Paintable, Sanded, Siliconized Acrylic Caulk, Expertly Formulated to... | Check Latest Price |
Imagine a crisp, white subway tile wall with deep, jet-black grout lines running perfectly between each tile. The high gloss of the tiles reflects ambient light, making the space feel brighter, while the dark grout creates a striking outline, emphasizing the pattern. The contrast adds depth, giving a vintage yet modern feel. It’s like stepping into a sleek, retro-inspired cafe or a chic minimalist bathroom.
You can swap traditional white tiles for colored or textured versions to match different aesthetics—think matte black tiles with white grout for a more contemporary look. For small spaces, keep the grout lines thin to avoid clutter, while larger areas can handle wider grout for more impact. Seasonal updates could include darker shades in winter or lighter hues in summer to refresh the vibe. The key is balancing contrast with your overall color scheme.
Start by choosing high-quality ceramic or porcelain tiles that suit your style. Measure your space carefully before buying enough tiles, including extra for cuts and breakage. Mix a dark grout, preferably a true black or charcoal, and apply it with a rubber float to ensure even coverage. Use painter’s tape for clean edges along borders, and seal the grout after drying to prevent stains. Maintenance involves regular cleaning with pH-neutral solutions to keep the contrast sharp.
Add unique touches like metallic or matte black grout for a different texture. Play with tile sizes—large subway tiles for a bold statement or smaller ones for intricate detail. Incorporate accent strips or borders in black or complementary shades to elevate the design. Personalize further with decorative tiles or mosaics at focal points, blending tradition with a dash of modern flair.
This classic look proves that simplicity can be striking. With a little effort, you can create a space that feels both timeless and current. Don’t be afraid to experiment with contrast—your home will thank you for the upgrade. Ready to make your walls stand out with bold, black grout? Trust me, you’ll love the sophisticated vibe it imparts.
2. Large Format White Tiles with Narrow Black Grout Lines
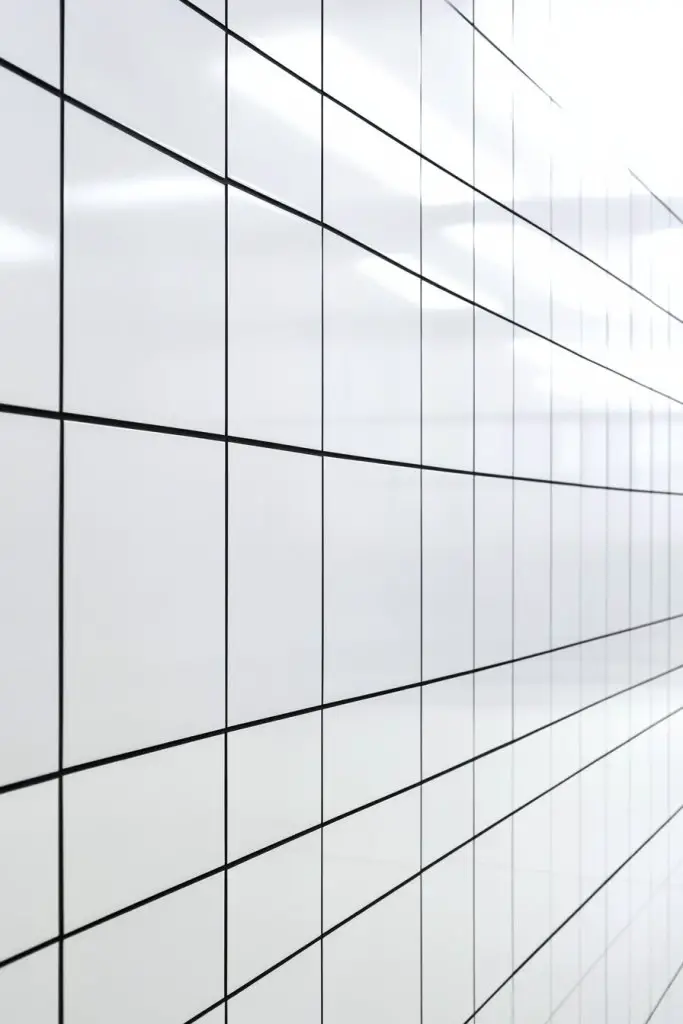
Are you over busy patterns and looking for a sleek, minimalist vibe? Large format white tiles with thin black grout lines create that ultra-modern, streamlined look. It’s perfect for making your space appear bigger and more open. Tired of grout lines that clutter your design? Narrow lines can visually expand the room while adding a touch of bold contrast.
Recommended Products to replicate this idea
| # | Preview | Product | |
|---|---|---|---|
| 1 |
|
Peel and Stick Floor Tile 20-Pack 20 Sq.Ft Matte Pattern Flooring, 12” x 12” Self Adhesive Vinyl... | Check Latest Price |
| # | Preview | Product | |
|---|---|---|---|
| 1 |

|
Grout Pen Black Tile Paint Marker: Waterproof Grout Paint, Tile Grout Colorant and Sealer Pen -... | Check Latest Price |
Picture expansive white tiles laid seamlessly across a wall or floor, with almost invisible black grout lines between them. The minimal grout emphasizes the size and simplicity of each tile, giving the illusion of a continuous surface. The subtle contrast adds just enough edge to define the layout without overpowering the space. It feels clean, fresh, and effortlessly elegant—like a luxury hotel lobby.
Adjust the tile size based on your space—large 24×48 inches for expansive areas or smaller formats for more detailed layouts. Narrow grout lines, around 1/16 inch, keep the look sleek and modern, but wider lines can add a more traditional or rustic touch. In colder climates, textured or matte finishes can make the surface feel warmer and more inviting. You can also mix matte and gloss finishes for subtle visual interest.
Choose large-format tiles made of porcelain or natural stone for durability. Use a leveling system during installation to prevent lippage and ensure flatness. Mix a dark, finely milled grout for thin lines, and apply with a rubber float, pressing firmly to avoid gaps. Allow sufficient curing time before sealing to prevent grout haze. Seal the tiles and grout to protect against stains and moisture infiltration. Professional installation is recommended to maintain the seamless appearance.
Personalize by incorporating accent tiles or decorative borders at focal points. Use contrasting grout colors sparingly—perhaps a softer gray instead of black for a more subdued effect. Add textured or patterned tiles in small areas to break the monotony if desired. For a more dynamic effect, alternate between matte and polished tiles in a checkerboard or staggered pattern.
Clean lines and minimalist design are timeless, and large tiles with narrow grout are no exception. They bring a sense of calm and order to any space, making it look larger and more refined. Perfect for contemporary homes, this layout offers a sophisticated yet simple aesthetic. Embrace this trend and enjoy a sleek, modern upgrade that’s easy to maintain.
3. Herringbone Pattern with Black Grout for Dynamic Visual Interest
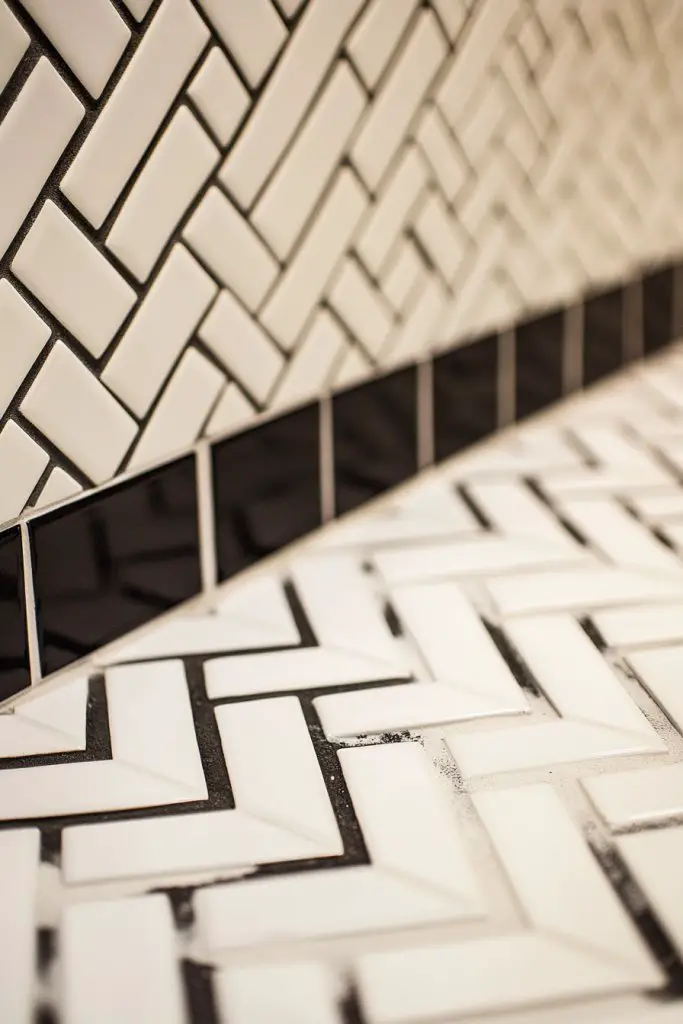
Looking to add a wow factor to your walls or floors? The herringbone pattern with black grout creates a lively, eye-catching effect that elevates any space. It’s perfect for those who want a design feature that’s bold but still classic. Tired of plain layouts? This pattern injects movement and sophistication into your decor.
Recommended Products to replicate this idea
| # | Preview | Product | |
|---|---|---|---|
| 1 |

|
Tiwoos Plain White Peel and Stick Backsplash Tile Rectangle Subway Self Adhesive Wall Tiles for... | Check Latest Price |
| # | Preview | Product | |
|---|---|---|---|
| 1 |

|
Outus 6 Pack 3 mm Width Graphic Chart Tape Art Tape Grid Marking Tapes Whiteboard Gridding Tape... | Check Latest Price |
Visualize white rectangular tiles arranged in a zigzag pattern, with crisp black grout lines accentuating each joint. The V-shaped layout directs the eye across the surface, creating a sense of depth and motion. The high contrast makes the pattern pop, giving your room a sense of energy. It’s like a dance of lines that adds personality without overwhelming the space.
You can tailor the size of your tiles to suit your space—smaller tiles for intricate details or larger ones for a more modern look. For floors, a subtle black grout keeps the pattern clean, while on walls, wider grout lines can enhance the visual impact. This pattern works well in bathrooms, kitchens, or even feature walls in living rooms. Seasonal accents or complementary colors can make it more personalized.
Start by selecting the right tiles—preferably rectangular and uniform for consistency. Lay out your pattern beforehand to ensure proper alignment. Mix a dark grout and apply it carefully with a rubber float, pressing into the joints firmly. Use spacers to maintain uniform gaps, and check for lippage on floors. After curing, seal the grout to preserve contrast and prevent staining. Precision during installation is key to a clean, professional look.
Add decorative elements like metallic or colored grout at certain joints for a modern twist. Incorporate accent tiles within the pattern for a custom touch. For a softer look, opt for a slightly lighter grout shade while keeping the pattern intact. Play with symmetry or asymmetry depending on your style preference. Artistic lighting can further highlight the intricate design.
The herringbone pattern is a timeless choice that brings vibrancy and elegance. It’s perfect for adding a statement feature without overwhelming the room. With careful planning and execution, you can achieve a stunning result that impresses everyone. Ready to turn simple tiles into a work of art? Your space will thank you for the bold upgrade.
4. Glossy White Tiles with Matte Black Grout for Textural Contrast
Ever feel like your space needs a little more depth? Glossy white tiles paired with matte black grout create a striking textural contrast that adds sophistication. It’s a simple trick to make your walls or floors stand out without overwhelming the senses. Tired of flat, lifeless surfaces? This combo brings dimension and interest in an instant.
Recommended Products to replicate this idea
| # | Preview | Product | |
|---|---|---|---|
| 1 |

|
Creative Hobbies 12 Pack of Glossy White Glazed Ceramic Tiles for Alcohol Ink Painting, Decorating,... | Check Latest Price |
| # | Preview | Product | |
|---|---|---|---|
| 1 |

|
PentaUSA Tile Grout Repair Kit - Black Grout Filler, Triple Protection, Fast Drying Formula Restores... | Check Latest Price |
Picture shiny, reflective white tiles that bounce light around, contrasted sharply by the velvety matte black grout lines. The gloss and matte finishes play off each other, creating a tactile experience that’s pleasing to both the eye and touch. The dark grout defines each tile, emphasizing the pattern while adding a modern edge. It’s like a dance of light and shadow on your wall or floor.
Mix finishes—use larger glossy tiles for a sleek, contemporary look, or smaller ones for detailed mosaics. You can also experiment with different grout widths—wider for a more rustic feel, narrow for ultra-modern minimalism. This combination works well in kitchens, bathrooms, or even accent walls. Seasonal decor can be added with textiles or accessories that complement the contrasting textures.
Choose high-quality glossy tiles with a smooth surface and durable matte grout. Carefully plan your layout before installation to ensure pattern consistency. Mix the grout to a dark gray or black shade, and apply with a rubber float, pressing firmly. Clean excess grout immediately to prevent haze, and allow proper curing. Seal the grout to maintain its matte finish and resist stains. Use spacers for uniform joints and double-check alignment during the process.
Play with color accents by adding colored grout or decorative tiles within the pattern. Incorporate textured or patterned tiles in select areas for extra flair. Use lighting to highlight the contrast—spotlights or strip lighting can make the textures pop. Personal touches like metallic trims or custom borders can further elevate the look.
This combination creates a space that feels sophisticated and layered. It’s a subtle way to add depth without clutter. Once finished, you’ll enjoy a surface that’s both functional and visually captivating. Ready to add texture and contrast? Your home deserves this sleek upgrade.
5. Mosaic White Tiles with Black Grout in Intricate Patterns
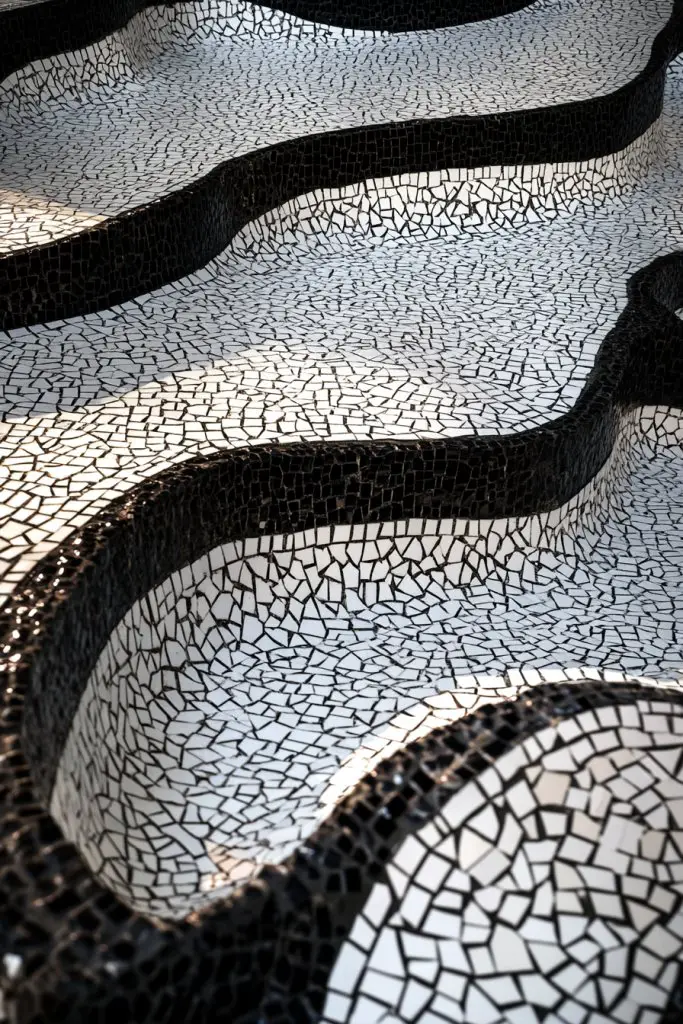
Looking to turn your plain walls or floors into a piece of art? Mosaic white tiles with black grout make intricate patterns pop, giving your space an artistic edge. It’s perfect for creative souls craving a unique, personalized touch. Tired of cookie-cutter designs? This approach transforms ordinary surfaces into statement features.
Recommended Products to replicate this idea
| # | Preview | Product | |
|---|---|---|---|
| 1 |

|
Goldblatt 2 Piece Glass Tile Nippers Set - Heavy Duty Wheeled Glass Mosaic Nipper & Hd Ceramic Tile... | Check Latest Price |
| # | Preview | Product | |
|---|---|---|---|
| 1 |

|
Miracle Sealants GRT SLR, Grout Sealer, 6 oz. | Check Latest Price |
Imagine tiny white mosaic tiles arranged in delicate floral, geometric, or abstract patterns. The black grout lines define every curve and corner, making the design stand out vividly. The textured surface invites touch, while the contrast heightens visual interest. It’s like wearing a piece of wearable art—bold, detailed, and captivating.
Choose mosaic tiles in various shapes—hexagons, triangles, or irregular cuts—to customize the pattern. Use this technique in backsplashes, shower walls, or decorative panels. Seasonal color accents or metallic grout can add a modern twist. For a more subdued look, opt for a softer black or dark gray grout. Combining different patterns creates a collage-like effect that’s truly one-of-a-kind.
Select high-quality mosaic tiles with consistent size and finish. Lay out your pattern on a flat surface before installation to avoid mistakes. Use a specialized adhesive for small tiles and press each piece firmly in place. Mix a dark, smooth grout and carefully fill the joints using a rubber float, pressing into every crevice. Clean excess grout with a damp sponge, and seal once fully dried. Patience is key when working with intricate designs.
Add metallic or colored grout at select joints for a modern edge. Incorporate custom shapes or combine different pattern motifs within the same surface. Frame the mosaic with a border of plain tiles or contrasting colors to emphasize the design. Highlights like LED accent lighting can further enhance the artistic feel.
Mosaic patterns showcase craftsmanship and individuality. They turn simple surfaces into conversation starters. With a bit of planning, you can create a stunning work of art in your own home. Feel inspired to experiment and let your creativity shine through.
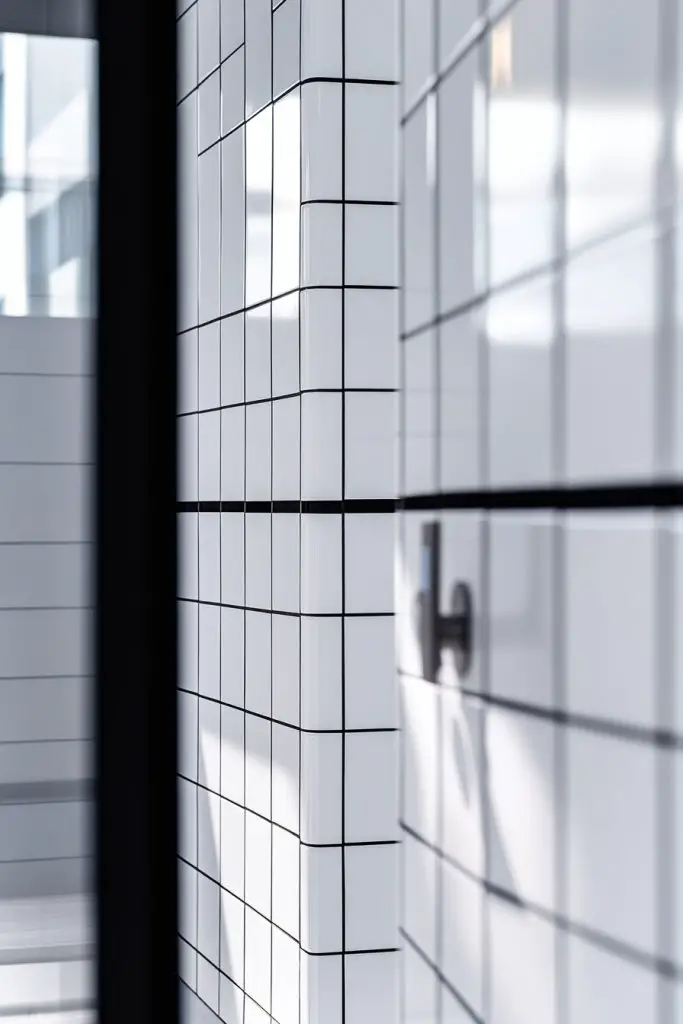
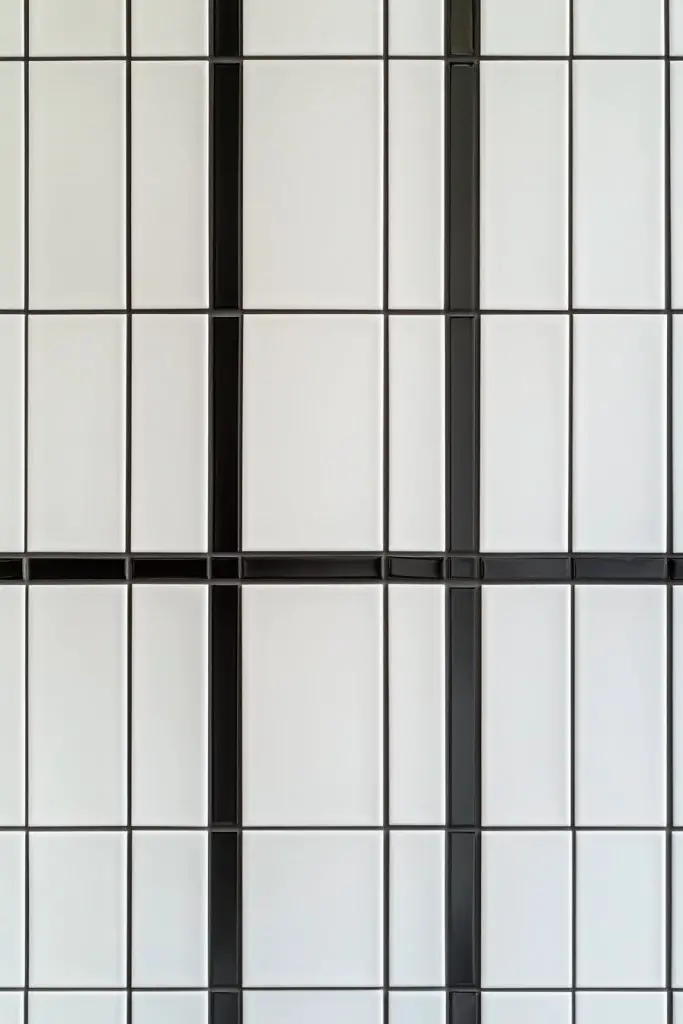
6. White Subway Tiles with Black Grout in a Grid Pattern for Urban Chic
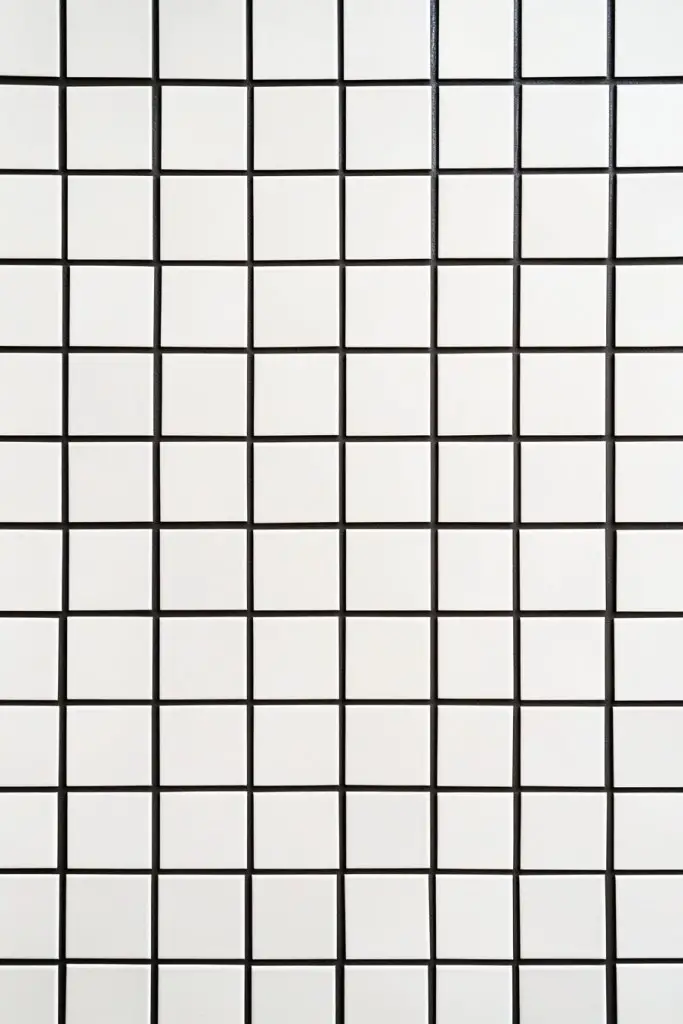
If you crave an urban-inspired vibe that’s both classic and edgy, a grid layout of white subway tiles with black grout hits the mark. It’s a straightforward update that instantly elevates your space. Tired of overly ornate decor? This minimalist approach offers a clean, structured aesthetic that’s versatile. Want a design that’s stylish yet timeless? This might be your answer.
Recommended Products to replicate this idea
| # | Preview | Product | |
|---|---|---|---|
| 1 |
|
STICKGOO 10-Sheet Peel and Stick Subway Tile, Stick on Tiles Backsplash for Kitchen & Bathroom in... | Check Latest Price |
| # | Preview | Product | |
|---|---|---|---|
| 1 |

|
Grout Pen Black Tile Paint Marker: Waterproof Grout Paint, Tile Grout Colorant and Sealer Pen -... | Check Latest Price |
Envision a wall of perfectly aligned white subway tiles laid in a traditional grid pattern, with bold black grout lines defining each joint. The arrangement creates a uniform, orderly look that’s visually calming yet striking. The stark contrast emphasizes the geometric precision, giving your space an industrial, yet polished feel. It’s like an artful blueprint brought to life.
You can opt for different grout widths—wider for a more raw, industrial look or narrow for a refined, sleek appearance. Integrate black accent tiles or borders within the grid for added depth. This layout works well in kitchens, bathrooms, or entryways. Seasonal touches might include textured textiles or metallic accessories to refresh the overall vibe.
Start by carefully measuring your wall or floor area, ensuring tiles are perfectly aligned. Use a level and spacers to keep joints straight. Mix a high-contrast black grout and apply it with a rubber float, pressing firmly into the joints. Clean excess grout immediately and let cure thoroughly. Seal the grout to prevent staining and moisture damage. Professional help can ensure precision for a flawless result.
Introduce decorative tiles or small insets in black or metallic finishes within the grid for visual interest. Play with grout colors—perhaps a dark gray for a softer contrast. Use lighting to highlight the pattern’s structure, or add shelving in black metal for functional decor. Keep the overall look minimal but impactful.
This grid pattern is a classic that adapts easily to various styles and spaces. It’s perfect for a sleek, urban aesthetic that’s both functional and beautiful. When done right, it creates a clean, modern backdrop that complements any decor. Ready to bring a touch of city chic into your home? Black grout is your secret weapon.
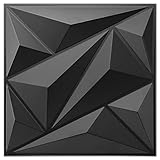
7. Textured White Tiles with Black Grout for a Rustic Feel
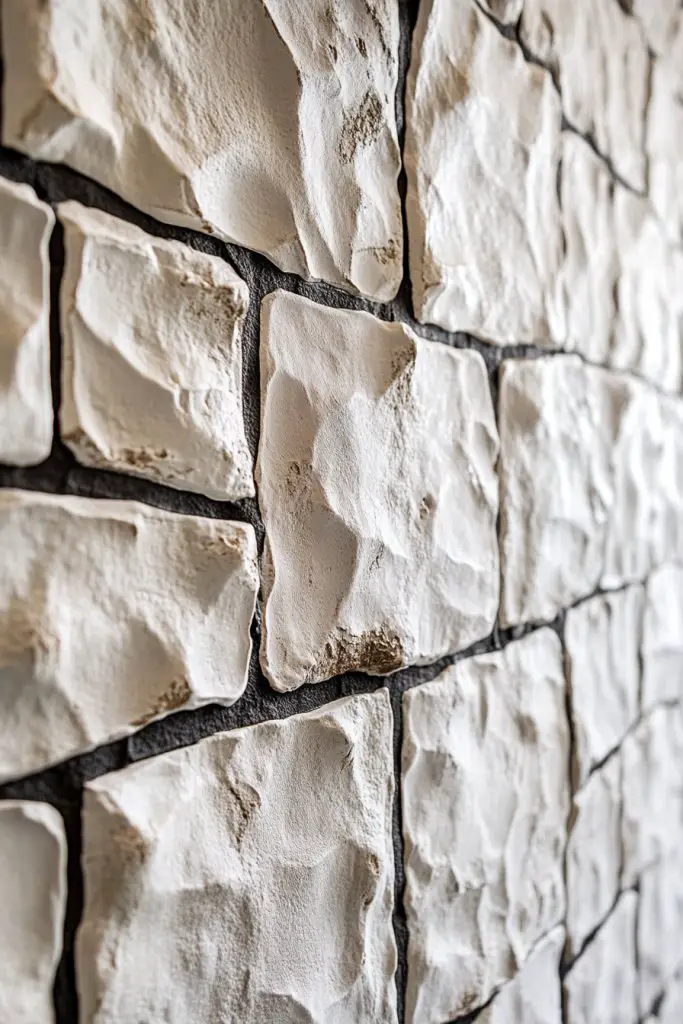
Craving a space that feels warm, inviting, and full of character? Textured white tiles with black grout can give your room a rustic charm that’s full of personality. It’s a perfect way to add depth without cluttering the design. Tired of flat, sterile surfaces? This combination offers a cozy, tactile experience.
Recommended Products to replicate this idea
| # | Preview | Product | |
|---|---|---|---|
| 1 |
|
Art3dwallpanels 33 Pack 3D Wall Panel Diamond for Interior Wall Décor, PVC Flower Textured Wall... | Check Latest Price |
| # | Preview | Product | |
|---|---|---|---|
| 1 |
|
PentaUSA Tile Grout Repair Kit - Black Grout Filler, Triple Protection, Fast Drying Formula Restores... | Check Latest Price |
Imagine white tiles with embossed, patterned, or rough textures, each one telling a story through its surface. The black grout lines sharply define each textured piece, creating a vivid contrast that highlights every detail. The tactile surface invites you to touch, adding an extra layer of engagement. It’s like a handcrafted mosaic brought to life.
Choose textured tiles with natural finishes like stone, clay, or handcrafted ceramics. Use in rustic kitchens, farmhouse bathrooms, or accent walls in living rooms. Pair with warm, earthy colors and natural textiles to enhance the cozy vibe. Seasonal updates could include woven baskets, wood accents, or soft textiles for added warmth.
Select textured tiles with consistent surface quality. Prepare your surface thoroughly and plan your layout to maximize the visual effect. Use a sturdy adhesive suitable for textured surfaces and press each tile firmly into place. Mix a black grout with a slightly sanded finish for better adhesion, and apply carefully with a rubber float. Clean excess grout immediately and seal the surface to protect against stains and moisture. Allow sufficient curing time, and perform regular maintenance to keep the textures looking their best. Professional installation can help manage intricate patterns and textures.
Add decorative elements like carved or patterned tiles in specific areas for focal points. Incorporate warm-colored grout or a distressed finish for an aged look. Use lighting that emphasizes the textures—warm LED lights or wall-mounted fixtures work well. Personalize your space further with rustic accessories or reclaimed wood furniture.
Textured tiles create a space that feels alive and full of history. They’re perfect for adding warmth and character to modern or traditional interiors. With a thoughtful layout and thoughtful details, you can craft a rustic haven that exudes comfort. Ready to embrace tactile charm? It’s an easy way to add depth and personality to your home.
8. Diagonal Tile Installation with Black Grout for Geometric Impact
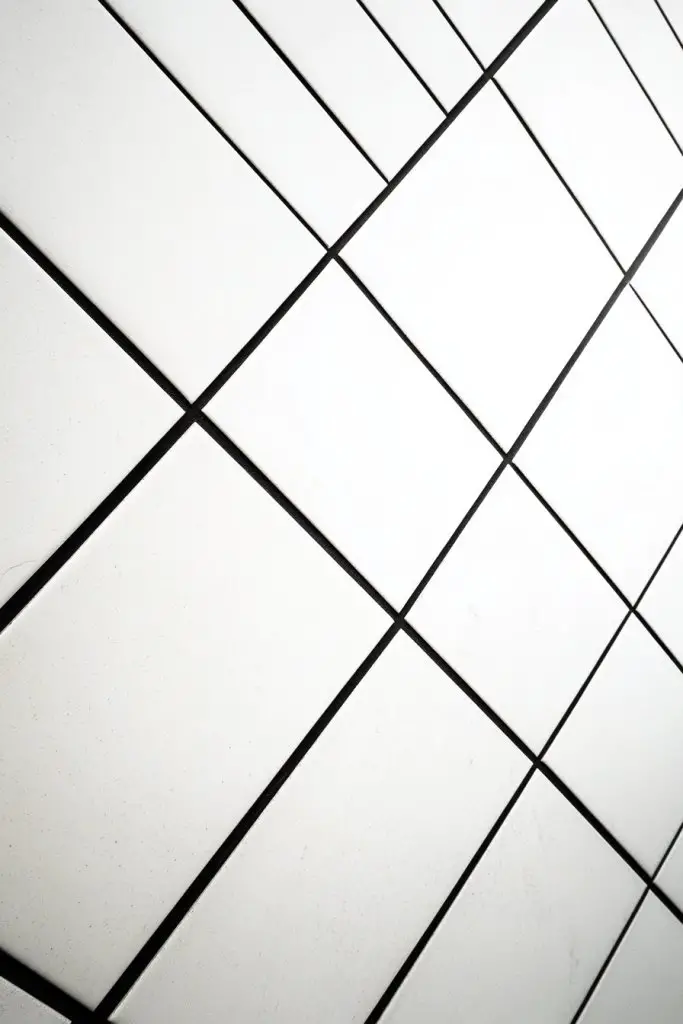
Want to add a modern twist to your tiling? Installing white tiles diagonally with black grout creates a bold geometric statement that energizes any space. It’s a simple change with a big visual payoff. Tired of traditional grid layouts? This pattern offers a fresh, dynamic look that’s full of movement.
Recommended Products to replicate this idea
| # | Preview | Product | |
|---|---|---|---|
| 1 |

|
Art3d 102-Piece Peel and Stick Wall Tile for Kitchen Backsplash, Bathroom, Fireplace, 3in. × 6in.... | Check Latest Price |
| # | Preview | Product | |
|---|---|---|---|
| 1 |
|
PentaUSA Tile Grout Repair Kit - Black Grout Filler, Triple Protection, Fast Drying Formula Restores... | Check Latest Price |
Visualize white tiles arranged at a 45-degree angle, with sharp black grout lines creating a striking diamond or herringbone effect. The diagonal layout breaks the monotony of straight lines, leading the eye across the space in a playful way. The contrast accentuates the pattern, making even small areas feel lively and expansive. It’s like artwork on your walls or floors.
Choose rectangular or square tiles depending on your desired effect—larger tiles for a subtle impact or smaller ones for intricate detail. The grout width can vary from thin to more pronounced, depending on the style. This layout works well in hallways, backsplashes, or feature walls. Seasonal accents might include metallic or colorful grout for added interest.
Lay out your tiles beforehand to ensure proper alignment and pattern accuracy. Use spacers to maintain consistent joint widths. Mix a dark, high-quality grout and apply it with a rubber float, pressing firmly into the joints. Take extra care to keep the grout lines straight and even. After curing, clean thoroughly and seal to preserve contrast. Precision during installation is essential for a professional finish.
Further personalize by incorporating decorative tiles or borders within the diagonal layout. Use contrasting grout colors or add metallic accents at corners or edges. Lighting can be used to emphasize the pattern—spotlights or directional lighting work well. Play with tile finishes—matte or gloss—to suit your overall design theme.
Diagonal tiling adds a contemporary, energetic vibe that’s perfect for modern homes. It’s a simple technique that creates a big impact. When done carefully, it elevates your space from ordinary to extraordinary. Ready to make your surfaces stand out? This pattern is your canvas for creativity.
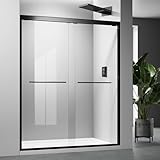
9. Frameless Shower Enclosure with Black Grout on White Tiles
Dreaming of a sleek, seamless shower that feels like a luxurious spa? Black grout on white tiles in a frameless enclosure creates a bold, modern look that’s both stylish and easy to clean. It’s a statement of minimalism with a punch. Tired of heavy, cluttered shower designs? This setup offers a clean, open feel.
Recommended Products to replicate this idea
| # | Preview | Product | |
|---|---|---|---|
| 1 |
|
Glass Shower Door,Matte Black 56-60 inch W x 72 inch H Semi-Frameless Sliding Door,Bypass Bathroom... | Check Latest Price |
| # | Preview | Product | |
|---|---|---|---|
| 1 |
|
PentaUSA Tile Grout Repair Kit - Black Grout Filler, Triple Protection, Fast Drying Formula Restores... | Check Latest Price |
Imagine a transparent glass shower with white tiles covering the walls and floor, outlined sharply by black grout lines. The absence of a frame makes the tiles appear to float, emphasizing the contrast and clean lines. The black grout defines each tile, adding depth and structure without visual bulk. This creates an expansive, uncluttered environment that feels fresh and contemporary.
Use large format tiles for a seamless appearance or smaller tiles for more detailed patterns. Incorporate textured or matte finishes to reduce glare and add tactile interest. Seasonal updates could include black fixtures or subtle decorative accents. Keep the color palette monochrome for a cohesive look or add subtle metallic hardware for a luxe touch.
Start with a solid, waterproof substrate. Install the tiles with precision, ensuring the grout lines are perfectly aligned. Use a high-quality, mold-resistant black grout, and apply carefully with a rubber float. Seal the grout after curing to prevent water infiltration and stains. Regular cleaning with gentle, non-abrasive cleaners will maintain the contrast. Professional installation can guarantee a flawless, leak-proof result.
Add textured or patterned tiles at focal points within the enclosure. Incorporate black trim or accents to frame the space subtly. Use lighting to highlight the contrast—built-in LED strips or spotlights work well. Minimalist fixtures in matte black or brushed nickel complement the sleek aesthetic. Personal touches make the space uniquely yours.
A frameless shower with black grout exudes sophistication and modernity. It’s a design that’s both functional and stunning. With attention to detail, you can create a luxurious space that feels open and inviting. Ready to upgrade your shower? This look combines simplicity with high-impact style, making every shower a retreat.
10. White Hexagon Tiles with Black Grout for a Retro Vibe

Craving a retro-inspired space that’s full of charm? White hexagon tiles with black grout evoke vintage glamour while remaining fresh and stylish. It’s a look that’s both nostalgic and trendy. Tired of plain rectangular tiles? This pattern injects personality and visual interest.
Recommended Products to replicate this idea
| # | Preview | Product | |
|---|---|---|---|
| 1 |

|
In Home InHome NH2359 Hexagon Marble Peel Stick Backsplash Tiles, White & Off-White | Check Latest Price |
| # | Preview | Product | |
|---|---|---|---|
| 1 |

|
Black Powdered (Sanded) Grout - 2 Lbs | Check Latest Price |
Picture a floor or wall covered in pristine white hex tiles, each outlined sharply by dark, contrasting grout. The honeycomb pattern creates a textured, mosaic-like surface that’s both playful and sophisticated. The black grout accentuates each shape, making the pattern pop and adding depth. It’s like stepping into a mid-century modern dream.
Use classic white hex tiles for a clean, vintage look or mix with colored or patterned tiles for a personalized touch. Incorporate black accents in borders or in combination with other geometric patterns. This style works well in kitchens, bathrooms, or as a decorative feature in entryways. Seasonal updates can be achieved with accessories or complementary textiles.
Choose high-quality, uniform hex tiles and plan your layout before adhering. Use a strong adhesive suitable for small, detailed tiles. Mix a dark grout with fine sand for better fill and apply with a rubber float, pressing into all joints. Clean excess grout immediately and seal thoroughly after curing. Patience and precision are key to achieving a seamless, vintage look.
Introduce colored grout or metallic accents for a modern twist. Mix different tile sizes or incorporate decorative insets for visual variety. Frame the hex pattern with contrasting borders or add lighting to emphasize the shape. Personalize with vintage-inspired fixtures or accessories to complete the look.
Hexagon tiles offer a playful yet elegant aesthetic that suits various decor styles. They bring a nostalgic charm that can be updated for modern tastes. With careful installation and thoughtful details, your space will radiate personality and style. Ready to embrace the retro vibe? Hex tiles make it easy to stand out.
11. Striped Pattern Using Alternating White and Light Gray Tiles with Black Grout

Want a subtle yet impactful way to add visual interest? Striped tiles with alternating white and light gray hues, accented with black grout, create a sophisticated pattern that’s easy to style. It’s perfect for those who love understated elegance with a modern twist. Tired of monotony? This pattern adds rhythm and depth without overwhelming your space.
Recommended Products to replicate this idea
| # | Preview | Product | |
|---|---|---|---|
| 1 |

|
STICKGOO 10-Sheet Peel and Stick Wall Tile, Self-Adhesive Kitchen Backsplash in Sandstone (Thicker... | Check Latest Price |
| # | Preview | Product | |
|---|---|---|---|
| 1 |

|
Troxell USA - 4" x 9" Urethane Grout Float with SoftGrip Handle | Check Latest Price |
Envision a wall or floor with horizontal or vertical stripes, where white and soft gray tiles alternate in a clean, orderly fashion. The black grout lines sharply define each stripe, emphasizing the pattern’s structure. The contrast creates a sense of movement, making the surface appear more dynamic and layered. It’s like a subtle visual symphony that complements various decor themes.
Change the width of the stripes—wider for a bold statement or narrower for a delicate effect. Use matte or satin finishes depending on your lighting and overall aesthetic. This pattern works well in kitchens, baths, or hallways, especially when paired with monochrome or pastel accessories. Seasonal updates can include textiles or decorative accents in coordinating shades.
Lay out your tiles before installation to ensure even stripes and proper alignment. Use spacers and a level to keep joints straight, and apply a dark grout with a fine finish for contrast. Carefully clean excess grout to avoid smudges, and seal all joints after curing. Regular maintenance preserves the pattern’s crispness. Patience during installation ensures a neat, professional result.
Personalize by adding decorative tiles within the stripes or inserting a contrasting color in select areas. Incorporate textured tiles or metallic grout at key points for extra flair. Use lighting to enhance the pattern’s rhythm, or add accessories that echo the stripe motif. Mix materials—glossy, matte, or textured—to create visual richness.
This striped pattern offers a refined, contemporary look that’s versatile and timeless. It’s easy to adapt to different spaces and styles, providing a subtle yet powerful design statement. When executed with care, it elevates your decor with minimal effort. Ready to add rhythmic elegance? Stripes in grout and tile make it possible.
12. White Tiles with Black Grout in a Staggered Brick Pattern
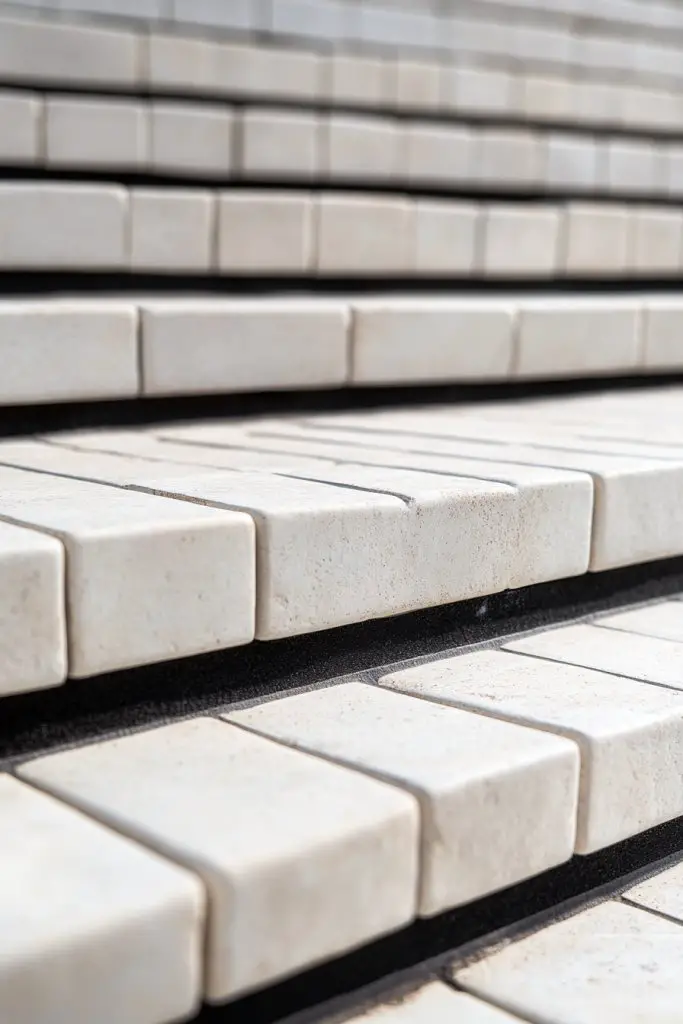
Seeking a classic yet modern pattern that adds texture? The staggered brick layout with black grout on white tiles combines timeless appeal with contemporary edge. It’s a subtle twist on the traditional, perfect for walls or floors. Tired of uniform patterns? This layout introduces visual depth and movement.
Recommended Products to replicate this idea
| # | Preview | Product | |
|---|---|---|---|
| 1 |
|
Art3d 102-Piece Peel and Stick Wall Tile for Kitchen Backsplash, Bathroom, Fireplace, 3in. × 6in.... | Check Latest Price |
| # | Preview | Product | |
|---|---|---|---|
| 1 |

|
Grout Removal Tool, Tile Grout Remover Tiling Tools, Saw Angled Grout Scraping Rake with 5 PCS Extra... | Check Latest Price |
Picture rectangular tiles arranged in a running bond pattern, with black grout lines creating a striking contrast against the white tiles. The staggered arrangement mimics traditional brickwork, adding warmth and charm. The dark grout emphasizes the layered effect, making the surface more dynamic. It’s like a textured, architectural feature beneath your feet or on your walls.
Opt for different tile sizes—small for a more intricate look or large for a bold statement. Use a slightly wider grout to accentuate the pattern or keep it narrow for a seamless appearance. This layout suits kitchens, bathrooms, or feature walls in living spaces. Seasonal updates can include decorative borders or contrasting accessories.
Measure carefully before installation to ensure consistent staggering. Use spacers and a level to keep joints aligned. Mix a dark grout and apply with a rubber float, pressing into the joints thoroughly. Clean excess immediately and cure completely before sealing. Regular maintenance preserves the pattern’s crispness. Professional installation ensures uniformity and quality.
Incorporate decorative borders or accent tiles at the edges for a refined look. Play with grout color—perhaps a softer gray for a subtle effect. Add textured or patterned tiles in select areas to increase visual interest. Lighting can be used to cast shadows that enhance the layered effect.
This layout provides a classic yet fresh aesthetic that’s easy to adapt. It’s a smart choice for both traditional and modern interiors. When done right, it creates a warm, inviting environment with a tactile appeal. Ready to add timeless charm? The staggered brick pattern with black grout is your go-to.
13. Minimalist Monochrome Wall with Large White Tiles and Black Grout Lines
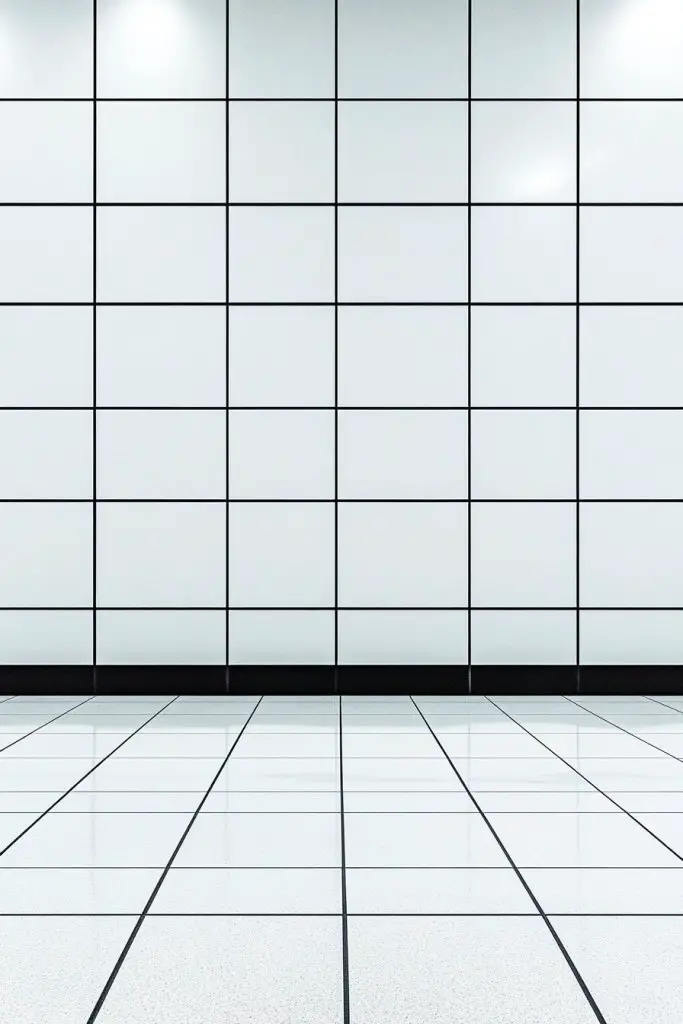
Craving a sleek, clutter-free look that feels both modern and expansive? Large white tiles with bold black grout lines deliver that minimalist punch. It’s a straightforward upgrade that elevates your space effortlessly. Tired of busy patterns? This clean, simple design focuses on form and contrast.
Recommended Products to replicate this idea
| # | Preview | Product | |
|---|---|---|---|
| 1 |
|
Peel and Stick Floor Tile 20-Pack 20 Sq.Ft Matte Pattern Flooring, 12” x 12” Self Adhesive Vinyl... | Check Latest Price |
| # | Preview | Product | |
|---|---|---|---|
| 1 |
|
PentaUSA Tile Grout Repair Kit - Black Grout Filler, Triple Protection, Fast Drying Formula Restores... | Check Latest Price |
Visualize a wall covered with giant white tiles, each outlined sharply by black grout lines. The large tiles minimize grout visibility, creating a seamless, expansive surface. The contrast adds definition, making the space feel larger and more open. It’s like a blank canvas ready for your personal style to shine through.
Choose between matte or gloss finishes, depending on the mood—matte for understated elegance or gloss for brightness. Keep the grout lines narrow for a sleek look or slightly wider for more definition. This style suits contemporary kitchens, bathrooms, or feature walls in living rooms. Seasonal updates can include textured textiles or simple accessories.
Select large-format tiles that fit your space, ensuring they are perfectly flat and uniform. Carefully plan your layout for maximum visual impact. Use a high-quality, dark grout and apply with a rubber float, pressing into the joints evenly. Clean thoroughly to prevent haze and seal after curing. Maintain with gentle cleaning to preserve the contrast and surface quality.
Add subtle decorative touches like textured tiles or insets in contrasting tones. Incorporate lighting to accentuate the scale and contrast—recessed or wall-mounted lights work well. Keep accessories minimal but impactful—think sleek shelves or simple art pieces. Personalize with textiles or small decorative elements that complement the monochrome palette.
This minimalist design exudes confidence and sophistication, perfect for modern lifestyles. It creates an environment that feels calm and orderly, ideal for relaxation or work. When executed with precision, it offers a timeless aesthetic that easily adapts to new trends. Ready to embrace sleek simplicity? Large tiles with black grout are the way to go.
14. Floating White Tile Shelf with Black Grout for a Stylish Niche
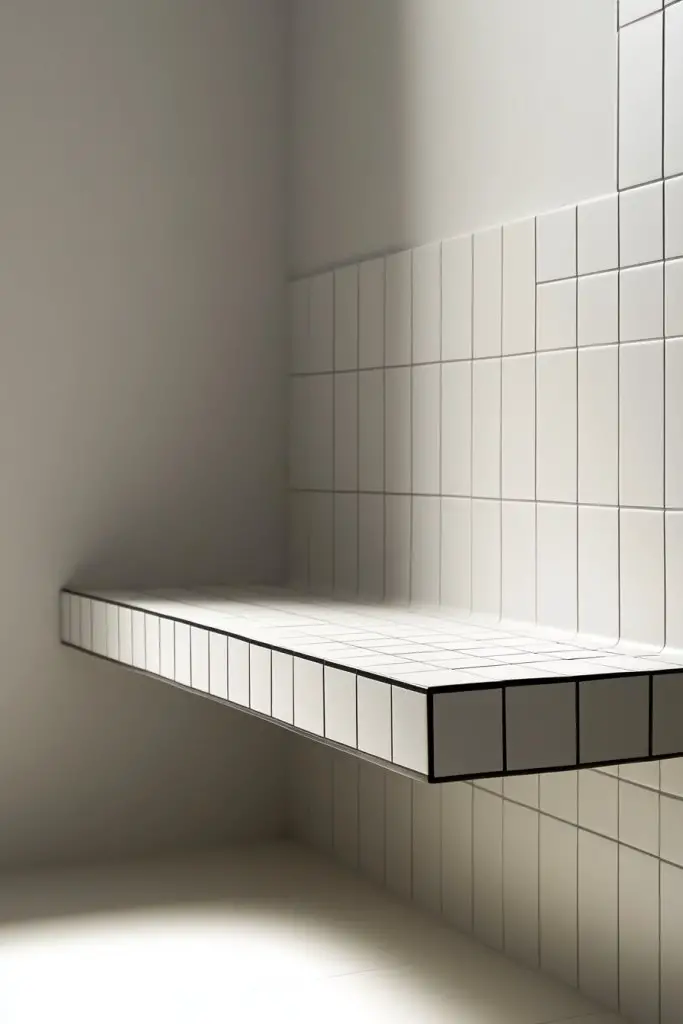
Looking for a practical yet stylish way to add storage or display? A floating white tile shelf with black grout creates a modern, minimalist niche that’s both functional and decorative. It’s perfect for showcasing small plants, books, or decor accents. Tired of bulky shelving? This sleek solution adds sophistication without clutter.
Recommended Products to replicate this idea
| # | Preview | Product | |
|---|---|---|---|
| 1 |

|
Heavy Duty Shelf Brackets - 8 Pcs L Shaped Metal Wall Mount Shelves Support for Floating Shelves... | Check Latest Price |
| # | Preview | Product | |
|---|---|---|---|
| 1 |

|
evron Acrylic Floating Shelves – 2-Pack White Wall Shelf for Bathroom, Bedroom, or Kitchen –... | Check Latest Price |
Imagine a narrow shelf made of white tiles with sharply defined black grout lines, mounted seamlessly on your wall. The floating effect gives the illusion of a sleek, sculptural element. Light reflects off the glossy tiles, while the dark grout emphasizes their clean edges. The shelf becomes a subtle, stylish focal point that enhances your space.
Use tiles of different sizes or finishes—glossy, matte, or textured—to match your decor. Incorporate LED strip lighting underneath for a soft glow or add decorative items that contrast or complement the white-and-black theme. This concept can be adapted to small niches or full-length shelves in kitchens, bathrooms, or living areas. Seasonal updates include swapping decor items or adjusting lighting.
Measure your wall carefully, then cut tiles to fit the dimensions of your shelf. Use strong adhesive suitable for tiles, and mount the shelf securely with brackets concealed behind the tiles. Apply black grout carefully, ensuring it fills all joints smoothly. Seal the grout to prevent stains and moisture damage. Finish with a high-gloss or matte topcoat if desired. Regular cleaning maintains the sleek look.
Personalize by adding decorative tiles or contrasting trim. Incorporate small, functional accessories like hooks or containers in matching finishes. Play with lighting effects—spotlights or backlit options can add drama. Use textured tiles or mixed finishes to add depth and interest to the shelf.
A floating tile shelf combines form and function with a modern edge. It’s a subtle way to add storage while elevating your decor. When styled thoughtfully, it becomes a signature design feature. Ready to upgrade your walls with sleek, architectural detail? This idea is simple, stylish, and highly customizable.
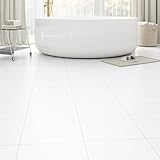
15. White Floor Tiles with Black Grout for a Dramatic Entryway
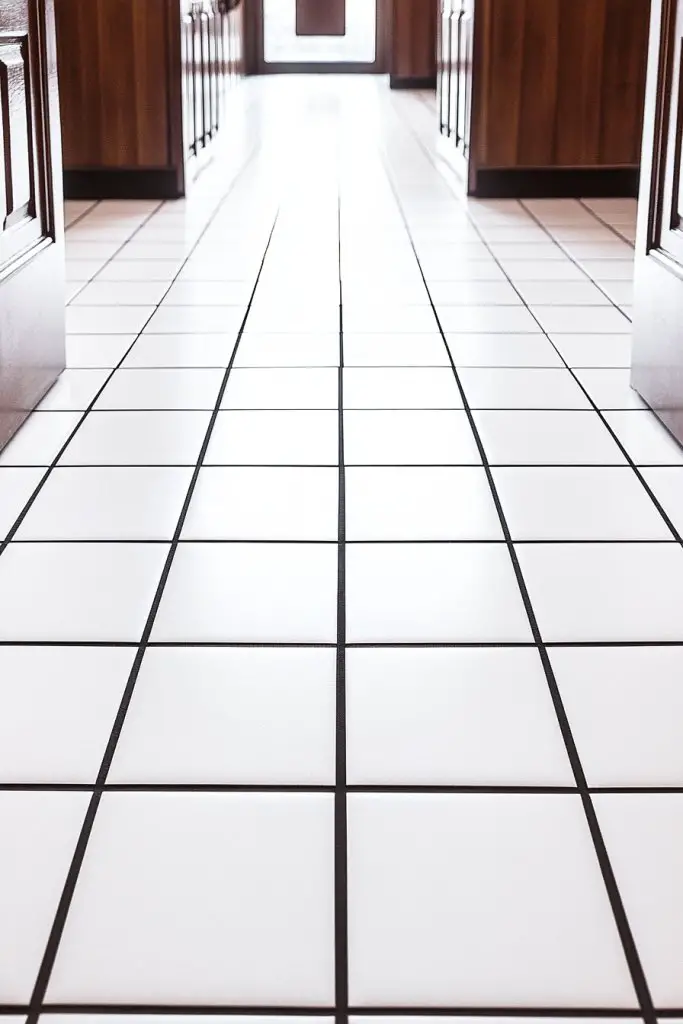
Want to make a bold first impression as guests enter your home? White floor tiles with black grout lines deliver a dramatic, high-contrast look that commands attention. It’s a simple way to elevate your entryway’s style instantly. Tired of dull or uninspired floors? This combination adds personality and sophistication.
Recommended Products to replicate this idea
| # | Preview | Product | |
|---|---|---|---|
| 1 |

|
20-Pack Peel and Stick Floor Tiles Vinyl Floor 12 x 12 inch Self Adhesive Waterproof Glossy Flooring... | Check Latest Price |
| # | Preview | Product | |
|---|---|---|---|
| 1 |

|
Red Devil 042260 Pre-Mixed Tile Grout - Professional Quality, Excellent Adhesion, Ideal for Wall &... | Check Latest Price |
Visualize a spacious entry with large white tiles laid in a grid pattern, defined sharply by black grout lines. The stark contrast draws the eye downward, emphasizing the floor’s design and making the space feel larger. The glossy finish reflects light, brightening the area, while the dark grout adds depth and structure. It’s like the red carpet of your home—glamorous and inviting.
Use textured or matte tiles to reduce slipperiness or add visual interest. Incorporate decorative borders or insets in black or metallic finishes to define zones or add elegance. Seasonal updates might include colorful doormats, planters, or lighting accents to complement the monochrome palette. This style suits modern, transitional, or even industrial decor.
Choose durable, slip-resistant tiles suitable for high-traffic areas. Measure carefully and plan your layout for symmetry. Use a high-quality adhesive and level each tile meticulously. Mix a deep black grout and apply with a rubber float, pressing into all joints. Clean thoroughly and seal to prevent staining and moisture ingress. Regular maintenance keeps the contrast sharp and the surface safe.
Add decorative tiles or inlays near the door or along the edges for a personalized touch. Incorporate lighting—recessed or wall-mounted—to highlight the pattern. Use accessories like a sleek shoe rack or coat hooks in black or metallic finishes to match the grout. Personal touches make the entryway both practical and stylish.
A striking entry sets the tone for your entire home. It’s a bold, confident statement that combines style with function. With proper installation and thoughtful details, your entryway will leave a lasting impression. Ready to transform your foyer? Black grout and white tiles are a classic duo that never fails.
16. Patterned White Tiles with Black Grout for Artistic Floors
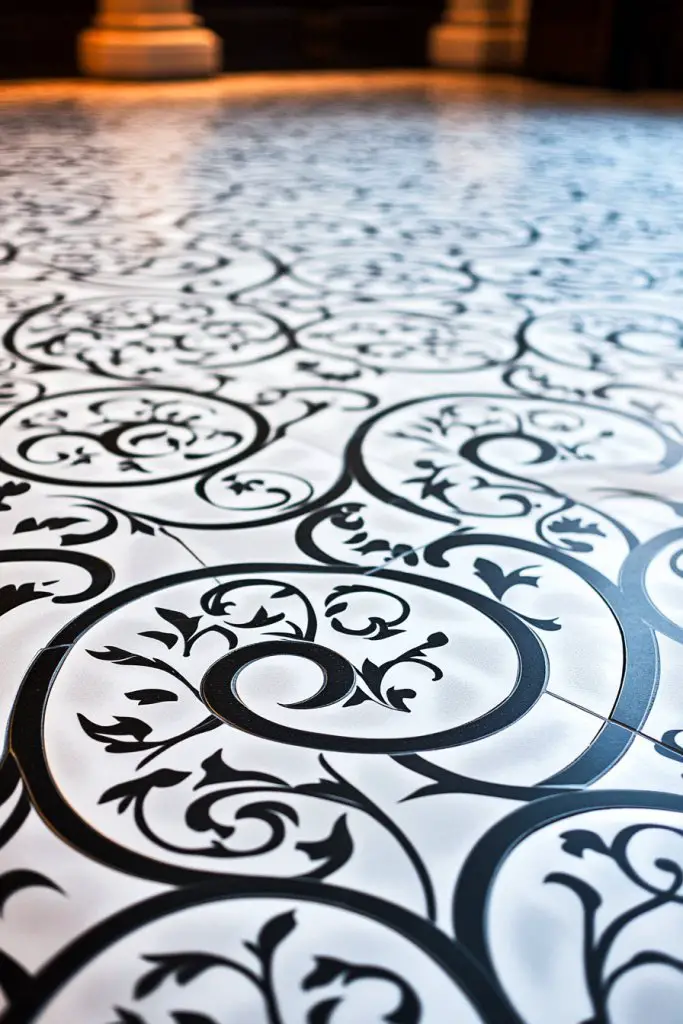
Looking for a floor that’s more than just functional? Patterned white tiles with black grout turn ordinary surfaces into artistic statements. It’s perfect for those who want a bold, creative touch in their home. Tired of plain tiles? This style delivers personality, charm, and a bit of edge.
Recommended Products to replicate this idea
| # | Preview | Product | |
|---|---|---|---|
| 1 |
|
STICKGOO 10-Sheet White Subway Tiles Peel and Stick Backsplash, Stick on Tiles Kitchen Backsplash... | Check Latest Price |
| # | Preview | Product | |
|---|---|---|---|
| 1 |
|
PentaUSA Tile Grout Repair Kit - Black Grout Filler, Triple Protection, Fast Drying Formula Restores... | Check Latest Price |
Imagine a mosaic of white tiles arranged in intricate geometric, floral, or abstract patterns, with black grout outlining each shape. The contrast accentuates the design, making every detail stand out vividly. The textured surface adds depth, inviting touch and admiration. It’s like a piece of art beneath your feet that complements your decor.
Use different tile shapes—hexagons, triangles, or custom cuts—to craft unique patterns. Incorporate insets or border tiles in black or metallic shades for contrast. This approach works well for kitchen floors, bathroom accents, or decorative entryways. Seasonal or thematic updates can include colorful accessories or textiles that enhance the pattern.
Design your pattern on paper before beginning to ensure accuracy. Select high-quality, uniform tiles and use a strong adhesive for installation. Lay out the tiles in your chosen pattern, pressing firmly into place. Mix a dark grout and fill all joints carefully, then clean excess grout to prevent haze. Seal the surface after curing to preserve the pattern’s vibrancy. Patience and precision yield the best results.
Introduce metallic or colored grout to highlight specific areas or create focal points. Mix different tile textures or finishes for extra visual interest. Use accent lighting to cast shadows and emphasize the pattern’s complexity. Personalize with decorative borders or insets that match your overall decor theme.
Artistic patterned tiles add a sense of craftsmanship and personality to your home. They make everyday spaces feel special and curated. With careful planning, you can achieve a stunning, gallery-like effect. Ready to express your style through tile art? Patterns with black grout are your canvas.
17. White Subway Tiles with Black Grout in a Vertical Pattern for Height

Want to make your walls feel taller and more dramatic? Installing white subway tiles vertically with black grout lines creates an illusion of height that transforms your space. It’s a simple tweak that can make a small room feel grander. Tired of horizontal layouts? Vertical orientation adds a fresh perspective.
Recommended Products to replicate this idea
| # | Preview | Product | |
|---|---|---|---|
| 1 |
|
Art3d 102-Piece Peel and Stick Wall Tile for Kitchen Backsplash, Bathroom, Fireplace, 3in. × 6in.... | Check Latest Price |
| # | Preview | Product | |
|---|---|---|---|
| 1 |
|
Red Devil 042260 Pre-Mixed Tile Grout - Professional Quality, Excellent Adhesion, Ideal for Wall &... | Check Latest Price |
Visualize a wall of white subway tiles stacked in a straight, vertical line, with bold black grout accentuating each joint. The vertical pattern draws the eye upward, emphasizing the room’s height. The glossy tiles reflect light, while the dark grout adds definition and contrast. It’s like an optical illusion that elevates your interior design.
Use narrow grout lines for a subtle, seamless effect or wider lines for more visual impact. Combine vertical tiles with horizontal ones in a mixed pattern for added interest. This style works well in bathrooms, kitchens, or accent walls. Seasonal accents include textured textiles or decorative trims that complement the vertical theme.
Plan your layout carefully, ensuring tiles are aligned perfectly in a vertical orientation. Use spacers and a level to maintain straight lines. Apply a dark, durable grout with a narrow float, pressing firmly into the joints. After curing, clean excess grout immediately and seal thoroughly. Proper installation guarantees the illusion of height and a polished finish.
Incorporate decorative trims or contrasting border tiles at the top or bottom for added flair. Use lighting—such as vertical sconces or LED strips—to highlight the vertical pattern. Personalize with artwork or textiles that draw the eye upward or add visual balance. Mixing finishes or adding textured tiles can further elevate the design.
Vertical tile installation is a clever way to add drama and space perception to your room. It’s a simple change with noticeable impact. When executed with precision, it will make your walls feel taller and more elegant. Ready to redefine your space’s proportions? Vertical subway tiles with black grout are the way to go.
18. Modern Kitchen Backsplash with White Tiles and Black Grout in a Random Layout
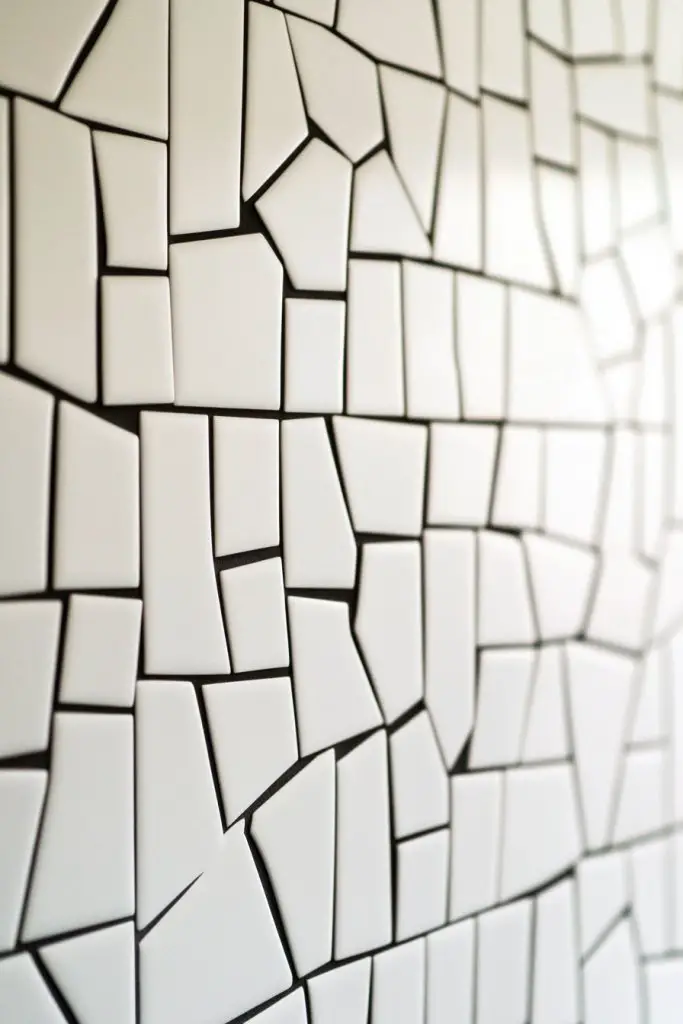
Looking for a backsplash that’s modern, edgy, and full of personality? Randomly laid white tiles with black grout create a dynamic, unstructured look that breaks the mold. It’s perfect for those who want a kitchen that’s both contemporary and a little rebellious. Tired of predictable patterns? This layout offers fresh visual energy.
Recommended Products to replicate this idea
| # | Preview | Product | |
|---|---|---|---|
| 1 |
|
STICKGOO 10-Sheet White Subway Tiles Peel and Stick Backsplash, Stick on Tiles Kitchen Backsplash... | Check Latest Price |
| # | Preview | Product | |
|---|---|---|---|
| 1 |
|
Grout Pen Black Tile Paint Marker: Waterproof Grout Paint, Tile Grout Colorant and Sealer Pen -... | Check Latest Price |
Imagine a mosaic of white tiles placed in a seemingly haphazard manner, with black grout lines creating a bold, irregular grid. The randomness adds visual interest and a sense of movement, making the space feel lively. The high contrast emphasizes the pattern’s unpredictability, giving your kitchen a unique personality. It’s like an abstract art piece at the heart of your home.
Use varied tile sizes, shapes, or orientations to increase visual complexity. Incorporate accent tiles or metallic details for focal points or borders. This layout works well in open-plan kitchens, especially when paired with sleek cabinets and modern fixtures. Seasonal updates may include colorful accessories or textiles to complement the pattern.
Lay out your tiles on a flat surface to plan the random pattern, then adhere them carefully, ensuring no tile overlaps or gaps. Use a dark grout and a flexible float, pressing grout into all joints. Clean excess immediately to prevent staining or haze. Seal the grout after curing for durability. Precision during installation is crucial for a cohesive, artistic effect.
Add decorative tiles in unexpected places or incorporate metallic or colored grout for added sophistication. Use lighting to highlight the pattern’s randomness—under-cabinet lights or spotlights work well. Personalize with accessories that echo the layout’s energy, like vibrant kitchenware or textured textiles. Create a space that feels both curated and spontaneous.
A random layout moves away from tradition, giving your kitchen a fresh, artistic edge. It’s a bold choice that reflects personality and creativity. When installed correctly, it offers a high-impact visual without complexity. Ready to break the rules? This layout is your canvas for a truly modern kitchen.
19. White Tile Wall with Black Grout Accents in a Framed Panel Design
Want a sophisticated, tailored look for your walls? Framed panel designs using white tiles with black grout create a structured, elegant aesthetic. It’s perfect for adding a sense of order and craftsmanship to any room. Tired of plain tiled walls? This approach introduces pattern and personality with a refined touch.
Recommended Products to replicate this idea
| # | Preview | Product | |
|---|---|---|---|
| 1 |
|
STICKGOO 10-Sheet Peel and Stick Wall Tile, Self-Adhesive Kitchen Backsplash in Sandstone (Thicker... | Check Latest Price |
| # | Preview | Product | |
|---|---|---|---|
| 1 |
|
Red Devil 042260 Pre-Mixed Tile Grout - Professional Quality, Excellent Adhesion, Ideal for Wall &... | Check Latest Price |
Imagine a large white tiled wall segmented into panels, each outlined with sharply defined black grout lines, forming a framed effect. The black borders mimic picture frames, adding depth and visual focus. The glossy tiles reflect light, while the black grout creates a crisp, clean outline that enhances the overall design. It’s like a gallery wall under your fingertips.
Adjust the size of the panels—large for a bold, modern look or smaller for intricate detailing. Use contrasting grout shades or decorative trims within the frames for added richness. This technique suits bathrooms, kitchens, or feature walls in living spaces. Seasonal updates may include art-inspired accessories or textiles to complement the framed effect.
Measure and mark your wall to divide it into even panels. Install tiles within each panel, ensuring consistent spacing. Use a high-quality adhesive and align tiles carefully. Fill the panel borders with black grout, pressing firmly to create a defined frame. Clean thoroughly, then seal to protect the grout and tiles. Precision ensures a polished, gallery-quality finish.
Add decorative insets or contrasting color accents within the frames for visual interest. Incorporate textured tiles or subtle patterns in the panels. Use directional or accent lighting to highlight the framed sections. Personal touches like custom artwork or stylish fixtures complete the elegant look.
Framed panel designs elevate the visual hierarchy of your walls. They combine craftsmanship with aesthetic appeal, perfect for creating a statement space. When executed well, they add a layer of sophistication and artistry. Ready to craft your own gallery wall? Framed tile panels are the perfect choice for a refined, modern look.
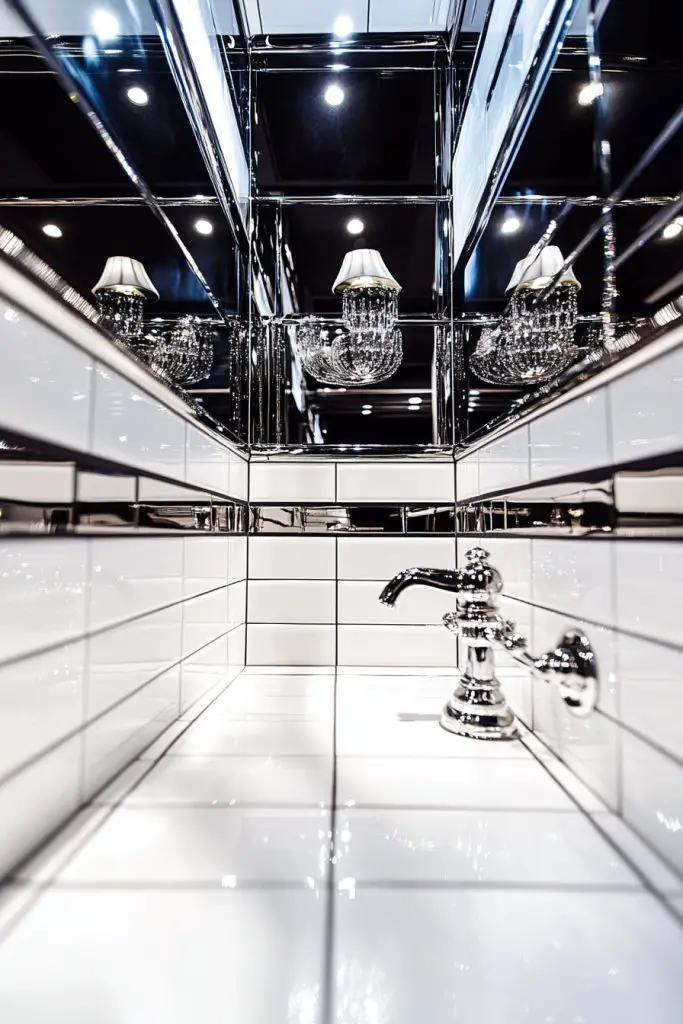
20. Combining White Tiles with Black Grout and Metallic Fixtures for Luxe Contrast
Dreaming of a space that radiates modern luxury? Combining white tiles with black grout creates a crisp, high-contrast backdrop, while metallic fixtures add a touch of glamour. It’s a look that’s both sleek and sophisticated, perfect for elevating your home’s style. Tired of dull finishes? This combo brings brightness and shine.
Recommended Products to replicate this idea
| # | Preview | Product | |
|---|---|---|---|
| 1 |
|
STICKGOO 10-Sheet White Subway Tiles Peel and Stick Backsplash, Stick on Tiles Kitchen Backsplash... | Check Latest Price |
| # | Preview | Product | |
|---|---|---|---|
| 1 |

|
Remenna Metal Wall Candle Sconce Holder Set of 2 Wall Mount Candle Holders Modern Wall Candle... | Check Latest Price |
Picture a pristine white tiled wall or floor accented by shiny black grout lines, complemented by fixtures in gold, brass, or matte black metals. The contrast between the surfaces amplifies the luxurious feel, while metallic accents reflect light and add warmth. The sleek surfaces and reflective metals create a harmonious balance of modern elegance. It’s like a designer showroom brought home.
Choose fixtures in various metallic finishes—brass, chrome, matte black—to match your style. Use decorative hardware, faucets, or lighting fixtures to add visual interest. Incorporate textured tiles or subtle patterns in the tiles for additional depth. Seasonal updates could include changing textiles or accessories in metallic shades for a fresh look.
Select quality tiles with a smooth, glossy surface. Install tiles with precision, ensuring grout lines are straight and even. Use a high-quality black grout and apply it evenly, pressing into joints. Seal the grout and tiles to protect against stains and moisture. Add metallic fixtures last, ensuring proper alignment and secure attachment. Regular cleaning maintains shine and contrast.
Mix and match metallic finishes for a layered look, such as gold fixtures with matte black accents. Incorporate decorative trims or insets that echo the metallic theme. Use lighting—chandeliers, wall sconces—to enhance the luxe effect and reflect light beautifully. Personal touches like plush towels or decorative accessories in metallic tones complete the ambiance.
This combination embodies modern luxury, turning everyday spaces into high-end retreats. It’s a versatile look that works in kitchens, bathrooms, or accent walls. When styled thoughtfully, it exudes confidence and elegance. Ready to elevate your interiors? Metallic fixtures paired with black grout and white tiles are your ticket to luxe contrast.
Conclusion
From classic subway tiles to intricate mosaic patterns, the ideas showcased demonstrate how versatile black grout on white tiles can be. Embrace these bold contrasts to add personality and style to your space, and don’t be afraid to experiment with different layouts and textures. Dive into your next tile project with confidence—your stunning, high-contrast design awaits to transform your home into a statement of bold elegance.