
18 Butterfly Nursery Ideas for Whimsical Style
Imagine stepping into a nursery that feels like a whimsical fairyland, where delicate butterflies flutter and vibrant colors evoke joy and wonder. Butterfly nursery ideas are incredibly popular because they bring a touch of magic and innocence to a child’s space, creating an environment that’s both calming and inspiring.
In this article, you’ll find a delightful array of butterfly-themed nursery ideas that cater to every style—from soft pastels and vintage touches to bold, modern accents. Whether you’re aiming for a subtle charm or a vibrant, playful atmosphere, these ideas will spark your creativity and help you craft a dreamy space your little one will adore.
1. Butterfly Wall Decals for a Playful Accent
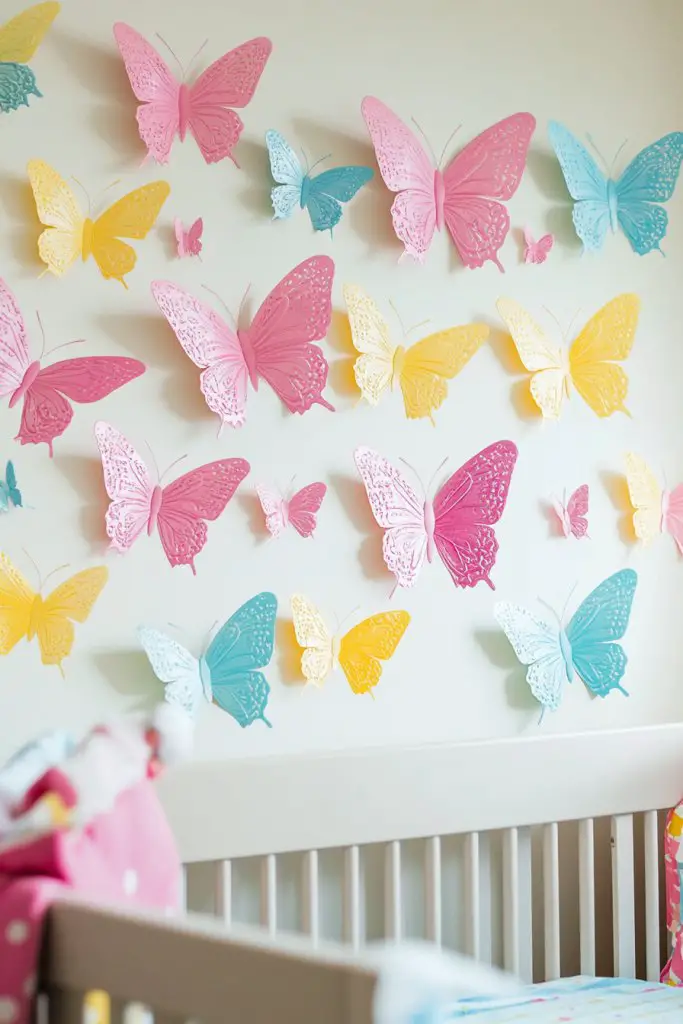
Ever wish your nursery could instantly feel more lively and inviting without a complete overhaul? Butterfly wall decals are the perfect quick fix to add a splash of color and playful charm. They transform a plain space into a whimsical haven with minimal effort. Who doesn’t want a nursery that looks like it belongs in a storybook?
Recommended Products to replicate this idea
| # | Preview | Product | |
|---|---|---|---|
| 1 |

|
OPSEAM Butterfly Wall Decor 24/48 PCS, 3D Butterflies Stickers for Party Decorations with... | Check Latest Price |
| # | Preview | Product | |
|---|---|---|---|
| 1 |
|
KUSUFEFI Plastic Razor Blade Scraper, 2PCS Scraper Tool with 60PCS Plastic Blades, Cleaning Scraper... | Check Latest Price |
Imagine a soft, pastel-colored wall adorned with vibrant, removable butterfly decals fluttering across the surface. Each decal features delicate wings with intricate patterns, creating a dynamic scene that feels alive. The decals can be repositioned easily, giving you the freedom to craft a unique composition. As light hits them, they cast gentle shadows that add depth to the wall.
You can opt for a monochromatic palette for a subtle effect or go bold with bright, contrasting colors for a statement wall. For smaller nurseries, scatter decals to create a sense of movement, while larger spaces can accommodate a more expansive scene. Seasonal themes can be achieved by swapping out decals or layering different designs for variety. These decals suit various decor styles, from modern to vintage.
Start by selecting decals that match your color scheme and style. Use painter’s tape or a level to ensure they are evenly placed if you want a precise pattern. Clean the wall surface thoroughly before application for maximum adhesion. Peel and stick decals are usually straightforward—just peel the backing and press onto the wall. For a more secure fit, smooth out air bubbles with a credit card or smoothing tool. Regular repositioning is simple thanks to the adhesive’s removable nature.
Add personal touches by creating custom decals with your child’s name or favorite characters. Incorporate glitter or metallic accents for extra sparkle. Combine decals with wall stickers or fabric banners for layered visual interest. You can also create a themed scene, like a garden or sky, by mixing different shapes and sizes. Personalization makes the nursery truly unique and memorable.
Using wall decals is an easy way to refresh your nursery whenever inspiration strikes. They’re budget-friendly and remove cleanly, so you can experiment without worry. Your space will feel more cheerful and child-friendly in no time. Ready to give your nursery that playful magic? Just peel, stick, and enjoy!
2. Hanging Butterfly Garland for a Dreamy Ceiling Display
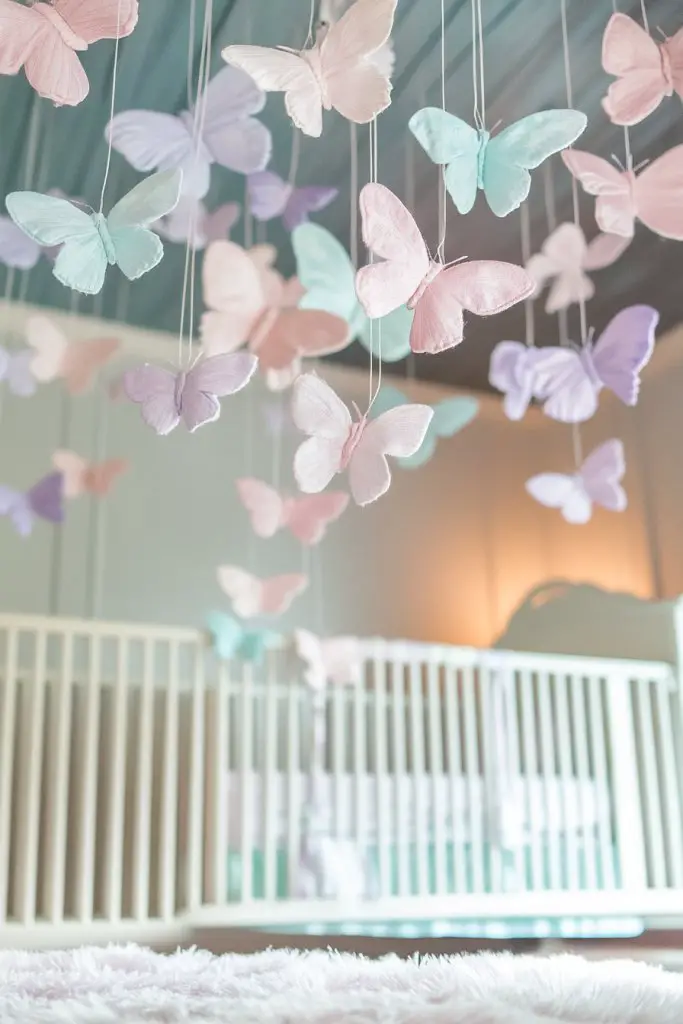
Do you dream of turning your nursery into a dreamy, fairy-tale space without major renovations? A hanging butterfly garland can instantly elevate the ceiling from boring to whimsical. It adds a lightweight, airy touch that makes the room feel more enchanting. Plus, it’s a simple DIY project that won’t break the bank.
Recommended Products to replicate this idea
| # | Preview | Product | |
|---|---|---|---|
| 1 |
|
Chrisfall 36 Pcs Butterfly Party Decoration Hanging Swirl Streamer Hanging Ceiling Large Paper... | Check Latest Price |
| # | Preview | Product | |
|---|---|---|---|
| 1 |

|
Govee Smart Outdoor String Lights 2, 144ft Outdoor Lights with Dimmable Warm White LED Bulbs, 47... | Check Latest Price |
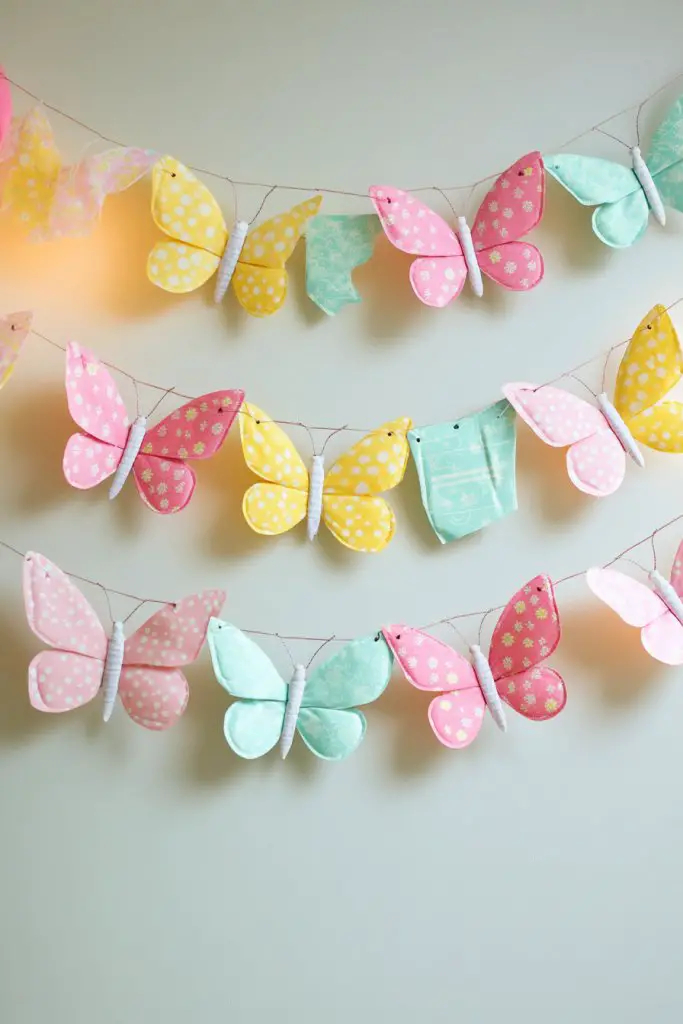
Picture a delicate string of fabric or paper butterflies suspended from the ceiling, floating gently above the crib. They sway softly with every breeze, creating a calming movement. The butterflies come in various sizes and pastel shades, resembling a gentle swarm of fairy wings. The soft glow of ambient light filters through the layers, casting a magical glow.
Choose different materials like tissue paper, felt, or lightweight fabric for a textured look. You can hang the garland closer together for a dense effect or space them out for a more subtle look. For a seasonal touch, incorporate additional elements like tiny paper stars or flowers. Adjust the height depending on ceiling height—to keep it out of reach or to create a floating effect.
Begin by measuring the length of your ceiling space to determine how many butterflies you’ll need. Attach each butterfly to a lightweight string or fishing line using glue or sewing pins. Secure the string to the ceiling with hooks, adhesive strips, or removable hooks designed for delicate surfaces. Vary the lengths for a more natural, flowing appearance. Make sure the hanging points are sturdy enough to handle the weight.
Personalize the garland by adding tiny LED fairy lights woven along the string for a gentle glow. Incorporate small charms or initial tags for a custom touch. Mix and match butterfly styles or colors to reflect your child’s personality. Changing out elements seasonally can keep the display fresh and engaging. It’s a versatile decor idea that grows with your child’s interests.
This ceiling display is a low-cost, high-impact way to create a dreamy nursery vibe. It’s easy to remove or reposition, so you can update the look anytime. Your little one will feel like they’re living among the clouds. Ready to craft a magical canopy? Just hang, sway, and enjoy the wonder!
3. DIY Butterfly Mobile with Bright Colors
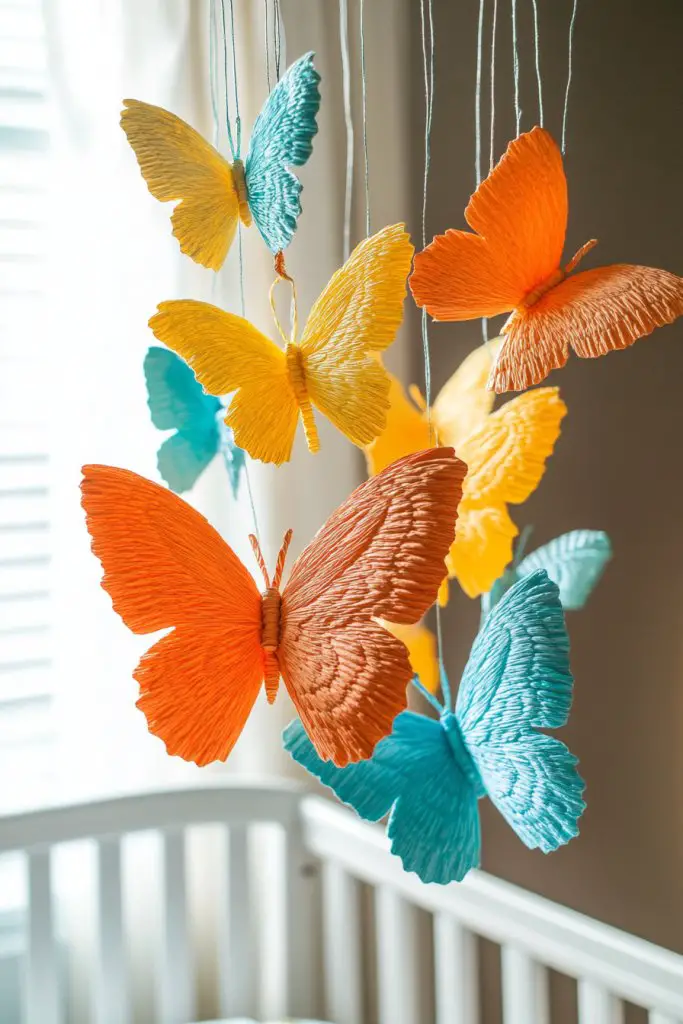
Want to add a charming focal point above the crib that’s both visually stimulating and easy to make? A DIY butterfly mobile with bright colors checks all the boxes. It’s a fun project that lets you customize the nursery’s theme while keeping it playful and cheerful. Plus, it’s a great way to add a personal touch that feels special.
Recommended Products to replicate this idea
| # | Preview | Product | |
|---|---|---|---|
| 1 |

|
RSEPD Crib Mobile with Music and Lights, Baby Mobiles for Cribs, Nursery Musical Mobile for... | Check Latest Price |
| # | Preview | Product | |
|---|---|---|---|
| 1 |
|
Naler 120pcs Felt Butterfly Felt Flowers Embellishments for Crafts Sewing Handcraft Decoration DIY,... | Check Latest Price |
Visualize a cluster of lightweight foam or felt butterflies hanging from a circular frame, suspended just above the crib. The butterflies are painted in bold, contrasting hues—think vibrant pinks, yellows, and blues—that catch the light as they sway gently. The movement creates a mesmerizing effect for your little one, stimulating their senses. The entire mobile is whimsical, lively, and full of personality.
Choose a variety of butterfly shapes and sizes for a more dynamic look. Use different colored ribbons or strings to add texture and movement. For a softer aesthetic, opt for pastel shades and delicate materials like tissue paper. You can also incorporate small beads or charms for added visual interest. Adjust the length of the hanging butterflies based on ceiling height or personal preference.
Start by creating or purchasing a lightweight circular or hoop frame. Cut out butterfly shapes from foam or felt, then decorate with non-toxic paint or markers. Attach the butterflies to the frame using colorful ribbons or strings, ensuring they hang freely. Secure the mobile to the ceiling with a strong hook or ceiling attachment, making sure it’s balanced and stable. Test the movement before placing it over the crib.
Personalize the mobile by adding your baby’s name or favorite patterns to the butterflies. Use glow-in-the-dark paint for a subtle night-time shimmer. Incorporate themes that match other nursery decor, like animals or floral motifs. Change out butterflies for different seasons or moods—this keeps the mobile fresh and engaging. It’s a handcrafted piece that grows with your child’s curiosity.
Creating a DIY mobile is not only budget-friendly but also deeply rewarding. It gives you a chance to craft something uniquely yours while sparking your creativity. Your little one will love the colorful, moving art hanging above their crib. Ready to hang your own cheerful butterfly masterpiece? Just craft, decorate, and enjoy the magic!
4. Butterfly-Themed Wall Stencil Art for a Subtle Touch
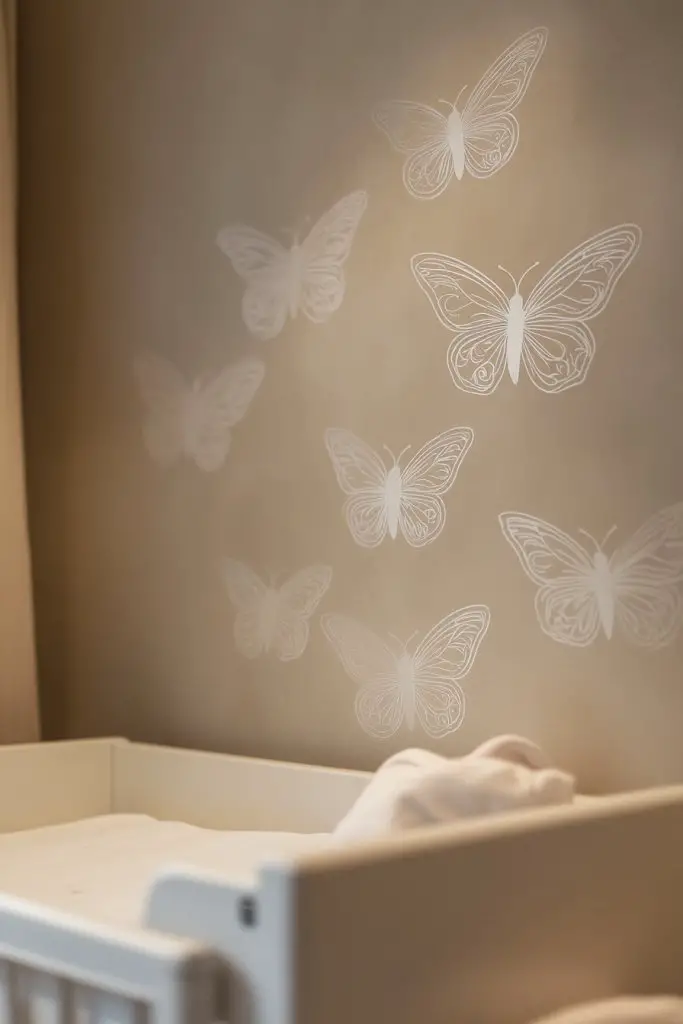
Looking to add a touch of elegance and subtlety to your nursery wall without overwhelming the space? Butterfly-themed wall stencils are perfect for creating delicate, artistic accents. They offer a refined way to incorporate whimsy without cluttering the room. Plus, stenciling is a satisfying DIY project anyone can try.
Recommended Products to replicate this idea
| # | Preview | Product | |
|---|---|---|---|
| 1 |

|
Cutting Edge Stencils - Stencil Essential Kit - Dense Foam Roller, White Bristle Brush, and Clip-On... | Check Latest Price |
| # | Preview | Product | |
|---|---|---|---|
| 1 |
|
OPSEAM Butterfly Wall Decor 24/48 PCS, 3D Butterflies Stickers for Party Decorations with... | Check Latest Price |
Envision soft, intricate butterfly patterns painted in gentle shades of blush, lavender, or mint along the top border of the wall. The stencils allow you to create detailed designs with a consistent look, resembling hand-painted art. The patterns can be repeated or varied to craft a seamless border or central motif. The soft colors blend seamlessly into the background, adding sophistication.
Opt for subtle metallic or matte finishes to match your decor style. Use different stencil sizes for contrast—larger butterflies with smaller ones around them. For a more modern look, incorporate geometric or abstract butterfly shapes. Seasonal variations can include adding gold accents or metallic paints for a luxe effect. These stencils suit both minimalist and traditional nurseries.
Begin by choosing a high-quality, reusable stencil with detailed butterfly designs. Use painter’s tape to secure the stencil to the wall in your desired pattern. Apply non-toxic, low-VOC paint with a stencil brush or sponge, dabbing gently to avoid bleeding. Carefully lift the stencil and reposition for pattern continuity. Clean your tools immediately for reuse. Keep a steady hand for crisp, clean lines.
Add your child’s initials or a short inspiring quote within the pattern for a personal touch. Mix metallic paints with matte to create contrast and dimension. Layer additional textures like polka dots or stripes to complement the butterfly pattern. You can also combine stenciled butterflies with decals or wall stickers for a layered look. Personal touches make the design unique and special.
Stencil art offers a sophisticated way to introduce subtle beauty into your nursery. It’s an achievable project that results in a polished, artistic finish. Your space will feel both peaceful and inspiring, perfect for nurturing little dreams. Ready to transform your wall into a work of art? Grab your stencil and start creating!
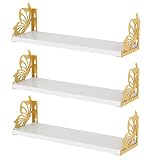
5. Butterfly-Shaped Wall Shelves for Practical Decor
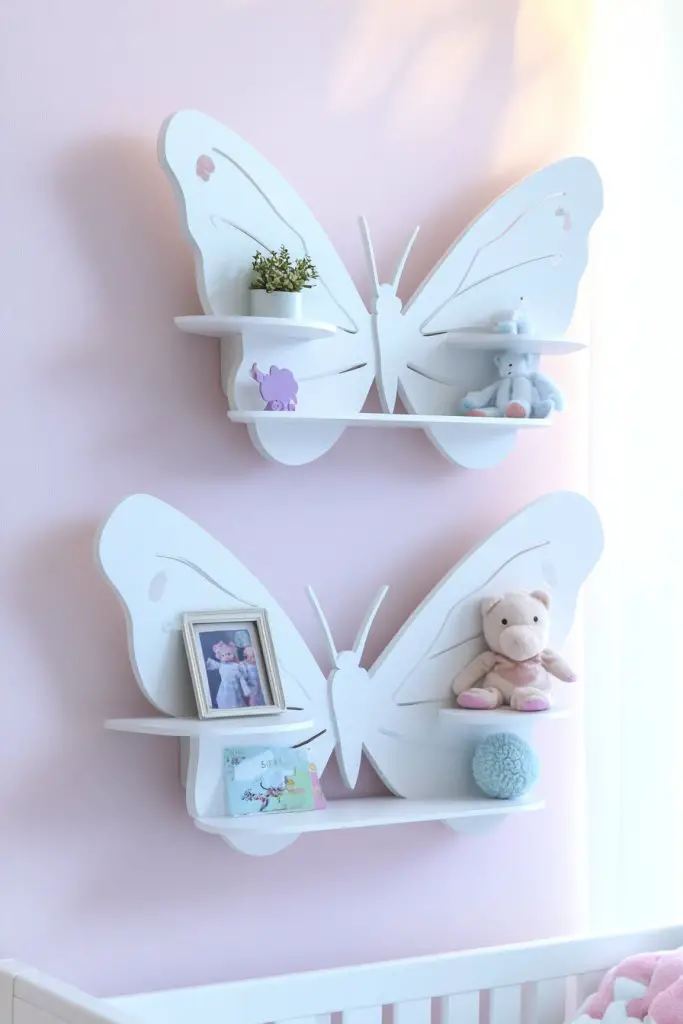
Ever struggle to find stylish storage that doesn’t clutter up your nursery? Butterfly-shaped wall shelves combine function with fun, giving you a unique way to display essentials without sacrificing style. They keep toys, books, or plushies accessible and organized. Plus, they add a whimsical touch that kids and adults alike will love.
Recommended Products to replicate this idea
| # | Preview | Product | |
|---|---|---|---|
| 1 |
|
Hoikwo 3 Pack Butterfly Wall Shelves, White Gold Floating Book Shelves, for Mother, Mom, Women,... | Check Latest Price |
| # | Preview | Product | |
|---|---|---|---|
| 1 |

|
Ougourim Furniture Anchors (10 Packs) Anti Tip Furniture Anchors for Baby Proofing, Furniture Wall... | Check Latest Price |
Imagine small, painted wooden shelves shaped like delicate butterfly wings mounted on the wall. The shelves hold tiny baskets, books, or decorative items, creating a charming tableau. The wings’ gentle curves mimic real butterfly wings, bringing an element of nature indoors. The colors can match your palette—soft pastels or bold hues—adding personality to the space.
Use different sizes and orientations to create a dynamic display. For minimalist decor, keep the shelves sleek and monochrome. For a more playful vibe, paint them in bright, contrasting colors or patterns. They can be grouped in clusters or aligned vertically for visual impact. Seasonal decor can be swapped out easily on the shelves for variety.
Start by selecting sturdy, lightweight wood or MDF cut into butterfly wing shapes. Sand edges for a smooth finish, then paint or decorate as desired. Mount each shelf securely using appropriate wall anchors and screws, ensuring they can support lightweight items. Arrange the shelves in a pattern that complements your nursery layout, leaving enough space for easy access. Decorate with small toys or books for a lived-in look.
Customize shelves with your child’s name painted on the wings or add decorative motifs. Use removable adhesive hooks or brackets for easy reconfiguration. Incorporate themed accessories, like fairy lights or mini figurines, to enhance the display. Changing decor on the shelves can keep the nursery fresh and engaging as your child grows.
Butterfly-shaped wall shelves are a clever way to marry practicality with whimsy. They add visual interest and keep clutter at bay, making your space more functional. This DIY-friendly idea offers endless customization options, so you can make it truly your own. Ready to soar into stylish storage? Let’s get mounting!
6. Butterfly Patterned Area Rug for a Cozy Foundation
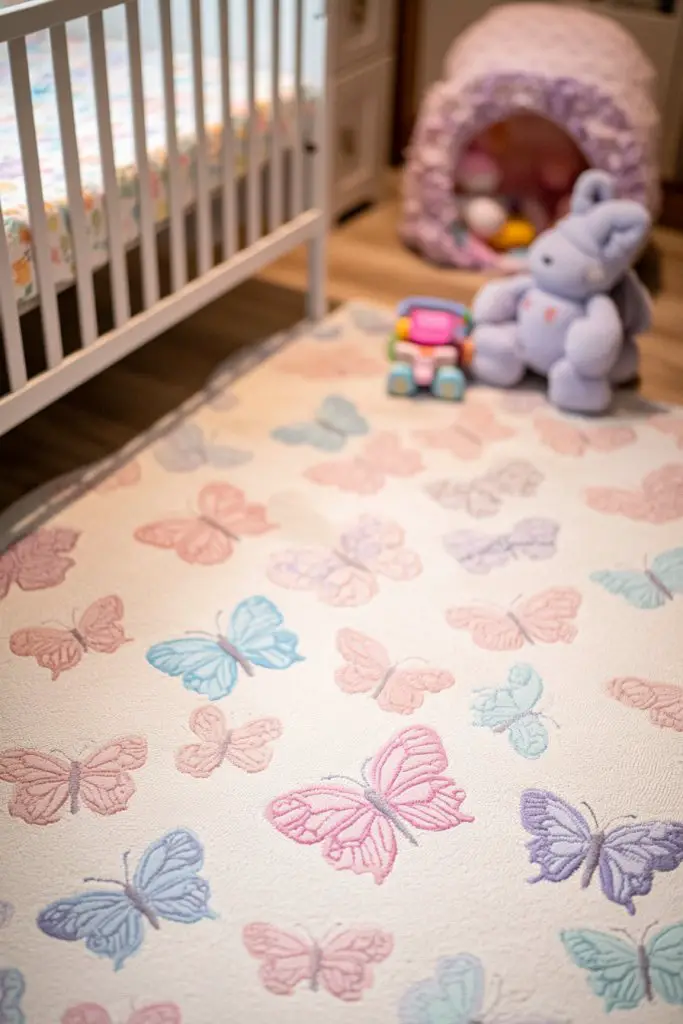
Looking to add warmth and personality to your nursery’s floor without overwhelming the space? A butterfly patterned area rug can do just that. It provides a soft surface for play and crawling while tying the decor together. Plus, it’s an easy way to introduce color and pattern without permanent changes.
Recommended Products to replicate this idea
| # | Preview | Product | |
|---|---|---|---|
| 1 |

|
Ophanie Area Rugs for Living Room Bedroom, Upgrade Non-Slip Fluffy Soft Grey Shag Carpet, Indoor... | Check Latest Price |
| # | Preview | Product | |
|---|---|---|---|
| 1 |

|
OLANLY Area Rugs for Living Room Bedroom, Machine Washable 4x5.9 ft Soft Fluffy Shaggy Bedside Rug,... | Check Latest Price |
Imagine a plush, pastel-colored rug featuring scattered butterfly motifs in contrasting shades. The soft fibers invite barefoot exploration, and the patterns add visual interest under the crib or rocking chair. The butterflies appear to dance across the floor, creating a lively yet soothing scene. The rug’s texture adds depth and comfort to the room.
Choose from a variety of styles, from subtle prints to bold, graphic patterns. Opt for natural fibers like wool or cotton for durability and easy cleaning. For a more playful look, select rugs with large, cartoonish butterflies; for a sophisticated touch, go for delicate, watercolor-style prints. Seasonal or thematic variations can be layered with additional textiles or accessories.
Start by measuring your room to select an appropriately sized rug. Look for non-slip backing or add a rug pad to prevent sliding. Choose a material that’s easy to clean and hypoallergenic. Lay the rug flat and position it under furniture or in open areas to define the space. Regular vacuuming will keep it looking fresh, and spot cleaning handles spills easily.
Add personalized touches by sewing or printing your child’s name onto the rug in a corner. Use complementary textiles like plush blankets or cushions to enhance the theme. Consider layering with smaller rugs for added texture and interest. Seasonal accents like fairy lights or themed plush toys can further personalize the space.
A patterned area rug anchors your nursery’s design and creates a cozy, inviting environment. It’s practical and stylish, making your space feel complete. Plus, it’s a versatile piece that can grow with your child’s changing interests. Ready to step into a warmer, more whimsical nursery? Just pick and roll!
7. Butterfly-Themed Storage Baskets for Organization
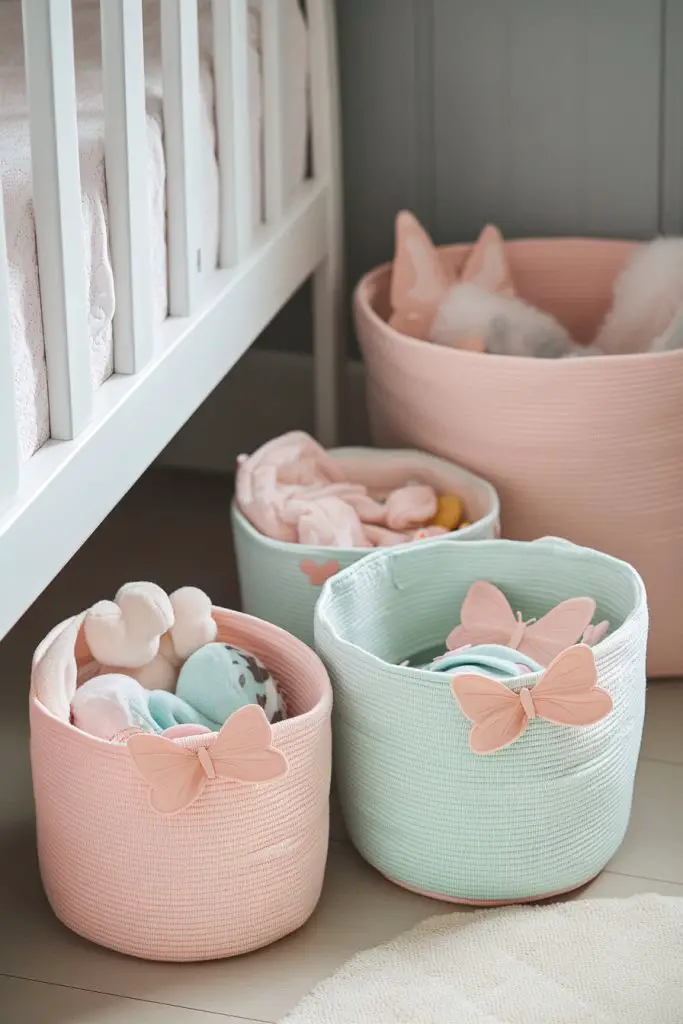
Clutter can quickly turn a cute nursery into chaos. But storage doesn’t have to be boring or look out of place. Butterfly-themed storage baskets combine practicality with charm, helping you stay organized while adding a whimsical touch. They’re perfect for toys, diapers, or clothes.
Recommended Products to replicate this idea
| # | Preview | Product | |
|---|---|---|---|
| 1 |

|
Maxuni 3-Pack Small Storage Baskets for Organizing | Woven Shelf Toy Basket | Rope Baskets for Gifts... | Check Latest Price |
| # | Preview | Product | |
|---|---|---|---|
| 1 |

|
Essme Rectangular Butterfly Baskets,Kids Storage Basket with Handles for Girls Room Decor, Girls... | Check Latest Price |
Visualize soft fabric baskets adorned with butterfly prints or appliqués nestled on shelves or in corners. The baskets come in bright colors or pastel shades, coordinating with your decor. Their rounded, wing-like shapes mimic real butterflies, adding a light, airy feel. When filled with essentials, they keep everything tidy and within reach.
Select baskets with different sizes and patterns to create visual interest. Use woven or plush fabrics for texture, or choose waterproof options for easy cleaning. Incorporate decorative ribbons or tags for personalization. Mix and match with other storage solutions like bins or boxes to fit your space and style.
Start by assessing storage needs and measuring available space. Choose baskets with sturdy handles for portability. Decorate plain baskets with fabric paint, patches, or appliqués if you want a custom look. Position the baskets on shelves, under changing tables, or in cubbies for easy access. Regularly declutter and reorganize to keep the space functional.
Personalize baskets with your child’s name or favorite colors. Use themed embellishments like tiny wings or antennae for a playful effect. Incorporate removable labels for different categories—clothes, toys, books. You can also add decorative trims or charms for extra flair. It’s a simple way to make organization fun.
Stylish storage baskets make tidying up feel less like a chore and more like decorating. They help keep your nursery neat while reinforcing your personal style. Plus, they’re easy to swap out or update as your child grows. Ready to organize with a touch of whimsy? Just fill, label, and enjoy!
8. Painted Butterfly Frame Borders for a Framed Accent
Want a subtle yet sophisticated way to add visual interest around your nursery walls? Painted butterfly frame borders offer a refined accent that enhances your decor without overwhelming it. They create a gentle framing effect, drawing the eye upward and adding elegance. It’s a simple upgrade that makes a big impact.
Recommended Products to replicate this idea
| # | Preview | Product | |
|---|---|---|---|
| 1 |

|
Mirabuy Big Plant Grass Wall Corner Stickers Flowers with Butterflies Base Board Skirting Line Wall... | Check Latest Price |
| # | Preview | Product | |
|---|---|---|---|
| 1 |

|
Making Murals: A practical handbook for wall painting and mural art to enhance your home | Check Latest Price |
Envision a delicate border of painted butterflies encircling the top of the walls, just below the ceiling. The butterflies are painted in soft, muted tones with fine details, mimicking hand-painted art. The border adds a touch of charm and sophistication, complementing other decorative elements. As light hits the wall, the painted patterns subtly shimmer.
Choose from watercolor-style, metallic, or matte paints depending on your theme. Keep the butterflies small and evenly spaced for a minimalist look or larger and more clustered for a bold statement. Seasonal adaptations might include adding glitter or gold accents for holiday themes. The border can be painted directly or applied as a wallpaper strip for easier installation.
Begin by measuring the wall perimeter to determine the border length. Use painter’s tape and a level to mark the placement line accurately. Sketch out the butterfly designs lightly with a pencil, then fill in with your chosen paints. Use fine brushes for detailed wings, and work in natural light. Remove tape carefully after the paint dries for clean edges. Consider sealing the design with a clear matte or gloss finish.
Add personalized initials or a meaningful quote within the border for a unique touch. Incorporate metallic or iridescent paints to catch light and add dimension. Pair the border with matching wall decals or stencils for a layered look. You can also change the border seasonally or for special occasions by repainting or adding new accents. It’s a timeless way to elevate your nursery’s decor.
Painted borders are a classic, elegant way to finish your nursery walls. They’re customizable and can be as simple or intricate as you like. Your space will feel more polished and thoughtfully designed. Ready to craft your own delicate frame? Just sketch, paint, and enjoy the result.
9. Butterfly Plush Toys as Soft Decor
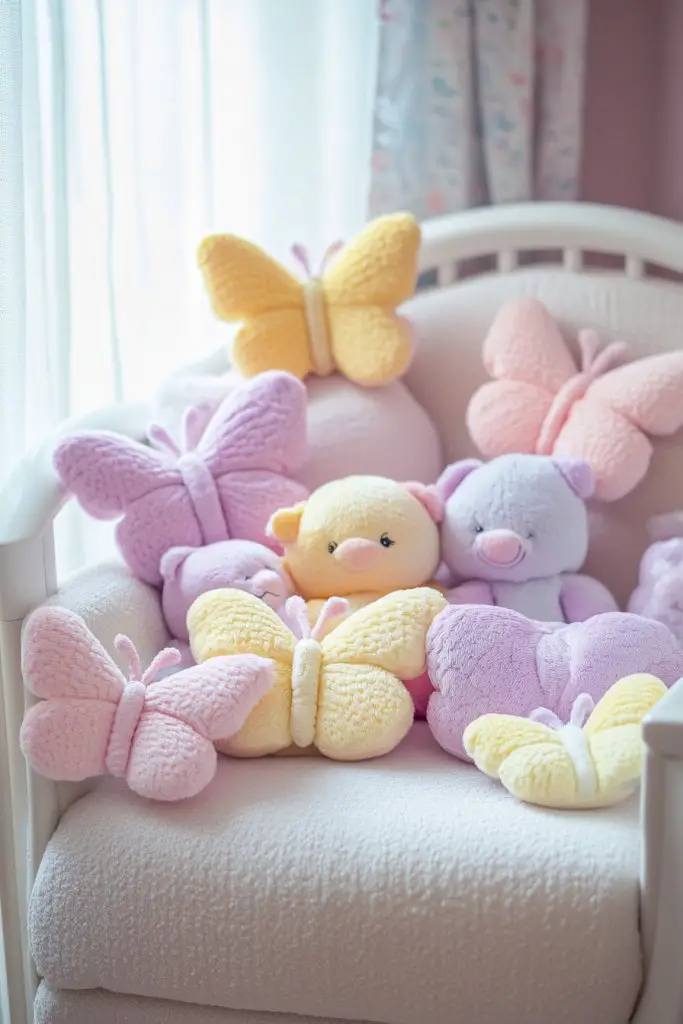
Looking to make your nursery feel cozy and inviting without adding clutter? Butterfly plush toys are the perfect soft decor that doubles as comfort objects. They bring a playful yet calming vibe that’s great for snuggling and decorating at the same time. Who says plushies can’t be stylish?
Recommended Products to replicate this idea
| # | Preview | Product | |
|---|---|---|---|
| 1 |

|
Fun-Plus Pink Dream Catcher Wall Hanging Set - 10 Butterflies & 16 Stars, Boho Room Decor for Girls,... | Check Latest Price |
| # | Preview | Product | |
|---|---|---|---|
| 1 |

|
Butterfly Crib Mobile Butterfly Mobile for Crib Baby Mobile for Girls Nursery Décor | Check Latest Price |
Picture a shelf or crib corner decorated with plush butterflies in various sizes and colors. Their soft, fuzzy textures invite little hands to touch and hold. The plush butterflies seem to flutter softly, adding a sense of movement and life. The gentle hues blend seamlessly into the nursery’s color palette, creating a warm, inviting atmosphere.
Mix different textures like velour, chenille, or fleece for variety. Use shades that match or contrast with your overall theme—pastels for calmness or bright colors for energy. Arrange them on shelves, in baskets, or tucked into cribs for a cozy touch. You can also create a focal point by clustering several plush toys in a corner.
Select plush butterflies that are safe and machine washable for ease of cleaning. Place them on floating shelves, in decorative baskets, or around the crib. Secure larger plushies with hooks or clips if needed, but most can simply sit or be gently nestled in place. Rotate plush toys seasonally or as your child’s interests evolve. Keep safety in mind by avoiding small parts and loose stitching.
Customize plush butterflies with embroidered initials or patches. Incorporate themed plushies that reflect your child’s favorite animals or characters. Use coordinating fabrics or patterns on the plushies to enhance the nursery’s style. Display a few in the crib for comfort or scatter them across shelves for visual interest. They’re a tactile, cuddly way to reinforce your decor.
Soft plush toys are timeless nursery staples that add warmth and personality. They’re easy to integrate and update as your child grows. Plus, they serve as comforting companions that can help with sleep and play. Ready to add some fluffy charm? Just pick your favorites and arrange!
10. Butterfly-Shaped Wall Hooks for Hanging Items
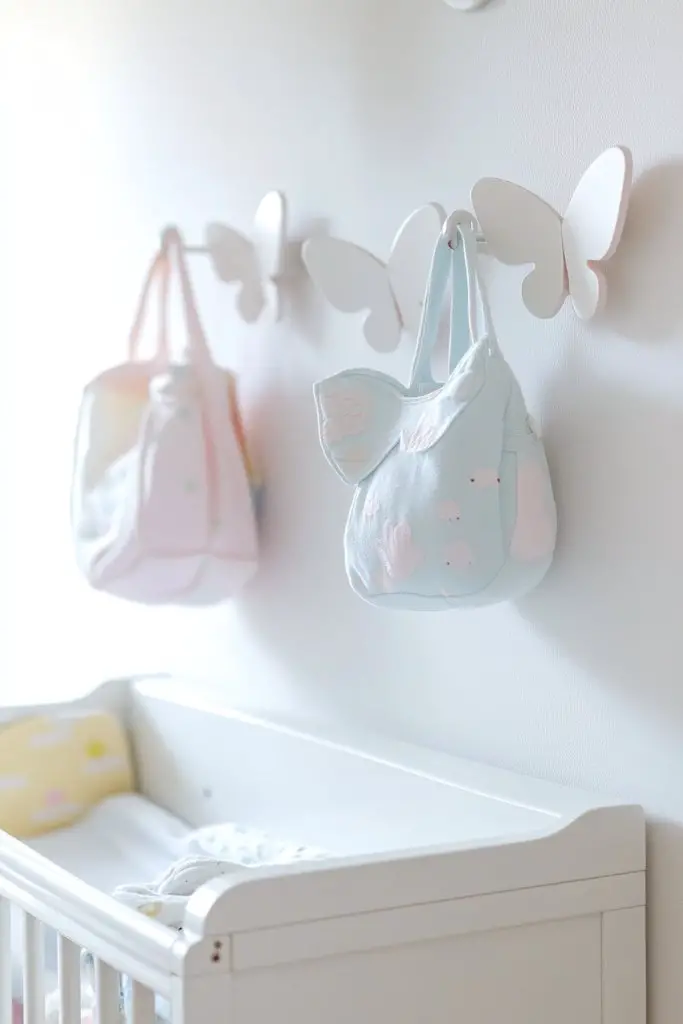
Cluttered nursery floors and changing tables can be a headache. Butterfly-shaped wall hooks offer a charming yet practical solution for hanging clothes, bags, or accessories. They help keep essentials within reach while adding a playful decorative element. Who knew organization could look this adorable?
Recommended Products to replicate this idea
| # | Preview | Product | |
|---|---|---|---|
| 1 |

|
Indian Shelf Decorative Brass Butterfly Cute Kids Wall Hooks Heavy Duty Coat Rack Wall Mount Vintage... | Check Latest Price |
| # | Preview | Product | |
|---|---|---|---|
| 1 |

|
KURUI Drywall Anchors and Screws Assortment Kit 270PCS, 135 Plastic Dry Wall Expansion Anchors and... | Check Latest Price |
Visualize metallic or painted wood butterfly hooks mounted at various heights on the wall. The wings serve as hooks, holding tiny jackets, hats, or diaper bags. The hooks’ delicate shapes mimic real butterflies, adding a light, whimsical touch. When used creatively, they turn everyday hanging into a decorative feature.
Choose hooks in different colors or finishes—matte, glossy, or metallic—to match your nursery’s theme. Mix sizes for visual interest or unify with a consistent color scheme. For a more natural look, opt for wood or bamboo. These hooks are versatile, fitting both modern and rustic styles.
Select sturdy hooks designed for wall mounting, and measure spacing carefully before installation. Use appropriate anchors for drywall or plaster walls to ensure safety. Attach the hooks with screws or adhesive strips, depending on weight requirements. Arrange them in a pattern that complements your furniture layout. Test each hook’s strength before hanging heavier items.
Personalize hooks by painting them in matching colors or adding decorative motifs like tiny wings or antennae. Use monogrammed tags or charms for a custom look. Group several hooks in a cluster for a statement wall or spread them out for functional zones. They can also serve as display points for small decorative items.
Butterfly-shaped hooks are a simple, charming upgrade that keeps your nursery tidy. They add personality without sacrificing function. Crafting or choosing the right hooks can be a fun DIY project that elevates your decor. Ready to hang your way to a more organized space? Just install, hang, and enjoy!
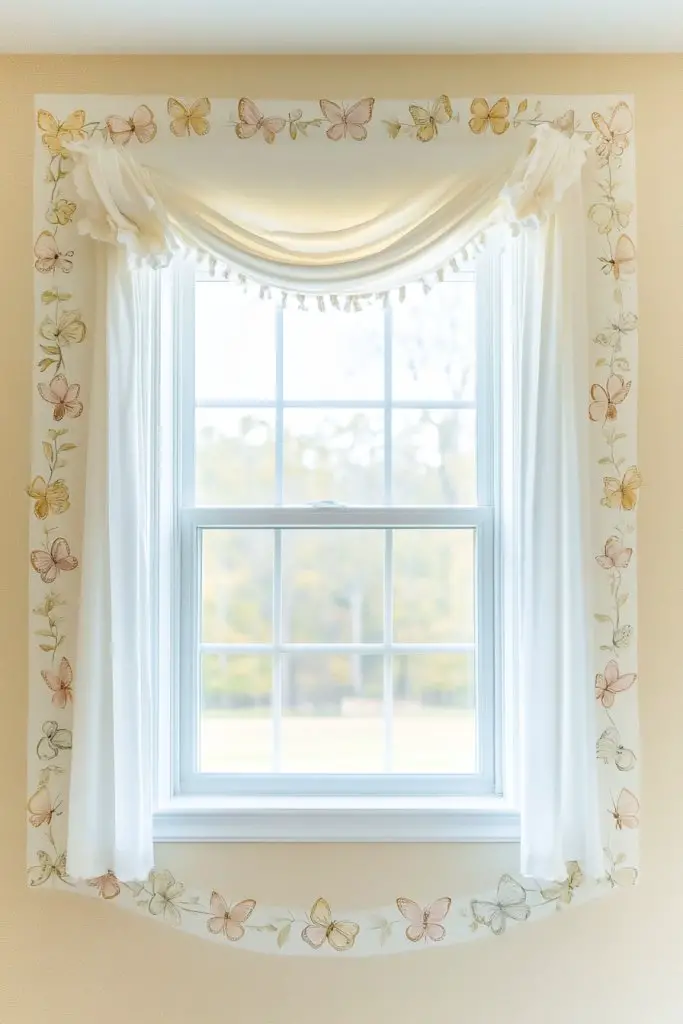
11. Butterfly Window Clings for Easy Seasonal Updates
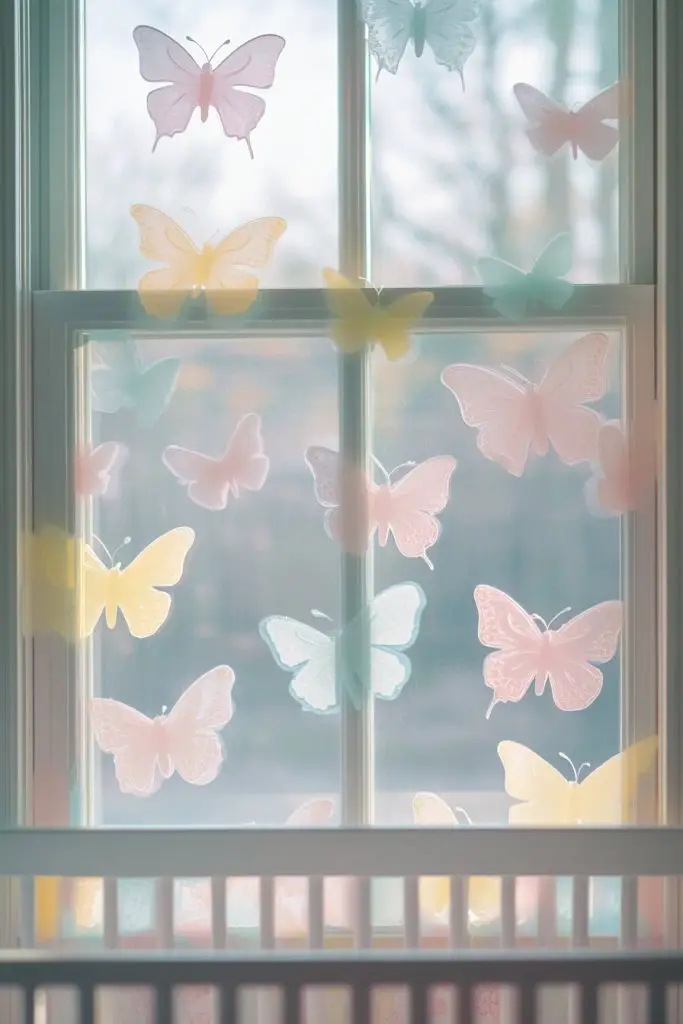
Want to keep your nursery decor fresh and seasonal without repainting or remodeling? Butterfly window clings are a quick and mess-free way to add whimsy to your windows. They’re perfect for changing themes throughout the year and creating a magical view for your little one. Plus, they’re super easy to apply and remove.
Recommended Products to replicate this idea
| # | Preview | Product | |
|---|---|---|---|
| 1 |

|
Iconikal 100-Count Static Cling Vinyl Window Decorations, Butterflies (5 Sheets of 20) | Check Latest Price |
| # | Preview | Product | |
|---|---|---|---|
| 1 |
|
rabbitgoo Window Privacy Film Rainbow Film Decorative Window Sticker, 3D Static Stained Glass Cling... | Check Latest Price |
Imagine translucent, colorful butterfly decals attached to your nursery windows, fluttering gently as sunlight filters through. The clings come in various sizes and designs, from tiny fluttering butterflies to larger, detailed ones. They shimmer and dance with the light, transforming ordinary windows into enchanting scenes. The effect is both calming and captivating.
Opt for clear or frosted decals for a subtle look or bright colors for a bold statement. Layer different sizes and shapes to create depth. Seasonal themes can include flowers, rainbows, or stars to complement the butterflies. They work well on glass doors, bay windows, or small panes, making your space versatile.
Clean the window surface thoroughly before application. Peel the decals carefully and press them onto the glass, smoothing out air bubbles with a credit card or squeegee. To reposition, gently peel and reapply as needed. They’re designed to be removable without residue, so you can switch themes easily. Store unused decals flat for future use.
Create custom designs by combining decals with your own drawings or initials. Use complementary colors to match your nursery’s palette. Seasonal updates can be achieved by adding new decals or layering different themes. For an extra touch, add fairy lights or soft fabric behind the window for a cozy glow.
Window clings are a simple, affordable way to keep your nursery decor lively and adaptable. They allow you to experiment with themes without permanent changes. Your child will love the changing scenes, making every season special. Ready to flutter into decorating? Just peel, stick, and enjoy!
12. DIY Butterfly Art Canvas for a Personal Touch
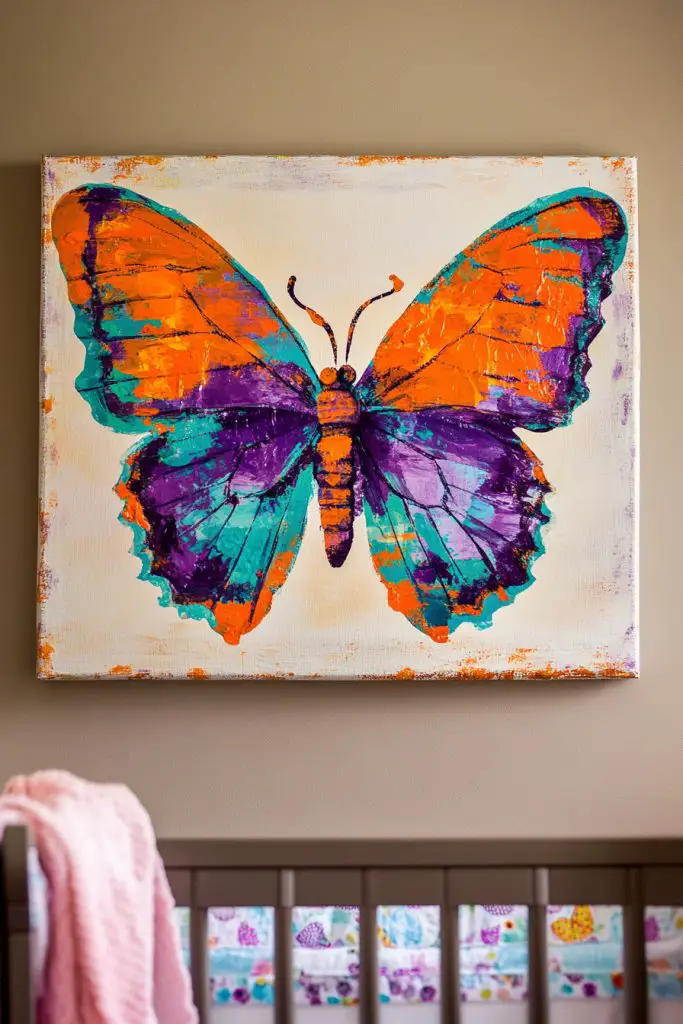
Searching for a meaningful piece of nursery art that’s both personal and stylish? A DIY butterfly art canvas offers a wonderful opportunity to showcase your creativity while creating a unique focal point. It’s a project that feels special because you made it yourself. Plus, it adds a heartfelt touch to your little one’s space.
Recommended Products to replicate this idea
| # | Preview | Product | |
|---|---|---|---|
| 1 |

|
Chalkola Acrylic Paint Set for Adults & Kids - 56 Pcs Canvas Painting Kit with 32 Paints (22ml), 10... | Check Latest Price |
| # | Preview | Product | |
|---|---|---|---|
| 1 |
|
Abtgt 8x10 Canvas Floating Frame with 0.9" Deep, Black Floater Frame for Canvas Paintings with... | Check Latest Price |
Picture a bright canvas featuring bold, painted butterflies in a freeform composition. The artwork can include your child’s favorite colors or patterns, making it truly personalized. The textured brushstrokes and vibrant hues create a lively visual that sparks curiosity. Hanging it at eye level, it becomes an instant conversation starter.
Use acrylics, watercolors, or mixed media depending on your skill level and style. Incorporate glitter or metallic paints for extra shimmer. For a modern look, opt for abstract or geometric butterfly shapes. Seasonal or themed canvases can add variety, and you can rotate them over time. Frame or stretch the canvas for a polished appearance.
Start by selecting a blank canvas and sketching your design lightly with a pencil. Use bright, non-toxic paints to fill in the butterflies, experimenting with different techniques for texture and depth. Allow the paint to dry thoroughly before adding details or accents. Attach a hanging wire or D-rings for easy display. Hang the finished piece at eye level for maximum impact.
Add your child’s name or a special quote within or around the artwork. Customize the color palette to match other nursery elements. Incorporate personal mementos like small fabric scraps or photos into the canvas for a mixed-media piece. Change or update the artwork as your child’s interests evolve.
Creating your own canvas art is a rewarding way to infuse personality into your nursery. It’s a project that can be as simple or elaborate as you wish, giving you confidence in your artistic abilities. Your child will cherish the personal touch for years to come. Ready to paint your own masterpiece? Just gather supplies and start creating!
13. Butterfly-themed Night Light for Gentle Illumination
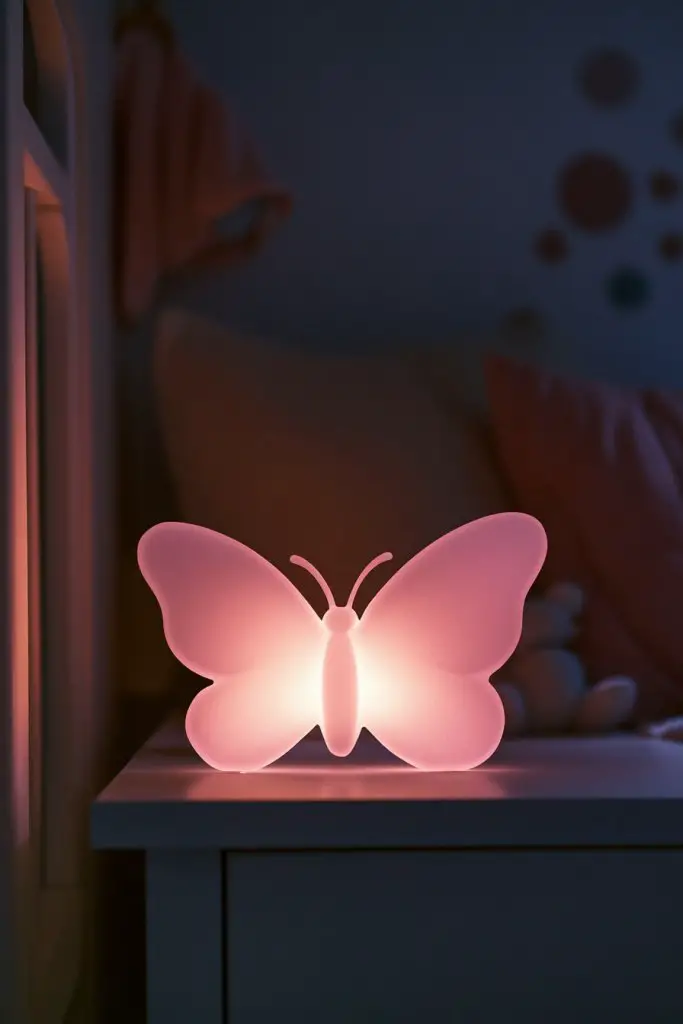
Nighttime nursery lighting can be tricky—bright lights disturb sleep or create harsh shadows. A butterfly-themed night light offers a soft, calming glow, perfect for soothing your baby into dreamland. It adds a whimsical touch to the room that’s both functional and decorative. Who says night lights have to be boring?
Recommended Products to replicate this idea
| # | Preview | Product | |
|---|---|---|---|
| 1 |
|
Star Projector Galaxy Night Light - Astronaut Space Projector, Starry Nebula Ceiling LED Lamp with... | Check Latest Price |
| # | Preview | Product | |
|---|---|---|---|
| 1 |

|
L LOHAS LED Kids Night Light, 8 RGB Color Changing Butterfly Night Lights with Dusk to Dawn Sensor,... | Check Latest Price |
Imagine a gentle glow emanating from a butterfly-shaped lamp or projection device, casting delicate patterns on the ceiling. The light is warm and muted, creating a cozy atmosphere that invites relaxation. Some night lights project animated butterflies that flutter across the ceiling, captivating your child and easing fears of the dark. The design blends seamlessly into your nursery decor.
Choose between soft silicone lamps, fabric-covered lights, or acrylic models in various colors. For a modern look, select sleek, minimalist designs; for a whimsical vibe, opt for handcrafted or plush versions. Some night lights feature adjustable brightness or color-changing options. Incorporate themes matching your overall nursery palette for cohesive decor.
Select a night light rated for nursery use, ensuring it’s safe, cool to touch, and compliant with safety standards. Place it on a dresser, shelf, or attach it to the wall with a secure mount. Use timers or dimmer settings to control brightness throughout the night. Keep cords out of reach to prevent hazards. Test the light’s effect at different times to find the perfect setting.
Add decorative elements like fabric wraps or painted details to customize the night light’s appearance. Incorporate your child’s favorite colors or characters for a personal touch. Layer the light with other soft lighting elements, like string lights or glow-in-the-dark stars, for a layered effect. It’s a simple upgrade that makes bedtime more enchanting.
A themed night light transforms your nursery into a peaceful retreat, encouraging restful sleep. It’s a practical yet adorable addition that grows with your child. Creating a cozy, magical environment is easier than ever. Ready to light up your nursery? Just choose, set, and relax!
14. Butterfly Patterned Bedding for a Cohesive Look
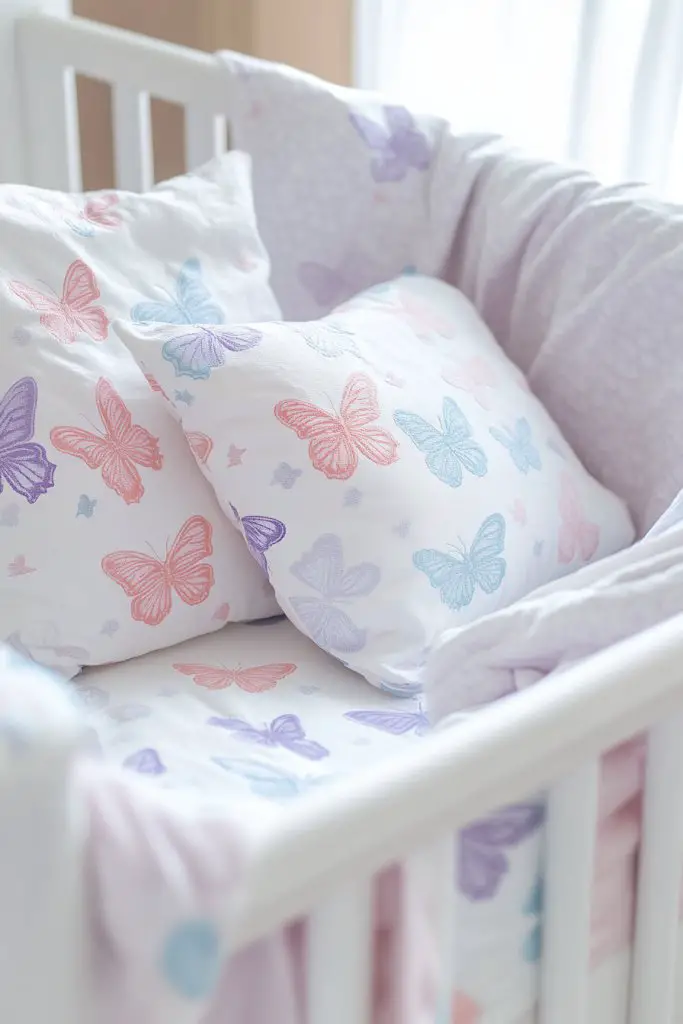
Want your nursery to feel like a harmonious retreat rather than a jumble of mismatched pieces? Butterfly patterned bedding is the perfect way to unify your decor theme effortlessly. It adds color, pattern, and a touch of whimsy to the essentials. Plus, it’s an easy update that can refresh the look anytime.
Recommended Products to replicate this idea
| # | Preview | Product | |
|---|---|---|---|
| 1 |

|
Yoofoss Baby Crib Sheets for Boys Girls, Fitted Crib Sheet 2 Pack for Standard Crib and Toddler... | Check Latest Price |
| # | Preview | Product | |
|---|---|---|---|
| 1 |

|
Amazon Basics Standard Pillow Cases Set of 2 - Lightweight, Super Soft Easy Care Microfiber, Bright... | Check Latest Price |
Imagine a soft crib sheet and pillowcases decorated with delicate butterfly motifs in coordinating colors. The patterns are playful yet subtle, adding visual interest without overwhelming the space. The bedding’s gentle hues and charming designs create a serene environment that’s perfect for naptime. When layered with textured blankets, it enhances the room’s cozy vibe.
Choose from various fabrics like organic cotton, jersey, or muslin for comfort and durability. Mix patterns—polka dots, stripes, or florals—with butterfly prints for a layered look. Seasonal updates can include quilted covers or plush throws in matching themes. Coordinate with curtains, rugs, or wall decals for a cohesive aesthetic.
Select high-quality, machine-washable bedding in sizes suitable for cribs or toddler beds. Layer different textures and patterns, ensuring softness and safety. Use fitted sheets that stay snug on the mattress, and add lightweight blankets or comforters for colder months. Wash regularly to maintain freshness. Replace or rotate bedding to keep the room feeling new.
Add embroidered initials, patches, or decorative trims to make the bedding unique. Incorporate your child’s favorite colors or motifs to reinforce their personality. Consider layering with a personalized quilt or custom pillow. You can also change themes seasonally by swapping out duvet covers or pillowcases.
Coordinated bedding ties the nursery decor together, creating a calm, inviting space. It’s functional and easy to refresh, helping you feel confident in your design choices. Your baby will associate comfort with style, making each nap and sleep a peaceful experience. Ready to dress your nursery in harmony? Just pick, layer, and relax!
15. Butterfly Wall Hangings with Textured Fabrics
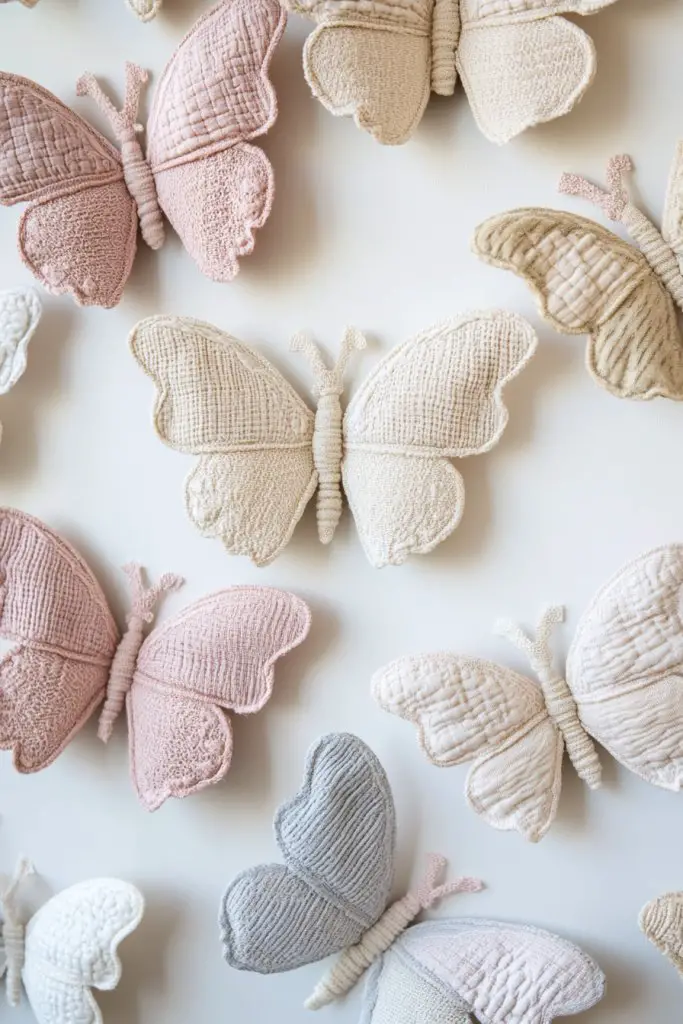
Looking to add dimension and tactile interest to your nursery walls? Butterfly wall hangings crafted from textured fabrics are a stylish way to do so. They create a layered, inviting look that’s both playful and sophisticated. Plus, they’re a simple DIY project that adds personality.
Recommended Products to replicate this idea
| # | Preview | Product | |
|---|---|---|---|
| 1 |

|
NORTHWEST Bluey Hooray Heelers Wall Hanging – Official Bluey Fabric Tapestry for Nursery, Playroom... | Check Latest Price |
| # | Preview | Product | |
|---|---|---|---|
| 1 |

|
Achart Macrame Wall Hanging Large- Boho Wall Decor- large wall art- Wall Decor Living Room- Macrame... | Check Latest Price |
Picture a series of fabric butterflies in various textures—knitted, embroidered, or felted—mounted in a cascading arrangement. The different materials catch light and invite touch, adding depth to the wall. The butterflies flutter in a dynamic pattern, bringing movement and life to the room. The variety of textures makes the space more engaging.
Use a mix of neutral and colorful fabrics to match your decor style. Opt for plush, silky, or rough textures depending on the desired effect. Arrange the butterflies in clusters or along a wall shelf for a more organic feel. Seasonal or thematic variations can include adding metallic or shiny fabrics for extra flair. They work well in modern, boho, or eclectic nurseries.
Create or purchase fabric butterflies in different textures and sizes. Attach them to lightweight backings with fabric glue or embroidery stitches. Mount them on the wall using picture-hanging strips or small nails, spacing them to create a flowing pattern. For a more permanent installation, sew or glue the fabric butterflies onto a fabric panel or canvas frame. Adjust placement until the desired visual effect is achieved.
Personalize with embroidered initials, favorite patterns, or themed motifs. Incorporate reflective or shiny fabrics for added dimension. Use trims like lace, fringe, or ribbons to embellish the edges. Change arrangements seasonally or as your child’s tastes evolve, keeping the decor fresh. Combining textures creates a tactile experience that’s both decorative and fun.
Textured fabric wall hangings are a creative way to add depth and personality. They’re a tactile delight and a conversation starter. Making your own allows you to tailor the design exactly to your style. Your nursery will feel layered, cozy, and uniquely yours. Ready to craft textured magic? Just sew, mount, and admire!
16. Butterfly-Themed Growth Chart for Practical Decor
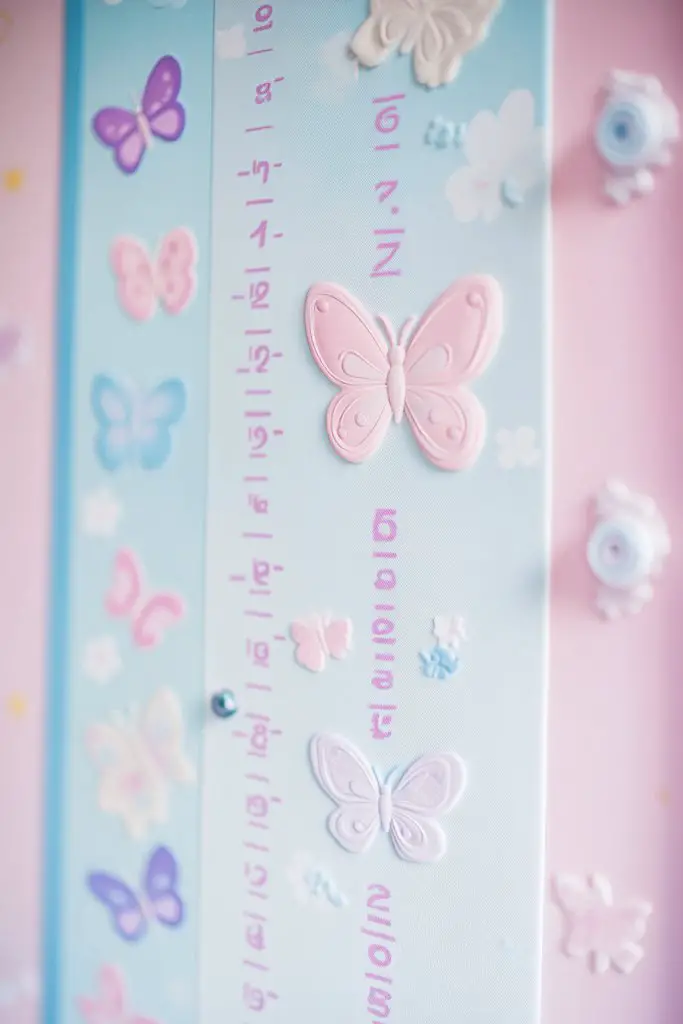
Want a fun way to track your child’s growth while adding a decorative element? A butterfly-themed growth chart combines practicality with whimsy. It’s an adorable keepsake that encourages milestones and adds personality to your nursery. Plus, it’s easy to make or customize.
Recommended Products to replicate this idea
| # | Preview | Product | |
|---|---|---|---|
| 1 |
|
Mibote Baby Growth Height Chart Handing Ruler Wall Decor for Kids, Canvas Removable Height Growth... | Check Latest Price |
| # | Preview | Product | |
|---|---|---|---|
| 1 |

|
Growth Chart for Wall Wooden Height Chart for Kids Unicorn Castle Height Measurement for Wall Kids... | Check Latest Price |
Imagine a vertical fabric or wooden chart decorated with colorful butterflies and numbers marking height. The design is playful yet functional, with space to record your child’s height at different ages. The butterflies flutter along the chart, creating a lively visual that grows with your child. It transforms a simple measuring tool into a charming piece of decor.
Choose from fabric, painted wood, or vinyl decals depending on your style. Use bright colors or soft pastels to match your nursery theme. Incorporate additional motifs like clouds, stars, or flowers for variety. Seasonal updates can include changing the background or adding new butterflies. Mount the chart in a prominent spot for easy access.
Start by selecting a durable material—canvas, wood, or vinyl—that’s safe and easy to clean. Measure and mark height lines clearly with a pencil or tape. Decorate with paints, decals, or fabric appliqués, ensuring all elements are securely attached. Mount the chart vertically on the wall with hooks or adhesive strips. Encourage your child to measure themselves regularly, making it a fun routine.
Add your child’s name or a motivational quote near the top for a personal touch. Use themed motifs that match other nursery decor. Change the design as your child grows—perhaps add new butterflies or accessories. Incorporate a photo strip or small frame at the bottom for milestone photos. It’s a keepsake that celebrates growth and personality.
A personalized growth chart makes milestone tracking a joyful activity. It’s a practical addition that adds charm and keeps memories alive. Your child will enjoy seeing their progress over time, building confidence and a sense of achievement. Ready to measure up? Just decorate, mount, and watch your little one grow!
17. DIY Butterfly Garden with Fabric or Paper Art

Craving a nature-inspired nursery decor that’s easy to update and maintain? A fabric or paper butterfly garden on your wall or shelf brings the outdoors inside in a charming, manageable way. It’s a delightful project that adds color and life, fostering a love for nature from an early age. Who needs real plants when you have a butterfly garden?
Recommended Products to replicate this idea
| # | Preview | Product | |
|---|---|---|---|
| 1 |

|
SAOROPEB 3D Butterfly Wall Decor - 48 Pcs, 4 Styles, 3 Sizes, Gold Butterfly Decorations for... | Check Latest Price |
| # | Preview | Product | |
|---|---|---|---|
| 1 |

|
shiviody Vintage Floral Canvas Wall Art Decor, Retro Dark Moody Flower Wall Art, Antique Flower... | Check Latest Price |
Visualize a miniature garden crafted from fabric or paper butterflies arranged on a wall or shelf. The butterflies flutter in a layered, textured display, mimicking a real garden’s vibrancy. Using bright fabrics or patterned paper, the scene feels lively and inviting. The garden can include flowers, leaves, and even tiny insects for added detail.
Create a lush, layered look with different sizes and colors. Use textured fabrics like felt, burlap, or silk for a tactile experience. For paper art, incorporate origami or layered cutouts for dimension. Seasonal themes can include autumn leaves or spring blossoms. Incorporate natural elements like twigs or moss for added realism.
Cut out butterfly shapes from fabric or paper, embellishing with paints, markers, or embroidered details. Attach them to a background panel or directly to the wall with removable adhesive strips. Use small hooks or pins for a three-dimensional effect. Layer different sizes and colors to create depth. Change or add new butterflies periodically to refresh the scene.
Personalize by adding your child’s name or favorite motifs around the garden. Incorporate small, decorative accessories like tiny watering cans or garden tools for fun accents. Use themes that match other nursery decor, such as fairy-tale or woodland motifs. Creating a seasonal “garden” display makes it a dynamic feature.
A fabric or paper butterfly garden is a creative, low-maintenance way to bring nature indoors. It adds color, texture, and a touch of magic that stimulates your child’s imagination. Plus, it’s a project you can keep expanding over time. Ready to grow your own indoor sanctuary? Just craft, hang, and enjoy!
18. Personal Butterfly Name Banner for a Customized Touch
Want to create a stunning focal point that celebrates your child’s identity? A personalized butterfly name banner is a cheerful, eye-catching way to showcase your little one’s name. It adds a custom touch that makes the nursery feel truly special. Plus, it’s a fun DIY project for crafty parents.
Recommended Products to replicate this idea
| # | Preview | Product | |
|---|---|---|---|
| 1 |

|
DIY Banner Kit with Letters Glitter Banner Letters Gold Customizable Birthday Banners Graduation... | Check Latest Price |
| # | Preview | Product | |
|---|---|---|---|
| 1 |

|
EZ4ENCE Butterfly Decoration Wall Art Boho Home Decor Hanging Appearance Metal Flower for Bedroom... | Check Latest Price |
Imagine a colorful banner featuring your child’s name spelled out with large, decorative letters surrounded by fabric or paper butterflies. The butterflies flutter along the top or bottom of the banner, adding movement and charm. Bright colors and playful fonts make the banner pop against the wall, becoming a centerpiece. It’s a personalized greeting that greets everyone who enters.
Use different materials like felt, cardstock, or fabric for the letters and butterflies. Incorporate themes or colors matching the nursery decor for cohesion. Add embellishments like glitter, sequins, or tiny pom-poms for extra fun. Vary the banner length depending on space—short for above the crib or long for a feature wall. You can also include elements like stars, hearts, or cloud shapes.
Cut out the letters from your chosen material, decorating them with paints, stickers, or embellishments. Attach fabric or paper butterflies around the letters, securing with glue or sewing. String the banner using twine, ribbon, or yarn, tying knots or bows at each end. Mount the banner securely on the wall with hooks or adhesive strips. Adjust the spacing to ensure it hangs evenly.
Add your child’s nickname or a meaningful quote alongside the name. Use metallic or glitter accents for a festive look. Incorporate matching motifs from other nursery decor to tie the theme together. Change the banner for birthdays or special occasions—this makes it a versatile keepsake. It’s a heartfelt addition that celebrates your child’s personality.
A personalized name banner boosts the nursery’s charm and makes your child’s space feel uniquely theirs. It’s a simple project that yields a big decorative payoff. Your kid will love seeing their name displayed proudly, fostering a sense of belonging. Ready to craft your own banner? Just cut, string, and hang!
Conclusion
From charming wall art and fluttering decals to butterfly-shaped furniture and whimsical textiles, these nursery ideas showcase the endless possibilities for creating a magical space. Feel free to mix and match these concepts to suit your unique style and your baby’s personality. Embrace your creativity and transform your nursery into a whimsical butterfly haven—your little one’s enchanted world awaits!