
17 Candy Vase Ideas for Sweet Displays
Imagine turning everyday vases into eye-catching candy displays that instantly brighten any occasion! Candy vase ideas have gained popularity for their fun, colorful, and creative appeal, making them perfect for parties, weddings, or just adding a sweet touch to your home decor.
In this article, you’ll discover a variety of inventive candy vase ideas that are as easy to make as they are delightful to look at. From rustic charm to glamorous glam, these ideas will inspire you to craft stunning displays that will wow your guests and satisfy your sweet tooth. Get ready to transform simple vases into irresistible treats that showcase your personal style and creativity!
1. Glass Mason Jars Filled with Colorful Candy for Rustic Charm
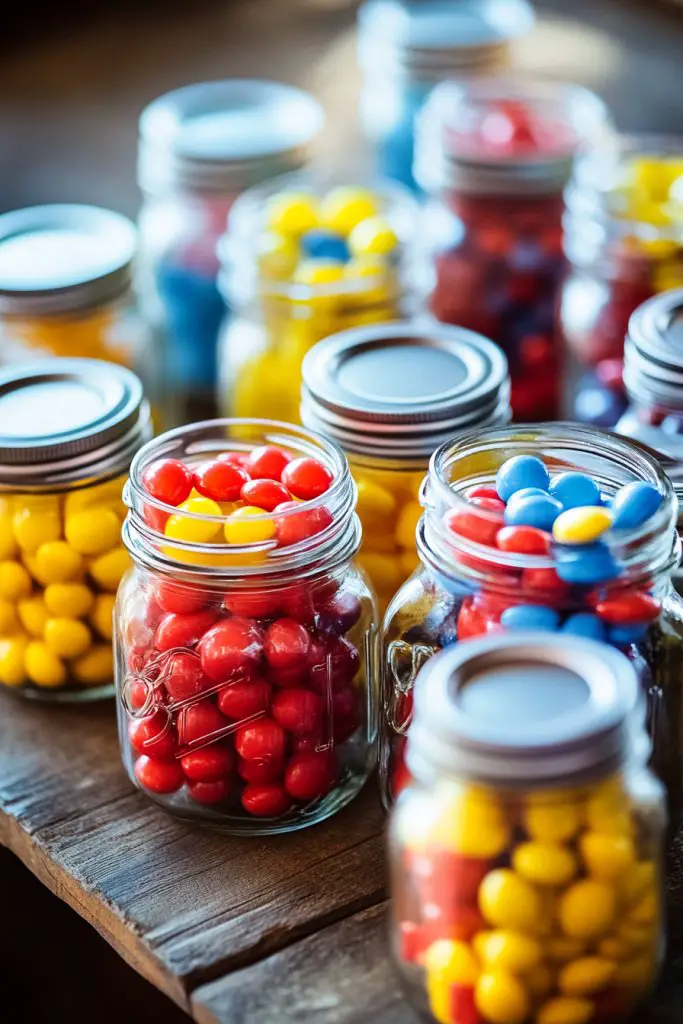
Ever struggled to find a simple way to add a splash of color and personality to your dessert table? Sometimes, all you need is a charming display that combines nostalgia with a touch of whimsy. Mason jars are the perfect blank canvas for this purpose, offering an easy way to showcase vibrant candies without fuss. They bring a cozy, rustic vibe that makes any gathering feel warmer and more inviting.
Recommended Products to replicate this idea
| # | Preview | Product | |
|---|---|---|---|
| 1 |

|
NETANY 6-pack 16 oz Overnight Oats Containers with Lids, Glass jars with Airtight Lids, Wide mouth... | Check Latest Price |
| # | Preview | Product | |
|---|---|---|---|
| 1 |

|
Bulk Candy Variety Pack - 2 lb Candy - CandyBulk Individually Wrapped Candies - Easter Candies -... | Check Latest Price |
Imagine clear glass jars filled to the brim with rainbow-hued gummies, chocolates, and mints. The jars sit on a distressed wooden surface, their metal lids adding a vintage touch. Bright candies spill slightly over the rim, inviting guests to grab a handful. The textured glass catches the light, casting colorful reflections across the table. This setup creates a cheerful, laid-back atmosphere perfect for casual parties or family gatherings.
Switch up the candy colors to match seasonal themes—pastels for spring, deep reds and greens for Christmas, or metallics for New Year’s. Use different jar sizes to add visual interest or cluster several for a more dramatic effect. For outdoor settings, add a burlap or lace ribbon around the jar necks for extra charm. You can also layer candies vertically or mix a variety of treats for a playful look.
Start with clean, transparent mason jars of various sizes. Fill them with your favorite colorful candies—gummy worms, jelly beans, or chocolate buttons work well. Decorate the jars with simple embellishments like twine, fabric, or ribbons for a personalized touch. Arrange them on a table or tray, ensuring easy access for guests. To keep candies fresh, consider covering jars with mesh lids or fitting them with decorative cloths secured with rubber bands. Refill as needed during the event to keep the display lively.
Add small chalkboard tags with fun labels or messages for a customized feel. Incorporate themed elements such as mini pumpkins for fall or tiny ornaments for winter celebrations. Mix candies with textured elements like crushed cookies or edible glitter to elevate the visual appeal. Personal touches like family recipes or special favorite treats can turn a standard display into a memorable centerpiece.
Using mason jars for candy displays is an easy, budget-friendly way to create a cozy, inviting vibe. It’s a classic look that complements rustic, vintage, or country-style decor effortlessly. Whether for a birthday, bridal shower, or casual get-together, this idea adds personality without overcomplicating your setup. Ready to turn simple jars into eye-catching candy art?
2. Transparent Apothecary Jars with Layered Sweet Treats
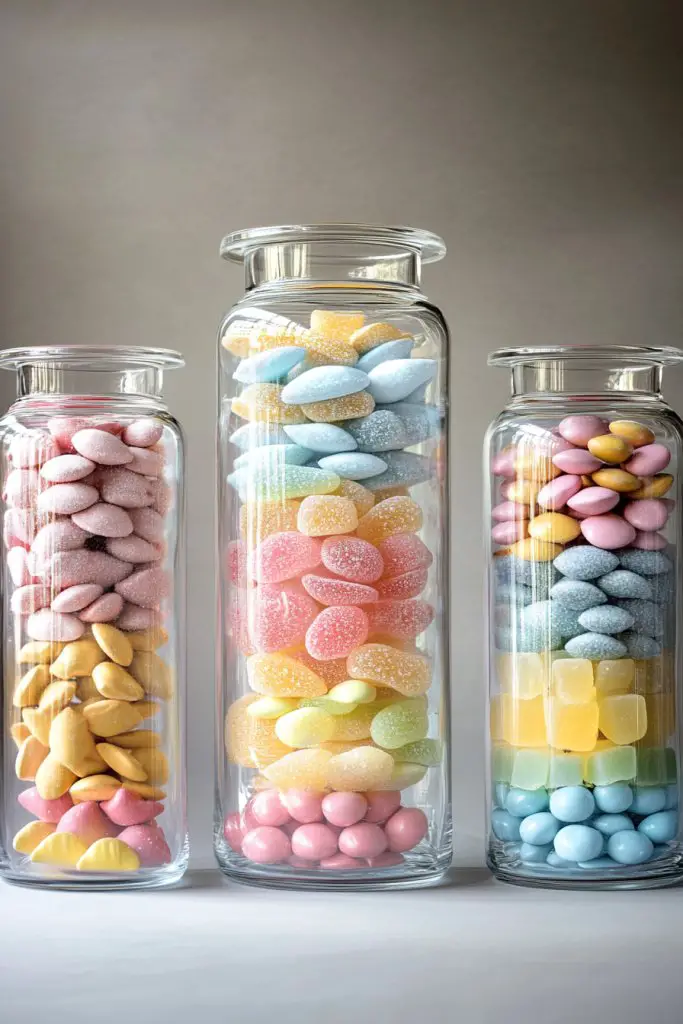
Tired of boring dessert displays that lack visual impact? If you want something sleek yet playful, clear apothecary jars offer a perfect solution. They turn ordinary candies into a captivating art piece, elevating any celebration’s aesthetic. Imagine a display that’s as much about style as it is about sweetness—who wouldn’t love that?
Recommended Products to replicate this idea
| # | Preview | Product | |
|---|---|---|---|
| 1 |

|
Anchor Hocking Heritage Hill 1 Gallon Glass Jar with Lid, Set of 2 | Check Latest Price |
| # | Preview | Product | |
|---|---|---|---|
| 1 |

|
12Pcs Dessert Table Display Set, Cupcake Stand, 3-Tier Cup Cake Tower Stands & 2-Tiered Cake Holder,... | Check Latest Price |
Picture tall, slender jars filled with neatly layered candies like gummies, chocolates, and mints. Each layer is distinct, creating a rainbow effect that catches the eye from across the room. The transparent glass showcases the vibrant hues and different textures, making the candies appear almost edible artwork. Light reflects off the glass, adding a subtle shimmer that invites guests to indulge.
Use different sizes and shapes of jars to create a varied and interesting display. For a more elegant vibe, add metallic or monochrome candies for a sophisticated look. Incorporate seasonal accents—think cinnamon sticks or cranberries for fall, citrus slices for summer. You can also label jars with custom tags or stickers to match your theme or add fun facts about the treats inside.
Select high-quality, clear glass jars with wide mouths for easy filling and access. Layer candies carefully, using a spoon or funnel to keep the layers neat. To keep the display fresh, cover the jars with airtight lids or decorative seals. Place the jars on a mirrored tray or a sleek tablecloth to enhance their visual appeal. For an added touch, integrate small LED lights underneath or around the jars to create a glowing effect.
Personalize the display with custom labels indicating flavors or fun names. Use decorative ribbons or metallic tapes to add a touch of glamour. Mix candies with different finishes—matte, shiny, textured—to create depth. For a rustic theme, add wooden tags or burlap accents to complement the clean glass look.
Layered candy jars are a versatile, stylish choice that makes any event feel upscale. They work beautifully for weddings, anniversaries, or sophisticated birthdays. Guests will appreciate the effort and creativity, making your party stand out. Ready to wow your crowd with this elegant display?
3. Upcycled Teacups as Mini Candy Vases
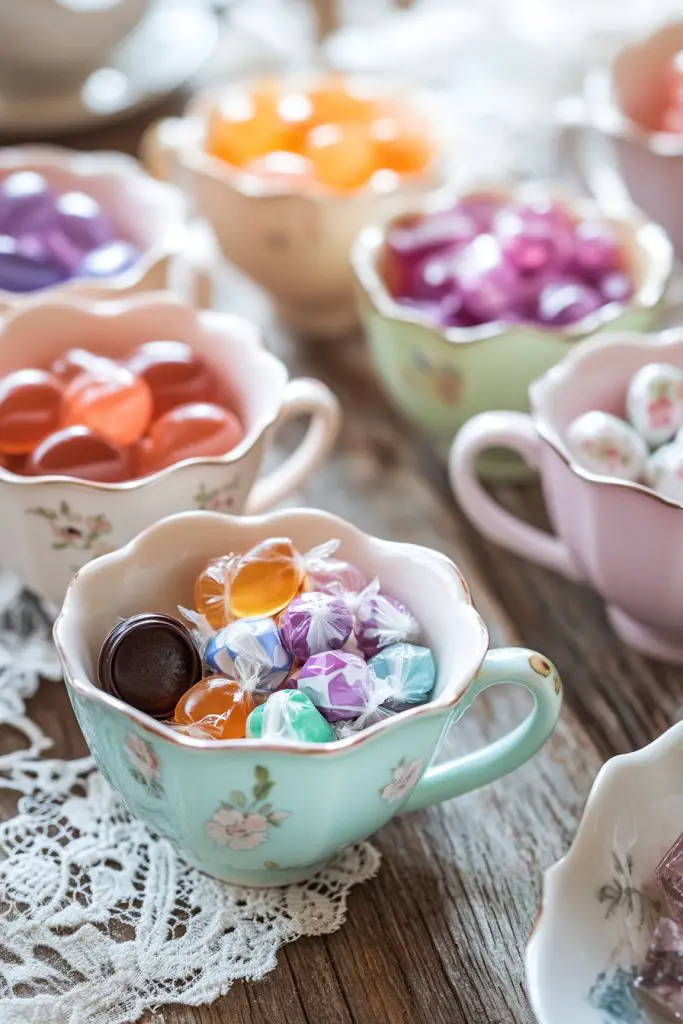
Looking for a charming, budget-friendly way to add a dash of vintage flair to your party? Upcycled teacups are an adorable and unexpected solution that transforms everyday items into delightful candy holders. They add a cozy, nostalgic vibe that instantly warms up any gathering. Plus, they’re eco-friendly and give new life to old treasures.
Recommended Products to replicate this idea
| # | Preview | Product | |
|---|---|---|---|
| 1 |

|
TATSUMI Country Roses Bone China Tea Cup and Saucer Set, 3 Pieces, Vintage Style, For Women and Tea... | Check Latest Price |
| # | Preview | Product | |
|---|---|---|---|
| 1 |

|
Super Z Outlet 5.5" Mini Acrylic Plastic Kitchen Scoops for Weddings, Candy Dessert Buffet, Ice... | Check Latest Price |
Envision tiny, delicate teacups filled with petite candies like mints, jelly beans, or chocolate-covered nuts. They sit atop a lace-draped table or a vintage tray, each cup showcasing a different pastel or jewel tone. The cups’ delicate handles and embossed patterns add a touch of elegance, making the display look like a scene from a charming vintage shop. Guests can pick up a cup easily, creating an intimate, inviting atmosphere.
Mix and match teacup styles—floral, plain, or patterned—to create a playful collection. For seasonal flair, add tiny decorative elements like mini pinecones or festive ribbons. Use a variety of saucers and small plates to create a layered, eclectic look. For outdoor or rustic settings, pair the cups with burlap or wooden accents for a more natural vibe.
Start by sourcing vintage teacups from thrift stores, flea markets, or your own cabinet. Clean and, if needed, restore them with gentle polishing. Fill each cup with your chosen petite candies, using tongs or small scoops for neatness. Arrange the cups on a decorative tray or tiered stand, adding small decorative touches like fabric napkins or tiny flowers around them. For stability, attach the cups to a sturdy base if needed or secure them with adhesive for a more permanent display.
Add custom tags or small flags with names or messages for a personalized touch. Incorporate themed elements—like mini umbrellas for summer or tiny scarves for winter. Use colorful or patterned napkins behind the cups for contrast. You can even create a mix of vintage and modern cups for an eclectic look that surprises your guests.
Upcycled teacups are a charming, resourceful way to serve candies that feels both nostalgic and stylish. They make great conversation starters and can be reused for future gatherings. This idea proves that you don’t need fancy or expensive decor to make a memorable impression. Ready to turn your old cups into edible works of art?
4. Floating Candy in Water-Filled Glass Vases
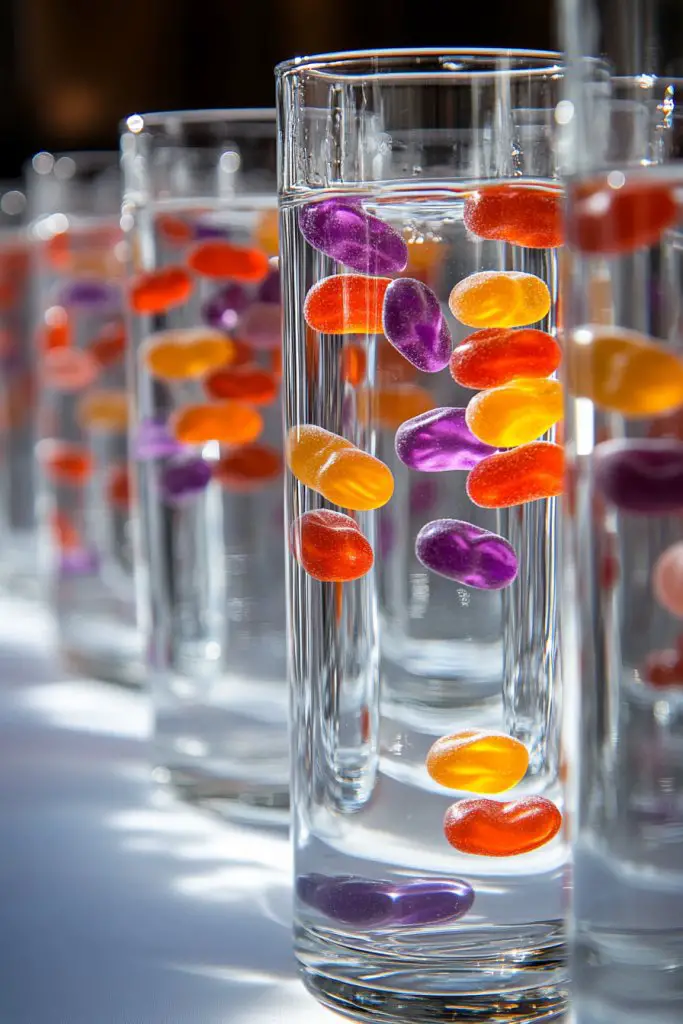
Ever wanted your dessert display to feel a little magical? Floating candies create an illusion that’s both playful and mesmerizing, perfect for adding a wow factor to any celebration. This idea transforms simple candies into a floating spectacle that captures guests’ attention and sparks curiosity. It’s an effortless way to make your setup look more enchanting.
Recommended Products to replicate this idea
| # | Preview | Product | |
|---|---|---|---|
| 1 |

|
Anquephd Glass Bud Vase Set of 32PCS Wedding Centerpieces for Tables,Mini Clear Bud Vases for... | Check Latest Price |
| # | Preview | Product | |
|---|---|---|---|
| 1 |
|
Tuyai (Set of 36) Floating Candles, 3 inch White Dripless Wax Burning Candles, for Weddings, Party,... | Check Latest Price |
Imagine tall, clear glass vases filled with water, with colorful gumdrops, jelly beans, or round chocolates suspended mid-air. The candies drift gently, creating a floating rainbow of hues. Light from nearby candles or soft LEDs reflects off the water’s surface, casting shimmering patterns that dance around the display. Guests can reach in to grab candies, feeling like they’re plucking treats from a magical pond.
Use different heights and shapes of vases for visual interest. Incorporate seasonal colors—orange and black for Halloween, pastel for Easter, or metallics for New Year’s. Add decorative elements like floating candles or small LED lights inside the water for a more dramatic effect. You could also fill the bottom with decorative stones or colored beads to enhance the underwater illusion.
Choose tall, narrow glass vases with wide openings to hold the candies and water. Fill each with clean, room-temperature water, adding a few drops of food coloring if desired. Carefully drop in candies one by one, ensuring they float and don’t sink. Use a small spoon or tongs to position them if needed. To prevent floating away, partially fill the vase with a thin layer of water or attach candies with a tiny bit of edible glue while they settle.
Label each vase with fun tags or themed stickers. Mix different candies to create a layered, colorful look. Add floating candles or tiny LED lights to make the display glow softly. For a more natural vibe, scatter some fresh flower petals or decorative stones in the water’s base. This setup is perfect for evening parties or romantic dinners.
Floating candy displays are a whimsical, eye-catching choice that instantly elevates your event. They’re surprisingly easy to set up and customize, making you look like a decor pro. Whether for a birthday, bridal shower, or just because, this idea guarantees smiles and admiration. Ready to create a floating feast?
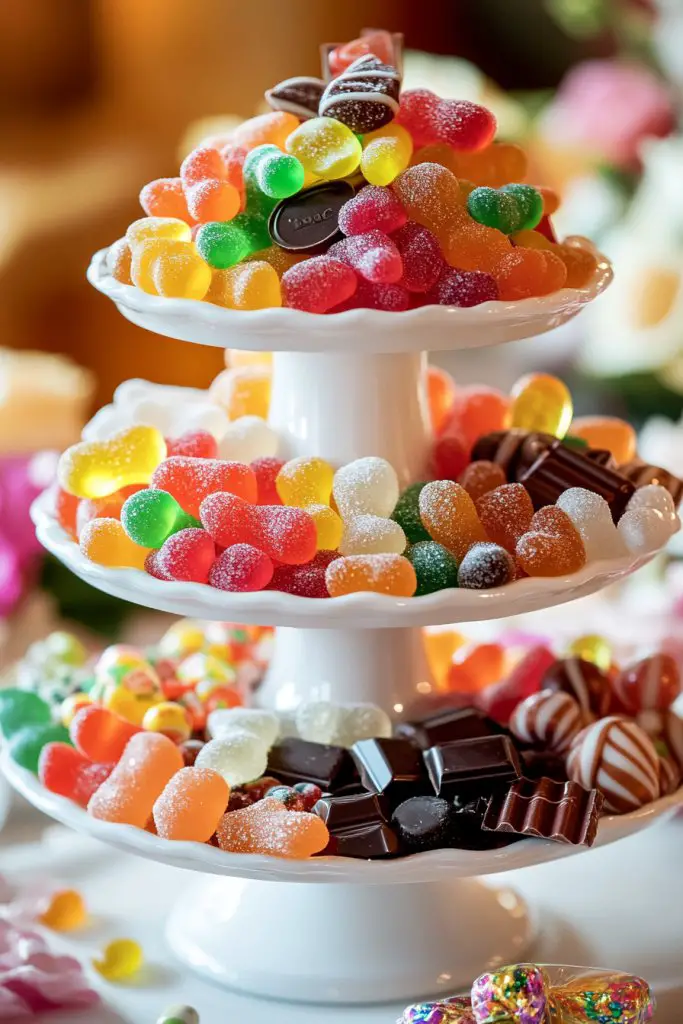
5. DIY Candy Centerpieces with Tiered Cake Stands
Want a stunning centerpiece that combines elegance with fun? Tiered cake stands filled with candies turn a simple table into a focal point that’s both beautiful and delicious. They’re perfect for birthdays, baby showers, or weddings where a little sweetness can steal the show. This DIY approach lets you customize your display without breaking the bank.
Recommended Products to replicate this idea
| # | Preview | Product | |
|---|---|---|---|
| 1 |

|
DAFURIET Dessert Cupcake Stand, 3 Tier Cup Cake Holder Tower for Tea Party/Birthday/Wedding, Plastic... | Check Latest Price |
| # | Preview | Product | |
|---|---|---|---|
| 1 |

|
M&M'S Peanut, SNICKERS, STARBURST & SKITTLES Fun Size Assorted Candy Variety Pack, 19.44 oz Bulk... | Check Latest Price |
Visualize a three-tiered stand with each level overflowing with an assortment of candies—chocolate truffles, fruit-flavored gummies, and colorful lollipops. The tiers are arranged in a symmetrical pattern, creating a sense of order and abundance. Bright colors spill over the edges, inviting guests to indulge. The stand itself, whether vintage or modern, adds height and grandeur to the setup.
Choose stands in different styles—white ceramic for a classic look, rustic wood for a country vibe, or metallic for a chic touch. Decorate the tiers with themed elements like mini banners or fairy lights. Mix in some textured elements like crinkled paper or fabric underneath for extra visual interest. You can also swap candies seasonally or for specific themes, changing the display easily.
Start by assembling or purchasing a sturdy tiered stand. Fill each level with a variety of candies, arranging them in a way that looks abundant and inviting. Use small scoops or tongs for neatness. Decorate the edges with fabric strips or decorative paper for a cohesive look. To keep candies fresh, consider placing the stand in a cool, shaded area or covering it with a clear dome during the event. For larger parties, have extra candies ready for refills.
Add personalized tags or mini flags with messages or names for a special touch. Incorporate seasonal accents—like mini pumpkins or pinecones—to match your theme. Use small decorative bowls or jars around the stand to hold extra treats or toppings. Personalize the entire setup with ribbons or banners that reflect your event’s style.
Tiered candy stands bring a touch of sophistication and fun, making your dessert table a highlight. They’re versatile enough to suit any occasion and can be easily adapted to different themes. Guests will love the abundance and variety, encouraging them to explore and enjoy. Ready to create a centerpiece that’s both stunning and sweet?
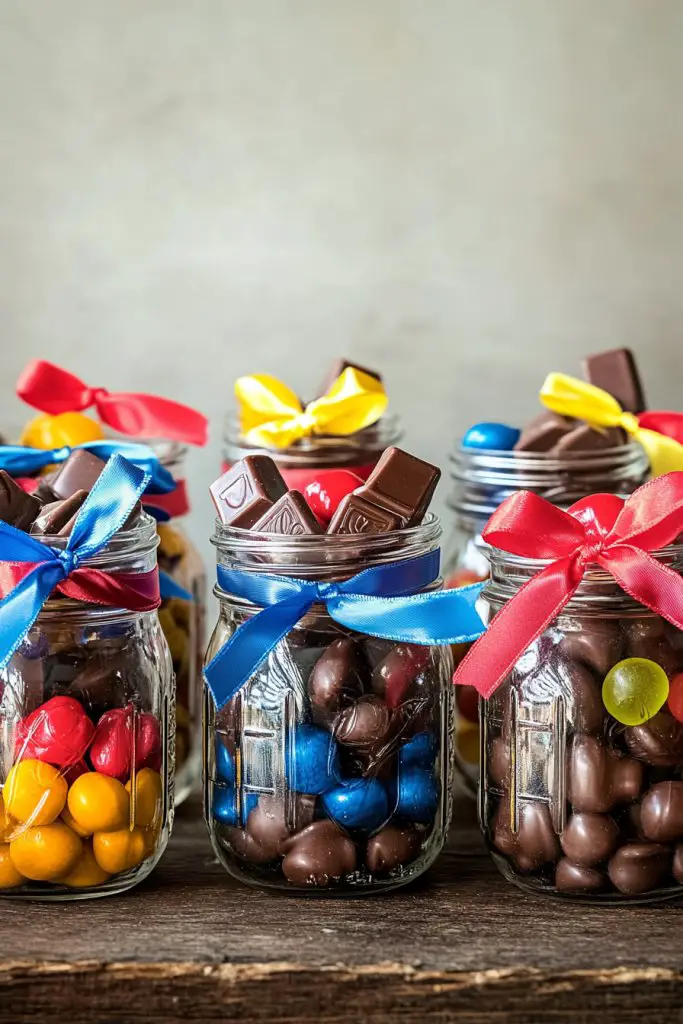
6. Candy-Filled Mason Jar Vases with Decorative Ribbons
Looking for a cheerful and customizable way to brighten up your event? Filling mason jars with candies and adding decorative ribbons creates an easy, festive display that’s both practical and pretty. It’s perfect for birthdays, picnics, or casual gatherings where a splash of color can lift the mood. Best of all, it’s a DIY project anyone can tackle.
Recommended Products to replicate this idea
| # | Preview | Product | |
|---|---|---|---|
| 1 |

|
Adodeen 32oz Vintage Glass Jars With Lids, Airtight Food Storage Containers, Kitchen Canisters For... | Check Latest Price |
| # | Preview | Product | |
|---|---|---|---|
| 1 |

|
LIUYAXI 500 Yard Fabric Ribbon Satin Ribbon Rolls Silk Satin Roll, 25 Yard/Rolls, 20 Rolls, Satin... | Check Latest Price |
Envision mason jars filled with vibrant candies like colorful chocolates, jelly beans, or sour candies. Each jar is tied with a ribbon matching your theme—think satin for elegance or burlap for rustic charm. The candies spill slightly over the rim, enticing guests to reach in. The jars sit grouped on a table, their labels and ribbons adding a cohesive, cheerful look. The glossy surface of the candies contrasts beautifully with the textured ribbons and jar glass.
Change ribbons according to seasons or themes—lace for romantic, plaid for cozy, metallic for glam. Use different jar sizes and shapes for visual diversity. Incorporate tags or handwritten labels for a personalized touch. For outdoor events, secure the ribbons with decorative pins or add small flowers around the jar necks. You can also layer candies in the jars for a more dynamic effect.
Fill clean mason jars with your preferred candies, arranging them neatly or randomly for a more casual look. Tie ribbons around the necks, tying bows or knots for extra flair. Attach small tags with messages or labels to identify flavors or add fun sayings. Arrange the jars on a decorated tray or cloth, ensuring easy access for guests. For longer events, consider resealing or covering jars to keep candies fresh.
Personalize with custom tags or labels, perhaps with names or event hashtags. Incorporate themed ribbons or add small charms to the ribbons for extra detail. Use a variety of ribbon textures—satin, burlap, or metallic—to suit your style. Adding a few decorative elements like mini flowers or themed confetti around the jars can boost visual appeal. This display is easily adjustable for any occasion.
Candy-filled mason jars are a simple yet charming way to add color and personality to your setup. They’re adaptable, budget-friendly, and easy to replenish. Guests will appreciate the thoughtful presentation and enjoy grabbing their favorite treats. It’s a quick win for creating a lively, inviting atmosphere.
7. Edible Flower and Candy Arrangements in Clear Cylinders

Want to impress guests with something both beautiful and edible? Combining candy with edible flowers creates an elegant, surprising display that elevates any occasion. This idea merges natural beauty with sweet indulgence, perfect for garden parties or romantic dinners. It’s a creative way to serve treats that look as good as they taste.
Recommended Products to replicate this idea
| # | Preview | Product | |
|---|---|---|---|
| 1 |

|
MagJo Naturals Brilliant Flower Petal Blend - Edible blend of calendula, blue cornflower and rose... | Check Latest Price |
| # | Preview | Product | |
|---|---|---|---|
| 1 |
|
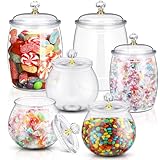
Nuogo 6 Pcs Plastic Candy and Cookie Jar with Lids Decorative Apothecary Jars Candy Buffet... | Check Latest Price |
Picture tall, slender cylinders filled with a layer of vibrant edible flowers—like pansies or violets—intertwined with colorful candies such as jelly beans or chocolate-coated nuts. The transparent glass showcases the intricate arrangement, highlighting the contrast between the natural blooms and bright confections. The flowers add a fresh, organic feel, while the candies bring a pop of color and sweetness. Soft lighting enhances the visual appeal, making the display look almost like a floral sculpture.
Choose flowers that are safe to eat and match your color scheme—think purple and yellow for spring, or deep reds for Valentine’s Day. Incorporate seasonal elements like citrus slices or mint leaves for added freshness. Use different cylinder heights or add decorative bases for variation. For outdoor events, add a few decorative stones or moss at the base for a more natural presentation.
Select edible flowers from reputable sources or grow your own. Carefully clean and arrange them at the bottom of each cylinder. Fill with candies in layers or scatter them evenly. Ensure the candies are sealed in wrappers to keep them fresh. Place the arrangements on a decorated tray or table, adding small decorative tags or ribbons if desired. Keep the display in a cool, shaded area to preserve the freshness of the flowers.
Label each container with fun names or flavors. Incorporate themed accents—like tiny flags or seasonal charms. Mix in other edible elements like herbs or citrus zest for extra flavor. Use decorative bases or wraps to match your decor style, whether rustic, elegant, or playful. These arrangements are perfect for adding a sophisticated, edible touch to your event.
Edible flower and candy arrangements are a show-stopping centerpiece that combines beauty with taste. They’re versatile and can be styled to suit any theme or season. Guests will be captivated by the unusual yet elegant display, making your event memorable. Ready to create a floral feast?
8. Candy-Coated Rocks in Glass Cylinders for a Natural Touch
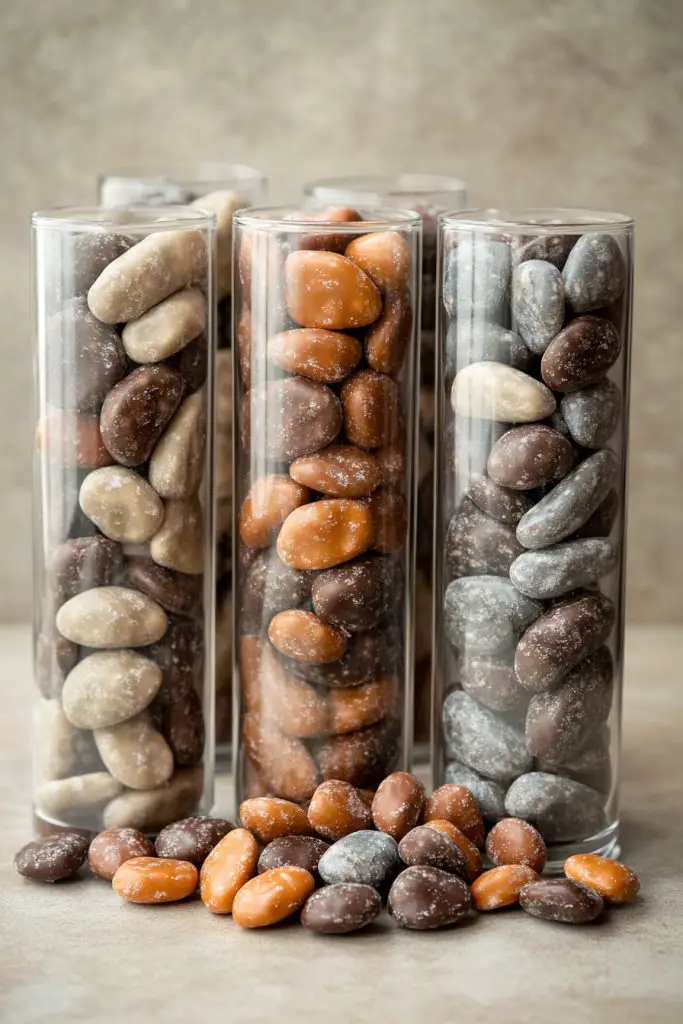
Looking to add a playful, nature-inspired element to your decor? Candy-coated chocolate rocks mimic natural stones but with a sweet twist. This idea combines the rugged feel of a rock garden with the fun of colorful confections. It’s perfect for outdoor parties or themed events that call for an earthy yet whimsical vibe.
Recommended Products to replicate this idea
| # | Preview | Product | |
|---|---|---|---|
| 1 |

|
Chocolate Rocks Kidu Candy Bulk – Candy Coated Edible Rock Chunks for Cake Decorating –... | Check Latest Price |
| # | Preview | Product | |
|---|---|---|---|
| 1 |

|
4 Pack Glass Cylinder Vases 4,6,8,10 Inch Tall Clear Flower Vase Hurricane Floating Candle Holder... | Check Latest Price |
Imagine tall glass cylinders filled with shiny, candy-coated rocks in shades of brown, gray, and pastel colors. The glossy surface of the candies reflects light, creating a sparkling, mineral-like appearance. The arrangement resembles a miniature rocky landscape, but up-close, it’s a cheerful, edible display. Small LED lights or glow-in-the-dark elements can be added for extra visual interest, especially at night.
Use larger or smaller jars to suit your space. Incorporate natural elements like twigs, moss, or small wooden plaques to enhance the earthy theme. Change the candy colors to match your event palette—neutrals for rustic, bright for fun themes. For a more polished look, fill the jars with a layer of sand or decorative gravel beneath the candies.
Purchase or make candy-coated rocks from chocolates coated with colored cocoa or candy melts. Fill the cylinders carefully to avoid shifting or breaking the candies. Arrange the jars on a natural fiber cloth or wooden tray to reinforce the theme. To increase stability, secure the jars with decorative stones or sand at the base. Add subtle lighting around the display for nighttime effects.
Label jars with playful names or theme-specific tags. Mix different types of candies or add small faux plants or miniature figurines for extra detail. Use ribbons or twine around the jars for a rustic finish. Incorporate complementary elements like small signs or mini picket fences to create a scene.
Candy-coated rocks are a fun, unexpected decor idea that adds texture and color. They’re easy to assemble and can be customized to match any theme. Guests will enjoy the clever illusion and the tasty surprise inside. Ready to create a natural yet sweet landscape?
9. Tiered Candy Vases with Fruit and Candy Mix
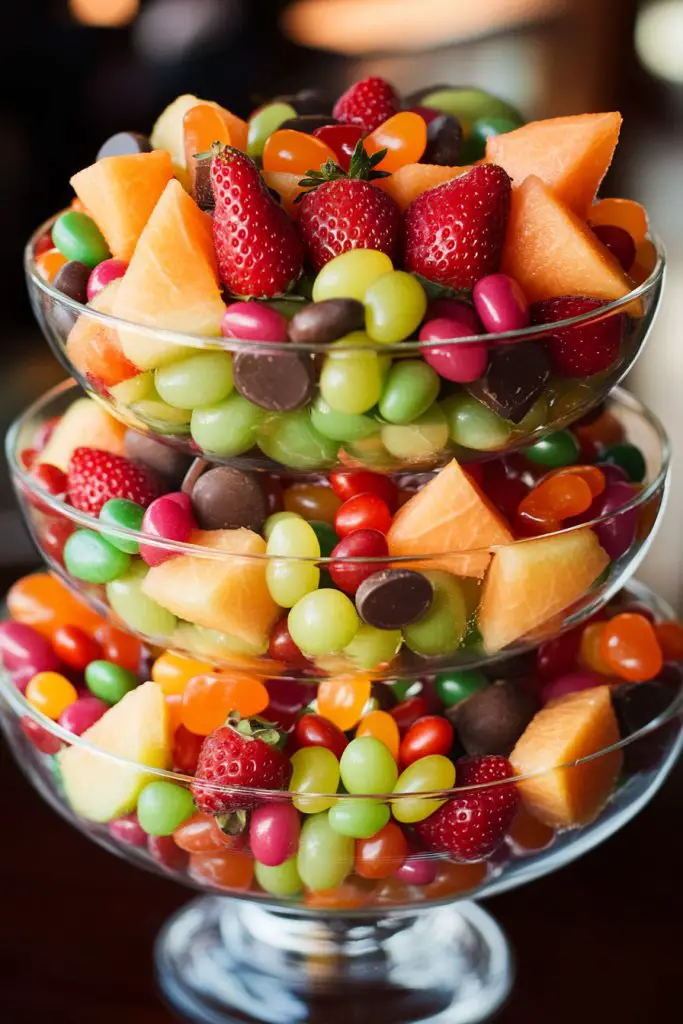
Want to combine the freshness of fruit with the indulgence of candy? Tiered vases filled with a mix of sliced fruit and colorful confections create a vibrant, mouth-watering display. This setup appeals to both the eye and the palate, making it perfect for summer parties or health-conscious celebrations. It’s an eye-catching way to serve a sweet and refreshing treat.
Recommended Products to replicate this idea
| # | Preview | Product | |
|---|---|---|---|
| 1 |
|
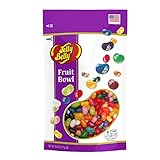
Jelly Belly Fruit Bowl Jelly Beans, Assorted Fruit Flavors, 9.8-oz | Check Latest Price |
| # | Preview | Product | |
|---|---|---|---|
| 1 |

|
CUCUMI 12 Pack Colorful Glass Bud Vases, Small Colored Vintage Vases for Centerpieces, Decorative... | Check Latest Price |
Visualize a multi-layered glass vase with alternating layers of fruit slices—like citrus, berries, and melons—and candies such as jelly beans or coated chocolates. The bright colors and varied textures create a lively, inviting look. The fruit’s natural sheen contrasts beautifully with the glossy candies, enticing guests to sample both. The height and transparency of the vase provide a stunning centerpiece that celebrates freshness and fun.
Use seasonal fruits and candies to match your theme—peach slices and caramel candies for summer, apple slices and cinnamon candies for fall. Incorporate decorative skewers or toothpicks to make serving easier. For smaller spaces, opt for compact, single-layer arrangements. For more impact, add garnishes like mint sprigs or edible flowers around the base.
Choose a clear, tiered glass vase or a large, decorative bowl with multiple levels. Layer sliced fruits and candies carefully to keep the colors vibrant and the layers distinct. Use skewers or small picks to hold the fruit in place if needed. Keep the setup chilled if serving immediately, especially in warm weather. Replenish fruit and candies as needed to maintain freshness and visual appeal.
Label each layer with fun tags or small signs indicating the fruit or candy type. Incorporate themed accents like mini umbrellas or seasonal decorations. Use colorful napkins or decorative tissue underneath the vase for added flair. Mix in some edible flowers or herbs for a gourmet touch. This creates an interactive, colorful display that excites guests.
Combining fruit and candy in a tiered vase is a lively, versatile idea that suits many occasions. It’s a healthy touch with a sweet twist, appealing to all ages. Guests will love the playful, colorful presentation and the chance to sample different flavors. Ready to serve up a feast for the senses?
10. Minimalist Single-Color Candy Vases for Modern Decor

Searching for a sleek, modern way to display candies? Sometimes, less is more, and monochromatic arrangements can create a stunning, contemporary look. Single-color candy vases are perfect for minimalist themes or modern interiors that favor clean lines and subtle elegance. They show that simplicity can be sophisticated.
Recommended Products to replicate this idea
| # | Preview | Product | |
|---|---|---|---|
| 1 |
|
Danmu Colorful Glass Storage Jar with Lid, Candy & Cookie Jar, Jewelry Box, Buffet & Biscuit... | Check Latest Price |
| # | Preview | Product | |
|---|---|---|---|
| 1 |

|
8 inch Clear Glass Flower Vases for Centerpiece Table Home Indoor Desk Decor,Ins Modern Boho Style... | Check Latest Price |
Envision tall, clear glass vases filled with candies of one hue—think all white chocolates, black licorice, or pastel pink gummies. The uniform color creates a cohesive, calming visual that looks polished and intentional. The candies spill over the edge slightly, inviting a closer look. The transparent vase highlights the smooth, consistent surface of the treats, adding to the sleek aesthetic.
Choose vases with geometric shapes or matte finishes for a more modern touch. Play with different heights and widths for visual interest. Incorporate complementary decor—like metallic accents or textured fabrics—without overcrowding the display. Seasonal variations include using metallic or glitter candies for holiday sparkle.
Select a set of uniform candies matching your chosen color palette. Fill the vases neatly, avoiding overcrowding for a clean look. Use minimal decorative elements—perhaps a single ribbon or small tag—if any. Arrange the vases on a sleek tray or shelf, ensuring symmetry for a balanced presentation. For added effect, illuminate the display with soft LED strip lighting.
Add subtle touches like metallic foil wrappers or edible glitter to enhance the monochrome effect. Customize with small, modern signage or tags with simple, bold fonts. Use matching or contrasting bases to elevate the vases in a cohesive way. This minimal approach is easily adaptable for any modern event or interior.
Single-color candy vases are a chic, low-maintenance decor idea that makes a big impact. They are versatile enough for corporate events, weddings, or chic birthday parties. This style proves that simplicity can be stunning and intentional. Ready to embrace sleek, modern elegance?
11. Vintage Glass Bottles with Candy Swirls for Retro Vibe

Craving a nostalgic touch that takes your guests back in time? Vintage glass bottles filled with colorful, swirling candies create a retro-inspired display that’s both charming and playful. It’s perfect for vintage-themed parties or to add a quirky twist to modern celebrations. This idea combines old-world charm with a sweet surprise.
Recommended Products to replicate this idea
| # | Preview | Product | |
|---|---|---|---|
| 1 |
|
Anchor Hocking Heritage Hill 1 Gallon Glass Jar with Lid, Set of 2 | Check Latest Price |
| # | Preview | Product | |
|---|---|---|---|
| 1 |

|
Yangbaga Rustic Wooden Serving Trays with Handle - Set of 7 Rectangular Platters for Entertaining,... | Check Latest Price |
Imagine a collection of antique-style glass bottles, each filled with brightly colored, spiral candies that swirl around the neck. The bottles sit on a distressed wooden tray or a vintage tin, their labels handwritten or aged for authenticity. The swirling candies mimic the patterns of old-fashioned soda bottles, adding a whimsical, nostalgic vibe. Light catches the glass, creating reflections that echo retro neon signage.
Use bottles of varying shapes and sizes for an eclectic display. Incorporate vintage tags, twine, or lace for added nostalgia. For themed events, decorate bottles with retro stickers or labels. Mix in other vintage items—like old keys or postcards—to create a layered, storybook scene. Seasonal themes could include holiday-specific candies or colors.
Source vintage bottles from thrift stores, flea markets, or vintage shops. Clean and, if necessary, gently polish them. Fill each with swirling candies wrapped in clear cellophane or in their wrappers. Arrange them on a rustic tray or crate, adding decorative elements like lace doilies or small props. Keep candies fresh by avoiding direct sunlight or high heat, and consider using small LED lights for nighttime displays.
Add personalized tags or labels with fun vintage fonts. Incorporate themed accessories—like mini umbrellas or retro postage stamps. Use ribbons or twine for a handcrafted look. You can also embed mini photographs or notes inside some bottles for a storytelling effect. This display is perfect for creating a memorable, nostalgic atmosphere.
Vintage glass bottles filled with swirling candies bring a playful, nostalgic charm that’s easy to assemble and customize. They make a striking statement at any vintage or retro-themed event. Guests will love the quirky, colorful display and the taste of yesteryear. Ready to bring vintage flair to your celebration?
12. Candy and Candle Combo in Clear Vases for Warm Ambiance

Ever wanted to serve up something sweet and cozy without turning your space into a candy store? Combining candies with candles in clear vases offers a warm, inviting vibe perfect for intimate gatherings or just relaxing evenings. It’s a clever way to add a dash of sweetness with a touch of glow, all without cluttering your surfaces. Plus, it’s surprisingly simple to pull off, even if you’re not a DIY expert.
Recommended Products to replicate this idea
| # | Preview | Product | |
|---|---|---|---|
| 1 |

|
STARBURST Original Easter Jelly Beans Chewy Candy, 14 oz Bag | Check Latest Price |
| # | Preview | Product | |
|---|---|---|---|
| 1 |

|
Vinkor Flameless Candles Battery Operated Candles Real Wax Pillar LED Candles with 10-Key Remote and... | Check Latest Price |
Picture a tall, glass cylinder filled with colorful jelly beans and topped with a flickering LED candle. The candies cascade in layers, creating a rainbow of textures and hues that catch the light as the flame dances. The gentle glow filters through the transparent vessel, casting a cozy ambiance that’s perfect for winter nights or romantic dinners. The contrast of vibrant sweets and warm illumination makes your space feel both playful and inviting.
Swap out candies seasonally—think pastel marshmallows for spring or cinnamon candies for fall. Use varied candle sizes or shapes to change the mood, from tall taper candles to short votives. You can also layer different types of candies or add decorative elements like faux snow or glitter for a more festive look. For outdoor setups, consider weatherproof LED candles to keep things safe and sparkly.
Start by selecting a clear, sturdy glass vase that fits your space. Fill it with your choice of candies, ensuring they’re dry and stable. Place a battery-operated LED candle on top—avoid real flames for safety and convenience. To keep candies from spilling out, consider adding a small layer of decorative filler or faux moss at the base. For added stability, secure the candle with a dab of hot glue or double-sided tape. Regularly replace candies to keep the display fresh and vibrant.
Personalize the display by choosing candies that match your color scheme or theme—think metallic chocolates for glam, or pastel gummies for a soft vibe. Wrap the vase with a ribbon or twine for a rustic touch, or add mini ornaments for festive flair. Incorporate mini flags or custom labels to celebrate occasions like birthdays or anniversaries. You can even layer different candies in sections to create a rainbow effect for visual interest.
This combo of candies and candles proves that you don’t need fancy decor to create a warm atmosphere. It’s versatile, budget-friendly, and easy to change up as your mood or season shifts. Remember, the key is to have fun with colors and textures—your space will thank you for the cozy, sweet touch. Ready to light up your room with a little edible glow?
13. DIY Candy Bouquet in Tall Glass Vases
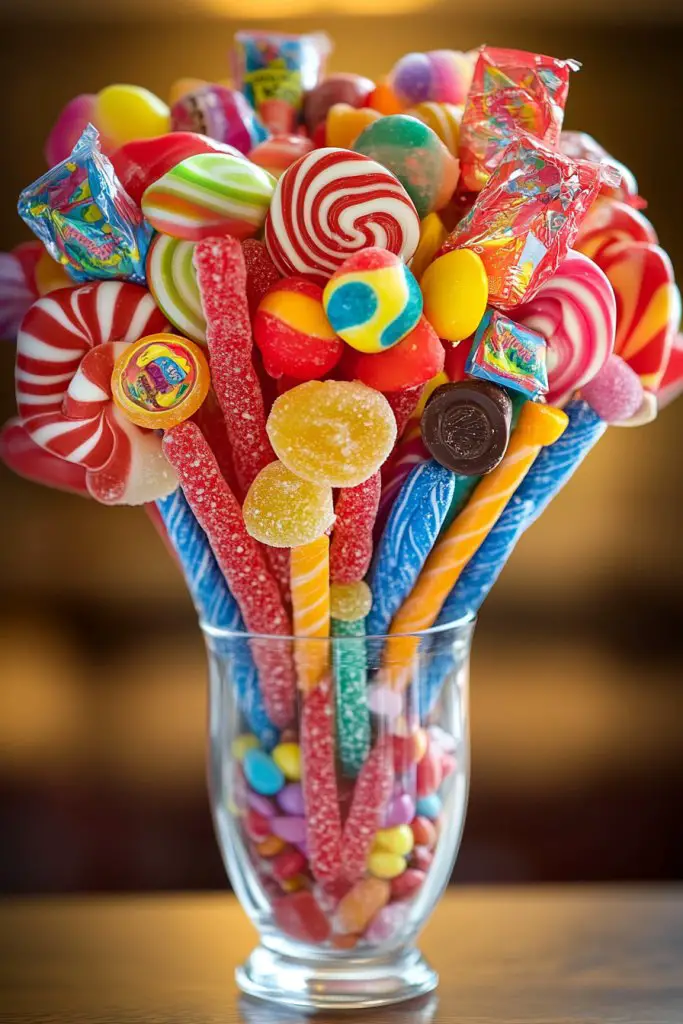
Ever wanted to give a gift that’s both pretty and tasty? A DIY candy bouquet in tall glass vases makes a fun, edible centerpiece that doubles as a sweet present. It’s perfect for birthdays, parties, or just because. Plus, it’s a creative alternative to traditional floral arrangements that everyone will love.
Recommended Products to replicate this idea
| # | Preview | Product | |
|---|---|---|---|
| 1 |

|
CYS Excel Clear Glass Cylinder Vase (H:12" D:4") | Multiple Size Choices Glass Flower Vase... | Check Latest Price |
| # | Preview | Product | |
|---|---|---|---|
| 1 |
|
HOPELF 6" Natural Bamboo Skewers for BBQ,Appetiser,Fruit,Cocktail,Kabob,Chocolate... | Check Latest Price |
Imagine a tall, slender vase filled with wrapped candies on sticks, resembling vibrant flower stems. The candies burst in a rainbow of colors, topped with decorative tissue or cellophane to mimic blooms. When arranged just right, it looks like a luxurious bouquet of flowers, but with a playful, edible twist. The shiny wrappers and colorful candies add a touch of whimsy, making it a showstopper on any table.
Customize your bouquet with different candy types—chocolates, gummies, lollipops—to match your theme. Use metallic or glittery wrappers for a glam effect, or opt for pastel shades for a soft, romantic look. Change the height of the sticks for visual interest or add decorative ribbons for extra flair. For outdoor events, consider using sturdy, weather-resistant candies or adding a protective layer of cellophane.
Start by selecting a tall, clear vase or container that can hold the candy sticks upright. Wrap candies on sticks with twist ties or floral wire, then insert them into the vase. Secure the base with floral foam or a handful of sugar or rice to keep everything stable. Arrange the candies evenly, making sure they look full and lush from all angles. Finish with decorative ribbons or bows around the vase neck. You can also add small faux leaves or floral accents for extra detail.
Personalize by choosing candies that match your recipient’s favorite flavors or colors. Add themed accessories, like tiny flags, badges, or custom tags. Consider integrating small plush toys or decorative picks for a layered look. Use a decorative vase or container to elevate the presentation or add a splash of metallic spray paint to the vase for a luxe feel. This makes your candy bouquet not just tasty but also a centerpiece that’s Instagram-worthy.
Creating a candy bouquet is easier than you think and totally customizable. It’s a delightful way to show someone you care, or just spoil yourself. Plus, it’s a guaranteed hit at any celebration. Get creative with colors and candies—you’ll be surprised how professional it looks with just a little effort!
14. Multi-Color Candy Mix in Geometric Glass Containers
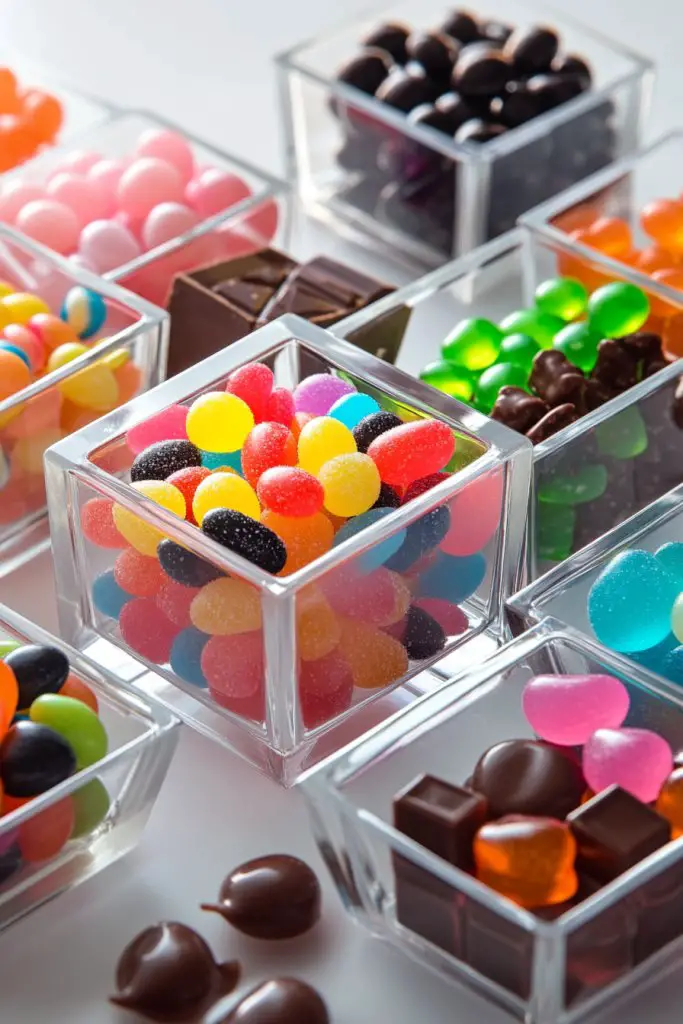
Looking for a modern way to display sweets that also acts as a conversation piece? Geometric glass containers filled with a multi-color candy mix make a bold statement. They’re perfect for contemporary parties or minimalist decor lovers who want a pop of fun without clutter. And the best part? They’re super easy to assemble.
Recommended Products to replicate this idea
| # | Preview | Product | |
|---|---|---|---|
| 1 |

|
WGVI Clear Slant Cut Bowl Glass Vase, Glass Terrarium, Candy Dish, Glassware, Slant Open: 7".... | Check Latest Price |
| # | Preview | Product | |
|---|---|---|---|
| 1 |
|
M&M'S Peanut, SNICKERS, STARBURST & SKITTLES Fun Size Assorted Candy Variety Pack, 19.44 oz Bulk... | Check Latest Price |
Envision a sleek, angular glass box or pyramid filled with an assortment of colorful candies—think bright gummies, shiny chocolates, and vibrant jellies. The geometric shapes catch light from all angles, creating a dynamic visual effect. The candies’ glossy surfaces reflect the ambient light, making the display look like a piece of edible art. It’s a perfect centerpiece that balances sophistication with playfulness.
Choose containers with different shapes—hexagons, cubes, or triangles—to suit your space or theme. Use a monochrome candy palette for a chic look, or go all out with a rainbow of colors for maximum impact. Incorporate metallic or matte finishes in your containers for added texture. For seasonal themes, swap candies for themed shapes or colors, like orange and black for Halloween or pastels for spring.
Start by selecting sturdy, chemical-resistant glass containers with geometric designs. Fill them with pre-sorted candies, ensuring they’re dry and stable. To prevent movement, place a layer of decorative filler or tissue paper at the bottom. For added visual appeal, arrange candies in layers or sections, creating a gradient or pattern. Keep the display clean by regularly refilling or replacing candies as needed. You can also stack multiple containers for a multi-tiered effect.
Customize your mix based on favorite flavors or color schemes—think tropical hues or seasonal shades. Add small decorative labels or tags to identify candy types or flavors. Incorporate themed elements, like mini flags or metallic accents, to match your event. For a more artistic presentation, sprinkle edible glitter or dust on the candies for extra sparkle. This way, your display becomes both edible and eye-catching.
This modern candy display proves that minimalism can be playful and elegant at the same time. It’s a guaranteed way to impress guests and elevate your decor game. Plus, it’s adaptable for any occasion—just swap out colors or shapes. Dive into your favorite candy collection and turn simple sweets into a stylish statement!
15. Seasonal Candy Vases with Themed Decorations
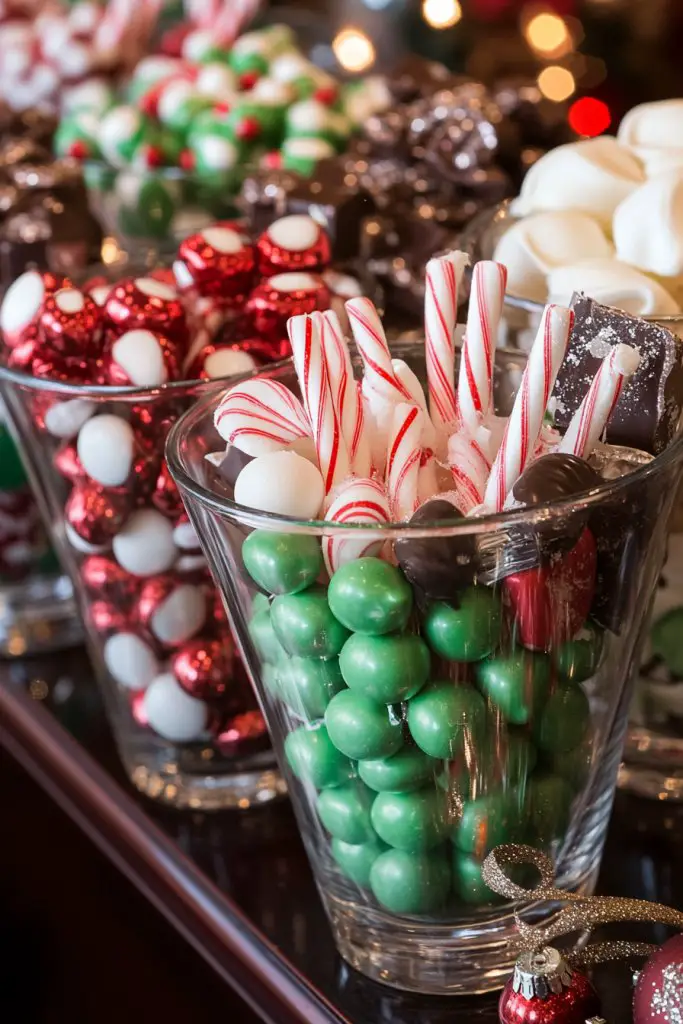
Ever struggled to make your holiday decor feel complete? Seasonal candy vases with themed decorations offer an easy way to add festive flair without overwhelming your space. They’re perfect for holiday parties, family gatherings, or just sprucing up your home seasonally. Plus, they turn simple candy displays into charming holiday accents.
Recommended Products to replicate this idea
| # | Preview | Product | |
|---|---|---|---|
| 1 |
|
Anquephd Glass Bud Vase Set of 32PCS Wedding Centerpieces for Tables,Mini Clear Bud Vases for... | Check Latest Price |
| # | Preview | Product | |
|---|---|---|---|
| 1 |

|
JOYIN 144 PCS Christmas Cellophane Bags with Ribbon for Holiday Treats, Christmas Clear Cello Gift... | Check Latest Price |
Visualize a tall glass vase filled with holiday-themed candies—like peppermint candies and chocolates wrapped in red and green for Christmas. Decorate the outside with small faux pumpkins, snowflakes, or ornaments that match the season. Add ribbons, bows, or faux foliage around the neck of the vase for extra charm. The candies peek through the transparent glass, inviting guests to indulge visually and literally.
Alter decorations based on the holiday—think spooky silhouettes for Halloween or heart-shaped confetti for Valentine’s Day. Incorporate seasonal colors and textures, like burlap for fall or glitter for New Year’s. Use themed toppers or labels to identify special candies or treats. For outdoor settings, consider weather-resistant embellishments to keep the decor fresh and festive.
Choose a clear glass vase that fits your space and fill it with candies that match your theme. Attach seasonal decorations—mini pumpkins, faux snow, or paper cutouts—using clear adhesive or ribbon. Embellish the outside with coordinating ribbons or small decorative picks. To add extra flair, place fairy lights or small battery-operated candles around the vase. Regularly refresh candies and decorations to maintain the festive look.
Make it personal by adding custom tags, labels, or small handcrafted touches like embroidered ribbons. Mix candies with different textures—crunchy, chewy, creamy—to please all taste buds. Incorporate themed accessories like tiny witch hats or reindeer antlers for a playful touch. Use personalized containers or DIY labels to make each display unique.
Seasonal candy vases make decorating fun and effortless, turning candy into a stylish statement. They’re a simple way to celebrate holidays with flair and personality. With a little creativity, your decor can look professional and inviting. Get inspired and make your next celebration unforgettable!
16. Clear Vases with Candy Toppings for Dessert Decor
Are you tired of boring dessert tables that lack wow factor? Clear vases topped with candies and edible decorations turn simple sweets into eye-catching displays. They’re perfect for weddings, birthdays, or any celebration craving a touch of glam. Plus, they double as edible decor, so your guests get a tasty bonus.
Recommended Products to replicate this idea
| # | Preview | Product | |
|---|---|---|---|
| 1 |
|
8 inch Clear Glass Flower Vases for Centerpiece Table Home Indoor Desk Decor,Ins Modern Boho Style... | Check Latest Price |
| # | Preview | Product | |
|---|---|---|---|
| 1 |

|
Pucker Powder Dessert Topping Assortment Pack - Candy, Ice Cream Topper, Cupcake and Cake Topper,... | Check Latest Price |
Imagine a tall glass vase layered with mini chocolates, sprinkles, and crushed candies, topped with a sprinkle of edible glitter or shimmering sugar. The transparent vessel showcases the colorful toppings, creating a sparkling, inviting look. As guests approach, they see the intricate details—like tiny sugar flowers or candy confetti—that make the display irresistible. The overall effect is both playful and elegant, elevating your dessert presentation.
Use different toppings to match your theme—metallic sprinkles for glam, crushed cookies for rustic charm, or edible flowers for spring. Change the layering pattern for visual interest—alternating colors or textures. Incorporate themed decorations, like gold leaf or colored sugar, to enhance special occasions. You can also fill the vase with candies or treats that complement the toppings inside.
Select a tall, clear glass vase with a wide opening. Fill it with your chosen candies or treats, then sprinkle edible glitter or sprinkles on top. For extra visual appeal, layer different toppings in sections or create patterns. Finish with a light dusting of edible shimmer or dust for a luxurious finish. For stability, use a small base or weight at the bottom of the vase if needed. Regularly refresh the toppings for a pristine look.
Customize by choosing toppings that match your color palette or theme—think metallic for elegance or rainbow for fun. Incorporate edible flowers or shaped candies for a unique twist. Add a personalized tag or label with a message, or tie a decorative ribbon around the neck. For a more elaborate look, include small decorative picks or themed confetti inside the vase.
This simple idea transforms everyday desserts into a show-stopping centerpiece. It’s versatile, easy to adapt, and guaranteed to impress your guests. Plus, it’s a fun way to showcase your creativity with minimal effort. Dive into your favorite candies and toppings—you’ll be amazed at the stunning results!
17. Transparent Vase with Candy-Covered Cones as Edible Arrangements

Looking for a unique way to serve treats that double as decor? Filling a transparent vase with candy-covered cones creates edible sculptures that wow guests and add a playful touch. It’s perfect for dessert tables, parties, or even as a creative gift. Plus, it’s a fun project that combines crafting and snacking.
Recommended Products to replicate this idea
| # | Preview | Product | |
|---|---|---|---|
| 1 |

|
Drumstick Dipped Variety Pack, Vanilla Fudge, Vanilla Caramel, Vanilla Sundae Cone, 8 Count (Frozen) | Check Latest Price |
| # | Preview | Product | |
|---|---|---|---|
| 1 |
|
8 inch Clear Glass Flower Vases for Centerpiece Table Home Indoor Desk Decor,Ins Modern Boho Style... | Check Latest Price |
Visualize a tall, clear vase filled with cones dipped in chocolate or caramel, then topped with sprinkles, nuts, or crushed candies. The cones stand upright, resembling flowers or sculptures, with colorful toppings adding texture and sparkle. As the cones are visible through the transparent vessel, it creates a lively, edible art piece. Guests can pick their favorite cone from the display, making it interactive and fun.
Experiment with different cone shapes—waffle, sugar, or cake—to vary textures and appearances. Decorate the cones with themed toppings—sprinkles for birthdays, edible glitter for glam nights. Change the container shape—square, cylindrical, or geometric—to match your decor style. Incorporate seasonal or holiday-themed toppings for added festivity.
Dip cones in melted chocolate or caramel, then decorate with toppings while still warm. Let them set on parchment paper, then insert into the vase upright. Fill the vase with a decorative filler or sugar to stabilize the cones. Arrange them for a balanced, full look, ensuring they stand securely. For durability, use sturdy cones and avoid overcrowding. Regularly replenish cones to maintain visual appeal.
Add labels or custom tags on each cone with flavors or messages. Incorporate themed toppers or small decorative picks. Use different colored chocolates or toppings for a rainbow effect or match your event palette. Wrap the vase with a ribbon or decorative band for extra style. Personal touches turn a simple display into a memorable centerpiece.
This approach makes your treats both beautiful and functional, elevating any dessert setup. It’s a creative way to showcase craftsmanship and flavor. Your guests will marvel at the edible sculptures, and you’ll feel proud of your DIY skills. Ready to create a show-stopping treat display? Just dip, decorate, and arrange!
Conclusion
With a diverse array of candy vase ideas, you now have endless options to infuse sweetness and charm into your decor. Whether you prefer playful, elegant, or quirky styles, these projects are perfect for elevating any event or space. Don’t hesitate to try these ideas yourself—your next stunning candy display is just a few creative steps away. Let your imagination run wild and turn everyday vases into irresistible sweet masterpieces!
Last update on 2026-03-03 / Affiliate links / Images from Amazon Product Advertising API