
19 Covering Popcorn Ceilings Ideas for Modern Interiors
Are you tired of the dated look that popcorn ceilings can give your home? Covering them up not only updates your space but also adds a touch of modern elegance that many homeowners crave. Popcorn ceilings have been popular for decades because they hide imperfections and were easy to install, but today, they often feel outdated and dull.
In this article, you’ll find a variety of creative ideas to transform your ceilings into stunning focal points. From simple paint solutions to innovative coverings and textures, there’s something here for every style and skill level. Get ready to be inspired and discover how easy and fun it can be to give your ceilings a fresh, modern makeover!
1. Smooth Refinish with Modern Paint Techniques
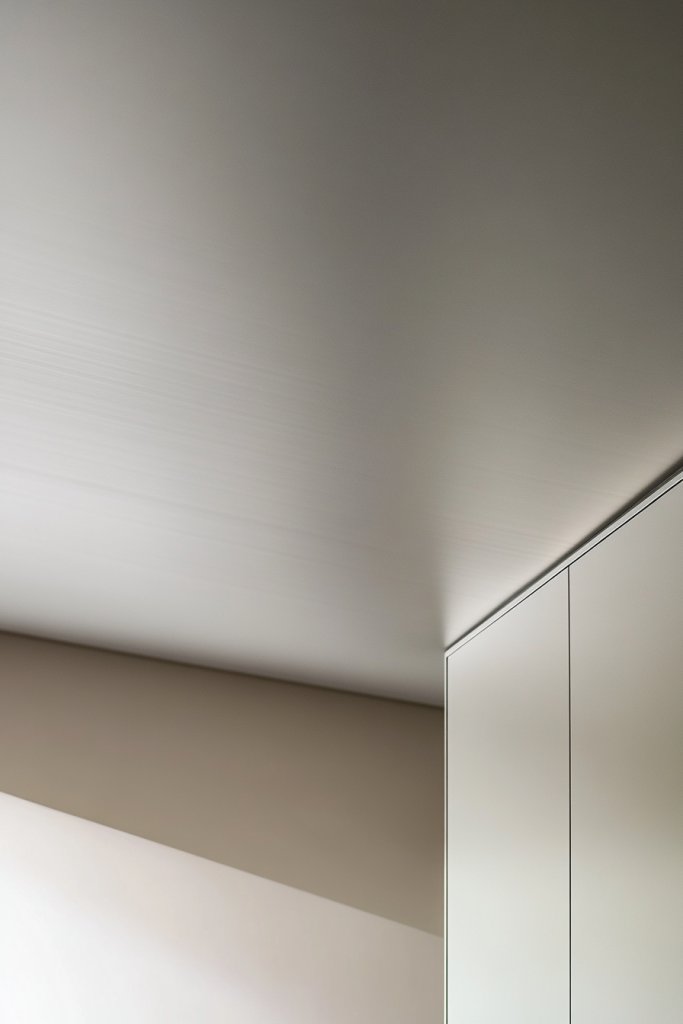
Ever tired of looking up at that dull, textured popcorn ceiling that makes your room feel outdated? Many homeowners crave a sleek, modern look that instantly lifts the space without a full overhaul. The idea of sanding and repainting might sound tedious, but the payoff is totally worth it. A fresh coat of paint can transform your ceiling from a dated eyesore into a stylish feature.
Recommended Products to replicate this idea
| # | Preview | Product | |
|---|---|---|---|
| 1 |
|
Rust-Oleum 1990502 Painter's Touch Latex Paint, Quart, Flat White 32 Fl Oz (1 Quarts Pack of 1) | Check Latest Price |
| # | Preview | Product | |
|---|---|---|---|
| 1 |

|
DESIGNERS FOUNTAIN Reedley 2-Lights Flush Mount Ceiling Light, 11 Inch Lighting Fixture for Kitchen,... | Check Latest Price |
Imagine running your hand over a smooth, matte surface that reflects light softly across the room. The neutral tones, like warm beige or cool gray, create a calming atmosphere. The ceiling looks expansive and clean, seamlessly blending with the wall colors. Light bounces gently off the surface, making the space feel brighter and more inviting.
You can customize this look with different paint finishes—matte for a subtle, velvety feel or semi-gloss for a slight sheen that adds dimension. For a more dramatic effect, consider darker shades like charcoal or navy to create a bold contrast. This approach works well in modern, minimalist, or even industrial interiors. Seasonal accents, like warmer hues in fall, can also add cozy vibes.
Start by thoroughly cleaning and sanding the popcorn texture to create a smooth surface. Use a primer designed for textured surfaces to ensure good adhesion. Choose high-quality ceiling paint in your preferred finish and apply with a roller for even coverage. Multiple coats might be necessary for full opacity. Protect walls and fixtures with painter’s tape, and work in well-ventilated areas. Patience during drying ensures a flawless finish.
Add personality by choosing accent colors for the ceiling—like a soft blush or deep navy—to define the space. Use painter’s tape to create geometric patterns or stripes for a playful twist. You can also add subtle texture through sponging or rag-rolling techniques before painting for a unique tactile feel. Incorporate lighting that complements the smooth surface, such as hidden LED strips or recessed fixtures. The result is a personalized, contemporary ceiling.
A smooth, painted ceiling lifts the entire room’s vibe and boosts your home’s modern appeal. It’s an affordable upgrade that makes a big difference in both style and perceived space. Plus, it’s DIY-friendly—if you’re willing to put in some effort, you’ll feel proud of the transformation. Ready to ditch the popcorn and embrace the sleek look?
2. Installing Recessed LED Lighting Panels
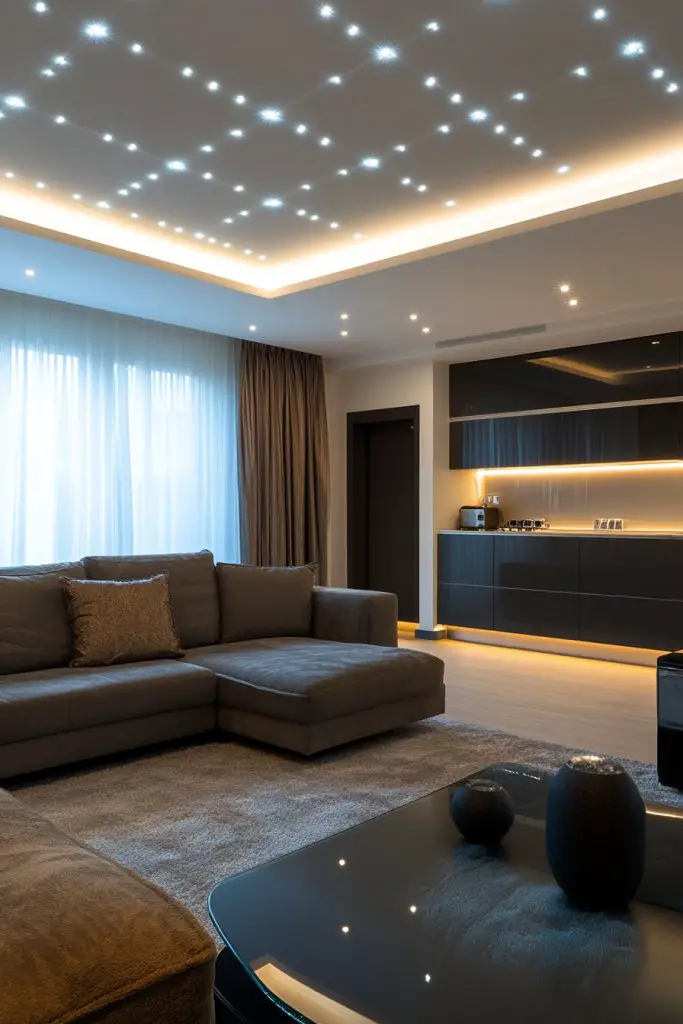
Tired of your ceiling looking dull and uninspired? Want to add a touch of sophistication and better lighting? Recessed LED panels are a sleek solution that can modernize your space instantly. They hide clutter, reduce shadows, and give your room a clean, airy feel. Plus, they’re energy-efficient, saving you money in the long run.
Recommended Products to replicate this idea
| # | Preview | Product | |
|---|---|---|---|
| 1 |
|
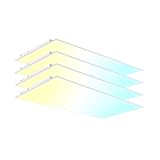
YPII 4 Pack 2x4 LED Flat Panel Light LED Drop Ceiling Light Fixture, 5 CCT 3000K-6500K Adjustable &... | Check Latest Price |
| # | Preview | Product | |
|---|---|---|---|
| 1 |

|
SunRider LED Flush Mount Ceiling Light Fixture, 5000K Daylight White, 2400LM, 12 Inch 24W White... | Check Latest Price |
Picture a ceiling with seamless, flush-mounted LED panels emitting a soft, even glow. The panels blend effortlessly into the ceiling plane, creating a floating effect that feels contemporary and upscale. The light quality is crisp yet warm, eliminating harsh shadows and brightening every corner. It’s like turning your ceiling into a piece of modern art.
You can choose from various sizes and shapes—square, rectangular, or even custom configurations—to suit your room’s layout. In open-concept spaces, large panels can define zones, while smaller ones work for cozy nooks. For a more industrial look, pair with exposed ductwork and minimalist fixtures. Seasonal adjustments include dimmable panels for mood lighting or color-changing options for special occasions.
Begin by measuring your ceiling to determine the size and number of panels needed. Hire an electrician to install the wiring and mount the panels flush with the ceiling surface. Ensure the electrical system can support the panels’ voltage and dimming features if desired. For DIY enthusiasts, some kits come with straightforward installation instructions, but caution is advised. After installation, connect to a compatible dimmer or smart home system for customizable lighting. Seal edges neatly for a polished look.
Customize the ambiance with color-tunable LED panels that shift from warm to cool tones. Combine with textured ceiling finishes or architectural moldings to add depth. For a more dramatic effect, install panels with diffusers or frosted covers to soften the light further. Layer with indirect lighting, such as cove lights or wall sconces, to enhance the modern feel. The key is balancing sleek technology with your personal style.
Recessed LED lighting transforms a basic ceiling into a high-end feature effortlessly. It’s a smart upgrade that highlights your modern aesthetic while improving functionality. If installed correctly, they require minimal maintenance and last for years. Take the leap—your space will thank you with brighter days and a more stylish vibe.
3. Applying Modern Coatings with Metallic Finishes
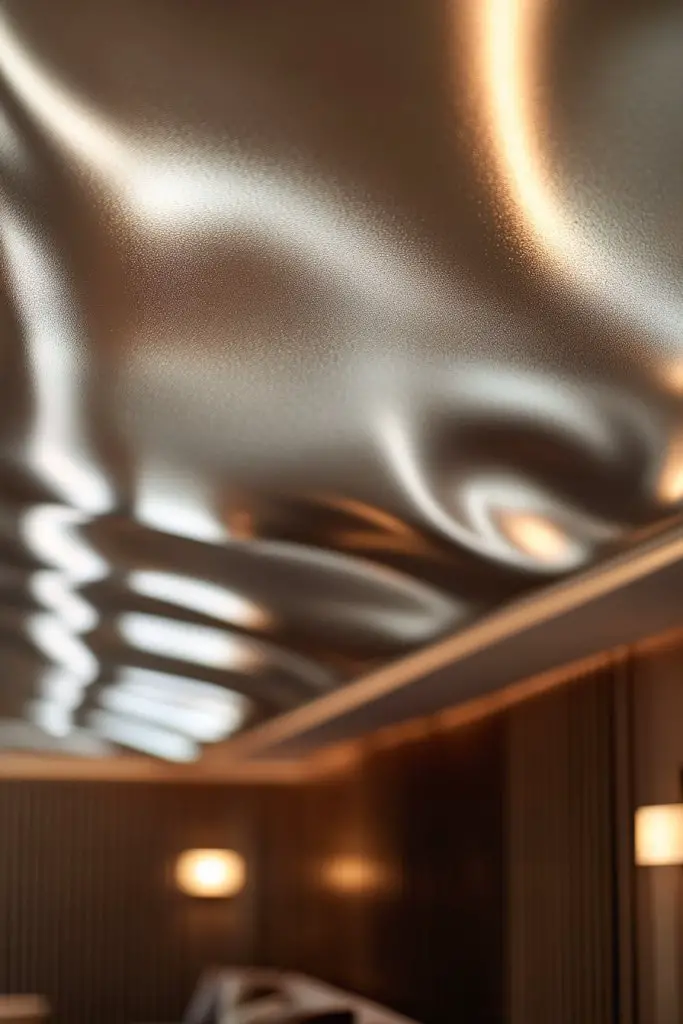
Looking for a subtle way to add glamour without going over the top? Metallic ceiling paints are perfect for creating a chic, modern statement. They catch the light beautifully and add a hint of shimmer that elevates your entire room. It’s ideal for those who want understated luxury with a contemporary edge.
Recommended Products to replicate this idea
| # | Preview | Product | |
|---|---|---|---|
| 1 |
![Silver Holographic Glitter for Paint Glitter Paint for Walls, Glitter Paint additive, Paint Glitter for Latex/Acrylic, Flakes for Interior and Exterior Walls, Ceilings [100g / 3.5oz]](https://m.media-amazon.com/images/I/51FWi4hlDoL._SL160_.jpg)
|
Silver Holographic Glitter for Paint Glitter Paint for Walls, Glitter Paint additive, Paint Glitter... | Check Latest Price |
| # | Preview | Product | |
|---|---|---|---|
| 1 |
|
DESIGNERS FOUNTAIN Reedley 2-Lights Flush Mount Ceiling Light, 11 Inch Lighting Fixture for Kitchen,... | Check Latest Price |
Envision a ceiling with a soft pearl or brushed gold finish that reflects ambient light. The metallic sheen creates depth and dimension, making the ceiling a captivating focal point. When paired with matte walls, the contrast enhances the room’s sophistication. The shimmer is gentle enough to be elegant, yet eye-catching enough to impress guests.
Choose from various metallic shades—silver, gold, bronze, or rose gold—to match your decor. For a more modern vibe, stick with matte or low-sheen finishes that don’t overpower the space. Textured plaster or faux metallic techniques can add even more visual interest. Seasonal touches include pairing metallic ceilings with warm lighting or candles for cozy winter nights.
Start by prepping the popcorn ceiling thoroughly—clean and sand to remove loose texture. Use a bonding primer suitable for metallic paints to ensure even coverage. Apply the metallic paint with a high-quality roller or brush, working in thin, even coats. Multiple coats may be needed to achieve the desired shimmer. Always follow the manufacturer’s instructions for drying times and sealing. For a more dramatic effect, apply a clear sealer with a satin or matte finish.
Create custom patterns or borders with metallic paint for added flair. Layer with textured wall finishes or incorporate sculptural ceiling medallions in complementary tones. Use lighting strategically—spotlights or uplights can accentuate the metallic sheen. For a personalized touch, mix different shades or add subtle glitter for extra sparkle. This approach makes your ceiling a true design feature.
Metallic ceiling finishes are a subtle luxury that can completely transform your room’s ambiance. They work beautifully in modern, glam, or eclectic interiors. With proper application, the results are stunning and durable. Don’t hesitate—your ceiling can become the room’s showstopper.
4. Installing Wooden Beadboard or Shiplap Panels

Ever wish your ceilings felt warmer and more inviting? Wooden beadboard or shiplap panels bring a cozy, rustic charm that’s surprisingly modern when done right. Covering popcorn texture with wood creates instant warmth and texture, giving your space a fresh, inviting vibe. Who says ceilings have to be boring?
Recommended Products to replicate this idea
| # | Preview | Product | |
|---|---|---|---|
| 1 |

|
Luxdecor Real Wood Wall Planks - White Shiplap Boards 5" Peel and Stick - 10 Pieces, 12.5 Sq Ft | Check Latest Price |
| # | Preview | Product | |
|---|---|---|---|
| 1 |

|
Ekena Millwork 3 1/2"W x 3 1/2"H x 120"L 3-Sided (U-Beam) Salvaged Timber HeritageTimber Faux Wood... | Check Latest Price |
Picture a ceiling lined with horizontally installed shiplap in a crisp white finish, contrasting beautifully with dark beams or soft wall colors. The textured wood adds depth and character, making the room feel more grounded and intimate. The natural grain and knots in the wood create a tactile experience, inviting the eye to explore every inch. Ambient light hits the panels, highlighting their natural beauty.
Choose from different wood types—pine, cedar, walnut—or painted versions for a modern twist. Vertical or diagonal patterns can reimagine the classic look, suitable for various styles from farmhouse to contemporary. For seasonal variation, consider staining or painting in different hues or adding decorative mouldings. This approach adapts well to dining rooms, bedrooms, or even bathrooms.
Start by removing the popcorn texture carefully, then measure your ceiling to determine panel sizes. Use a level and spacer to ensure straight, even installation. Secure the wood panels with nails or screws into ceiling joists, using a pneumatic nailer for efficiency. Finish with caulking and paint or stain to enhance durability and style. Consider adding a protective sealant for moisture-prone areas. This project can be DIY-friendly with proper tools and patience.
Mix and match wood tones or add painted accents for a custom look. Incorporate decorative trim or molding along the edges for a polished finish. For added warmth, pair with soft textiles like a plush area rug or cozy throws. Use lighting that accentuates the wood grain—such as directional spotlights or sconces—to create a layered, inviting atmosphere. Personal touches make the space uniquely yours.
Wood paneling is a timeless choice that adds both style and comfort. It elevates your interior with natural textures that never go out of fashion. When installed properly, it’s a DIY project that pays off in both aesthetics and satisfaction. Your ceiling will feel like a warm embrace—ready to impress?
5. Using Large-Scale Geometric Acoustic Tiles
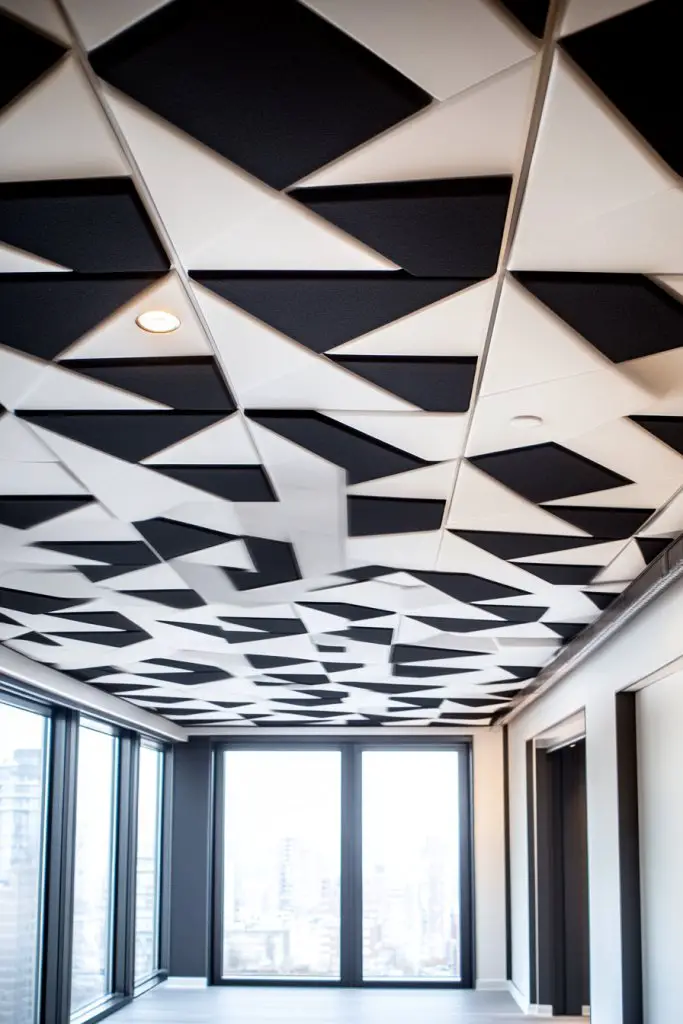
Struggling with echoey rooms or dull aesthetics? Large-scale geometric acoustic tiles offer a dual purpose: they improve sound quality while adding a bold design statement. Perfect for modern living rooms or home offices, these tiles can turn a boring ceiling into a focal point. Plus, they’re lightweight and easy to install.
Recommended Products to replicate this idea
| # | Preview | Product | |
|---|---|---|---|
| 1 |

|
Armstrong Ceiling Tiles; 2x4 Ceiling Tiles - 10 pc White; Acoustic Ceilings for Suspended Grid;... | Check Latest Price |
| # | Preview | Product | |
|---|---|---|---|
| 1 |
|
Art3dwallpanels 33 Pack 3D Wall Panel Diamond for Interior Wall Décor, PVC Flower Textured Wall... | Check Latest Price |
Imagine oversized tiles arranged in a dynamic pattern—hexagons, triangles, or rectangles—in monochrome shades. The three-dimensional surfaces create shadows and highlights, adding depth and interest. The tiles’ matte or semi-gloss finishes catch light subtly, emphasizing their geometric shapes. They give the ceiling a sculptural, modern look that’s both functional and artistic.
Choose from various shapes and sizes to match your room’s vibe—sleek and minimalist or bold and abstract. Stick with neutral tones for a sophisticated look or go for contrasting colors for visual impact. You can also combine materials, like fabric-backed tiles for extra sound absorption. Seasonal tweaks include adding metallic accents or integrating LED backlighting for a futuristic touch.
Start by cleaning popcorn residues thoroughly to ensure adhesion. Use a level and chalk line to plan a grid layout. Attach the tiles with adhesive designed for lightweight composites—some come with peel-and-stick backing for easy installation. For larger areas, consider a grid system with strategic placement for maximum effect. Seal edges neatly for a seamless appearance. Once installed, enjoy a quieter, more stylish space.
Customize by selecting tiles with different textures or finishes—smooth, rough, or metallic. Combine with minimalist lighting or indirect LED strips to highlight the geometric patterns. For a playful twist, alternate tile colors or rotate patterns seasonally. Incorporate elements like metallic inserts or textured borders to add sophistication. These tiles truly turn ceilings into modern art.
Large-scale geometric tiles are a bold move that instantly modernizes your space. They demonstrate that ceiling design can be both functional and artistic. With a bit of planning, you can DIY or hire a pro to achieve professional results. Your home will radiate contemporary style and improved acoustics—ready for the wow factor?
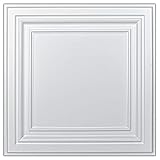
6. Creating a Faux Coffered Ceiling with Molding
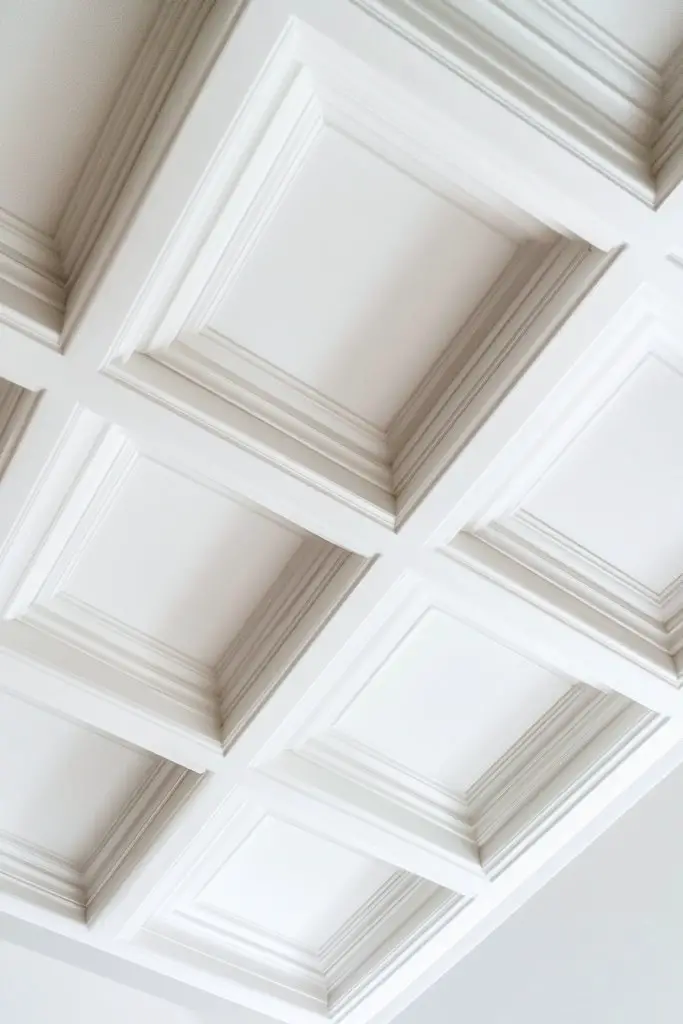
Feeling like your ceilings are a bit flat and uninspired? A faux coffered ceiling adds architectural interest without the expense of a real one. Using simple molding techniques, you can create the illusion of depth and elegance. It’s a clever way to elevate a standard room into something sophisticated and modern.
Recommended Products to replicate this idea
| # | Preview | Product | |
|---|---|---|---|
| 1 |

|
Art3d 10-Pack 47Ft White Ceiling Crown Molding Trim, High Impact Polystyrene Decorative Ceiling... | Check Latest Price |
| # | Preview | Product | |
|---|---|---|---|
| 1 |

|
Zinnser 03688 Covers Up Stain Sealing Ceiling Paint, White | Check Latest Price |
Visualize a grid of clean-lined moldings forming rectangular or square patterns across your ceiling. The design mimics traditional coffered ceilings but is much easier and cheaper to implement. The moldings create shadow lines that add texture and dimension, making the ceiling feel taller. When painted in contrasting shades, the pattern becomes a striking feature.
Opt for simple, modern profiles—flat or rounded edges—for a sleek look. Use contrasting colors such as white moldings on a darker ceiling for dramatic impact, or monochrome for a subtle effect. For a softer, more organic feel, choose rounded or beveled moldings. Seasonal variations can include adding decorative rosettes or corner accents.
Start by measuring and marking the ceiling for your grid pattern. Cut moldings to size with a miter saw, then secure with adhesive and finish nails. Fill nail holes and seams with putty, then sand smooth. Prime and paint the moldings before attaching for a clean finish. To add extra depth, paint the recessed areas a darker shade or add faux beams for a dramatic look.
Customize by choosing different molding profiles or combining multiple widths for visual interest. Incorporate LED strip lighting behind the moldings for ambient glow. Add decorative corner blocks or medallions at intersections for a personalized touch. Pair with sleek furniture and minimal decor to keep the focus on the architectural detail.
A faux coffered ceiling offers a high-end look with DIY appeal. It’s a smart way to add architectural charm without breaking the bank. When finished, your ceiling will look like a crafted architectural feature, elevating your entire interior. Ready to add timeless elegance?
7. Applying Textured Wall Coverings or Wallpaper

Bored of your plain popcorn ceiling? Want to make a bold statement or add depth to your space? Textured wall coverings or wallpaper can transform your ceiling into a dynamic feature. They’re quick to install and come in endless patterns and textures. It’s an easy way to inject personality without a major renovation.
Recommended Products to replicate this idea
| # | Preview | Product | |
|---|---|---|---|
| 1 |

|
15.7" X 118" Black Silk Wallpaper Embossed Self Adhesive Peel and Stick Wallpaper Contact Paper... | Check Latest Price |
| # | Preview | Product | |
|---|---|---|---|
| 1 |

|
Roman Ultra Clear Strippable Wallpaper Adhesive, Clear Glue, Zero VOC, PRO-880 (32 Ounce - 80 sq.... | Check Latest Price |
Imagine a ceiling covered in floral, geometric, or abstract textured wallpaper. The pattern adds visual interest and feels like a piece of art overhead. Some wallpapers have tactile elements—embossed patterns or raised textures—that create shadows and layers. When light hits these surfaces, they cast subtle shadows, making the ceiling appear more dimensional.
Choose from a variety of textures—grasscloth, fabric-backed, embossed vinyl—for different effects. For a modern look, opt for large-scale geometric or metallic patterns. Seasonal adaptations include changing out wallpaper for different textures or colors, like warm metallics in winter or cool neutrals in summer. Use complementary wall paints or finishes to balance the design.
Prepare the popcorn surface by cleaning thoroughly and applying a primer if necessary. Carefully measure and cut the wallpaper or covering to size, leaving extra for trimming. Use a high-quality adhesive suited for textured surfaces, applying with a roller or brush. Smooth out air bubbles with a wallpaper smoothing tool. Trim excess at edges and seams for a seamless appearance. Finish with a protective topcoat if recommended.
Add metallic accents or textured finishes to the wallpaper for extra flair. Incorporate layered textiles or fabric strips for a boho-chic vibe. For an artsy touch, combine patterned wallpaper with murals or stenciled designs. Use lighting—such as hidden LED strips or sconces—to highlight textured surfaces. Personal touches make your ceiling a true conversation starter.
Textured wallpaper or wall coverings are a quick, impactful upgrade that can redefine your space. They offer a wide range of styles—from subtle to statement-making—so you’re sure to find something that fits your taste. Properly installed, they last for years and require minimal upkeep. Time to turn your ceiling into a stylish masterpiece?
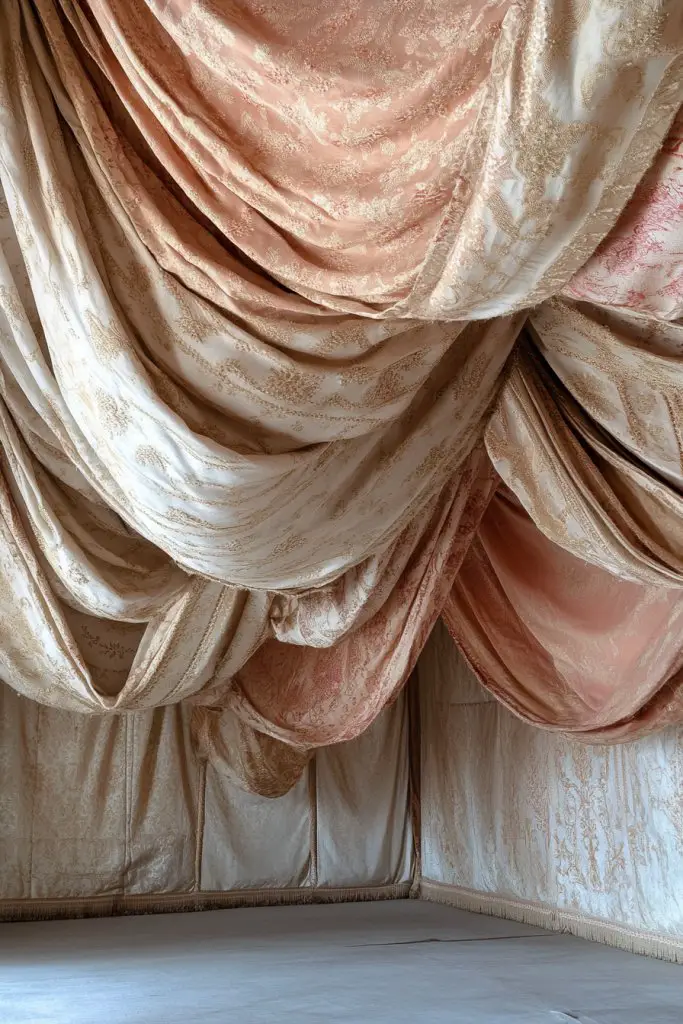
8. Installing Fabric Ceiling Drapes or Canopies
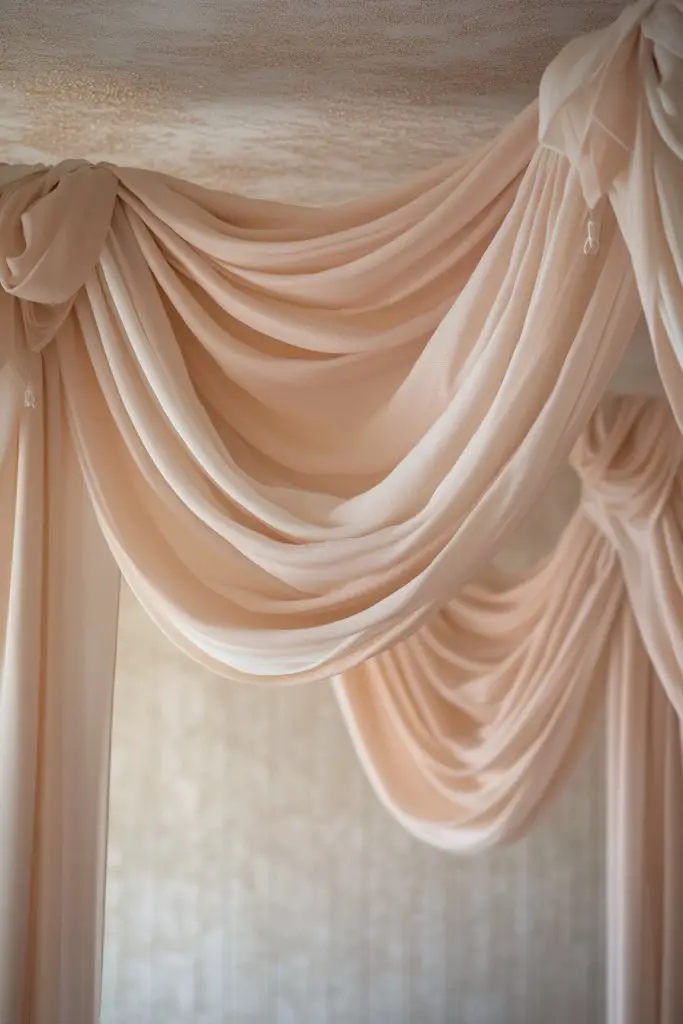
Looking for a soft, elegant way to conceal a popcorn ceiling? Fabric drapes or canopies create a luxurious, dreamy effect that instantly elevates a room. They’re perfect for adding texture and warmth, especially in spaces where you want a cozy, boutique feel. Plus, they’re easy to change out when your style evolves.
Recommended Products to replicate this idea
| # | Preview | Product | |
|---|---|---|---|
| 1 |

|
6 Panels White Ceiling Drapes for Wedding Ceiling Drapes 5ftx20ft Wedding Arch Draping Fabric Sheer... | Check Latest Price |
| # | Preview | Product | |
|---|---|---|---|
| 1 |

|
LED Ceiling Spotlight Dimmable12W 3CCT 3000K/4000K/5000K Adjustable spotlight ceiling light Indoor... | Check Latest Price |
Imagine flowing fabrics cascading from the ceiling, creating gentle folds that catch the light softly. Light-colored linens or silk can add a touch of glamour, while textured knits or burlap lend rustic charm. The fabric sways gently with movement, adding a sense of serenity and elegance. When paired with subtle spotlights or uplights, the effect is stunning.
Choose from various fabrics—sheer, velvet, linen—for different moods. For a boho vibe, layer multiple fabrics with tassels or decorative trims. Seasonal variations include swapping fabrics for heavier textiles in winter or airy linens in summer. Use tension rods, ceiling hooks, or decorative rods to hang the fabric in different configurations, from draped canopies to curtain-like panels.
Secure anchor points into the ceiling joists or beams using hooks or brackets. Drape the fabric evenly, ensuring it hangs smoothly and symmetrically. Use weights or ties at the bottom to prevent movement. For a more permanent solution, sew fabric into panels and attach with clips or rings. Mix and match fabrics or add decorative elements like beads or tassels for a personalized look.
Create layered effects by combining different textures and colors. Incorporate LED uplighting or string lights behind the fabric for a magical glow. Use decorative trims, embroidery, or appliqués to add unique details. Personal touches like monograms or themed fabrics can make your ceiling a statement piece. The result is a soft, inviting atmosphere.
Fabric canopies and drapes are a versatile, budget-friendly way to add elegance and conceal imperfections. They’re perfect for boho, romantic, or eclectic interiors. With some creativity and basic tools, you can craft a dreamy ceiling that invites relaxation. Ready to wrap your room in softness?
9. Using Glued-Down Vinyl or PVC Ceiling Tiles
Hate dealing with that outdated popcorn texture but don’t want a messy renovation? Vinyl or PVC ceiling tiles are a quick, affordable fix that can give your ceiling a fresh, modern look. They’re lightweight, waterproof, and easy to install—perfect for DIYers and renters alike. Plus, they come in a variety of stylish patterns.
Recommended Products to replicate this idea
| # | Preview | Product | |
|---|---|---|---|
| 1 |
|
Art3d PVC Ceiling Tiles, 2'x2' Plastic Sheet in White (12-Pack) | Check Latest Price |
| # | Preview | Product | |
|---|---|---|---|
| 1 |

|
Adhesive Ceiling Hooks for Hanging Decor:20 Pack No Drill Small Drop Ceiling Hanger Strips for... | Check Latest Price |
Imagine sleek tiles laid out in a grid pattern, each with contemporary geometric or textured designs. The glossy or matte finishes reflect light subtly, adding depth without overwhelming the space. The tiles cover the popcorn texture completely, creating a smooth, uniform surface. The clean lines and modern patterns instantly upgrade the room’s vibe.
Choose from various patterns—concrete, metallic, or wood-look—to match your decor. For a subtle effect, go with monochrome tones; for a bold statement, incorporate contrasting colors or metallic accents. These tiles work well in kitchens, bathrooms, or laundry rooms. Seasonal updates include swapping out tiles for different patterns or finishes to refresh the look.
Start by removing loose popcorn debris and cleaning the ceiling thoroughly. Measure and plan your layout, considering tile size and pattern. Use adhesive or mechanical fasteners suitable for PVC or vinyl tiles—many are peel-and-stick for simplicity. Carefully align each tile, pressing firmly to ensure adhesion. Trim tiles as needed for edges and corners. Seal seams with compatible caulk or sealant for a seamless appearance.
Mix different tile patterns or textures for a custom mosaic effect. Incorporate metallic or textured tiles for visual interest. Use LED backlighting behind the tiles to add glow and depth. Combine with other modern ceiling elements like molding or a painted border for a layered look. The goal is a cohesive, stylish ceiling that’s easy to maintain.
Vinyl and PVC tiles are a resilient, budget-friendly solution that transforms ceilings quickly. They’re ideal for renters or anyone wanting a fast upgrade. When installed properly, they look professional and last for years. Your ceiling will look sleek, modern, and effortless—ready for your next gathering?
10. Creating a Monochrome Ceiling with Paint and Texture
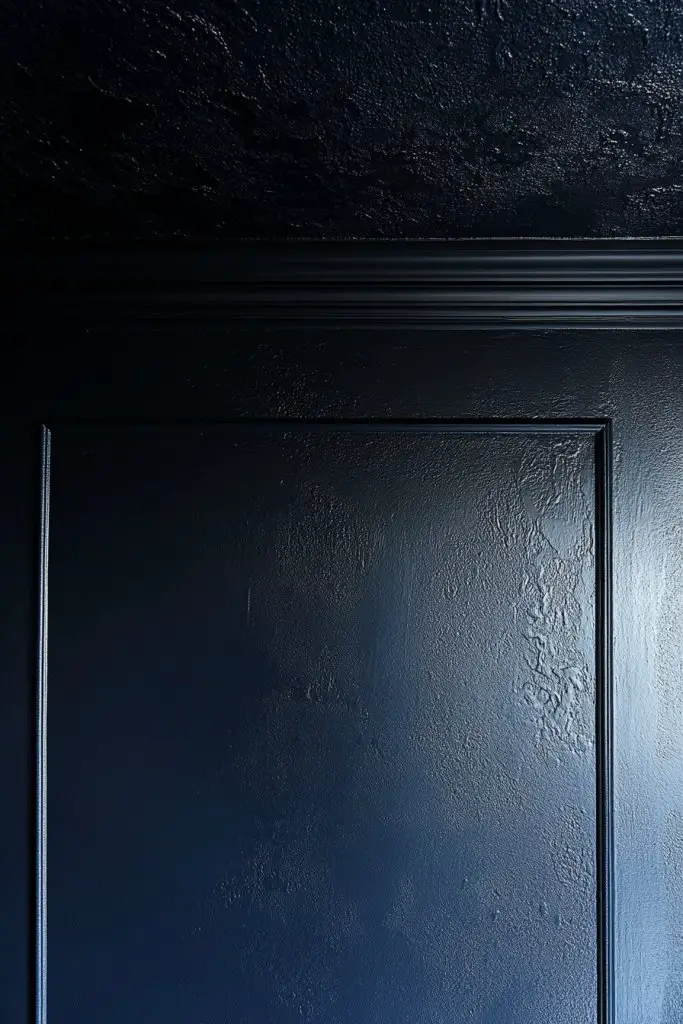
Ever feel like your ceiling is just an afterthought? Turning it into a monochrome statement can dramatically elevate your space. Using a bold or dark color with subtle texture creates a modern, sophisticated look. It’s perfect for making your room feel more intimate or adding a dramatic focal point.
Recommended Products to replicate this idea
| # | Preview | Product | |
|---|---|---|---|
| 1 |
|
Zinnser 03688 Covers Up Stain Sealing Ceiling Paint, White | Check Latest Price |
| # | Preview | Product | |
|---|---|---|---|
| 1 |

|
Homax 41072041218 Texture Touch Up Kit, Wall and Ceiling Texture and Sprayer | Check Latest Price |
Picture a deep charcoal or navy ceiling that absorbs light, contrasting with crisp white walls. The textured finish—such as a subtle sponge or rag-rolling technique—adds depth without overwhelming. When lit properly, the textured surface catches shadows, giving the ceiling a layered, dimensional effect. It feels both sleek and inviting.
Opt for matte or satin finishes to keep the look contemporary and understated. For a softer touch, choose muted shades like olive or taupe; for a bold statement, go for black or jewel tones. Seasonal accents include adding metallic or shimmer finishes for special occasions. This approach works well in bedrooms, dining rooms, or home theaters.
Prepare the popcorn surface by cleaning and lightly sanding to promote adhesion. Use a high-quality primer designed for textured ceilings. Apply the paint with a roller, working in small sections for an even coat. Use a sponge or rag to add subtle texture while the paint is wet. Multiple coats may be necessary for full coverage. Finish with a clear matte sealer to protect and unify the surface.
Add visual interest by incorporating metallic or contrasting borders around the ceiling edges. Layer with decorative moldings or beams painted in complementary shades. Use lighting—such as directional spotlights or uplights—to accentuate the texture. Personalize further with stenciled patterns or painted motifs for a bespoke touch. The result is a high-impact, modern ceiling.
A monochrome textured ceiling is a daring yet elegant choice that instantly modernizes any room. It’s a simple way to add depth and character without clutter. When done right, it becomes a conversation piece that elevates your entire decor. Ready to make your ceiling the room’s centerpiece?
11. Adding a Layer of Clear Acrylic or Glass Panels

Want a sleek, contemporary way to conceal that popcorn ceiling? Clear acrylic or glass panels offer a modern, minimalist solution that creates a floating ceiling effect. They hide imperfections while adding a sophisticated touch. Plus, they reflect light beautifully, brightening your space effortlessly.
Recommended Products to replicate this idea
| # | Preview | Product | |
|---|---|---|---|
| 1 |

|
Frienda 4 Pcs Fluorescent Light Covers Replacement Flat Clear Prismatic Acrylic Ceiling Light Cover... | Check Latest Price |
| # | Preview | Product | |
|---|---|---|---|
| 1 |
|
Blulu 20 Pack Mirror Holder Clips for 6 mm in (6/25) Glass Mirror Hanging Kit for Wall Mounting... | Check Latest Price |
Imagine transparent panels suspended just below the popcorn ceiling, creating an illusion of depth and openness. The panels’ smooth surfaces bounce light around, enhancing the room’s brightness. When installed with sleek hardware, they look like a design feature rather than a cover-up. Frosted or tinted options add a subtle color or privacy element.
Choose between clear, frosted, or tinted panels to suit your style. They can be installed in rectangular, circular, or custom shapes to match your space. For a more dynamic look, combine with LED strip lighting behind the panels. Seasonal variations include adding decorative trims or framing for a more finished appearance.
Measure your ceiling and order panels with a slight overhang for installation ease. Use ceiling-mounted brackets or a track system to hang the panels securely. Ensure the hardware is rated for the panel weight and allows for easy removal if needed. Seal the edges with minimal trim or molding for a seamless look. Regular cleaning keeps the panels looking pristine.
Add subtle LED lighting behind the panels for a floating effect. Incorporate decorative framing or metal accents for a luxurious look. Use frosted or tinted panels to introduce color or privacy. Combining with textured paint or subtle ceiling patterns beneath the panels creates layered sophistication. Personal touches like custom shapes or arrangements make it unique.
Acrylic or glass panels instantly upgrade your ceiling with a modern, high-end vibe. They’re versatile, durable, and easy to maintain. When installed correctly, they create a stunning visual impact that elevates your entire room. Ready to give your ceiling a sleek, contemporary makeover?
12. Incorporating Metallic or Mirror Ceiling Accents
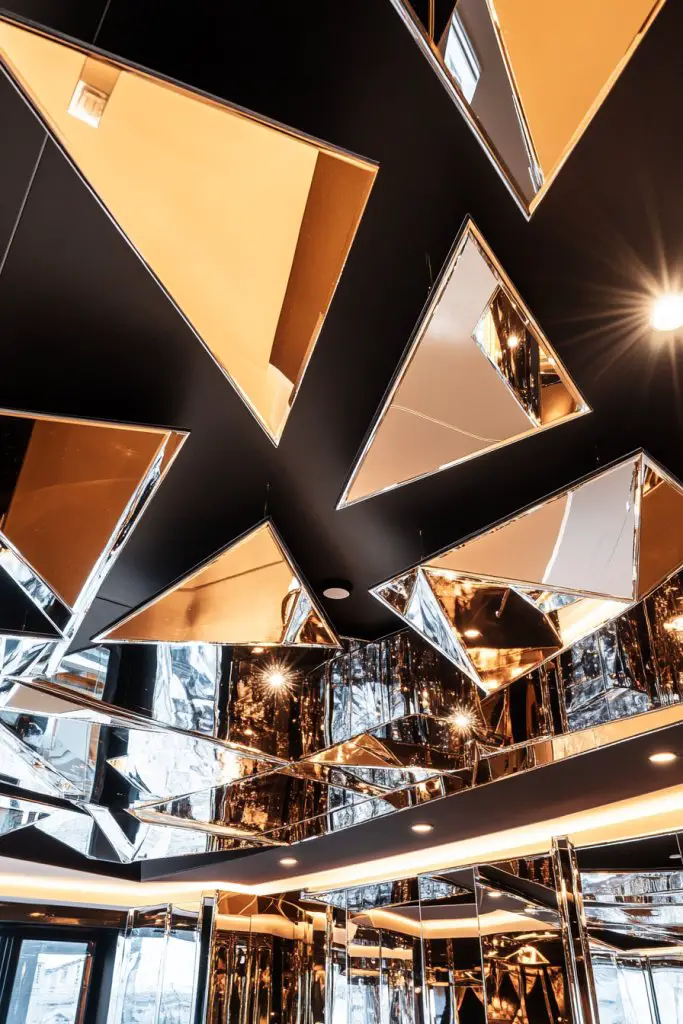
Looking for a way to add a touch of glamour and modernity? Metallic or mirror accents on the ceiling can dramatically transform your space. They reflect light and create a sense of openness, making rooms feel larger and more luxurious. It’s an unexpected detail that packs a visual punch.
Recommended Products to replicate this idea
| # | Preview | Product | |
|---|---|---|---|
| 1 |

|
STICKGOO Glue Up Ceiling Tiles, 24x24 Inch PVC Decorative Drop Ceiling Tile Antique Copper 48 Sq.... | Check Latest Price |
| # | Preview | Product | |
|---|---|---|---|
| 1 |

|
Ruomeng Home Gym Mirrors 12 Inch x 12Pcs Wall Mounted Mirror Glass Frameless Full Length Mirror... | Check Latest Price |
Picture shimmering metallic tiles or mirror strips arranged in geometric patterns across the ceiling. They catch and bounce light, creating a dynamic play of reflections and shadows. When paired with minimalist decor, these accents become statement features that elevate the entire room. The surfaces add texture and depth, making the ceiling a focal point.
Opt for mirrored tiles, polished metal sheets, or metallic paint in gold, silver, or bronze tones. Combine with matte walls for contrast or mirror a ceiling panel with a wall mirror for cohesion. Seasonal touches include adding removable metallic decals or foils for special occasions. These accents suit modern, art deco, or glam interiors.
Prepare the popcorn surface by cleaning and smoothing. Attach metallic or mirror panels with appropriate adhesives, ensuring they are level and securely fixed. Use spacers and level guides for precise placement. For mirrors, use safety-backed or shatterproof options. Seal edges with decorative trim or molding for a finished look. Regular cleaning with glass cleaner keeps the reflective surfaces sparkling.
Layer with LED uplighting or backlighting for extra glow. Incorporate decorative trims or framing to enhance the accents. Combine with textured wall finishes or minimalist decor to keep focus on the ceiling. Personalize with custom-cut shapes or patterns for a tailored look. These accents add an undeniable wow factor.
Metallic and mirror ceiling accents bring instant luxe to any room. They reflect your style and make a bold statement with minimal effort. When installed properly, they’re durable and easy to clean. Elevate your space with these stunning, modern touches.
13. Installing Floating Ceiling Clouds with LED Lighting
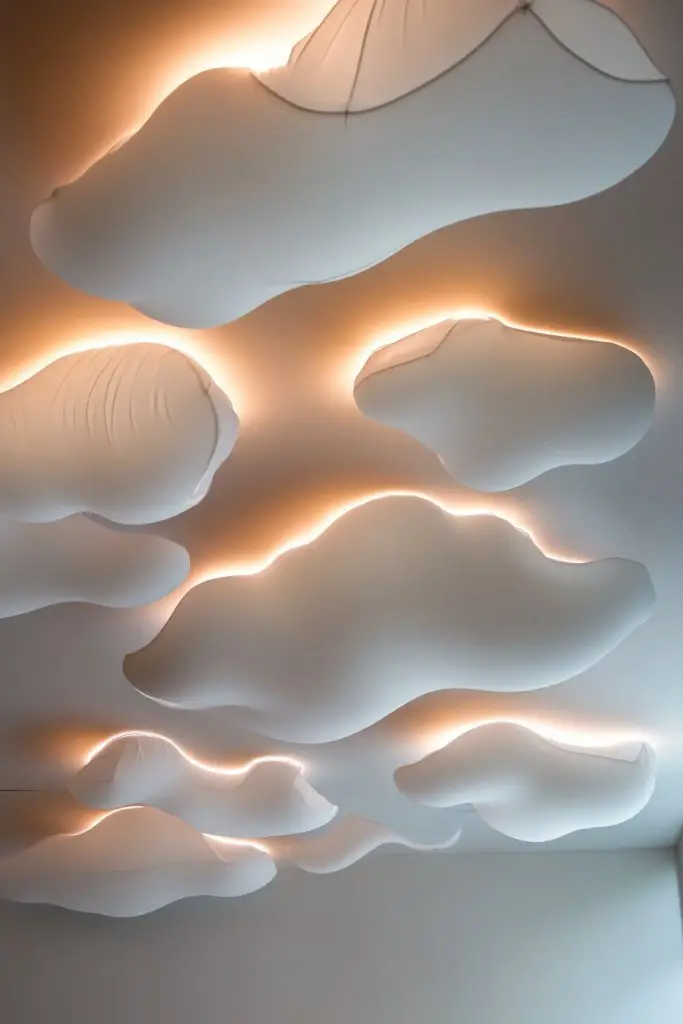
Longing for a dreamy, artistic ceiling? Floating ceiling clouds with integrated LED lighting create a surreal, modern centerpiece. They soften the room’s acoustics and add a sculptural element that’s both calming and stylish. It’s a bold statement that works especially well in contemporary or artistic interiors.
Recommended Products to replicate this idea
| # | Preview | Product | |
|---|---|---|---|
| 1 |

|
Cloud Light Ceiling Panels & LED Lights – Peel-and-Stick, 32.8 ft LED Strips, Alexa-Enabled,... | Check Latest Price |
| # | Preview | Product | |
|---|---|---|---|
| 1 |

|
ALZO Suspended Drop Ceiling Photo Video Light Mount Kit for 2 Lights | Check Latest Price |
Visualize soft, sculptural cloud shapes suspended just below the popcorn ceiling. The surfaces are smooth or textured, illuminated from within by soft LED lights. The glowing clouds cast gentle shadows, creating a floating, ethereal effect. The overall ambiance is tranquil, almost like being inside a modern art installation.
Opt for different cloud shapes—rounded, elongated, or abstract—to suit your style. Use dimmable LED lighting for customizable mood settings. Incorporate multiple clouds at varying heights for depth and drama. Seasonal touches include changing the light color or adding decorative fiber optic elements.
Construct the cloud shapes from lightweight materials like foam, plaster, or acrylic sheets. Install a sturdy mounting system into ceiling joists or beams. Embed LED strips or panels inside each cloud for even illumination. Seal edges and paint or finish surfaces as desired. Connect lighting to dimmers or smart controls for easy adjustments. Ensure all wiring complies with electrical codes.
Add textured finishes or fabric covers to soften the cloud surfaces. Incorporate decorative elements like metallic accents or fiber optics. Use color-changing LEDs for dynamic effects during parties or relaxing evenings. Personalize shape and size for your space—think large, dramatic clouds or subtle, small formations. Layer lighting to amplify the artistic aspect.
Floating ceiling clouds are a captivating way to bring artistry and tranquility into your home. They turn an ordinary ceiling into an interactive art piece. With some creativity and DIY skills, you can craft a stunning centerpiece that sparks conversation. Ready to float above the ordinary?
14. Covering with Modern Fabric or Tapestry Panels
Craving a cozy, textured ceiling that feels warm and inviting? Fabric or tapestry panels offer a soft, tactile alternative to traditional coverings. They’re easy to install, removable, and perfect for adding color or pattern without commitment. Ideal for creating a relaxed, boho vibe, or a luxurious lounge feel.
Recommended Products to replicate this idea
| # | Preview | Product | |
|---|---|---|---|
| 1 |

|
Htper 10ft x 20ft Wrinkle Free White Ceiling Drapes for Wedding Parties, 2 Panels Ceiling Tent... | Check Latest Price |
| # | Preview | Product | |
|---|---|---|---|
| 1 |

|
Mr. Pen- Double Headed Picture Hanging Nails, 50 Pack, Black, Push Pins for Wall | Check Latest Price |
Imagine flowing fabrics draped gracefully across the ceiling, with patterns like floral, geometric, or abstract designs. The textiles add softness and depth, catching ambient light and casting gentle shadows. Layered or pleated fabric panels create a rich, textured ceiling that feels plush and inviting. When lit from above or behind, they glow with warmth and personality.
Opt for lightweight, breathable fabrics like linen, velvet, or silk for different moods. Use decorative rods, tension wires, or adhesive hooks for easy installation. Seasonal changes include swapping fabrics for different textures or colors—think vibrant prints in summer or cozy knits in winter. Experiment with layered panels or asymmetrical arrangements for a unique look.
Measure your ceiling space and select fabrics that complement your decor. Attach mounting hardware into ceiling beams or studs, ensuring secure anchoring. Use rings, clips, or curtain hooks to hang the fabric panels evenly. For a more permanent setup, sew panels into a fixed frame or install track systems. Trim excess fabric and add decorative trims or tassels for flair. Keep fabrics clean and wrinkle-free for best appearance.
Create visual interest with contrasting patterns or colors layered together. Incorporate LED uplights or spotlights behind the fabric for a soft, glowing effect. Personalize with embroidered details, painted motifs, or decorative trims. Combine with ambient lighting and minimal decor to keep the focus on the textile ceiling. Your space becomes a cozy retreat or a chic lounge.
Fabric ceiling panels are a flexible, stylish solution that adds warmth and texture. They’re perfect for renters or anyone wanting a quick update. When installed with care, they last long and look luxurious. Your ceiling will feel like a fabric-encased haven—ready to impress?
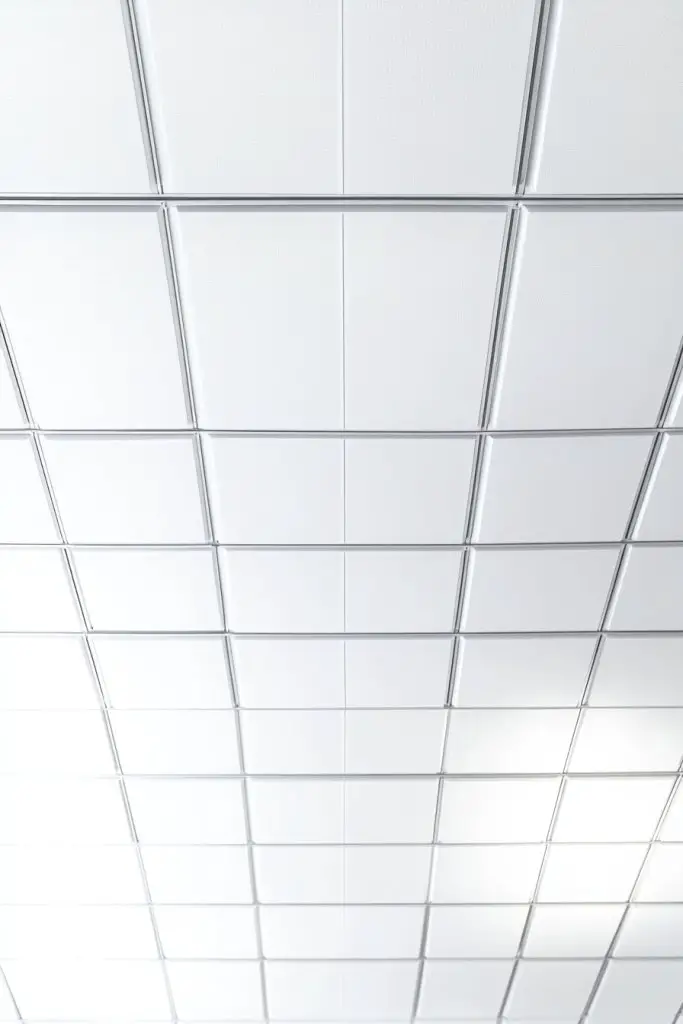
15. Replacing with a Sleek Drop Ceiling with Minimalist Tiles
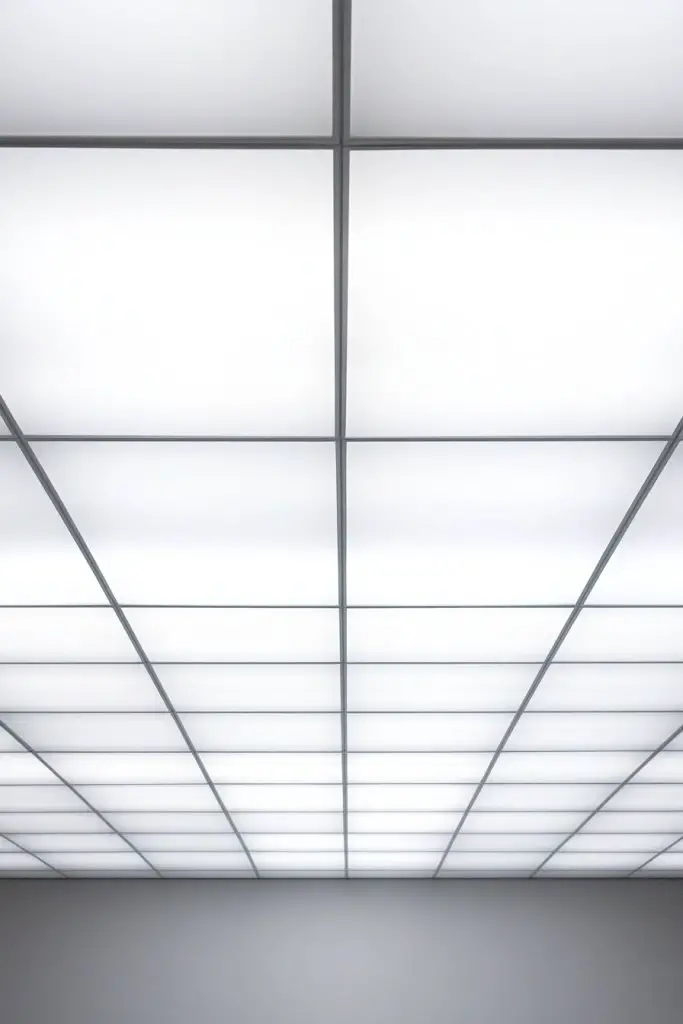
Hate that popcorn texture but don’t want to spend ages fixing it? A drop ceiling with sleek, minimalist tiles is a modern, practical fix that completely transforms your space. It hides imperfections while adding a clean, structured look. Plus, it’s easy to access electrical or plumbing systems above.
Recommended Products to replicate this idea
| # | Preview | Product | |
|---|---|---|---|
| 1 |
|
Art3d PVC Ceiling Tiles, 2'x2' Plastic Sheet in White (12-Pack) | Check Latest Price |
| # | Preview | Product | |
|---|---|---|---|
| 1 |

|
Muzata 64 Sq Ft Drop Ceiling Grid System White Complete Set Galvanized Steel Grid Kit Easy... | Check Latest Price |
Picture a grid of thin, uniform tiles in a neutral tone, perfectly aligned for a seamless look. The grid system creates a sense of order and modernity, while the tiles’ smooth surface reflects light softly. This approach gives your ceiling a polished, contemporary appearance that’s both functional and stylish. When combined with modern lighting, it elevates the entire room.
Choose from different tile materials—aluminum, PVC, or mineral fiber—to suit your aesthetic and needs. Opt for plain, textured, or patterned tiles to match your decor. Seasonal updates include swapping tiles for different colors or finishes for a fresh look. The grid can be painted or customized with decorative trim to add flair.
Start by removing popcorn and preparing the surface. Install a grid framework, making sure it’s level and square. Cut tiles to fit edges or around fixtures as needed. Attach tiles with clips, snaps, or adhesive, depending on the system. Seal seams with caulk or paint for a cohesive finish. Ensure access panels are incorporated for maintenance.
Add stylish lighting fixtures directly into the grid for a sleek look. Incorporate decorative moldings or painted borders for a custom touch. Use tiles with different textures or colors to create patterns or zones within the ceiling. Layering with wall decor and furniture completes the modern aesthetic.
A drop ceiling is a smart, stylish solution for hiding popcorn and updating your space. It’s a DIY-friendly project that offers flexibility and ease of maintenance. When installed properly, it looks seamless and professional. Your ceiling will look crisp, clean, and modern—ready to impress?
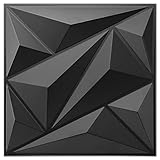
16. Using 3D Wall Paneling on the Ceiling
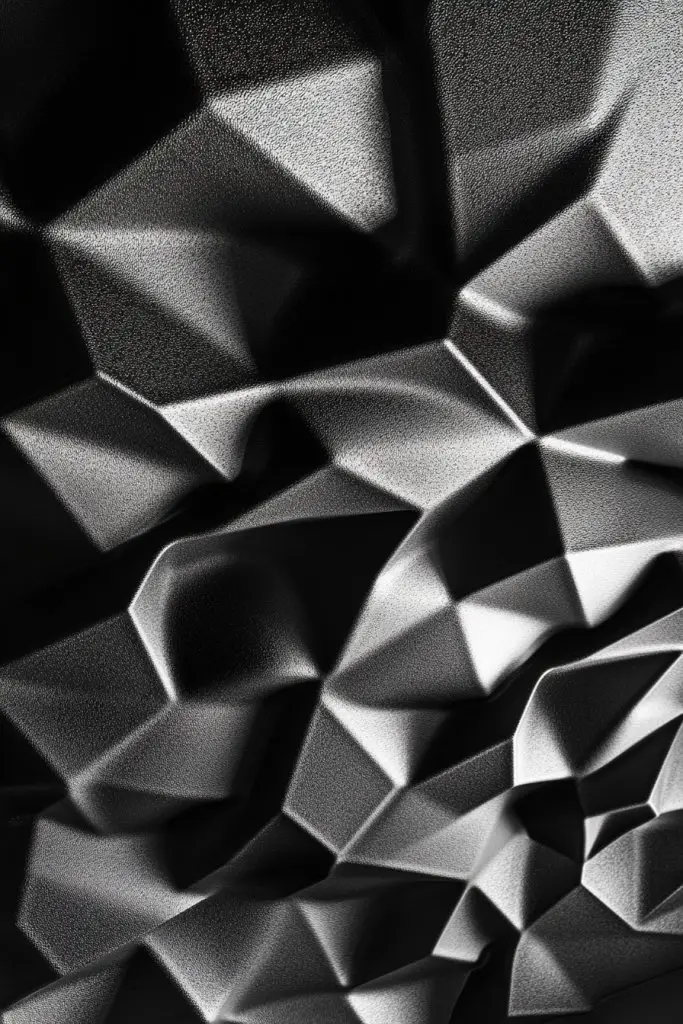
Want a ceiling that commands attention and adds texture? 3D wall panels are a bold way to turn your ceiling into a stunning visual feature. They create depth, pattern, and a contemporary vibe that’s hard to ignore. Perfect for modern or avant-garde interiors looking for a statement piece.
Recommended Products to replicate this idea
| # | Preview | Product | |
|---|---|---|---|
| 1 |
|
Art3dwallpanels 33 Pack 3D Wall Panel Diamond for Interior Wall Décor, PVC Flower Textured Wall... | Check Latest Price |
| # | Preview | Product | |
|---|---|---|---|
| 1 |
|
STICKGOO Glue Up Ceiling Tiles, 24x24 Inch PVC Decorative Drop Ceiling Tile Antique Copper 48 Sq.... | Check Latest Price |
Imagine a ceiling covered with geometric or organic 3D panels in neutral or metallic shades. The textured surfaces cast shadows that shift with the light, adding dynamism. The panels’ shapes—hexagons, waves, or tessellations—bring a sculptural quality that energizes the space. The overall effect is artistic and sophisticated.
Choose from a variety of materials—PVC, MDF, or aluminum—for durability and style. Mix different panel designs or create patterns for visual interest. Seasonal variations include painting in metallic, matte, or gloss finishes. Integrate LED lighting behind or within the panels for dramatic effects. This approach suits modern, industrial, or eclectic interiors.
Measure and plan your panel layout carefully, marking out grid lines. Attach panels using strong adhesive, screws, or clips designed for your material. Ensure proper alignment and secure fixation. Fill gaps or seams with caulk or joint compound, then sand smooth. Finish with primer and paint or sealant as desired. For larger areas, consider professional installation for precision.
Highlight the panels with LED backlighting or directional spotlights. Customize with metallic paints or textured finishes for extra flair. Combine with other architectural features like moldings or beams. Personalize by creating focal points with larger, more intricate panels. Layer lighting and textures for a multi-dimensional effect.
3D panels on the ceiling create a modern masterpiece that elevates your decor. They’re a creative way to add depth and artistic flair. When installed carefully, they’re durable and low maintenance. Your ceiling becomes a conversation starter—ready to impress?
17. Installing a Suspended Wooden Slat Ceiling System
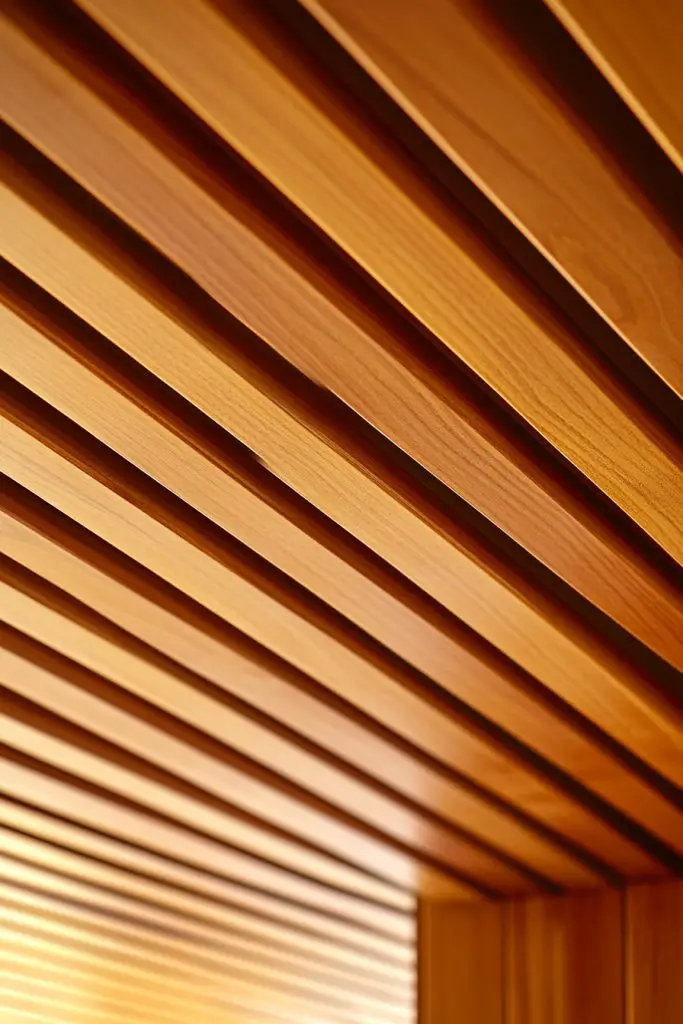
Craving a warm, inviting ceiling that stands out? A suspended wooden slat system hides popcorn texture and adds architectural interest. It brings a natural, modern vibe that’s perfect for creating cozy, stylish interiors. Plus, it offers a sense of depth and rhythm to your room.
Recommended Products to replicate this idea
| # | Preview | Product | |
|---|---|---|---|
| 1 |

|
Art3d 4-Piece Wood Slat Acoustic Panels for Stylish Decor and Noise Reduction, 3D Textured Panel for... | Check Latest Price |
| # | Preview | Product | |
|---|---|---|---|
| 1 |

|
Westinghouse 0107000 Saf-T-Grid for Suspended Ceilings | Check Latest Price |
Visualize parallel wooden slats running across the ceiling, with spaces in between that allow light to filter through. The warm tones and natural grain add texture and richness. When illuminated with soft lighting, the slats cast subtle shadows, creating a layered, dynamic look. The overall effect is both modern and welcoming.
Choose different wood types—oak, cedar, or bamboo—for varied aesthetics. Vary the width and spacing of the slats for different visual effects. For seasonal changes, stain or paint the wood in different shades or add decorative accents like metal or fabric inserts. This system suits contemporary, rustic, or Scandinavian styles.
Begin by removing popcorn and installing a sturdy framework that supports the slats. Secure the wooden slats parallel to each other using clips or brackets. Use a level to ensure uniform spacing. Seal and finish the wood with protective coatings or stains. Install lighting fixtures between or above the slats to enhance the layered effect. Regular maintenance involves cleaning and re-staining as needed.
Add LED strip lighting along the edges or between the slats for ambient glow. Personalize by staining or painting the wood in colors that match your decor. Incorporate decorative metal accents or textured panels for variety. Layer with textiles or decorative elements on adjacent walls for a cohesive look. The result is a warm, modern ceiling that feels handcrafted.
A suspended wooden slat ceiling adds warmth and depth, elevating your space instantly. It’s a design choice that combines natural materials with modern aesthetics. When installed properly, it’s durable and easy to maintain. Your ceiling will radiate style and craftsmanship—ready to impress?
18. Painting with Bold, Contrasting Colors for Visual Impact
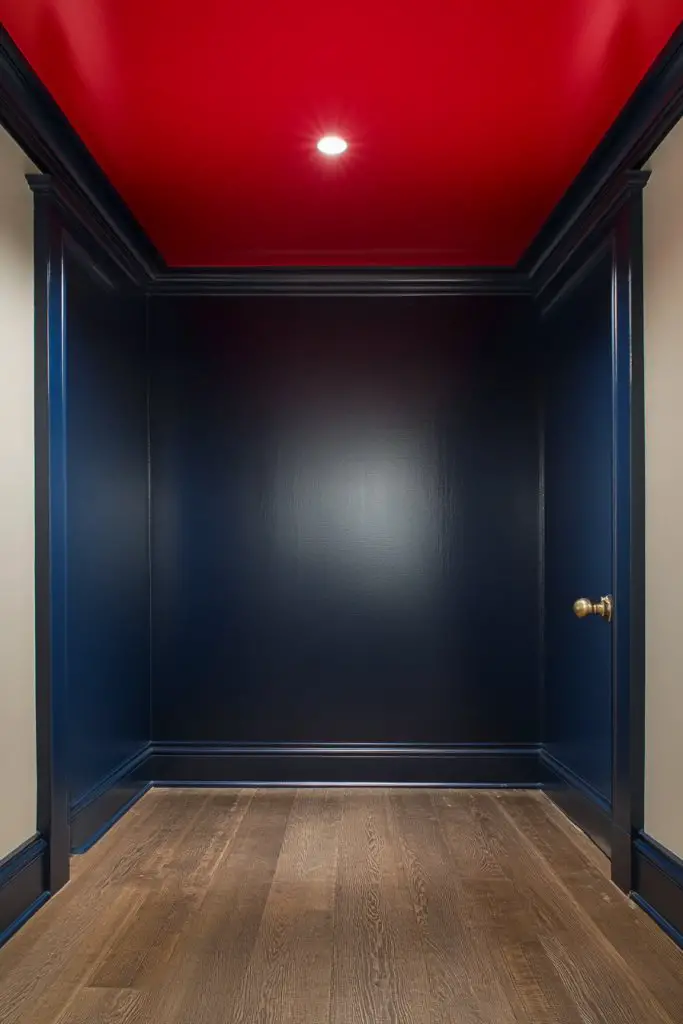
Want to make your ceiling the star of the room? Bold, contrasting colors turn a plain popcorn ceiling into a striking focal point. It’s an easy update that can dramatically change your space’s vibe. Perfect for modern, eclectic, or artistic interiors that crave personality.
Recommended Products to replicate this idea
| # | Preview | Product | |
|---|---|---|---|
| 1 |
|
Zinnser 03688 Covers Up Stain Sealing Ceiling Paint, White | Check Latest Price |
| # | Preview | Product | |
|---|---|---|---|
| 1 |
|
Homax Easy Patch Aerosol Ceiling Texture, Popcorn, 14 oz | Check Latest Price |
Imagine a deep navy or emerald green ceiling with a matte finish, set against crisp white walls. The contrast creates a sense of height and drama, instantly drawing the eye upward. The textured popcorn surface adds subtle depth, making the color pop even more. When paired with minimal decor, the ceiling becomes a visual anchor.
Choose colors that match your mood—vibrant reds, jewel tones, or even black for maximum impact. For a softer contrast, pair dark ceilings with light walls and vice versa. Seasonal updates include changing accent colors or adding metallic or glitter finishes for special occasions. Use glossy or satin paints for a different reflective quality.
Clean and sand the popcorn ceiling to ensure good paint adhesion. Apply a primer suited for textured surfaces to prevent uneven absorption. Use a roller with a thick nap to cover the texture evenly, or spray for a smooth coat. Multiple coats may be necessary for vibrant, consistent color. Seal with a clear matte or satin topcoat to protect the finish. Ensure proper ventilation during and after painting.
Add decorative borders or stenciled patterns in contrasting shades for more visual interest. Incorporate lighting—like track lights or spotlights—to highlight the bold color. Layer with colorful or patterned textiles in the room to amplify the effect. Personal touches like painted motifs or geometric shapes can make it uniquely yours.
Painting your ceiling in bold colors is a daring move that instantly modernizes your space. It’s a simple, cost-effective way to add personality and depth. When done right, it creates a memorable, stylish statement that elevates your entire decor. Ready to turn your ceiling into a masterpiece?
19. Incorporating Artistic Ceiling Murals or Abstract Designs
Dreaming of a ceiling that’s truly unique? Artistic murals or abstract designs turn a plain popcorn ceiling into a personal art piece. They add character, color, and a sense of creativity that makes your space stand out. Perfect for art lovers or anyone wanting to make a bold design statement.
Recommended Products to replicate this idea
| # | Preview | Product | |
|---|---|---|---|
| 1 |

|
Roman’s E-Z Hang Peel & Stick Wallpaper Helper + Pre-Pasted Activator, Clear, Non-Staining, 32... | Check Latest Price |
| # | Preview | Product | |
|---|---|---|---|
| 1 |

|
Unicozin LED 4 Light Track Lighting Kit, Matt Nickel 4 Way Ceiling Spot Lighting, Flexibly Rotatable... | Check Latest Price |
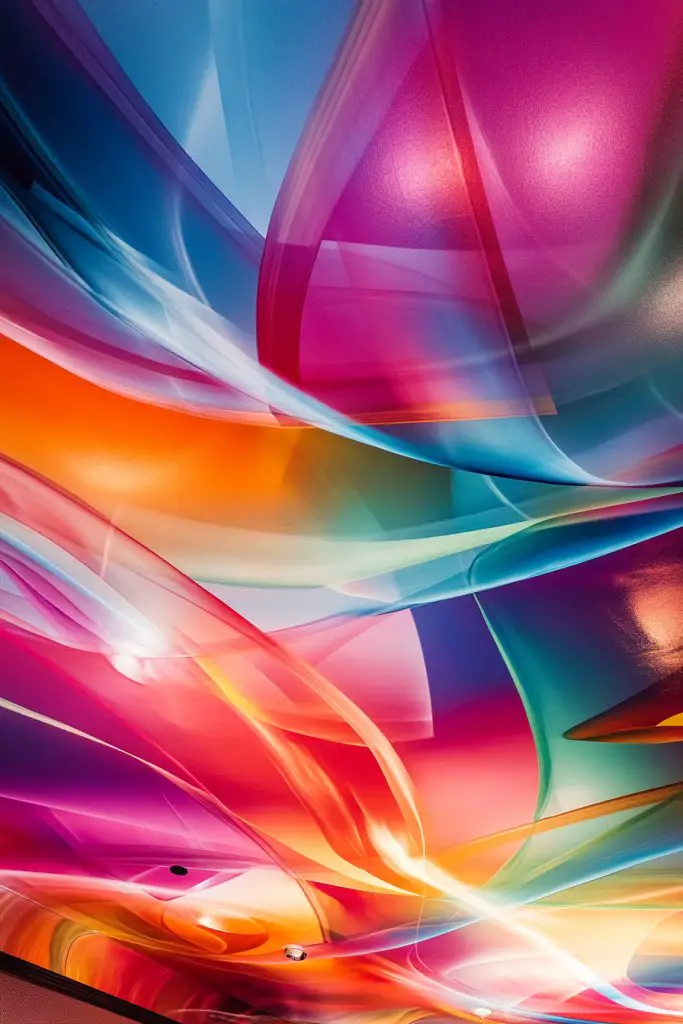
Imagine a sprawling abstract mural with vibrant colors or a subtle, monochrome landscape stretching across the ceiling. The design can be large-scale or intricate, depending on your style. When lit with spotlights or uplights, the artwork comes alive, filling the room with energy. The popcorn texture becomes a textured background that enhances the mural’s depth.
Choose from styles—geometric, organic, or painterly—matching your decor theme. Seasonal variations include changing the mural’s color palette or adding elements like gold leaf accents. For a minimalist look, opt for subtle, monochrome designs; for maximal impact, go bold with colors and details. Incorporate complementary wall art or decor for cohesion.
Hire a mural artist or use stencils and high-quality paints for DIY projects. Prepare the popcorn surface by cleaning and priming. Sketch your design lightly with chalk or transfer paper before painting. Use acrylic or latex paints for durability, sealing with a clear topcoat for protection. Consider incorporating metallic or textured paints for extra dimension. Proper lighting highlights the artwork’s details.
Add metallic or glitter accents for extra sparkle. Use LED uplights or color-changing bulbs to alter the mood. Frame the mural with decorative moldings or borders for a finished look. Personal touches like initials, motifs, or themed imagery make it truly yours. Layer with textured walls or furniture that complements the art.
Ceiling murals are a bold, artistic choice that instantly elevates your decor. They showcase your personality and creativity, making your home uniquely yours. When executed well, they impress and inspire. Your ceiling becomes a canvas—ready to wow everyone who enters.
Conclusion
Exploring these diverse covering popcorn ceilings ideas can help you find the perfect solution to refresh your home’s look. Whether you choose paint, new textures, or decorative panels, each option offers a unique way to elevate your space. Don’t hesitate to try out these ideas and put your personal touch on your ceilings. Take action today and turn your ceilings into stunning features that enhance your entire interior!