
17 Hallway Gallery Wall Ideas for Creative Displays
Walking down a hallway might seem like just a passage from one room to another, but with a creative gallery wall, it can become a stunning focal point that reflects your personality and style. These hallway gallery wall ideas are incredibly popular because they add visual interest, make narrow or plain corridors feel more inviting, and showcase your favorite art and photos in a personalized way.
In this article, you’ll find a variety of inspiring ideas to transform your hallway into a captivating display. Whether you prefer eclectic arrangements, symmetrical layouts, or minimalist designs, there’s something here to spark your creativity and elevate your home’s aesthetic.
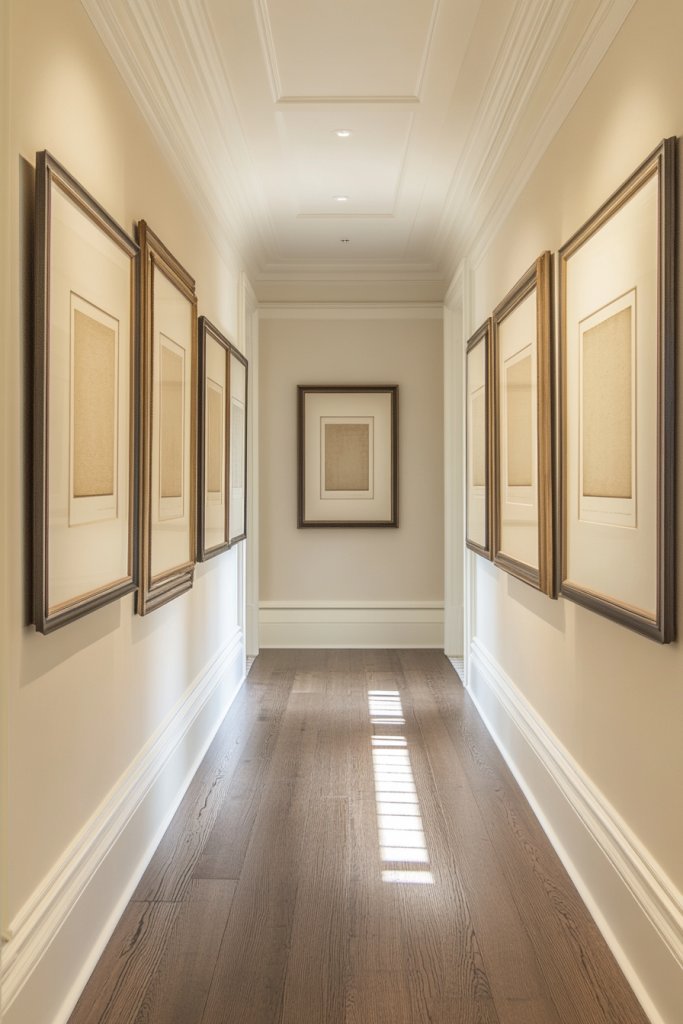
1. Symmetrical Framed Art Arrangement for a Classic Look
Ever wonder how some homes exude timeless elegance without looking stuffy? Achieving a balanced, polished hallway can seem daunting, especially when you want a look that feels both sophisticated and effortless. Many struggle with uneven wall displays that feel cluttered or too chaotic, leaving their space feeling off. The desire is for a clean, harmonious aesthetic that instantly elevates the entire vibe.
Imagine a grid of identical frames perfectly aligned, each containing art or photos that complement each other in color and style. The symmetry creates a sense of order and peace, drawing the eye inward and making the hallway appear more spacious. The frames might be matte black or sleek metallic, contrasting with neutral walls for a modern touch. The overall effect is a crisp, curated look that feels both timeless and inviting.
This classic approach works well with monochrome palettes or a mix of black, white, and metallic finishes. You can adapt the layout for smaller or larger walls by adjusting the size and number of frames. Seasonal tweaks might involve swapping out photos or art for different themes or colors, keeping the display fresh. For a softer look, opt for more rounded frames, or go bold with oversized pieces for a statement.
Start by choosing uniform frames in your preferred finish—metal or wood work well. Measure your wall carefully to determine the best grid size and spacing, typically 1-2 inches apart. Lay out the frames on the floor first to visualize the arrangement before hanging. Use a level and painter’s tape to mark the positions on the wall. For a perfectly aligned look, hang each frame at eye level or slightly above, depending on your ceiling height. Keep the arrangement symmetrical and balanced for that classic vibe.
Personalize by selecting art or photos that tell your story—family moments, travel memories, or favorite quotes in minimalist typography. Add a subtle touch with textured mats or matte glass to elevate the frames further. Mixing in a few metallic or wood accents can break the monotony and add warmth. To keep things fresh, rotate your images seasonally or whenever you feel like a quick update.
This timeless setup creates a sense of order and sophistication that never goes out of style. It’s a simple, effective way to make your hallway feel like a curated gallery. Once you see the polished symmetry, you’ll feel inspired to extend this style throughout your home. Ready to transform your space into a classic masterpiece?
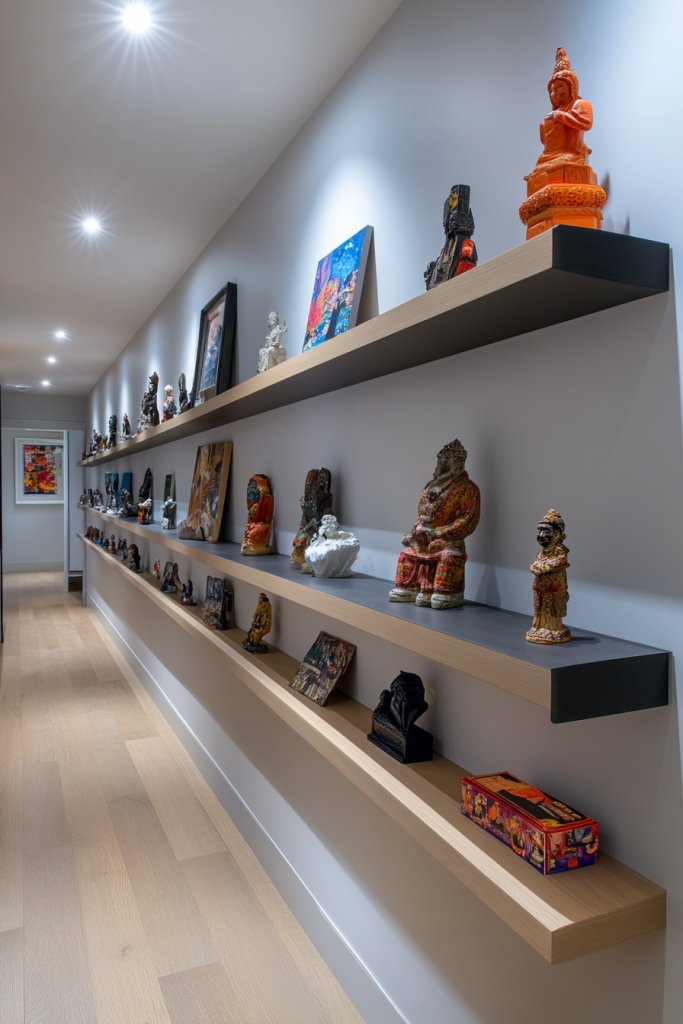
2. Floating Shelves with Curated Art and Souvenirs
Looking for a flexible way to display art and mementos without committing to holes in the wall? Floating shelves are a perfect solution, offering a clean, modern way to showcase a curated mix of items. The challenge is making the display look intentional and stylish, rather than cluttered or haphazard. The goal is a personalized gallery that can evolve over time.
Imagine narrow, white or wood-toned floating shelves running along the wall, each holding a selection of framed art, small sculptures, or meaningful souvenirs. Layering items at different heights creates visual interest, while leaving space between pieces keeps the display feeling fresh. Soft lighting from hidden LED strips or sconces enhances the textures and colors. The overall look is airy, curated, and adaptable.
Use varying shelf lengths and heights to suit your space and style. In a minimalist setting, opt for sleek, slim shelves with monochrome or metallic accents; in a boho vibe, go for rustic wood with colorful objects. Change out items seasonally, adding new souvenirs or artwork to keep the display lively. Incorporate small plants or decorative boxes for added texture, while avoiding clutter.
Select sturdy floating shelves that match your decor—wood, metal, or a combination. Install brackets securely into wall studs for stability. Arrange your art and souvenirs on the shelves first, experimenting with placement until you find a balanced look. Use level tools and spacers to ensure even spacing and alignment. Secure the shelves tightly to prevent accidents, especially if holding heavier objects.
Personalize with your travel finds, family heirlooms, or favorite decorative objects. Rotate items periodically or swap them out for seasonal updates. Add small LED or fairy lights underneath for ambiance. Incorporate decorative storage boxes or textured ceramics to add variety without visual clutter. Keep it flexible so your display can grow and change.
Floating shelves allow your personality to shine through with minimal effort, turning a plain hallway into a storytelling space. They provide a sense of curated elegance that’s easy to update. Once you master the art of layering and spacing, you’ll want to extend this idea into other rooms. Your hallway becomes a visual diary of your life.
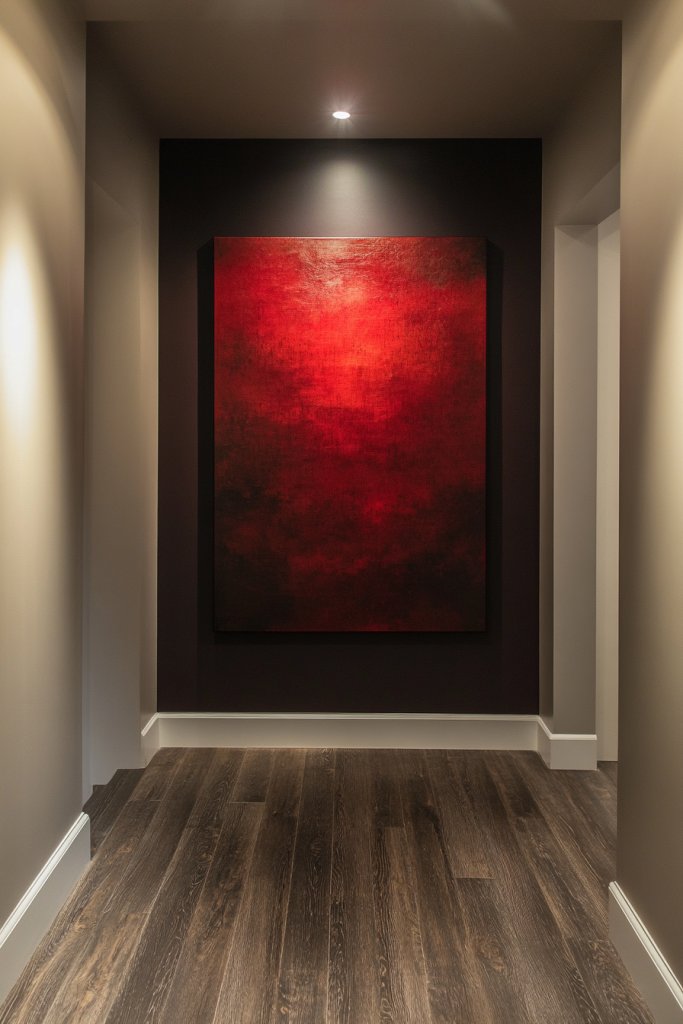
3. Bold Accent Wall with Large-Scale Canvas Prints
Ever feel like your hallway is missing that wow factor? A single, impactful piece of art can transform a dull space into a striking focal point. But choosing the right piece can be tricky—something too small feels underwhelming, while too many can look cluttered. The goal is a bold statement that commands attention and sets the tone.
Envision a large, textured canvas spanning most of the wall, featuring abstract art, a vibrant landscape, or a textured mixed media piece. The bold colors and massive scale immediately draw the eye, creating a sense of depth and drama. Surrounding the print with minimalist decor or neutral walls emphasizes its impact, making the hallway feel expansive and curated. The textured surface invites touch and adds tactile richness.
Choose a canvas that matches your style—bright and energetic for a lively vibe or subdued and textured for understated elegance. For seasonal variation, swap out the artwork with different themes or colors. Smaller prints can be clustered together for a similar effect, or go all-in with a single statement piece. Frame it with a simple sleek border or leave it unframed for a modern look.
Select a large-scale canvas or order a custom print to fit your space. Mount it securely using wall hooks designed for heavy art or use wire systems for easy adjustments. Make sure the wall surface is clean and smooth before hanging. For added drama, consider lighting the piece with adjustable picture lights or wall-mounted sconces. Keep surrounding furniture minimal to let the artwork shine.
Personalize by choosing artwork that reflects your personality—favorite colors, hobbies, or memories. Layer in textured elements like fabric or a small sculpture nearby for depth. Use framed photos or smaller prints in complementary styles around the large print for a curated gallery feel. Change the artwork periodically to keep the space fresh and aligned with your evolving taste.
A bold, large canvas sets a confident tone for your decor, proving that one statement piece can do all the work. It’s a simple but effective way to elevate your hallway and showcase your style. Once you see how much impact a single piece makes, you’ll be motivated to go bigger and bolder elsewhere. Ready to make a statement?
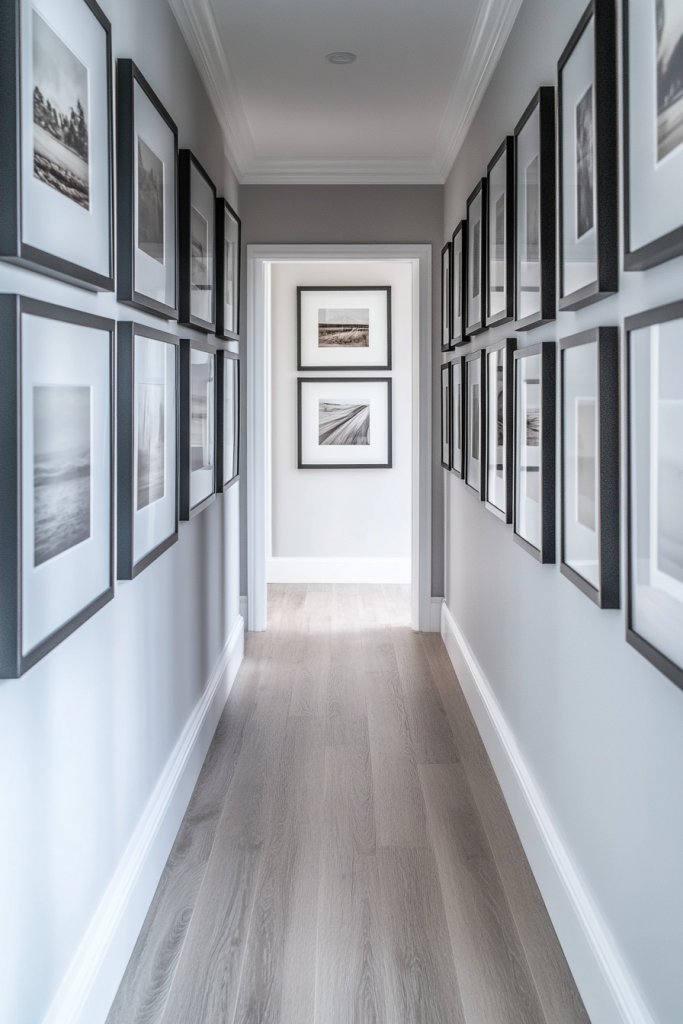
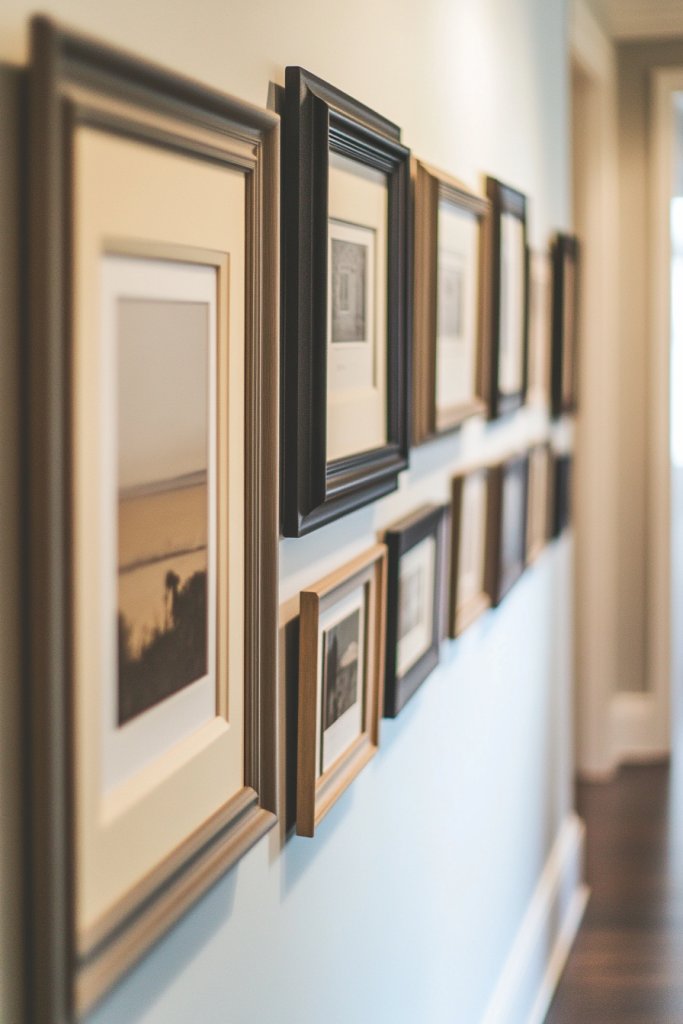
4. Gallery Wall with Monochrome Frames and Neutral Tones
Does your hallway feel a little flat or uninspired? Sometimes all it takes is a cohesive display to add sophistication and calm. A gallery wall with monochrome frames in neutral tones creates a unified look that is both modern and timeless. The challenge? Achieving variety without losing harmony.
Visualize a wall filled with frames in shades of black, white, or metallics—arranged in an organic or grid pattern. Inside, feature a mix of personal photos, subtle illustrations, or textured prints that blend seamlessly. The neutral palette provides a quiet elegance, allowing the content inside to shine without competing. The overall effect is a serene, polished space that invites lingering.
This approach works well in minimalist, Scandinavian, or contemporary decor themes. You can vary frame sizes and styles within the monochrome palette for visual interest. For seasonal updates, switch out the inner content or add a splash of metallic accents. This style is versatile enough for small or large walls and can be paired with other neutral decor elements.
Choose frames in a consistent color—black, white, or metallic—and measure your wall to plan the layout. Use painter’s tape to mark the arrangement before hanging, ensuring even spacing. Mix and match art, photos, or prints that share a similar tone or style for cohesion. Hang each frame securely, ensuring they are level. Keep the arrangement balanced but slightly organic for a contemporary feel.
Personalize by incorporating textured papers or matte prints behind glass to add depth. Use subtle decorative elements like small metal or ceramic accents nearby for a touch of shine. Rotate the inner content periodically to reflect changes in your interests or seasons. Keep the overall palette muted for a calming, sophisticated ambiance.
This monochrome gallery wall elevates your hallway with minimal effort, proving that simplicity is often the most elegant choice. It provides a blank canvas for your personal stories while maintaining a cohesive look. Once you master this style, it’s easy to adapt and extend across your entire home. Ready for some understated chic?
5. Asymmetrical Layout for Dynamic Visual Interest
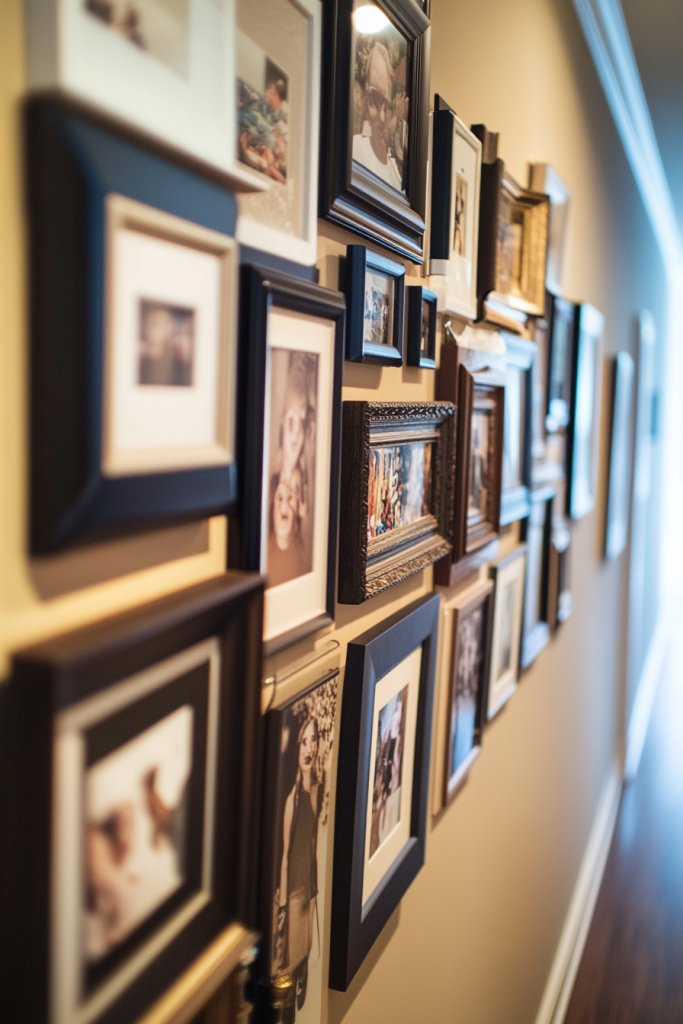
Feeling bored by perfectly aligned wall art that feels too predictable? An asymmetrical layout adds energy and movement to your hallway, making the space feel more lively. The challenge is creating a balanced look without seeming haphazard or chaotic. You want a design that’s intentionally imperfect but still pleasing to the eye.
Imagine a collection of frames and art pieces arranged in a seemingly spontaneous pattern, with different sizes, shapes, and orientations. The arrangement might resemble a freeform constellation, with some pieces clustered and others spaced apart. This dynamic setup invites curiosity and encourages the eye to explore. Bright colors or textured frames can enhance the effect, creating a modern, eclectic vibe.
This approach suits contemporary, boho, or industrial styles. You can play with the rule of thirds or create a visual anchor point, then build around it asymmetrically. Using a mix of large and small frames, or overlapping elements, adds depth. For seasonal updates, swap out or reposition pieces to keep the display fresh and energetic.
Start by selecting a few anchor pieces with bold shapes or colors. Arrange them on the floor or a large table to experiment with placement. Use painter’s tape on the wall to map out your layout, adjusting until it feels right. Hang the main pieces first, then fill in gaps with smaller items. Keep the overall composition balanced but intentionally off-center for a lively effect.
Add variety with textured or three-dimensional elements like small shelves or sculptural objects. Incorporate your favorite colors or themes for a personalized touch. Play with layering and overlapping for a more curated, artistic look. Seasonal or mood-based changes keep the display engaging and relevant.
This layout style breaks the rules and unleashes creativity, making your hallway uniquely yours. It’s a great way to showcase your personality and artistic side. Once you see the energy it creates, you’ll want to experiment more—perhaps in other rooms too. Ready to embrace the imperfectly perfect?
6. Incorporate Mirror Frames to Enhance Light and Space

Does your hallway feel cramped or dark? Mirrors are a classic trick to visually expand space and reflect light, making even the narrowest hallways feel brighter and larger. The challenge is choosing the right mirror style that complements your decor without overwhelming the space.
Picture a series of elegant mirror frames arranged in a grid or asymmetrical pattern along the wall. The reflective surfaces catch ambient light, bouncing it around the room and creating a luminous effect. Framing mirrors in sleek metals or ornate vintage styles adds personality, while their placement enhances the room’s depth and brightness. The overall look is both functional and artistic.
In modern decor, opt for frameless or minimal metal-framed mirrors for a sleek look. For a more traditional vibe, choose ornate, carved frames in gold or silver. Mix different shapes—round, oval, rectangular—for visual interest. Incorporate functional mirrors near entry points or decorative ones as focal points, adjusting the layout for your space.
Select mirrors that match your style and size constraints. Measure wall space carefully, planning the arrangement to maximize light reflection. Hang mirrors at eye level, using appropriate anchors for weight. Consider grouping smaller mirrors for a gallery effect or a large statement piece for impact. Keep the arrangement balanced and aligned for a polished appearance.
Add decorative elements like etching, frosted designs, or subtle framing details to customize your mirrors. Incorporate lighting fixtures like sconces or LED strips to enhance their reflective qualities. Keep the surrounding wall simple to let the mirrors stand out, or pair with textured wall finishes for contrast. Regular cleaning keeps reflections clear and bright.
Mirrors do double duty—brightening your hallway while elevating its style quotient. They’re a smart, versatile choice for small spaces, turning functionality into decor. Once you harness their power, you’ll see your entire home feel more open and inviting. Ready to reflect your style?
7. DIY Wall with Personal Handwritten Quotes and Art
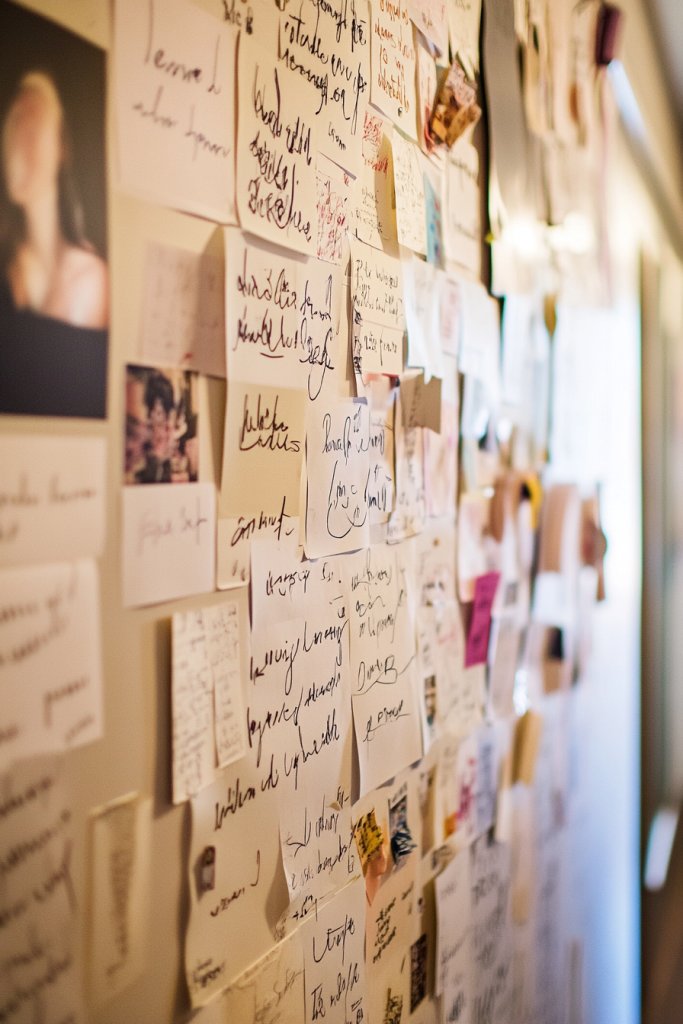
Looking for a way to add personality and inspiration to your hallway without breaking the bank? Handwritten quotes, doodles, or personal art can make your space uniquely yours. The challenge is making it look intentional and stylish, not cluttered or amateurish. DIY art offers a heartfelt touch that mass-produced pieces can’t match.
Imagine a wall full of your favorite quotes written in beautiful calligraphy or playful handwriting, framed by simple borders or painted directly onto the wall. You might include sketches, doodles, or abstract designs for added flair. Using bold colors or metallic accents emphasizes certain words or themes, making the display both personal and vibrant. The overall effect is a charming, motivational gallery that feels authentic.
Choose your medium—chalkboard paint, wall decals, or freehand painting—based on your skill level and decor style. For a more polished look, use stencils or transfer techniques. Vary the size and style of your quotes to create visual rhythm. Incorporate small illustrations or decorative borders for a cohesive, creative vibe. Seasonal or mood changes can be easily incorporated by repainting or updating quotes.
Pick a wall section that’s visible and has enough space. Sketch your design lightly with pencil before committing with paint or markers. Use high-quality, fade-resistant paints or markers to ensure longevity. For a professional look, practice your lettering on paper first. Seal the finished art with a clear protective coat if needed. You can also frame or mount printed versions of your quotes for variety.
Add decorative elements like washi tape borders or embellishments with metallic pens. Incorporate your own handwriting style to make it more personal. Change or add new quotes regularly to keep the space fresh and inspiring. Use complementary colors or themes that match your overall decor to create harmony.
Creating your own wall art fills your space with positive energy and personal stories. It’s a fun, inexpensive way to refresh your hallway and showcase your creative side. Once you see how much personality it adds, you’ll be motivated to try more DIY projects around your home. Let your walls tell your story.
8. Incorporate Small Clocks or Functional Art Pieces
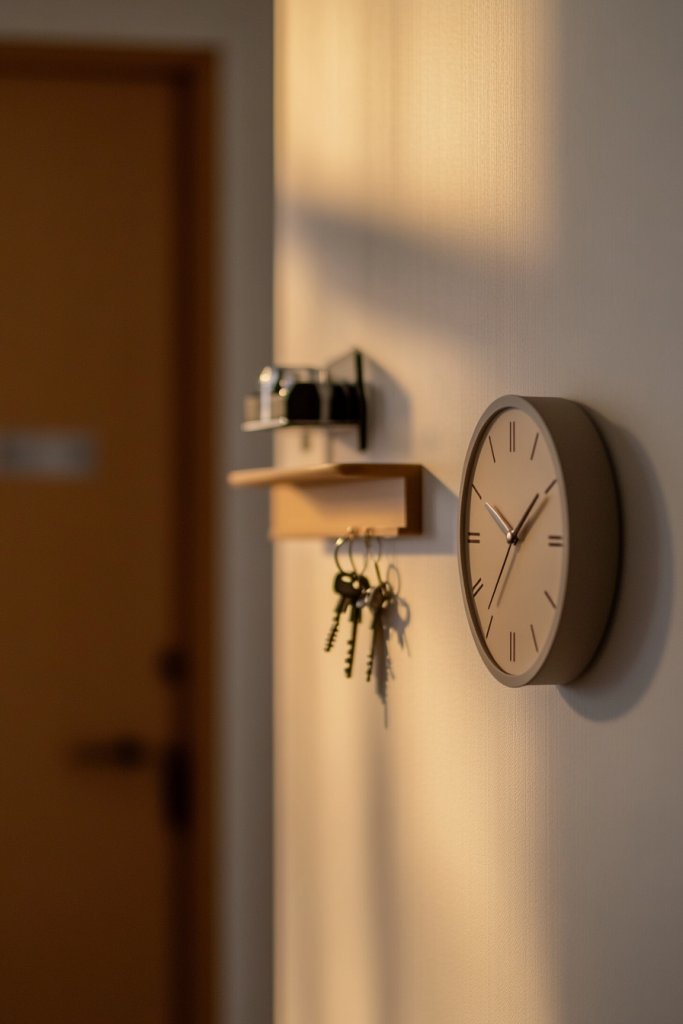
Ever wish your hallway could be both stylish and practical? Small wall clocks or functional art pieces combine form and function seamlessly. They serve as decor while helping you keep track of time or organize your space. The challenge is choosing pieces that don’t look like afterthoughts but instead elevate the entire design.
Picture a sleek, minimalist clock mounted above a console table or entryway. Alternatively, opt for multi-functional pieces like wall-mounted organizers with clock faces integrated into artistic designs. The clock’s style—whether modern, vintage, or industrial—sets the tone for your decor. Framing it with complementary textures or materials enhances its presence, making it a focal point.
Choose clocks with clean lines for modern decor or ornate frames for vintage charm. Incorporate other functional elements like hooks or small shelves nearby for keys or mail. For a playful twist, select clocks with unusual shapes or colors that contrast with your wall color. Adjust placement based on your hallway’s size and traffic flow for maximum utility.
Select a clock that matches your style and fits the wall space. Mount it securely at eye level using appropriate anchors. Pair it with a small shelf or organizer if needed, ensuring they don’t clutter the space. Consider adding a contrasting wall color or accent behind the clock to make it pop. Regularly check for accuracy and battery life for optimal function.
Personalize with custom clock faces, or add decorative elements like magnetic boards or memo clips nearby. Use themed or seasonal accessories to keep the display lively. Combine multiple small clocks in different rooms for a coordinated look. Keep the area tidy and functional to avoid clutter.
Blending decor with practicality elevates your hallway and simplifies daily routines. It’s a subtle but impactful upgrade that boosts both style and efficiency. Once you see how well it works, you’ll want to incorporate functional art throughout your home. Ready to make your space both beautiful and useful?
9. Use Color-Coordinated Frames for a Cohesive Palette
Feeling overwhelmed by a mishmash of random frames and artwork? A coordinated color scheme can instantly create harmony and elevate your hallway’s style. Using frames in matching or complementary hues ties the display together, giving it a unified, polished look. The trick is balancing color variety with cohesion.
Visualize a wall filled with frames in shades of soft pastels, bold primaries, or metallics, all carefully chosen to match your decor palette. Inside, feature a mix of photos, prints, or textured art that echoes the frame colors. The result is a seamless, harmonious display that feels intentional and curated. Light-colored walls and subtle accents highlight the frames, making the whole space feel calm and cohesive.
Choose frames in a single color for a monochrome look or in a few shades for variety without chaos. Incorporate metallics or wood tones for added warmth or sophistication. For seasonal updates, swap out the inner artwork or photos while keeping the frames consistent. This approach works well in both modern and traditional settings.
Start by selecting frames in your chosen color palette. Measure and plan your layout carefully, considering spacing and arrangement—whether grid or organic. Use painter’s tape to mark the placement before hanging. Keep the inner content varied but within the color scheme for coherence. Hang each piece with level tools for precision. Maintain consistency in spacing and alignment.
Add personal touches by choosing mats or backing papers that match your palette. Incorporate themed elements like seasonal colors or favorite hues for special occasions. Mix different textures—matte, glossy, or textured papers—to add visual interest behind the glass. Personalize further by including small decorative objects or labels.
A cohesive color scheme simplifies decision-making and creates a calming, sophisticated atmosphere. It’s a versatile approach that works across various decor styles. Once you see how harmonious your hallway looks, you’ll be inspired to extend this technique elsewhere. Your space will feel more curated and intentional.
10. Create a 3D Gallery with Shadow Boxes and Depth
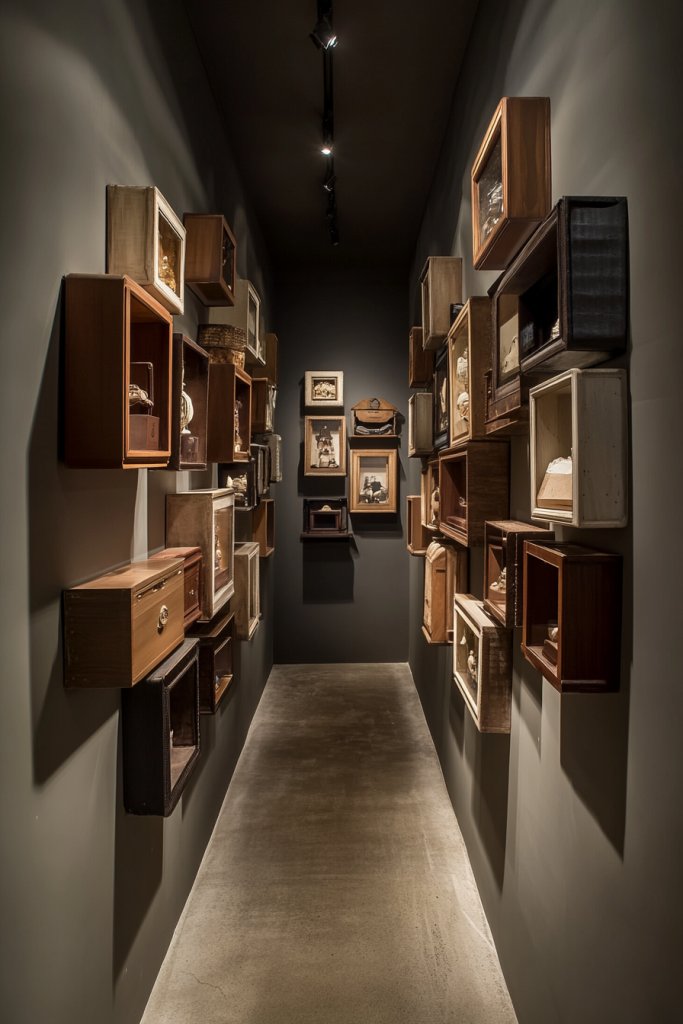
Looking to add dimension and texture to your hallway display? Flat art and photos can feel dull and lifeless. Shadow boxes and layered objects introduce depth, creating a dynamic visual experience. The challenge is balancing 3D elements without overwhelming the space or making it look cluttered.
Imagine a wall decorated with shadow boxes containing small sculptures, textiles, or layered art pieces. Some boxes might hold vintage memorabilia, while others display textured fabrics or natural elements like shells. The play of light and shadow enhances the sense of depth, making the display lively and tactile. The overall effect is a curated, museum-like vibe that invites exploration.
Combine different depths and sizes of shadow boxes for variety. Use materials like wood, metal, or textured paper backgrounds for added interest. Incorporate objects that tell your story—small collectibles, textiles, or natural items—while maintaining balance. Adapt the arrangement for different themes, such as rustic, industrial, or boho, by choosing appropriate objects.
Select shadow boxes in various sizes and styles that match your decor. Mount them securely with appropriate anchors, ensuring they are level and stable. Arrange the boxes on the floor first, experimenting with placement and layering. Hang the boxes with sturdy hooks or nails, leaving enough space for shadows and depth. Use lighting to highlight key objects or textures.
Fill shadow boxes with meaningful objects—travel souvenirs, family heirlooms, or textured fabrics. Change items seasonally or for special occasions to keep the display fresh. Incorporate lighting inside or around the boxes for dramatic effects. Mix in artwork or photos in flat frames to complement the layered objects.
A 3D gallery adds richness and storytelling to your hallway, making it a conversation starter. It combines art, collectibles, and textures into a cohesive display. Once you master layering and depth, you can extend this concept into other rooms for a truly immersive home. Get ready for a more tactile, engaging space.
11. Incorporate Artistic Wall Decals or Stencils as Backgrounds
Tired of plain, boring walls that lack personality? Wall decals and stencils offer an easy way to add pattern, color, and artistic flair without painting or wallpapering. The goal is to create a captivating backdrop that enhances your gallery without the need for extensive renovation. The challenge is selecting designs that complement your overall style.
Picture a wall with subtle geometric patterns or intricate stenciled motifs in neutral or bold colors. These backgrounds serve as a canvas for your frames or objects, adding texture and visual interest. The patterns can be modern, floral, or abstract, depending on your decor theme. When combined with carefully selected pieces, they elevate the entire space into a stylish art installation.
Use decals with simple shapes for a minimalist look or elaborate patterns for a boho or eclectic style. Choose stencils that allow you to create custom designs, giving your space a personal touch. For seasonal updates, apply removable decals or paint over stencils easily. Layer the decals with frames or objects for a multi-dimensional effect.
Select decals or stencils that suit your style and wall surface. Clean the wall thoroughly before applying decals to ensure adhesion. Use painter’s tape and level guides to position stencils accurately. Follow manufacturer instructions for application or painting, and seal with a clear topcoat if needed. Once dry, add your framed art or objects on or around the patterned background.
Customize by choosing patterns that reflect your personality—floral for romantic, geometric for modern, or whimsical for playful. Add metallic or textured paints for extra dimension. Incorporate your favorite colors or themes, and consider combining with wall-mounted lighting for added drama. Change the decals or stencils seasonally for a fresh look.
This technique turns a plain wall into a captivating feature, making your hallway memorable. It’s a budget-friendly way to add style and personality without major renovations. Once you see how a simple stencil or decal transforms the space, you’ll be inspired to experiment more. Your hallway becomes a canvas of your creativity.
12. Hang a Series of Small, Themed Prints for Narrative Flow
Ever wished your hallway could tell a story or evoke a mood? A series of small, related prints can create a narrative that draws viewers in and adds depth to your decor. The challenge is selecting themes and arranging the prints for maximum impact without cluttering the space.
Imagine a sequence of tiny prints—illustrations, maps, or vintage postcards—arranged in a linear or grid pattern. The theme could be travel, nature, or personal milestones. Using matching frames or mats in your chosen color palette creates cohesion. The overall effect is a curated narrative that invites exploration and curiosity.
Mix and match images that share a common story or aesthetic—like botanical sketches or vintage travel posters. For a more eclectic look, vary the frame styles slightly but keep the color palette consistent. You can arrange them in a straight line, a zigzag, or a freeform pattern depending on your space and taste. It’s versatile enough for small or large walls.
Gather your themed prints—digital downloads, original sketches, or vintage finds—and get them printed in uniform sizes. Frame each with matching or complementary mats and frames. Use painter’s tape or washi tape to experiment with placement on your wall before hanging. Hang in a neat sequence, ensuring even spacing and alignment. Adjust until the flow feels natural.
Add small labels or handwritten notes to deepen the story. Incorporate personal photos or memorabilia that relate to the theme. Change out prints seasonally or for special occasions to keep the narrative fresh. Use shadow boxes or layered frames for a dimensional effect that adds visual interest.
This storytelling approach transforms your hallway into a visual diary, making it more engaging. It’s an easy way to showcase your interests or travel adventures in a compact format. Once you see how a sequence of small images can make a big statement, you’ll want to try it with other themes and spaces. Your walls will tell your story.
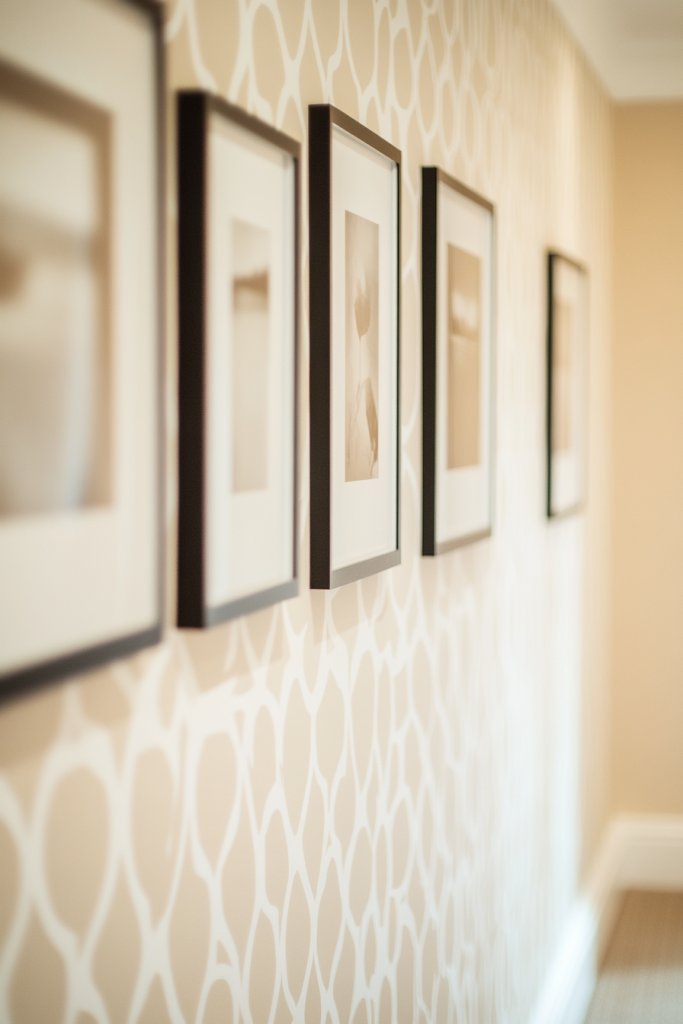
13. Use Minimalist White Frames for a Clean, Modern Feel

Feeling overwhelmed by busy, cluttered wall arrangements? Minimalist white frames offer a sleek, modern solution that emphasizes simplicity and elegance. They help your artwork or photos stand out against any wall color, creating a fresh and airy vibe. The key is choosing the right pieces that complement the understated aesthetic.
Visualize a wall of clean, white frames evenly spaced in a grid or linear pattern. Inside, feature monochrome photos, simple sketches, or textured prints—anything that benefits from a neutral, distraction-free border. The white frames act as a visual breath, allowing each piece to breathe and shine. The overall look is crisp, uncluttered, and contemporary.
This style adapts easily to various decor themes—from ultra-modern to Scandinavian minimalism. For variation, use different sizes of white frames or mix in clear acrylic mounts. Incorporate subtle matting in black or gray to add depth. Change the inner art or photos seasonally, maintaining the minimalist frame as a constant.
Select high-quality white frames that match your wall size and style. Measure and plan your layout—most often, a grid or a straight line works best. Use painter’s tape to mark positions before hanging, ensuring even spacing. Hang each frame securely with appropriate hooks or nails. Keep the arrangement symmetrical or slightly organic, depending on your taste.
Add variety with textured or patterned backgrounds behind the art, or incorporate small decorative objects nearby. Use consistent framing styles for a cohesive look, or mix with other minimalist elements like clear acrylic shelves. Rotate your inner artwork regularly to keep the display fresh and aligned with your evolving style.
A display of white frames elevates your hallway’s modern appeal with minimal effort. It’s a versatile and timeless look that can be adapted across different rooms. Once you master this clean style, it’s easy to extend into other areas of your home for a unified aesthetic. Simple, elegant, and effective.
14. Combine Art and Functional Items like Hooks or Shelves
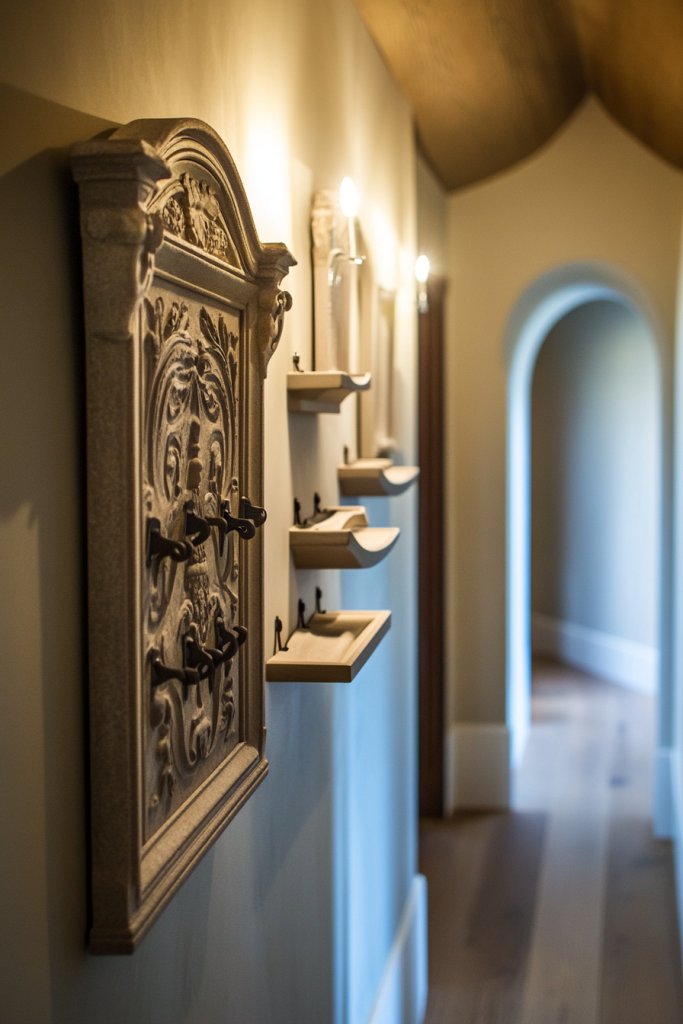
Want your hallway to be both beautiful and practical? Combining art with functional elements like hooks or shelves creates a space that’s stylish and useful. The challenge is integrating these pieces seamlessly so the space doesn’t feel cluttered or chaotic.
Picture a row of decorative hooks with minimalist shapes, holding your coats, bags, or umbrellas, all while serving as a backdrop for framed prints or decorative objects. Shelves can display small sculptures, ceramics, or personal items, adding layers of interest. The combination balances visual appeal with everyday utility, making your hallway inviting and organized.
Use matching or contrasting materials—metal, wood, or acrylic—for hooks and shelves to match your decor style. Position hooks at varying heights for visual rhythm or uniform heights for order. Shelves can be floating, corner-mounted, or tiered, depending on your needs. Incorporate decorative hardware or painted elements for a personalized touch.
Choose sturdy hooks and shelves based on what you plan to hang or display. Measure and mark their placement carefully, ensuring they are secure and level. Install hooks at convenient heights for daily use, and place shelves where they won’t obstruct movement. Group related items together for a cohesive look, and keep the overall design balanced.
Add decorative elements like colorful or textured hooks, or painted shelves to match your style. Incorporate small baskets or containers for keys, mail, or accessories. Change the displayed art or objects seasonally to keep the display engaging. Keep it functional but curated for a sleek, intentional vibe.
This blend of art and utility turns your hallway into a thoughtfully designed space that’s both attractive and practical. It’s a smart solution for small spaces where every inch counts. Once you see how functional decor enhances your daily life, you’ll want to incorporate it throughout your home. Style meets function effortlessly.
15. Incorporate Metallic Accents in Frames or Mounting Hardware
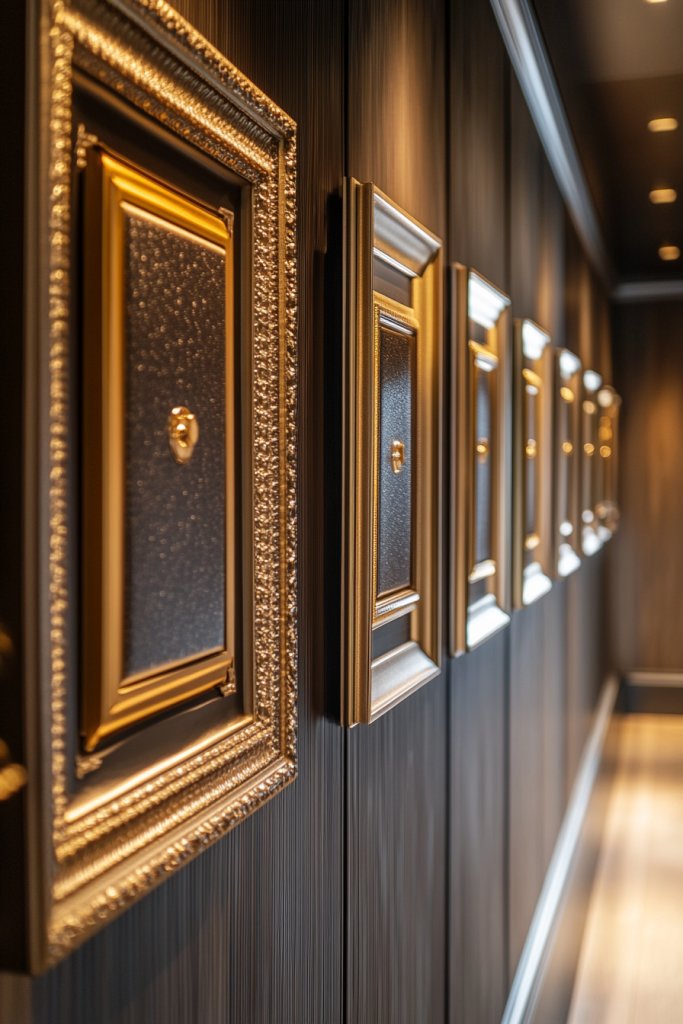
Looking to add a touch of glamour and sophistication to your hallway? Metallic accents in frames or mounting hardware instantly elevate the space, making it feel more luxe. The challenge is balancing shine without overpowering the decor or creating a busy look.
Visualize frames with gold, silver, or brass finishes paired with artwork or photos that complement the metallic shimmer. Hardware like hooks, nails, or wire systems in matching metals enhance the cohesive look. The reflective surfaces catch light, adding brightness and elegance, especially in spaces with soft or dim lighting. The overall vibe is chic and polished.
Mix metals for a contemporary eclectic feel, or stick to one tone for a more refined look. Incorporate metallic accents in small decorative objects nearby, like sculptures or bowls, to reinforce the theme. Use metallic frames with textured or matte finishes for variety. Adapt the level of shine based on your decor—subtle brushed finishes or high-gloss metals.
Choose frames and fixtures in your preferred metallic tone. Measure wall space and plan your layout, considering how the metallic elements will catch light. Hang frames securely, ensuring they are level and spaced evenly. Use matching or contrasting hardware to tie the look together. Consider adding accent lighting to highlight metallic details for extra impact.
Personalize with custom metallic frames or hardware that reflect your style—industrial, glam, or vintage. Incorporate small metallic accessories, like decorative nails or knobs, nearby. Change out inner artwork or photos for variety, keeping the metallic accents as a constant feature. Regular polishing keeps the metals shiny and eye-catching.
Metallic accents add a layer of sophistication and modernity that’s hard to beat. They lend a sense of luxury and elevate even simple displays. Once you master the use of metallic details, you’ll find endless ways to incorporate glamour throughout your home. Time to shine.
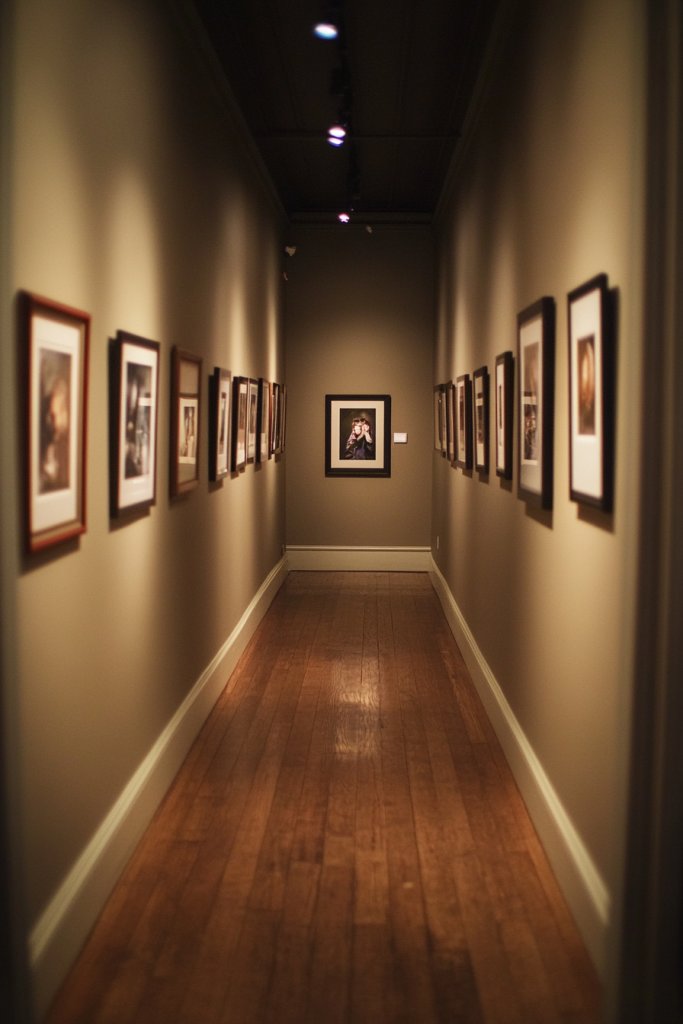
16. Highlight a Single Statement Piece with Spotlighting
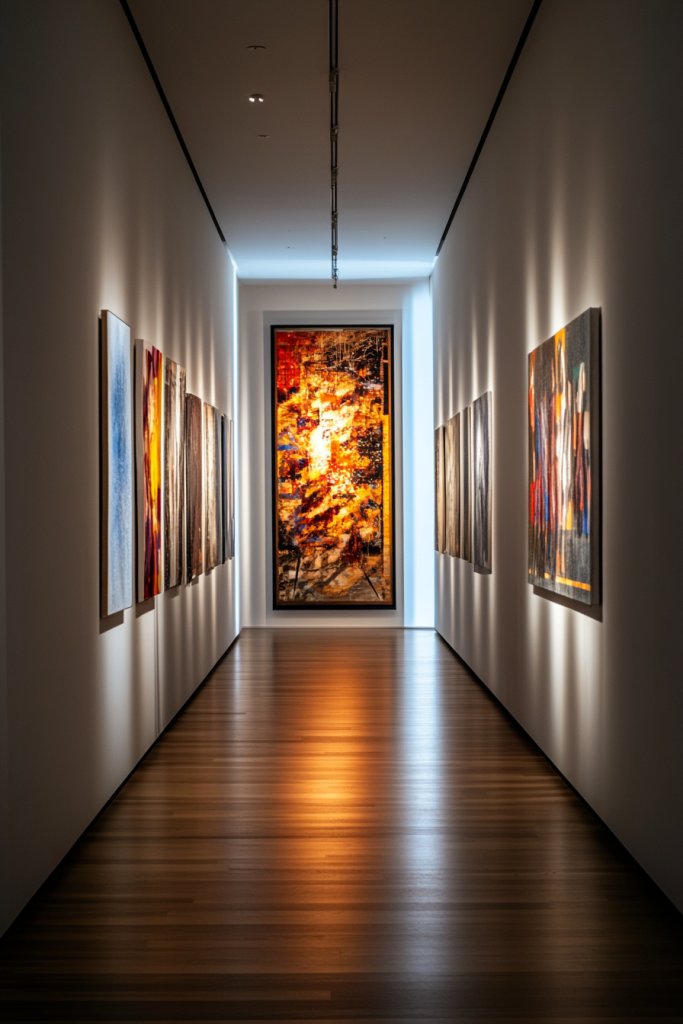
Ever want to draw immediate attention to a favorite piece without overwhelming your decor? Spotlighting a single statement art or photograph creates focus and drama. The challenge is choosing the right piece and lighting to make it pop without feeling forced or out of place.
Imagine a well-lit, large photograph or textured artwork illuminated by an adjustable wall-mounted lamp or picture light. The focused beam highlights details, textures, and colors, making the piece the star of the space. Surrounding it with minimalist decor ensures nothing distracts from the focal point. The effect is both gallery-like and intimate, emphasizing its importance.
Use adjustable picture lights, spotlights, or LED strips to achieve the perfect glow. Keep the surrounding walls neutral or subdued to enhance the spotlight effect. For a modern look, choose sleek, minimal fixtures; for vintage charm, opt for ornate sconces. Position the lighting to avoid glare and shadows, ensuring the art’s best features are illuminated.
Select lighting fixtures compatible with your wall type and the size of your art. Mount fixtures at the correct height for optimal illumination—typically just above eye level or slightly below the art. Use dimmable lights for flexibility in ambiance. Test different angles and intensities before fixing permanently. Keep electrical wiring discreet for a clean look.
Personalize with adjustable lighting to create different moods—bright for daytime, softer for evenings. Incorporate dimmable bulbs or smart lighting controls for convenience. Pair with a sleek frame or textured mat to enhance the artwork’s visual impact. Refresh the art periodically to keep the display engaging.
Spotlighting transforms a simple piece into a captivating focal point that elevates your entire hallway. It’s a small investment with a big visual payoff, making your decor feel curated and professional. Once you see how lighting enhances your favorite art, you’ll want to highlight more pieces around your home. Let your walls shine.
17. Use Reclaimed Wood or Industrial Elements for a Rustic Look
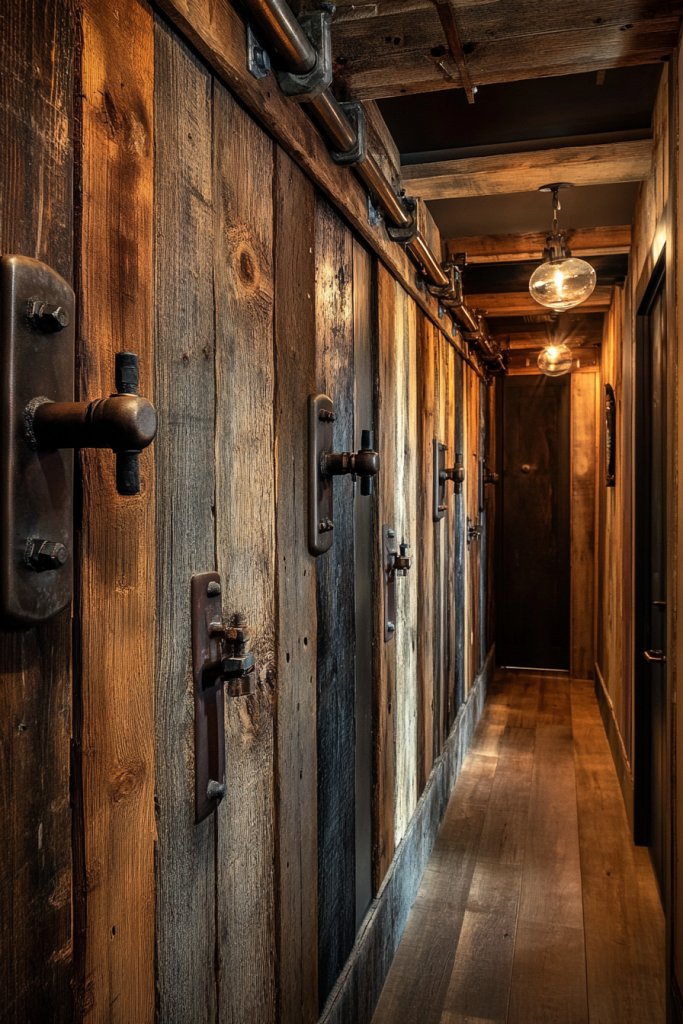
Craving a warm, inviting hallway with character? Reclaimed wood and industrial hardware bring a rugged, rustic charm that feels authentic and cozy. The challenge is incorporating these elements seamlessly into modern spaces without making it look too rough or mismatched.
Picture a wall decorated with reclaimed wood panels or shelves, combined with metal brackets or hooks. The textures of weathered wood and industrial metal create a layered, tactile effect that adds warmth and depth. Arranged with vintage or textured art, the space feels like a curated studio or farmhouse retreat, full of stories and history.
Mix different reclaimed wood tones—light, medium, or dark—to match your decor. Use industrial fixtures like pipe shelving or metal frames to enhance the rugged look. Incorporate vintage or handmade objects to reinforce the theme. Adapt the hardware to suit your space—large brackets for a bold look or smaller fixtures for subtlety.
Source reclaimed wood from sustainable suppliers or salvage yards. Measure your wall and decide on the layout—horizontal planks, floating shelves, or a combination. Mount hardware securely into studs or wall anchors, ensuring stability. Attach the wood panels or shelves with appropriate fasteners, leaving natural edges exposed for authenticity. Pair with textured or neutral-colored art for balance.
Add vintage signs, industrial lighting fixtures, or personalized engraved plaques for a custom touch. Incorporate textiles like woven rugs or linen textiles to soften the ruggedness. Change display items seasonally or as your collection grows. Keep the rustic vibe consistent across your decor for a unified look.
Reclaimed and industrial elements create a space full of warmth, history, and personality. They evoke a sense of craftsmanship and sustainability that resonates with modern eco-conscious living. Once you see how these materials transform your hallway, you’ll be inspired to carry the rustic aesthetic throughout your home. Embrace the charm of reclaimed beauty.
Conclusion
With a wide range of hallway gallery wall ideas, you now have the tools to turn an ordinary space into an extraordinary showcase of your style. From bold arrangements to subtle displays, these ideas invite you to experiment and personalize your hallway. Don’t be afraid to get creative and make your walls a true reflection of you—your perfect gallery awaits!