
17 Interior Archway Decorating Ideas for Stylish Transitions
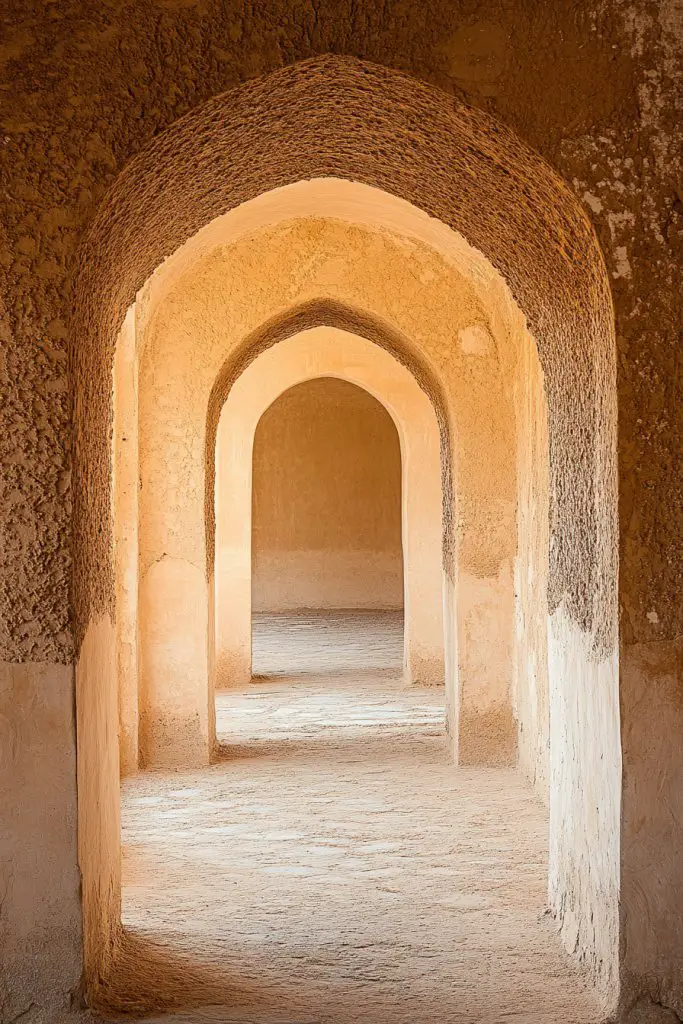
Step into a world where architectural elegance meets creative flair—interior archways are quickly becoming the go-to feature for adding charm and sophistication to any home. Their timeless appeal lies in their ability to frame spaces beautifully, creating seamless transitions while making rooms feel more open and inviting.
In this article, you’ll find a variety of decorating ideas that will inspire you to enhance your archways with style and personality. From bold paint choices to intricate moldings and decorative accents, these ideas cater to every aesthetic, helping you turn ordinary archways into stunning focal points that elevate your entire space.
1. Paint-Treated Archways for a Bold Color Pop
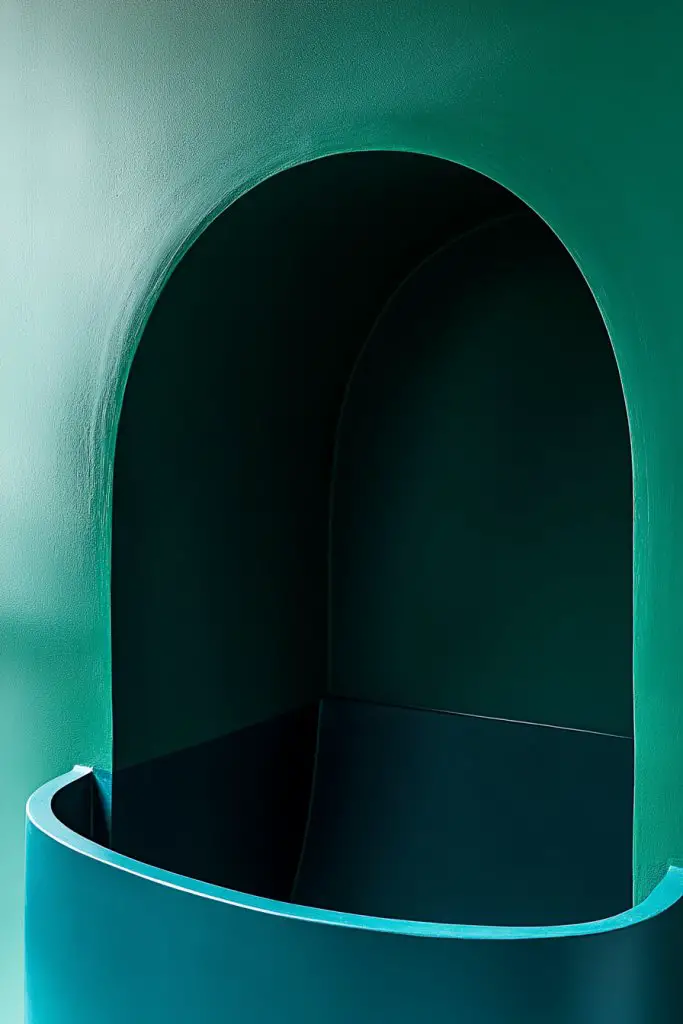
Ever felt like your home’s transition spaces are just dull corridors that lack personality? A splash of bold color on your archways can instantly turn a bland entry into a statement piece. It’s about making your home feel vibrant and intentional, not just functional. Who doesn’t want their spaces to wow guests the moment they walk in?
Recommended Products to replicate this idea
| # | Preview | Product | |
|---|---|---|---|
| 1 |

|
Rust-Oleum 369384 Advanced Dry Door & Trim Paint, Quart, Satin White | Check Latest Price |
| # | Preview | Product | |
|---|---|---|---|
| 1 |

|
Pro Grade, Paint Brushes, 5-Piece, Paint Brush Set: Flat & Angle Brushes for Latex and Oil Paints,... | Check Latest Price |
Imagine a crisp navy blue arch framing a cozy, sunlit living room, or a soft blush pink accentuating a serene bedroom entrance. The paint’s matte or satin finish adds depth, making the arch stand out dramatically against neutral walls. Light dances on the freshly painted surface, creating a captivating contrast that draws the eye instantly. This simple change transforms the space into an eye-catching focal point.
Bright, bold hues work great in modern or eclectic styles, while softer shades suit boho or Scandinavian interiors. For seasonal twists, consider swapping out colors—deep reds and golds for fall, icy blues and silvers for winter. If space is tight, a single accent wall can mimic the effect without overwhelming. You can also experiment with two-tone effects or ombre finishes for extra flair.
Start with clean, smooth surfaces—sand and prime if needed. Choose high-quality, washable paint in your desired shade. Use painter’s tape to create clean lines and avoid messes on adjoining walls. For sharp edges, a steady hand or a painter’s shield works wonders. Apply at least two thin coats for vibrancy, allowing drying time between layers. Finish with a clear sealant if you want extra durability and ease of cleaning.
Personalize your arches with decorative tape or stencils to add patterns or motifs that match your decor. Consider contrasting trim or molding painted in a complementary color for a layered look. If you’re feeling daring, add metallic or glitter accents to make the color pop even more. Use painter’s tape to create geometric shapes or stripes for a modern twist.
Bold painted arches can redefine your space, making it more lively and personalized. They’re a cost-effective way to refresh your home without major renovations. Once you see how a splash of color transforms your hallways or doorways, you’ll feel inspired to tackle other DIY projects. Your home will stand out as a reflection of your vibrant personality.
2. Installing Decorative Molding or Trim for Elegant Definition
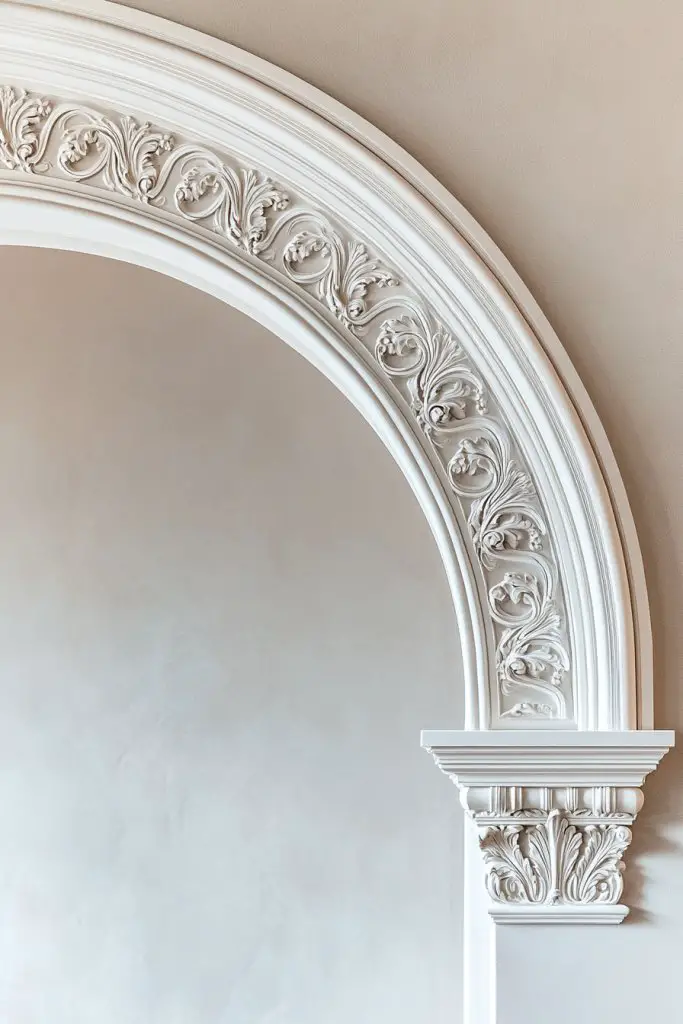
Does your archway look a bit plain or flat? Adding decorative molding or trim can elevate its appearance, giving it that classic, refined edge. It’s like giving your space a tailored suit rather than off-the-rack. Who wouldn’t want their transitions to look crisp and polished?
Recommended Products to replicate this idea
| # | Preview | Product | |
|---|---|---|---|
| 1 |

|
Art3d 10-Pack 47Ft White Ceiling Crown Molding Trim, High Impact Polystyrene Decorative Ceiling... | Check Latest Price |
| # | Preview | Product | |
|---|---|---|---|
| 1 |

|
Art3d Pre-Cut Wall Molding Set of 6 pcs, Ready-to-Assemble Wainscoting Panels for Interior Wall... | Check Latest Price |
Picture ornate crown molding framing a grand arch, painted in a glossy white that catches the light. Or imagine beadboard trim outlining a rustic, farmhouse-style arch with a warm, textured feel. The intricate details add depth and sophistication, making your arch a piece of architectural art. Light plays off the raised edges, emphasizing its craftsmanship.
Choose from sleek, minimalist trims for modern interiors or elaborate, vintage-inspired moldings for traditional decor. Seasonal updates could involve painting trims in contrasting colors or adding faux finishes like antiquing or metallic accents. For a budget-friendly option, foam or PVC moldings mimic wood but are easier to install. Consider scale—larger moldings suit spacious rooms, while slimmer profiles work in tighter spaces.
Measure your arch’s perimeter and select molding profiles that complement your style. Use a miter saw to cut corners precisely. Attach the trim with strong adhesive or finishing nails, making sure to countersink nails for a smooth finish. Fill nail holes with wood filler, then sand smooth. Prime and paint or stain the trim to match or contrast your walls, sealing with a clear finish for durability. Caulk gaps for a seamless look.
Personalize with decorative rosettes or medallions at the top center for a regal feel. Experiment with different finishes—matte, satin, or high-gloss—to suit your decor. Add metallic foil or gilding for a luxe touch. For a more subtle effect, paint the trim in a slightly different shade from the wall for a layered look.
Adding decorative molding instantly boosts the architectural charm of your space. It’s an investment that pays off in timeless elegance, whether you favor vintage or contemporary styles. When you see your archway transformed into a detailed masterpiece, you’ll be motivated to refine other parts of your home. It’s a small change with a big impact!
3. Using Wallpaper or Patterned Wall Coverings Inside the Arch
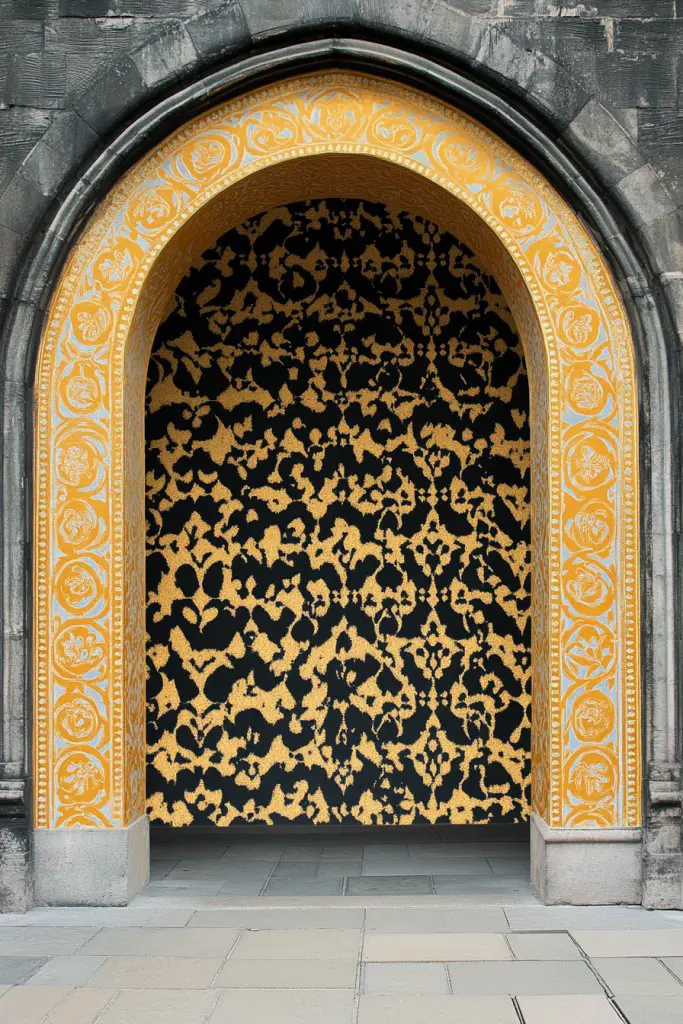
Tired of plain, boring archways? Wallpaper or patterned coverings can inject personality and style into your transition spaces. It’s a creative way to add visual interest without a full wall makeover. Plus, it’s a fun project that can showcase your personality in subtle or bold ways.
Visualize a textured floral wallpaper inside an arch that hints at vintage charm, or a geometric pattern that screams modern chic. The wallpaper adds layers of depth, making the space feel more curated and intentional. When light hits the textured or patterned surface, it creates subtle shadows and highlights, enriching the space’s character. It’s like dressing up your arch in its favorite outfit.
Go for wallpaper with bold patterns for a statement look, or opt for subtle textures like grasscloth or linen-inspired prints for a calm vibe. Seasonal changes could involve switching to lighter, breezier patterns in summer, then switching back to cozy, textured papers in winter. For smaller arches, scale down patterns to avoid overwhelming the space. Use peel-and-stick options for easy updates and removal.
Start by choosing a wallpaper that suits your style and space size. Prepare the inside surface by cleaning and smoothing it out. Use a wallpaper adhesive suited for your chosen paper, applying it evenly with a brush or roller. Carefully position the wallpaper, smoothing out air bubbles with a squeegee. Trim excess material with a craft knife for clean edges. Finish with a clear sealant if needed for extra protection.
Layer your wallpaper with decorative trims or painted accents to frame the pattern. Mix textures by combining wallpaper with fabric panels or textured paints for a unique effect. Personalize with stenciled motifs or metallic foils for a custom touch. Use removable wallpaper for easy seasonal updates or renter-friendly options.
Wallpaper inside an arch transforms a simple transition into a focal point full of personality. It’s a creative outlet that lets you experiment with colors and patterns without major renovations. Seeing your space styled with patterned surprises will boost your confidence to try more daring decor ideas. Your home becomes a true reflection of your style and taste.
4. Incorporating LED Strip Lighting for a Modern Glow
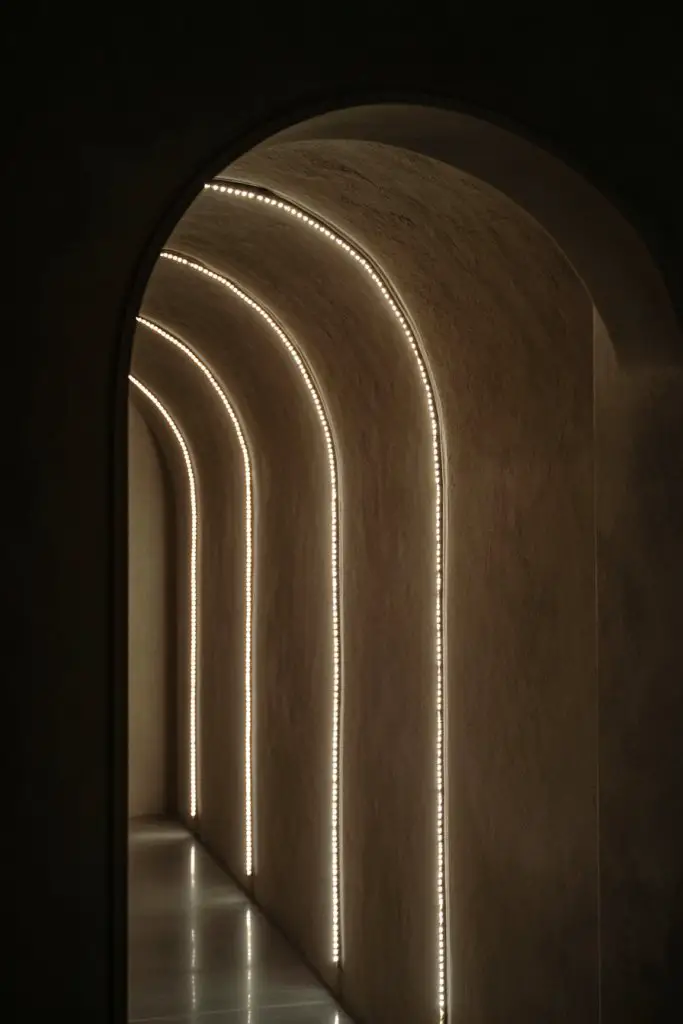
Ever wish your home had that trendy, gallery-like ambiance? LED strip lighting along your arch’s edges creates a sleek, modern glow that transforms the whole space. It’s subtle yet impactful, making your transitions feel like part of the design instead of just functional gaps. Who doesn’t want a little extra mood lighting?
Recommended Products to replicate this idea
| # | Preview | Product | |
|---|---|---|---|
| 1 |

|
KSIPZE 100ft Led Strip Lights RGB Music Sync Color Changing Led Lights with Smart App Control Remote... | Check Latest Price |
| # | Preview | Product | |
|---|---|---|---|
| 1 |
|
JOYLIT 28 Keys LED RF RGB Remote Controler for RGB SMD 3528 5050 LED Strip LED Lights Controller... | Check Latest Price |
Visualize soft, warm LED strips outlining a curved arch, casting a gentle halo of light. Or imagine cool white or colored LEDs adding a futuristic vibe to your entryway. The light emphasizes the arch’s shape, making it stand out against dark or contrasting walls. When dimmed or set to color-changing modes, it creates an atmosphere perfect for relaxing or entertaining.
Choose different color temperatures to match your mood—warm whites for cozy nights, or vivid colors for parties. Install dimmers for adjustable brightness, and control everything via smart home apps for convenience. For a minimalist look, hide the strips behind trim or molding. Seasonal lighting effects, like flickering candles or holiday colors, can add festive charm.
Start by measuring your arch’s perimeter and selecting flexible LED strip kits with adhesive backing. Prepare a clean, dry surface free of dust. Use a level to ensure straight placement, then peel and stick the strips carefully along the edges. Connect to a power source and test the lighting before finalizing placement. Use connectors for corners and extensions if needed. Sync with your smart home system for remote control.
Pair LED lighting with dimmable switches or voice control for easy adjustments. Combine with textured wall finishes or architectural features that catch the light differently. For a more luxe feel, add diffusers or frosted covers for softer glow. Use lighting to highlight other decor elements like textured wall panels or sculptural accents.
Modern LED lighting makes your home feel more sophisticated and thoughtfully designed. It’s an easy upgrade that dramatically elevates your space’s ambiance. Once you see how lighting transforms your arch, you’ll be inspired to add similar touches elsewhere. It’s all about creating mood and making your home uniquely yours.
5. Framing with Sculptural Wooden or Metal Accents
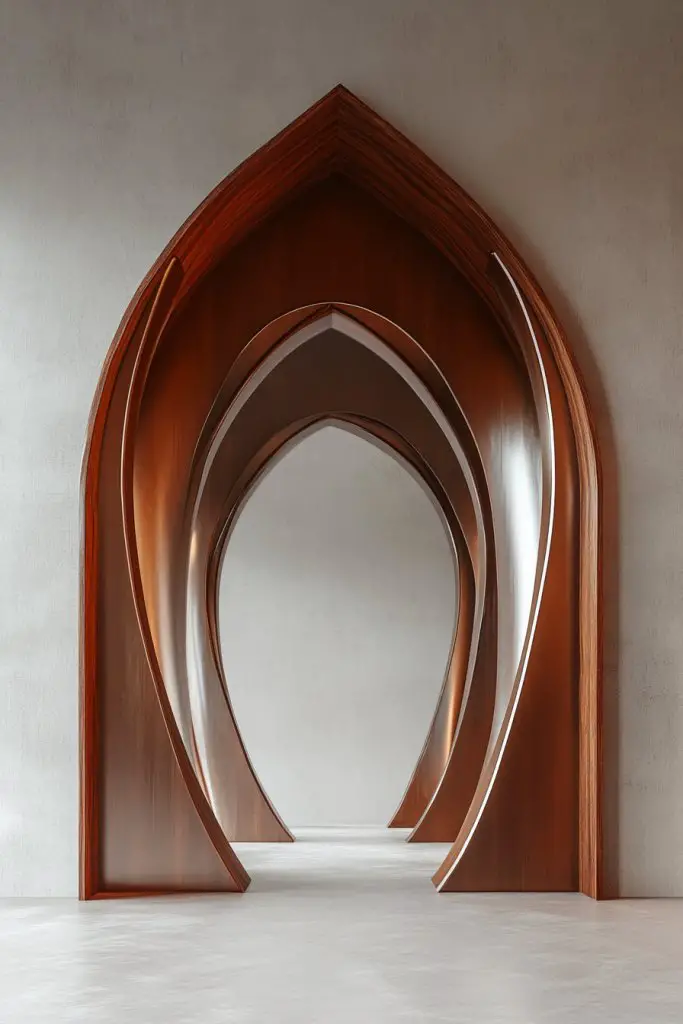
Is your arch looking a bit flat and uninspired? Framing it with sculptural wooden or metal accents can add a bold, artistic touch. It’s like turning a simple doorway into a piece of modern sculpture. Who wouldn’t want their transition spaces to double as art statements?
Recommended Products to replicate this idea
| # | Preview | Product | |
|---|---|---|---|
| 1 |

|
Golden State Art - 11x14 Aluminum Picture Frame - with Mat for 8x10 Photo or Without Mat for 11 x 14... | Check Latest Price |
| # | Preview | Product | |
|---|---|---|---|
| 1 |

|
upsimples 11x14 Picture Frame, Display Pictures 8x10 with Mat or 11x14 Without Mat, Wall Hanging... | Check Latest Price |
Picture a sleek, black metal frame with geometric cutouts surrounding a white arch, adding a contemporary edge. Or imagine a rustic, reclaimed wood frame that emphasizes the arch’s curves with organic textures. The combination of materials and shapes creates visual interest, drawing the eye and adding depth. When light hits these accents, shadows dance across the surface, enhancing the sculptural effect.
Choose minimalist metal frames for a sleek, industrial look or ornate wooden carvings for a vintage vibe. Seasonal or style updates might involve painting or staining the accents in different finishes. For a bold statement, combine contrasting materials like copper and black steel. Scale your accents to suit your room—smaller for tight spaces, larger for open areas.
Select your sculptural accents based on your design vision, then measure carefully. Attach metal frames with strong anchors or screws, ensuring they are level and secure. Wooden accents can be glued or screwed into place, with pre-drilled holes for precision. Finish with protective coatings or paint to match your decor. For a seamless look, hide mounting hardware behind decorative elements.
Customize with engraved patterns or painted details that reflect your personality. Mix materials—metal with wood, or painted with natural finishes—for a layered effect. Consider adding LED backlighting behind the accents for a floating illusion. Incorporate sculptural elements like abstract shapes or motifs that resonate with your style.
Sculptural accents turn a basic arch into a captivating focal point. They showcase your taste and artistic flair, making your home feel curated and intentional. The confidence gained from these creative touches encourages you to experiment with other architectural details. Your space becomes a reflection of your bold, artistic side.
6. Creating a Faux Window Effect with Translucent Panels
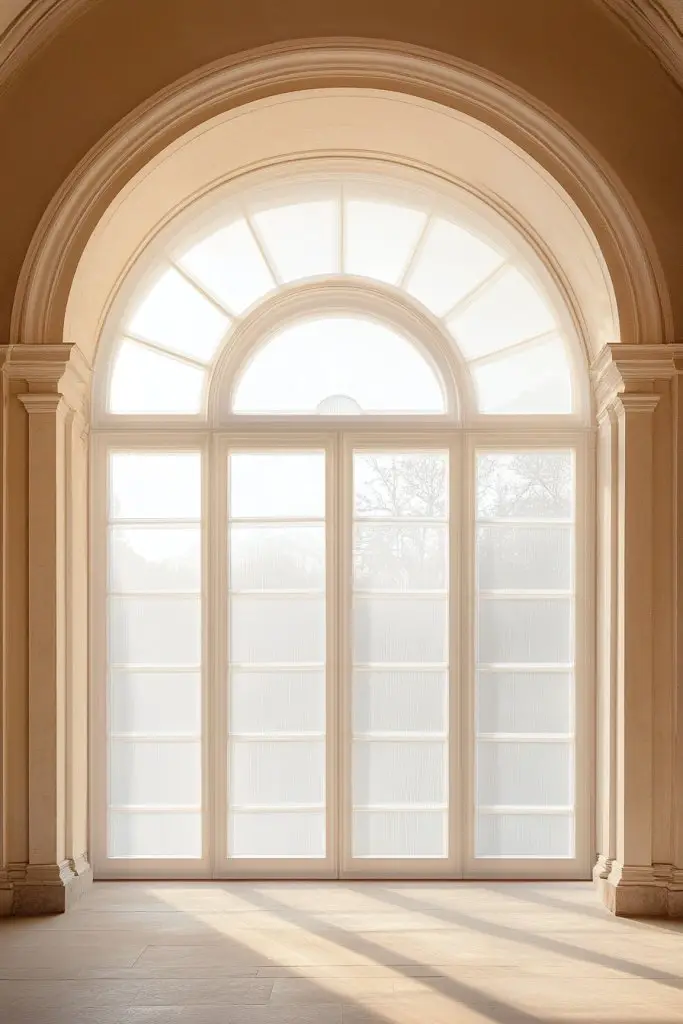
Feeling like your interior lacks light or a view? Faux window panels inside your arch can simulate the charm of a real window without the hassle of actual glazing. It’s a clever way to add brightness and a sense of openness to your space. Who wouldn’t want a brighter, airier home?
Recommended Products to replicate this idea
| # | Preview | Product | |
|---|---|---|---|
| 1 |

|
Rock Hard Plastics - 12" x 12" Clear Frosted P95 Privacy Acrylic Sheet Lucite Plexiglass (Actual... | Check Latest Price |
| # | Preview | Product | |
|---|---|---|---|
| 1 |

|
DGSL 6 Pcs Polycarbonate Greenhouse Panels, 4' x 2' x 0.16'' Twin-Wall Panels, Polycarbonate Sheet... | Check Latest Price |
Imagine frosted acrylic panels with a subtle textured pattern, mimicking stained glass or a scenic view. Or think of translucent polycarbonate that softly diffuses light, creating a glow that makes the space feel larger. The panels catch and scatter light, adding a luminous quality to your transition. It’s like giving your home a secret window to the outside world.
Choose from opaque, frosted, stained, or textured panels depending on your desired look and level of privacy. Seasonal variations might include changing out panels for different effects—clear for summer, patterned for winter. For a rustic style, opt for distressed or faux-wood finishes. The panels can also be backlit with LEDs for extra impact.
Measure your arch opening precisely and select panels that fit snugly. Attach frame trims or molding around the perimeter to hold the panels securely—use adhesive or mechanical fasteners as needed. Ensure panels are lightweight and easy to handle. Seal edges with weatherproof or decorative trim paint for a finished look. Test lighting conditions to optimize the effect.
Add decorative film or tinting for color accents, or incorporate etched patterns for a customized look. Use LED backlighting behind the panels for a luminous effect that changes with your mood. Combine with textured wall finishes or architectural details to enhance the illusion. These faux windows can be a playful, elegant feature.
Creating a faux window adds a unique, personalized element that brightens your home’s interior. It’s a simple yet effective way to introduce light and a sense of space without major renovations. Seeing how this small feature transforms your ambiance will inspire you to explore other creative architectural ideas. Your home will feel more open and inviting.
7. Installing a Curated Gallery of Art or Photographs Within the Arch
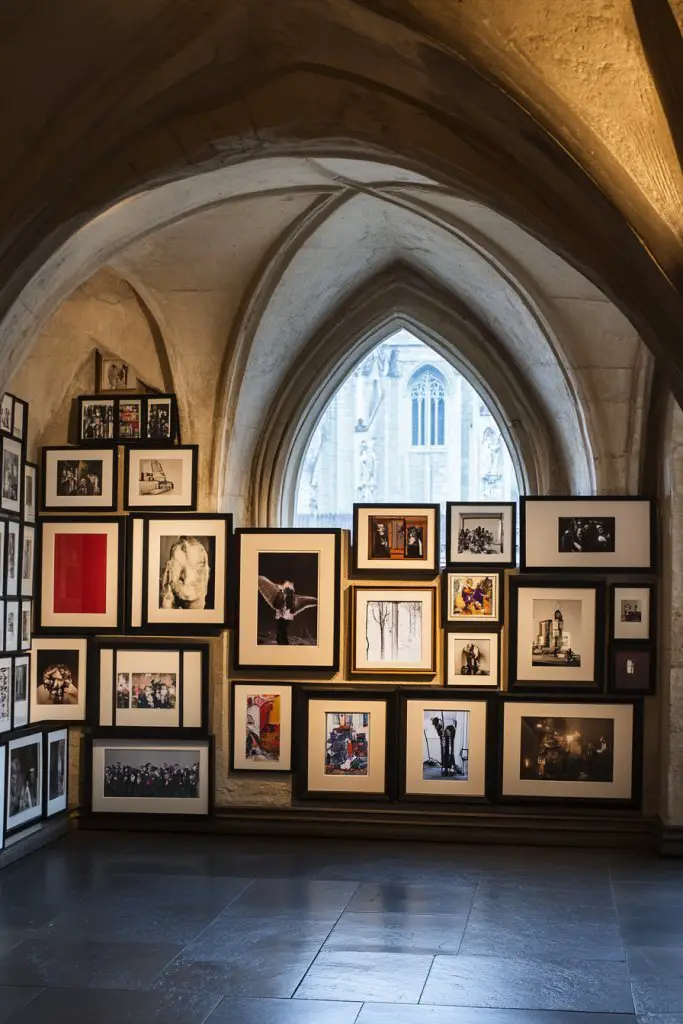
Looking for a way to showcase your personality and style? Filling your arch with a curated gallery of art or photographs turns a plain transition into a personalized display. It’s a fun, creative way to make your space truly yours. Who says gallery walls are only for large empty walls?
Recommended Products to replicate this idea
| # | Preview | Product | |
|---|---|---|---|
| 1 |

|
Upgraded 10 Inch WiFi Digital Photo Frame 16GB Smart Electronic Picture Frame with HD IPS Touch... | Check Latest Price |
| # | Preview | Product | |
|---|---|---|---|
| 1 |

|
upsimples 8x10 Picture Frame Set of 5, Display Pictures 5x7 with Mat or 8 x 10 Without, Wall Gallery... | Check Latest Price |
Visualize a collection of framed black-and-white photographs arranged symmetrically inside the arch. Or imagine a series of colorful abstract prints that pop against neutral walls. The arrangement adds depth and invites viewers to explore your story. When lit properly, the frames become focal points, elevating the entire space.
Mix and match frame styles and sizes for an eclectic look or keep everything uniform for a sleek, modern vibe. Rotate artwork seasonally or for special occasions to keep the display fresh. Use floating shelves or picture ledges inside the arch for easy updates and layering. Consider themes—family, travel, or nature—to reflect your passions.
Start by selecting your artwork and framing styles. Measure the space to arrange frames symmetrically or in a dynamic grid. Use picture-hanging strips or nails for secure mounting, ensuring levels and spacing are perfect. For lightweight prints, adhesive hooks work well; for heavier pieces, anchors are recommended. Keep the arrangement balanced and eye-level for best impact.
Add decorative elements like small sculptures or textured panels between frames for variety. Incorporate personal mementos or handmade pieces for a sentimental touch. Use themed lighting—like picture lights or spotlights—to highlight your favorites. Keep the display updated to reflect your evolving tastes.
A curated gallery inside your arch creates a warm, inviting atmosphere full of personality. It’s a creative project that showcases your taste and storytelling skills. The pride you feel in your personalized display will motivate you to keep experimenting with decor. Your home becomes an inspiring reflection of your life and passions.
8. Adding Textured Wall Treatments for Depth and Dimension
Flat, smooth walls can feel boring and uninspired. Textured wall treatments add depth and tactile interest, making your archway stand out effortlessly. It’s a simple way to elevate your decor and create a more engaging environment. Who doesn’t want walls that invite touch and admiration?
Recommended Products to replicate this idea
| # | Preview | Product | |
|---|---|---|---|
| 1 |

|
20 oz Homax 4092 Aerosol Texture Water-Based Orange Peel Wall Texture | Check Latest Price |
| # | Preview | Product | |
|---|---|---|---|
| 1 |
|
Art3dwallpanels 33 Pack 3D Wall Panel Diamond for Interior Wall Décor, PVC Flower Textured Wall... | Check Latest Price |
Imagine shiplap panels running inside the arch for a rustic, cozy vibe, or a stucco finish that adds a rough, tactile surface. Fabric-backed wall coverings lend softness and warmth, while textured paints can create patterns or faux finishes mimicking stone or plaster. The textures catch light and shadows, adding visual complexity. It’s like turning your transition into a piece of art.
Choose from a variety of textures—rough, smooth, patterned, or layered—for different styles. Seasonal updates could involve switching textures, like adding fabric panels for winter coziness. For a boho look, combine textured paint with woven or fabric accents. Use textured finishes in small doses in tight spaces or go all out for a feature wall effect.
Prepare the surface by cleaning and repairing imperfections. Apply a primer suited for textured finishes. Use specialized tools—stipple brushes, rollers, or trowels—to create the desired texture. For textured paints, apply multiple thin coats, experimenting with patterns and techniques. Seal with protective coatings to ensure longevity and easy cleaning. Layering different textures can be done with overlays or mixed media.
Combine textures with contrasting colors or metallic accents for extra flair. Incorporate textured wall panels or overlays that mimic natural materials like stone or wood. Add decorative trim or molding to frame textured areas. Personalize by choosing patterns that echo your personality, like geometric or organic shapes.
Textured treatments transform flat surfaces into engaging focal points. They add character and a sense of craftsmanship that elevates your entire decor. When you see your arch with tactile richness, you’ll be inspired to experiment further. Your home will radiate personality and thoughtful design.
9. Hanging Decorative Curtains or Fabric Panels for Soft Privacy
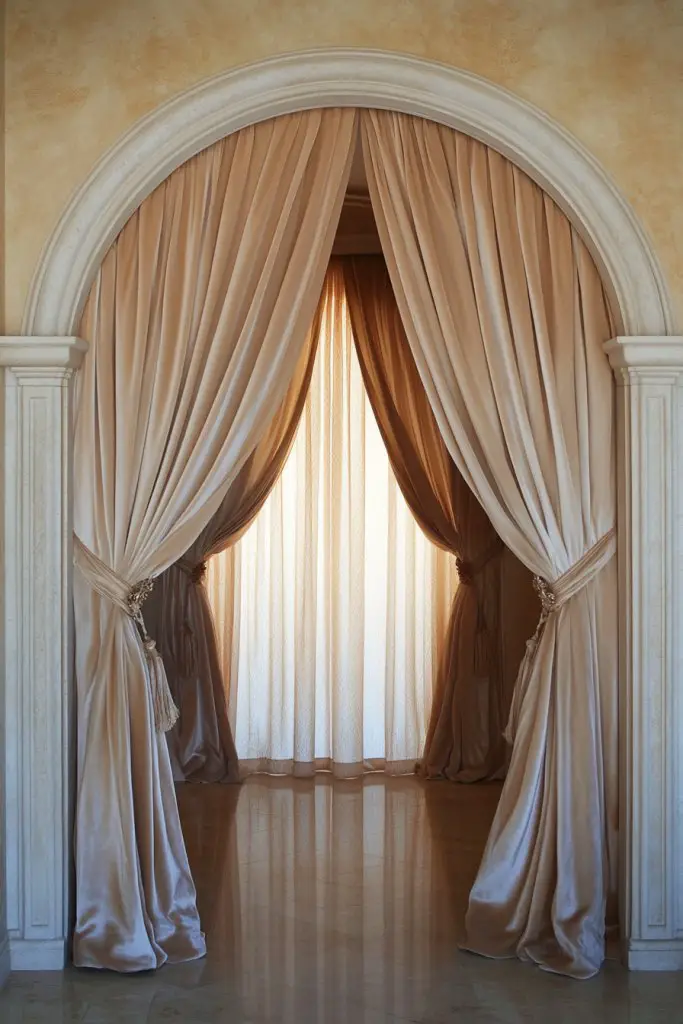
Want to add softness and a touch of elegance to your arch? Hanging curtains or fabric panels offers a flexible way to soften hard architectural lines and provide privacy or separation. It’s an easy, cost-effective solution that adds warmth and texture. Who says partitions have to be rigid?
Recommended Products to replicate this idea
| # | Preview | Product | |
|---|---|---|---|
| 1 |

|
OWENIE Sheer Curtains 84 inches Long 2 Panels Set for Living Room/Bedroom, Rod Pocket Voile Sheer... | Check Latest Price |
| # | Preview | Product | |
|---|---|---|---|
| 1 |

|
KKJIAF Red Stretch Velvet Fabric 60 Inch Wide, 1 Yard Soft Stretchy Fabric for Sewing Clothes,... | Check Latest Price |
Picture sheer, flowing fabrics in airy whites or muted tones draping inside your arch, catching the light and fluttering softly. For a more dramatic look, choose heavier fabrics like velvet or brocade, adding richness and weight. The fabric creates a gentle boundary, inviting a cozy atmosphere. When gently swayed by a breeze, they add movement and life.
Layer lightweight sheers with thicker drapes for versatility, switching between privacy and openness as needed. Seasonal fabric choices—lighter linens for summer, velvets for winter—keep the look fresh. Use decorative curtain rods or tension wires for easy hanging and removal. Tiebacks or decorative holdbacks can add a polished finish.
Measure your arch’s width and height to select the right curtain length and rod placement. Install a sturdy rod or wire across the arch’s top, ensuring it is level and securely anchored. Hang your fabric panels with rings, clips, or ties depending on your style preference. Adjust the length to just brush the floor or puddle for a romantic effect. Regularly clean or wash your fabrics to keep them fresh.
Add decorative trims, embroidery, or fringes to your fabric panels for a personalized touch. Layer different textures or patterns for a boho or eclectic appearance. Incorporate color accents matching your decor palette. For special occasions, swap fabrics for seasonal or themed patterns—think florals, metallics, or holiday motifs.
Curtains inside your arch soften the space and add a cozy, inviting vibe. They’re a versatile decor element that’s easy to change as your style evolves. Seeing how fabric dramatically alters the space will encourage you to experiment more boldly. Your home becomes not just beautiful but also functional and adaptable.
10. Incorporating Vertical Garden Elements for a Fresh Touch
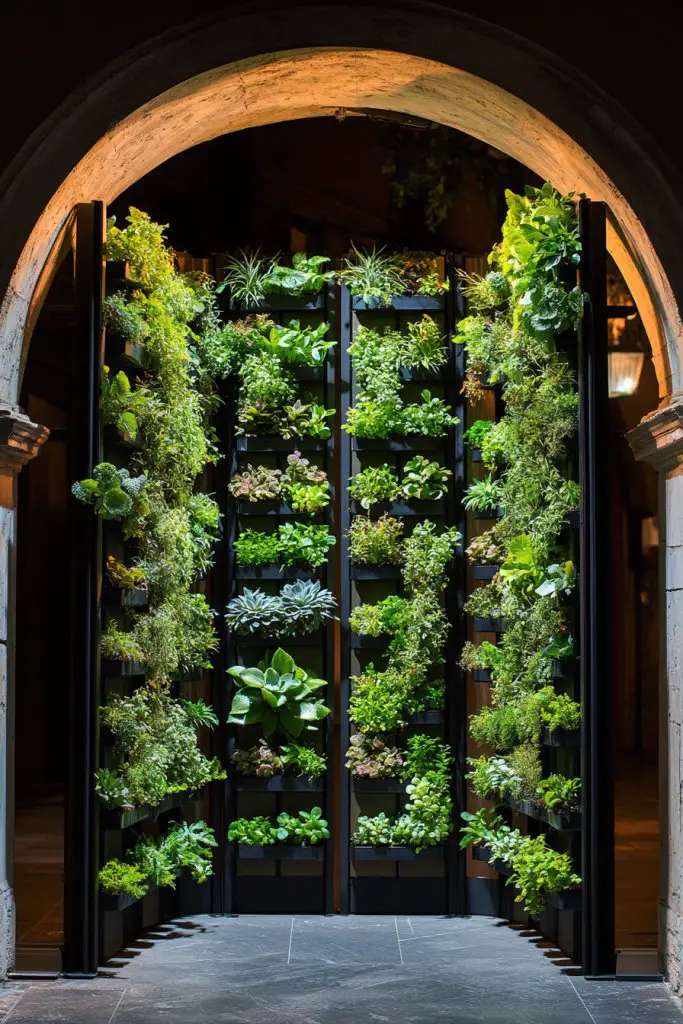
Longing for a touch of nature without sacrificing space? Vertical garden elements inside your arch can bring a lively, fresh vibe into any room. It’s a way to enjoy greenery in small spaces or create a natural focal point. Who says plants are the only way to add life?
Recommended Products to replicate this idea
| # | Preview | Product | |
|---|---|---|---|
| 1 |

|
Make Good PlantPod Luxe - Self-Watering Wall Planters (Set of 6) - Easy to Water and Install -... | Check Latest Price |
| # | Preview | Product | |
|---|---|---|---|
| 1 |

|
ODTORY Artificial Grass Wall Panel Backdrop,10" X 10" 12P(8.4 sqft) UV-Anti Greenery Boxwood Panels... | Check Latest Price |
Picture a wall of small, geometric planters filled with succulents or air plants lining your arch. Or imagine a lush, faux-green wall crafted from textured panels or fabric that mimics foliage. The greenery adds color, texture, and a sense of vitality, making the space feel more inviting. When paired with warm lighting, it creates a calming, natural ambiance.
Choose real plants for a natural look or high-quality faux plants for low maintenance. Vertical planters can be modular, allowing you to customize the arrangement. Seasonal updates might involve swapping out plants or changing container colors. For small spaces, compact planters or hanging baskets work well. Incorporate natural materials like wood or stone for a rustic feel.
Select your planters and arrange them in a pattern that suits your space. Mount planters securely onto the wall or use a freestanding vertical garden frame. Ensure proper drainage and watering access for live plants. Use waterproof backing or sealants to protect your walls. For faux greenery, attach panels with adhesive or mounting hardware, and add lighting for extra effect.
Personalize with decorative stones, fairy lights, or miniature sculptures among your plants. Mix different shades of green or add flowering varieties for color. Incorporate natural elements like driftwood or decorative pebbles. Change your plant arrangements seasonally to keep the space lively and engaging.
A vertical garden inside your arch injects life and freshness, making your home feel vibrant and healthy. It’s a creative way to merge nature with interior design. The pride in cultivating or designing your green space will inspire further personalized decor projects. Your home becomes a sanctuary of natural beauty.
11. Installing Geometric or Modern Tile Insets for Visual Contrast
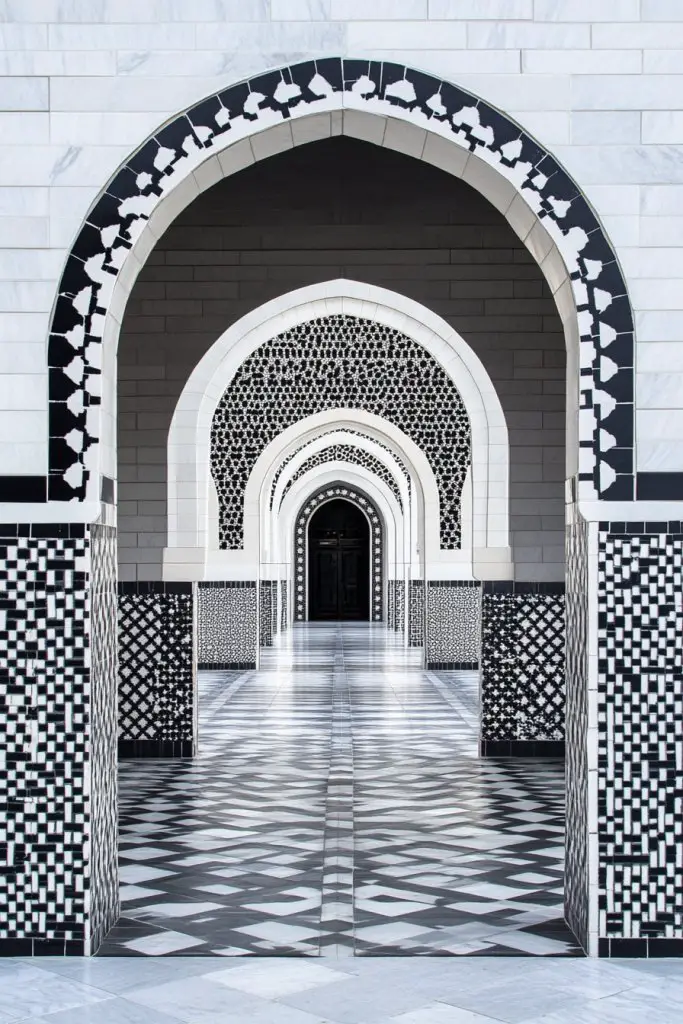
Looking to add a striking visual element to your arch? Geometric or modern tile insets can create a bold, contemporary statement. It’s a clever way to introduce pattern and texture, elevating your space from plain to wow. Who says transitions can’t be the highlight?
Recommended Products to replicate this idea
| # | Preview | Product | |
|---|---|---|---|
| 1 |

|
Goldblatt 2 Piece Glass Tile Nippers Set - Heavy Duty Wheeled Glass Mosaic Nipper & Hd Ceramic Tile... | Check Latest Price |
| # | Preview | Product | |
|---|---|---|---|
| 1 |

|
155 PCS Wooden Pattern Blocks Set, 24 Double-Sided Design Cards(48 Patterns) Geometric Shape Puzzle... | Check Latest Price |
Imagine a sleek, monochrome tile inset with sharp triangles or chevrons within the arch, contrasting with smooth painted walls. Or picture a colorful mosaic with irregular shapes that catch the eye and invite closer inspection. The tiles add dimension, breaking up large surfaces with eye-catching detail. When light hits the textured surfaces, it emphasizes their unique shapes.
Opt for neutral tiles like black, white, or gray for a minimalist look, or go for vibrant colors and patterns for a playful vibe. Seasonal updates could involve swapping out tiles or adding decorative borders. Use different shapes—hexagons, diamonds, or irregular mosaics—to suit your style. Keep scale in mind: small tiles work well in tight spaces, larger ones make a bolder statement.
Begin by measuring your arch’s dimensions and selecting tiles that fit your aesthetic. Prepare the surface by cleaning and leveling it. Use a suitable adhesive or thin-set mortar to attach tiles securely, starting from the center outward for accuracy. Grout the tiles carefully, wiping excess and sealing for longevity. Consider adding a clear protective layer for durability.
Coordinate grout colors with your decor palette or add metallic or glow-in-the-dark grout for a special effect. Mix and match tile patterns for a customized mosaic. Incorporate small accent tiles or borders for framing. For a softer look, matte finishes work well; gloss adds vibrancy.
Tile inset accents turn simple doorways into eye-catching focal points. They showcase your style and craftsmanship, making your home feel curated. Seeing your unique tile design boost your confidence to try other bold decor ideas. Your transition space becomes a showcase of creativity.
12. Using Metallic or Mirror Accents for a Glamorous Look
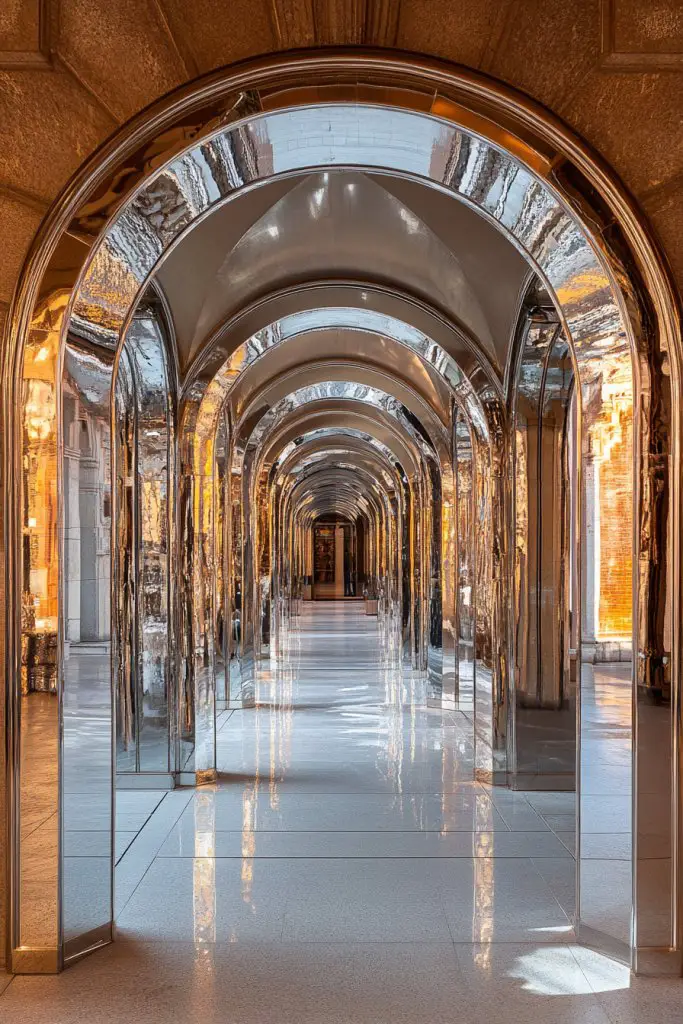
Craving a touch of luxury and sparkle? Metallic or mirror accents inside your arch can instantly add glamour and sophistication. It’s a quick way to elevate your decor without a complete overhaul. Who doesn’t want their home to feel a little more luxe?
Visualize a thin strip of gold or brass framing the inner edge of your arch, reflecting light and adding warmth. Or picture small, decorative mirrors with intricate frames arranged asymmetrically for a modern art vibe. The reflective surfaces bounce light around, making the space feel brighter and larger. When ambient light hits these accents, it creates a luminous, inviting glow.
Choose metallic finishes like matte gold, shiny chrome, or brushed brass to suit your style. Mirror accents can range from small decorative pieces to full panels. Seasonal updates might involve swapping out finishes or adding decorative metallic decals. Mix metals for an eclectic look or keep it uniform for simplicity. Use these accents as highlights or framing elements.
Select your metallic or mirror pieces based on size and style. Attach mirrors with strong, wall-safe adhesive or mounting hardware, ensuring they are level. Metallic trims can be glued or nailed into place, then sealed with paint or clear coats for protection. For mirrors, use safety glass and consider professional installation for larger pieces. Finish with a protective sealant if necessary.
Create a custom mosaic or pattern with small mirrors and metallic shapes. Incorporate contrasting finishes—matte and shiny—to add visual interest. Use lighting to highlight these accents, emphasizing their reflective qualities. Personalize with engraved or embossed metallic decals that resonate with your style.
Metallic and mirror accents bring a luxurious, elegant feel that can transform your entire space. They offer a sophisticated touch that’s also playful when mixed with other textures. Seeing your home shimmer and shine will inspire you to explore more high-end decor ideas. Your space will radiate confidence and style.
13. Setting Up a Mini Book Nook or Display Shelf
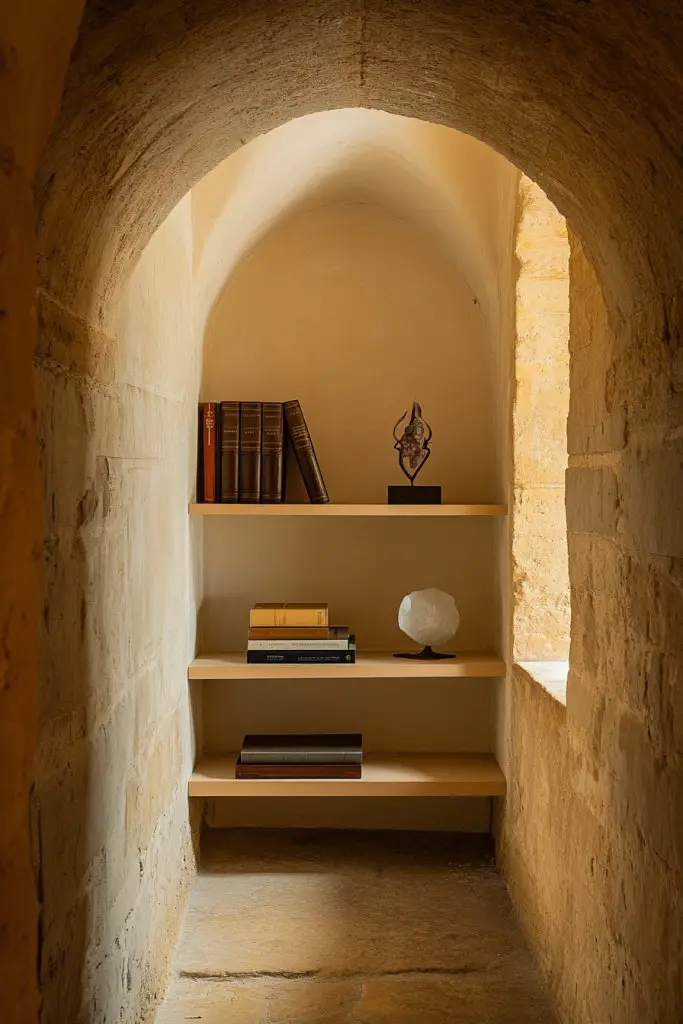
Want to add a functional yet charming feature to your transitional space? A mini book nook or display shelf inside your arch can serve as both decor and storage. It’s a clever way to showcase your favorite objects without cluttering other areas. Who says your entryway or hallway can’t be practical and pretty?
Picture a slim, floating shelf filled with a curated selection of your favorite books, small sculptures, or decorative objects. The shelf is painted in a contrasting color to make it pop, or stained to match your wood accents. When lit with subtle LED strips or spotlights, the shelf becomes a warm, inviting focal point. It’s like having a tiny gallery at your doorstep.
Use open shelving for easy access or incorporate glass-fronted cases for a more polished look. Style with a mix of vertical and horizontal arrangements for visual interest. Change your display seasonally with themed objects or color schemes. Use decorative brackets or hidden supports for a clean, minimalist look.
Measure the arch’s depth and length to determine shelf size. Attach brackets or floating shelf supports securely into the wall studs or anchors. Paint or stain shelves beforehand for a finished look. Arrange your objects thoughtfully, balancing height, color, and texture. Regularly dust and rotate items to keep the display fresh.
Add framed photos, small potted plants (if allowed), or decorative trinkets aligned with your style. Incorporate LED or fairy lights for a cozy glow. Personalize with custom labels or engraved plaques. Use different shelf heights and depths to create a layered, dynamic display.
A mini display shelf turns a simple arch into a personal gallery, showcasing your interests and style. It’s a functional decor that invites conversation and admiration. Successfully creating your own nook boosts confidence to tackle other DIY projects. Your home becomes a curated space that reflects your personality.
14. Applying Chalkboard or Whiteboard Paint for Interactive Spaces
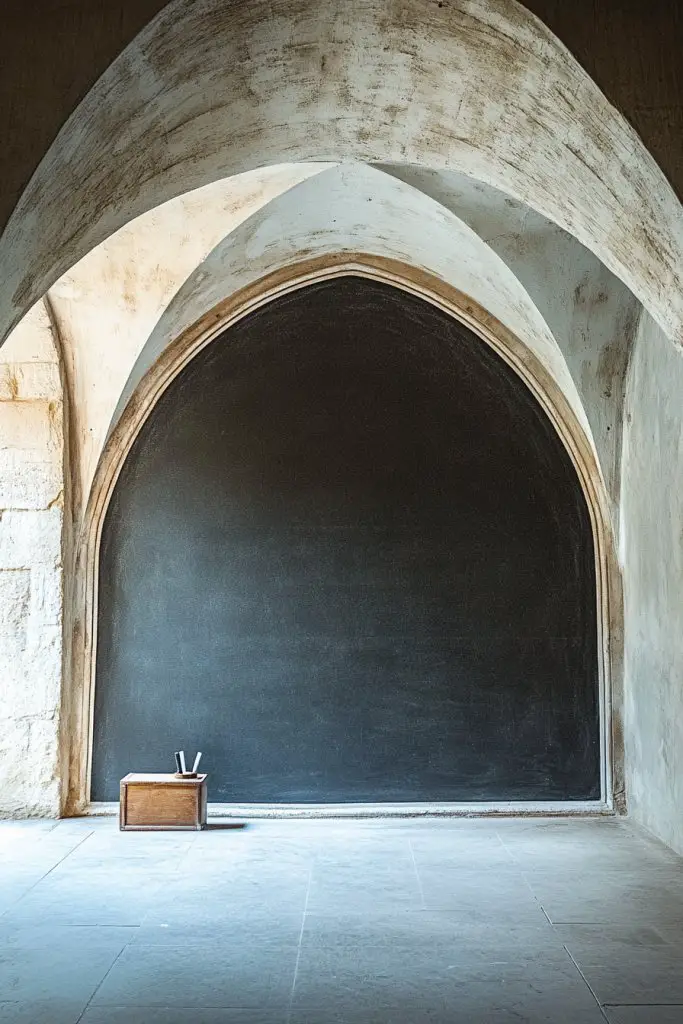
Ever wished your home could double as a creative hub? Chalkboard or whiteboard paint inside your arch makes it possible. It transforms an ordinary transition into an interactive space for notes, doodles, or reminders. Who says decor can’t be functional?
Recommended Products to replicate this idea
| # | Preview | Product | |
|---|---|---|---|
| 1 |

|
Rust-Oleum 206540 Chalkboard Brush-On Paint, 30 oz, Black | Check Latest Price |
| # | Preview | Product | |
|---|---|---|---|
| 1 |

|
Rust-Oleum 241140 Specialty Dry Erase Brush-On Paint Kit, White 16 Fl Oz (Pack of 1) | Check Latest Price |
Picture a sleek black chalkboard surface inside a white arch, perfect for jotting down daily to-dos or inspirational quotes. Or imagine a whiteboard painted with a colorful border for a cheerful, engaging look. The surface invites interaction, making your space lively and personal. When not in use, it blends seamlessly into your decor.
Choose between classic black chalkboard paint or modern whiteboard finishes depending on your style. Use colorful chalks or markers for fun, vibrant writing. Seasonal updates could include themed borders or decals. Incorporate small ledges or trays for chalk and markers to keep everything organized. Use micro-porous paint for erasability and durability.
Prepare the surface by cleaning and lightly sanding. Apply multiple even coats of chalkboard or whiteboard paint, following manufacturer instructions. Use painter’s tape to create clean edges. Once dry, prime with chalk if using chalkboard paint. Install accessories like small shelves for markers or erasers. Regularly clean and maintain the surface for best performance.
Decorate the border with washi tape, decals, or painted patterns to match your decor. Use colorful chalks or pens to add visual interest. Personalize with inspirational quotes or daily mottos. Change the style seasonally or for special occasions to keep it fresh and engaging.
A writable surface inside your arch adds a playful, functional element that sparks creativity. It makes your space more interactive and personalized. Seeing your home transformed into a dynamic hub will inspire you to incorporate more innovative ideas. Your space becomes a lively reflection of your personality.
15. Enhancing with Textured Paint or Plaster Finishes
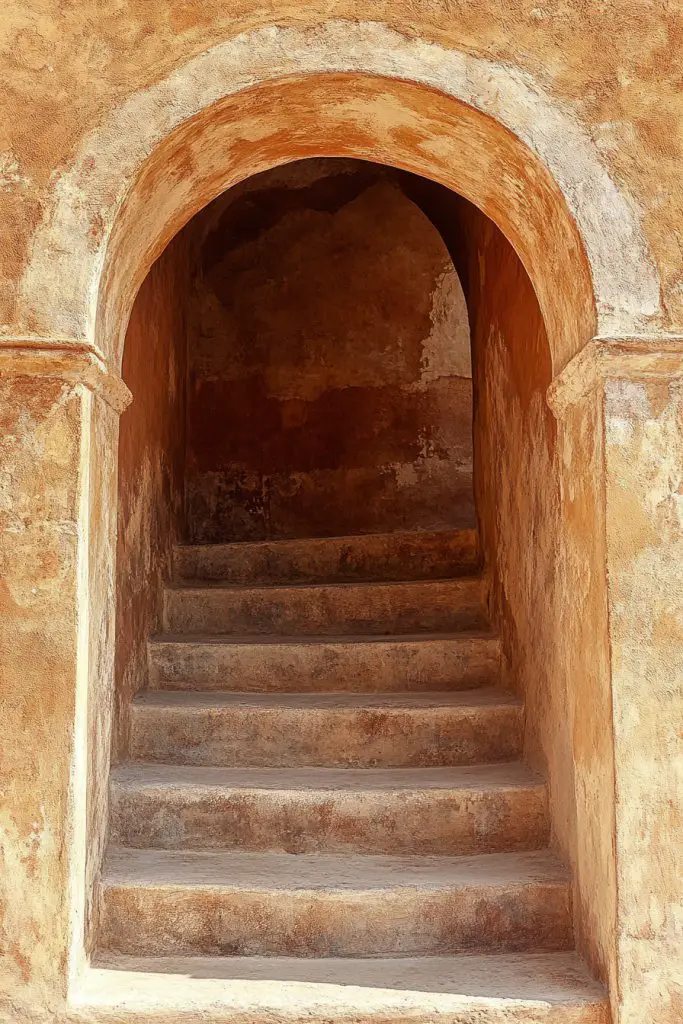
Flat, even walls can feel uninspiring. Textured paint or plaster finishes add tactile depth, making your archway a standout feature. It’s a subtle way to introduce personality and craftsmanship into your decor. Who doesn’t want their home to feel layered and inviting?
Recommended Products to replicate this idea
| # | Preview | Product | |
|---|---|---|---|
| 1 |
|
Homax 41072024174 Roll On Wall Texture White, Sand, 2 gal, 256 Fl Oz (Pack of 1) | Check Latest Price |
| # | Preview | Product | |
|---|---|---|---|
| 1 |

|
DAP 10304 Plaster Wall Patch, White, 25 lb. Bag | Check Latest Price |
Imagine a rough stucco finish in a warm, earthy tone that adds rustic charm. Or a smooth, troweled plaster with subtle swirl patterns for a sleek, modern feel. The textures catch and reflect light differently, creating shadows that add visual depth. When paired with lighting, they turn simple walls into textured works of art.
Opt for bold textures like heavy stucco or smooth Venetian plaster, or choose lighter textures for a more subtle effect. Seasonal updates might involve changing colors or adding metallic or mica flecks for shimmer. Use textured finishes to create a feature wall or to complement other textured elements in your decor. Combine with paint or wallpaper for layered effects.
Prepare the surface by cleaning, repairing, and priming. Apply textured paint or plaster using rollers, trowels, or sponges, depending on the desired effect. Experiment with different tools to create unique patterns. Seal with a clear, matte or satin protective coat for longevity. Practice on scrap material first to perfect your technique.
Combine textures with contrasting colors or metallic accents to enhance visual interest. Incorporate decorative plaster moldings or overlays for a layered look. Add metallic pigments or mica powders to your plaster for subtle shimmer. Personalize by choosing textures that evoke your style—rustic, industrial, boho, or sleek modern.
Textured finishes elevate your walls from flat surfaces to tactile art. They add warmth, character, and a handcrafted feel that’s hard to replicate with smooth paint. When you see your uniquely textured arch, you will be motivated to explore more artisanal decor touches. Your home will radiate personality and thoughtful design.
16. Framing with Architectural Columns or Pilasters for Grandeur
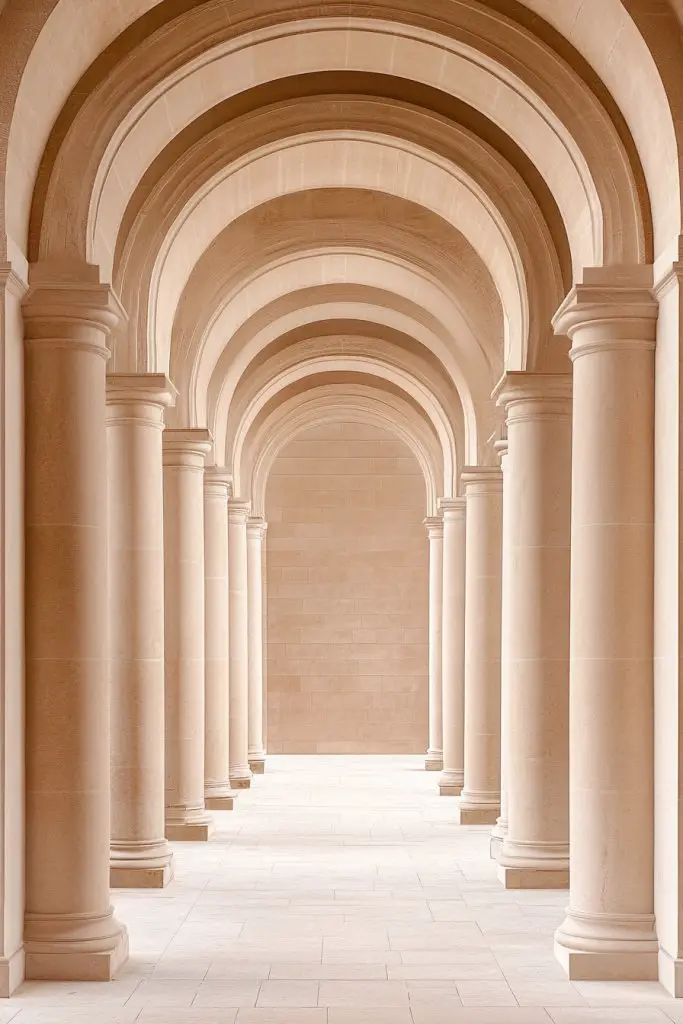
Want to add a majestic, timeless touch to your space? Pairing your arch with architectural columns or pilasters instantly elevates the look, creating a sense of grandeur. It’s the decor equivalent of dressing up for a fancy occasion. Who wouldn’t want their home to feel more regal?
Recommended Products to replicate this idea
| # | Preview | Product | |
|---|---|---|---|
| 1 |

|
Ekena Millwork 10" Bottom Width to 6" Top Width x 4'H Premium Square Tapered Smooth PVC Endura-Craft... | Check Latest Price |
| # | Preview | Product | |
|---|---|---|---|
| 1 |

|
Endurathane Fluted Pilaster w/ Attached 13 1/4" Plinth, 7"W x 90"H x 2 1/4"D, Plinth Can Be Trimmed... | Check Latest Price |
Visualize classical columns with ornate capitals framing your arch, painted in crisp white or a rich hue to match your decor. Or opt for sleek, modern pilasters with clean lines, adding architectural interest without heaviness. When paired with lighting, they cast dramatic shadows, emphasizing the arch’s shape and scale. It’s like creating a mini temple entrance at home.
Choose traditional styles with detailed carvings or go minimalist with simple rectangular pilasters. Seasonal or style updates could involve painting or staining the columns to match your furniture or wall colors. Use complementary molding or decorative accents for added richness. Scale your columns proportionally to your space—big and bold for large rooms, slender for smaller areas.
Measure your arch and select columns or pilasters accordingly. Securely attach columns to the floor and ceiling with appropriate anchors or fasteners, ensuring stability. For a seamless look, hide hardware behind decorative trim or paint the hardware to match the columns. Finish with paint, stain, or faux finishes to blend with your decor. Consider adding capitals or bases for a more elaborate look.
Customize with decorative motifs, patterns, or metallic accents. Incorporate lighting to highlight their grandeur, such as uplights or hidden LEDs. Mix materials like wood, plaster, or metal for a layered, eclectic effect. Personalize by engraving initials, emblems, or motifs that reflect your style.
Columns and pilasters add a sense of history and elegance that transforms your space into a statement. They reflect a classic architectural style, making your home feel more curated and sophisticated. Seeing your home elevated with these features will inspire further architectural and decor experiments. Your space becomes a timeless showcase of style.
17. Incorporating Minimalist Floating Shelves for Practical Decor
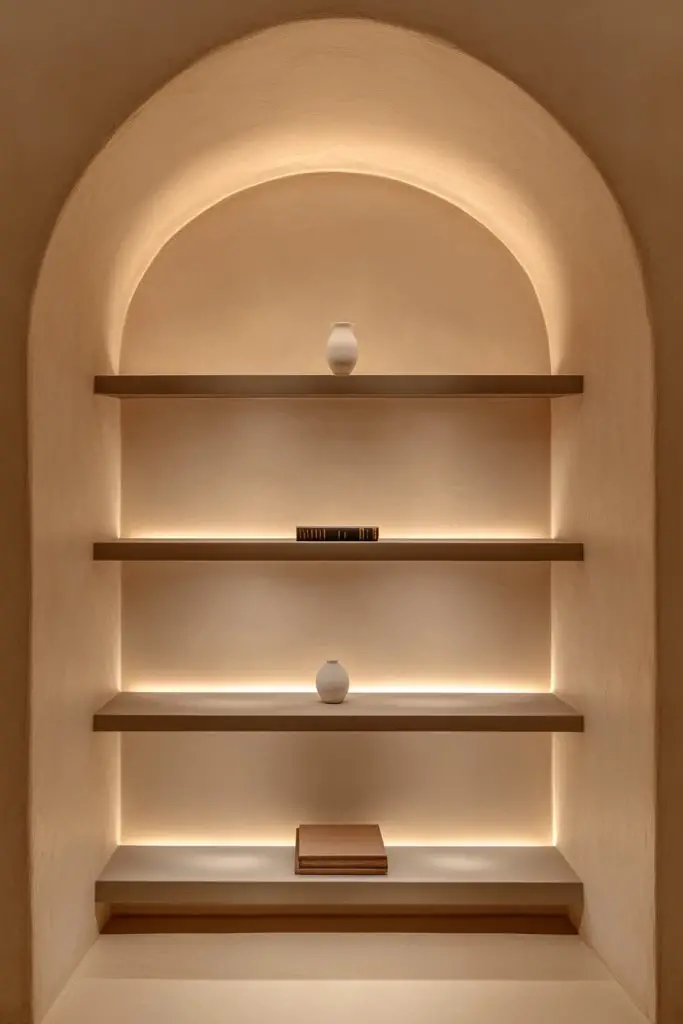
Need a functional yet stylish way to display your favorite decor? Minimalist floating shelves inside your arch provide practical storage without clutter. They’re perfect for small spaces or when you want a clean, modern look. Who says practicality can’t be sleek?
Recommended Products to replicate this idea
| # | Preview | Product | |
|---|---|---|---|
| 1 |

|
BAYKA Floating Shelves for Wall, Wall Mounted Rustic Wood Shelves for Bathroom, Bedroom, Living... | Check Latest Price |
| # | Preview | Product | |
|---|---|---|---|
| 1 |

|
EZVALO 6-Pack Under Cabinet Lighting, Rechargeable Motion Sensor Puck Lights with Remote, 3 Color... | Check Latest Price |
Picture slim, matte-finish shelves holding a few curated objects—small sculptures, candles, or decorative boxes—aligned neatly within the arch. The floating design creates a sense of openness and lightness, making the space feel less crowded. When illuminated with subtle lighting, the shelves become a highlight, blending form and function.
Choose from different lengths, thicknesses, and finishes to match your decor. Mix materials like wood, metal, or acrylic for a contemporary vibe. Seasonal or style updates could involve swapping objects or changing shelf arrangements. Use brackets or hidden supports for a clean, seamless appearance. Layer objects at different heights for visual interest.
Measure your arch carefully to determine shelf length and placement. Install supports into wall studs or anchors, ensuring they are level and secure. Attach shelves with screws or brackets, hiding hardware behind decorative objects or paint. Finish with paint or stain to match your decor palette. Regularly dust and rotate your display items to keep the look fresh.
Personalize with small potted plants, decorative ceramics, or themed objects that reflect your style. Add LED strip lighting underneath or behind the shelves for a subtle glow. Use decorative supports or brackets in contrasting finishes for a more distinctive look. Change objects seasonally or as your mood shifts.
Floating shelves inside your arch combine practicality with minimalist style, turning a simple transition into a functional feature. They showcase your taste while keeping clutter at bay. Successfully installing and styling these shelves will give you the confidence to explore more creative storage solutions. Your home will be both beautiful and purposeful.
Conclusion
Exploring these diverse interior archway decorating ideas shows just how versatile and impactful this design element can be. Whether you prefer a minimalist approach or a more ornate style, there’s a creative solution waiting for you. Don’t hesitate to try these ideas and make your home uniquely yours—transform your spaces and enjoy the beautiful transitions that archways can bring!