
18 Kids Room Storage Ideas for Organized Play
A cluttered kids’ room can quickly turn into a stressful space, but clever storage solutions can make all the difference! Kids room storage ideas are incredibly popular because they help create organized, functional, and fun environments where children can thrive.
In this article, you’ll find a variety of creative and practical storage ideas that cater to different styles and space sizes. From colorful bins to space-saving furniture, these tips will inspire you to transform your child’s room into an organized haven that encourages independence and play.
1. Color-Coded Storage Bins for Easy Toy Sorting
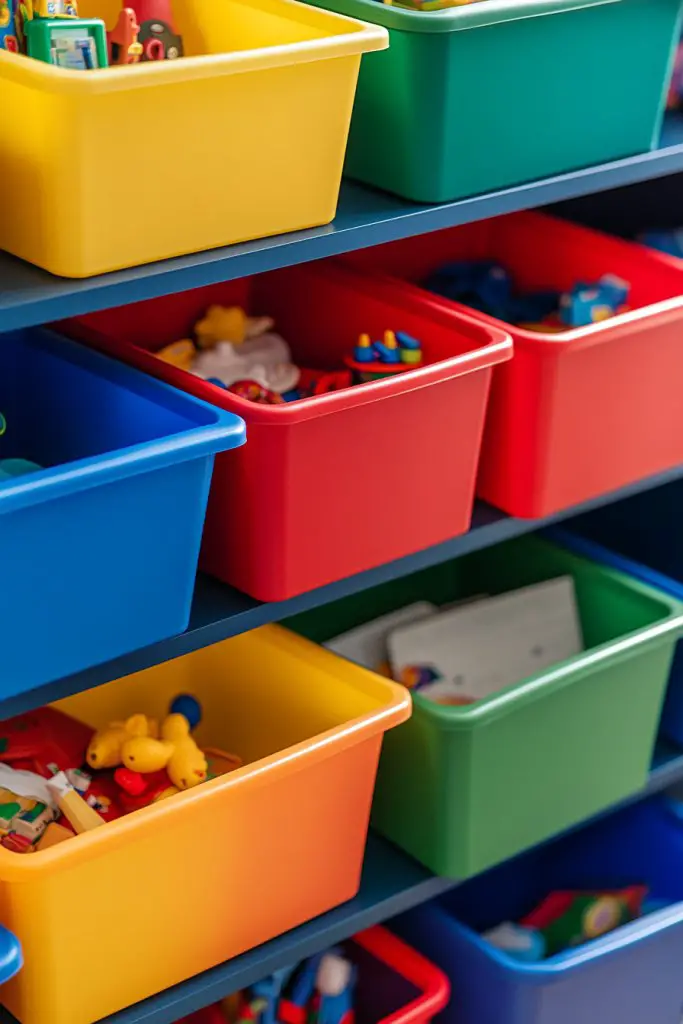
Ever struggled with kids tossing toys into a single bin and then spending ages rummaging for that one specific item? Color-coded bins solve this nightmare, making cleanup faster and teaching kids early organizational skills. Who doesn’t want a room where everything has its place, and kids know exactly where to find or return their treasures?
Recommended Products to replicate this idea
| # | Preview | Product | |
|---|---|---|---|
| 1 |

|
IRIS USA 72 QT Plastic Storage Box with Lid and Latches - 4 Pack - BPA-Free, See-Through Organizing... | Check Latest Price |
| # | Preview | Product | |
|---|---|---|---|
| 1 |

|
Avery Multi-Use Removable Labels, 1" x 3", White, Non-Printable, 72 Blank Labels Total (6728) | Check Latest Price |
Picture a set of bright, sturdy plastic bins lined up on a low shelf, each labeled with a vibrant sticker or tag showing what belongs inside. Red for cars, blue for action figures, green for craft supplies—kids quickly learn to match colors with categories. The labels feature playful fonts and pictures, turning cleanup into a fun, game-like activity. Everything looks neat, colorful, and inviting.
Choose bins in bold, contrasting colors for a lively aesthetic or soft pastels for a calming vibe. Labels can be written by hand, printed, or even laminated for durability. You can also opt for stackable bins to save space or baskets for a more relaxed, boho look. Seasonal or themed bins—like Halloween or summer—add a playful touch and keep things fresh.
Start by sorting toys into groups that make sense for your child’s routine. Purchase bins with handles or lids for easy transport and stacking. Label each container with clear images and words, or use color-coded tape for quick identification. Place frequently used items at eye level, while less common toys go on higher shelves. Involve your child in the labeling process to foster ownership and responsibility.
Let your kid choose their favorite colors or themes for the bins, turning organization into a personalized project. Decorate labels with stickers or drawings that reflect their interests. You can also add small charms or accessories to the bin handles for extra flair. Mixing up the colors and labels keeps the system engaging and prevents boredom.
Color-coded bins make tidying up instinctive and less of a chore. Kids gain confidence as they learn to categorize and manage their toys independently. Plus, the room looks instantly more organized and inviting. It’s a simple change that makes a big difference—who knew organization could be so colorful?
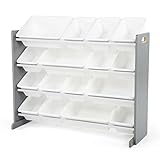
2. Wall-Mounted Cubby Shelves for Display and Storage
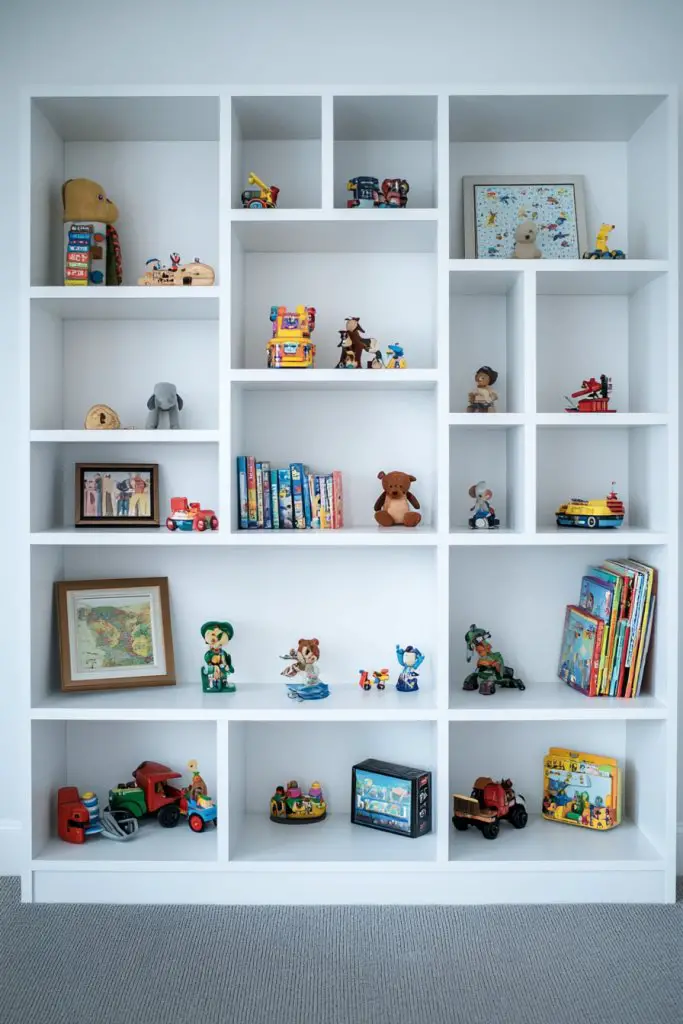
Cluttered floors and crowded surfaces make a kids’ room feel chaotic and overwhelming. Wall-mounted cubby shelves offer a sleek way to keep small toys, books, and treasures off the ground while displaying favorites. Want a room that feels organized but still showcases your kid’s personality? This is the answer.
Recommended Products to replicate this idea
| # | Preview | Product | |
|---|---|---|---|
| 1 |

|
morimoe Wooden Kids Bookshelf, Wall Mount Shelf with Hooks, Organizer for Toys and Books,... | Check Latest Price |
| # | Preview | Product | |
|---|---|---|---|
| 1 |
|
C&AHOME Cube Storage Organizer, 16-Cube Shelves Units, Plastic Storage Cubes, DIY Closet Organizer,... | Check Latest Price |
Imagine open, wooden or plastic cubbies lined up along a colorful wall, each filled with neatly arranged toys, plushies, or tiny collectibles. The shelves are at a kid-friendly height, making everything accessible. Brightly colored baskets or containers inside the cubbies add pops of color, while the open design invites curiosity and easy cleanup. The whole wall becomes a lively display zone.
Choose materials to match your decor—natural wood for a warm vibe or painted MDF for a fun, playful look. Mix and match sizes or add decorative trim for a customized appearance. For a more minimalist style, opt for sleek, monochrome bins inside the cubbies. Adjust shelf heights based on the size of your child’s favorite toys or books, creating a flexible display.
Install sturdy brackets or wall anchors suitable for your wall type, ensuring safety. Arrange the cubbies in an engaging pattern—vertical, horizontal, or staggered—for visual interest. Use labels or small tags to identify contents, or leave open for a more decorative look. Incorporate baskets or fabric bins to contain smaller items and keep everything tidy. Regularly rotate items to keep the display fresh and engaging.
Personalize the cubbies with your child’s name or favorite themes, such as animals, stars, or superheroes. Paint or decorate the background wall with chalkboard paint for an interactive surface. Add hooks underneath for hanging items like hats or bags. Let your kid choose the arrangement periodically to foster a sense of ownership.
Wall-mounted cubbies turn a cluttered corner into a curated display. Kids learn to organize and care for their belongings, boosting independence. Plus, they get to see their favorite toys front and center, encouraging pride and responsibility. It’s a win-win for your decor and their development.
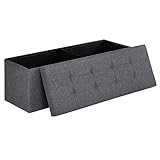
3. Multi-Functional Toy Chests with Seating Capability
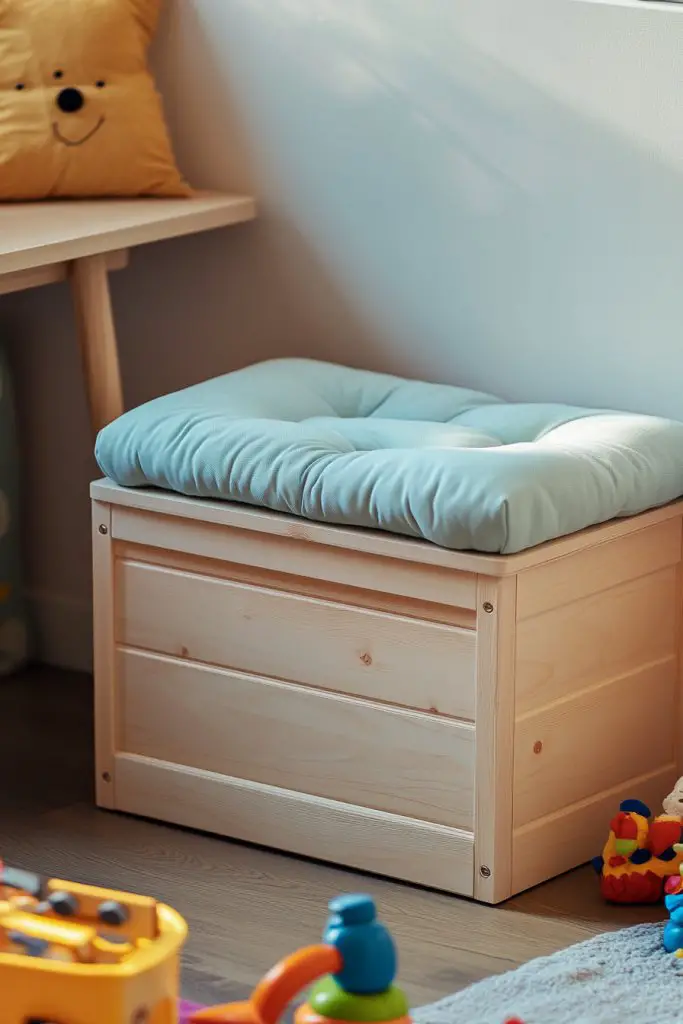
A toy chest that doubles as a seat? Yes, please! Kids’ rooms often lack seating while overflowing with toys, turning every moment into a game of musical chairs. Combining storage and seating solves two problems at once, making rooms more functional and fun. Who wouldn’t want a piece of furniture that’s both practical and playful?
Recommended Products to replicate this idea
| # | Preview | Product | |
|---|---|---|---|
| 1 |
|
SONGMICS MAZIE Collection - 43 Inches Folding Storage Ottoman Bench, Ottoman Foot Rest, End of Bed... | Check Latest Price |
| # | Preview | Product | |
|---|---|---|---|
| 1 |
|
Humble Crew Supersized Toy Storage Organizer with 16 Removable Bins, Grey/White – Large Toy... | Check Latest Price |
Picture a sturdy fabric or wooden bench with a hinged lid, painted in bright, cheerful colors. Kids can sit on it comfortably during playtime or while reading. Inside, it’s filled with stuffed animals, puzzles, or dress-up clothes—easily accessible but hidden from view when closed. The sleek design blends seamlessly with the room decor, creating a cozy corner.
Choose materials based on your style—classic wood for durability, soft fabric for a cozy look, or even upcycled vintage pieces for eco-chic vibes. Add cushions or throws on top for extra comfort and style. Some models feature storage compartments for different toy categories or seasonal items. Adjust the size to fit your space, from compact ottomans to larger benches.
Select a sturdy, safety-approved piece that opens smoothly without pinching fingers. Decide on a color scheme that complements the room—bright primary colors or softer pastels. Place it in a corner or at the foot of the bed for convenience. Fill the interior with organized bins or baskets to keep toys tidy. Regularly review and rotate contents to keep it fresh and functional.
Add name decals or custom embroidery to make it special. Decorate with removable cushions or themed covers aligned with your child’s interests. Use labels inside for different toy categories for easy tidying. Incorporate small side pockets for storing books or small accessories for quick access.
This dual-purpose furniture encourages kids to tidy up by making it part of their routine. They learn responsibility and gain confidence in managing their space. Plus, it creates a welcoming, organized corner that feels like their personal retreat. Ready to elevate your room with style and function?
4. Stackable Bins for Customizable Storage Solutions
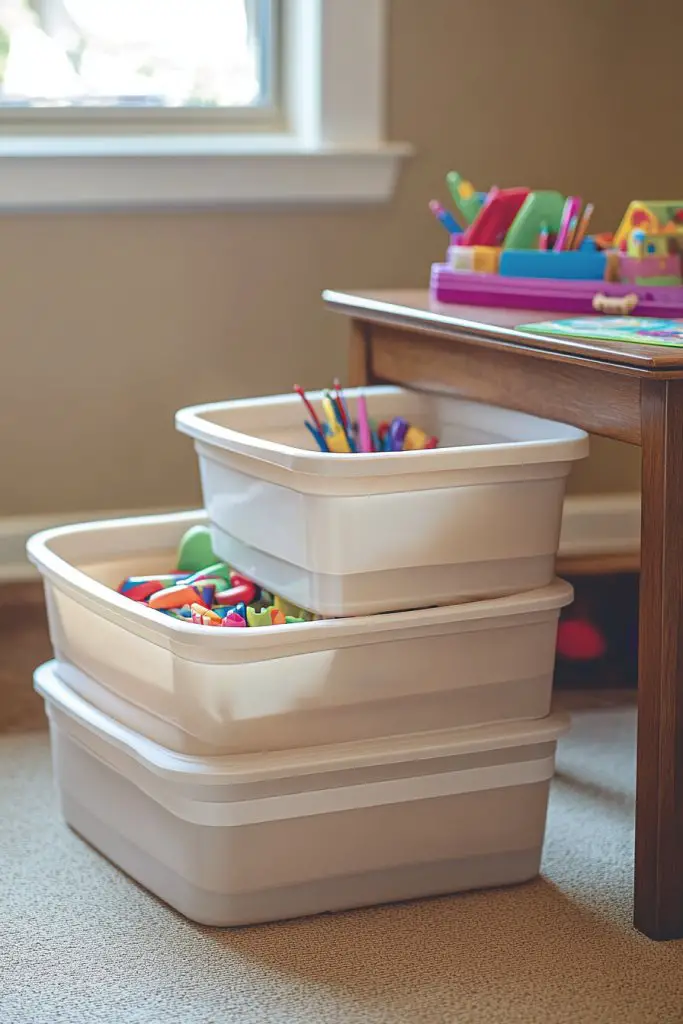
Kids’ toys come in all shapes and sizes, making it hard to keep everything organized without ending up with a giant, messy pile. Stackable bins offer a flexible, scalable way to store toys, art supplies, or clothes. Want a system that grows with your kid and adapts to your space? This is it.
Recommended Products to replicate this idea
| # | Preview | Product | |
|---|---|---|---|
| 1 |

|
CTSNSLH 4 Tier Plastic Storage Bins and Boxes Organizer - Stackable with Lids for Bedroom, Living... | Check Latest Price |
| # | Preview | Product | |
|---|---|---|---|
| 1 |

|
Sterilite 1427CLR Stack & Carry - 2 Layer Box, Clear Lid & Blue Handle, See-through layers | Check Latest Price |
Imagine a tower of colorful, interlocking bins stacked neatly on a shelf or in a corner. Each bin holds different items—lego bricks, dolls, or craft materials—easily accessible and clearly separated. The uniform shape and vibrant colors create a playful, orderly display. When needed, you can unstack or rearrange sections to suit changing needs.
Select materials like durable plastic for easy cleaning or fabric-covered bins for a softer look. Incorporate labels or pictures on the front to teach kids categorization. Stack in various configurations—vertical towers or horizontal rows—to fit your room’s layout. For a more sophisticated touch, choose monochrome tones or metallic finishes.
Start by assessing your storage needs and available space. Purchase a set of compatible bins with secure lids or handles for easy transport. Organize contents by frequency of use—daily toys on top, seasonal or less-used items at the bottom. Place the stack on a sturdy shelf or in a dedicated corner, and label each bin for quick identification. Regularly review and rotate to keep the system effective.
Customize bins with your child’s favorite colors, themes, or characters. Use stickers, paint, or fabric covers for a personalized look. Encourage your child to decorate or label their bins, turning organization into a fun craft project. Mix and match sizes for different storage needs, making the setup dynamic and engaging.
Modular stacking systems empower kids to manage their belongings independently. They learn to organize, categorize, and clean up efficiently. Plus, the room’s appearance instantly improves with a tidy, structured setup. It’s a simple upgrade that makes a big difference in daily routines.
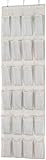
5. Over-Door Organizers for Quick Access to Art Supplies and Books
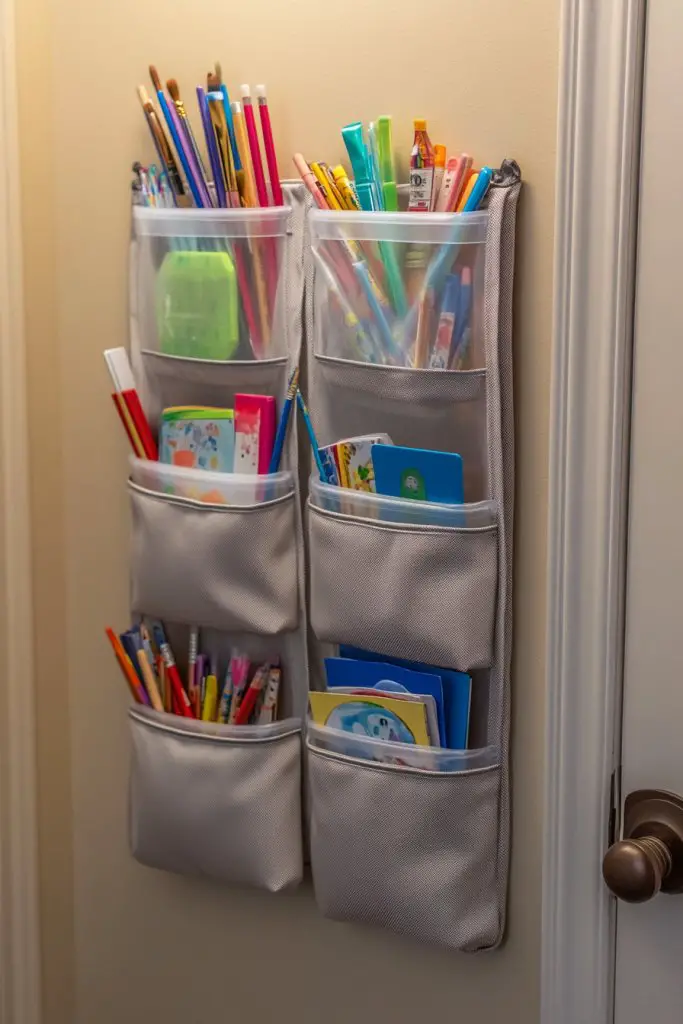
Cluttering up drawers and shelves with art supplies and books can make tidying a nightmare. Over-door organizers provide a quick, accessible solution for storing items your kids reach for daily. Want to keep their favorite supplies in sight and within arm’s reach? This clever hack is perfect.
Recommended Products to replicate this idea
| # | Preview | Product | |
|---|---|---|---|
| 1 |

|
JARLINK Over The Door Organizer Storage, 5 Shelf Hanging Door Organizer with 5 Large Capacity... | Check Latest Price |
| # | Preview | Product | |
|---|---|---|---|
| 1 |
![Crayola Inspiration Art Case Space Coloring Set (140pcs), Art Kit for Kids, Crayons, Markers, Pencils, Holiday & Christmas Gift for Boys & Girls, Ages 5, 6, 7 [Amazon Exclusive]](https://m.media-amazon.com/images/I/512fTojPeRL._SL160_.jpg)
|
Crayola Inspiration Art Case Space Coloring Set (140pcs), Art Kit for Kids, Crayons, Markers,... | Check Latest Price |
Visualize a hanging organizer with multiple pockets, each stuffed with crayons, markers, coloring books, or small notebooks. It drapes over the door, taking up minimal space while turning the back of the door into a mini storage zone. Bright colors and clear labels make it playful and easy to navigate, turning cleanup into a game.
Choose fabric or mesh pockets in colors matching your decor or with fun patterns. Some organizers come with clear windows, allowing kids to see their treasures at a glance. For smaller rooms, opt for slim profiles that won’t obstruct door movement. You can also hang multiple organizers for different categories—art, reading, or small toys.
Attach the organizer with hooks or adhesive strips that won’t damage the door surface. Fill the pockets with supplies, grouping similar items together. Place frequently used items at the top for easy access. Regularly check and refill supplies, and encourage your kid to tidy up by returning items to their designated pockets. A quick wipe or wash keeps it fresh.
Personalize pockets with labels or stickers depicting characters or themes your child loves. Let your kid decorate the fabric with fabric paint or iron-on patches for a personalized touch. Use colorful ribbons or tags to mark categories, making it a fun craft activity. Rotate contents seasonally for variety.
This simple, accessible storage encourages independence and responsibility. Kids learn to put away their supplies properly, fostering good habits early on. Plus, it declutters the room, making space for play and learning. It’s an easy upgrade with big organizational payoffs.
6. Pegboard Wall for Hanging Art Supplies and Small Toys

Small toys, art supplies, and accessories tend to scatter everywhere, turning clean rooms into clutter zones. A pegboard wall offers a flexible, customizable solution for keeping everything organized and visible. Want a neat, creative space that doubles as decor? Pegboards are your friend.
Recommended Products to replicate this idea
| # | Preview | Product | |
|---|---|---|---|
| 1 |

|
300-Piece Pegboard Hook Set, Pegboard Organizer Accessories for Hanging, Durable Metal Hooks for... | Check Latest Price |
| # | Preview | Product | |
|---|---|---|---|
| 1 |

|
StorageTastic Storage Bins, 3-Pack Large Storage Box with Rope Handles, Collapsible Storage Basket... | Check Latest Price |
Visualize a colorful pegboard mounted at a kid-friendly height, filled with hooks, baskets, and hanging containers. Small toys like cars and figurines hang from hooks, while baskets hold craft supplies or jewelry. The open grid design creates a playful, industrial look that’s easy to update as your child’s interests change. Everything is within easy reach, making clean-up quick.
Choose painted or natural wood pegboards to match your decor. Use colorful hooks or metallic finishes for a more modern feel. Incorporate small shelves or containers to hold loose items or art supplies. Arrange hooks and baskets in a pattern that suits your space and style—symmetrical or random for a whimsical vibe. Adjust the arrangement as your child’s collection evolves.
Mount the pegboard securely on the wall at a height comfortable for your child. Use a level and appropriate anchors for stability. Organize small items by type and hang or place them within easy reach. Mix hooks, baskets, and shelves to accommodate various sizes and shapes of toys or supplies. Regularly review and reorganize to keep the space functional and fun.
Decorate the pegboard with your child’s favorite colors or themes—stars, animals, or superhero motifs. Personalize with custom labels or painted designs. Use decorative hooks or themed containers to add character. Let your child participate in arranging the accessories for a sense of ownership and pride.
Pegboards turn clutter into a curated display, inspiring kids to care for their belongings. They develop organizational skills and enjoy the fun of customizing their space. Plus, a tidy, interactive wall boosts confidence and independence. Ready to hang up some fun and function?
7. Mason Jar Holders for Small Toys and Craft Supplies
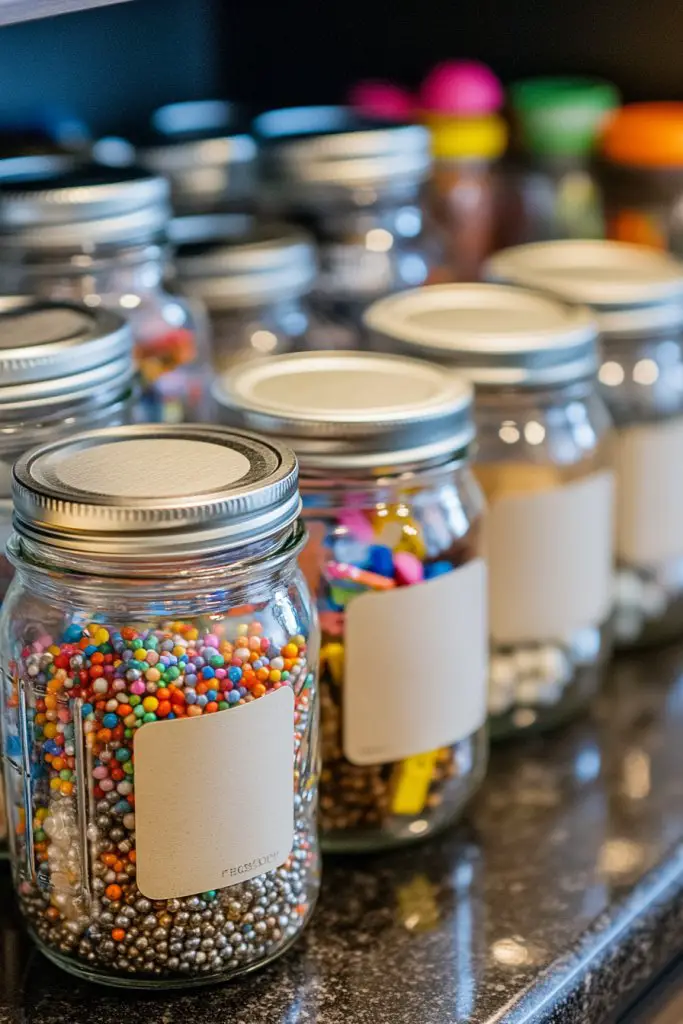
Tiny toys, beads, and art supplies can easily get lost or spilled everywhere, making cleanup a chore. Mason jars, or similar glass containers, offer a stylish, functional way to organize these little items. Want a cute, accessible storage solution that also adds charm? This idea is a winner.
Recommended Products to replicate this idea
| # | Preview | Product | |
|---|---|---|---|
| 1 |

|
Multi Size - 5 Pack Square Glass Jars with Airtight Lid, Wide Mouth Mason Jars with Clamp Lids, Air... | Check Latest Price |
| # | Preview | Product | |
|---|---|---|---|
| 1 |

|
Rustic Hanging Mason Jar Organizer - BeSuerte Farmhouse Home Mason Jar Toothbrush Holder, Wall Mount... | Check Latest Price |
Envision a row of small mason jars sitting on a shelf or mounted on a wall, filled with colorful buttons, beads, or miniature figurines. The transparent glass makes it easy to see everything inside, while the metal or painted lids add a vintage or modern touch. Arrange them in a cluster or a line for a neat, decorative display. Kids love being able to pick out what they need easily.
Use painted or patterned lids to match your decor or theme. Mix different sizes of jars for variety or uniform sizes for a sleek look. Attach small labels or pictures to identify contents, especially for younger children learning to sort. For a more creative approach, hang jars upside down with the lids on top, turning them into wall-mounted storage.
Securely mount jars on a wall using brackets, or place them on open shelves for easy access. Fill each jar with specific items—crayons, buttons, beads, or small toys—and label accordingly. Keep frequently used items at eye level for quick grabbing, and store seasonal or less-used supplies higher up. Clean and refill jars regularly to maintain order.
Decorate the jars with paint, washi tape, or stickers to match your child’s favorite colors or characters. Use different colored lids or labels to create a visual sorting system. Encourage your child to personalize their jars, making organization a fun activity. Incorporate small decorative elements like charms or faux flowers for extra style.
Using mason jars for storage teaches kids responsibility and sorting skills. They gain confidence in managing their belongings and taking pride in their organized space. Plus, it transforms clutter into a charming display that brightens the room. Who knew organization could look so good?
8. Rotating Storage Carts for Easy Toy Access
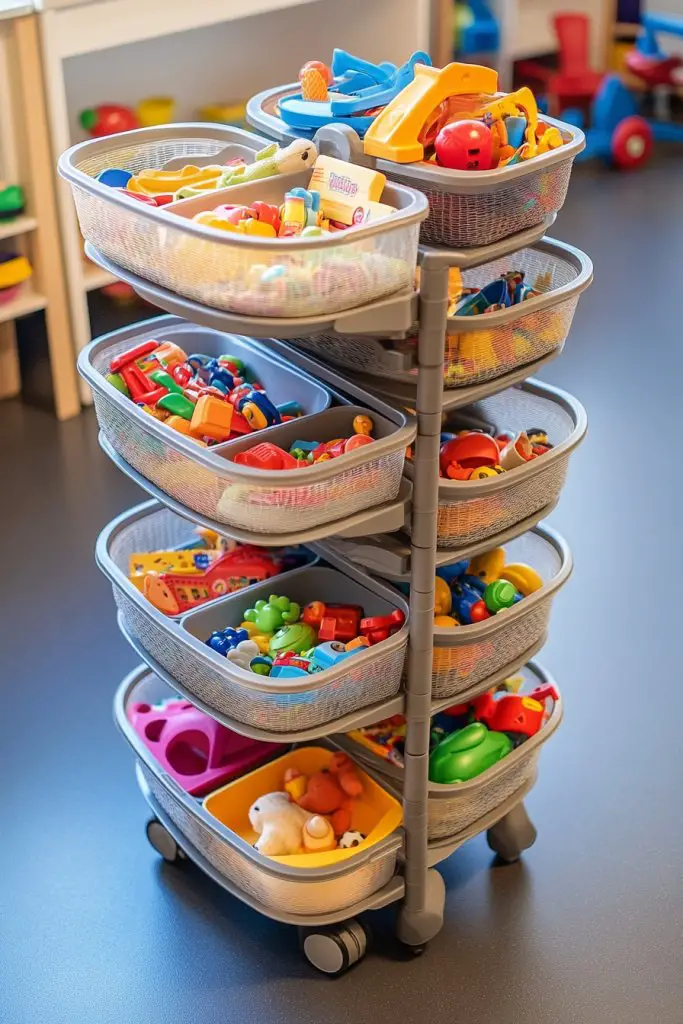
Kids often forget about toys buried in the back of shelves or bins, leading to clutter and frustration. Rotating storage carts keep a variety of toys within reach and make tidying up effortless. Want a mobile, versatile solution that keeps playtime fresh and organized? This cart is a game-changer.
Recommended Products to replicate this idea
| # | Preview | Product | |
|---|---|---|---|
| 1 |

|
MISSLO Large Toy Box with Wheels Big Toy Chest for Kids Organizer Toy Storage Bin, 124L, Black | Check Latest Price |
| # | Preview | Product | |
|---|---|---|---|
| 1 |

|
Humble Crew Toy Storage Bins for Kids, Set of 4, Primary Colors, Small - Sturdy, Colorful Plastic... | Check Latest Price |
Picture a rolling cart with multiple tiers or baskets, each filled with different types of toys—action figures, puzzles, or art supplies. The wheels allow you to move it easily from room to room or hide it in a closet when not in use. Kids love spinning it around to find their favorites, turning cleanup into a fun activity. Bright colors and labels make everything pop.
Choose materials like sturdy plastic or metal for durability, or wood for a rustic look. Use removable baskets or bins for easy cleaning and reorganizing. Label each tier with pictures or words to help young children identify what goes where. For small spaces, opt for slim, narrow carts; for larger rooms, go for bigger, multi-tiered options.
Fill each compartment with specific toy categories, ensuring everything has a home. Place the cart in a central spot for quick access or tuck it away in a closet. Use labels or color-coding to streamline tidying. Encourage your child to put toys back after play by making it a routine. Regularly review contents to keep it manageable.
Decorate the cart with stickers or paint to match your child’s interests. Use themed labels featuring their favorite characters or animals. Incorporate small accessories like clip-on toys or decorative handles to add personality. Let your kid choose which toys go on each level for a sense of ownership.
Rotating carts foster independence by allowing children to manage their own toy storage. They learn categorization, responsibility, and cleaning habits naturally. Plus, they can easily access their favorite toys without adult help. It’s a practical, playful way to keep a busy room organized.
9. Built-In Shelving Units for Floor-to-Ceiling Storage
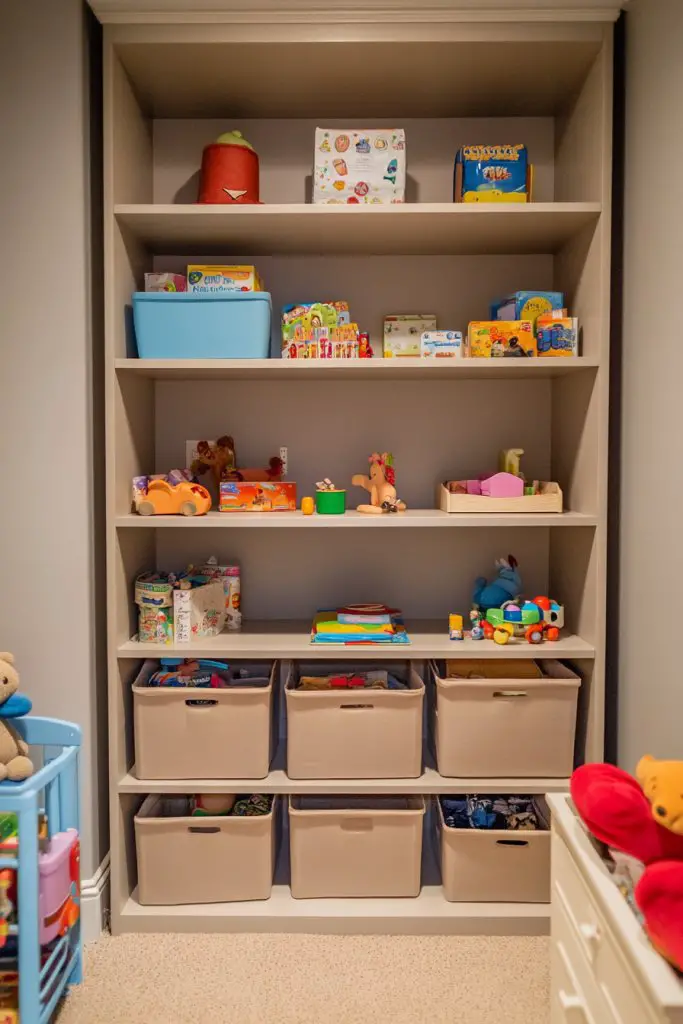
Limited space in a kids’ room often results in cluttered shelves and cramped corners. Built-in or modular shelving units maximize vertical space, providing ample storage without sacrificing floor area. Want a sleek, integrated look that holds everything from books to plush toys? This is your go-to.
Recommended Products to replicate this idea
| # | Preview | Product | |
|---|---|---|---|
| 1 |

|
Harwaya Floating Shelves for Wall 36 Inches Long 8 Inch Deep, Large Wall Book Shelves for Bedroom,... | Check Latest Price |
| # | Preview | Product | |
|---|---|---|---|
| 1 |

|
Sterilite 6-Pack Industrial Tote, Plastic Storage Container Bins with Lids, 27 Gallon - Heavy-Duty... | Check Latest Price |
Imagine a tall, open shelving system stretching from floor to ceiling, filled with colorful bins, stacks of books, and neatly folded blankets. The shelves are customized to fit your space, with some sections dedicated to specific categories. The open design creates a visual focus that keeps everything accessible and organized, turning the wall into a functional art piece.
Opt for minimalist, white modular shelves for a clean look or vibrant, painted units for a playful vibe. Mix open shelves with closed cabinets for hidden storage. Incorporate small baskets, boxes, or fabric bins to contain smaller items. Adjust shelf heights based on your child’s needs—low for easy reach, high for less-used items.
Measure your wall space carefully and select modular or built-in units accordingly. Securely anchor the shelves to the wall for safety, especially if your child is active. Use labels or color coding to identify contents easily. Fill the shelves with a mix of books, toys, and storage boxes, keeping frequently accessed items at lower levels. Regular decluttering helps maintain order.
Paint or decorate the back panel of the shelves with your child’s favorite colors or patterns. Incorporate themed storage boxes or personalized labels with their name or cartoon characters. Add decorative elements like small figurines or themed stickers on the shelves themselves. Let your kid help arrange their favorite items for a personalized touch.
Floor-to-ceiling shelves turn a cluttered wall into an organized showcase of your child’s interests. They encourage a routine of tidying up, as everything has a designated spot. Kids develop pride in their organized environment and learn to handle responsibilities early. It’s a stylish, functional upgrade that lasts for years.
10. Toy Hammocks or Nets for Ceiling or Corner Storage
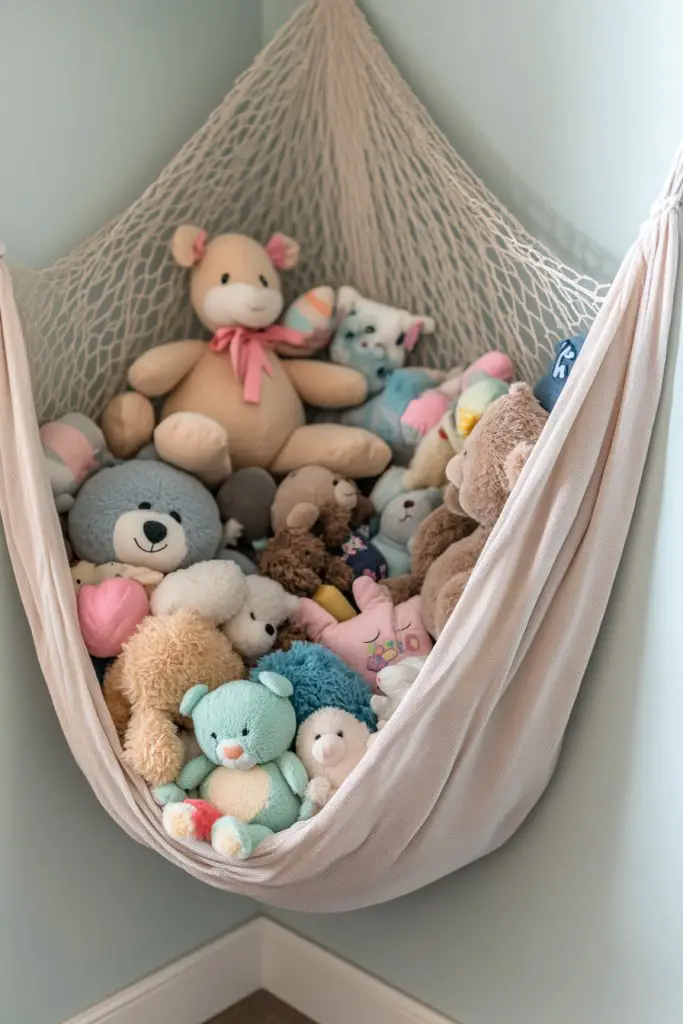
Soft toys, plushies, and stuffed animals often take over beds and floors, turning a room into a cuddly chaos zone. Toy hammocks or nets utilize ceiling or corner space to keep soft toys visible and accessible. Want a playful, space-saving solution that adds a cozy vibe? This trick is a hit.
Recommended Products to replicate this idea
| # | Preview | Product | |
|---|---|---|---|
| 1 |

|
Stuffed Animal Storage Hammock or Net Corner - Large Toy Hammock Net for Stuffed Animals Room Decor... | Check Latest Price |
| # | Preview | Product | |
|---|---|---|---|
| 1 |

|
Mandark 2PCS Mesh Cargo Net for Car Trunk Storage, Elastic Vehicle Wall Sticker Organizer Net, 9.8 *... | Check Latest Price |
Picture a colorful fabric hammock or mesh net hanging in a corner or above the bed, filled with fluffy plushies. The soft fabric blends into the room’s decor, while the toys sit visibly, ready for play or cuddles. The net’s airy design keeps toys contained without cluttering the floor, making the space feel open and inviting. Kids love reaching up and grabbing their favorites.
Choose fabrics in bright, cheerful colors or neutral tones to match your decor. Use decorative ribbons or ties to secure the net in place, or opt for easy-to-install hooks. For a more rustic look, opt for natural fiber nets; for a modern vibe, choose sleek, patterned fabrics. Adjust the size based on your collection—small nets for a few plushies or large ones for a big stash.
Securely attach hooks or ceiling anchors in a corner or above the bed. Fill the hammock or net with plush toys, ensuring weight is evenly distributed. If using a net, double-check the tension to prevent sagging. Teach your kids to rotate toys periodically for variety and to keep the display fresh. Regularly check for wear or tears and wash the fabric for cleanliness.
Decorate the edges with ribbons, bows, or fabric paint to match your kid’s favorite themes. Personalize with patches or embroidered names for a special touch. Encourage your child to add or rearrange toys, making it an engaging organization activity. Use themed fabrics for holidays or special occasions to keep things fun.
Ceiling or corner toy nets turn clutter into a playful display that fosters responsibility. Kids learn to organize and care for their plush collection, boosting independence. Plus, it frees up floor space for active play or study. It’s a whimsical, practical solution that delights kids and parents alike.
11. Multi-Purpose Bedside Caddies for Small Items
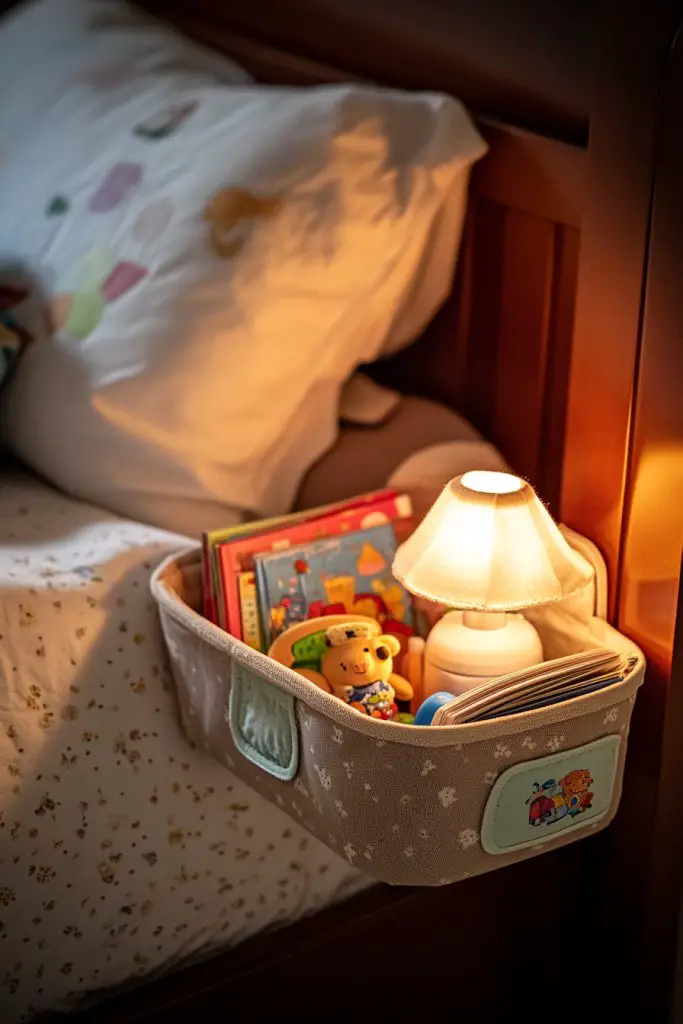
Bedside tables often turn into clutter catch-alls, making it hard to find nighttime essentials or small toys quickly. Multi-purpose caddies attach to beds or headboards, keeping necessities close at hand without cluttering surfaces. Want a tidy, accessible spot for everything? This simple hack works wonders.
Recommended Products to replicate this idea
| # | Preview | Product | |
|---|---|---|---|
| 1 |

|
Lilithye Bedside Caddy Storage Organizer with Fixed Straps and Water Bottle Holder for Home,... | Check Latest Price |
| # | Preview | Product | |
|---|---|---|---|
| 1 |
|
Amazon Basics 24 Medium Pocket Over-the-Door Hanging Shoe Organizer, Light Grey | Check Latest Price |
Imagine a fabric or mesh caddy hanging from the side of a bed, with compartments for a flashlight, a favorite book, or a small toy. It’s lightweight, easy to remove, and keeps everything organized and visible. Kids can grab their bedtime goodies without rummaging through drawers or cluttered nightstands. The design is sleek, with multiple pockets for different needs.
Select waterproof or washable fabrics in fun patterns or neutral tones to match your decor. Customize with labels or embroidery for a personal touch. Some models include adjustable straps or hooks for different bed types. For a more sophisticated look, opt for leather or faux-leather accents.
Attach the caddy securely to the headboard or bed frame using straps or hooks. Organize small items into compartments—glasses, chargers, toys, or snacks. Keep frequently used items at the top or in front for easy access. Regularly review contents to keep the caddy tidy, replacing or washing as needed. Encourage your child to put things back after use.
Decorate the caddy with patches, stickers, or fabric paint that reflect your child’s personality. Use color-coded compartments for different categories—sleep essentials, nighttime toys, or reading materials. Let your child choose the design or add small charms for a fun, personalized touch. Rotate items seasonally or as interests change.
Bedside caddies teach kids organization and responsibility, fostering independence at bedtime. They learn to keep their space neat and manage small belongings efficiently. Plus, everything they need is within arm’s reach, making bedtime routines smoother. It’s a simple, effective upgrade for any kids’ room.
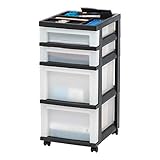
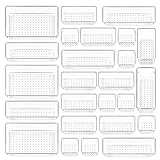
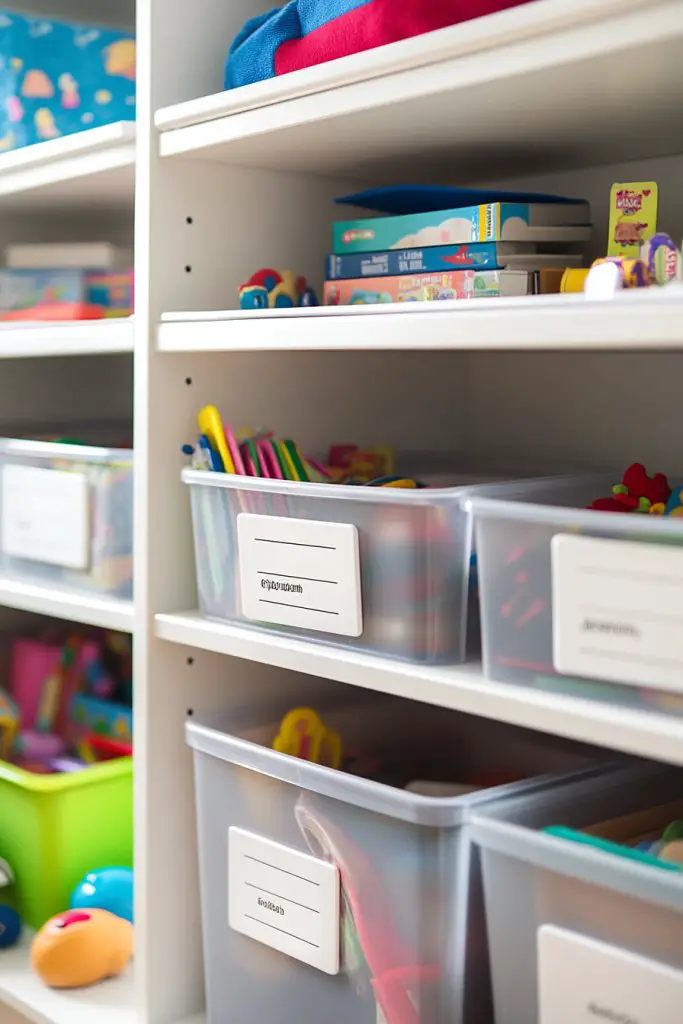
12. Clear Plastic Container Drawers for Visual Inventory
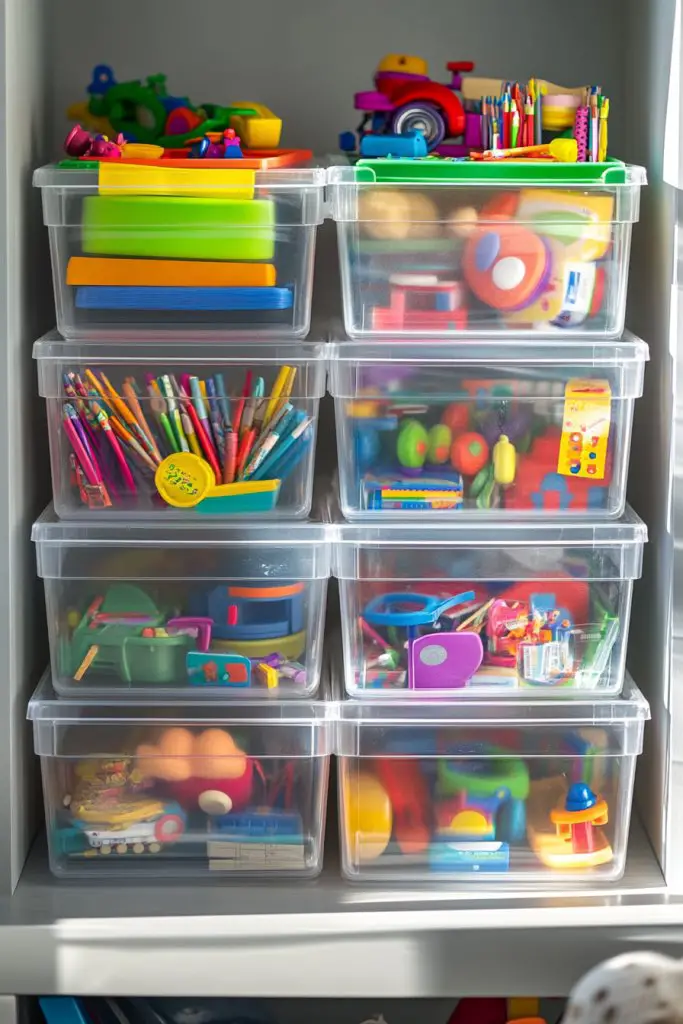
Messy rooms often stem from kids not knowing what’s inside their storage containers, leading to frustration and messes. Clear plastic drawers solve this by offering instant visibility of contents, reducing rummaging and encouraging tidiness. Want a straightforward way for kids to find and put away their toys? This is it.
Recommended Products to replicate this idea
| # | Preview | Product | |
|---|---|---|---|
| 1 |
|
IRIS USA Plastic Drawer Storage Organizer Rolling Cart, with Wheels Casters, 4-Drawers, for... | Check Latest Price |
| # | Preview | Product | |
|---|---|---|---|
| 1 |
|
Vtopmart 25 PCS Clear Plastic Drawer Organizers Set, 4-Size Versatile Bathroom and Vanity Drawer... | Check Latest Price |
Envision a set of transparent drawers stacked neatly in a corner or on a shelf, each filled with different categories—building blocks, figurines, or art supplies. The see-through design means kids can identify what’s inside at a glance, making cleanup faster and easier. The drawers’ sleek look fits well with modern decor and keeps everything organized.
Choose drawers with different sizes for versatile storage or uniform sizes for a tidy look. Use labels or stickers on the front for added organization, or leave them clear for a minimalist aesthetic. Stack multiple units or place them side by side depending on your space. Incorporate a small labeling system for quick identification.
Position the drawers on open shelving or in cubbies, ensuring stability. Fill each drawer with specific items and label accordingly—use printed labels or write directly on the plastic. Encourage your kid to return items to the correct drawer after play. Regularly review contents to prevent overstuffing and to keep things visible and accessible.
Decorate the drawers with colorful labels, stickers, or themed tape to match your child’s interests. Use different colors for different categories—red for vehicles, blue for plush toys, etc. For added fun, incorporate personalized name tags or characters. Rotate contents seasonally or for special occasions to keep it fresh.
Transparent drawers foster independence by making it easy for kids to see and manage their belongings. They develop sorting skills and take pride in maintaining an organized space. Plus, everything stays visible, so clutter is less likely to accumulate. It’s a simple, effective method to boost confidence and responsibility.
13. Hidden Storage in Staircase Drawers or Steps
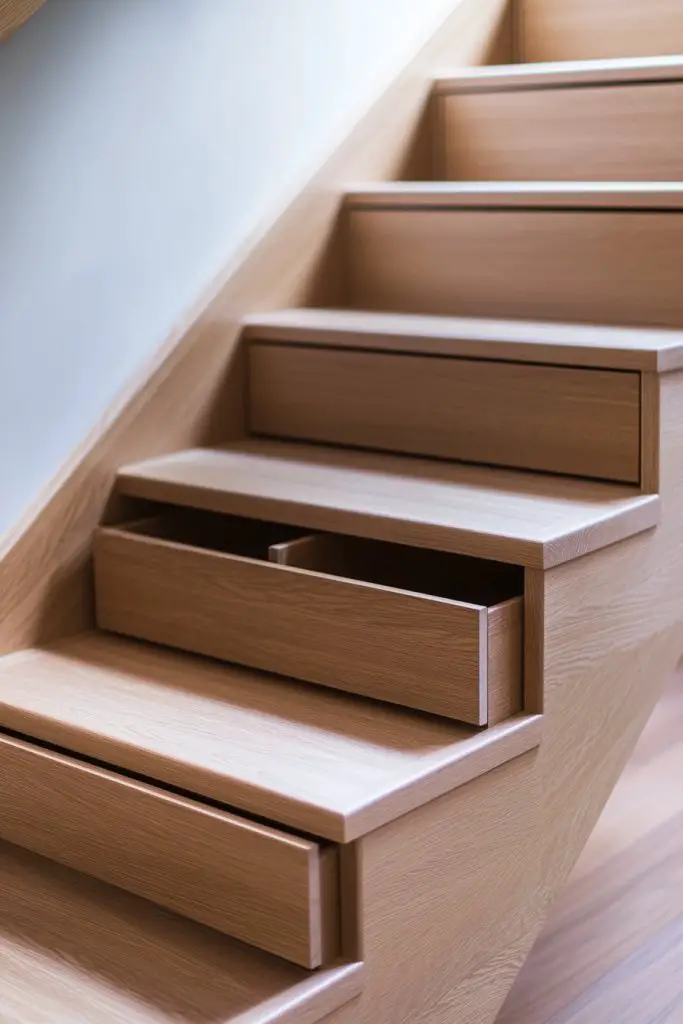
Staircases often become dumping grounds for shoes, toys, or seasonal items, creating clutter and hazards. Integrating storage into staircase steps turns unused space into a clever, hidden storage solution. Want a seamless way to declutter while maintaining style? This idea is genius.
Recommended Products to replicate this idea
| # | Preview | Product | |
|---|---|---|---|
| 1 |

|
Prime-Line R 7227 Rear Drawer Track Back Plate – Support and Maintain Alignment of Bottom/Side... | Check Latest Price |
| # | Preview | Product | |
|---|---|---|---|
| 1 |

|
VEVOR Under Bed Storage with Clear Lids, 33.5 x 16.9 x 4.7 Inch, 45L Large Underbed Clothes Storage... | Check Latest Price |
Imagine stair treads that lift up to reveal shallow drawers filled with shoes, toys, or spare linens. The drawers are integrated into the staircase design, so they don’t interfere with everyday use. When closed, the stairs look sleek and uniform, maintaining your decor’s integrity. Kids love opening and closing their secret compartments.
Choose materials that match your stairs—wood, laminate, or painted finishes. Use handles or finger pulls that blend into the design for a clean look. Vary drawer sizes based on what you plan to store—larger for shoes, smaller for toys or accessories. Incorporate labels or color coding for easy organization.
Hire a carpenter or DIY if you’re handy, ensuring sturdy, smooth-operating drawers. Measure each step carefully and reinforce for safety. Install the drawers with rails and handles, then organize contents inside—shoes, toys, or linens. Test the opening and closing mechanism for ease and safety. Regularly check for wear or damage.
Decorate the drawer fronts with paint, stickers, or themes matching your child’s interests. Add labels or small decals to identify contents quickly. For a more elegant look, use matching hardware and finishes. Encourage your kids to participate in organizing their items into the drawers.
Hidden staircase storage maximizes space and keeps clutter out of sight, creating a safer environment. Kids learn to take responsibility for their belongings, especially when they see their stored items organized and accessible. It transforms the staircase into a functional feature that boosts room efficiency and style. Ready to get creative with your staircase?
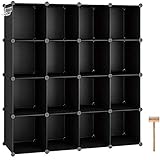
14. Modular Cube Storage Units for Flexible Organization

Kids’ interests and collections change quickly, making static storage systems frustrating. Modular cube units offer flexible, customizable storage that adapts to evolving needs. Want a versatile setup that grows with your child and fits any space? This is your solution.
Recommended Products to replicate this idea
| # | Preview | Product | |
|---|---|---|---|
| 1 |

|
Amazon Basics Collapsible Fabric Storage Cubes Organizer with Handles, Sturdy, Gray,... | Check Latest Price |
| # | Preview | Product | |
|---|---|---|---|
| 1 |
|
C&AHOME Cube Storage Organizer, 16-Cube Shelves Units, Plastic Storage Cubes, DIY Closet Organizer,... | Check Latest Price |
Picture a grid of cube shelves, some filled with plush toys, others with books or baskets. The units can be rearranged into various configurations—stacked vertically, side by side, or in a T-shape—creating a dynamic display. Brightly colored cubes or neutral tones fit any decor style. Kids love customizing their space by swapping or adding cubes.
Choose open cubes for easy access or add fabric bins for a tidy appearance. Mix different sizes or incorporate drawers for hidden storage. Use paint or decals to personalize each cube, reflecting your child’s personality. Adjust the configuration as needs change—more storage, display, or play area.
Select a set of cubes that fit your space and storage needs. Assemble on the floor or mount on the wall, depending on your preference. Fill with toys, books, or decorative items, and label or color code for organization. Reconfigure periodically to refresh the look and optimize storage. Secure units to prevent tipping in active spaces.
Customize with themed decals, paint, or fabric inserts for a unique look. Involve your child in decorating each cube, fostering ownership. Incorporate themed accessories—like superhero or princess motifs—to match their interests. Use different textures or finishes to add visual interest.
Modular cubes teach kids organization, adaptability, and creativity. They develop a sense of control over their environment while keeping clutter at bay. The flexible design allows for ongoing personalization and growth, making it a long-term investment in tidy, happy spaces. Time to build your custom storage universe!
15. Repurposed Furniture for Unique Storage Solutions
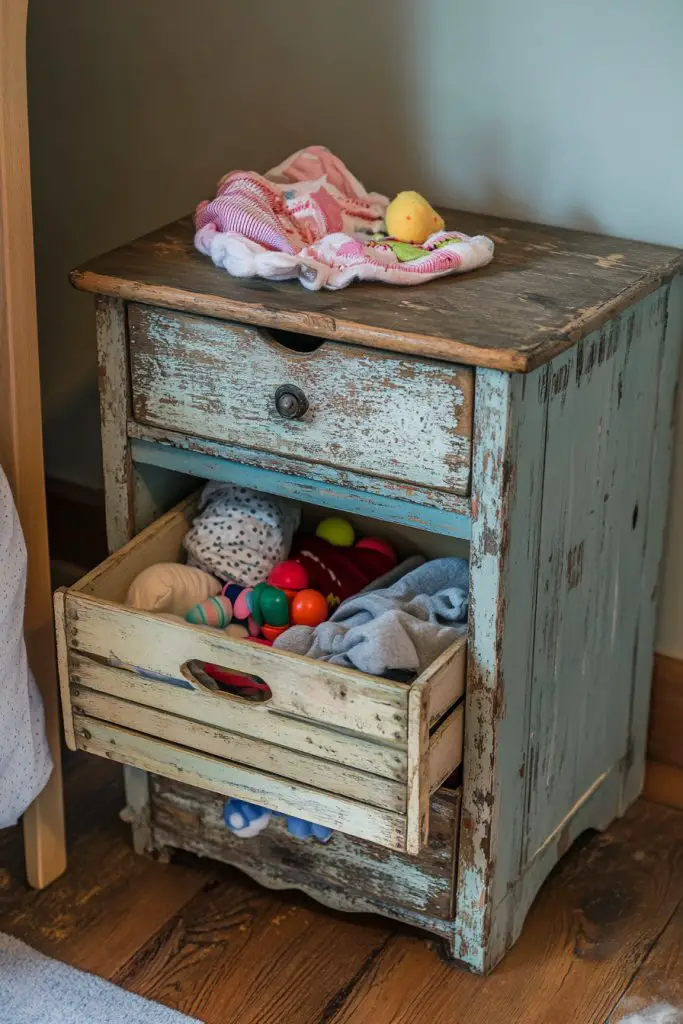
Buying new storage furniture can be expensive, and often uninspired. Repurposing vintage or leftover furniture turns clutter into character while saving money. Want to create a one-of-a-kind space that’s functional and full of personality? This idea is perfect for DIY enthusiasts.
Recommended Products to replicate this idea
| # | Preview | Product | |
|---|---|---|---|
| 1 |

|
LANSKLBD 8 Set Packing Cubes for Suitcases Travel Luggage Packing Organizers,Travel Accessories... | Check Latest Price |
| # | Preview | Product | |
|---|---|---|---|
| 1 |

|
I Had a Favorite Dress: A Picture Book | Check Latest Price |
Imagine turning an old dresser, suitcase, or wooden crate into a playful storage piece. For example, a vintage suitcase can hold art supplies or toys, adding a nostalgic touch. An upcycled dresser can store clothes, books, or craft materials while serving as a statement piece. The room gains charm and function simultaneously.
Paint or distress the furniture to match your decor style—rustic, shabby chic, or modern. Add decorative hardware or fabric liners to enhance its look and function. Use it as a standalone piece or combine multiple items to create a custom storage wall. Incorporate small labels or tags for easy identification.
Source old furniture from thrift stores, flea markets, or your attic. Clean and repair as needed before repurposing. For storage, add shelves, baskets, or dividers inside. Place the piece in a strategic spot—by the bed, in a corner, or under a window—and fill it with organized items. Regular maintenance keeps it looking fresh.
Decorate with stencils, decals, or paints reflecting your child’s favorite themes. Attach personalized tags or charms for extra flair. Incorporate reversible or interchangeable elements to keep the look fresh. Invite your kid to help decorate, making it a collaborative project.
Repurposed furniture fosters creativity and resourcefulness. Kids learn to see potential in old items and develop DIY skills. They take pride in their personalized space, which reflects their unique style. It’s a sustainable, stylish way to keep clutter under control.
16. Hanging Baskets or Bins for Closet or Wall Storage
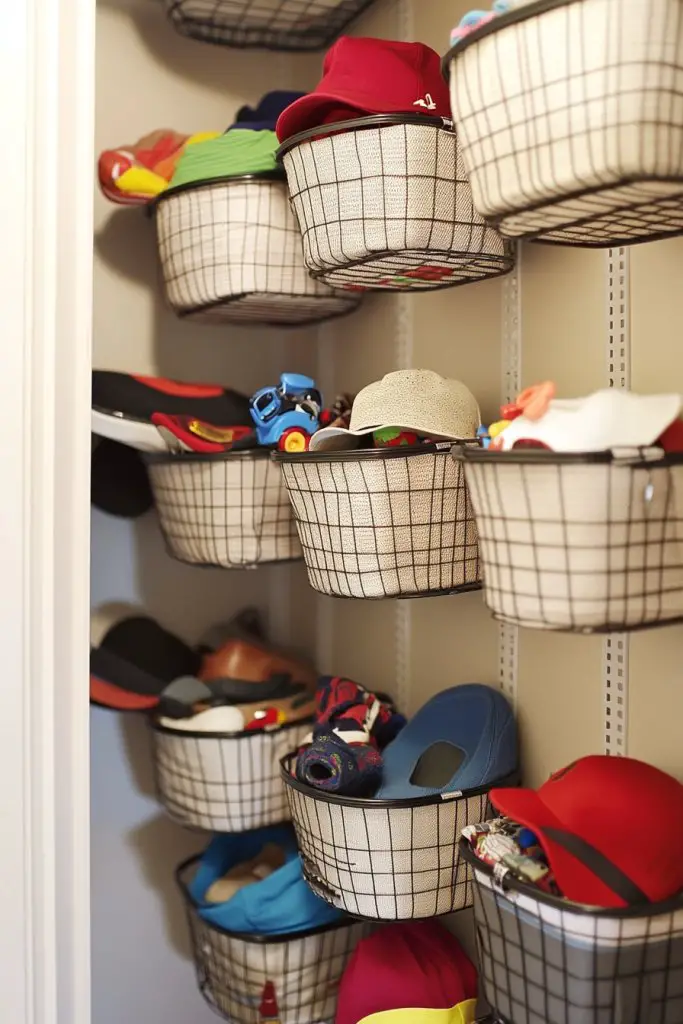
Cluttering up closet floors or shelves with shoes, hats, and small toys makes finding items a hassle. Hanging baskets or bins utilize vertical space efficiently, keeping essentials organized and accessible. Want to keep clutter off the ground and within easy reach? This simple solution is a game-changer.
Recommended Products to replicate this idea
| # | Preview | Product | |
|---|---|---|---|
| 1 |

|
wymulot 3 Tier Wall Mounted Woven Hanging Basket, Over the Door Hanging Basket with Hooks,... | Check Latest Price |
| # | Preview | Product | |
|---|---|---|---|
| 1 |

|
Lifewit 6 Pack Clothes Storage Bins with Lids, Foldable Blanket Storage Bags with Zippers, Clear... | Check Latest Price |
Imagine a series of woven or fabric baskets hanging inside the closet or on the wall, each filled with shoes, hats, or small toys. They’re suspended from hooks or rods, creating a neat, tiered display. The baskets’ textures and colors add warmth and charm, transforming storage into part of the decor. Kids can easily grab and replace their items.
Select baskets in natural fibers or colorful fabrics depending on your decor style. Use clear labels or tags for quick identification, especially for younger children. Hang baskets at different heights to accommodate various items—shoes at the bottom, accessories above. For limited space, opt for slim, stackable or tiered designs.
Install sturdy hooks or rods inside closets or on walls, ensuring safety and stability. Fill baskets with organized items—shoes, hats, or small toys—and label or color-code them for easy sorting. Teach your child to put things back into the right basket after use. Regularly check for wear or overloads and clean the baskets periodically.
Decorate baskets with fabric paint, stickers, or personalized tags. Choose themes that appeal to your child’s interests—animals, superheroes, or favorite colors. Encourage them to participate in selecting and decorating the storage to foster ownership. Rotate contents seasonally for variety and freshness.
Hanging baskets teach responsibility and organization skills, making kids more independent. They learn to keep their closet neat and manage small belongings efficiently. Plus, the room looks tidy and inviting, inspiring pride and care. It’s a simple, effective upgrade for any space.
17. DIY Rope Baskets for Stylish Toy Storage
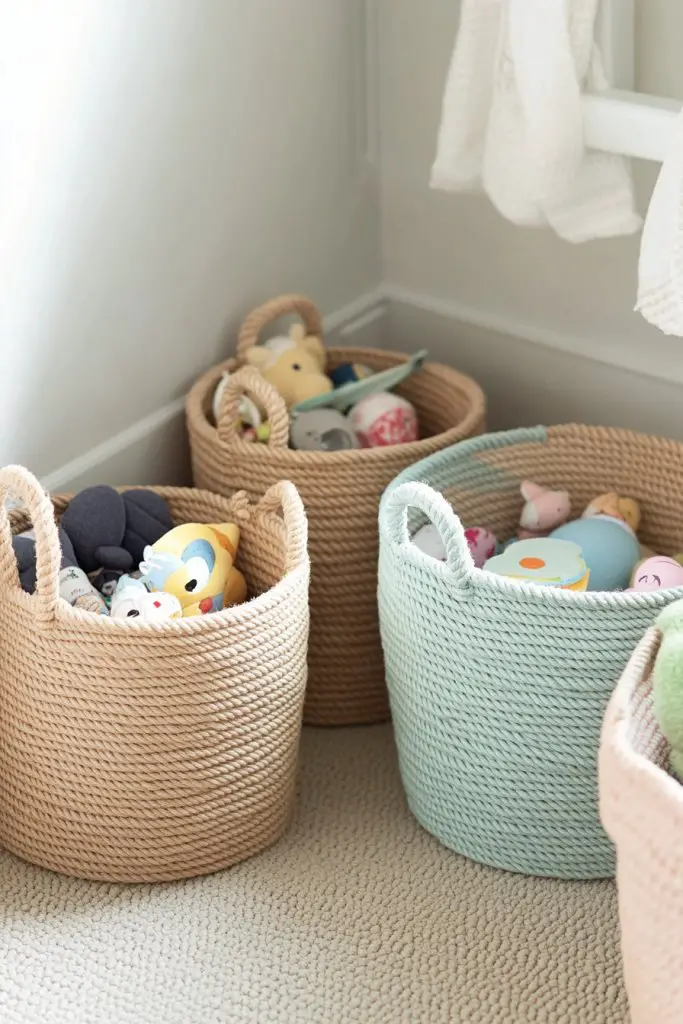
Tired of bulky plastic bins and baskets that clash with your decor? DIY rope baskets offer a chic, handcrafted alternative for storing toys, laundry, or accessories. Want a stylish, customizable solution that adds texture and warmth? This project is worth the effort.
Recommended Products to replicate this idea
| # | Preview | Product | |
|---|---|---|---|
| 1 |

|
INDRESSME XXXLarge Cotton Rope Basket 21.7" x 21.7" x 13.8" Woven Baby Laundry Blanket Basket Toy... | Check Latest Price |
| # | Preview | Product | |
|---|---|---|---|
| 1 |

|
Trycooling Stuffed Animal Storage Zoo Holder Space Save Vertical PVC with Elastic Band and Net for... | Check Latest Price |
Imagine a soft, woven basket made from thick, colorful rope sitting in a corner or on a shelf. It’s filled with plush toys, blankets, or craft supplies, adding a cozy, artisanal vibe to the room. The braided texture and vibrant hues create a focal point that’s both functional and decorative. Kids love reaching into their unique storage piece.
Use natural fibers like jute or hemp for a rustic look or bright synthetic ropes for a vibrant, modern feel. Add decorative accents like tassels or beads to customize the basket’s look. Make different sizes for various uses—small for tiny toys, large for blankets. Incorporate patterns or color blocks for extra flair.
Start by choosing durable, thick rope and a sturdy base or frame. Use hot glue or strong adhesive to secure the braid, or sew sections together for extra stability. Shape the basket as you go, reinforcing the rim for durability. Once complete, fill with organized items and place where needed. Regularly clean and maintain to keep it looking fresh.
Decorate the outside with paint, fabric patches, or custom embroidery. Personalize with your child’s name or favorite motifs. Mix different colors or textures to match room decor. Encourage your kid to help with the decorating for a fun, bonding experience.
DIY rope baskets teach creativity, craftsmanship, and responsibility. Kids learn to create functional art pieces and take pride in their handmade storage. They develop a sense of ownership and enjoy organizing their space with unique, meaningful items. Time to get weaving!
18. Labeling System for Consistent, Organized Play Space
Even the best storage solutions fall apart without proper labels, leaving kids confused and rooms chaotic. A clear labeling system turns organization into an easy, consistent routine. Want your kids to tidy up without constant supervision? Labels are your secret weapon.
Recommended Products to replicate this idea
| # | Preview | Product | |
|---|---|---|---|
| 1 |
|
Sterilite 6-Pack Industrial Tote, Plastic Storage Container Bins with Lids, 27 Gallon - Heavy-Duty... | Check Latest Price |
| # | Preview | Product | |
|---|---|---|---|
| 1 |

|
SUPVAN T50M Pro Bluetooth Label Maker Machine with Tape, Wide Waterproof Label, Versatile App with... | Check Latest Price |
Visualize a series of bins, shelves, and baskets each clearly marked with words and pictures—cars, dolls, art supplies, or books. Bright, bold labels with icons make it easy for even young children to identify where things go. The labels create a visual map that encourages independence and responsibility. Everything looks orderly and inviting.
Use laminated cards, printed labels, or chalkboard stickers for flexibility. Incorporate colorful tags, alphabet or picture labels, or themed decals to match your decor. Change labels seasonally or as interests evolve, keeping the system fresh. Label everything from toy boxes to closet shelves for maximum effect.
Label each container with clear, legible text and a corresponding picture or icon. Place labels at eye level for kids’ ease of use. Use waterproof or laminated labels to withstand cleaning or spills. Teach your children to read and follow the labels, rewarding their effort to stay organized. Consistency is key—make it a part of daily routines.
Create labels with your child’s favorite characters or themes to make organization fun. Involve them in designing and decorating labels, fostering ownership. Use different colors for different categories to reinforce visual cues. Seasonal or themed labels make tidying more engaging and festive.
A well-structured labeling system builds independence and organizational skills in kids. They learn to manage their belongings with minimal adult help. Plus, a tidy room boosts confidence and pride in their space. It’s a simple, effective way to maintain order long-term.
Conclusion
With a diverse range of kids room storage ideas, you now have the tools to turn any chaotic space into an organized retreat. Try out these innovative solutions and watch your child’s room become a neat, inviting, and inspiring environment. Take action today and create a space where organization and fun go hand in hand!