
15 Kitchen Design Mistakes to Avoid for Functional Style
Ever wondered why some kitchens just feel right, while others miss the mark? Kitchen design mistakes are surprisingly common—and often unintentional—yet they can dramatically impact both the functionality and style of your space.
This article is packed with practical tips and creative ideas to help you avoid these pitfalls. Whether you’re planning a full renovation or just sprucing up your existing kitchen, you’ll find insightful advice and inspiring solutions to create a space that’s both beautiful and highly functional.
1. Overlooking the Work Triangle: Ensuring Efficient Kitchen Workflow
Ever tried cooking while running around the kitchen like a headless chicken? A poorly planned work triangle makes every task more frustrating, turning simple meal prep into a marathon. Most homeowners forget that layout matters just as much as the appliances themselves. The goal is to make your kitchen a smooth operator, not a chaotic maze.
Imagine the sink, stove, and fridge perfectly aligned in a triangle, each easily reachable without walking across the room. The countertops are clutter-free, and everything feels intuitively placed. Soft daylight spills over the workspace, highlighting the clean lines and effortless flow. It’s a kitchen where cooking feels like second nature, not a chore.
Depending on your space, the work triangle can be adjusted—L-shape, U-shape, or galley kitchens all benefit from smart placement. For open-concept layouts, consider visual cues like contrasting cabinet finishes or lighting to define zones. If your kitchen is small, focus on keeping the triangle tight; larger spaces might need wider spacing to avoid congestion. Seasonal accessories or color schemes can also subtly highlight the workflow zones.
Start by measuring the distances between your sink, stove, and refrigerator. Keep these within 4 to 9 feet for optimal efficiency. Prioritize clear pathways and avoid placing appliances in corners or blocking doorways. Use a simple sketch or digital planner to visualize the layout. Installing the fridge slightly offset can improve traffic flow, while keeping countertops open prevents bottlenecks. Remember, function trumps aesthetics here—your kitchen should work as hard as it looks.
Add personal touches like custom cabinet pulls or colorful backsplash tiles near the main work zones. You can also install under-cabinet lighting along the pathways to brighten the work triangle. Using different countertop textures or finishes can subtly delineate zones while adding visual interest. Think about adding a small, dedicated spice drawer or utensil organizer close to the stove for added convenience.
A well-planned work triangle transforms your cooking experience and boosts your kitchen’s overall vibe. You’ll enjoy spending more time creating meals instead of navigating a maze. Plus, a smart layout impresses guests and adds value to your home. Ready to reimagine your kitchen flow? It’s easier than you think when you prioritize functionality.
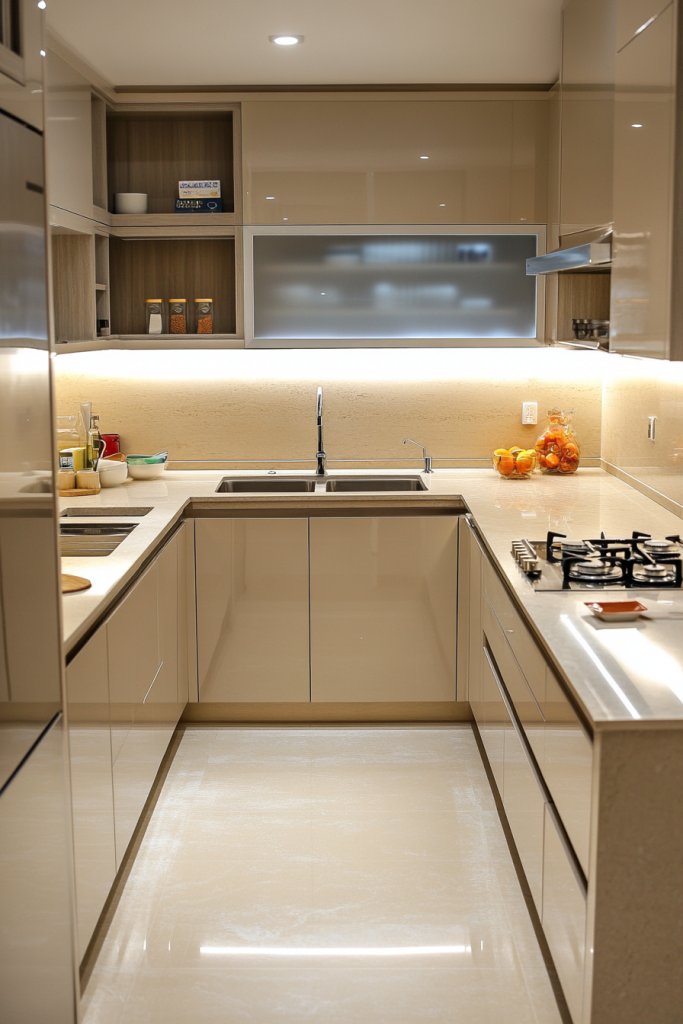
2. Ignoring Adequate Counter Space: Prioritizing Practical Prep Areas
Ever found yourself elbow-deep in flour and realizing there’s no room left on the counter? Insufficient prep space can turn cooking into a juggling act, making even simple tasks feel stressful. Most kitchens overlook how valuable ample counter space is for efficiency and comfort. If your countertops are cluttered or too small, it’s time to rethink the layout.
Picture a sprawling quartz countertop wiped clean with a soft cloth, ready for any culinary adventure. A butcher block section provides a warm, textured surface that invites chopping and kneading. The space is organized with sleek containers, and a few decorative jars add personality without clutter. Natural light floods the area, accentuating the spaciousness and making every task feel effortless.
For small kitchens, consider extending countertops with fold-down surfaces or installing pull-out workspaces. Modular islands with additional surface area work well in open layouts. Seasonal changes can affect your needs—add a portable butchers block for extra prep space during busy holidays. Incorporate multi-purpose surfaces, like a baking station with built-in storage underneath, to maximize utility.
Assess your daily prep routines and identify gaps in your current setup. Choose durable, easy-to-clean materials like quartz, laminate, or wood with protective coatings. Use edge-to-edge countertops to eliminate wasted space, and consider adding a dedicated baking or chopping zone. Keep frequently used tools within arm’s reach—think wall-mounted knife strips or utensil rails. If space allows, install an island or peninsula to create more surface area and improve workflow.
Add a pop of color with vibrant countertop accessories or a textured backsplash behind your main prep zone. Use layered textiles like a soft cream throw blanket with chunky knit texture on a nearby stool for added coziness. Incorporate built-in cutting boards or slide-out trays to keep your workspace tidy. Personalize your setup with custom storage solutions that suit your cooking style.
Ample counter space isn’t just about aesthetics—it’s about making cooking joyful again. With enough room to spread out, you’ll enjoy experimenting, baking, and preparing meals without feeling cramped. A spacious prep area elevates your entire kitchen experience and can even inspire new culinary adventures. Ready to expand your workspace? It’s a game-changer for any home chef.
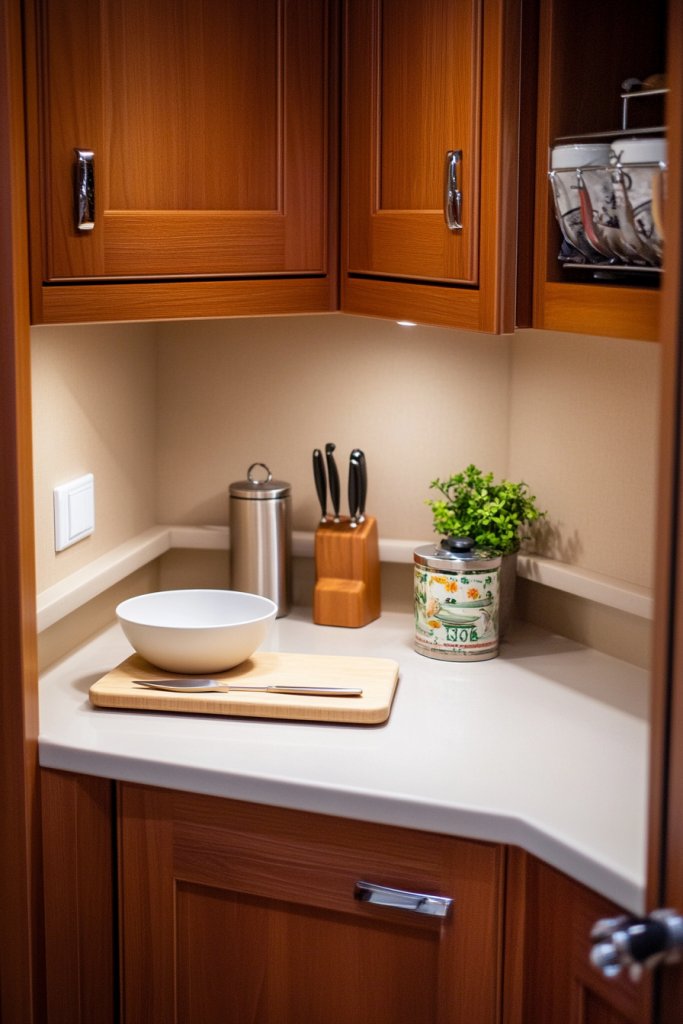
3. Underestimating Storage Needs: Incorporating Smart Storage Solutions
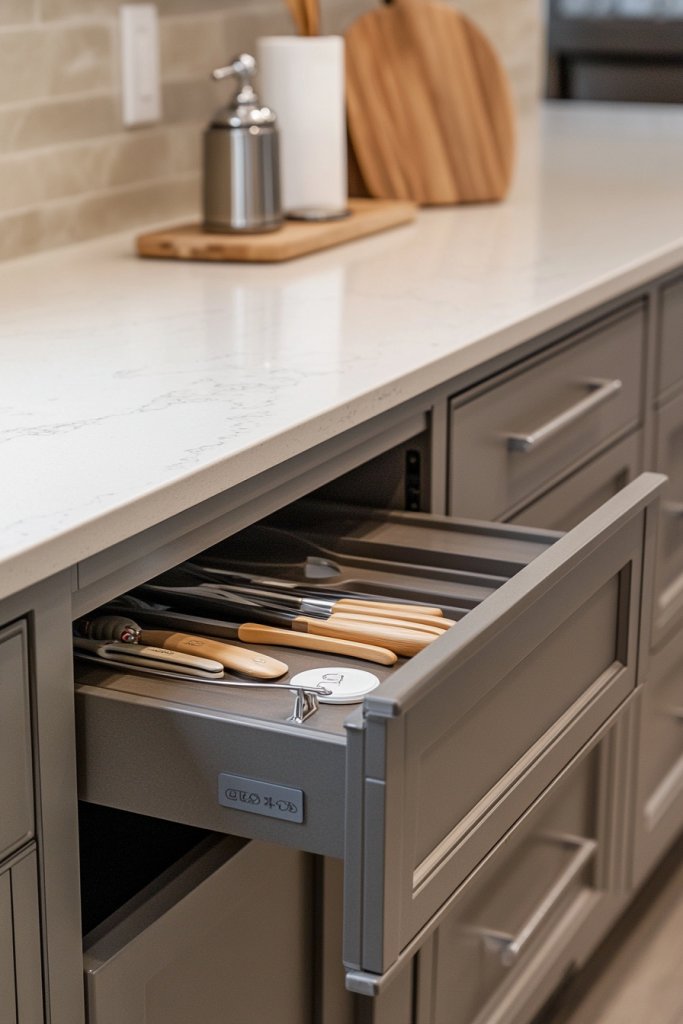
Does your kitchen feel like a cluttered closet rather than a culinary haven? Underestimating storage needs leads to chaos, lost utensils, and a constant hunt for that one spice jar. Many homeowners focus on style but forget that smart storage keeps everything accessible and tidy. Without it, your beautiful kitchen quickly becomes a mess.
Envision sleek pull-out cabinets revealing neatly organized trays of spices, pots, and pans. Deep drawers hold bulky appliances and baking sheets, while vertical dividers store cutting boards and baking mats. Hidden compartments conceal less-used items, keeping counters clear. The entire space feels calm and functional, with everything in its place and easy to find.
Adjust storage solutions based on your needs—install lazy Susans for corner cabinets, or add tiered shelving inside drawers. For small spaces, vertical storage is key—think wall-mounted racks or pegboards. In larger kitchens, consider adding a pantry or tall cabinets with pull-out baskets. Seasonal or lifestyle changes might require flexible storage options, like modular units that can be reconfigured.
Start by decluttering and categorizing your kitchen items. Invest in high-quality, customizable storage units like deep drawers, pull-out shelves, and vertical dividers. Use clear containers for dry goods, labeling everything for quick access. Maximize vertical space with wall-mounted racks or hooks, and consider installing a lazy Susan for hard-to-reach corners. Regularly reassess your storage system to keep it efficient and clutter-free.
Create a personalized system by adding decorative baskets or fabric bins inside cabinets, matching your decor theme. Incorporate labels or color-coded containers for quick identification. Use innovative storage like a sliding spice rack or a fold-out baking sheet holder. Personal touches like a custom-made utensil organizer or a dedicated wine rack can make your kitchen uniquely yours.
Having smart storage transforms your kitchen from a cluttered nightmare into a streamlined sanctuary. You’ll spend less time hunting and more time enjoying your culinary creations. Organized spaces also inspire confidence—making you more willing to try new recipes and entertain guests. Once your storage is optimized, cooking becomes a pleasure, not a chore.
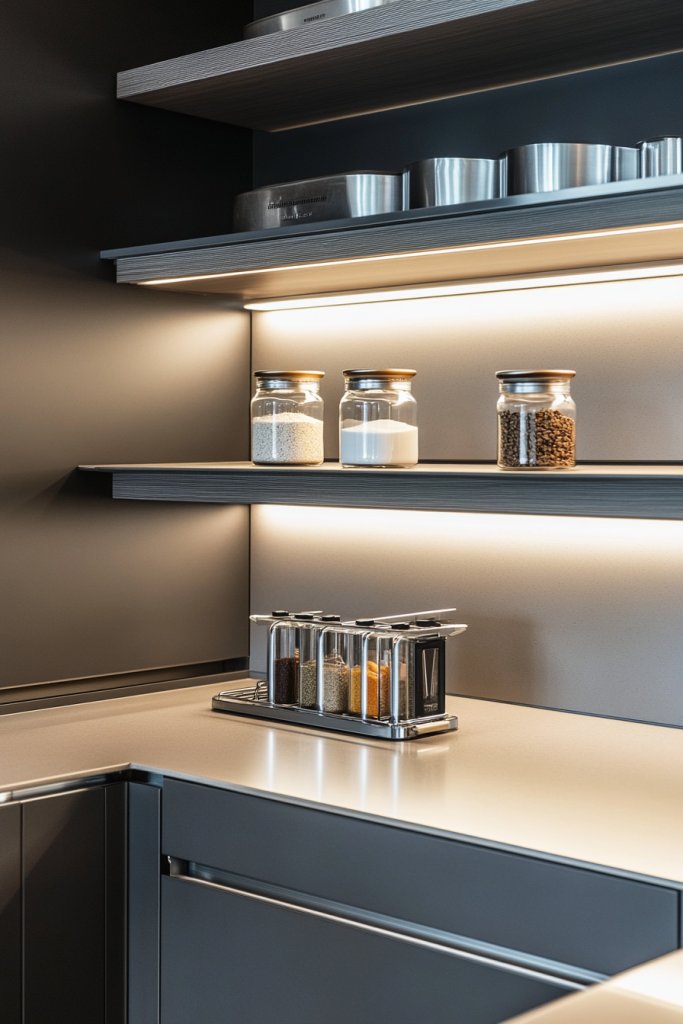
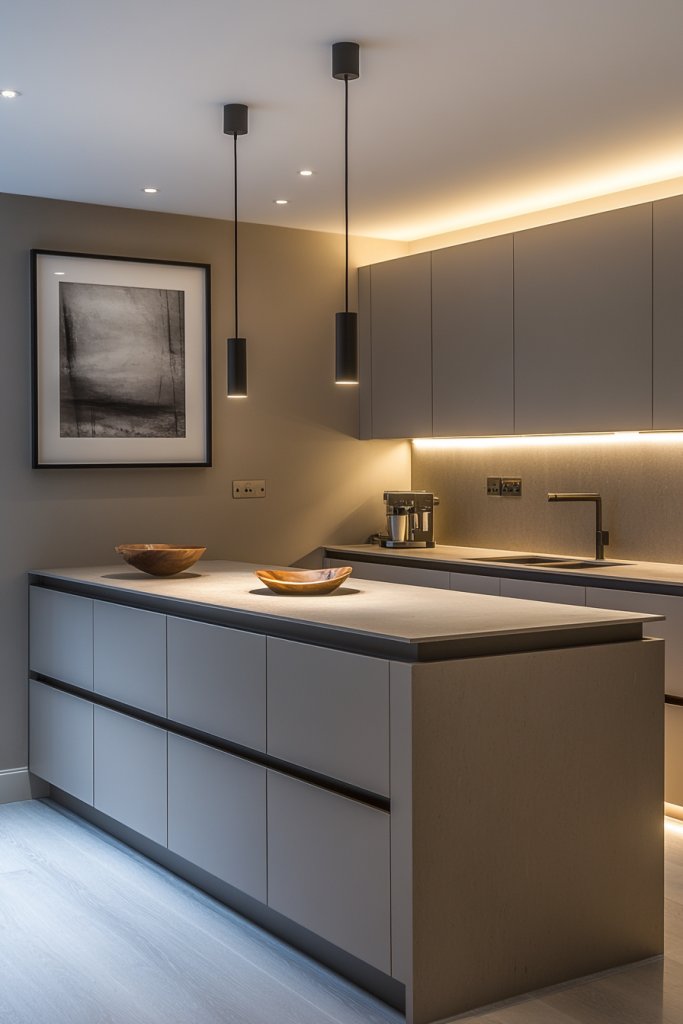
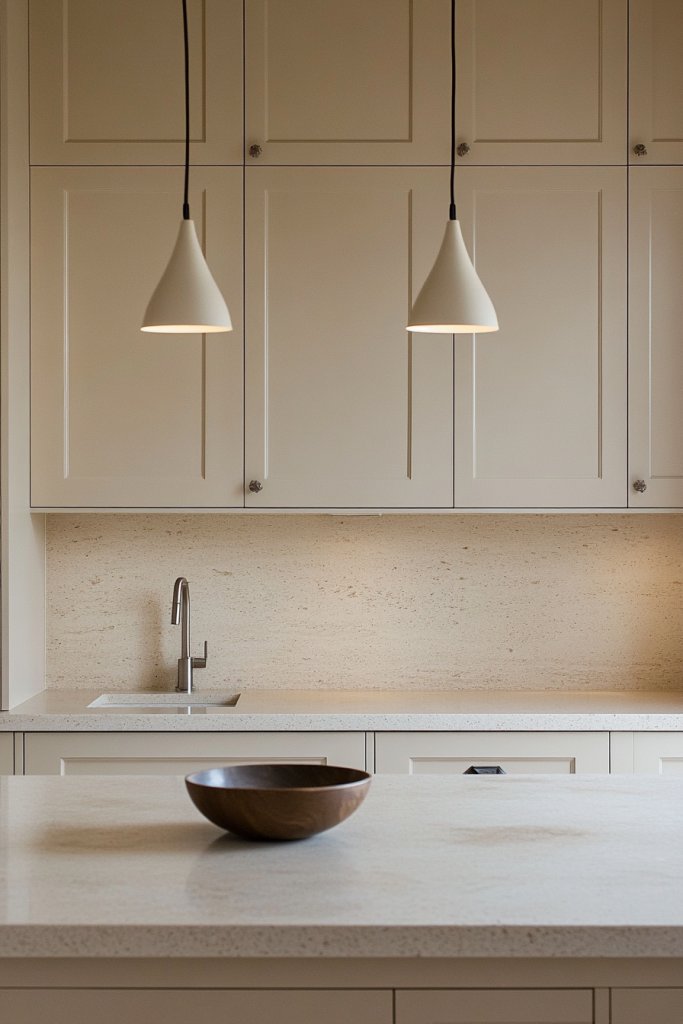
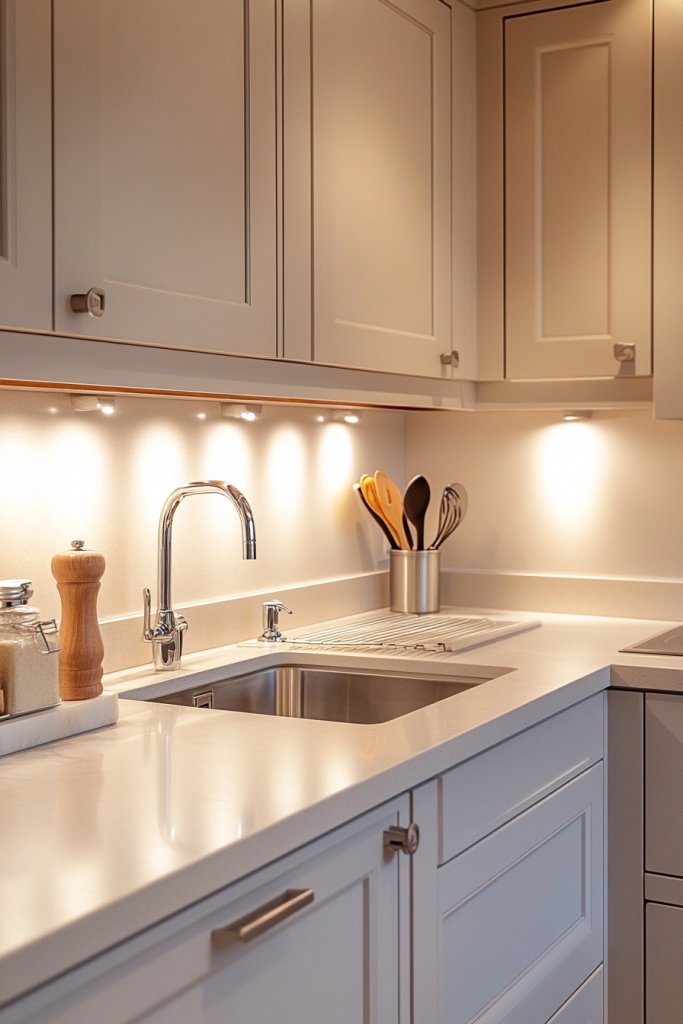
4. Poor Lighting Planning: Combining Ambient, Task, and Accent Lighting
Ever flicked on the harsh overhead light and instantly regretted it? Poor lighting can make even the most beautiful kitchens look dull or feel uninviting. Without layered lighting, your space lacks depth, functionality, and ambiance. Good lighting isn’t just about visibility—it’s about mood and efficiency.
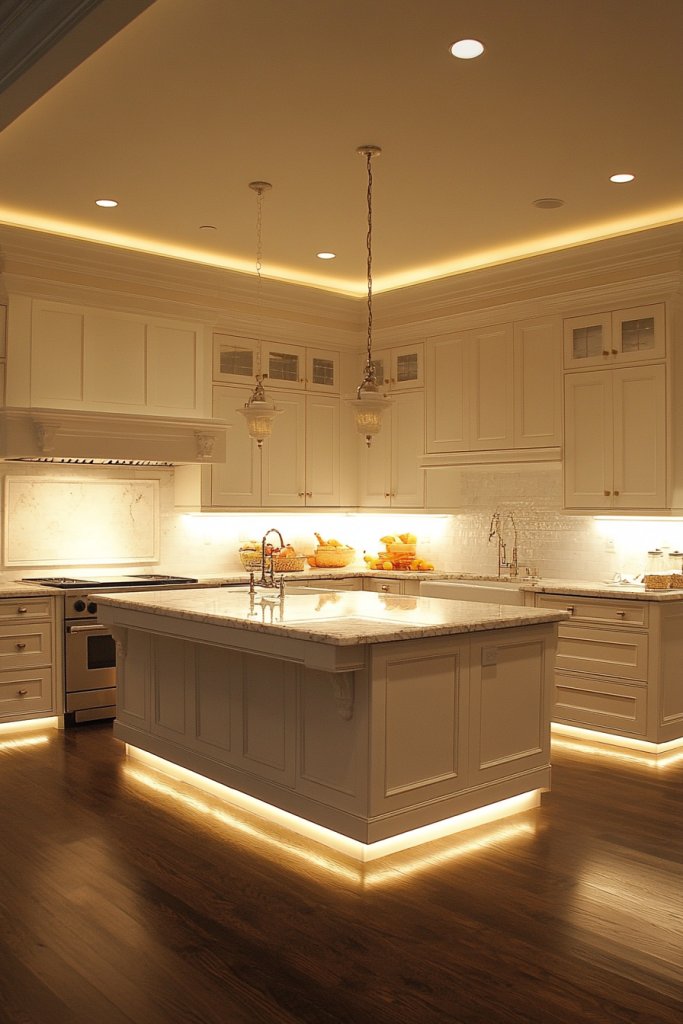
Picture a kitchen softly illuminated with warm LED recessed lights overhead, balanced by bright under-cabinet fixtures that spotlight your work surfaces. A stylish pendant adds a focal point over the island, casting a gentle glow. The combination creates a cozy, functional atmosphere where cooking and socializing feel equally inviting. Shadows are minimized, and every corner feels purposeful and warm.
Adjust your lighting scheme based on your kitchen style—modern minimalism favors recessed LEDs, while rustic or vintage looks benefit from warm pendant fixtures. Use dimmer switches for flexibility, allowing you to switch from task to mood lighting easily. Consider installing wall sconces or decorative fixtures that complement your decor for added flair. For seasonal changes, swap out bulbs or shades to match holiday themes.
Plan your lighting layout by identifying key zones—prep areas, cooking stations, and dining spots. Use LED strips or puck lights under cabinets to brighten work surfaces without glare. Install dimmers to control brightness levels. Choose fixtures that match your style—sleek metal, matte finishes, or vintage-inspired designs. Test different bulb temperatures to find the best ambiance, typically warm white for cozy scenes and daylight for task areas. Regular maintenance ensures longevity and consistent lighting.
Personalize your lighting with decorative fixtures or colored bulbs for special occasions. Incorporate smart lighting systems for voice control or app-based adjustments. Use textured shades or unique materials like frosted glass or metallic finishes to add visual interest. You might also add candles or vintage lanterns on open shelves for a touch of charm during relaxed evenings.
Thoughtful lighting elevates your entire kitchen experience—making prep easier and dinners more atmospheric. It allows you to showcase your decor choices and creates a space that feels warm and inviting. Proper lighting boosts confidence in your cooking and entertaining skills. Ready to shed some light on your kitchen? It’s the easiest way to upgrade your space instantly.
5. Choosing Incompatible Cabinet Heights and Widths
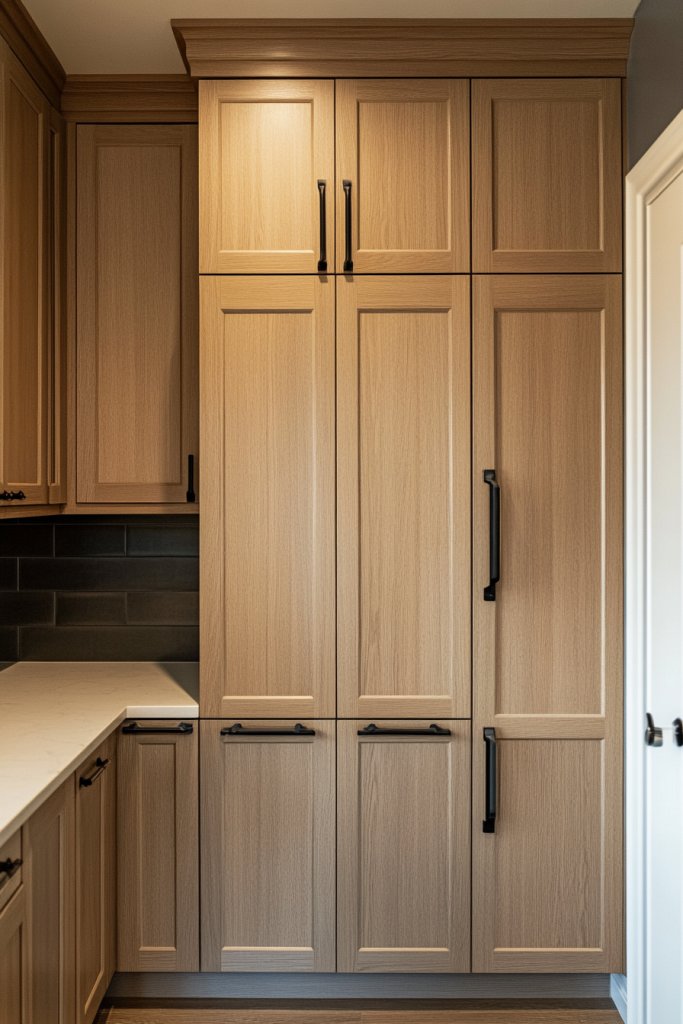
Have you ever struggled to reach the top shelf or squeezed into a narrow cabinet? Incompatible cabinet sizes can make your kitchen feel awkward and inefficient. Picking the wrong heights and widths results in wasted space and frustration every time you cook or clean. Your cabinets should be tailored to your needs, not just look good.
Imagine tall cabinets reaching the ceiling, with adjustable shelves for every height of dishware. Below, wide drawers store pots and pans, while narrow units hold spices and baking supplies. The layout is symmetrical yet functional, with easy-access handles and soft-close hinges. Everything has a place, and nothing feels out of proportion or hard to reach.
Custom cabinets allow for varied heights—install a tall pantry for bulk items or lower upper cabinets for easier access. Modular units let you mix and match widths to fit awkward spaces or design preferences. For small kitchens, opt for slim, vertical cabinets to maximize storage without crowding. Consider adjustable shelves and pull-out features to enhance usability, especially for seniors or those with mobility challenges.
Start by assessing your storage needs and measuring available wall and floor space. Choose cabinet heights that align with your ceiling height—standard upper cabinets are 30 inches, but taller options can add extra storage. Use a mix of widths—standard 12-24 inches for base units and 24-36 inches for wall cabinets—to optimize space. Incorporate adjustable shelving and soft-close hinges for smooth operation. Professional installation ensures everything aligns perfectly, avoiding gaps or uneven surfaces.
Customize cabinet finishes and hardware to match your style—matte black handles, brass pulls, or sleek stainless steel. Add glass-front doors or open shelving for display opportunities, or install pull-out trays for easy access. Use contrasting colors or textures on cabinet fronts to create visual interest. Personal touches like integrated charging stations or hidden compartments can make your cabinets uniquely functional.
Properly sized cabinets make everyday tasks smoother and your kitchen more spacious. When everything fits just right, it boosts your confidence to cook, entertain, and maintain your space. Custom layouts reflect your lifestyle and taste, turning your kitchen into a true reflection of you. Ready to rethink your cabinet design? It’s easier than you think when proportions match your needs.
6. Neglecting Ventilation and Airflow: Installing Effective Range Hoods
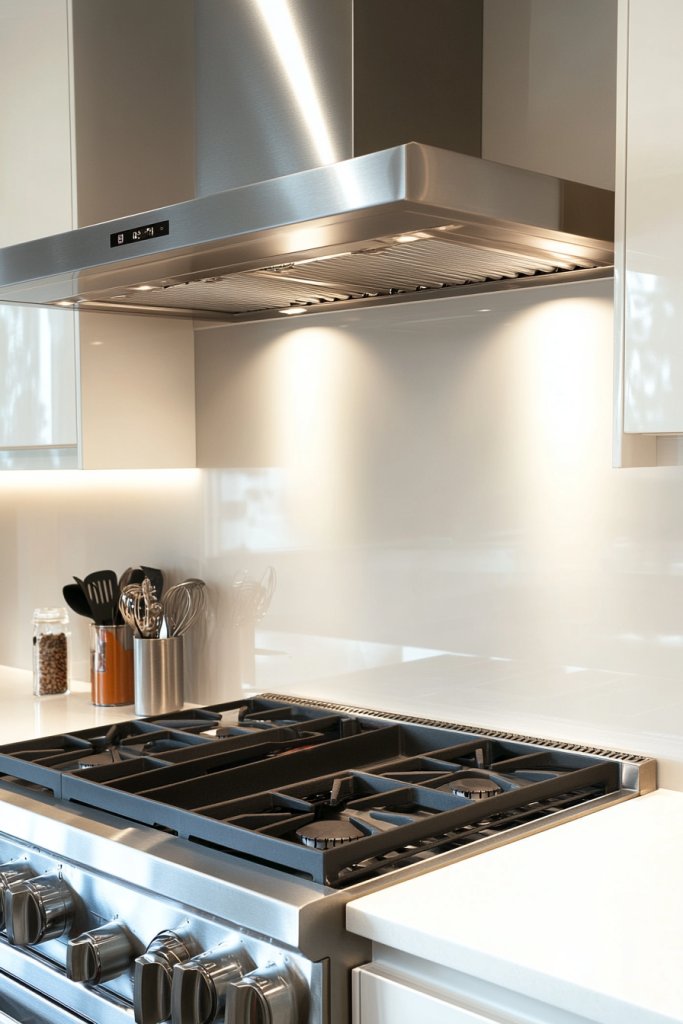
Ever cooked a smoky stir-fry and wondered if your kitchen was auditioning for a horror movie? Poor ventilation leads to lingering odors, excess humidity, and even mold. Without proper airflow, your beautiful space can quickly turn stuffy and uncomfortable. Good ventilation isn’t just a luxury—it’s a necessity for health and comfort.
Imagine a modern range hood with sleek lines, quietly sucking up cooking fumes while blending seamlessly into your decor. Fresh air circulates through vents hidden behind stylish cabinetry, leaving the kitchen smelling clean and fresh. Sunlight filters through open windows, and a gentle breeze carries away any remaining steam. The space feels airy, inviting, and free of cooking odors.
Choose between under-cabinet, wall-mounted, or island range hoods based on your kitchen layout. For small spaces, compact or downdraft systems work well. Larger kitchens can benefit from powerful, ducted hoods with high CFM ratings. Consider decorative options like custom metal finishes or integrated lighting to match your style. Seasonal adjustments like opening windows or using exhaust fans enhance airflow.
Select a hood with adequate extraction capacity—generally 100 CFM per 10 inches of stove width. Position it directly above the cooktop, ensuring at least 24-30 inches clearance. Venting options include ducted (more effective) or ductless models with filters. Regularly clean filters and ducts to maintain efficiency. Seal gaps around the hood to prevent air leaks, and consider adding ceiling or wall vents for better circulation.
Add LED lighting or decorative panels to your range hood for style points. Incorporate smart controls for automatic fan speed adjustments based on cooking intensity. Use attractive metal finishes—brushed steel, matte black, or copper—to complement your decor. For eco-conscious choices, opt for ENERGY STAR-rated models that save power while maintaining performance.
Effective ventilation makes cooking more enjoyable and your home healthier. No more lingering odors or humidity buildup—just fresh, clean air. When your airflow system works flawlessly, confidence in your kitchen grows, inspiring more culinary experiments. Want a fresh start? Invest in a quality range hood today—it’s a breath of fresh air for your home.
7. Overloading with Trendy Styles: Balancing Modern Aesthetics and Practicality
Caught up in the latest kitchen trends but finding your space impractical? Overloading your decor with fleeting styles can make your kitchen look trendy but also cluttered and hard to use. Staying stylish and functional at the same time is a delicate balancing act that many overlook.
Visualize a kitchen with matte black fixtures paired with timeless white cabinetry, complemented by neutral-toned countertops. Subtle textured backsplashes and sleek hardware add modern flair without overwhelming. The space feels balanced—bold enough to impress, but rooted in practicality. Every element serves a purpose, not just a look.
Mix trendy finishes with classic materials—think matte black fixtures with warm wood accents or two-tone cabinets. Seasonal updates, like swapping out hardware or accessories, keep your look fresh without sacrificing function. Opt for durable, easy-to-maintain surfaces that age gracefully. Incorporate personal touches like textured textiles or vintage-inspired fixtures for a unique vibe.
Prioritize quality over short-lived trends—invest in sturdy cabinets, scratch-resistant countertops, and impact-proof flooring. Use trendy finishes sparingly as accents rather than main features. Balance bold colors with neutral tones to avoid visual overload. Choose timeless hardware with modern twists, such as matte black or brushed nickel, for longevity. Regular maintenance preserves your style and practicality.
Add personal flair with handcrafted hardware or custom-designed cabinetry. Incorporate textured textiles like linen curtains or woven baskets for warmth. Use statement lighting (like sconces or pendant lights) that can be swapped seasonally. Personal touches make your kitchen uniquely yours, blending trends with timeless appeal.
A balanced approach to trendy design keeps your kitchen stylish yet livable. When your decor reflects your personality and is built to last, confidence skyrockets. It’s easier to entertain and create when your space feels authentic. Ready to embrace style without sacrificing function? It’s all about balance—and you’ve got this.
8. Using Fragile or Low-Quality Materials: Opting for Durability Over Cost
Ever spend hours decorating your kitchen only to see it marred by cheap countertops or flimsy cabinets? Using low-quality materials might save money now, but it costs you in the long run—chipping, staining, or warping. Investing in durable materials means your kitchen stays beautiful and functional for years.
Imagine a granite countertop with a polished finish that resists scratches and stains, paired with solid wood cabinets that feel sturdy and substantial. Impact-proof flooring withstands heavy foot traffic, while stainless steel appliances add a sleek, durable touch. The overall look is cohesive and built to last, with surfaces that age gracefully and maintain their appeal.
Choose impact-resistant or scratch-proof materials like quartz, porcelain, or high-quality laminates. For flooring, opt for stone, hardwood, or impact-proof vinyl. Budget-friendly options include recycled composite materials or textured tiles that hide wear. Seasonal or style updates can be achieved with paint or veneer overlays without replacing entire units.
Prioritize quality brands with good reviews and warranties. Select impact and scratch-resistant countertops—quartz is a popular choice—while ensuring cabinets are made from solid or engineered wood. For flooring, consider impact-proof vinyl or porcelain tiles. Proper installation is key—hire professionals to ensure everything fits perfectly and performs well over time. Regular maintenance extends lifespan and keeps surfaces pristine.
Personalize your durable surfaces with custom finishes, hardware, or protective coatings. Use decorative yet impact-resistant elements like textured wall panels or impact-proof glass. Incorporate a mix of materials—wood, metal, stone—for visual interest and resilience. Keep your surfaces clean and sealed to preserve their beauty.
Choosing quality materials pays off in durability and style, giving you peace of mind. A resilient kitchen withstands the hustle and bustle of daily life while staying beautiful. When you invest wisely, your space becomes a source of pride and inspiration. Ready to upgrade to lasting materials? It’s worth every penny for peace of mind.
9. Ignoring the Importance of Proper Appliance Placement
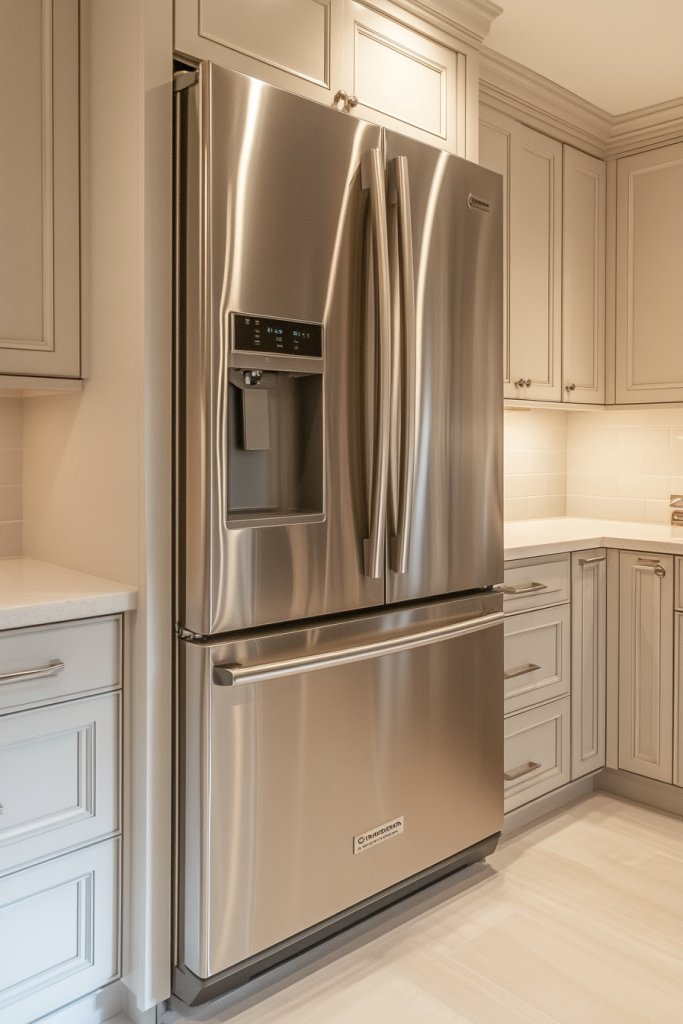
Have you ever opened the fridge only to have it block the doorway? Poor appliance placement can turn your kitchen into an obstacle course. It hampers workflow, makes cleaning harder, and can even be dangerous. Smart placement is the secret to a seamless, functional kitchen that works with you, not against you.
Picture a sleek, built-in fridge tucked into cabinetry, with ovens and microwaves positioned at ergonomic heights. The dishwasher is seamlessly integrated into the cabinetry, and the cooktop is conveniently placed near prep zones. The appliances blend into the design, creating a cohesive look that’s both stylish and practical. Clear pathways and balanced spacing make every task effortless.
In small kitchens, prioritize built-in or integrated appliances to save space. For larger layouts, consider spacing appliances to avoid crowding, especially near sinks and prep areas. Use custom cabinetry to hide appliances when not in use, maintaining a clean look. For multi-use spaces, incorporate appliances into islands or peninsulas for easy access.
Start by mapping out your kitchen’s workflow and measuring appliance dimensions. Keep the fridge accessible without blocking traffic pathways. Position ovens and microwaves at comfortable heights—eyebrow level for convenience. Ensure the dishwasher is close enough to the sink for easy loading. Use built-in or panel-ready appliances for a sleek, integrated appearance. Regular maintenance and strategic placement keep everything running smoothly.
Personalize your appliance setup with custom panels or decorative handles that match your cabinetry. Use under-cabinet lighting to highlight appliances and prep zones. Incorporate smart appliances for added convenience and tech appeal. Keep appliances clean and well-maintained for longevity and aesthetics.
Proper appliance placement transforms your kitchen into a well-oiled machine. It simplifies daily routines and boosts your confidence in handling meal prep and entertaining. When every appliance has its place, your kitchen becomes more inviting and efficient. Ready to optimize? It’s easier than you think when you plan thoughtfully.
10. Forgetting About Accessibility: Designing for All Users
Ever tried reaching that top cabinet only to realize it’s impossible without a step stool? Overlooking accessibility can turn your dream kitchen into a frustrating space, especially for older adults or those with mobility challenges. Designing with everyone in mind ensures your kitchen remains functional and safe for years to come.
Imagine wide, low cabinets with pull-out shelves and adjustable-height counters that suit every user. Handles are easy to grip and positioned within reach. The space feels open and inviting, with clear pathways and tactile cues guiding movement. The design seamlessly blends style and function, making everyone feel welcome.
Use lever-style handles instead of knobs for easier operation. Incorporate pull-down shelves or Lazy Susans in upper cabinets for easier access. Adjustable-height counters or islands accommodate different users. Incorporate tactile labels or contrasting colors for visual cues, aiding those with vision impairments. Small but thoughtful changes make a big difference.
Start by assessing the needs of all potential users in your household. Install lower or adjustable countertops to serve different heights. Use pull-out drawers or shelves in upper cabinets to reduce strain. Choose appliances with easy-to-use controls and accessible placement. Test the layout with actual users or simulate different needs to ensure comfort and safety. Regularly update features as needs evolve.
Add custom hardware or tactile labels for better grip and identification. Incorporate ergonomic accessories like cushioned mats or handles. Use color contrasts to highlight controls and edges. Personalize with features that reflect your household’s specific needs, making the space truly inclusive.
Designing for accessibility creates a kitchen that everyone can enjoy, making daily routines safer and more enjoyable. When your space adapts to all users, it becomes more inclusive and valuable. It’s a long-term investment in comfort, safety, and peace of mind. Ready to make your kitchen truly everyone-friendly? Start today—small changes make a big impact.
11. Overcomplicating Design with Excessive Details
Ever walked into a kitchen that looks like a jewelry box—overcrowded and overwhelming? Overdoing the details can turn a stylish space into a visual headache. Simplicity often wins when it comes to functionality and timeless appeal. Cluttered designs not only look busy but can also hinder your daily routines.
Visualize a sleek kitchen with clean lines, minimal hardware, and a neutral palette. The focus is on quality materials and subtle textures, not on excessive ornamentation. Hidden storage keeps surfaces clear, and integrated appliances maintain a streamlined look. The overall effect is calming and sophisticated, encouraging you to cook and relax.
Opt for simple, high-quality hardware and finishes that complement your overall decor. Avoid overly ornate fixtures or excessive decorative moldings. Use a monochromatic color scheme with subtle variations in texture to add depth. Seasonal or trend updates can be made with small accessories rather than overhauling the entire design.
Choose a minimalist aesthetic by focusing on essential features and high-quality materials. Keep hardware and fixtures uniform—think matte black or brushed nickel for a cohesive look. Incorporate flat-front cabinets and handleless drawers for a sleek appearance. Declutter your surfaces and use concealed storage to hide everyday items. Maintain the simplicity by resisting the temptation to add unnecessary embellishments.
Personalize with subtle accents like textured textiles, unique door handles, or a statement backsplash. Use lighting strategically to highlight architectural details rather than clutter. Incorporate a few statement pieces—like a sculptural light fixture or a textured countertop—without overwhelming the space. Keep accessories minimal but meaningful.
Simple, uncluttered kitchens feel more spacious and calm, encouraging you to cook more often. When design is straightforward, maintenance becomes easier, and your space stays fresh longer. Confidence grows when you see that less truly is more, and your kitchen remains timeless. Want a stress-free, stylish kitchen? Keep it simple and elegant.
12. Not Planning for Future Needs: Flexible, Adaptable Storage and Layouts
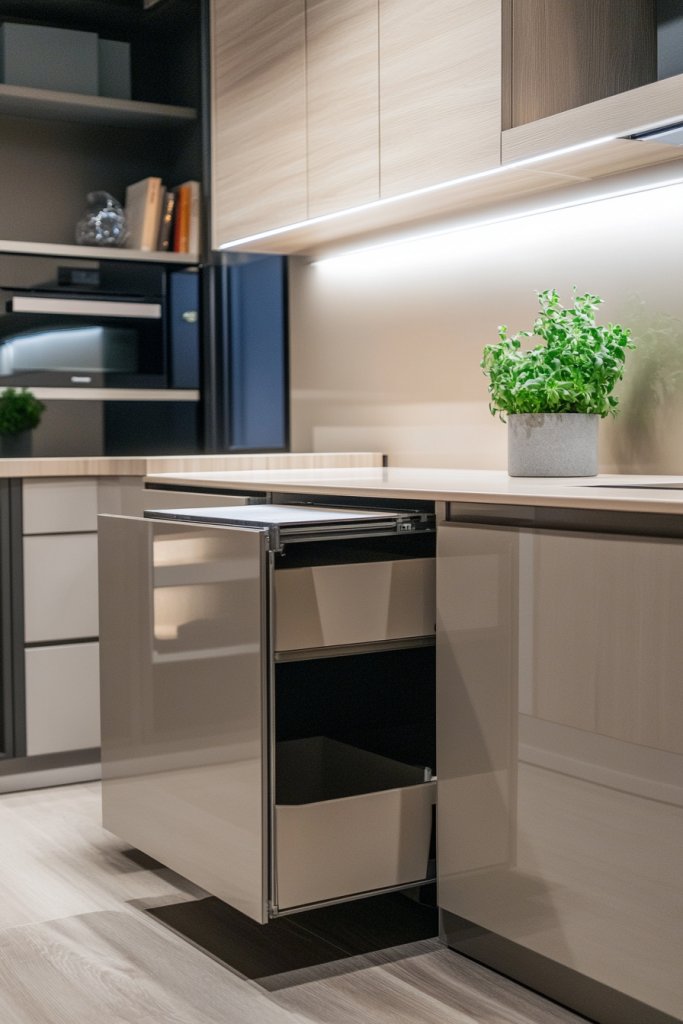
Are you stuck with a kitchen that feels perfect now but totally useless in five years? Failing to plan for future needs can turn your dream kitchen into an awkward space fast. Flexibility is key—your needs change, and your kitchen should evolve with you, not against you.
Picture modular cabinets with adjustable shelves, pull-out workstations, and hidden compartments that adapt over time. A versatile island with removable extensions or extra storage keeps things flexible. The space feels alive and adaptable, ready to accommodate new appliances, hobbies, or family changes. Every inch is designed with growth in mind.
Choose modular cabinetry systems that can be reconfigured—think removable panels, adjustable heights, and flexible accessories. Incorporate multi-purpose furniture, like fold-down tables or extendable islands. For future-proofing, select appliances that can be upgraded or integrated seamlessly. Seasonal or lifestyle shifts, like a new hobby or a growing family, should be easy to incorporate.
Start your planning with a long-term vision—consider potential changes in your household or lifestyle. Use modular units with adjustable features, and install power and data outlets in flexible locations. Opt for appliances that are easily upgradable or replaceable. Use a combination of open shelving and concealed storage to keep options open. Regularly reassess your layout, and make small adjustments over time.
Personalize your adaptable kitchen with removable decorative panels, customizable hardware, or multi-use accessories. Use color schemes that can be refreshed easily—think neutral tones with seasonal accents. Incorporate smart technology that can be updated as new innovations emerge. Design with versatility at the forefront, making your kitchen a true reflection of your evolving lifestyle.
A flexible kitchen adapts to your changing needs, saving you time and money in the long run. It inspires confidence to try new recipes, host gatherings, and enjoy your space without worry. When your layout grows with you, it becomes more than just a kitchen—it’s a lifelong investment. Ready to future-proof? Start planning for growth today.
13. Skimping on Proper Backsplash and Wall Protection
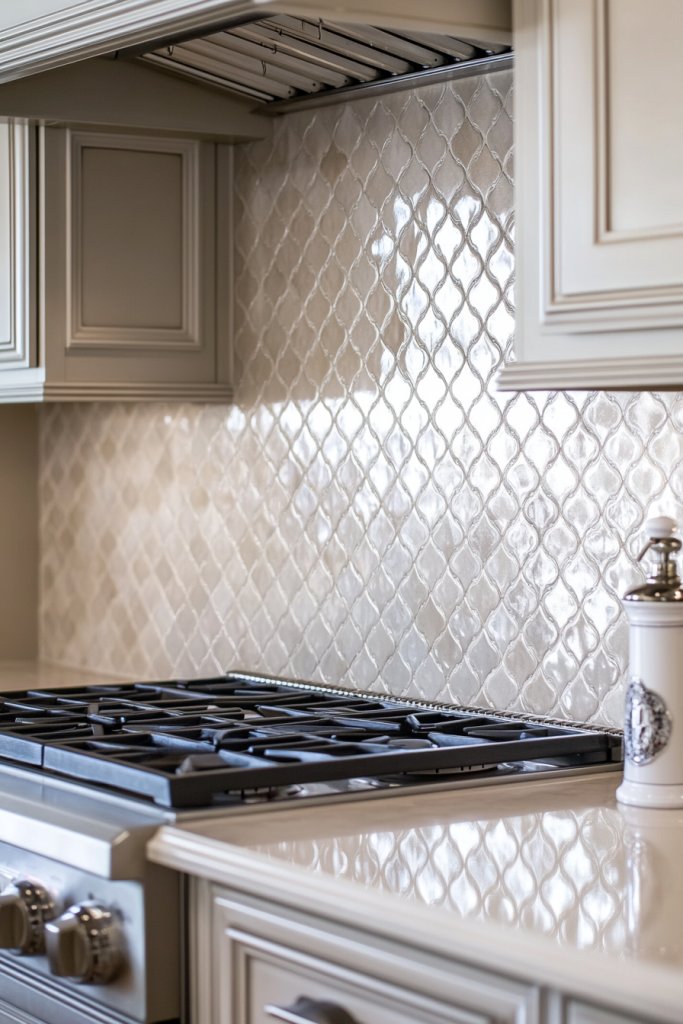
Ever noticed how walls near the stove turn greasy and stained over time? A poor or neglected backsplash can turn your kitchen into a maintenance nightmare. Plus, it’s your chance to add style and personality—so why skimp on wall protection?
Imagine a glossy subway tile backsplash reflecting the warm glow of under-cabinet lighting. It shields the wall from splatters while adding a classic, clean look. The textured surface is easy to wipe clean, and the vibrant color pops against neutral cabinets. It ties the whole space together, making it feel polished and cohesive.
Consider different materials—ceramic, glass, metal, or stone—based on your style and maintenance preferences. Large-format tiles reduce grout lines for easier cleaning, while textured or patterned tiles add visual interest. For budget-friendly options, peel-and-stick tiles or paint with high-quality heat-resistant paint work well. Seasonal updates can be as simple as swapping out a decorative border.
Select a durable, easy-to-clean material suited for high-moisture environments. Prepare the wall by cleaning and leveling the surface. Use spacers and a level to ensure even tile installation. Seal grout lines to prevent stains and moisture penetration. For DIY projects, follow manufacturer instructions and allow proper curing time. Regular cleaning keeps your backsplash looking fresh and functional.
Add personal flair with decorative tile patterns, mosaics, or colorful accents. Incorporate metal trims or decorative borders to frame your backsplash. Use heat-resistant paint or panels for a quick refresh that matches your decor changes. Personal touches like custom mosaics or monograms make it uniquely yours.
A well-designed backsplash elevates your kitchen’s style and protects your walls for years. It’s a simple upgrade that makes cleaning easier and your space more inviting. When your walls are protected and stylish, confidence in your kitchen design soars. Ready for a backsplash upgrade? It’s easier and more rewarding than you think.
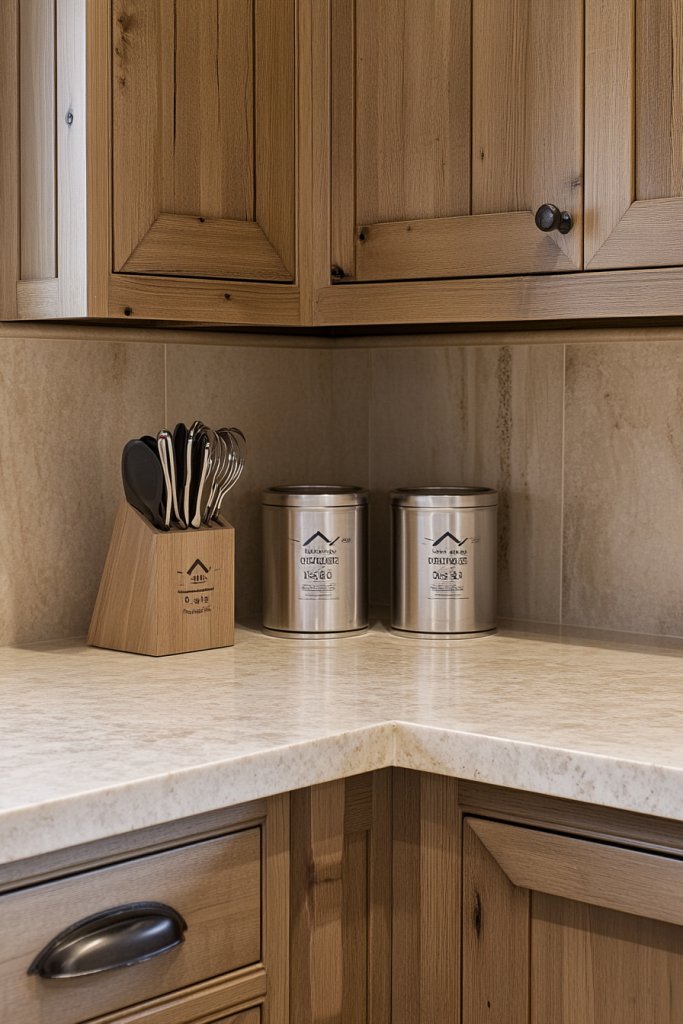
14. Overlooking the Importance of Clear Zones: Designating Specific Areas for Tasks
Ever feel like you’re searching for utensils in a cluttered kitchen? Overlooking clear zones turns your space into a chaotic mess, making cooking and cleaning less efficient. Properly designated areas help streamline tasks, reduce clutter, and make your kitchen a joy to use.
Picture a kitchen divided into distinct zones: a prep area with a large, open countertop, a cooking zone with easy access to appliances, and a cleaning corner with a sink and trash. Shelves and storage are thoughtfully placed within each zone for quick access. The overall layout feels intuitive, with smooth transitions between tasks, creating a harmonious flow.
Create zones based on your habits—dedicate a coffee station, baking corner, or snack bar. Use visual cues like different colors, flooring, or lighting to delineate areas. For open kitchens, define zones with furniture, rugs, or partial walls. Seasonal changes, such as holiday baking, can be accommodated by temporarily expanding or shifting zones.
Analyze your routine to identify key activity areas. Allocate space for prep, cooking, cleaning, and storage, ensuring each has ample room. Use storage solutions like labeled containers or drawer dividers within each zone. Position frequently used items close to their respective zones to minimize movement. Regularly reassess and adjust the zones for optimal efficiency.
Add decorative elements like themed textiles or signage that define each zone. Incorporate built-in organizers or custom cabinetry to keep each area tidy. Use lighting to highlight specific zones, making tasks easier and spaces more inviting. Personal touches like custom labels or artwork can add character.
Designating clear zones makes your kitchen more organized and functional, boosting confidence in your daily routines. It simplifies cooking, cleaning, and entertaining, turning your kitchen into a well-oiled machine. When each area has its purpose, you’ll enjoy spending time in your space more than ever. Ready to organize? Start by defining your zones today.
15. Ignoring Noise Control: Incorporating Sound-Absorbing Elements
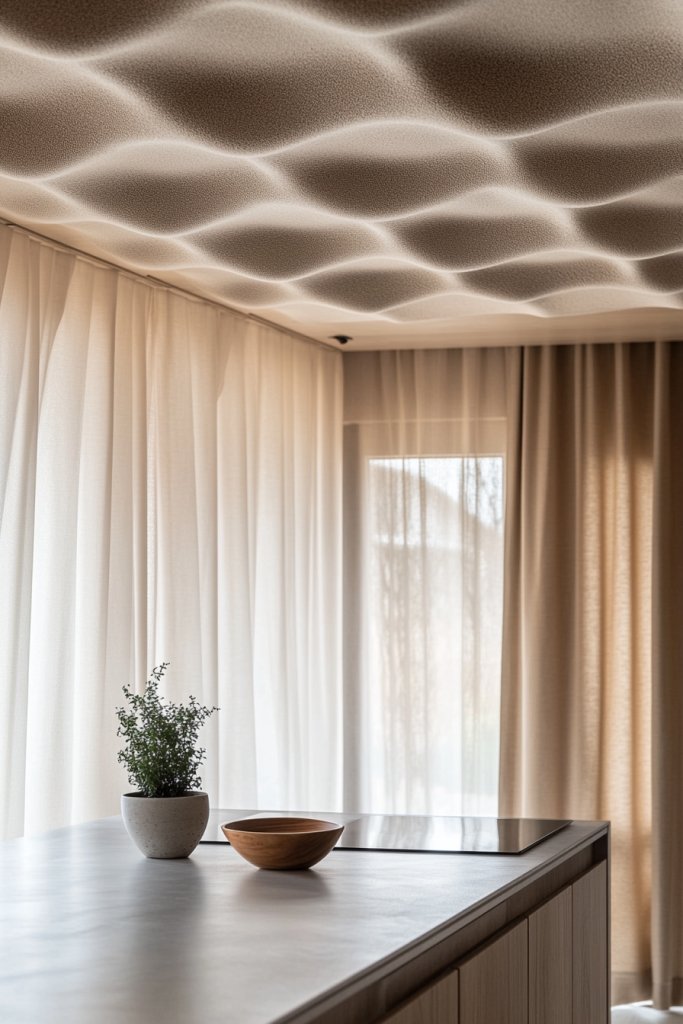
Ever had a dinner party ruined by loud clattering or a constant hum in the background? Noise in the kitchen isn’t just annoying—it’s disruptive and stressful. Ignoring sound control can turn an enjoyable space into a cacophony. Incorporating sound-absorbing elements makes your kitchen peaceful and more pleasant.
Visualize soft-close cabinet doors and drawers that hush every movement. Insulated walls and ceilings dampen the overall noise, while textured wall panels absorb sound waves. Plush rugs or cork flooring add warmth and reduce echo, making the space feel cozy and calm. The entire environment feels tranquil, inviting you to cook, chat, and relax.
Use acoustic tiles or decorative wall panels with sound-absorbing properties. Incorporate soft textiles like upholstered chairs or fabric window coverings. For open-plan kitchens, consider installing ceiling baffles or soundproofing insulation. Seasonal or event-specific changes can include adding fabric curtains or wall hangings for extra noise dampening.
Start by assessing the main noise sources—appliances, floors, or open layouts. Select noise-reducing materials like cork or foam panels for walls and ceilings. Opt for soft-close cabinetry and drawers to minimize slamming sounds. Use rugs or mats in high-traffic areas, and consider installing quieter appliances or adding soundproofing insulation behind walls. Regular maintenance helps sustain noise control.
Add decorative acoustic panels that match your design style—think fabric-covered or textured. Incorporate plush textiles or curtains to soften sound further. Choose appliances known for quieter operation. Personalize your space with custom wall treatments that blend aesthetics with function, creating a peaceful kitchen environment.
Controlling noise levels enhances the overall ambiance, making your kitchen a relaxing retreat. It encourages longer cooking and entertaining sessions without stress. When your space is quiet and calm, confidence in your home environment grows. Want a more peaceful kitchen? Invest in sound-absorbing solutions today—it’s a true game-changer.
Conclusion
Exploring these common kitchen design mistakes reveals a variety of ways to enhance your space with smarter choices and better planning. Don’t be afraid to try new ideas that balance style and practicality—your dream kitchen is within reach. Take action today and transform your kitchen into a perfect blend of functional elegance and personal flair!