
16 Living Room Gallery Wall Ideas for Stylish Displays
A stunning gallery wall can instantly elevate the look of any living room, making it a popular choice for homeowners seeking to showcase their personality and style. These displays are not only visually captivating but also versatile, allowing for endless creative combinations of art, photos, and decorative accents.
In this article, you’ll discover a variety of living room gallery wall ideas that cater to different tastes and space configurations. Whether you prefer a minimalist arrangement, a mix of bold frames, or a curated vintage collection, there’s an idea here to inspire your next decorating project and transform your living space into a gallery-worthy haven.
1. Symmetrical Frame Arrangements for a Balanced Look
Ever struggle with making your living room feel organized without looking chaotic? Symmetry offers that perfect balance, creating a sense of order that’s both calming and stylish. It’s like giving your space a little dose of Zen, but with frames instead of Zen gardens. If you crave a clean, modern vibe that doesn’t feel cold, this idea might be just what you need.
Recommended Products to replicate this idea
| # | Preview | Product | |
|---|---|---|---|
| 1 |

|
Vittanly 8x10 Picture Frames Set of 9, Shatter Resistant Plexiglass, Display 5x7 Pictures with Mat... | Check Latest Price |
| # | Preview | Product | |
|---|---|---|---|
| 1 |

|
Gallery Perfect 12-Piece Black Photo Frame Set with Hanging Template - 12x12 Picture Frame Matted to... | Check Latest Price |
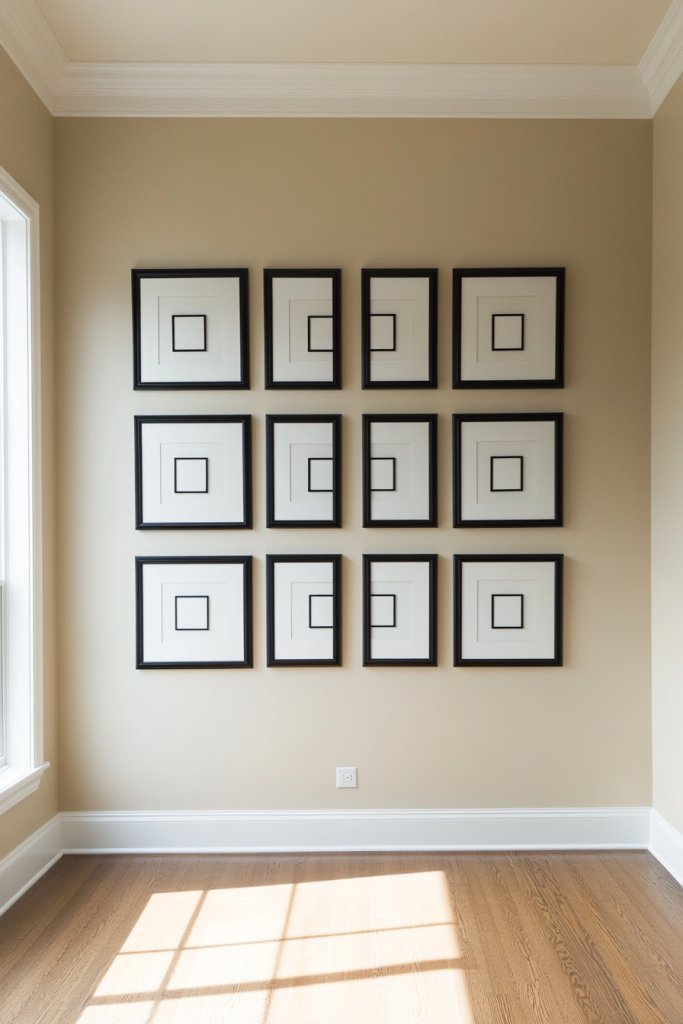
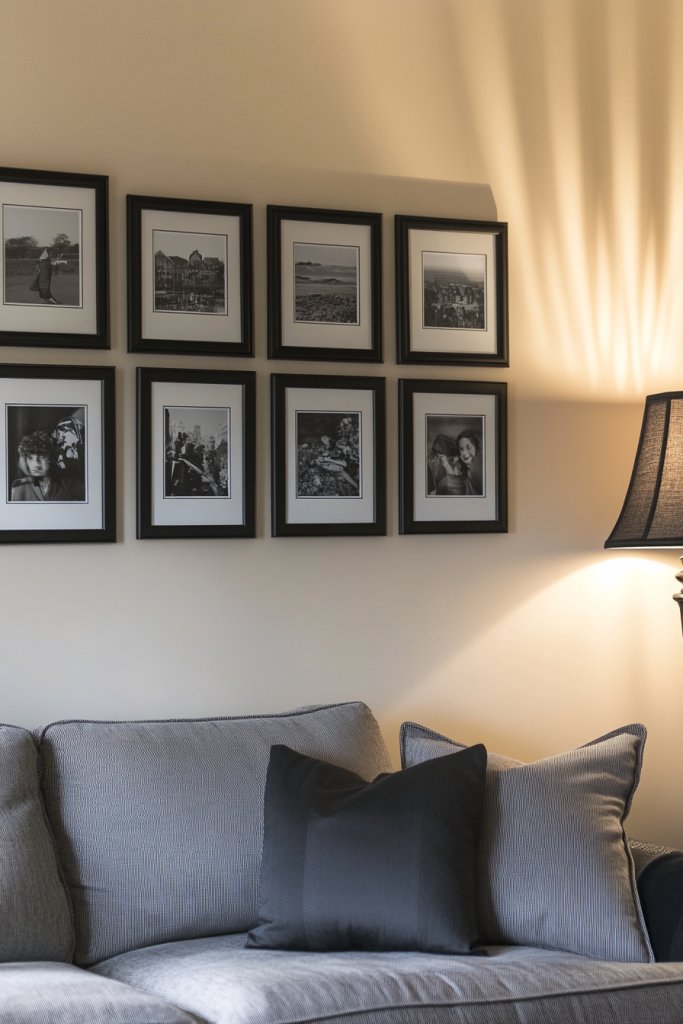
Imagine a wall where matching frames hang in perfect mirror image, each aligned precisely at the same height. The frames themselves are sleek, maybe black or white, with crisp edges that add to the symmetry. The photos or prints inside complement each other, creating a cohesive look that feels effortless. The overall effect is like a piece of art—balanced, intentional, and visually satisfying.
You can adapt this idea to match your personal style by choosing ornate frames for a vintage look or minimalist ones for a contemporary feel. For small spaces, stick to two or three frames for a subtle statement; larger walls can handle a grid of nine or more for maximum impact. Seasonal tweaks might include swapping out prints or photos to match holidays or moods. Feel free to mix textures or materials as long as the symmetry remains intact.
Start by measuring your wall space and choosing frames of equal size. Use a level and painter’s tape to mark where each frame will hang—this prevents crooked chaos. Select images or prints that work well together, perhaps black-and-white photography or matching artwork. Hang the frames at eye level for the best visual flow. For added precision, consider using frame hangers with built-in levels or a laser level tool. Keep the spacing consistent—about 2-3 inches apart—for a polished look.
Add a personal touch by choosing frames with unique textures or colors that pop against your wall. Incorporate small decorative elements like metallic accents or matte finishes for variety. You could also create a theme, like black-and-white family photos or art prints with a similar color palette. Changing out prints seasonally keeps the display fresh without disrupting the overall symmetry. This way, your wall feels both curated and personal.
Symmetrical arrangements give your space a professional, gallery-like feel that boosts your confidence as a decorator. It’s a timeless look that works with any decor style, from ultra-modern to cozy farmhouse. Once you get the hang of measuring and spacing, it’s an easy DIY project that transforms your living room into a stylish sanctuary. Ready to make your wall the envy of all your friends?
2. Mixed-Size Frame Collage for Dynamic Visual Interest
Tired of boring, uniform wall displays that lack personality? A mixed-size collage breaks free from sameness, injecting energy and character into your living space. It’s perfect for showcasing an eclectic style or adding visual punch to a plain wall. Who says all frames need to match? Sometimes, variety creates the most charm.
Recommended Products to replicate this idea
| # | Preview | Product | |
|---|---|---|---|
| 1 |
|
LUCKYLIFE Picture Frames Collage Wall Decor 10-Pack, Gallery Wall Frame Set with 8x10 5x7 4x6 Frames... | Check Latest Price |
| # | Preview | Product | |
|---|---|---|---|
| 1 |

|
Venusmiles 15 Pack Picture Frames Collage Wall Decor, Gallery Frame Set for Wall Mounting or... | Check Latest Price |
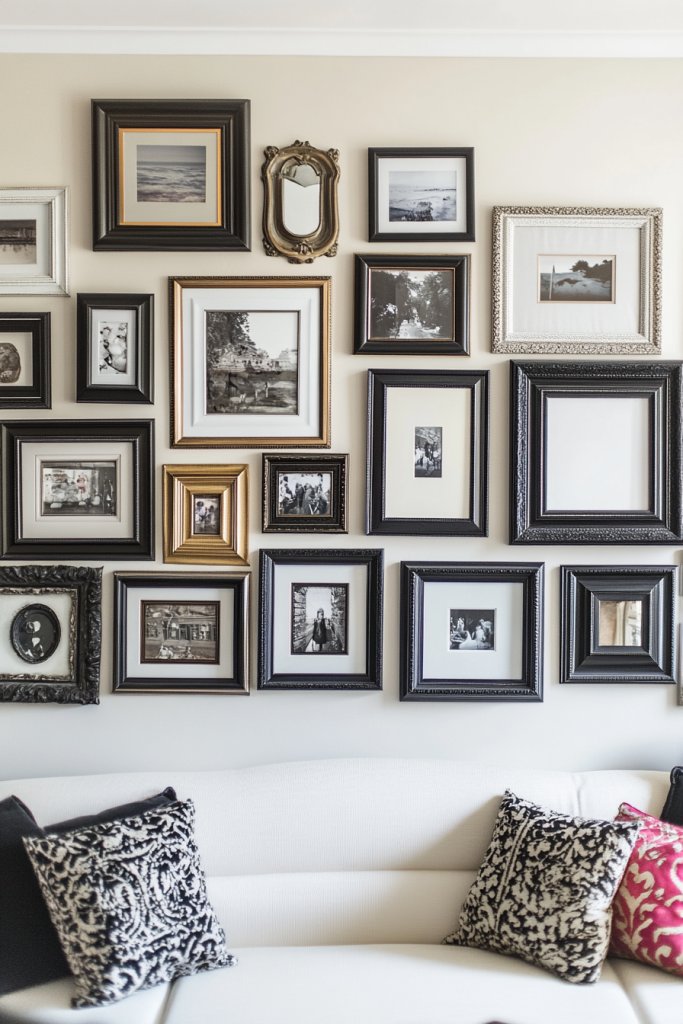
Picture a collection of frames in different shapes and sizes arranged in a seemingly casual, yet curated manner. Larger frames anchor the display, while smaller ones weave around them, creating movement. The varied textures of the frames—wood, metal, or acrylic—add depth. Inside, a mix of photos, prints, and maybe even small decorative objects peek through, creating a lively, layered effect.
Mix and match to reflect your personality—use vintage frames for a shabby-chic vibe or sleek modern ones for a contemporary look. For small apartments, keep the collage tight and compact; for larger walls, let it breathe with more spacing. You can also rotate pieces seasonally or for special occasions, keeping things fresh. Incorporate different colors or finishes for a boho or maximalist aesthetic.
Gather a variety of frames in different sizes that complement your decor. Lay them out on the floor first to experiment with arrangement before committing to holes in the wall. Use painter’s tape to outline the shapes on your wall, adjusting until perfect. Mix in different orientations—vertical, horizontal, or tilted—for a dynamic feel. Secure each piece with appropriate wall hooks or adhesive strips, depending on weight. Maintain a balance between clutter and cohesiveness.
Add a personal touch by including memorabilia, textured fabrics, or hand-drawn art inside some frames. Integrate small shelves or shadow boxes to display three-dimensional objects like souvenirs or keepsakes. Use frames in colors that pop or match your room’s palette for unity. Layering with textiles like woven mats or fabric backgrounds can add softness and richness.
A mixed-size collage reflects your personality and makes your wall a conversation starter. It’s an approachable project that encourages creativity without needing perfection. Once you see how varied frames work together, you’ll gain confidence in mixing styles and textures. Your living room will feel more vibrant, personalized, and full of life—just like you.
3. Floating Frame Display for a Sleek, Contemporary Vibe
Ever wish your wall art looked more modern and seamless? Floating frames give a minimalist, clean appearance that elevates any space. They create the illusion that your photos or art are suspended in mid-air, adding that sleek, contemporary touch. If you love the idea of understated elegance, this style might be your new best friend.
Recommended Products to replicate this idea
| # | Preview | Product | |
|---|---|---|---|
| 1 |

|
Trwcrt 5x7 Floating Picture Frames Set of 4, Double Glass Photo Frame Display up to 7 x 9 Photos for... | Check Latest Price |
| # | Preview | Product | |
|---|---|---|---|
| 1 |
|
B&NN 8x10 Acrylic Picture Frame Floating Look,3MM + 3MM Thickness Clear Photo Frame ,Desktop... | Check Latest Price |
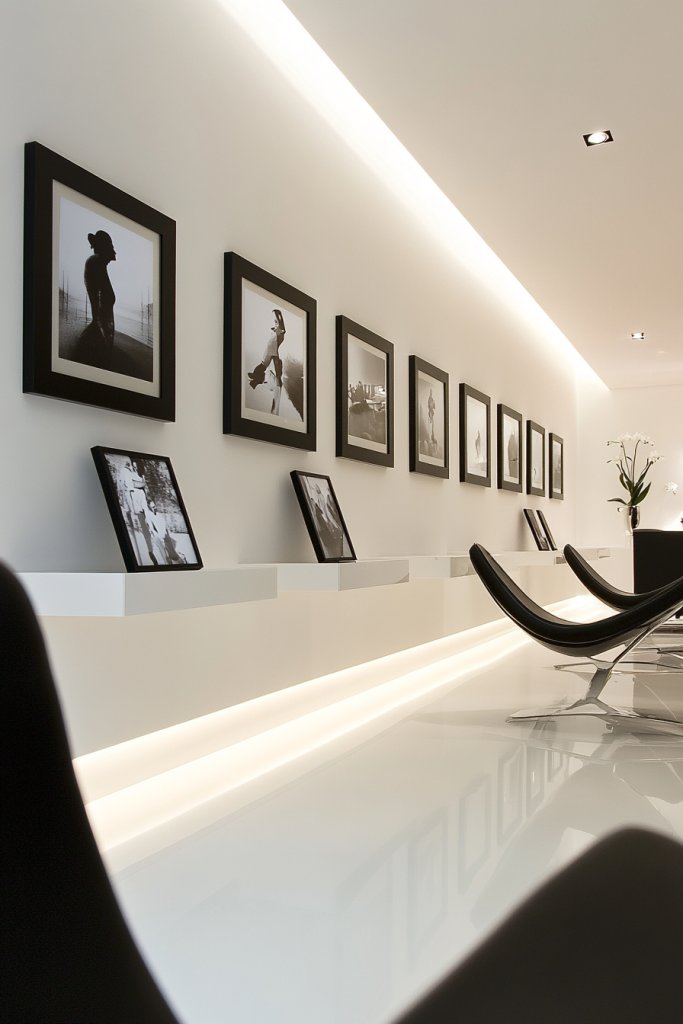
Visualize images or prints encased in thin, transparent edges with no visible borders, hanging with space around them. The frames seem to hover, highlighting the artwork without distraction. The surrounding wall remains visible, emphasizing simplicity. The overall effect is airy and uncluttered, perfect for highlighting your favorite shots or artwork.
Use monochrome or metallic floating frames for a refined look, or opt for transparent acrylic for the most modern feel. Mix different sizes for an asymmetrical yet balanced display. For seasonal updates, swap out the images or prints within the frames easily, maintaining the floating illusion. This style works well with both large statement pieces and smaller, grouped displays.
Purchase frames with built-in clips or mounts designed for floating displays. Measure and plan your layout carefully, using painter’s tape to mark the positions. Hang each frame with discreet hooks or strips that hold the frame flush against the wall. Ensure the images are centered and aligned for a polished look. Use a level for perfect placement, especially with multiple pieces.
Personalize by choosing prints that evoke emotion or match your decor palette. Incorporate textured backgrounds or matte finishes for added depth. Create themed groups, like family memories or travel photos, to tell a story. Keep framing minimal to let the images be the star, or add subtle metallic accents for a touch of glamour.
Floating frames make your wall look professionally curated, boosting your confidence in decorating skills. They offer flexibility and are easy to update, making your space feel fresh regularly. Once you see how sleek and modern your wall becomes, you’ll be inspired to try other minimalist ideas that elevate your home’s style.
4. Geometric Pattern Layouts for a Modern Artistic Touch
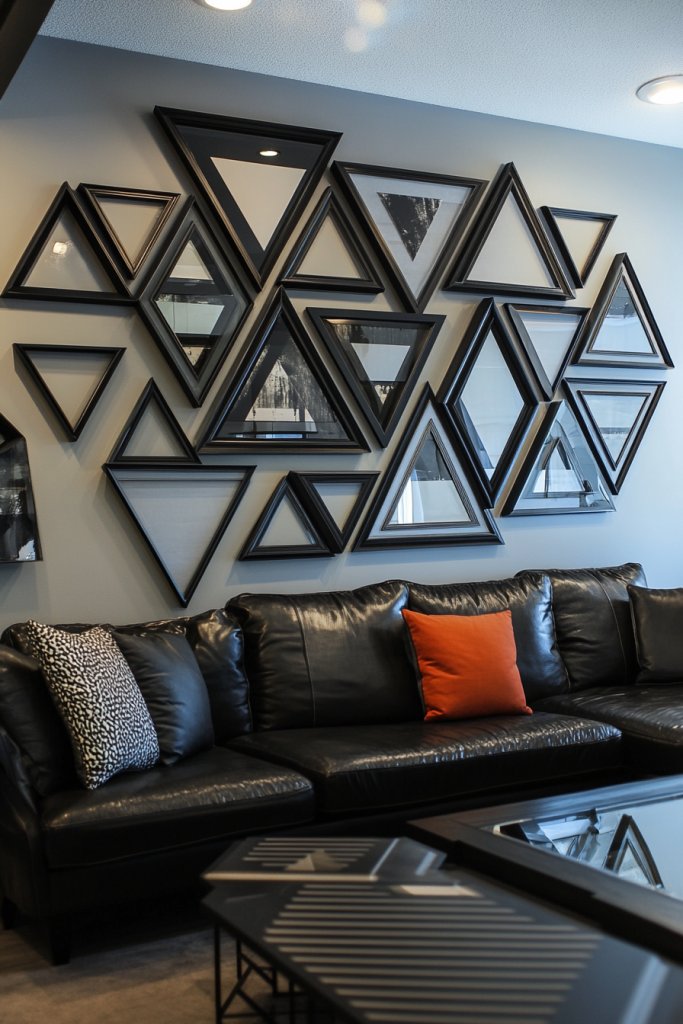
Looking to add a bit of artistic flair to your living room? Geometric patterns turn a simple gallery wall into a modern masterpiece. They introduce structure, rhythm, and visual interest, making your space feel more dynamic. If you’re tired of traditional grid or random arrangements, geometric layouts offer a fresh perspective.
Recommended Products to replicate this idea
| # | Preview | Product | |
|---|---|---|---|
| 1 |
|
AceList Set of 3 Glass Photo Frame Collection Simple Metal Geometric Picture Frame with Glass Cover... | Check Latest Price |
| # | Preview | Product | |
|---|---|---|---|
| 1 |

|
CXYNDFA Gold Hexagon Wall Shelves Set of 3 - Floating Metal Shelves for Wall Mounted Decor,... | Check Latest Price |
Imagine arranging frames in triangles, diamonds, or hexagon shapes, creating a puzzle-like pattern on your wall. The symmetry and repetition evoke a sense of harmony and order, while the angles add a touch of boldness. Colorful mats or contrasting frame finishes enhance the geometric effect, making each piece stand out while contributing to the overall design.
Use frames of different sizes but with consistent shapes or colors for coherence. For an ultra-modern look, stick to monochrome tones; for more playful vibes, experiment with bright colors and mixed materials. This layout adapts well to both small and large walls—the key is planning your pattern first on the floor or paper. Incorporate negative space intentionally for a breathable, airy feel.
Sketch your pattern on paper or use design software to visualize the layout. Measure your wall and mark the positions with painter’s tape, respecting the pattern’s geometry. Use a level to ensure each frame hangs straight and accurately. Start from the center or a focal point, working outward to keep symmetry intact. Secure each frame with appropriate hooks, ensuring stability for the sharp angles.
Personalize with themed images that match your room’s color palette or mood. Add textured backgrounds or metallic frames for extra visual interest. For variation, include small sculptural elements or layered materials in the pattern, creating a tactile experience. Play with scale—combine large central pieces with smaller side accents.
Geometric galleries turn your wall into an art installation, boosting your confidence as a creative decorator. They’re adaptable to different styles, from ultra-modern to eclectic. Once you master the pattern, you’ll find it easy to experiment with other artistic arrangements, elevating your entire living space.
5. Gallery Wall with Architectural Accents
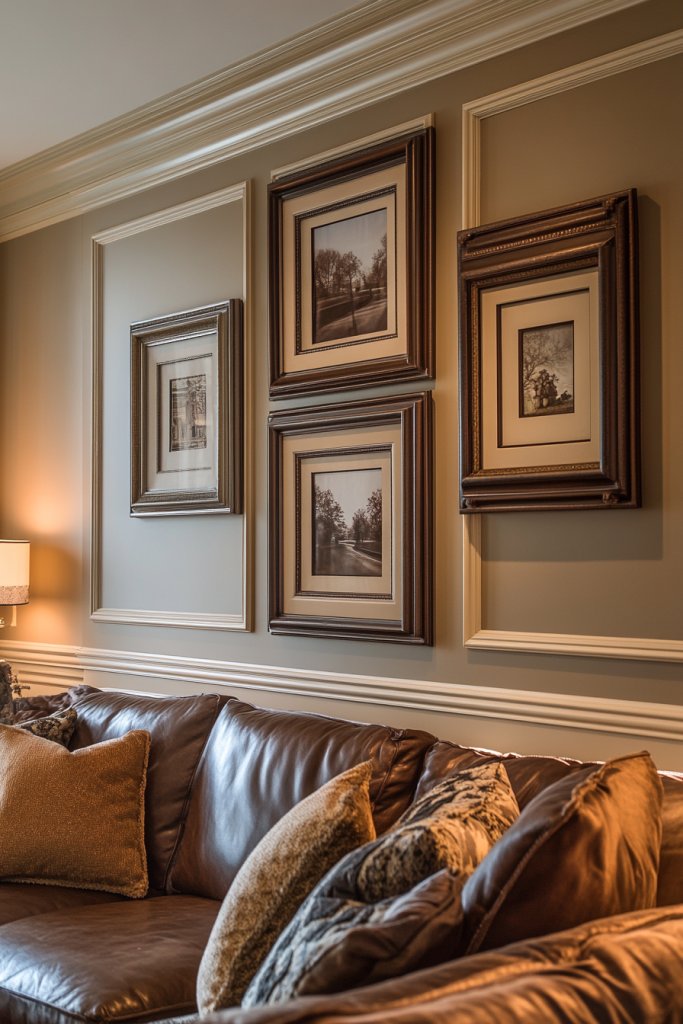
Want your living room to feel more sophisticated and architecturally interesting? Incorporating design elements like wall molding or decorative trim transforms a plain wall into a feature. It adds depth and elegance, making even simple frames look like part of a grand design. If you love classic or refined aesthetics, this approach might be your secret weapon.
Recommended Products to replicate this idea
| # | Preview | Product | |
|---|---|---|---|
| 1 |

|
Pangda 3 Set Peel and Stick Wall Molding Kit, 3D Premade Accent Molding Wainscoting Panel for... | Check Latest Price |
| # | Preview | Product | |
|---|---|---|---|
| 1 |

|
Umbra Exhibit Picture Frame Gallery Set, Adjustable Wall Collage Displays Five Photos (Two 4x6 and... | Check Latest Price |
Picture a wall framed with elegant molding that creates panels or a subtle border around your photos or art. The raised trim adds shadows and dimension, making the display pop. The contrast between textured wall accents and sleek frames creates a layered, luxurious effect. It feels like a built-in feature rather than a simple gallery.
Choose molding that complements your style—ornate for traditional decor, clean-lined for modern spaces. You can add decorative corner elements or use wallpaper within the panels for extra flair. For small spaces, a single framed panel works; large walls can handle multiple sections for a gallery effect. Paint or stain the trim to match or contrast with your wall color.
Start by installing the architectural accents, either by attaching pre-made molding or custom carpentry. Use a level to ensure precision, and secure the trim with appropriate fasteners. Once the borders are in place, arrange your frames within each section, maintaining balance and symmetry. Use spacers or templates for uniform gaps. Finishing touches might include caulking or painting to hide nail holes and seams.
Personalize the space by choosing frames that echo the architectural style—perhaps ornate for vintage, sleek for contemporary. Incorporate textured fabrics or woven accents within the panels for softness. Use lighting—like picture lights or sconces—to highlight the architectural details and framed displays. This layered approach elevates your entire decor.
Adding architectural accents to your gallery wall creates a high-end look that boosts your confidence in DIY projects. It elevates your living room from ordinary to extraordinary with a few simple elements. Once you see how much depth and character this adds, you’ll be inspired to try other architectural details in your home.
6. Thematic Monochrome Frame Arrangement
Looking for a cohesive, understated look that still packs a punch? A monochrome theme in your gallery can unify diverse images and styles into a harmonious display. It’s perfect if you prefer subtle sophistication over loud, colorful chaos. Plus, it’s a foolproof way to match your decor without worrying about clashing colors.
Recommended Products to replicate this idea
| # | Preview | Product | |
|---|---|---|---|
| 1 |

|
Americanflat Set of 10 Picture Frames with Shatter-Resistant Glass - Gallery Wall Frame Set with Two... | Check Latest Price |
| # | Preview | Product | |
|---|---|---|---|
| 1 |
|
Monochrome Coloring Book – Flowers: Large Print Black & White Floral Patterns for Calm and Focus | Check Latest Price |
Visualize an arrangement where all frames are black or white, with matching mats or borders. Inside, you might feature a collection of black-and-white photos, sketches, or minimalist prints. The uniform color palette creates a visual rhythm, guiding the eye smoothly across the display. The simplicity exudes elegance and calm, making your wall a visual retreat.
Choose frames in a single color or finish—matte black, glossy white, or brushed metal. Mix in different textures like matte, gloss, or textured borders for subtle variation. You can also layer different shades within the same palette for depth, such as charcoal, slate, or ivory. This style adapts easily to any room, from sleek modern to cozy rustic.
Select uniform frames and plan your layout on paper or using a digital tool. Use painter’s tape to mark the positions on your wall, ensuring consistent spacing. Hang the frames at eye level and check alignment with a level. Group similar images or prints to enhance the thematic coherence. Keep the arrangement simple and balanced for maximum impact.
Customize by choosing prints or photos that fit your monochrome theme—family portraits, architectural shots, or abstract sketches. Incorporate textured backgrounds or matte finishes for added depth. Use matching mats to frame each piece or experiment with different shades within the palette for subtle contrast. This approach makes your display feel curated and intentional.
A monochrome gallery is a timeless, elegant choice that elevates your decor effortlessly. It proves that simplicity can be powerful and stylish. Once you see how cohesive and polished your wall looks, you’ll gain confidence in creating other themed displays that reflect your personality.
7. Asymmetrical Layout with Centerpiece Art
Fed up with rigid, predictable gallery arrangements? An asymmetrical layout breaks the rules and adds a touch of personality and spontaneity. It draws attention and creates visual interest, especially when anchored around a bold centerpiece. If you love a bit of chaos with style, this idea is your new best friend.
Recommended Products to replicate this idea
| # | Preview | Product | |
|---|---|---|---|
| 1 |

|
3D Wood Textured Large Neutral Abstract Wall Art, Modern Beige Brown Geometric Paintings Artwork for... | Check Latest Price |
| # | Preview | Product | |
|---|---|---|---|
| 1 |
|
LUCKYLIFE Picture Frames Collage Wall Decor 10-Pack, Gallery Wall Frame Set with 8x10 5x7 4x6 Frames... | Check Latest Price |
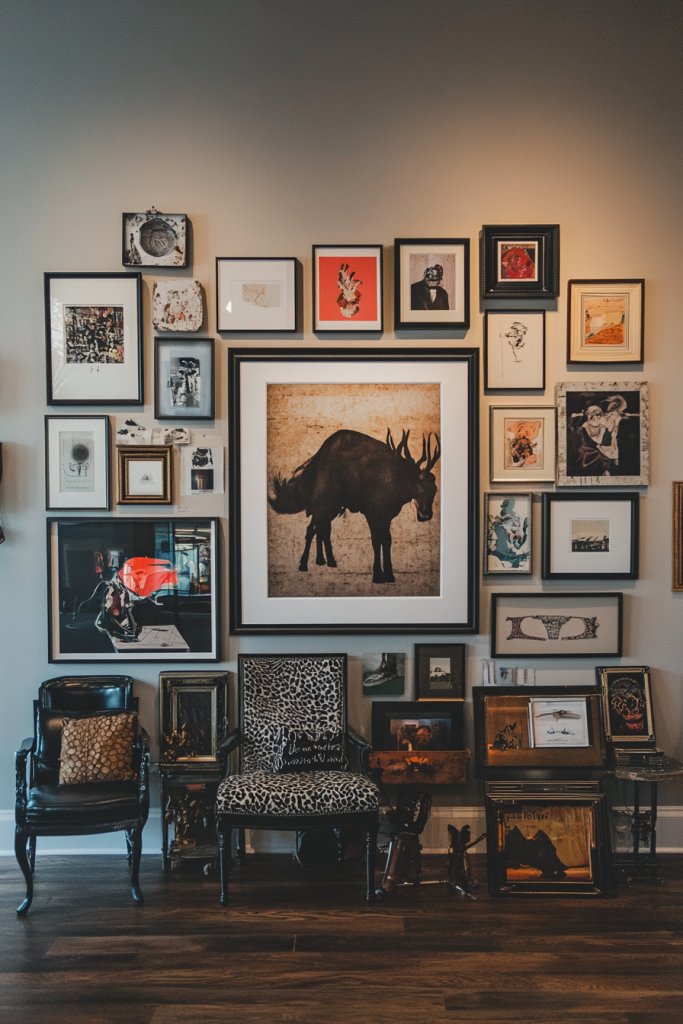
Imagine a large, striking piece slightly off-center, surrounded by smaller frames or objects arranged in a balanced yet unaligned way. The imbalance creates a dynamic flow, encouraging the eye to wander and explore. The mix of sizes, shapes, and orientations adds a playful, eclectic vibe, perfect for showcasing your unique taste.
Use an eye-catching art print or photograph as your focal point, then add smaller framed pieces or decorative objects around it. For a softer look, stick to neutral tones; for bold impact, incorporate bright colors or contrasting textures. This layout works well in both wide and narrow walls—just keep the visual weight balanced.
Begin by selecting a centerpiece that really speaks to you—could be an abstract print, bold photo, or textured artwork. Position it slightly off-center on your wall, then arrange smaller pieces around it in a loose, organic pattern. Use painter’s tape to experiment with placement before hanging. Mix orientations—some vertical, some horizontal—for a relaxed feel. Secure each piece with suitable hooks, and step back to ensure the overall balance.
Frame your centerpiece with a bold mat or frame in a contrasting color to make it pop. Incorporate personal items like small sculptures or textured textiles to add depth. Play with different frame styles for a layered look—metal, wood, or mixed materials. Keep the arrangement flexible so you can swap out pieces as your taste evolves.
An asymmetrical gallery exudes personality and confidence—proof that perfect symmetry isn’t always necessary. It encourages you to experiment and celebrate your eclectic style. Once you see how lively and inviting your wall becomes, you’ll be inspired to embrace more unconventional decor ideas.
8. Incorporating Mirror Frames for Brightness and Depth
Want to make your living room feel bigger and brighter without knocking down walls? Mirrors are the ultimate illusion creators, bouncing light and opening up space. Framing them creatively adds style while serving a practical purpose. If you dislike dark, cramped rooms, this trick could be your game-changer.
Recommended Products to replicate this idea
| # | Preview | Product | |
|---|---|---|---|
| 1 |
|
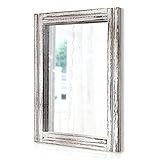
AAZZKANG Wall Mirror with Wood Framed Rustic Mirrors for Wall Rectangle Decorative for Bedroom... | Check Latest Price |
| # | Preview | Product | |
|---|---|---|---|
| 1 |
|
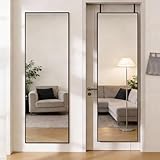
DUMOS 47x14 Full Length Mirror Over The Door, Wall Mounted Full Body Mirror, Door Hanging Metal... | Check Latest Price |
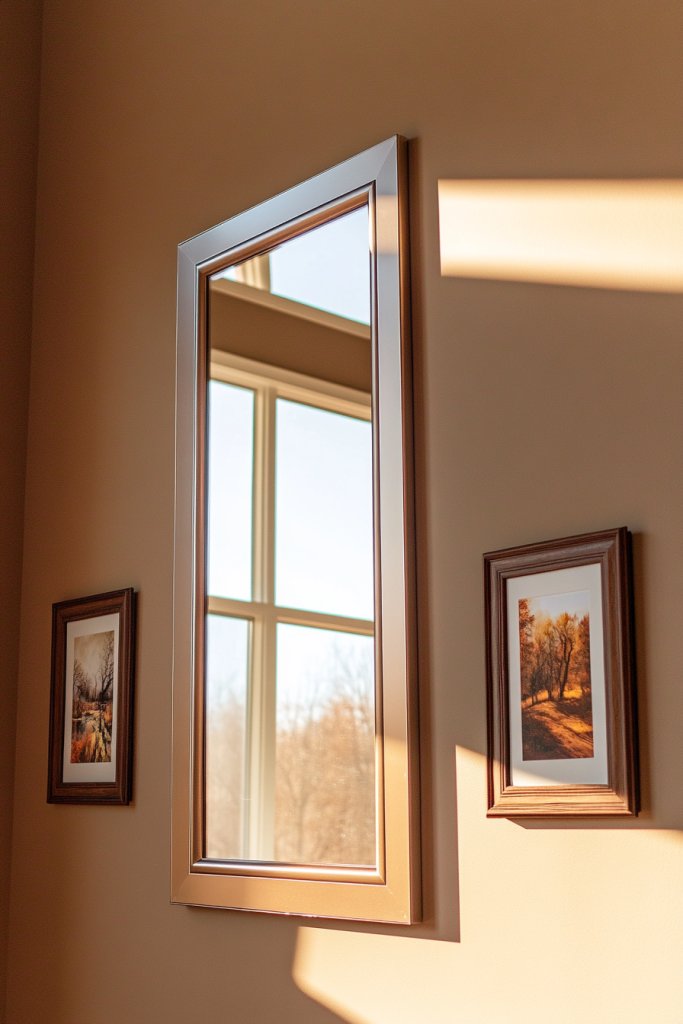
Picture a wall dotted with various mirrors in different shapes—round, rectangular, or organic—set within decorative frames. Light reflects off the glass, illuminating your space naturally. The frames add personality, ranging from ornate vintage styles to sleek modern designs. The overall look is both functional and decorative, enhancing depth and luminosity.
Use frames in contrasting finishes—gold, black, or matte—to suit your decor. Group smaller mirrors together for a clustered effect or hang a large statement mirror as a focal point. Incorporate textured or sculptural frames to add dimension. Seasonal updates might include swapping out frames or replacing the mirrors with new shapes for a fresh look.
Select mirrors with frames that match your style—antique, modern, or eclectic. Plan your layout carefully, considering the room’s light sources and focal points. Use a level to hang each mirror securely, ensuring they are aligned and evenly spaced. For uneven walls, consider custom framing or shimming to achieve a flat appearance. Install hooks or brackets suited for the mirror’s weight.
Add decorative elements around the mirrors—like sconces, small sculptures, or textured wall panels—to create a layered effect. Personalize with photos or artwork in complementary frames nearby. Play with symmetry or asymmetry based on your vibe—symmetrical for classic elegance, asymmetric for modern edge. Keep the mirrors clean for maximum brightness.
Mirrors not only beautify your space but also boost your confidence as a decorator. They reflect your personality and enhance functionality. Once you see your room feel more open and lively, you’ll be motivated to incorporate more reflective elements in your design. Brighten your space and your mood today.
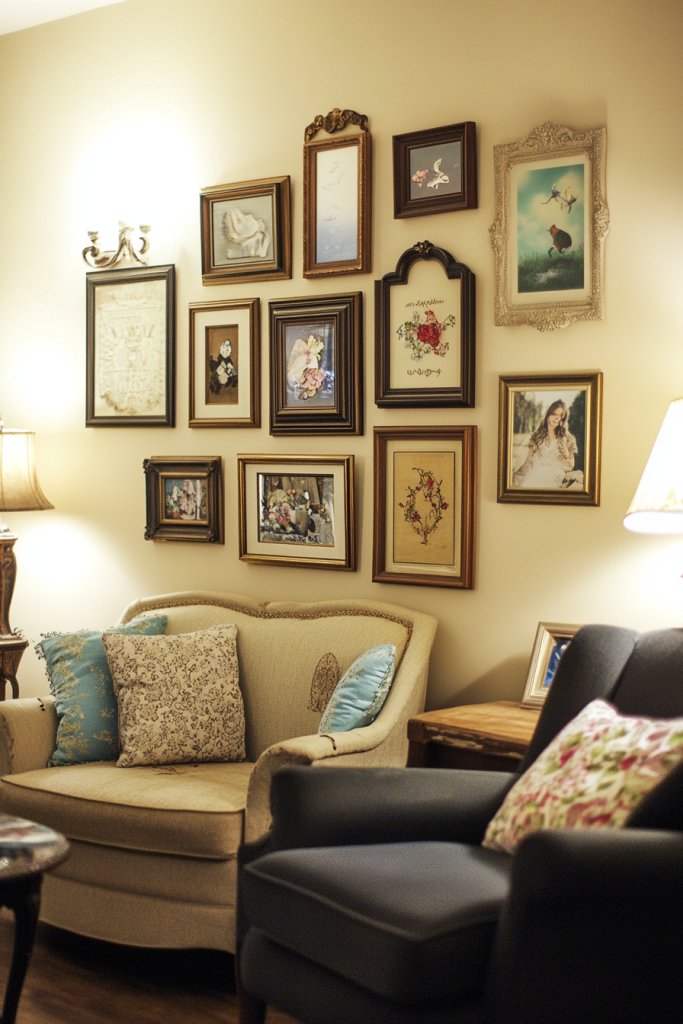
9. Rustic Wooden Frame Gallery for Cozy Charm
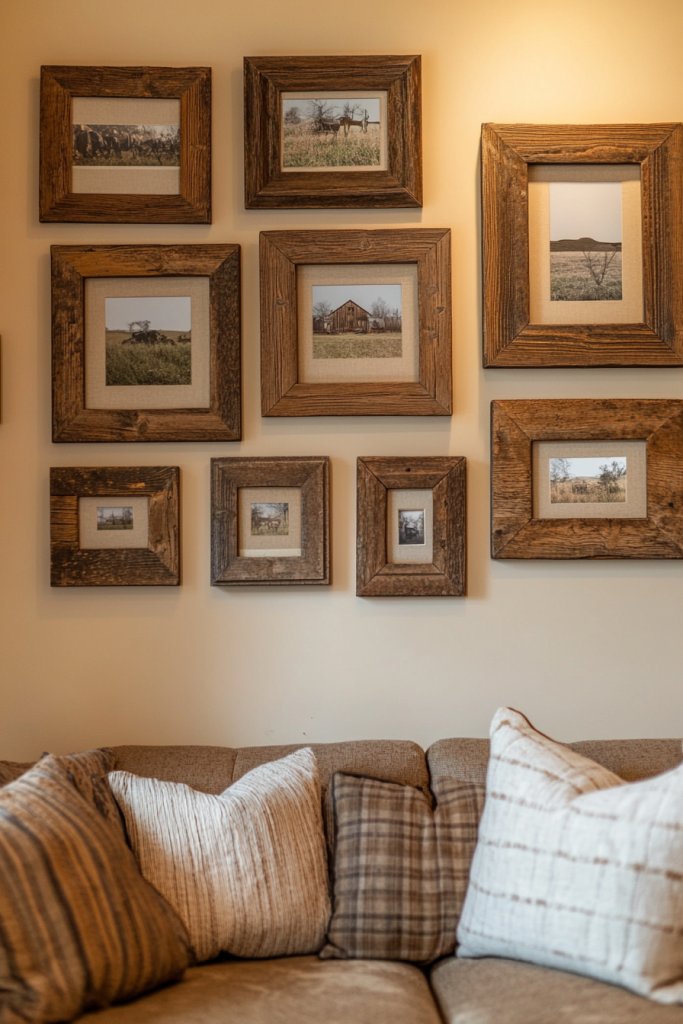
Craving a warm, inviting vibe that feels like a hug? Rustic wooden frames instantly add cozy charm and texture to your living space. They evoke a farmhouse or vintage aesthetic, making your wall feel both lived-in and stylish. If comfort is your priority, this idea is a perfect match.
Recommended Products to replicate this idea
| # | Preview | Product | |
|---|---|---|---|
| 1 |
|
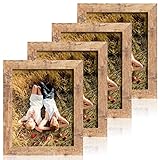
iRahmen 8x10 Picture Frame Set of 4, High Definition Real Glass Rustic Brown Frame, 8 x 10 Wood... | Check Latest Price |
| # | Preview | Product | |
|---|---|---|---|
| 1 |

|
Kate and Laurel Bordeaux Gallery Wall Kit, Set of 10 with Assorted Size Frames in 3 Different... | Check Latest Price |
Imagine weathered, reclaimed wood frames with visible grain and imperfect edges, housing family photos or nature-inspired prints. The natural tones—warm browns, soft creams—blend effortlessly with neutral or earthy decor. The texture of the wood adds depth, making each piece stand out against the wall. The overall effect is charming, inviting, and organic.
Mix different wood tones and finishes—light, dark, distressed—to add interest. Incorporate woven textiles or vintage artifacts nearby for a complete rustic look. For a more modern twist, pair rustic frames with sleek metals or glass. Use this style in open-plan spaces or cozy corners; it adapts well to various room sizes.
Source reclaimed or distressed wood frames from thrift stores or specialty shops, or DIY with reclaimed wood. Measure your wall and plan your layout, considering the rustic theme’s organic feel. Hang each frame securely, respecting the natural lines and flow. Arrange the frames in a loose grid or clustered formation for a more casual look. Distressed finishes hide imperfections and add character.
Personalize with vintage postcards, handwritten notes, or textured backgrounds inside the frames. Incorporate woven baskets or ceramic pieces nearby to enhance the rustic feel. Use warm lighting, like Edison bulbs or candle sconces, to cast a soft glow. Keep the overall vibe relaxed, imperfect, and authentic.
A rustic gallery creates a welcoming atmosphere that reflects your appreciation for craftsmanship and history. It’s a timeless style that can be easily customized as your taste evolves. Seeing your cozy, curated wall will inspire you to embrace other natural textures and handcrafted decor in your home.
10. Tiered Shelves with Framed Art and Decor Items
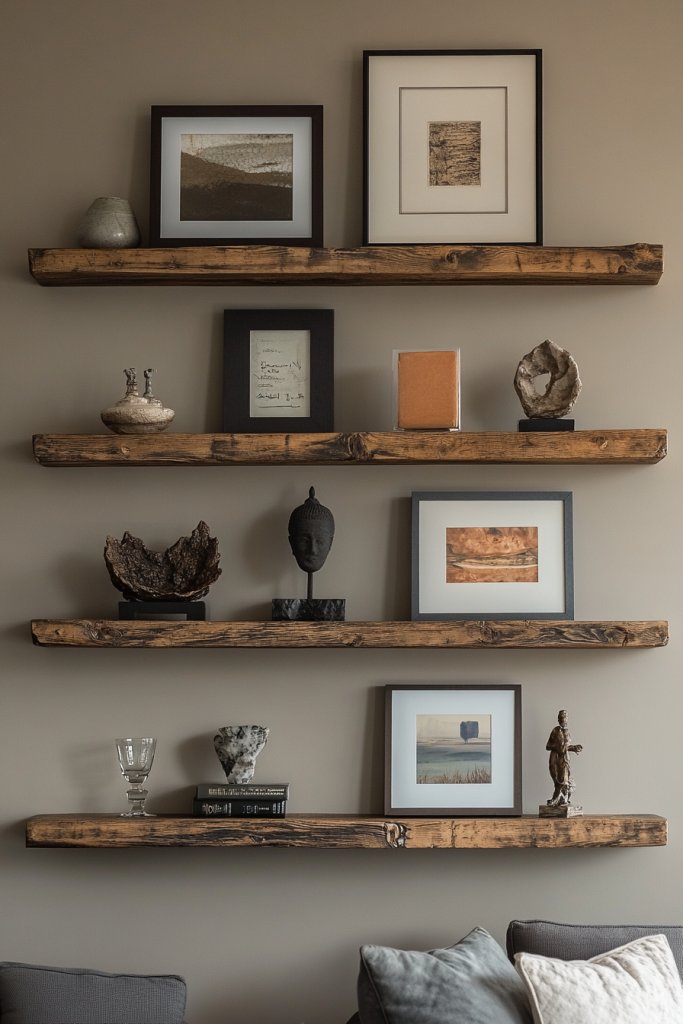
Want a living room display that’s both functional and stylish? Tiered shelves allow you to showcase art, photos, and decor while adding dimension to your wall. It’s like creating a mini gallery with built-in storage, perfect for those who love to change things up. If you dislike clutter but crave variety, this idea is for you.
Recommended Products to replicate this idea
| # | Preview | Product | |
|---|---|---|---|
| 1 |

|
Harwaya 5 Tier Wall Bookshelf Unit for Bedroom Books, Large Floating Book Shelves Wall Mounted,... | Check Latest Price |
| # | Preview | Product | |
|---|---|---|---|
| 1 |
|
LUCKYLIFE Picture Frames Collage Wall Decor 10-Pack, Gallery Wall Frame Set with 8x10 5x7 4x6 Frames... | Check Latest Price |
Visualize narrow, horizontally layered shelves stacked vertically, each tier holding framed art, small sculptures, or decorative objects. The varying depths and heights create a dynamic, multi-layered effect. The open design makes it easy to swap out items, keeping your display fresh and lively. The overall look is casual yet curated, perfect for a relaxed aesthetic.
Use floating or bracket-supported shelves in different finishes—wood, metal, or painted—to match your decor. Arrange items by theme or color for coherence, or mix for eclectic charm. Incorporate plants, books, or textured objects for variety. Adjust the spacing between shelves based on the size of your decor, from small collectibles to larger framed art.
Install the shelves at different heights to create visual interest, using a level and measuring tape for accuracy. Secure each shelf into studs or with wall anchors for stability. Arrange your art and decor items before fixing to ensure a balanced layout. Mix vertical and horizontal orientations for variety. Keep the shelves clutter-free by grouping similar items together.
Personalize with framed photos, small potted plants, or decorative books. Use colorful or textured backgrounds behind items for extra pop. Incorporate sculptures or ceramics for tactile interest. Change out or rearrange items seasonally or whenever you feel like a refresh, keeping the display engaging.
Tiered shelves make decorating flexible and fun, empowering you to experiment without permanent commitment. They add texture and depth to your wall, making your living space more inviting. Once you see how easily you can refresh your display, you’ll be motivated to try other creative shelving ideas in your home.
11. Grid Pattern with Uniform Frames for Minimalist Elegance
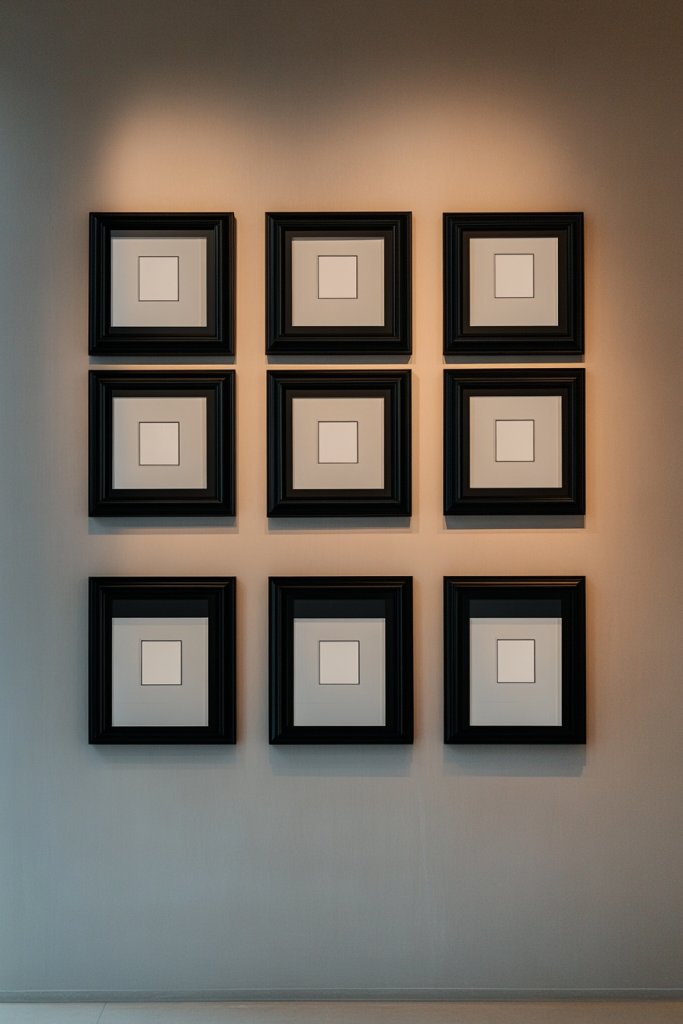
Craving a sleek, orderly wall that exudes calm and clarity? A grid pattern with uniform frames offers a minimalist yet striking aesthetic. It’s perfect for those who prefer a clean, organized look that still feels intentional. If you love modern simplicity, this approach might be your new favorite.
Recommended Products to replicate this idea
| # | Preview | Product | |
|---|---|---|---|
| 1 |

|
SESEAT Picture Frames Collage, Gallery Wall Frame Set with 11x14 8x10 5x7 4x6 Frames in 3 Different... | Check Latest Price |
| # | Preview | Product | |
|---|---|---|---|
| 1 |
|
Big John Products The Ultimate Picture and Wall-Hanging Template | Check Latest Price |
Picture a wall where identical frames are hung in perfect rows and columns, creating a precise grid. The consistency in size and spacing enhances a sense of balance and harmony. Inside, select images or prints that share a common theme or color scheme, reinforcing the cohesive look. The overall effect is polished, neat, and visually soothing.
Use monochrome frames or those with subtle textures for added interest. For a more dynamic vibe, alternate between matte and glossy finishes or incorporate subtle color accents. This layout adapts effortlessly to small or large walls—just keep the grid tight or spacious depending on your space. It works well with family photos, abstract prints, or curated art.
Measure your wall meticulously, then mark the grid points with painter’s tape. Use a level and tape measure to ensure perfect alignment. Hang each frame with uniform spacing—about 2-3 inches apart—for a clean appearance. Start from the center or a corner, working systematically across the wall. Use appropriate hooks or mounting hardware suited for your frame weight.
Customize with different art styles or photos that share a color palette or subject matter. Incorporate textured mats or borders within the frames for subtle variation. Add a small ledge or shelf below for decorative objects or lighting, enhancing the overall impact. Keep the arrangement simple for maximum elegance.
A grid layout demonstrates that simplicity can be sophisticated, giving you confidence in minimalist decorating. It’s a timeless look that works with any decor style—modern, Scandinavian, or industrial. Once you see your wall’s clean, organized beauty, you’ll be inspired to create more streamlined, stylish spaces in your home.
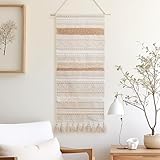
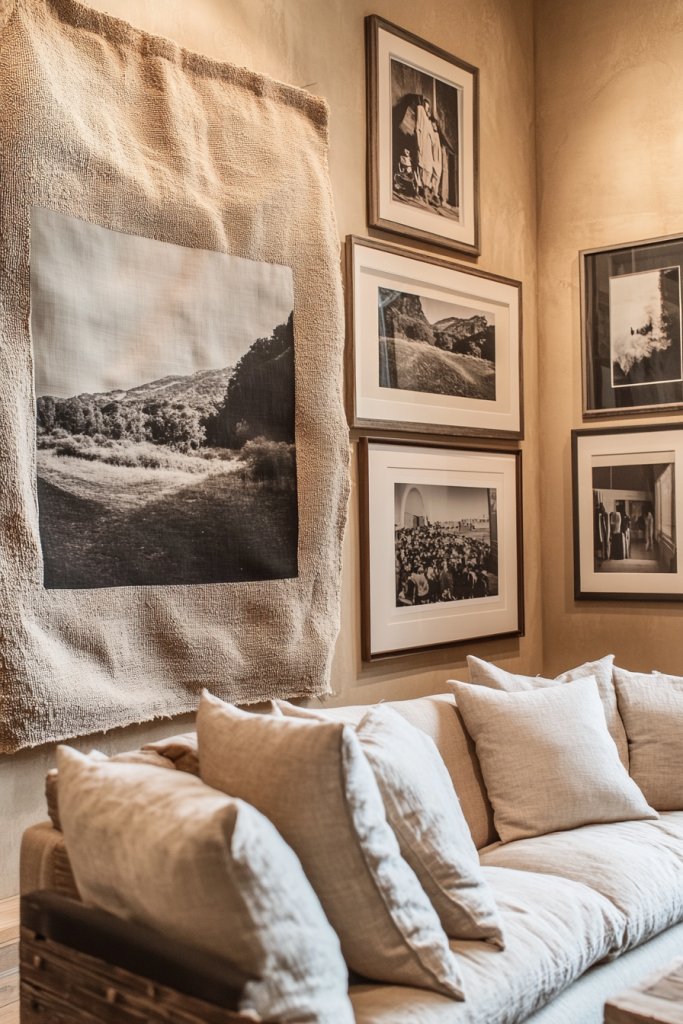
12. Incorporating Textile Elements within the Gallery
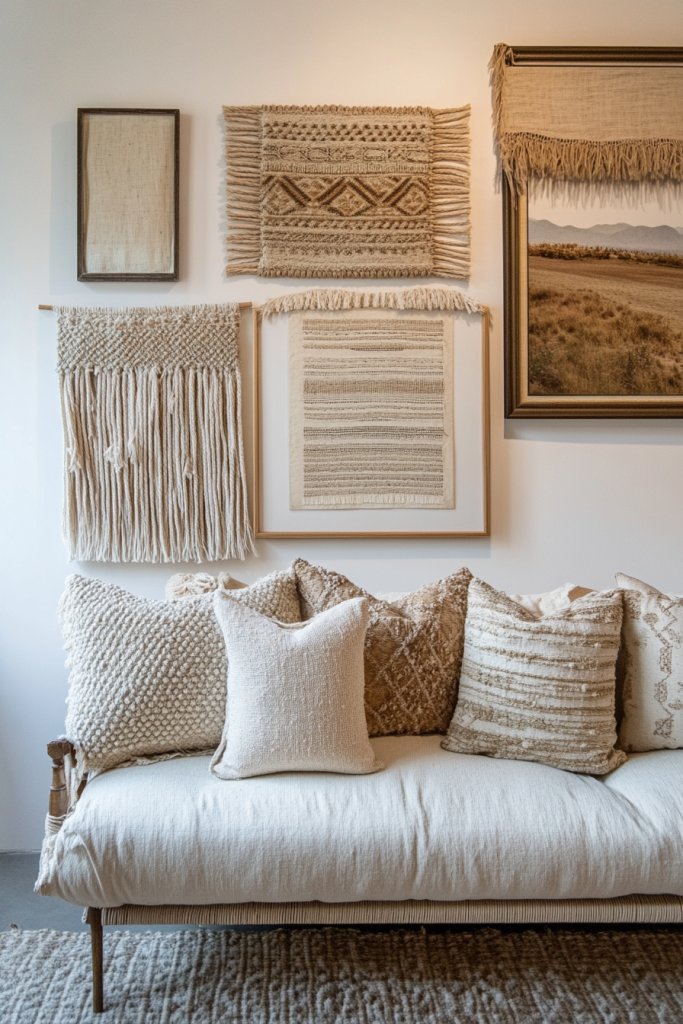
Want to add warmth and texture to your living room wall? Incorporating textiles like woven wall hangings, fabric art, or textured tapestries creates a cozy, inviting vibe. It’s a simple way to soften hard surfaces and introduce tactile interest. If you love layered, tactile decor, this idea will resonate.
Recommended Products to replicate this idea
| # | Preview | Product | |
|---|---|---|---|
| 1 |
|
BlissBlush Long Vertical Wall Hanging Tapestry Woven Boho Farmhouse Decor Cream Beige Tassel... | Check Latest Price |
| # | Preview | Product | |
|---|---|---|---|
| 1 |

|
46"x46" XL Framed Wall Art - Decor Nature Earthy Brown Tones (Frame Assembly Required) | Check Latest Price |
Visualize a wall decorated with woven wall hangings, fabric banners, or textile art panels alongside framed prints. The varied textures and patterns create depth and richness, making the space feel layered and curated. Natural fibers, like jute or wool, add earthy warmth, while bold textiles inject color and personality. The overall look is boho, rustic, or eclectic.
Mix textiles with different weaves, colors, and patterns for a vibrant, layered effect. Hang fabric art in a grid or asymmetrical arrangement, or weave textiles into a gallery wall with frames. For seasonal updates, swap out textiles to match your mood or decor theme. Use rods, clips, or hooks designed for textiles for easy hanging and removal.
Choose textiles in complementary colors or contrasting patterns. Use decorative rods, tension wires, or wall hooks to hang fabric pieces. Secure each piece well to avoid sagging or slipping. Combine textiles with framed art or photos for a mixed-media look. Ensure the textiles are stretched and hung smoothly for a polished appearance. Consider creating a layered effect with textiles behind frames or layered over a wall panel.
Add personal touches like embroidered patches, handwoven pieces, or vintage fabrics. Incorporate decorative tassels, fringes, or embroidery for detail. Use textiles to frame or border your artwork for a unique, textured border. Pair with natural elements like wooden dowels or ceramic rods for a handcrafted feel. Change textiles seasonally for a fresh look.
Textile elements bring warmth and tactile richness, making your space feel more inviting. They showcase your appreciation for craftsmanship and cozy aesthetics. Once you see how textiles transform your wall into a textured masterpiece, you’ll be inspired to experiment with other mixed-media decor ideas and elevate your home style.
13. Use of Color-Themed Frames for Visual Cohesion
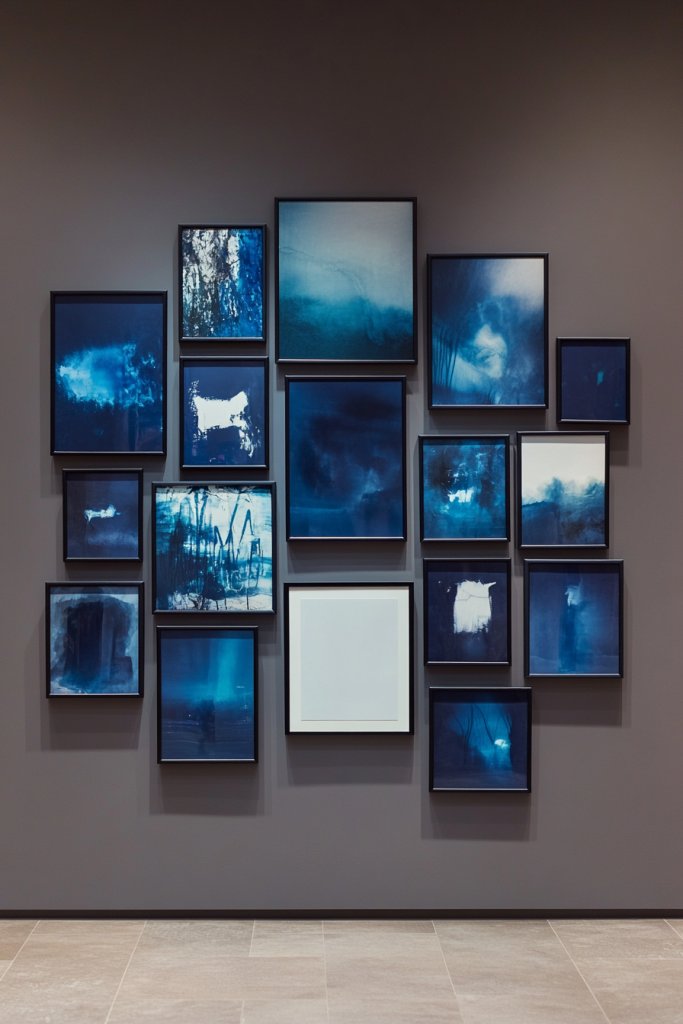
Looking to unify a diverse collection of photos and art? Color-themed frames create visual cohesion that ties everything together effortlessly. It’s an easy way to add harmony and sophistication without sacrificing variety. If you love a polished, curated look, this method will be your new favorite.
Recommended Products to replicate this idea
| # | Preview | Product | |
|---|---|---|---|
| 1 |

|
upsimples 11x14 Picture Frame, Display Pictures 8x10 with Mat or 11x14 Without Mat, Wall Hanging... | Check Latest Price |
| # | Preview | Product | |
|---|---|---|---|
| 1 |

|
Giftgarden 14 Pack Gold Picture Frames with Mat for Various Sizes Photos, Assorted Matted Frame Set... | Check Latest Price |
Imagine all your frames in shades of blue, or perhaps warm metallics like gold or copper. The consistent color palette creates a seamless background that lets the images shine. Inside, you can use images with similar tones or themes to reinforce the cohesive vibe. The overall effect is refined, balanced, and visually pleasing.
Stick to a single color family for a monochromatic look, or combine complementary hues for a more vibrant display. Mix textures within the frames—matte, glossy, or metallic—to add subtle variation. This approach works well in monochrome, pastel, or jewel-tone decor schemes. Adjust the size and orientation of frames for a layered, dynamic effect.
Select frames in your chosen color or finish, ensuring they match or complement each other. Lay out your collection on the floor first, then arrange on your wall using painter’s tape. Hang each frame with matching hardware for a uniform appearance. Maintain consistent spacing—about 2 inches—between frames for a polished look. Step back regularly to check alignment.
Coordinate your images or prints with the frame color—use soft pastels, vibrant hues, or black-and-white for contrast. Incorporate textured backgrounds or layered mats inside the frames for added depth. Use metallic frames to add a touch of glamour, or matte finishes for a subdued elegance. Keep the display fresh by swapping images seasonally.
Color-themed frames turn your gallery into a harmonious art piece that enhances your overall decor. They demonstrate that simplicity and consistency create a high-end look without much fuss. Once you see how unified your wall feels, you’ll be inspired to experiment further with color coordination and themed displays.
14. Incorporating Non-Frame Wall Art for Textural Contrast
Want to add variety and texture to your gallery wall without relying solely on traditional frames? Incorporating non-frame wall art like decals, stencils, or fabric art introduces visual and tactile contrast. It’s a creative way to diversify your display and make your wall stand out.
Recommended Products to replicate this idea
| # | Preview | Product | |
|---|---|---|---|
| 1 |

|
72 Pcs Acrylic Mirror Circle Wall Stickers, Round Self Adhesive Removable Wall Decal Set, 3D Round... | Check Latest Price |
| # | Preview | Product | |
|---|---|---|---|
| 1 |

|
Mkono Macrame Wall Hanging Art Woven Boho Home Décor, Geometric Beautiful Yarn Tapestry Wall Decor... | Check Latest Price |
Picture wall decals with geometric or botanical designs applied directly to the wall, layered with framed photos or prints. Fabric wall hangings or textured panels add softness and dimension, contrasting with smooth framed art. The mix creates a rich tapestry of textures, inviting touch and exploration. The overall vibe feels curated and thoughtfully eclectic.
Use removable decals or stencils for temporary or seasonal updates. Combine textured fabric art with sleek frames for a balanced look. Incorporate wall sculptures, carved wood panels, or woven art for added tactile interest. Adjust the placement—cluster for intimacy or spread for impact—depending on space and style.
Apply decals or stencils directly to the wall using painter’s tape and following manufacturer instructions. Hang fabric or textured panels with adhesive hooks, tension wires, or decorative rods. Layer different textures at varying heights to create depth. Use command strips or hooks for easy removal and rearranging. Mix various mediums for a rich, layered appearance.
Personalize by creating custom decals or fabric art that reflect your style or interests. Add decorative elements like tassels, fringes, or embroidery for extra detail. Use lighting—spotlights or sconces—to highlight textured surfaces. Incorporate small sculptures or wall-mounted ceramics nearby to complement the tactile theme.
Incorporating non-frame art adds richness and depth, making your wall a tactile experience. It encourages you to experiment with different materials and techniques, boosting your confidence as a creative decorator. Once your wall feels textured and inviting, you’ll be inspired to try more mixed-media projects that reflect your personality.
15. Vertical Gallery Wall to Maximize Narrow Spaces
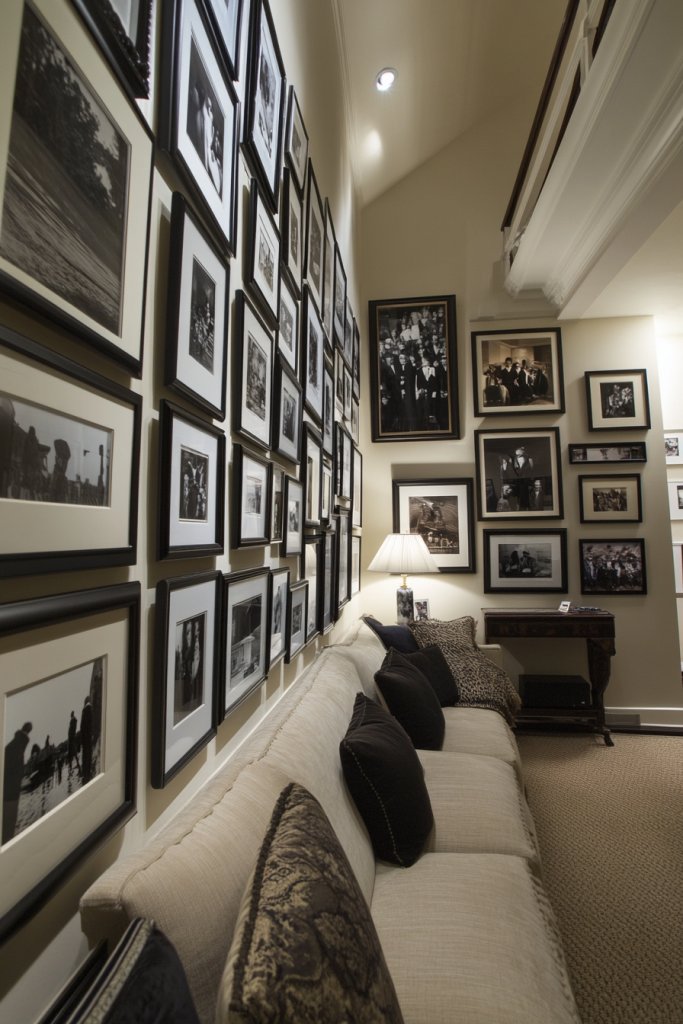
Got a narrow wall that feels like dead space? A vertical gallery wall is the perfect solution to add style and personality without sacrificing square footage. It draws the eye upward, creating the illusion of height and making your room feel taller. If space is limited but you want impact, this idea is a game-changer.
Recommended Products to replicate this idea
| # | Preview | Product | |
|---|---|---|---|
| 1 |

|
ccdcc 5x7 Collage Picture Frames Set of 2, Rustic Wooden Real Glass Vertical Hanging 3 Opening 5 by... | Check Latest Price |
| # | Preview | Product | |
|---|---|---|---|
| 1 |

|
Go Hang It! Pro, All-in-One Picture Hanging Kit - Picture Leveling and Hanging Tool - Hang... | Check Latest Price |
Imagine a tall, slim strip of wall decorated with a series of framed photos, prints, or art pieces stacked vertically. The varied sizes and orientations add visual interest, while the linear arrangement emphasizes height. Incorporate decorative tapestries or narrow shelves for added texture and depth—all aligned in a clean, cohesive flow.
Use a consistent color palette or mix different styles for a more eclectic look. For a sleek vibe, stick to monochrome or metallic finishes; for cozy charm, incorporate warm woods or woven accents. Adjust spacing based on the ceiling height and room style—closer for formal spaces, wider for relaxed vibes. You can also add vertical lighting or sconces for extra luminosity.
Measure your wall height and mark key points for hanging. Use a level to keep everything straight and painter’s tape to plan your layout. Hang frames with appropriate hooks, starting from the bottom or center, then work upward or downward. Play with different orientations—vertical, horizontal, or mixed—for variety. Keep the arrangement balanced but not overly symmetrical.
Personalize with meaningful photos, travel mementos, or artwork that evokes emotion. Incorporate decorative elements like string lights, fabric banners, or small sculptures for added interest. Use frames with different textures or finishes to break monotony. Over time, swap out pieces to reflect your evolving style or season.
Vertical galleries turn narrow spaces into focal points and showcase your creativity. They boost your confidence in making the most of limited areas while creating a striking visual statement. Once you see how height can transform your room, you’ll be inspired to try other space-maximizing decor ideas.
16. Rotatable Gallery for Seasonal or Themed Updates
Tired of your gallery wall feeling static and out of date? A rotatable gallery makes it easy to refresh your space with seasonal or themed updates. It keeps your decor lively and relevant without a total overhaul. If you love changing things up but dislike the hassle, this concept is your new best friend.
Recommended Products to replicate this idea
| # | Preview | Product | |
|---|---|---|---|
| 1 |

|
WATINC Wooden Picture Frame Set - 16 Interchangeable Seasonal Posters for Valentines Day Home Porch... | Check Latest Price |
| # | Preview | Product | |
|---|---|---|---|
| 1 |

|
Command 15 lb Large Picture Hanging Strips 14 Pairs (28 Strips), Damage-Free Hanging Picture... | Check Latest Price |
Visualize a wall with clip frames or ledge shelves where you can easily swap out art, photos, or prints. You might have a collection of favorite images for summer, fall, or special occasions, ready to rotate in. The design allows for quick updates, keeping your decor fresh and engaging all year round. The flexibility means your wall can reflect your mood, seasons, or themes.
Use clip frames, magnetic boards, or picture ledges for easy interchangeability. Choose neutral finishes or playful colors to match your decor mood. Incorporate themed elements—like holiday decor or travel souvenirs—seasonally. Arrange the items in a balanced, yet casual way for a lively, approachable look. Mix in small decorative objects for added interest.
Install ledge shelves or clip frames at a height that’s easy to access for swapping items. Use adjustable supports or hooks to accommodate different sizes and weights. Organize your images or art in advance, then simply change them out as needed. Keep tools and replacement pieces handy for quick updates. Periodically clean and reorganize for a polished appearance.
Create themed collections—family, travel, art—that you can rotate seasonally. Incorporate personal memorabilia, handwritten notes, or small crafts for added charm. Use labels or tags to identify different sets for easy swapping. This approach keeps your wall dynamic, meaningful, and uniquely yours.
A rotatable gallery makes decorating an ongoing, fun project. It encourages creativity and keeps your space feeling fresh and reflective of your current interests. Once you see how easy it is to change your decor, you’ll be inspired to experiment with themes, colors, and styles regularly. Your living room will become a true reflection of your evolving personality.
Conclusion
From sleek modern arrangements to eclectic and boho-inspired displays, these living room gallery wall ideas provide a wealth of inspiration for every style. Don’t hesitate to experiment with different layouts, frames, and artwork to make your space uniquely yours. Take the leap and turn your blank wall into a captivating focal point—your stylish new gallery awaits!
Last update on 2026-02-18 / Affiliate links / Images from Amazon Product Advertising API