
18 Make Colorful DIY Chevron Arrows Ideas for Creative Decor
Looking to add a splash of color and a touch of personality to your decor? Colorful DIY chevron arrows are an incredibly popular choice for those seeking a vibrant, chic, and customizable accent in their space. Their bold pattern and lively hues can brighten up any room, making them a favorite among DIY enthusiasts and home decorators alike.
In this article, you’ll find a variety of creative ideas to make your own colorful chevron arrows that suit any style or occasion. Whether you’re decorating a nursery, sprucing up your living room, or planning a fun craft project, these ideas will inspire you to craft unique and eye-catching pieces that reflect your personality and flair.
1. Vibrant Painted Wooden Chevron Wall Art
Ever wanted a bold statement piece that instantly livens up a dull wall? Sometimes, plain wall space just screams for a splash of personality. Creating eye-catching decor doesn’t have to be complicated or expensive, but it does need to reflect your style. If you’re tired of generic wall art, this DIY chevron idea might just be your new best friend.
Recommended Products to replicate this idea
| # | Preview | Product | |
|---|---|---|---|
| 1 |

|
Jetec 4 Pieces Rustic Wooden Arrow Wall Decor Chevron Aztec Arrow Farmhouse Wall Hanging Art Decor... | Check Latest Price |
| # | Preview | Product | |
|---|---|---|---|
| 1 |

|
KURUI Drywall Anchors and Screws Assortment Kit 270PCS, 135 Plastic Dry Wall Expansion Anchors and... | Check Latest Price |
Imagine large wooden planks arranged horizontally, each painted with vibrant shades in a zigzag pattern. The textured grain of the wood contrasts beautifully with the bright, crisp lines of the chevron. When hung above a sofa or bed, the colors bounce light and create a lively focal point. The combination of natural wood and vivid paint makes a statement that’s both modern and warm.
You can customize the color palette to match your room’s theme—pastels for a soft look or neon shades for a pop of fun. For a rustic vibe, opt for distressed wood and muted tones. Shorten or lengthen the planks based on your wall space, or experiment with different patterns like chevron plus stripes or polka dots for variety. Seasonal color swaps keep the artwork fresh year-round.
Gather wooden planks, preferably reclaimed for a rustic charm, and sand them smooth. Use painter’s tape to outline your chevron pattern, then carefully paint each section with acrylic or exterior paint for durability. Seal the project with a clear coat to protect against wear. Hang the art using sturdy hooks or brackets, ensuring it’s level for maximum impact. If you prefer a less labor-intensive approach, use pre-cut wooden panels or veneer sheets.
Add a personal touch by incorporating metallic accents or glitter into certain sections for extra flair. You can also stencil initials, meaningful symbols, or patterns into the design. To make it more dynamic, layer additional textures like fabric or decorative trim around the edges. Framing the piece in a sleek frame or leaving it raw creates different visual effects.
This DIY wooden chevron wall art is a fantastic way to showcase your creativity and add a vibrant personality to your space. It’s a project that offers a satisfying sense of accomplishment while transforming your wall into a work of art. Ready to turn plain wood into a statement piece? Your walls will thank you for the bold upgrade.
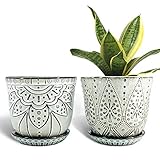
2. Colorful Chevron Painted Flower Pots
Nothing brightens up a room or patio quite like lively planters, but plain terracotta just isn’t cutting it anymore. If you love plants but crave a touch of personality, painting chevron patterns on your pots is an easy way to jazz things up. Plus, it’s a perfect project for those who want a splash of color without a huge commitment.
Recommended Products to replicate this idea
| # | Preview | Product | |
|---|---|---|---|
| 1 |
|
Gepege 6 Inch Beaded Ceramic Planter Set of 2 with Drainage Hole and Saucer for Plants,... | Check Latest Price |
| # | Preview | Product | |
|---|---|---|---|
| 1 |

|
YGAOHF 36 Pcs Empty Paint Pots, Large empty Paint Pots with Lids, Easy Open Acrylic Paint Container... | Check Latest Price |
Picture a row of small ceramic pots, each adorned with bold, colorful chevron stripes in shades of turquoise, coral, and yellow. The glossy paint adds a smooth finish, while the patterns give each pot a playful, modern look. These pots sit on a windowsill or outdoor table, instantly drawing attention with their cheerful vibe. The contrast of the natural soil and vibrant patterns makes your plants pop.
You can tailor the design to suit your style—go for subtle pastel chevrons for a more subdued look or use metallic paints for a luxe feel. Different sizes of pots allow for varied pattern widths, creating visual interest. Seasonal themes work well—think icy blues and silvers for winter or bright florals for summer. Use waterproof or outdoor acrylic paints for durability in the elements.
Start by cleaning your pots thoroughly and lightly sanding them for better paint adhesion. Use painter’s tape to outline the chevron pattern; you can also freehand for a more organic look. Apply multiple thin coats of acrylic paint, allowing each layer to dry completely. Remove the tape carefully to reveal sharp edges. Finish with a clear sealant to protect the paint from water or dirt. You can also add embellishments like glitter or metallic accents for extra flair.
Personalize your pots with hand-painted initials, small motifs, or contrasting patterns inside the chevrons. Mix and match colors based on your decor theme or plant palette. For a more rustic look, use chalk paint for a matte finish that can be easily wiped clean or changed. You could also decoupage textured paper or fabric for a layered pattern effect.
Colorful chevron-painted pots turn ordinary planters into artistic accents that reflect your personality. They’re perfect for brightening up your living space or creating a lively garden display. Plus, this project is budget-friendly and easily customizable. Get creative, and watch your plants become even more charming with their new stylish homes.
3. Bright Chevron Patterned Throw Pillows
Are your plain throw pillows feeling a little uninspired? Adding a splash of color and pattern can instantly refresh your sofa or bed. But buying new decorative pillows can get expensive, and slipcovers might not be exactly what you want. Enter DIY chevron pillow covers—an easy way to elevate your decor without breaking the bank.
Recommended Products to replicate this idea
| # | Preview | Product | |
|---|---|---|---|
| 1 |

|
Topfinel Decorative Throw Pillow Covers Cushion Cases, Set of 4 Soft Velvet Modern Double-Sided... | Check Latest Price |
| # | Preview | Product | |
|---|---|---|---|
| 1 |

|
Utopia Bedding Throw Pillows Insert (Pack of 2, White) - 18 x 18 Inches Bed and Couch Pillows -... | Check Latest Price |
Imagine a set of soft fabric pillow covers in neutral tones, each featuring bold chevron stripes in contrasting bright colors like pink and teal. The fabric is smooth yet durable, perfect for everyday use. When arranged on your couch, they create a vibrant, contemporary look. The zigzag pattern adds visual movement, making your space feel lively and modern.
Switch up the colors to match seasonal themes—warm reds and oranges for fall, cool blues and greys for winter. You can also experiment with different fabrics: linen for a rustic look, velvet for luxury, or cotton for everyday comfort. Use iron-on transfers or fabric paint for simple designs, or sew the chevron pattern directly onto the fabric for a seamless finish. Mix different sizes and shapes for added interest.
Start by cutting your fabric to the desired pillow size, leaving extra for seams. Use stencils or painter’s tape to outline the chevron pattern, then fill in with fabric paint or markers. For a more polished look, sew the pattern directly onto the fabric or attach pre-cut fabric strips with a sewing machine. Insert pillow inserts, then sew the opening shut. Alternatively, use a zipper for easy removal and washing. Iron the final piece to set the paint or adhesive.
Add embellishments like pom-poms, tassels, or metallic thread accents along the chevron edges for extra flair. Customize the color schemes to match your existing decor or personal favorites. You can also embroider initials or small motifs inside the zigzag for a personalized touch. Layering different patterns or textures creates a curated, eclectic look.
Bright chevron pillows are a quick, fun way to inject personality into any room. They’re perfect for DIY enthusiasts looking for a creative project with a big visual payoff. You’ll have custom cushions that reflect your style, and they’re easy to switch out whenever you want a new look. Ready to add a pop of color and pattern to your space?
4. Chevron Tape Wall Borders in Kids’ Rooms
Kids’ rooms often need a fun, playful touch that’s easy to change as they grow. But painting bold stripes or murals can be messy and time-consuming. Luckily, chevron tape offers a quick, clean solution to add a whimsical vibe without the fuss. Want a wall that’s lively but not permanent? This is your answer.
Recommended Products to replicate this idea
| # | Preview | Product | |
|---|---|---|---|
| 1 |

|
Rindion 45 FT Black Wood Grain Wallpaper Border, Removable Waterproof Mirror Frame Border, Self... | Check Latest Price |
| # | Preview | Product | |
|---|---|---|---|
| 1 |

|
RoomMates Bluey Family and Friends Peel and Stick Wall Decals, RMK5457SCS | Check Latest Price |
Picture a soft-colored wall with bright, multi-colored chevron tape arranged in a zigzag pattern along the border. The tape sticks firmly but peels off cleanly, creating crisp, clean lines. The pattern adds a sense of movement and energy, transforming a plain wall into a fun feature. Playful colors like yellow, turquoise, and pink make the room feel cheerful and inviting.
Use different tape widths for varying stripe sizes, or alternate colors for a rainbow effect. Create asymmetrical borders or combine chevron with other patterns like polka dots or stars. For themed rooms, match tape colors with bedding or accessories. Seasonal or holiday-themed tape can be swapped out easily, making it a versatile decorating tool. For a more sophisticated look, stick to metallic or pastel shades.
Start by cleaning the wall surface thoroughly to ensure adhesion. Measure and mark the desired border height, then apply painter’s tape as guides. Carefully cut strips of chevron tape to fit your pattern, pressing firmly to eliminate bubbles or gaps. Use a smoothing tool or credit card to ensure the tape sticks well. Finish by removing the painter’s tape carefully to reveal sharp, clean lines. It’s a no-mess, no-fuss way to decorate.
Add small decals or stickers within the chevron pattern for extra fun. Personalize the border with your child’s name or favorite characters using additional tape or markers. Incorporate glow-in-the-dark tape for a magical effect at night. Layer multiple patterns or add metallic accents for a more sophisticated look. This method leaves your wall ready for quick updates as tastes evolve.
Using chevron tape for wall borders is a simple yet impactful way to refresh a kid’s space. It’s perfect for parents who want a stylish upgrade without the mess or expense of paint. Plus, it’s a project kids can help with, making decorating a fun family activity. Ready to give your child’s room a playful new look?
5. Multi-Colored Chevron Canvas Prints
Looking for a quick way to add personality to your walls without forking over a fortune? Canvas prints are an easy, versatile option, but generic artwork can feel a bit uninspired. Why not create your own vibrant chevron designs that reflect your style? It’s a fun project that results in a custom piece everyone will admire.
Recommended Products to replicate this idea
| # | Preview | Product | |
|---|---|---|---|
| 1 |

|
30 PCS Push Pins Picture Hangers Wall Hooks, Double Headed Thumb Tacks for Wall Hangings, Renter... | Check Latest Price |
| # | Preview | Product | |
|---|---|---|---|
| 1 |

|
KURUI 303Pcs Picture Hanging Kit, Picture Hangers Assorted Kit with Heavy Duty Picture Hanging... | Check Latest Price |
Imagine a blank canvas transformed into a burst of color with bold chevron stripes in shades like coral, teal, and gold. The paint is applied in crisp, clean lines, creating a modern, graphic look. When hung in a gallery wall or as a standalone piece, it instantly draws the eye and sets a lively tone. The textured surface of the canvas enhances the vibrancy and depth of the colors.
Choose a monochrome palette for a sleek, minimalist effect, or go for rainbow hues for maximum impact. You can also experiment with metallic paints or glitter accents for extra sparkle. Different sizes of canvases allow for creative arrangements, from large statement pieces to smaller clusters. Seasonal themes or color swaps make it easy to refresh your decor.
Start with a blank stretched canvas and sketch your chevron pattern lightly with pencil. Use painter’s tape to mask off each section before painting with acrylics or fabric paints. For sharper lines, work with a steady hand and thin brushes. Let each layer dry thoroughly before removing tape. Seal the finished piece with a clear acrylic spray for longevity. Frame it or leave it unframed for a modern look.
Add personal touches by including initials, small symbols, or subtle patterns within the chevron sections. Use metallic or iridescent paints for a shimmering effect. You can also incorporate textured mediums or mixed media elements to add dimension. Mount additional embellishments around the print, like metallic studs or fabric trims, for extra style.
Creating your own chevron canvas print is a rewarding way to showcase your artistic side. It’s a budget-friendly alternative to store-bought art, and it’s highly customizable. Plus, it proves that with a little effort, you can turn simple geometric patterns into sophisticated home decor. Time to get your creative juices flowing!
6. Colorful Chevron Bunting or Garland
Parties, celebrations, or just adding charm to everyday spaces—bunting is always a crowd-pleaser. But store-bought garlands can be pricey and generic. Making your own chevron banners is a simple, fun way to add vibrant flair and personalize your decor. Want a cheerful, handmade touch? This project is for you.
Recommended Products to replicate this idea
| # | Preview | Product | |
|---|---|---|---|
| 1 |

|
dealzEpic - Swallowtail-shaped Multi Color Rustic Burlap Banners with Chevron Pattern for Country... | Check Latest Price |
| # | Preview | Product | |
|---|---|---|---|
| 1 |

|
Outdoor String LED Patio Lights - 100Ft 30M Outside Waterproof Light with Remote Dimmable ST38... | Check Latest Price |
Visualize strips of fabric or paper cut into chevron shapes, each in bright, coordinating colors like yellow, pink, and turquoise. These shapes are strung together with twine or ribbon, creating a lively, zigzag pattern. The banner hangs across a room, patio, or even outdoors, instantly lifting the mood. The movement of the flags and the cheerful colors make any space feel festive.
Use different sizes of chevron shapes for layered depth or alternate fabric textures like burlap, felt, or shiny paper. Customize the color scheme to match seasonal themes or individual tastes. For outdoor events, choose weather-resistant materials. Shorten or lengthen the garland depending on your space, or cluster multiple banners for a more dramatic effect. Adding small embellishments like tassels or pom-poms enhances the fun.
Cut your fabric or paper into symmetrical chevron shapes using templates or rulers. Punch holes at the top of each piece, then thread through twine, string, or ribbon. Secure the ends with knots or clips. Space the shapes evenly for a uniform look or cluster them for a more eclectic vibe. Hang the garland with hooks or push pins, making sure it’s taut and level. For outdoor use, opt for weatherproof twine and durable materials.
Personalize your bunting with initials, small motifs, or themed symbols. Mix patterns and textures to add visual interest. Incorporate LED string lights for nighttime parties or events. You can also add small decorative elements like paper flowers or tassels to the flags. This DIY garland is easily adaptable to any occasion—weddings, birthdays, or just a cheerful kitchen nook.
Colorful chevron bunting is a cheerful, cost-effective way to make any space feel festive and welcoming. It’s a project that combines creativity with practicality, perfect for any skill level. Plus, it’s a great way to show off your DIY skills and make your decor truly one-of-a-kind. Get ready to celebrate in style!
7. Painted Chevron Wooden Crate Storage
Clutter piling up in your craft room or closet? Finding stylish storage options that don’t look like they belong in a warehouse can be a challenge. Wooden crates are versatile, but plain ones can feel a bit dull. Painting chevron patterns on them transforms simple storage into statement pieces that add flair and function.
Recommended Products to replicate this idea
| # | Preview | Product | |
|---|---|---|---|
| 1 |

|
LYDWOO8D Wooden Storage Crates Nested Crates Set of 3 (Large,Medium,Small),Farmhouse Decorative... | Check Latest Price |
| # | Preview | Product | |
|---|---|---|---|
| 1 |

|
Hampton Art 2-Pack White Nested Wooden Crates, Rustic Style, 9 1/3"x 6 1/2"x 5 1/4" & 7"x 5 1/2"x... | Check Latest Price |
Imagine rustic wooden crates painted with bold chevron stripes in navy, white, and coral. The geometric pattern adds a modern twist to the classic crate shape. Stacked or used individually, these crates serve as decorative storage for craft supplies, books, or toys. The contrasting colors and patterns make organization visually appealing and surprisingly chic.
Choose different color combinations to match your decor—monochrome for sleekness or vibrant hues for playfulness. You can also vary the size and shape of the crates for a dynamic display. For a shabby chic look, lightly sand the paint to create a distressed effect. Incorporate metallic or glitter accents for an extra touch of glam. Use labels or decals to identify contents and keep things organized.
Start by cleaning and lightly sanding your crates for better paint adhesion. Use painter’s tape to create chevron patterns or freehand with a steady hand and a brush. Apply several thin coats of acrylic or chalk paint, allowing each to dry thoroughly. Seal with a clear protective topcoat for durability. Arrange the crates in a way that maximizes storage while keeping the design visible and attractive. Add handles or wheels for mobility if needed.
Personalize with stenciled labels, decorative hardware, or custom decals. Incorporate your favorite colors or metallic finishes for a trendy look. You can also add fabric liners or cushioned pads inside for delicate items. For extra uniqueness, paint inside or on the sides with contrasting colors or patterns. These crates become both functional and decorative focal points.
Transforming plain crates into chevron-styled storage is a simple project with high visual impact. It’s a fantastic way to organize while adding personality to your space. Plus, it’s adaptable to any decor style—rustic, modern, boho, or eclectic. With a little paint and patience, your storage solutions can become stunning decor assets.
8. Chevron Patterned Coasters
Are your coffee table and dining area always cluttered with unsightly coasters? Or maybe you’re tired of boring, plain cork or wood coasters that don’t match your decor? Adding colorful chevron patterns to coasters is a quick way to protect surfaces and inject style into your space. Plus, they make great handmade gifts!
Recommended Products to replicate this idea
| # | Preview | Product | |
|---|---|---|---|
| 1 |

|
12 Pcs Cork Coaster for Drink, Absorbent Heat Resistant Reusable Tea or Coffee Coaster, Blank... | Check Latest Price |
| # | Preview | Product | |
|---|---|---|---|
| 1 |

|
SOUJOY 6 Pack Metal Coaster Holders, Coaster Stands for Both Round and Square Coasters, Minimalist... | Check Latest Price |
Visualize a set of round cork coasters painted with bright, zigzag chevron stripes in shades like turquoise, gold, and blush. The glossy finish enhances the bold design and prevents water rings. When stacked or placed on a table, they add a pop of color and personality. The pattern’s sharp lines and vibrant hues turn ordinary coasters into eye-catching accents.
Use different shapes—square, hexagon, or oval—for variety. Play with contrasting color schemes, such as black and white or pastel shades, to suit your decor. Incorporate metallic or glitter paints for a luxe effect. Seal the painted surface with a waterproof varnish for longevity. Personalize with monograms or small motifs for a unique touch.
Start by cleaning and sanding your coaster surfaces for smoothness. Use painter’s tape to outline the chevron pattern or freehand if confident. Apply multiple thin coats of acrylic paint, letting each dry completely. Finish with a waterproof sealant, especially if the coasters will be used frequently. Attach felt pads underneath to prevent scratches on furniture. Store or gift the set for an easy, stylish upgrade.
Add initials, symbols, or small decorative elements inside the chevron pattern with fine brushes or markers. Customize color schemes to match your kitchen or living room. Use metallic or iridescent paints for a shimmering effect. Consider embedding small embellishments like rhinestones or beads for extra texture. These personalized coasters serve as both functional and decorative pieces.
Chevrons on coasters are a simple DIY project that combines practicality with design. They protect your surfaces and add a lively touch to your decor. Plus, they’re perfect for gifting or crafting with kids. With just a few supplies, you can create a set that’s both stylish and functional—proof that small details make a big difference.
9. DIY Chevron Patterned Rugs
Tired of dull, boring rugs that do nothing for your space? Or maybe you want to add a bold statement piece but can’t find exactly what you’re looking for? Painting or stenciling chevron patterns onto a plain rug offers a fun, customizable way to elevate your flooring. It’s a project that’s surprisingly doable and highly impactful.
Recommended Products to replicate this idea
| # | Preview | Product | |
|---|---|---|---|
| 1 |

|
SAFAVIEH Area Rug 8x10 - Adirondack Collection - Large - Ivory & Charcoal, Chevron Pattern,... | Check Latest Price |
| # | Preview | Product | |
|---|---|---|---|
| 1 |
|
GORILLA GRIP Strong Rug Pad Gripper, US Designed, Grips Keep Area Rugs Safe and in Place, Thick,... | Check Latest Price |
Imagine a neutral-toned rug with large, colorful chevron stripes in bright pinks and blues. The crisp pattern creates a modern, graphic effect that anchors your room. The textured surface of the rug adds depth, while the vibrant colors energize the space. Whether placed in an entryway, bedroom, or living room, this DIY rug draws attention and sets a stylish tone.
Experiment with different color combinations—monochrome for a sleek look or multi-color for a playful vibe. Use painter’s tape and fabric paint or outdoor-safe acrylics for durability. For a more subtle effect, opt for pastel hues; for high impact, go bold with neon or metallic shades. Different rug sizes and shapes allow for tailored designs fitting your space. Seasonal color swaps keep your decor fresh.
Start by choosing a rug with a flat, tightly woven surface for an even paint application. Tape off your chevron pattern using painter’s tape or create stencils for precision. Apply fabric or outdoor paint in thin, even coats, letting each dry fully. For extra durability, seal with a clear, waterproof topcoat. You can also add non-slip backing or binding around the edges for safety and a finished look. Regular maintenance involves gentle vacuuming and spot cleaning.
Incorporate metallic or glitter accents into the chevron pattern for a touch of glam. Customize the colors to match seasonal themes or your mood. Use stencils or freehand techniques to create unique variations. Embellish with small decorative elements like tassels or fringe along the edges. This project lets you turn a simple rug into a statement piece uniquely yours.
DIY chevron rugs are a fantastic way to add color and pattern without buying expensive designer pieces. They’re perfect for those who love customizing their space and enjoy hands-on projects. With some paint and patience, you can craft a rug that’s both stylish and personal. Ready to make your floors pop?
10. Colorful Chevron Mason Jar Lanterns
Looking to add some cozy, colorful ambiance to your outdoor gatherings or indoor nooks? Mason jars are already charming, but wrapping them with chevron patterns takes their appeal to the next level. These lanterns are simple, inexpensive, and customizable, perfect for creating a warm glow wherever you want it.
Recommended Products to replicate this idea
| # | Preview | Product | |
|---|---|---|---|
| 1 |

|
GIGALUMI Hanging Mason Jar Solar Lights, 6 Pack 30 Led Hanging Solar Lanterns Outdoor Waterproof,... | Check Latest Price |
| # | Preview | Product | |
|---|---|---|---|
| 1 |

|
Brightown 12 Pack LED Fairy Lights Battery Operated String Lights - 7ft 20LED Waterproof Silver Wire... | Check Latest Price |
Picture a set of mason jars painted with vibrant chevron stripes in shades like coral, mint, and gold. The jars are wrapped with washi tape or painted directly with acrylics, then topped with candles or fairy lights. When lit, they cast colorful, patterned shadows across your patio or table. Their cheerful, handcrafted look makes any space feel inviting and festive.
Use different sizes of jars for layered lighting effects or mix colors for a rainbow-inspired look. For outdoor use, opt for weatherproof paints or sealants. Wrap the jars with patterned tapes or paint in metallics for a luxe touch. You can also add decorative elements like beads, twine, or small charms to personalize each lantern. Incorporate battery-operated candles for safety and convenience.
Clean the mason jars thoroughly and tape off sections to create chevron patterns, or paint freehand for a more organic look. Use acrylic or outdoor-safe paint, applying in thin layers and letting each dry fully. Seal with a clear waterproof topcoat for longevity. Insert candles, LED lights, or fairy lights inside, then secure the lids or leave open. Arrange the lanterns on tables, hang them from trees, or line walkways for a charming effect.
Personalize with initials, small motifs, or color accents inside the chevron pattern. Use metallic or glow-in-the-dark paints for a special nighttime glow. Attach decorative elements like ribbons or charms for extra flair. For a more rustic look, add twine or burlap around the neck of the jar. These lanterns are perfect for parties, weddings, or cozy nights at home.
Chevron mason jar lanterns are a simple yet impactful DIY project that adds warmth and character to any setting. They’re a cost-effective way to enhance your decor with a personal touch. Plus, they’re portable and reusable, making them a practical addition to your seasonal decorating arsenal. Light up your space with handmade charm!
11. Painted Chevron Planter Pots
Plain, boring planters can dull even the most vibrant plant displays. If you want to turn your indoor or outdoor plant arrangements into eye-catching features, painting chevron patterns on your pots is a fantastic solution. It’s an easy hack to add color and personality without buying new containers.
Recommended Products to replicate this idea
| # | Preview | Product | |
|---|---|---|---|
| 1 |

|
MEXTEQUIL - Talavera Mexican Pottery Planters with Saucer 4" Rancherito - Cactus - Sun Pot Hand... | Check Latest Price |
| # | Preview | Product | |
|---|---|---|---|
| 1 |

|
Sunnydaze 10" Chevron Pattern Ceramic Plant Pot - Features 1 Drainage Hole - 3.2 Gal Soil Capacity -... | Check Latest Price |
Envision a collection of terracotta pots painted with bold chevron stripes in bright shades like yellow and navy. The pattern enhances the round shape of the pots, making them stand out on shelves or patio tables. The glossy or matte finish adds a polished look, while the patterns give a modern edge. These painted pots become focal points, elevating your plant game.
Match the chevron colors to your garden’s theme or go for contrasting tones for a striking effect. Use waterproof or outdoor paints for durability outside, or chalk paint for a matte, vintage feel indoors. Vary the size and shape of the pots for visual interest. You can also add decorative elements like metallic accents or stenciled initials for extra personalization.
Clean your pots thoroughly, removing dirt and loose particles. Use painter’s tape to mark the chevron pattern or freehand with a steady hand and small brush. Apply multiple thin coats of paint, allowing each to dry completely. Seal with a clear waterproof topcoat if used outdoors. Place your plants inside once dry, and arrange them in your chosen space.
Layer additional designs like small motifs, metallic accents, or textured paint for unique effects. Personalize with hand-painted labels or monograms. Experiment with different color combinations to match seasonal themes or decor updates. You can also incorporate natural elements like stones or shells around the base for an earthy touch.
Painting chevron patterns on planters transforms simple pots into statement pieces that showcase your style. It’s a simple, budget-friendly project that breathes new life into your greenery. Plus, it’s a great way to add a pop of color to any garden or home decor. Your plants will look even better in their new stylish homes.
12. Chevron Patterned Wall Hooks
Cluttered entryways or messy mudrooms can make organization feel like a losing battle. Functional hooks are essential, but they don’t have to be boring or ugly. Adding chevron patterns to wall hooks turns everyday functionality into a stylish feature. Want a practical upgrade that also adds personality? This idea is perfect.
Recommended Products to replicate this idea
| # | Preview | Product | |
|---|---|---|---|
| 1 |

|
Optish Coat Rack Wall Mount, 16.5 Inches Wood Coat Hooks Wall Mount, Wall Coat Rack with 5 Hooks,... | Check Latest Price |
| # | Preview | Product | |
|---|---|---|---|
| 1 |

|
CBWLWJ 10 Pack Coat Hooks Wall Hooks for Hanging, Heavy Duty Double Prong Metal Hook Wall Mounted... | Check Latest Price |
Think of wooden or metal hooks painted with vibrant chevron stripes in bold colors, arranged in a row on a wall. The zigzag pattern adds visual interest and guides the eye along the wall. These hooks hold coats, bags, or scarves while serving as decorative accents. Their lively pattern contrasts with neutral walls, creating a fun, modern vibe.
Customize the color scheme to match your decor—bright and cheerful or muted and sophisticated. Use different hook shapes and sizes for a varied look. Incorporate metallic or neon paints for a contemporary feel. For a rustic look, opt for distressed wood with painted chevrons or stenciled designs. Group multiple hooks for maximum impact.
Start by cleaning the hooks thoroughly and lightly sanding if needed. Use painter’s tape to outline the chevron pattern, then paint with acrylic or spray paint, applying thin, even coats. Remove the tape carefully once paint is dry to ensure crisp lines. Mount the hooks securely on the wall with appropriate hardware. For a cohesive look, paint all hooks the same way or create a pattern mix.
Add small decorative elements like metallic studs or painted accents to the hooks for extra detail. Personalize with initials or symbols using small stencils or brushes. Incorporate hooks with different finishes—matte, gloss, or metallic—to create visual layers. You can also add a backing panel painted with chevron patterns for a more polished display.
Chevron wall hooks combine practicality with style, making organization feel less like a chore. They’re perfect for entryways, bathrooms, or bedrooms. With a simple paint job, you can turn everyday hardware into a statement piece. Get creative—your walls will thank you!
13. Bright Chevron Patterned Bookends
Bookshelves often look cluttered or dull, especially when they lack personality. Instead of buying expensive designer bookends, why not craft your own with a bold chevron pattern? They’re a simple, stylish solution that adds a splash of color and keeps your favorite reads organized.
Recommended Products to replicate this idea
| # | Preview | Product | |
|---|---|---|---|
| 1 |

|
Book Ends,1 Pair Bookends Wood Book Ends Universal Economy Bookend | Check Latest Price |
| # | Preview | Product | |
|---|---|---|---|
| 1 |

|
Acrylic Bookends 4 Pcs, Clear Book Ends for Shelves, Transparent Bookend Organizer, Book Holder... | Check Latest Price |
Imagine painted wooden or acrylic bookends with zigzag stripes in contrasting shades like black and white or bright orange and teal. The pattern creates a striking visual anchor on your shelf, drawing the eye and adding a modern touch. The sturdy design supports your books while serving as a decorative element.
Choose different sizes and shapes—L-shaped, rectangular, or custom-cut forms—to suit your space. Use metallic or matte paints for different finishes. Incorporate additional decorative motifs or initials for personalization. Match the colors to your room’s theme or opt for a monochrome look for versatility. These custom pieces can complement a variety of decor styles.
Start with blank wooden blocks or acrylic sheets, then sketch your chevron pattern with a pencil. Use painter’s tape or stencils to outline the design, then fill in with your chosen paints. Apply multiple thin coats, allowing each to dry thoroughly. Seal with a clear protective finish to prevent chipping. Place your bookends on the shelf, balancing books for stability.
Personalize with initials, small symbols, or contrasting accents to match your taste. Add metallic or glow-in-the-dark paints for a unique effect. Use textured paints to add dimension or incorporate small embellishments like rhinestones or beads. You can also paint the interior or underside for hidden surprises.
Custom chevron bookends are a practical way to showcase your creativity while keeping your books tidy. They’re a budget-friendly project that makes a big impact. Plus, they add a modern, personalized touch that elevates your entire shelf. Ready to get crafty?
14. Colorful Chevron Fabric Wall Hangings
Tired of plain, flat wall decor? Want something with texture and movement that also shows off your personality? A fabric wall hanging with a chevron pattern is a cozy, artistic way to dress up your space. It’s a handmade touch that adds warmth and visual interest.
Recommended Products to replicate this idea
| # | Preview | Product | |
|---|---|---|---|
| 1 |
|
Jetec 4 Pieces Rustic Wooden Arrow Wall Decor Chevron Aztec Arrow Farmhouse Wall Hanging Art Decor... | Check Latest Price |
| # | Preview | Product | |
|---|---|---|---|
| 1 |

|
Wood Curtain Rods for Windows: 1 Inch Diameter Heavy Duty Adjustable Curtain Rod 48" to 84", Wood... | Check Latest Price |
Picture a wooden dowel hanging on a wall, with fabric strips sewn into a chevron pattern in bright colors like peach, mint, and lavender. The layered textures create depth, while the zigzag pattern adds a playful vibe. When hung over a bed or in a reading nook, it softens the space and invites a sense of comfort and style. The fabric’s movement and vibrant colors make the wall come alive.
Use different fabrics—quilted, woven, or embroidered—for varied textures. Change the color palette to match seasons or moods, from warm earth tones to cool pastel shades. Incorporate decorative trims, tassels, or fringe for additional flair. Vary the length and width of the fabric strips for a layered, boho vibe. Attach small embellishments or patches for extra personality.
Cut fabric into strips or panels, then sew or glue them into a chevron pattern. Attach the fabric to a sturdy dowel or wooden rod using hot glue or sewing stitches. Ensure the fabric is taut and evenly spaced for a neat finish. Hang with a decorative cord or ribbon, making sure it’s securely attached. Adjust the length for the desired visual impact.
Add embroidered initials, small fabric patches, or painted accents for a personalized touch. Incorporate beads or metallic threads for shimmer. Mix different patterns or textures to create a dynamic piece. Change the fabric colors periodically to match your decor updates or seasons. This wall hanging becomes a statement of your creativity.
Fabric wall hangings with chevron patterns bring warmth and texture to any room. They’re a simple, customizable project that enhances your space with a handcrafted feel. Plus, they’re easy to update or move around, making your decor flexible and fun. Your walls will tell a colorful, cozy story.
15. DIY Chevron Patterned Clocks
Looking for a functional piece that also acts as eye candy? Clocks are a necessity, but they often look plain and uninspired. Creating a chevron-patterned clock is a fun way to add personality to your space while keeping track of time in style. It’s an easy project with a big visual impact.
Recommended Products to replicate this idea
| # | Preview | Product | |
|---|---|---|---|
| 1 |

|
WallarGe 14.5'' Large Digital Wall Clock Battery Operated with Jumbo Numbers, Temperature and Date -... | Check Latest Price |
| # | Preview | Product | |
|---|---|---|---|
| 1 |

|
Mr. Pen- Double Headed Picture Hanging Nails, 50 Pack, Black, Push Pins for Wall | Check Latest Price |
Imagine a round clock face painted with bold chevron stripes in striking colors like red and white or navy and gold. The pattern radiates outward, drawing focus to the center where the clock hands sit. The vibrant design energizes a kitchen or workspace, turning a standard timepiece into a statement decor piece. The contrast between the pattern and the clock’s functional elements makes it both practical and artistic.
Choose different color schemes to match your room—soft pastels for a relaxed vibe or metallics for a luxe touch. Use painter’s tape to create sharp chevron lines or decals for precision. Incorporate different textures or layered paints for added depth. You can also customize the clock hands or add decorative embellishments around the face. Mix and match sizes for a gallery wall of unique clocks.
Start with a plain clock face or a blank round surface. Sketch your chevron pattern lightly with pencil or use stencils. Use painter’s tape to outline each stripe, then fill with acrylic or spray paint. Remove the tape carefully to reveal crisp lines. Attach or paint the clock mechanism and hands, ensuring they move freely. For a polished look, seal the entire surface with a clear coat. Hang your new custom clock where it can be admired daily.
Add decorative touches like metallic leafing or glitter inside the chevrons. Personalize with initials or motifs in the center. Use contrasting colors or textures for a more dynamic appearance. Incorporate LED or glow-in-the-dark paint for a fun nighttime effect. This project allows you to combine practicality with creative expression easily.
DIY chevron clocks are a fantastic way to showcase your style and add a personalized touch to your home. They’re functional, fashionable, and budget-friendly. Plus, creating one boosts your craft confidence and results in a unique decor piece that’s truly yours. Ready to keep time in style?
16. Colorful Chevron Tape Desk Organizer
Cluttered desks make it hard to focus and get things done. Boring storage containers don’t help either. Want a stylish way to organize your stationery that also brightens your workspace? Using chevron-patterned washi or painter’s tape transforms plain jars, boxes, and trays into vibrant organizers. It’s a quick, customizable fix that’s both fun and functional.
Recommended Products to replicate this idea
| # | Preview | Product | |
|---|---|---|---|
| 1 |

|
Anchor Hocking Heritage Hill 1 Gallon Glass Jar with Lid, Set of 2 | Check Latest Price |
| # | Preview | Product | |
|---|---|---|---|
| 1 |
|
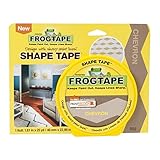
FROGTAPE 282549 Shape Tape Painting Tape, Yellow, Chevron Design, 1.81-Inch x 25-Yard Roll | Check Latest Price |
Picture clear glass jars wrapped in bright chevron tape, arranged neatly on your desk holding pens, paper clips, or markers. The zigzag pattern adds energy and color, making organization look attractive rather than a chore. The tape’s glossy finish catches the light, giving your workspace a fresh, lively vibe. It’s a simple way to turn everyday items into decor statements.
Use different tape widths or colors for layered patterns, or combine with other decorative tapes like metallic or glitter varieties. Decorate boxes, trays, or even binders with matching patterns for a cohesive look. Change the tape style seasonally or for special occasions. For a more polished look, seal the tape with a clear adhesive spray to prevent peeling.
Clean your containers thoroughly to ensure good adhesion. Measure and cut strips of chevron tape to fit each item, then carefully apply, smoothing out bubbles or wrinkles. Overlap edges for a seamless look or leave a border for contrast. For additional durability, spray with a clear sealant once the tape is applied. Fill with your supplies, and enjoy a clutter-free, colorful workspace.
Add small labels or initials with permanent markers for easy identification. Mix different tape patterns or add decorative stickers to customize each container. Use metallic or holographic tapes for extra shine. You can also layer tapes to create a multi-texture effect that’s visually appealing. Your desk will be both organized and stylish.
A chevron tape desk organizer proves that small touches can make a big difference. It’s an affordable, creative project that improves your workspace aesthetics and efficiency. Plus, it’s easy to update or change whenever your style evolves. Get ready to work in a space that’s as inspiring as your ideas.
17. Chevrons on Furniture Edges
Tired of your furniture looking tired or outdated? Simple updates like painting the edges can give your pieces a fresh, modern vibe. Want to add a trendy touch that’s easy to do and highly effective? Applying chevron patterns to furniture edges is the perfect way to elevate your decor without a full makeover.
Recommended Products to replicate this idea
| # | Preview | Product | |
|---|---|---|---|
| 1 |

|
2-Pack USMC Rank Sergeant Stripes Chevron Shaped Sticker (Marine Corps SSI Logo Vinyl Decal (2.5... | Check Latest Price |
| # | Preview | Product | |
|---|---|---|---|
| 1 |

|
ZYJT Melamine Edge Banding, 3/4 inch x 50ft roll of Veneer White Edge Banding Pre-glued, Real Wood... | Check Latest Price |
Imagine a dresser with its top and side edges painted with bright, contrasting chevron stripes in shades like black and gold. The pattern adds a graphic, contemporary twist that instantly updates the piece. The sharp zigzag lines draw attention to the furniture’s shape and craftsmanship. When placed in a room, it becomes an eye-catching focal point that balances modern flair with a touch of playful design.
Choose bold or subtle color combinations depending on your decor style—monochrome for minimalism or vibrant hues for fun. Use painter’s tape to create clean chevron lines along furniture edges or drawers. For a distressed look, lightly sand over the painted pattern for a vintage feel. Incorporate metallic or matte finishes for different effects. This technique works well on dressers, side tables, or headboards.
Prepare your furniture by cleaning and lightly sanding edges to ensure paint adhesion. Use painter’s tape to outline the chevron pattern, pressing firmly to avoid bleed-under. Apply multiple thin coats of paint, allowing each to dry thoroughly. Remove tape carefully to reveal crisp lines. Seal with a clear topcoat for durability, especially in high-traffic areas. Reassemble or place your furniture back in the room to enjoy the updated look.
Add metallic accents or contrasting colors for a more dramatic effect. Customize the pattern with small motifs or initials for a personal touch. Incorporate textured paints or glitter for extra dimension. Change the color palette seasonally or whenever you want a new vibe. This simple update can dramatically transform the look and feel of your furniture.
Chevrons on furniture edges are a quick, stylish upgrade that makes a big impact. They’re perfect for DIY novices and seasoned decorators alike. This technique allows you to express your personality and modernize your space easily. Your furniture becomes a statement piece that reflects your creative flair.
18. Painted Chevron Curtain Tiebacks
Plain fabric curtain tiebacks can be dull and uninspired, leaving your window treatments feeling flat. Want a simple way to add a splash of style that ties your decor together? Painting chevron patterns on your tiebacks is an easy project that adds personality and color to your window area.
Recommended Products to replicate this idea
| # | Preview | Product | |
|---|---|---|---|
| 1 |

|
KLOGTSIND Magnetic Wood Bead Curtain Tiebacks, Curtain Holders for Boho Bedroom, Baby Nursery,... | Check Latest Price |
| # | Preview | Product | |
|---|---|---|---|
| 1 |

|
allydrew Striped Japanese Washi Masking Tape - Black Chevron | Check Latest Price |
Picture fabric tiebacks wrapped with chevron-patterned tape or painted with bold stripes in colors like coral and mint. When tied back, they frame your curtains with a lively, geometric design. The pattern adds a modern touch that complements your decor, making even functional elements look intentional and stylish. The vibrant colors and crisp lines create a cheerful, cohesive look.
Choose different fabrics—linen, burlap, or cotton—for varied textures. Use painter’s tape and fabric paint for quick patterns, or sew chevron fabric onto the tiebacks for a more polished look. Change the color scheme based on seasons or mood—soft pastels for spring, deep jewel tones for winter. Add decorative knots, tassels, or metallic accents for extra flair.
Measure your curtain rods and cut fabric or tape to size. Use painter’s tape to mark the chevron pattern, then paint with fabric or acrylic paints, applying thin, even layers. Let dry completely before removing tape. Sew or glue the patterned fabric onto the tiebacks if desired. Attach the tiebacks to your curtains using hooks or loops, ensuring they hold securely. Adjust for a neat, balanced appearance.
Personalize with monograms, small motifs, or metallic details. Incorporate contrasting colors or textures for visual interest. Use decorative trims or tassels for a luxe feel. Change the pattern or colors seasonally to keep your decor fresh. These customized tiebacks add a thoughtful, handmade touch that elevates your window treatments.
Chevron curtain tiebacks are a simple way to add a modern, personalized touch to your windows. They’re easy to make and instantly elevate your decor style. Plus, they’re practical and easy to change out, making decorating fun and flexible. Your windows will look polished and intentional—without a big investment.
Conclusion
From playful wall art to charming decor accents, the colorful DIY chevron arrows featured in this article showcase a wide range of creative possibilities. Don’t hesitate to try these ideas in your own home — they’re easy, fun, and customizable to your taste. Embrace your creativity and transform your space with these vibrant, handmade touches that will surely impress and inspire!