
17 Mineral Spirits on Wood Ideas for Smooth Finishing
Imagine transforming your wooden surfaces into stunning works of art or sleek, polished finishes with just a simple step—using mineral spirits! These versatile solvents are beloved by DIY enthusiasts and professional woodworkers alike for their ability to clean, prep, and refine wood surfaces effortlessly.
In this article, you’ll uncover a variety of creative ideas and practical tips on how to leverage mineral spirits to achieve smooth, flawless finishes on your wood projects. Whether you’re aiming for a rustic charm or a modern sleek look, these ideas will inspire you to experiment and elevate your woodworking game to the next level.
1. Achieving a Flawless Antique Look with Mineral Spirits and Stain
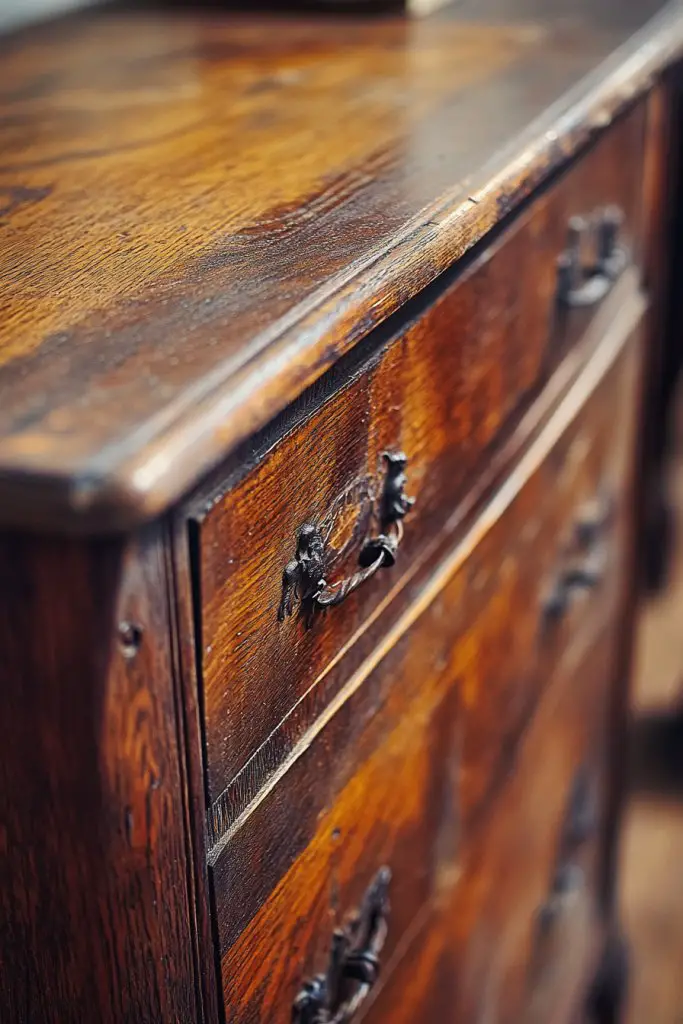
Ever wanted to give your old wooden furniture a new life without losing its charm? Achieving a flawless antique look can seem tricky, especially if you’re unsure how to blend stains and finishes. Maybe you’ve tried sanding and re-staining, but the results fell flat or looked too modern. The good news is that mineral spirits can be your secret weapon for that perfect vintage vibe.
Recommended Products to replicate this idea
| # | Preview | Product | |
|---|---|---|---|
| 1 |
|
Varathane Premium Fast Dry Wood Stain, Half Pint, Dark Walnut | Check Latest Price |
| # | Preview | Product | |
|---|---|---|---|
| 1 |

|
Klean Strip Odorless Mineral Spirits 1 Quart | Check Latest Price |
Imagine a weathered oak table with rich, deep hues that seem to tell a story. The wood’s natural grain is enhanced with a subtle, smoky tint from a light stain, softened further by the gentle wipe of mineral spirits. You see how the finish creates a matte, aged appearance, almost like it’s been around for decades. The contrast of darker and lighter areas adds depth, making the piece feel authentic and well-loved.
This technique works beautifully on various wood types, from pine to mahogany, allowing customization based on your style. For a more distressed look, apply a darker stain first, then lighten specific areas with mineral spirits. Seasons influence the approach too—warmer tones suit cozy, rustic interiors, while cooler hues fit modern vintage themes. Adjust the stain intensity and spirits’ wiping technique for different effects.
Start by choosing a high-quality stain that complements your wood. Apply it evenly, then let it sit for a few minutes. Use mineral spirits on a clean cloth to wipe away excess stain, controlling how much color remains. For an aged look, focus on corners, edges, and areas that naturally wear. Keep a spray bottle handy for light misting to blend streaks and soften transitions. Always test on scrap wood before starting your project to avoid surprises.
Personalize your antique look by layering different stains or adding a touch of pigment before wiping. Incorporate decorative elements like carved details or inlays to enhance the vintage feel. Finish with a buffing cloth to bring out the wood’s natural luster or leave it matte for an authentic aged appearance. Experimenting with varying spirits’ application can give each piece a unique character.
Mastering this technique unlocks endless creative potential, making your furniture stand out with personality. Whether you’re restoring family heirlooms or creating a vintage-inspired piece from scratch, mineral spirits are a versatile tool. Think of each project as a chance to craft history and character into your woodwork. Go ahead, embrace the imperfectly perfect antique aesthetic—you’ll love the results.
2. Creating a Satin Finish for Modern Dining Tables

Tired of dull, matte tables that lack personality? A satin finish offers a sleek, modern look that’s both attractive and practical. But achieving that smooth, even sheen can be intimidating, especially if you’re worried about brush marks or uneven surfaces. Luckily, mineral spirits can help you get that flawless satin sheen without the fuss.
Recommended Products to replicate this idea
| # | Preview | Product | |
|---|---|---|---|
| 1 |

|
Furniture Clinic Wood Varnish | Satin | Polyurethane Waterproof Coating | Water Based Clear Coat |... | Check Latest Price |
| # | Preview | Product | |
|---|---|---|---|
| 1 |

|
63" Large Imitation Marble Dining Table for 4-6 People(Patent Pending),Island Table with LED Lights,... | Check Latest Price |
Picture a dining table with a subtle glow, almost as if it’s softly illuminated from within. The surface feels silky to the touch, with a gentle reflective quality that catches the light just right. The wood’s natural grain is visible but softened, giving it a polished yet understated elegance. This finish makes the table appear both sophisticated and inviting, perfect for everyday use or special dinners.
You can tailor the satin finish to suit different wood types and interior styles. For light woods like maple or ash, a thinner coat enhances their brightness, while darker woods like walnut benefit from a slightly richer hue. Seasonal changes—such as adding warm tones for winter or cooler shades for summer—can be achieved by adjusting the stain before sealing. The technique works well on various furniture sizes, from small breakfast nooks to large banquet tables.
Begin by sanding the surface smoothly, then apply a compatible stain if desired. Use mineral spirits to wipe the surface, removing dust and prepping for finishing. Mix a small amount of finish—be it polyurethane, lacquer, or oil-based—then apply with a soft brush or foam pad in thin, even coats. Between coats, lightly sand with fine-grit paper to eliminate brush marks. Finish by wiping with mineral spirits to smooth out the final layer, creating that satin sheen. Patience and even strokes are key to a professional look.
Add a personal touch by experimenting with different sheen levels—matte, satin, or semi-gloss—to match your aesthetic. Incorporate decorative edge detailing or subtle inlays for added sophistication. Consider applying a tinted topcoat for a hint of color that still preserves the wood’s natural beauty. Regular cleaning with gentle products will keep your satin finish looking fresh for years.
A satin-finished table elevates your dining space, making everyday meals feel special. It’s a simple upgrade that combines style with durability—perfect for busy households. Once you master this technique, you’ll find it easy to refresh other furniture pieces too. Embrace the sleek, modern look—you’ll be surprised how much a little mineral spirit magic can do.
3. Using Mineral Spirits to Blend Multiple Wood Tones Seamlessly
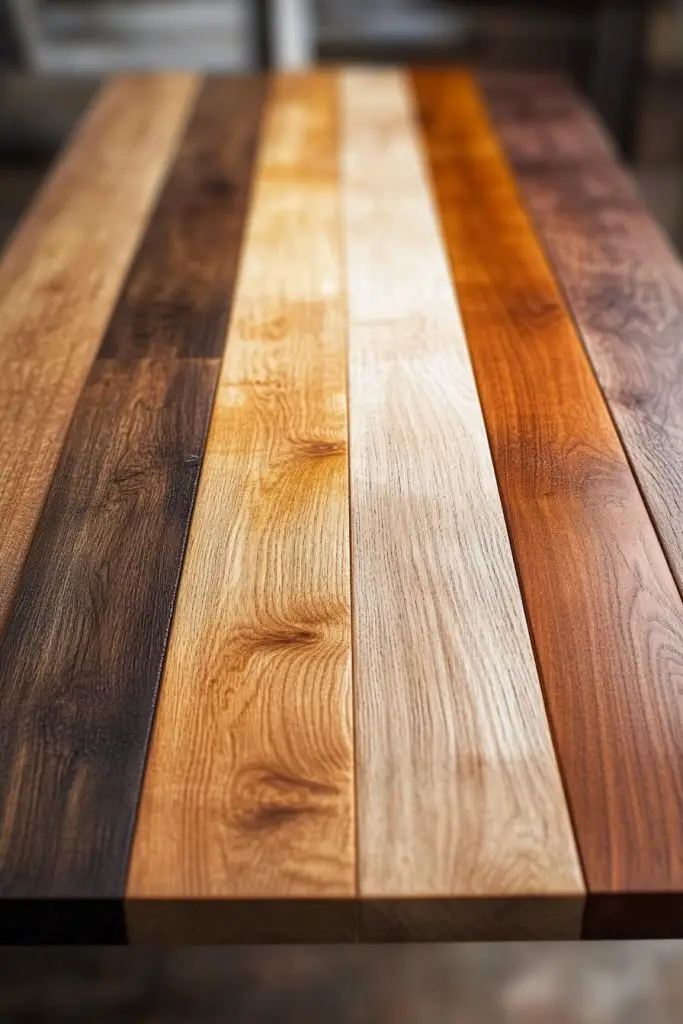
Ever mixed different wood pieces and ended up with a discordant look? Blending multiple wood tones into a cohesive piece is a challenge many DIYers face. It’s frustrating when your project looks patchy or mismatched, making the entire effort seem wasted. Mineral spirits can be your secret weapon for achieving a smooth, unified finish.
Recommended Products to replicate this idea
| # | Preview | Product | |
|---|---|---|---|
| 1 |
|
Klean Strip Odorless Mineral Spirits 1 Quart | Check Latest Price |
| # | Preview | Product | |
|---|---|---|---|
| 1 |
|
Minwax 233334444 Polycrylic Protective Wood Finish, Clear Satin, ½ Pint | Check Latest Price |
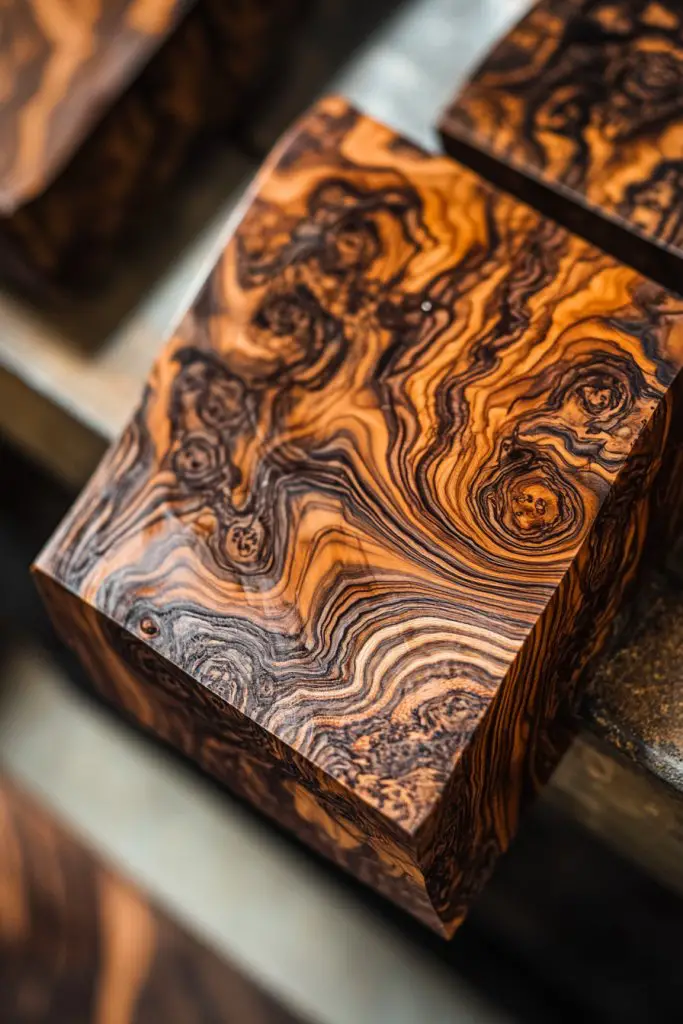
Imagine a coffee table crafted from reclaimed wood with varying shades of honey, chestnut, and dark walnut. With a gentle wipe of mineral spirits, these different tones melt into a harmonious palette. The surface appears intentionally layered yet seamlessly blended, with no harsh lines or abrupt color changes. The result is a beautiful, rustic yet polished piece that looks like a natural sculpture.
This method works well on mixed woods, veneers, or even distressed finishes. For a more pronounced contrast, apply stains selectively, then soften edges with mineral spirits. You can also create a gradient effect by blending from dark to light across the surface. Seasonal variations—like adding warm amber hues in winter or cooler shades in summer—are easily achieved by adjusting stain and spirits’ application. Experiment on scrap before tackling your main project.
Start with a clean, sanded surface. Apply different stains to designated areas, allowing them to penetrate for a few minutes. Use mineral spirits on a rag to gently blend the boundaries, moving back and forth until the transition is smooth. For more subtle blending, mist spirits lightly over the entire piece. Finish with a clear coat to lock in the blended tones. Patience and careful manipulation are essential for a seamless look.
Personalize by adding subtle color accents or highlights to certain areas, then blending for a layered effect. Incorporate textured or patterned inlays to add visual interest. You can also vary the sheen—matte for a rustic feel or semi-gloss for a more refined look. Regular touch-ups with spirits help maintain the seamless transition over time.
Blending multiple wood tones with mineral spirits elevates your craftsmanship, giving a rich, sophisticated appearance. It’s a technique that celebrates natural variation and adds character to your projects. With practice, you’ll be able to create stunning, professional-looking furniture that truly stands out. Dive in and enjoy the process—you’re capable of mastering this art.
4. Enhancing Natural Grain with a Clear, Smooth Sealant
Want to showcase the natural beauty of your wood without overwhelming it with color or gloss? Enhancing the grain while keeping a clean, smooth finish is a delicate balance many strive for. Excessive coatings can hide the intricate patterns, but a poorly applied sealant can result in a dull or uneven surface. Mineral spirits can help you achieve that perfect clear, smooth seal.
Recommended Products to replicate this idea
| # | Preview | Product | |
|---|---|---|---|
| 1 |
|
Minwax 233334444 Polycrylic Protective Wood Finish, Clear Satin, ½ Pint | Check Latest Price |
| # | Preview | Product | |
|---|---|---|---|
| 1 |

|
Minwax Fast Drying Polyurethane Protective Wood Finish, Warm Satin, 1 Quart | Check Latest Price |
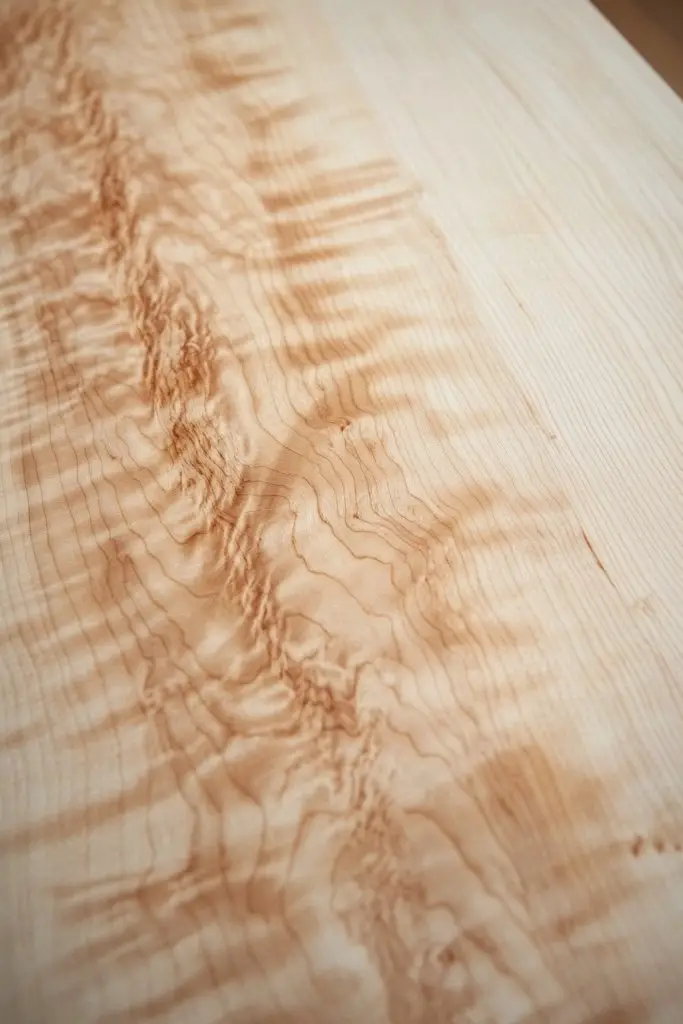
Visualize a handcrafted side table where the fine lines of the oak grain are clearly visible, shimmering softly under a matte or satin finish. The surface feels silky and smooth, inviting touch. The natural patterns—swirls, knots, and lines—are accentuated, adding depth and personality. The transparent sealant preserves the wood’s organic charm while providing protection against daily wear.
Different woods respond uniquely to sealants—maple’s subtle grain benefits from light coats, while more textured woods like cherry or walnut gain richness. Seasonal changes influence your choice—use matte or satin finishes in summer for a natural look, and switch to semi-gloss for winter warmth. For outdoor pieces, select sealants with UV protection; indoors, focus on enhancing the grain’s clarity. Layering is key for depth.
Begin by sanding the wood smoothly, removing any dust or old finish. Wipe down with mineral spirits to clean the surface and open the grain. Apply a thin, even coat of clear sealant using a soft brush or cloth, working with the grain. Wait for it to dry, then lightly sand with fine grit to smooth out imperfections. Repeat as needed for clarity and depth. Finish with a final wipe of spirits to remove excess and enhance the natural appearance.
Personalize by adding a slight tint to the sealant for subtle color shifts—warm amber for rich warmth or cool blue for a modern touch. Incorporate textured finishes like brushing or wiping for varied grain effects. Use decorative edge profiles or carved details to frame the natural grain showcase. Consistent maintenance with gentle cleaning preserves the clarity and beauty.
Highlighting the wood’s grain elevates your craftsmanship and creates timeless pieces. It’s a simple yet elegant way to add value and character, whether for furniture, art, or accents. Mastering this technique ensures your projects stand the test of time and trends. Enjoy the satisfaction of revealing the natural artistry of your woodwork—you’ve got this.
5. Prepping Old Furniture for a Smooth Refinish Using Mineral Spirits
Got tired, scratched, or sticky old furniture that needs a fresh start? Prepping is the most overlooked step in refinishing, yet it’s crucial for a smooth, professional look. Sanding alone often isn’t enough to remove grime, old finishes, or stubborn residues. Mineral spirits can help you clean and prepare surfaces, ensuring your new finish adheres beautifully.
Recommended Products to replicate this idea
| # | Preview | Product | |
|---|---|---|---|
| 1 |
|
Klean Strip Odorless Mineral Spirits 1 Quart | Check Latest Price |
| # | Preview | Product | |
|---|---|---|---|
| 1 |

|
Romeda 8-Pack Sanding Sponge, Four Grits Per Pack 60/80/120/220, Washable and Reusable Handmade... | Check Latest Price |
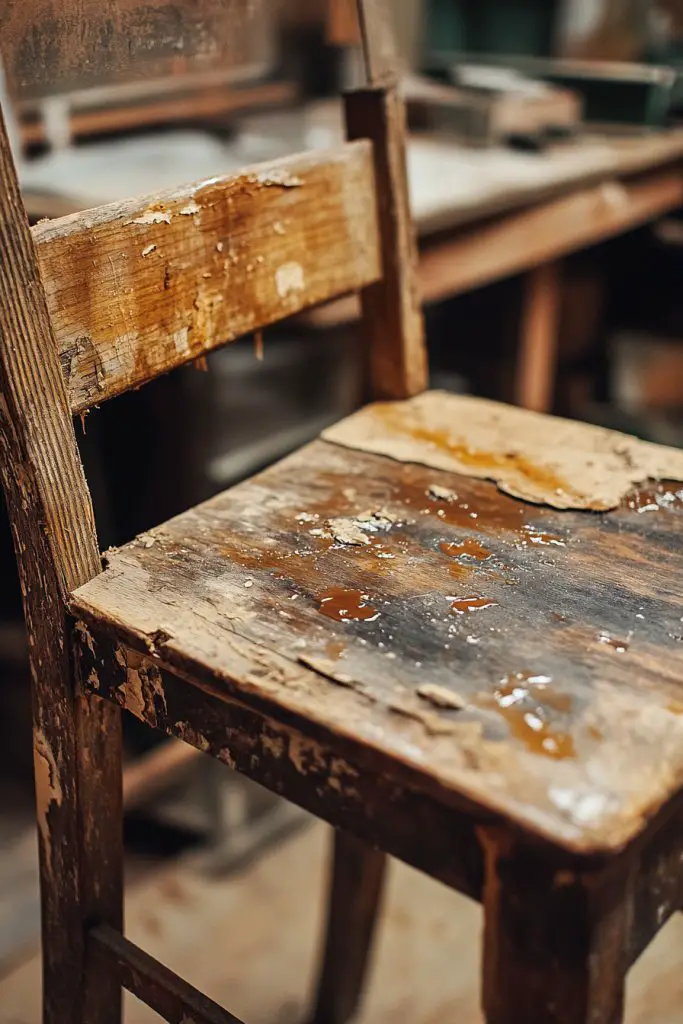
Picture a vintage dresser with peeling paint and sticky patches. After wiping it down with mineral spirits, the surface feels clean and slightly tacky, ready for sanding. The intricate carvings stand out more clearly, and the wood’s natural texture begins to reemerge. The process reveals a fresh canvas, free of dirt and old varnish, setting the stage for a flawless transformation.
This prep technique adapts well to various finishes—paint, stain, or lacquer. For heavily coated surfaces, a thorough wipe with spirits softens and loosens the old layers, making sanding easier. In humid climates, use spirits to remove moisture and prevent bubbles or peeling. Adjust your approach based on the age and condition of the furniture—more stubborn pieces may require multiple applications.
Start by removing hardware and cleaning the surface with a vacuum or brush. Dampen a clean rag with mineral spirits and wipe thoroughly, paying attention to crevices and details. Let it sit for a few minutes, then wipe again to lift residues. Light sanding after spirits ensures a smooth base; for glossy finishes, sand with fine grit to dull the surface for better adhesion. Always work in a well-ventilated area.
After prepping, consider adding a stain or primer that complements your desired look. Use decorative techniques like distressing or inlays to personalize the piece further. Seal with a compatible finish that enhances the intended aesthetic—matte for rustic charm, gloss for sleek modernity. Regular cleaning and touch-ups extend the life of your refinished furniture.
Proper preparation sets the foundation for a stunning transformation. It’s empowering to start with a clean slate and see the potential in aging pieces. Mastering this step saves time, money, and frustration later on. Now, with your furniture prepped and ready, you’re all set to create something truly special—you’ve got the skills.
6. Highlighting Wood Patterns with a Light Mineral Spirits Wash
Ever admired those beautifully patterned woods and wished you could make their details pop? Highlighting wood grain without overpowering it is an art, and many struggle to find that perfect balance. Heavy finishes can obscure the intricate patterns, but a light wash of mineral spirits can bring them to life. Want your wood pieces to truly stand out?
Recommended Products to replicate this idea
| # | Preview | Product | |
|---|---|---|---|
| 1 |
|
Klean Strip Odorless Mineral Spirits 1 Quart | Check Latest Price |
| # | Preview | Product | |
|---|---|---|---|
| 1 |

|
FOTOSOK 6-Tier Bamboo Shelf, Bamboo Bookcase with Adjustable Shelves, Free Standing Storage Shelf... | Check Latest Price |
Visualize a reclaimed pine shelf where the grain’s natural swirls and knots are gently accentuated. A thin, even coat of mineral spirits seeps into the wood, elevating the contrast and revealing every detail. The surface feels silky, and the subtle sheen invites your touch. The pattern emerges with clarity, transforming a simple piece into a statement of natural beauty.
This technique works well on raw or lightly finished woods, adding depth without a glossy overlay. For darker woods, use spirits to soften the color and highlight grain variations subtly. Seasonal adjustments include adding a tint before spirits to match interiors—warm tones for cozy settings or cooler shades for modern spaces. Suitable for furniture, flooring, or decorative accents.
Start with a clean, sanded surface. Dampen a cloth with mineral spirits and wipe the wood evenly, working along the grain. For more contrast, apply a light stain or dye first, then follow with spirits to soften transitions. Use a clean, dry cloth to buff away excess and enhance grain details. Repeat as needed to achieve the desired level of highlight. Finish with a sealant for durability.
Add subtle color accents or metallic powders under the spirits for unique effects. Layering with different stains and spirits can create complex, multi-dimensional patterns. Incorporate custom carvings or textured inlays to add visual interest. Think about combining this technique with decorative edges or frames for a personalized touch. Keep your workspace organized for consistent results.
This method celebrates the natural artistry of wood, making each piece uniquely yours. It’s satisfying to see the intricate patterns come alive with just a simple wipe. Perfect for furniture, flooring, or art projects—this approach boosts confidence in your finishing skills. Go ahead, give your wood the spotlight it deserves—you’ll love the transformation.
7. Smoothing Out Rough Surfaces for a Sleek, Contemporary Bench
Have you ever sat on a bench and felt the rough patches snagging your clothes? Rough surfaces ruin the sleek, modern look you’re aiming for, making furniture feel unfinished and uninviting. Smoothing out those imperfections is key to creating a clean, contemporary piece. Mineral spirits can be your secret helper for achieving that silky, flawless surface.
Recommended Products to replicate this idea
| # | Preview | Product | |
|---|---|---|---|
| 1 |
|
Romeda 8-Pack Sanding Sponge, Four Grits Per Pack 60/80/120/220, Washable and Reusable Handmade... | Check Latest Price |
| # | Preview | Product | |
|---|---|---|---|
| 1 |
|
Klean Strip Odorless Mineral Spirits 1 Quart | Check Latest Price |
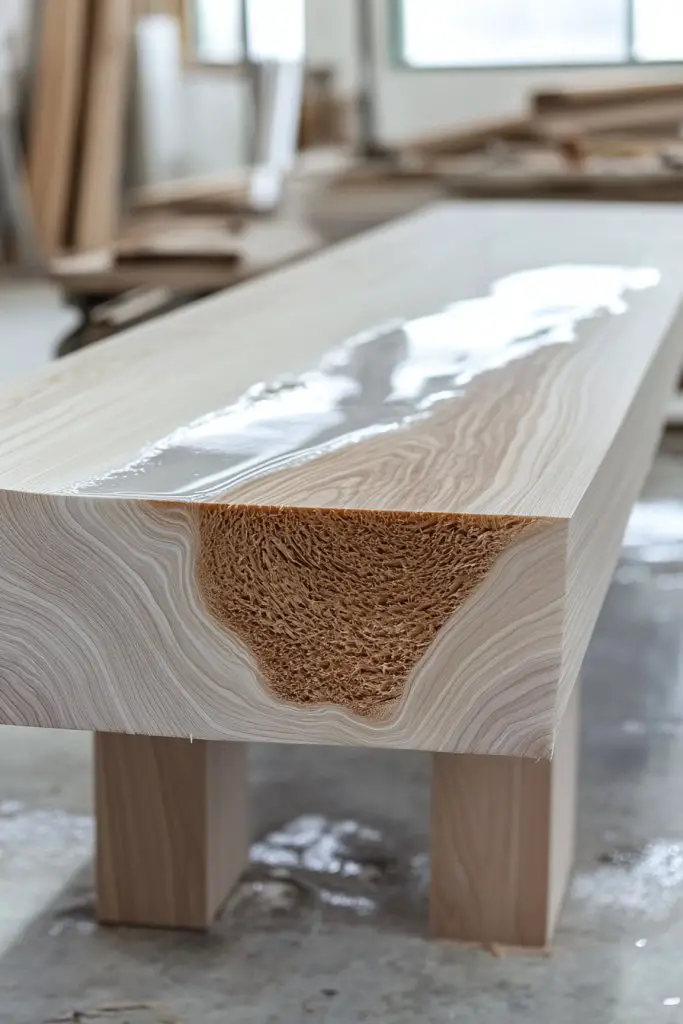
Picture a minimalist concrete-inspired bench with a wooden top. The surface initially feels coarse and uneven, but after a careful wipe with mineral spirits and some sanding, it transforms. The wood’s grain becomes more defined, and the surface appears polished and smooth, almost like glass. The contrast between the rough and refined areas highlights the transformation.
This approach works across different wood types and styles, from rustic reclaimed wood to sleek veneers. For a super smooth finish, combine spirits with fine-grit sanding pads. Adjust the level of smoothing based on the intended use—softer for a decorative piece, more durable for a functional bench. Seasonal factors, like humidity, can affect drying times and finish adhesion.
Begin by sanding the surface thoroughly, removing splinters and rough patches. Dampen a cloth with mineral spirits and wipe the entire surface to remove dust and residual finish. For a silky feel, apply a final layer of spirits after sanding, working with the grain. Use a fine sanding sponge to smooth out any remaining imperfections. Finish with a protective sealant if needed for outdoor furniture.
Add subtle details like beveled edges or sculptural elements to enhance the sleekness. Incorporate inlays or contrasting woods for visual interest. You can also experiment with different sheen levels—matte for a soft touch or semi-gloss for a subtle shine. Regular maintenance with spirits and gentle cleaning keeps the smooth surface looking fresh.
Smoothing rough surfaces elevates your craftsmanship and the overall aesthetic. It’s deeply satisfying to touch a perfectly smooth piece that invites interaction. Mastering this technique opens doors to creating contemporary furniture that truly looks high-end. Confidence comes from knowing you can turn a rough piece into sleek art—you’ve got this.
8. Achieving a Blended, Vintage Vibe on Reclaimed Wood Shelves
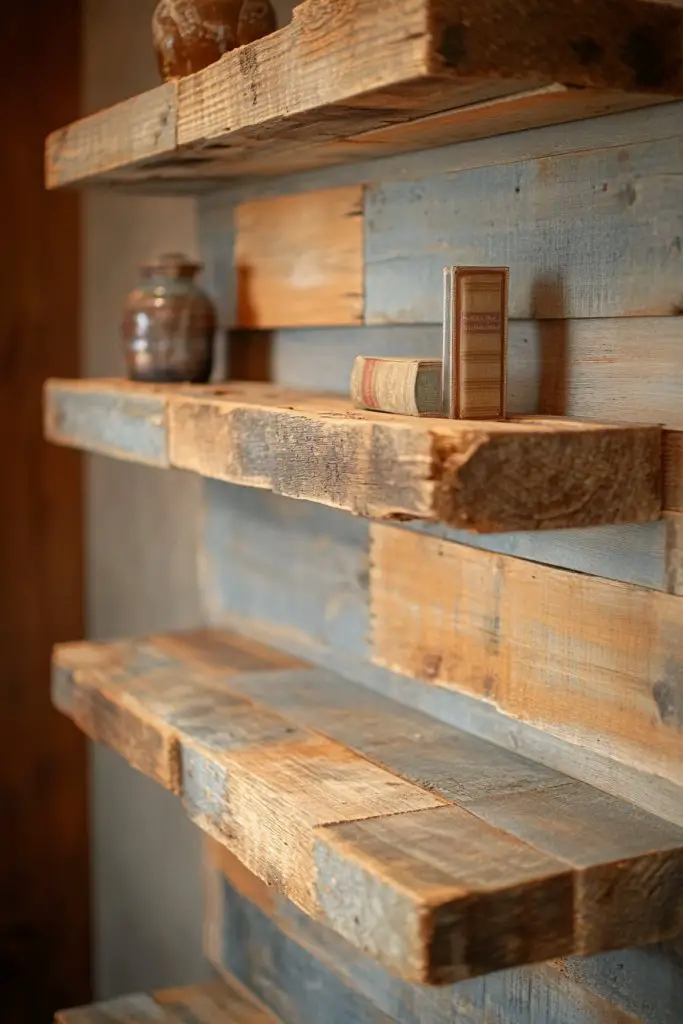
Dreaming of that perfect vintage look for your reclaimed wood shelves? Sometimes, the patchwork of different wood pieces and finishes can look chaotic rather than charming. Blending these variations into a cohesive, aged aesthetic is tricky—unless you know the right tricks. Mineral spirits can help you create that beautifully blended, vintage vibe.
Recommended Products to replicate this idea
| # | Preview | Product | |
|---|---|---|---|
| 1 |

|
FLYJOE Floating Shelves | 8" Deep Rustic Reclaimed Barnwood Wall Hanging Shelves with Invisible... | Check Latest Price |
| # | Preview | Product | |
|---|---|---|---|
| 1 |
|
Klean Strip Odorless Mineral Spirits 1 Quart | Check Latest Price |
Imagine a set of open shelves with mismatched planks, each with its own story. Using mineral spirits, you gently wipe over the surface, softening the contrast and melding the different tones. The shelves now appear weathered and harmonious, with the natural grain patterns emphasized. The overall effect is rustic yet refined, like a piece that’s been around for generations.
This technique is perfect for distressed or multi-tone woods, especially in shabby chic or rustic interiors. Adjust the spirits’ application to either highlight or soften areas—more spirits for a subtle blend, less for pronounced variation. Seasonal shifts, like darker hues in winter or lighter tones in summer, can be achieved by varying stain and spirits. Incorporate decorative brackets or textured wall supports for added charm.
Begin with a thorough cleaning and light sanding. Apply a base stain or finish to unify the tones if needed. Use mineral spirits on a rag to gently blend the edges of different planks, working along the grain and across joint lines. For a more aged look, focus spirits on edges and corners. Finish with a matte or satin protective coat to seal the look. Repeated light applications build depth.
Personalize by adding subtle color washes or tinted spirits to create depth. Incorporate decorative elements like metal brackets or painted accents to add character. For a more distressed appearance, lightly sand or chip areas, then blend again with spirits. Consistent upkeep keeps the vintage charm alive over time.
Blending different wood tones with spirits transforms mismatched pieces into a cohesive statement. It’s a simple way to add character and history to your space. As you perfect this skill, your furniture and decor will radiate timeless charm. Confidence in your finishing abilities will inspire more creative projects—you’re capable of stunning results.
9. Using Mineral Spirits to Remove Excess Finish for a Soft Matte Look

Ever applied a finish that turned out too shiny or uneven? Removing excess finish to achieve a soft matte look can be frustrating without the right tools. Over-application or streaks can ruin the overall aesthetic of your project. Mineral spirits are your go-to for gently removing unwanted gloss and smoothing out the surface.
Recommended Products to replicate this idea
| # | Preview | Product | |
|---|---|---|---|
| 1 |
|
Strip & Prep Furniture Stripping Kit | Removes Multiple Paint Layers | Varnish Remover | Wood Paint... | Check Latest Price |
| # | Preview | Product | |
|---|---|---|---|
| 1 |

|
Method Daily Wood Cleaner, Almond, Cleans Shelves, Tables and Other Wooden Surfaces While Removing... | Check Latest Price |
Imagine a wooden coffee table with a glossy top that looks too reflective. Wiping it gently with mineral spirits instantly dulls the shine, revealing a velvety matte surface. The grain becomes more pronounced, and the overall feel is inviting rather than slick. The transformation feels almost magical—a quick fix that elevates the entire piece.
This method works well on various finishes—gloss, semi-gloss, or even high-sheen lacquers. For a more uniform matte effect, apply a thin coat of finish first, then use spirits to lightly remove excess. Adjust the pressure and amount of spirits for different sheen levels. Seasonal factors, like humidity, influence drying and removal times.
After applying your chosen finish, wait for it to dry partially—about 50% cure. Dampen a clean cloth with mineral spirits and gently wipe the surface, focusing on areas with too much gloss or streaks. Use light, circular motions to evenly dull the surface. If needed, buff with a soft cloth to enhance the matte finish. Repeat the process for a consistent look.
Customize by layering matte topcoats or experimenting with different sheen levels during application. Incorporate textured or brushed finishes before spirits to add visual interest. For outdoor furniture, choose spirits that won’t degrade the finish over time. Regular maintenance with spirits keeps the matte effect looking fresh.
Achieving a soft matte finish not only improves the appearance but also protects your piece from glare and fingerprints. It’s a subtle upgrade that makes your craftsmanship stand out. Mastering this quick technique boosts confidence for future refinishing projects—you’re on your way to professional results.
10. Creating a Uniform, Glossy Surface on Hardwood Flooring
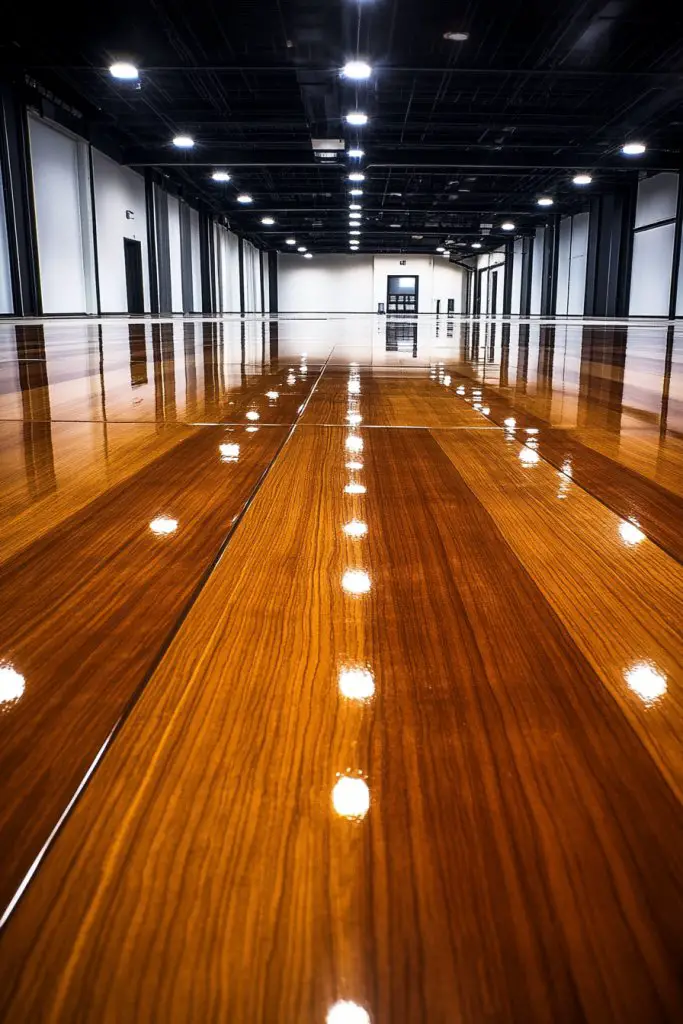
Want your hardwood floors to gleam like they just installed? Achieving a uniform, glossy surface can be a challenge—especially if previous coats are uneven or streaky. Many DIYers struggle with blotchy finishes that ruin the sleek look. Mineral spirits can help smooth out those imperfections and produce a mirror-like shine.
Recommended Products to replicate this idea
| # | Preview | Product | |
|---|---|---|---|
| 1 |

|
Varathane 284470 Triple Thick Polyurethane Wood Finish, Gloss, Quart | Check Latest Price |
| # | Preview | Product | |
|---|---|---|---|
| 1 |
|
Romeda 8-Pack Sanding Sponge, Four Grits Per Pack 60/80/120/220, Washable and Reusable Handmade... | Check Latest Price |
Picture a luxurious open-concept living room with gleaming oak floors. After applying a high-gloss finish, you notice streaks and uneven patches. A few gentle wipes with mineral spirits and fine sanding make the surface uniformly shiny, revealing the wood’s natural beauty. The result is a flawless, reflective surface that enhances the entire space, making it feel expansive and elegant.
This technique works on different wood types and finish systems—oil-based polyurethanes, water-based finishes, or epoxy coatings. For outdoor decks, choose spirits that won’t weaken UV-protective layers. Seasonal climate influences drying and curing times. Adjust the level of gloss by controlling the thickness and number of coats—more coats for a deeper shine, fewer for a subtler gloss.
Start by thoroughly sanding the floor with fine grit to ensure a smooth base. Apply the finish evenly, then wait until the coat is partially cured but still tacky. Dampen a cloth with mineral spirits and gently wipe the surface in long, smooth strokes to remove inconsistencies. Use a buffer or burnishing pad for an extra glossy effect if desired. Finish with a final light wipe to refine the shine.
Incorporate decorative inlays or contrasting stains in small sections to add visual interest before sealing. Experiment with different sheen levels—semi-gloss for a softer look or high-gloss for maximum reflectivity. Regular cleaning with gentle products maintains the glossy finish. Protective pads under furniture prevent scratches and preserve the shine.
A glossy floor elevates your entire space, offering an upscale feel with minimal effort. Once mastered, this technique allows you to maintain a showroom-quality finish for years. It’s empowering to see how a few simple steps can transform your home’s look and feel. Your floors will thank you for the extra care—you’re capable of achieving stunning results.
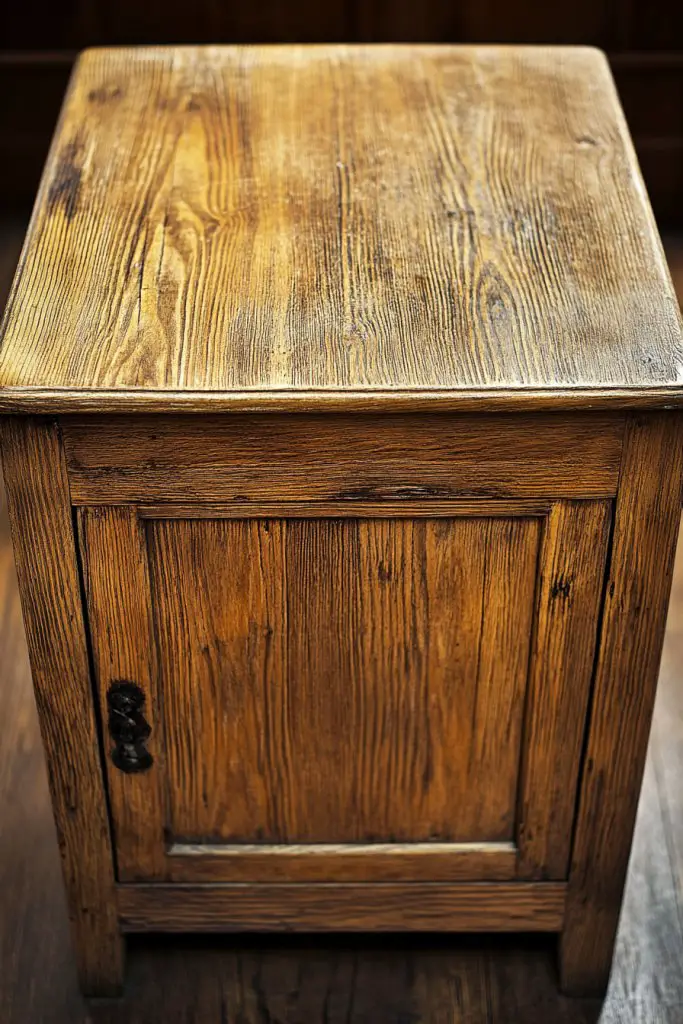
11. Refinishing Wooden Kitchen Cabinets for a Smooth, Durable Finish
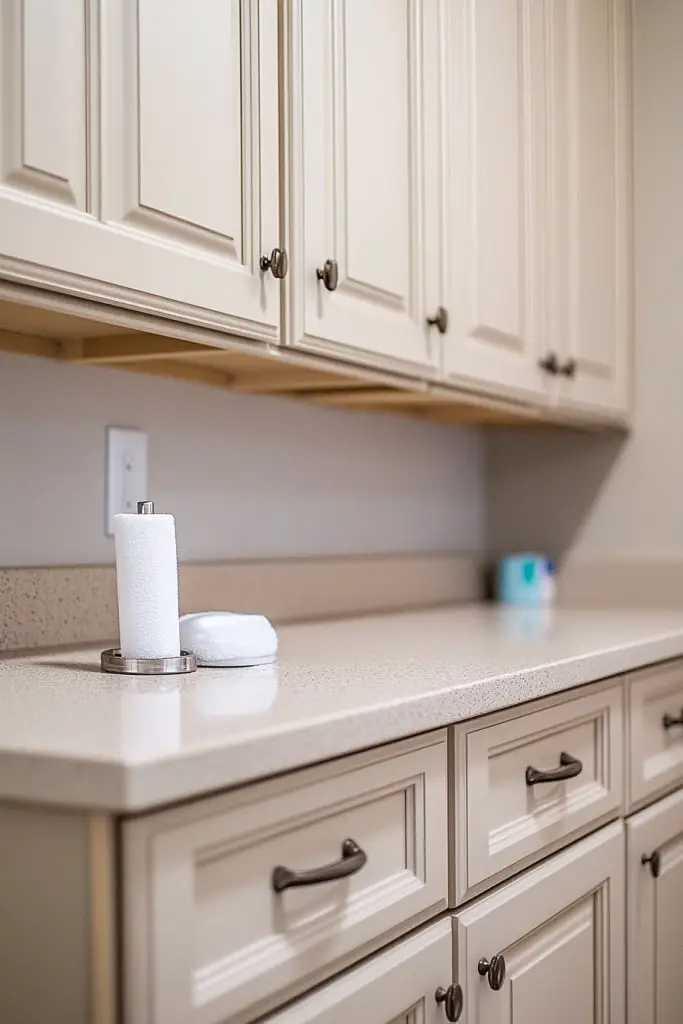
Kitchen cabinets take a beating—splashes, grease, and fingerprints—and often look tired after years of use. Refinishing them to a smooth, durable finish can seem daunting, especially with tight spaces and stubborn grime. Mineral spirits are essential for cleaning and prepping, ensuring your new finish sticks and lasts.
Recommended Products to replicate this idea
| # | Preview | Product | |
|---|---|---|---|
| 1 |

|
Rust-Oleum 372011 Transformations Basics Cabinet & Trim Paint, Quart, Espresso | Check Latest Price |
| # | Preview | Product | |
|---|---|---|---|
| 1 |

|
Furniture Clinic Wood Stain | Dark Oak | Water Based | Fast Drying, Low Odor, & Non-Toxic | for... | Check Latest Price |
Imagine opening aged, grimy cabinets that once looked dull and chipped. Wiping them down with mineral spirits reveals fresh, clean wood with a rich, natural grain. After applying a smooth coat of paint or stain, the cabinets gleam with a sleek, uniform surface. The transformation is dramatic, bringing a fresh, modern vibe to your kitchen.
This process suits both painted and stained finishes, with adjustments for different materials—pine, oak, or MDF. For a more rustic look, lightly distress the surface after applying spirits. Seasonal factors like humidity influence drying times and adhesion—more humid climates may require longer curing. Incorporate different hardware or decorative accents to personalize your refreshed cabinets.
Begin by removing hardware and thoroughly cleaning the surface with mineral spirits, paying attention to grease and grime. Sand lightly to smooth out imperfections. Use spirits again to clean off dust and residual finish. Apply your chosen paint or stain in thin, even coats, allowing each to dry fully. Finish with an extra layer of spirits or a clear protective coat for a smooth, durable surface.
Personalize your cabinets with custom paint colors, contrasting trims, or decorative panels. Add unique hardware or soft-close hinges for a modern touch. Incorporate decorative moldings or glass inserts to elevate the design. Regular maintenance with spirits and gentle cleaning keeps the finish looking fresh and new.
Refinishing cabinets is a rewarding project that instantly upgrades your kitchen. It’s satisfying to see old, tired surfaces transformed into sleek, functional art. Once you get the hang of this process, future touch-ups or refinishing become straightforward. Your kitchen will become a space you’re proud of—ready for years of use.
12. Smoothing and Sealing Wooden Wall Paneling for a Minimalist Aesthetic
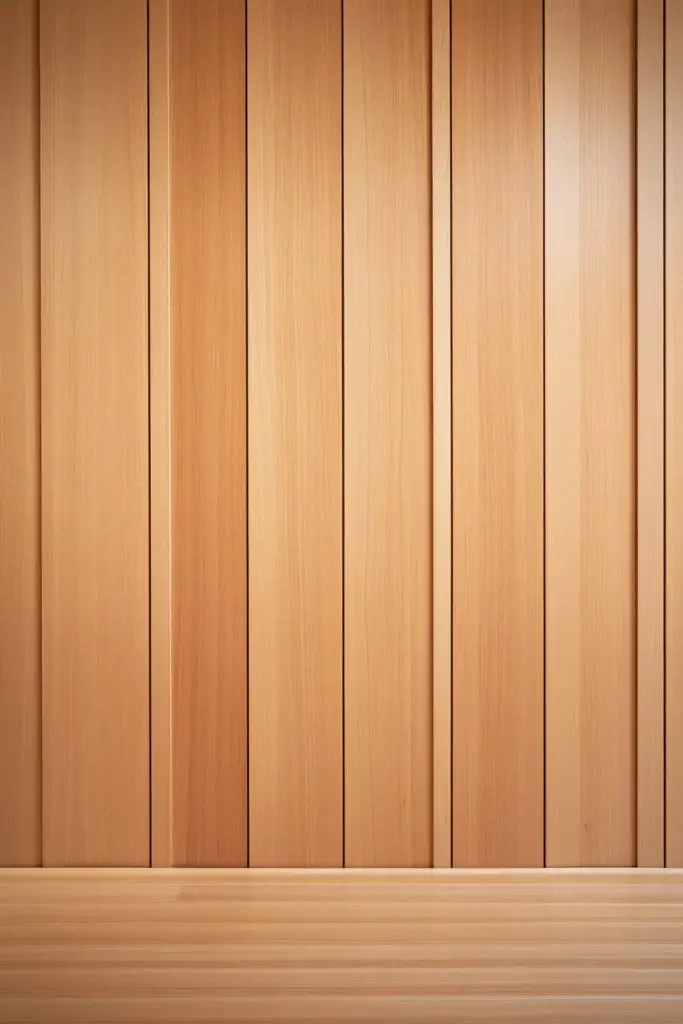
Dreaming of a sleek, minimalist wall that feels warm and inviting? Wooden paneling can easily look rough or unfinished, ruining that clean aesthetic. Smoothing and sealing the surface creates a polished, modern backdrop. Using mineral spirits simplifies the process, helping you achieve a seamless, sophisticated finish.
Recommended Products to replicate this idea
| # | Preview | Product | |
|---|---|---|---|
| 1 |

|
NeatiEase Wood Panels for Wall, 4-Piece 96" x 12.6" Soundproof Wood Slat Wall Panel for Interior... | Check Latest Price |
| # | Preview | Product | |
|---|---|---|---|
| 1 |
|
Minwax 233334444 Polycrylic Protective Wood Finish, Clear Satin, ½ Pint | Check Latest Price |
Visualize a room with vertical wood panels that once looked rustic and uneven. After wiping them with mineral spirits, the surface feels instantly smoother and more uniform. The wood’s natural grain is subtly enhanced, giving the space a refined texture. The finish is matte or satin, blending effortlessly with minimalist decor and allowing other design elements to shine.
Adjust your approach based on the panel type—wide planks or narrow slats. For a more textured look, lightly sand after spirits, or for a sleek surface, skip sanding altogether. Seasonal tweaks include adding subtle stains for warmth or cool tones. Incorporate decorative molding or painted accents to add personal flair within a minimalist framework.
Start by cleaning the paneling thoroughly, removing dust and grease. Use mineral spirits on a clean cloth to wipe down the surface, removing any residue or old finish. Lightly sand if needed, then wipe again with spirits. Apply a sealant—preferably matte or satin—to lock in the smoothness and enhance the natural beauty. Use a brush or roller for even coverage, working in the direction of the grain.
Add subtle color washes or tinted sealants for warmth or contrast. Incorporate decorative elements like minimalist trim or geometric patterns painted on the panels. For durability, choose sealants suited for high-traffic areas. Regular touch-ups with spirits help maintain the smooth, modern look over time.
Smooth, sealed wooden wall panels create a stunning minimalist backdrop that elevates any space. It’s a simple upgrade that feels sophisticated and timeless. Once you master this technique, updating other surfaces becomes effortless. Your home’s style will feel cohesive, clean, and inviting—you’ve got this.
13. Preparing Rustic Wood for a Smooth, Modern Countertop
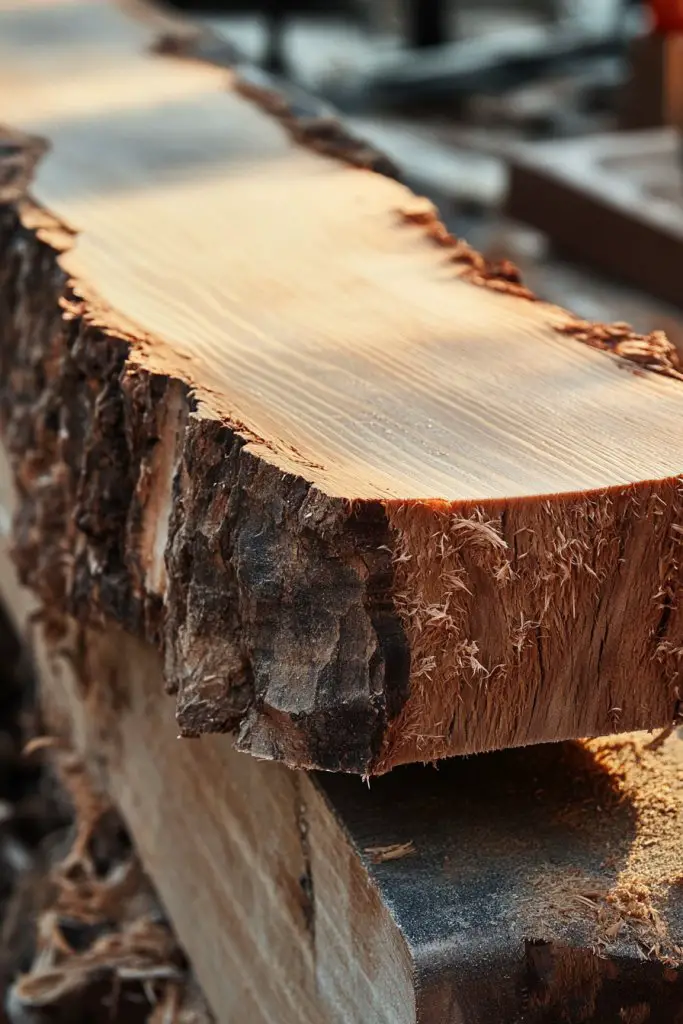
Rustic wood countertops add charm but often come with rough surfaces and uneven edges. If you want that sleek, modern look without losing the warmth of wood, smoothing and sealing are crucial. Achieving that smooth, refined finish can be tricky without the right tools. Mineral spirits can help you get there, making your rustic piece look polished and contemporary.
Recommended Products to replicate this idea
| # | Preview | Product | |
|---|---|---|---|
| 1 |
|
Klean Strip Odorless Mineral Spirits 1 Quart | Check Latest Price |
| # | Preview | Product | |
|---|---|---|---|
| 1 |
|
Romeda 8-Pack Sanding Sponge, Four Grits Per Pack 60/80/120/220, Washable and Reusable Handmade... | Check Latest Price |
Imagine a reclaimed barn wood countertop with rough edges and splinters. After wiping with mineral spirits, the surface feels silky, and the wood’s natural grain is brought to life. The irregularities are softened, but the rustic character remains, giving a perfect blend of modern smoothness and vintage charm. The finished surface invites both visual and tactile appreciation.
This approach suits various wood types, from thick slabs to thinner veneer overlays. For a more industrial look, leave some textured areas intentionally, then blend the rest for contrast. Seasonal adjustments include adding a tinted sealant for warmth in colder months or a clear coat for summer freshness. Edging details can be rounded or beveled for extra refinement.
Start by sanding the surface with coarse grit, then progressively move to finer grits. Wipe down thoroughly with mineral spirits to remove dust and open the grain. Use spirits to clean and prepare the surface for sealing; a light coat of sealant or oil is then applied in thin layers. Buff with a soft cloth after each coat to achieve a smooth, even finish. Sealants with UV protection are recommended for outdoor or sunlit areas.
Enhance the rustic-modern hybrid by adding subtle inlays or contrasting edges. Incorporate decorative metal brackets or embedded lighting for a sleek look. For a personal touch, stain the edges or carve custom patterns before sealing. Regular maintenance with spirits and gentle cleaning preserves the finish and keeps the wood looking fresh.
Transforming rustic wood into a sleek countertop combines beauty with function. It’s empowering to see how simple techniques can elevate natural materials into modern statement pieces. With practice, refinishing rustic wood becomes an accessible craft that adds value and style. Your space will feel warm, inviting, and uniquely yours—you’re capable of creating stunning results.
14. Achieving a Velvety Soft Finish on Wooden Bed Frames
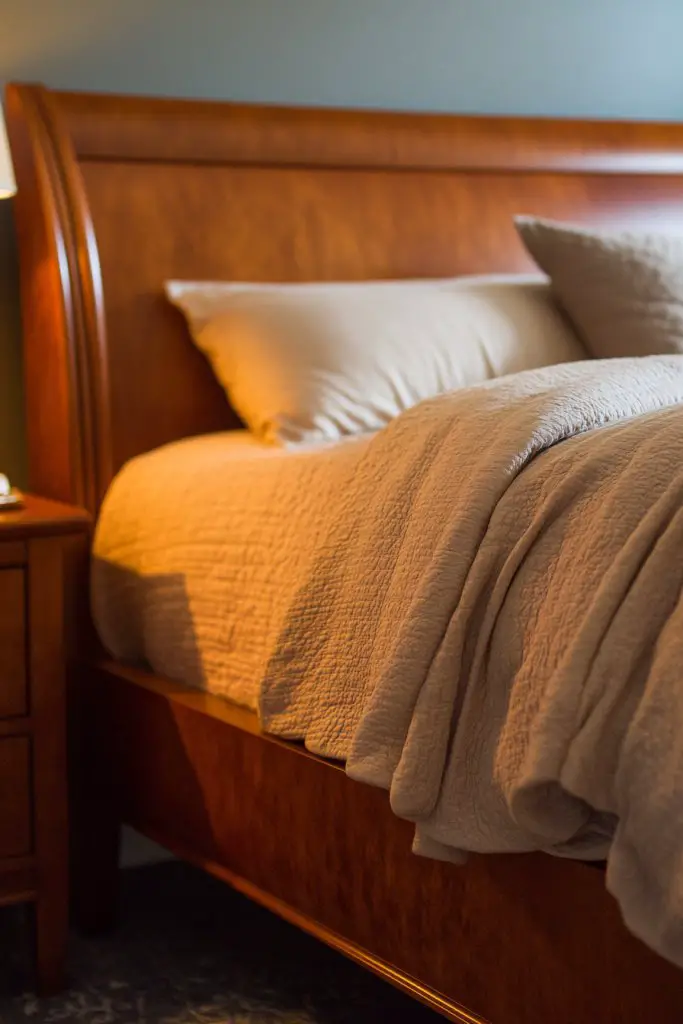
Looking to upgrade your wooden bed frame with a luxurious, velvety finish? A soft, matte surface adds comfort and elegance, making your bedroom feel like a retreat. Achieving that plush, velvety touch without a heavy coating is a challenge—unless you know the right technique. Mineral spirits can help you smooth and prepare the surface for a silky finish.
Recommended Products to replicate this idea
| # | Preview | Product | |
|---|---|---|---|
| 1 |
|
Minwax 233334444 Polycrylic Protective Wood Finish, Clear Satin, ½ Pint | Check Latest Price |
| # | Preview | Product | |
|---|---|---|---|
| 1 |

|
DecoArt Americana Decor Varnish 8oz, Soft Touch, White | Check Latest Price |
Imagine running your hand over a freshly refinished bed frame where the surface feels buttery and smooth. The grain’s natural patterns are subtly highlighted, but the overall feel is velvety rather than glossy. The finish absorbs light softly, creating a calming, inviting atmosphere. The transformation makes the entire bedroom look more refined and cozy.
This approach works on various wood types, from soft pine to dense hardwoods. For a more tactile finish, incorporate textured topcoats or matte sealants. Seasonal changes—like adding warm hues for winter or lighter shades for summer—are easy with tinted spirits or stains. Combining this technique with decorative carvings or inlays personalizes your bed frame further.
Begin by sanding the bed frame to a smooth, even surface. Use mineral spirits to clean off dust and residual finish. Apply a thin layer of matte or velvet-like sealant with a sponge or brush, working with the grain. Wait for it to dry, then lightly sand with fine grit for extra smoothness. Repeat as necessary to build a plush, velvety surface. Finish with a final wipe of spirits to remove any excess.
Personalize further by adding a subtle tint or color wash that complements your bedroom decor. Incorporate decorative elements like carved details or textured headboards to enhance the plush feel. Use soft, textured bedding and throws to match the finish, creating a cohesive, luxurious look. Regular gentle cleaning preserves that velvety softness.
A velvety finish turns your bed into a statement of comfort and style. It’s surprisingly simple to achieve with the right techniques, boosting your confidence in refinishing furniture. Once you master this, you can easily refresh other pieces to create a cozy, elegant space. Your bedroom will feel more inviting—you’ve got the skills to make it happen.
15. Creating a Subtle, Distressed Effect with Mineral Spirits and Light Sanding
Craving that charming, worn-in look on your furniture but worried about overdoing it? A subtle distressed effect adds character without looking battered. The challenge lies in controlling the aging process to look intentional and tasteful. Mineral spirits combined with light sanding can help you achieve that perfect balance.
Recommended Products to replicate this idea
| # | Preview | Product | |
|---|---|---|---|
| 1 |
|
Klean Strip Odorless Mineral Spirits 1 Quart | Check Latest Price |
| # | Preview | Product | |
|---|---|---|---|
| 1 |
|
Romeda 8-Pack Sanding Sponge, Four Grits Per Pack 60/80/120/220, Washable and Reusable Handmade... | Check Latest Price |
Picture a vintage side table with gently worn edges and soft, uneven color. Using spirits, you soften the finish, revealing glimpses of the underlying wood or previous layers. Light sanding emphasizes the worn effect, especially around corners and edges. The result is a piece that radiates history and personality, but with a refined touch. It’s like giving your furniture a gentle, well-loved patina.
This technique suits various styles—Shabby Chic, rustic, or coastal. For more dramatic effects, apply a darker stain first, then wipe away or sand down areas selectively. Seasonal tweaks include adding light or dark washes to match your decor mood. Combining with decorative hardware or painted accents personalizes the look even further.
Start with a clean, sanded surface. Apply a stain or paint if desired, then use mineral spirits on a rag to lightly distress the surface—working along the grain and focusing on edges. Use fine sandpaper or a sanding sponge to gently remove paint or stain from high-wear areas. Seal with a matte or low-sheen topcoat for durability. Reapply spirits between coats for a more authentic aged appearance.
Add decorative elements like fabric or leather accents for a layered look. Incorporate carved or textured details to enhance the aged effect. Use contrasting colors or metallic highlights for a unique touch. Regular maintenance with spirits and light sanding keeps the distressed look fresh and charming.
Achieving a subtle distressed effect lends your furniture a timeless appeal. It’s a technique that combines creativity with control, making each piece uniquely yours. As you refine your skills, you’ll find endless ways to add charm and character to your home. Embrace the imperfect beauty—you’re capable of creating stunning vintage-inspired pieces.
16. Using Mineral Spirits to Enhance Color Depth in Stained Wooden Art Pieces
Want your stained wooden art pieces to pop with richer, deeper colors? Overly light or flat finishes can make artwork look dull or lifeless. Enhancing color depth without overpowering the original stain is a delicate art. Mineral spirits can help you deepen and enrich hues, giving your art a vibrant, gallery-worthy finish.
Recommended Products to replicate this idea
| # | Preview | Product | |
|---|---|---|---|
| 1 |
|
Klean Strip Odorless Mineral Spirits 1 Quart | Check Latest Price |
| # | Preview | Product | |
|---|---|---|---|
| 1 |
|
NeatiEase Wood Panels for Wall, 4-Piece 96" x 12.6" Soundproof Wood Slat Wall Panel for Interior... | Check Latest Price |
Imagine a handcrafted wooden panel with a soft, translucent stain. Wiping it with mineral spirits intensifies the color, revealing complex undertones and subtle variations. The surface feels smooth and velvety, inviting close inspection. The result is a piece that radiates depth and richness, transforming a simple art project into a captivating focal point.
Adjust your approach based on the type of stain—oil, water, or gel. For a subtle boost, dilute spirits and apply in light, controlled wipes. For more dramatic depth, layer multiple applications, allowing each to cure before adding the next. Seasonal considerations include warmer temperatures enhancing the spirits’ penetration. This technique works well on panels, sculptures, or decorative plaques.
Start by applying your chosen stain and letting it dry thoroughly. Use spirits on a clean cloth to wipe away excess, focusing on areas you want to deepen. Work in long, even strokes, blending edges seamlessly. For added richness, reapply spirits after the initial wipe, building layers gradually. Finish with a protective sealant suited to your desired sheen—matte or glossy. The key is patience and controlled application.
Layer with tinted spirits or metallic powders for unique effects. Incorporate decorative carving or inlay work to complement the enhanced color. Use contrasting frames or mounts to highlight the richness of the finish. Regular touch-ups with spirits ensure your art maintains its vibrant depth over time. Experimentation unleashes your creative potential.
Deepening color in stained wood elevates your artwork from simple to stunning. It’s a simple technique that adds complexity and allure, making your pieces stand out. Mastering this skill boosts your confidence in working with stains and spirits alike. Soon, your home will be filled with art that’s as rich in color as it is in meaning—you’re capable of creating masterpieces.
17. Sealing and Smoothing Outdoor Wooden Furniture for Long-Lasting Elegance
Outdoor furniture faces the elements—rain, sun, and dirt—making durability and appearance a constant concern. Achieving a smooth, sealed finish that lasts for years is a challenge many DIYers shy away from. Mineral spirits can help prep the surface and improve the adhesion of protective coatings. Want your patio set to look great and stand the test of time?
Recommended Products to replicate this idea
| # | Preview | Product | |
|---|---|---|---|
| 1 |

|
Thompson’s WaterSeal Multi-Surface Waterproofer Stain, Clear, 1 Gallon | Check Latest Price |
| # | Preview | Product | |
|---|---|---|---|
| 1 |
|
Romeda 8-Pack Sanding Sponge, Four Grits Per Pack 60/80/120/220, Washable and Reusable Handmade... | Check Latest Price |
Picture a weathered wooden bench with faded, rough patches. After a thorough wipe with mineral spirits and light sanding, the surface feels refreshed and even. Applying a high-quality outdoor sealant creates a protective, smooth coating that enhances the natural grain. The surface now glows with a subtle sheen, inviting relaxation and outdoor gatherings. The transformation proves that proper prep makes all the difference.
This process suits different wood types—cedar, teak, or composite materials—each requiring tailored sealants. For high-traffic or exposed areas, opt for sealants with UV and waterproofing properties. Seasonal updates include adding stain or tint in winter to add warmth, or clear coats in summer for maximum protection. Adjust sanding and spirits’ application based on the initial surface condition.
Start by cleaning and removing any old finish or dirt. Lightly sand to smooth out rough patches and open the grain. Wipe down with mineral spirits to remove dust and residual oils. Apply a weatherproof sealant with a brush or spray, working in thin layers for even coverage. Use spirits to wipe after each coat for a smooth, uniform finish. Allow adequate curing time in dry, moderate conditions.
Add a tint or stain before sealing for a richer color, especially in darker hues. Incorporate textured elements like carved borders or decorative inlays to elevate the design. Use contrasting or metallic accents to personalize the look further. Regular maintenance with spirits and gentle cleaning preserves the finish and keeps your outdoor furniture looking elegant.
Sealing and smoothing outdoor furniture extends its life and beauty, making your investment worthwhile. It’s gratifying to see a once-weathered piece turn into a stylish, durable feature of your yard. With this technique, you gain confidence in tackling outdoor projects and creating lasting beauty. Your outdoor space will look stunning year-round—you’ve got this.
Conclusion
Exploring the many ways to use mineral spirits on wood opens up a world of creative possibilities for your home projects. From prepping surfaces to enhancing natural grain, these ideas can help you achieve professional-looking results with ease. Don’t hesitate to try out these techniques—your perfect wood finish is just a project away. Embrace the process and let your creativity shine!