
17 Office Supply Closet Organization Ideas for Efficient Spaces
A cluttered office supply closet can drain your productivity and cause unnecessary stress—so, organizing it effectively is more than just a tidy-up, it’s a game-changer! Office supply closet organization ideas are popular because they help us find what we need quickly, save space, and make our work environments more inviting and efficient.
In this article, you’ll discover a variety of creative and practical ideas to transform your cluttered closet into an organized haven. From clever storage solutions to DIY hacks, these tips will inspire you to create a space that’s both functional and visually appealing, making your workday smoother and more enjoyable.
1. Use Color-Coded Storage Bins for Quick Identification
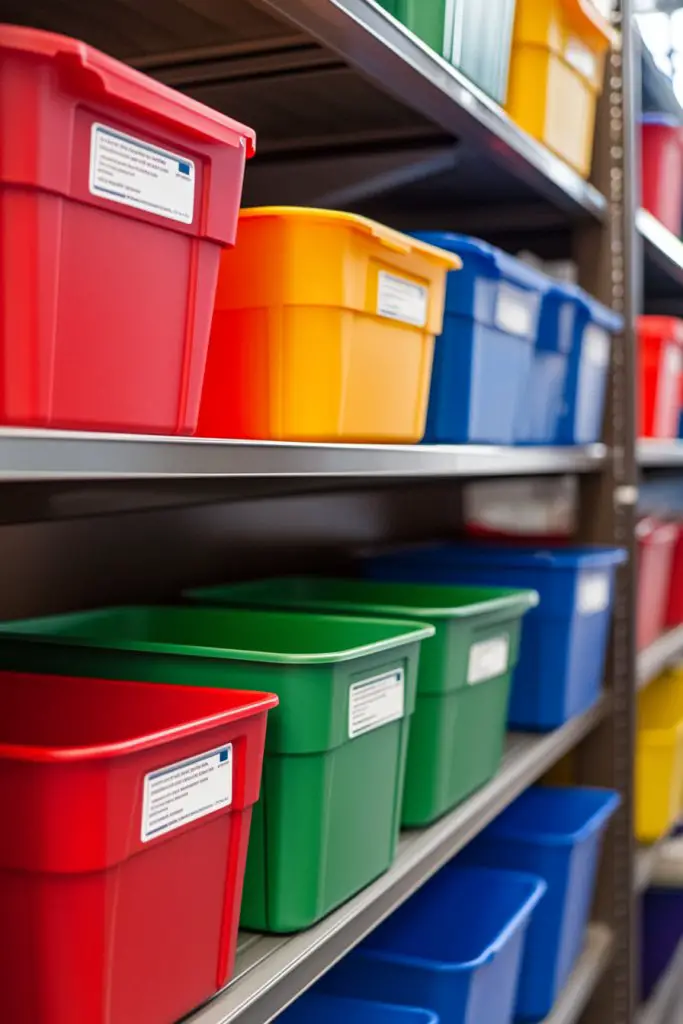
Ever spent ages rummaging through a cluttered closet just to find that one elusive pen or sticky note? It’s frustrating when supplies are buried under piles of other items, wasting your precious time. A disorganized office supply closet can turn a quick task into a scavenger hunt. Who doesn’t wish for a simple way to grab what they need without the chaos?
Recommended Products to replicate this idea
| # | Preview | Product | |
|---|---|---|---|
| 1 |

|
Sterilite 6-Pack Industrial Tote, Plastic Storage Container Bins with Lids, 27 Gallon - Heavy-Duty... | Check Latest Price |
| # | Preview | Product | |
|---|---|---|---|
| 1 |

|
Nelko Label Maker Machine with Tape, P21 Bluetooth Label Printer, Wireless Mini Label Makers with... | Check Latest Price |
Imagine vibrant bins lined up in a rainbow of colors, each labeled clearly with bold, easy-to-read tags. The smooth plastic surfaces reflect soft overhead lighting, giving the space a cheerful, energetic vibe. When you open a bin, you see a neat stack of paper clips, sticky notes, or pens, all perfectly arranged by color and type. These bright bins create a visual harmony that makes the closet inviting and easy to navigate.
Choose bins in colors that match your office decor, from sleek monochrome shades to playful pastels. For seasonal tweaks, swap out colors to reflect holidays or moods. If space is tight, stack smaller bins vertically or nest them inside larger ones. For a more minimalist look, opt for transparent containers with subtle labels. The key is customizing the palette to suit your style and workflow.
Start by sorting your supplies into categories like writing tools, paper, or miscellaneous items. Purchase uniform bins with lids that stack securely to prevent spills. Label each bin with large, clear tape or sticker labels, emphasizing visibility. Arrange them on shelves at eye level for quick access. For added durability, consider using color-coded labels or markers. Regularly revisit and reorganize to keep everything tidy and accessible.
Add decorative touches like patterned washi tape around the edges of labels or custom stickers to reflect your personality. Use different textures, such as matte or glossy finishes, to create visual interest. Incorporate small dividers within larger bins for tiny items like rubber bands or push pins. Personalizing labels with fun fonts or icons can also make organization more engaging and less of a chore.
Color-coded bins make your workspace feel more lively and less chaotic, boosting productivity and mood. Seeing everything neatly organized encourages regular upkeep and pride in your space. Plus, this simple system proves that a little effort goes a long way in transforming clutter into clarity. Ready to turn your supply chaos into a rainbow of order?
2. Install Adjustable Shelving for Customizable Storage Solutions
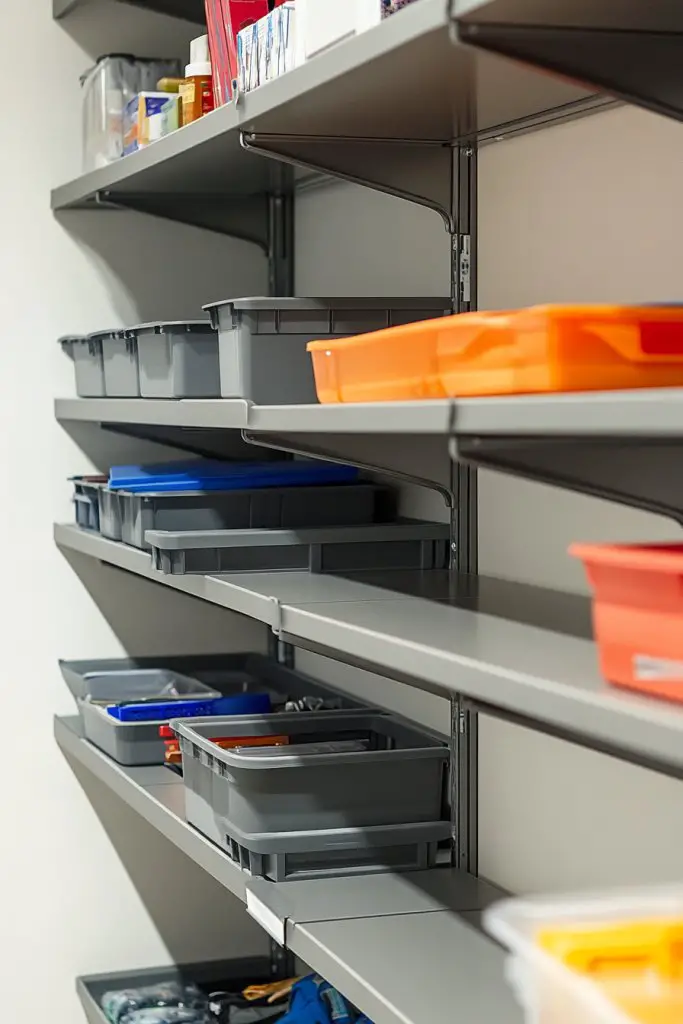
Do you ever feel like your office closet is fighting back, with shelves that are either too high, too low, or just plain awkward? Standard fixed shelves often waste space or make reaching for supplies a hassle. If your storage setup doesn’t flex with your changing needs, it’s time for an upgrade. Who wants to struggle with a one-size-fits-all system?
Recommended Products to replicate this idea
| # | Preview | Product | |
|---|---|---|---|
| 1 |

|
Delta Minimalistic Black Shelf Brackets Cycle, Set of 10 Fully Adjustable 12-inch Heavy Duty Shelf... | Check Latest Price |
| # | Preview | Product | |
|---|---|---|---|
| 1 |
|
C&AHOME Wire Cube Storage, 12-Cube Storage Organizer Metal, C Grids Storage Bins Shelving, Modular... | Check Latest Price |
Picture sleek metal or wood shelves mounted on adjustable brackets, allowing you to slide and reposition them with ease. The shelves hold everything from paper reams to small storage boxes, all perfectly aligned. The space feels open and organized, with items neatly stacked and easily reachable. The adjustable system adapts seamlessly to different heights, creating a tailor-made storage environment.
Choose durable materials like metal for a modern industrial look or warm wood for a cozy vibe. For seasonal or project-based needs, rearrange shelves to accommodate larger binders or seasonal supplies. In smaller closets, opt for narrow shelves to maximize every inch, while larger spaces can handle wider, sturdier units. You can also add hooks or baskets underneath for extra versatility.
Begin by measuring your closet’s interior dimensions and planning shelf placement. Purchase adjustable shelving kits with compatible brackets and support rods. Install the brackets at desired heights using a level to ensure straight lines. Place the shelves on the brackets, adjusting for perfect fit. Label each shelf if needed to categorize contents, and consider adding bumper pads to protect the shelves from damage. Regularly reconfigure as your storage needs evolve.
Customize your shelves with decorative edge trims or paint them in your favorite color to match your decor. Integrate modular storage bins or baskets on the shelves for small items. Use labels or tags for quick identification, and consider adding LED strip lighting underneath for better visibility. Personal touches make the space both functional and inspiring.
Adjustable shelving creates a flexible system that grows with your needs, making organization effortless. It’s a solution that combines practicality with style, proving that customized storage is within reach. Once installed, you’ll feel confident knowing your supplies are neatly stored and easy to access. Are you ready to give your closet a fresh, adaptable look?
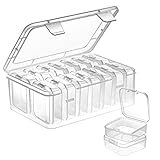
3. Incorporate Clear Acrylic Containers for Visibility and Accessibility
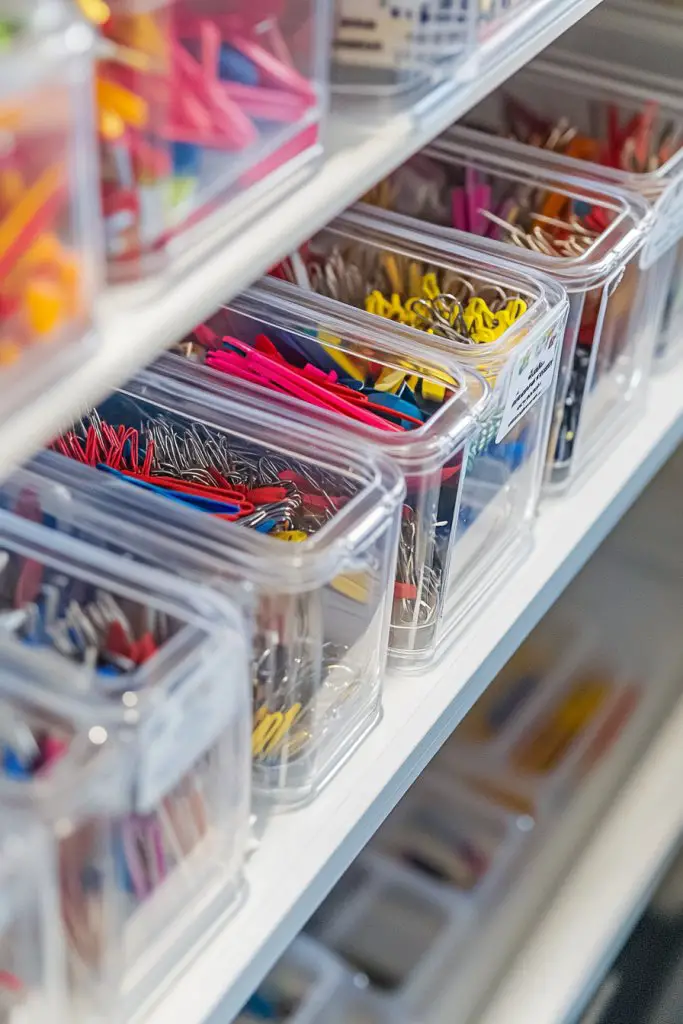
Ever opened a drawer or closet and felt overwhelmed by tiny, jumbled piles of supplies? Small items like paper clips, thumbtacks, or sticky notes often get lost or buried under clutter. If only you could see everything at a glance without rummaging, your stress levels would drop instantly. Clear containers are the simple fix for a disorganized nightmare.
Recommended Products to replicate this idea
| # | Preview | Product | |
|---|---|---|---|
| 1 |

|
iDesign Kitchen Binz BPA-Free Plastic Stackable Organizer Box with Lid - 7.26" x 10.75" x 2.37",... | Check Latest Price |
| # | Preview | Product | |
|---|---|---|---|
| 1 |
|
Vtopmart 25 PCS Clear Plastic Drawer Organizers Set, 4-Size Versatile Bathroom and Vanity Drawer... | Check Latest Price |
Imagine transparent acrylic boxes arranged on shelves, revealing every item inside. The smooth, glossy surfaces reflect ambient light, making the space brighter and more inviting. When you need a specific paper clip or push pin, you just glance at the container and grab it. The neat, uniform look turns chaos into order, with everything in plain sight.
Opt for modular containers in different sizes to suit various small items. Stackable acrylic boxes save space and keep things tidy. For a more polished look, label each container with minimalist labels or icons. In more decorative spaces, choose containers with rounded edges or frosted finishes. You can also mix and match with fabric or wood accents for a personalized touch.
Start by sorting small items into categories—office supplies, craft bits, or tech accessories. Purchase clear acrylic containers with lids or open tops depending on your preference. Label each container with a waterproof sticker or a dry-erase marker for easy updates. Arrange the containers on open shelving or inside drawers, ensuring easy access. Regularly purge and reorganize to maintain clarity and order.
Add decorative labels with fun fonts or icons to make identifying items more intuitive. Use colored paper or inserts inside containers for a pop of color or visual cues. Incorporate small risers or tiered trays within larger containers to maximize space. Personal touches like custom engraving or patterned edges can make your storage uniquely yours.
Clear acrylic containers make your workspace look sleek and professional, inspiring you to keep things tidy. The transparency encourages ongoing organization since clutter is immediately obvious. Once you see everything at a glance, maintaining order becomes second nature. Ready to enjoy a clutter-free, visually appealing supply closet?
4. Hang Over-the-Door Organizers for Extra Storage Space
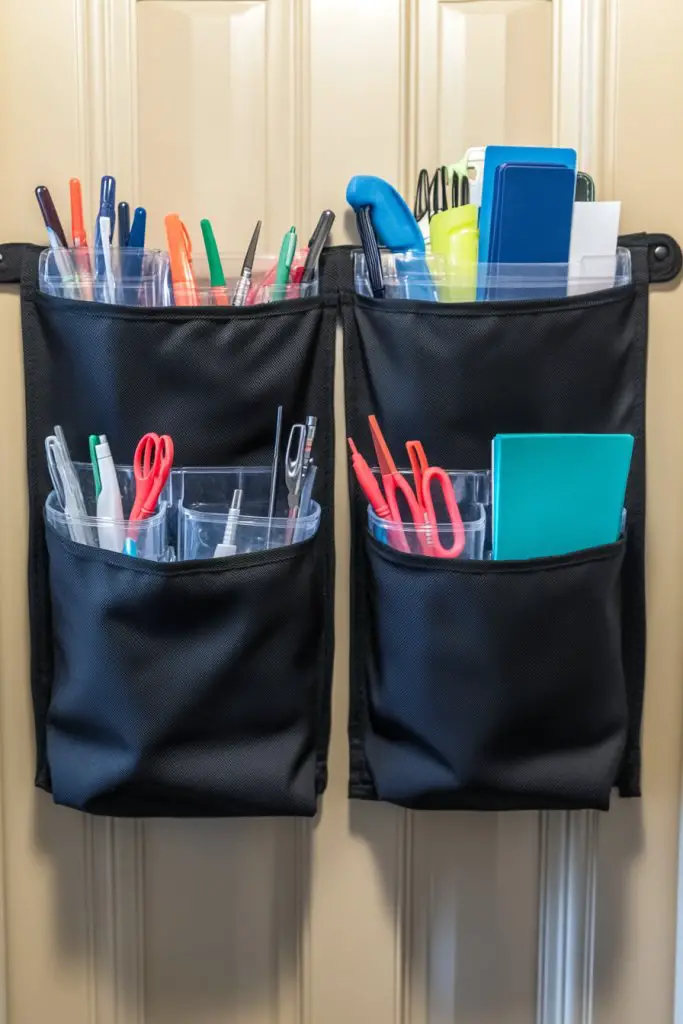
Is your closet overflowing with supplies, leaving no room for anything new? Do you wish there was a way to utilize every inch without adding bulky furniture? Over-the-door organizers are the secret weapon to reclaim wasted space. They turn your door into a handy storage zone with minimal effort.
Recommended Products to replicate this idea
| # | Preview | Product | |
|---|---|---|---|
| 1 |

|
SpaceHacks 1 Pack Over The Door Organizer, Hanging Storage Organizer with Clear Window, 40lb Ultra... | Check Latest Price |
| # | Preview | Product | |
|---|---|---|---|
| 1 |

|
Someteth 2 Pack Wall Hanging Storage Bag,Wall Hanging Organizer with Pockets, Hanging storage basket... | Check Latest Price |
Picture a fabric or mesh organizer hanging over the closet door, full of small pockets and pouches. Pens, chargers, scissors, and sticky notes all find a home in these accessible compartments. The soft fabric contrasts with the sturdy door, adding a touch of texture and color. It’s a simple, unobtrusive way to keep frequently used supplies within arm’s reach.
Choose between fabric, mesh, or clear vinyl styles based on your aesthetic preferences. For a more professional look, opt for sleek, neutral tones; for a playful vibe, go for bright colors or patterns. These organizers work well in small offices, craft rooms, or even kitchens for additional storage. You can also mount smaller versions on walls or inside cabinet doors for extra versatility.
Start by measuring your door’s height and width to select the right organizer. Hang it securely over the top or attach it with hooks or adhesive strips if you want a more permanent solution. Organize your supplies by type and assign each pocket a specific purpose. Use the top hooks for larger items like rulers or tape dispensers. Regularly review and adjust contents to keep it functional.
Personalize the look with decorative trims or fabric covers that match your decor. Use colorful labels or tags for quick identification. Incorporate small hooks or clips inside pockets for keys or badges. For a fun twist, add charms or embellishments that reflect your personality. This keeps organization playful and uniquely yours.
Over-the-door organizers make efficient use of vertical space, making clutter less overwhelming. They’re quick to install and easy to update as your needs change. Seeing all your essentials neatly arranged encourages ongoing tidiness. Ready to maximize your space without sacrificing style?
5. Use Drawer Dividers to Keep Small Items Organized and Prevent Clutter
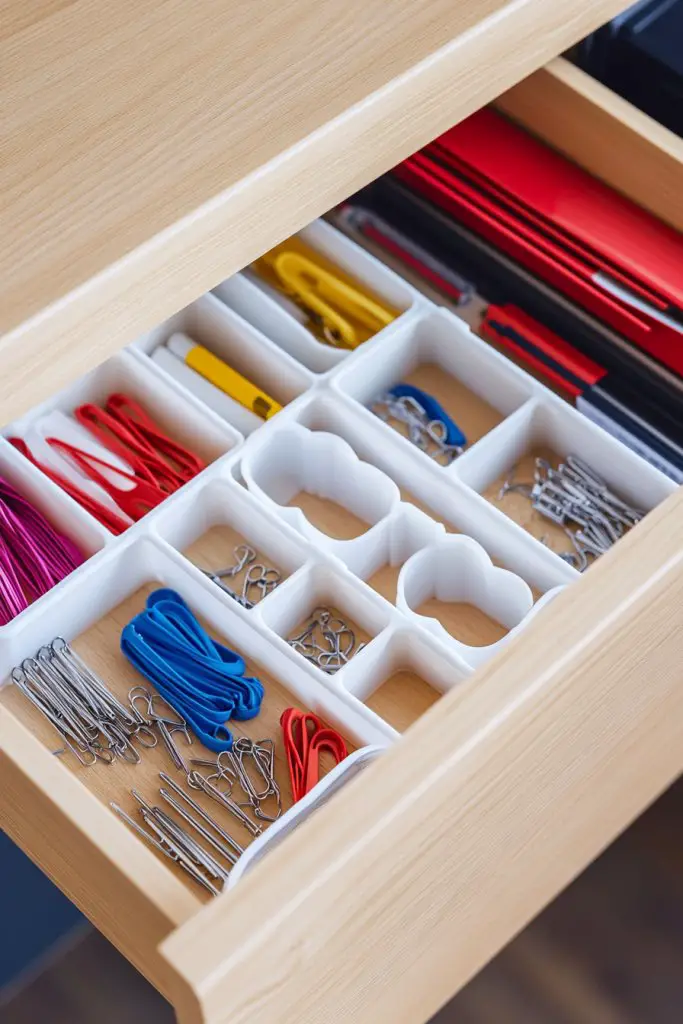
Do your drawers become a black hole for tiny supplies like staples, rubber bands, and paper clips? The chaos makes it tough to find what you need in seconds, leading to frustration. Drawer dividers are a simple way to create order out of clutter. They turn a messy drawer into a well-organized tool station.
Recommended Products to replicate this idea
| # | Preview | Product | |
|---|---|---|---|
| 1 |
|
Vtopmart 12 Pack Drawer Dividers for Clothes, 4" High 10.2"-16.5" Adjustable Expandable Dresser... | Check Latest Price |
| # | Preview | Product | |
|---|---|---|---|
| 1 |
|
Mathtoxyz Small Bead Organizers, 15 Pieces Plastic Storage Cases Mini Clear Bead Storage Containers... | Check Latest Price |
Imagine a deep drawer divided into neat sections, each dedicated to specific items. Rubber bands sit in one compartment, push pins in another, and small notepads in yet another. The dividers are sleek, adjustable, and easy to reposition. When you open the drawer, everything is visible and accessible without digging or dumping.
Opt for adjustable plastic or bamboo dividers that fit your drawer size. For a more aesthetic touch, choose dividers with rounded edges or painted finishes. Use them in both desk drawers and filing cabinets to keep small accessories tidy. You can also combine dividers with labeled containers to further categorize items.
Begin by emptying and sorting your drawer contents. Measure the internal dimensions to select appropriately-sized dividers. Install the dividers at desired intervals, making sure they are sturdy and secure. Group similar items together and label sections if needed. Periodically review and adjust the layout to accommodate new supplies or changes.
Personalize your dividers with custom paint or decorative tape to match your workspace. Use small containers within sections for ultra-tiny items like push pins or batteries. Incorporate color coding for quick recognition of categories. This adds both style and function to your organization system.
Well-placed drawer dividers make your workspace more efficient and reduce stress. They help you maintain a clutter-free environment, which boosts your productivity. Once organized, you’ll enjoy the satisfaction of a tidy desk, ready for any task. Ready to reclaim your drawer space?
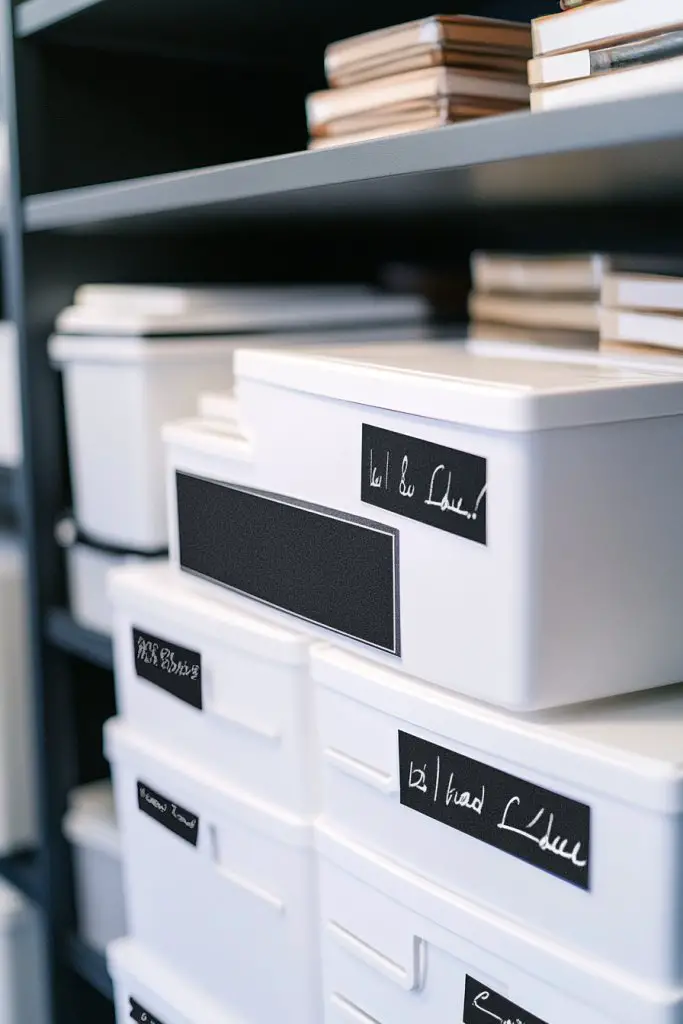
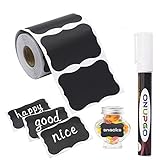
6. Label Everything with Stylish Chalkboard or Label Tapes
Ever pick up a container or drawer and wonder what’s inside? Without clear labels, you waste time opening multiple boxes or rummaging through clutter. Labels are the unsung heroes of organization, turning chaos into clarity. But boring labels? Nope, not here. Stylish chalkboard or label tapes make labeling both functional and fun.
Recommended Products to replicate this idea
| # | Preview | Product | |
|---|---|---|---|
| 1 |
|
ONUPGO Chalkboard Labels-180pcs Waterproof Reusable Blackboard Stickers with 1 Liquid Chalk Marker... | Check Latest Price |
| # | Preview | Product | |
|---|---|---|---|
| 1 |

|
Scotch Vinyl 700 Electrical Tape, 1 Roll, Black, 3/4-in x 66-ft, General Purpose, Commercial Grade,... | Check Latest Price |
Picture black chalkboard labels with white handwritten text or sleek vinyl tape with modern fonts. These labels stick firmly to containers, drawers, or shelves, instantly transforming the look of your space. The contrast makes text easy to read, and you can update or change labels with ease. The combination of practicality and style creates a polished, cohesive aesthetic.
Choose chalkboard labels for a rustic or vintage vibe, or opt for glossy vinyl in bold colors for a contemporary look. Use decorative fonts or icons to add personality. For seasonal updates, switch out labels or add embellishments like washi tape borders. Labels work well on jars, baskets, and even on shelving to designate zones.
Start by cleaning your containers and surfaces to ensure good adhesion. Write or print labels with clear, legible fonts, then affix them securely. For a consistent look, use a label maker or printable sticker sheets. Arrange your labeled containers in logical groups, and keep a label supply nearby for future updates. Regularly refresh labels as needed to keep everything current.
Add decorative touches like doodles or color-coded backgrounds to make labels stand out. Use different styles for different categories—chalkboard for casual, vinyl for sleek. Incorporate icons or symbols for quick recognition. Customizing labels adds a layer of fun and personality to your organization system.
Clear, stylish labels make your entire space look intentional and neat. They reduce confusion and save time, making daily routines smoother. With everything labeled, maintaining order becomes automatic. Ready to elevate your organization with a touch of style?
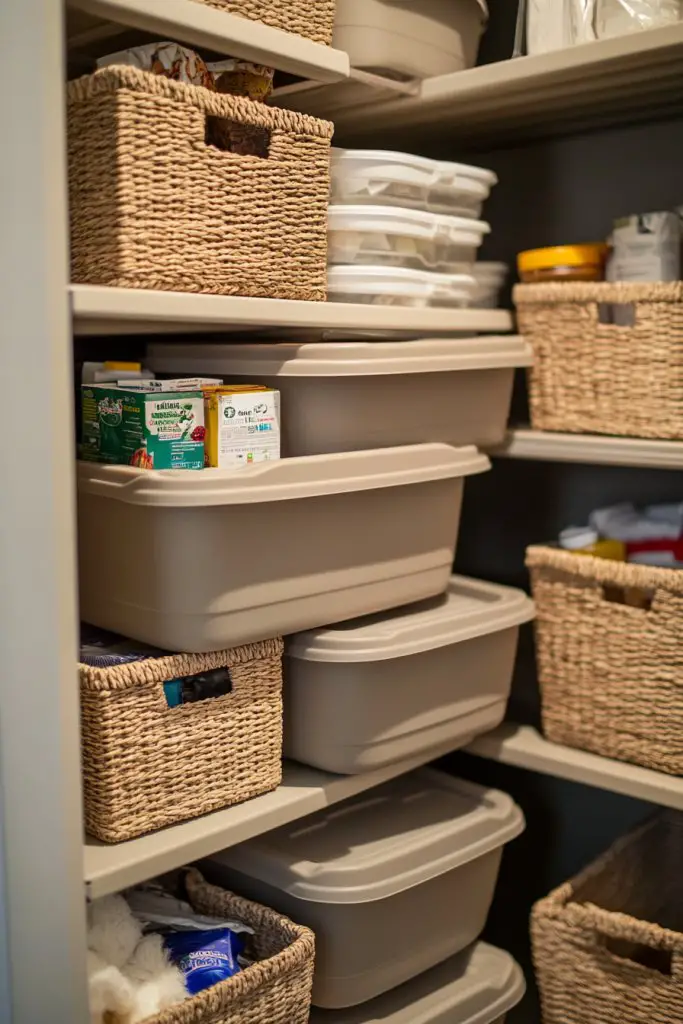
7. Maximize Space with Stackable Storage Bins and Baskets
Is your supply closet bursting at the seams with no clear way to store bulk or seasonal items? Do you wish you could fit more into less space without sacrificing accessibility? Stackable storage bins are the answer. They let you double or triple your storage capacity with minimal effort. Who doesn’t want more room for their stuff?
Recommended Products to replicate this idea
| # | Preview | Product | |
|---|---|---|---|
| 1 |

|
CTSNSLH 4 Tier Plastic Storage Bins and Boxes Organizer - Stackable with Lids for Bedroom, Living... | Check Latest Price |
| # | Preview | Product | |
|---|---|---|---|
| 1 |

|
SIXDOVE 4 Pack Storage Baskets for Organizing, Woven Baskets for Shelves - Perfect for Toys, Books,... | Check Latest Price |
Envision uniform bins neatly stacked in columns, each labeled for easy identification. The sturdy plastic or woven baskets create a clean, organized look, maximizing vertical space. You can see everything at a glance, with items arranged from small to large. When you need supplies, simply lift a bin or slide out a basket, revealing your well-organized collection.
Choose clear bins for visibility or opaque for a sleek look. Stackable baskets come in various materials, from plastic to woven rattan, fitting different decor styles. Use nesting bins for seasonal or infrequently used items, freeing up more space. Incorporate dividers inside larger bins for smaller items, keeping everything tidy.
Start by sorting your supplies into categories and choosing appropriately sized bins. Label each container clearly and secure lids to prevent dust and spills. Stack bins vertically on sturdy shelving or the floor, leaving room for easy removal. For added stability, secure stacks with clips or straps if necessary. Regularly review contents to prevent overflow and clutter.
Personalize your bins with custom labels, patterned fabrics, or paint accents. Use different colors for different categories, making it easy to locate seasonal or bulk supplies. Incorporate decorative touches like faux greenery or textured containers to add visual interest. Keep a few empty bins on hand for future expansion or shifting needs.
Stackable bins unlock the full potential of your storage space, making clutter a thing of the past. They inspire you to keep things tidy, knowing everything has a designated spot. As your collection grows, your organization system adapts effortlessly. Ready to stack your way to a cleaner, more efficient closet?
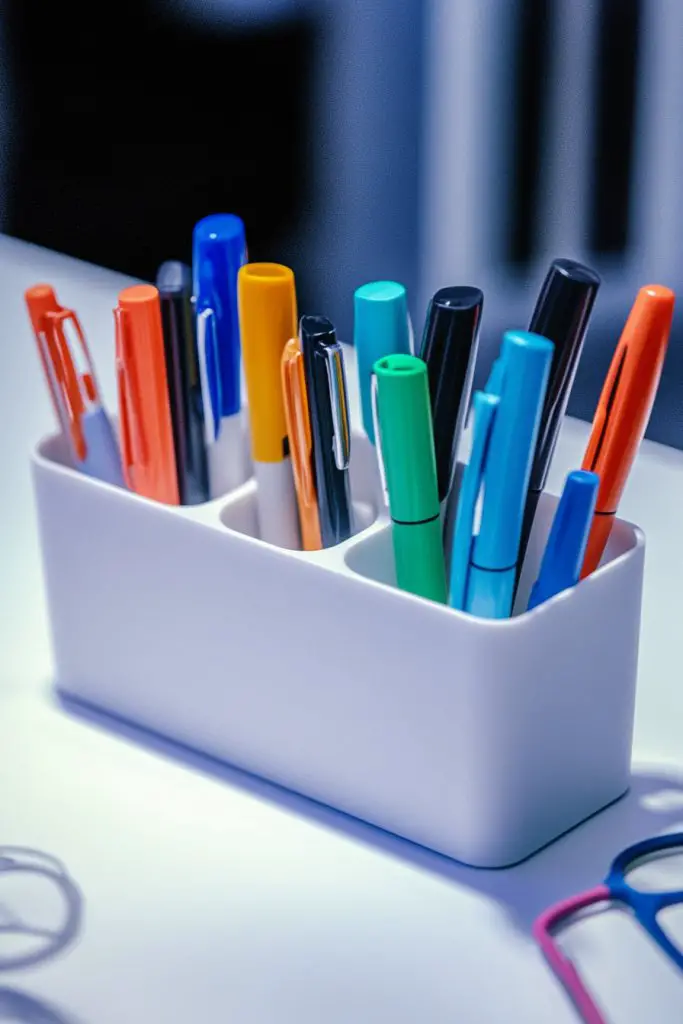
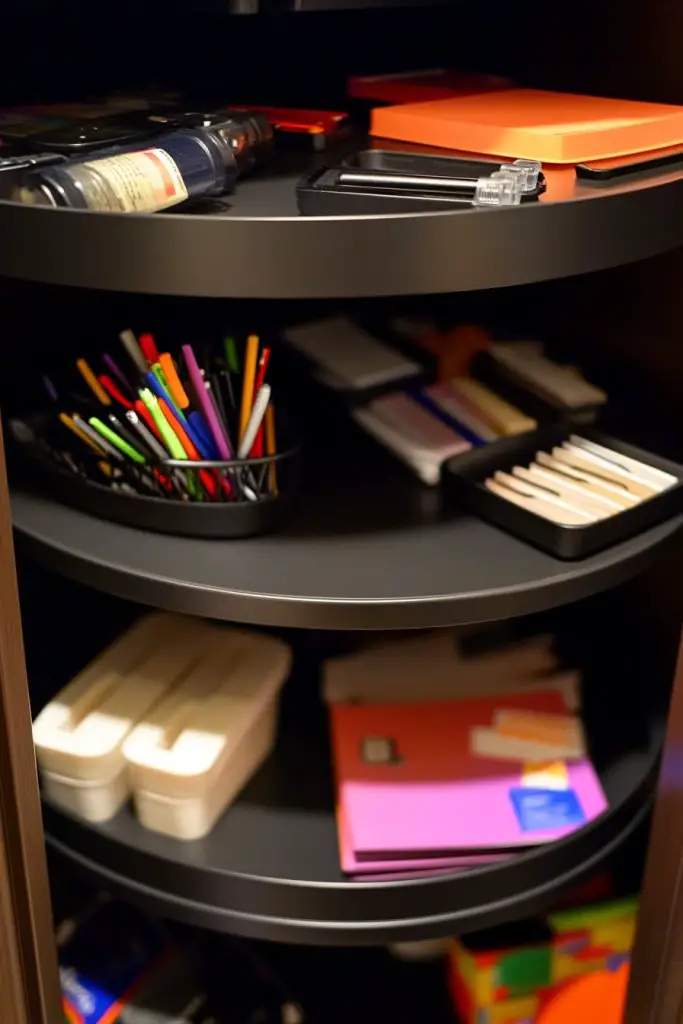
8. Create a Dedicated Station for Stationery with Compartments and Holders
Do your pens and markers end up scattered across your desk or stuffed into random drawers? It’s a pain digging through clutter just to find the right writing tool. Creating a dedicated station keeps everything in one place and makes your workspace look instantly organized. Who doesn’t want a tidy, inspiring spot for all things stationery?
Recommended Products to replicate this idea
| # | Preview | Product | |
|---|---|---|---|
| 1 |

|
Supeasy 5 Trays Paper Organizer Letter Tray with Handle-Mesh Desk File Organizer, Paper Sorter Desk... | Check Latest Price |
| # | Preview | Product | |
|---|---|---|---|
| 1 |

|
HSYMQ Acrylic Pen Holder 4 Compartments Clear Pencil Holder Organizer Makeup Brush Holder | Check Latest Price |
Visualize a sleek tray or cup with multiple compartments, each holding pens, markers, scissors, and sticky notes. The stand is sturdy, with a modern or rustic finish that complements your decor. Items sit upright and are easy to grab without knocking everything over. A well-designed station transforms chaos into calm and sparks creativity.
Choose divided trays or stands with adjustable sections to fit your collection. For a more personalized touch, opt for colorful or patterned holders. Use different heights or stacking trays to maximize space. For a minimal look, select clear acrylic holders that showcase your favorite pens and tools. Add a small chalkboard or label for extra organization.
Start by gathering all your stationery in one place. Select a container or stand with compartments that fit your collection and workspace size. Organize items by type—writing instruments, adhesives, small tools—and assign each a specific slot. Label each section if desired. Keep frequently used items at the front for quick access. Regularly tidy and refill to maintain order.
Decorate your station with washi tape or paint to match your style. Incorporate small decorative accents like charms or stickers to make it uniquely yours. Use colorful or themed containers for different projects or moods. Personal touches turn a simple station into a fun, inspiring part of your workspace.
A dedicated stationery station keeps your supplies accessible and your mind clear. It encourages regular tidying, which in turn boosts your productivity. When everything is in its place, you’re more likely to stay organized and motivated. Ready to create your perfect stationery hub?
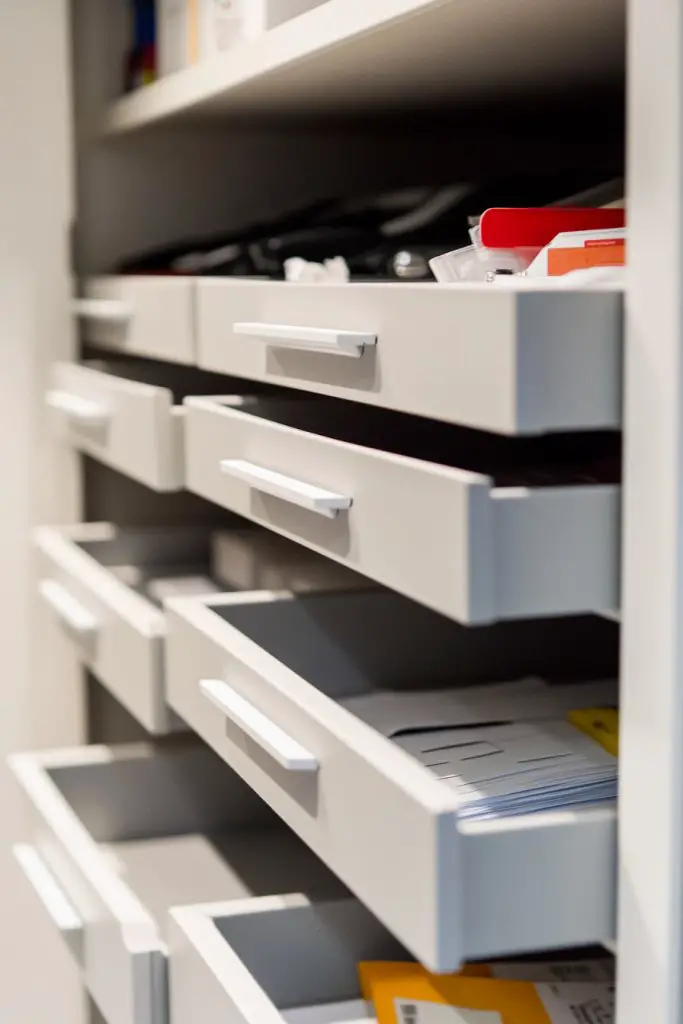
9. Install Pull-Out Drawers or Trays for Easy Access to Hidden Items
Ever had to dig through a mountain of supplies just to find that one hidden item? Deep or cluttered shelves often hide essentials out of sight, causing frustration and wasted time. Pull-out drawers or trays bring hidden items into plain view with a simple slide. Who doesn’t love quick access and a clutter-free space?
Imagine smooth metal or wood trays that glide out effortlessly from within your shelves or cabinets. The contents—folders, tech gadgets, or supplies—are revealed in an organized, accessible manner. The sleek design minimizes visual clutter and adds a touch of sophistication. With a gentle pull, everything you need is at your fingertips.
Choose between full-extension drawers or shallow trays depending on your height and needs. For a modern look, select minimalist finishes and handleless designs. Use within existing cabinets or build a custom drawer system into your shelving. Add dividers or small containers inside trays for enhanced sorting. Adapt the size and number to your storage volume.
Identify cluttered or deep shelves where sliding trays would make a difference. Measure interior dimensions to select compatible pull-out units. Install using appropriate hardware, ensuring smooth sliding and stability. Organize items within trays by category, using small containers or dividers. Regularly review contents for efficiency and to prevent overflow.
Customize with labels or color-coded trays for different categories. Use soft-close mechanisms for quieter operation. Decorate the front panels with paint or stencils to match your decor. Incorporate matching handles or pulls for a unified look. Personal touches make the system both functional and stylish.
Pull-out trays turn inaccessible spaces into efficient storage zones, making your entire closet easier to maintain. They give you quick access to seldom-used items without the hassle of crawling or digging. Once installed, you’ll feel more in control of your organization. Ready to slide your way to a neater space?
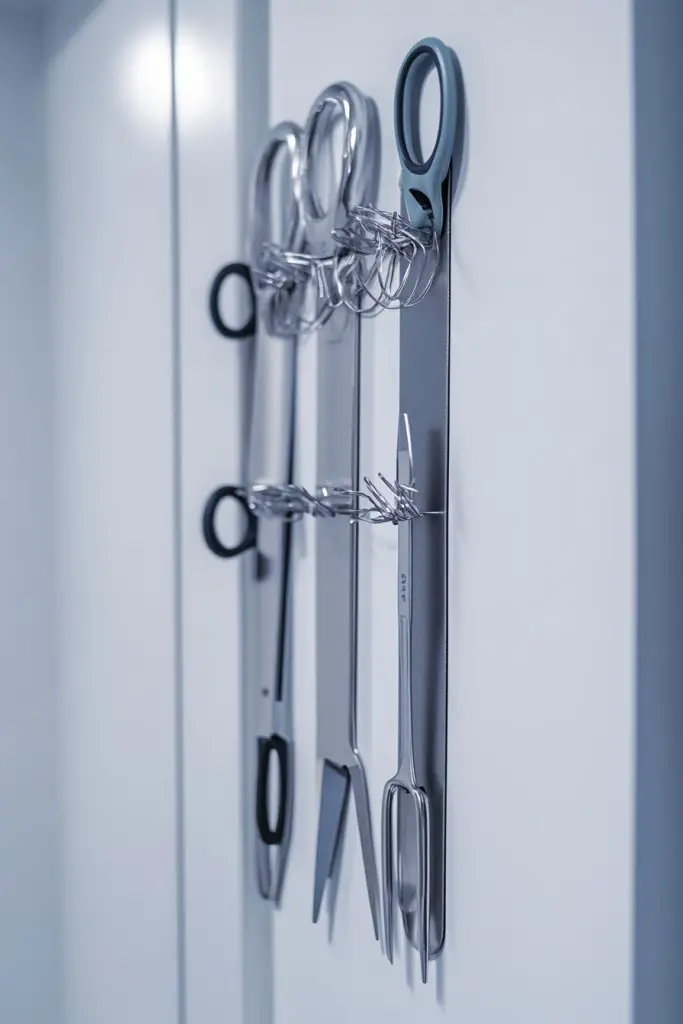
10. Use Magnetized Strips for Metallic Office Tools and Supplies
Are your scissors, clips, and metallic tools often falling behind shelves or cluttering your workspace? It’s annoying when small metal items roll away or get lost. Magnetized strips offer a clever way to hold these supplies in plain sight and within easy reach. Who knew magnets could save your sanity?
Recommended Products to replicate this idea
| # | Preview | Product | |
|---|---|---|---|
| 1 |

|
SEDY 7-Piece 12" Magnetic Tool Holder Storage Organizer, Garage Wall Mount Rack Organization Strip... | Check Latest Price |
| # | Preview | Product | |
|---|---|---|---|
| 1 |

|
Veken Coffee Canister with Window,Airtight Stainless Steel Pantry Container,Home Kitchen Food... | Check Latest Price |
Picture a sleek strip mounted inside your closet door or on a wall, dotted with small metal tools. Magnets hold scissors, clips, and even small metal containers securely in place. The strip keeps everything organized and visible, reducing clutter and search time. The minimalist design blends into your space without drawing attention.
Choose from magnetic strips in stainless steel, painted wood, or flexible rubber to match your decor. For a more industrial look, opt for metallic finishes; for a softer vibe, go for painted or matte options. Attach smaller magnetic containers for holding tiny items like thumbtacks or washers. Mount strips at different heights for multiple tool zones.
Select a location near your workspace or closet door for easy access. Clean the surface thoroughly before mounting with screws or adhesive strips. Arrange your tools on the magnetic strip, grouping similar items together. Use additional magnetic containers for small parts, and label them if desired. Regularly update the arrangement as your tools or supplies change.
Decorate the magnetic strip with paint or stickers to match your space. Use colorful or patterned magnetic containers for a fun look. Incorporate a small magnetic board nearby for notes or reminders. Personal touches like custom magnets or labels keep the system engaging and functional.
Magnetic strips keep metallic tools visible and accessible, saving time and reducing clutter. They make your entire supply area more efficient and visually appealing. Once you see how organized and easy everything is, you’ll wonder why you didn’t do this sooner. Ready to magnetize your space?
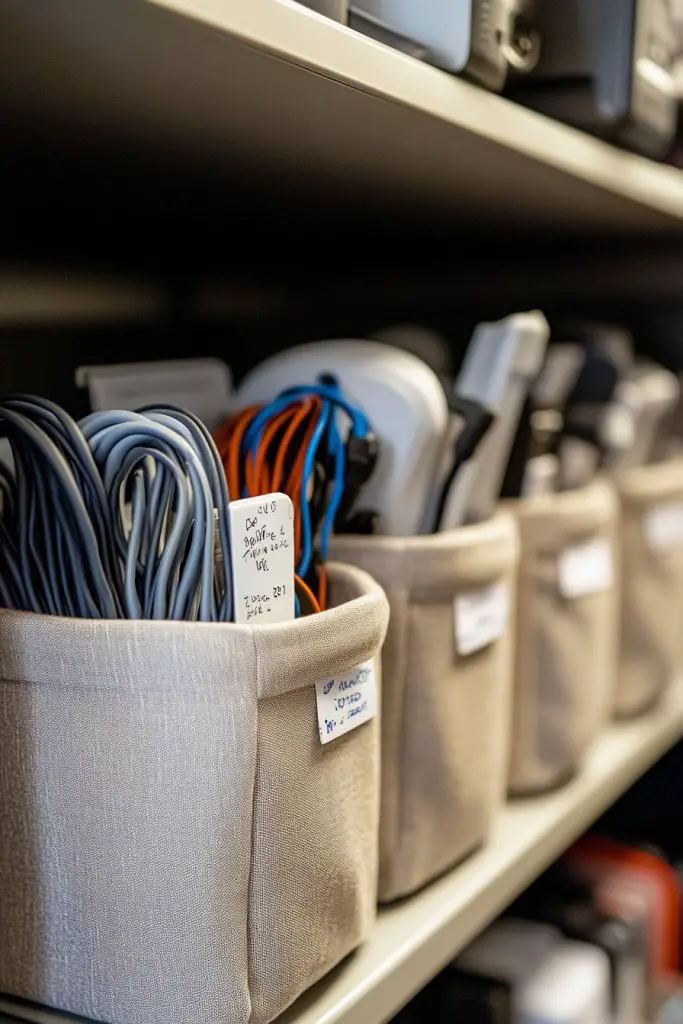
11. Incorporate Small Bins for Organizing Cables, Chargers, and Tech Accessories
Do tangled cables and chargers turn your closet into a wiring jungle? It’s frustrating digging through a tangle of cords just to find the right one. Small bins dedicated to tech accessories can tame this chaos. Who wants to spend extra minutes untangling when you could be productive?
Recommended Products to replicate this idea
| # | Preview | Product | |
|---|---|---|---|
| 1 |
|
CTSNSLH 4 Tier Plastic Storage Bins and Boxes Organizer - Stackable with Lids for Bedroom, Living... | Check Latest Price |
| # | Preview | Product | |
|---|---|---|---|
| 1 |

|
Cable Organizer Storage Box with 7 Wire Ties,Desktop Cable Management Box with Switch, Power Cord... | Check Latest Price |
Visualize labeled, stackable bins filled with neatly coiled cables, chargers, and adapters. Each bin is dedicated to a device type or family, making everything easy to locate. The bins sit on shelves or inside drawers, keeping your tech tidy and protected. The organized setup looks clean, modern, and ready for quick grabs.
Choose bins with lids or open-top containers depending on your preference. Use color coding—blue for computers, red for phones, green for miscellaneous—to simplify identification. Incorporate cable ties or Velcro straps within bins for neat coiling. For a more decorative approach, opt for textured or patterned containers.
Sort all your cables and accessories into categories. Purchase small, stackable bins with labels or transparent sides. Coil each cable neatly and secure with ties or clips before placing inside the bin. Label each container clearly and place in an accessible location. Periodically review and discard unnecessary or damaged cables for maintenance.
Decorate labels with colorful markers or stickers for quick recognition. Use themed bins that match your decor style, from sleek modern to rustic. Incorporate cable organizers or clips inside bins for even more order. Keep a few spare containers for future tech upgrades or additions.
Organized cable bins save time and frustration, making your tech setup more efficient. They reduce clutter and prevent damage to delicate cords. Seeing everything in its designated place encourages ongoing tidiness. Ready to wire your closet with clarity?
12. Add a Hanging File Organizer for Important Documents and Templates
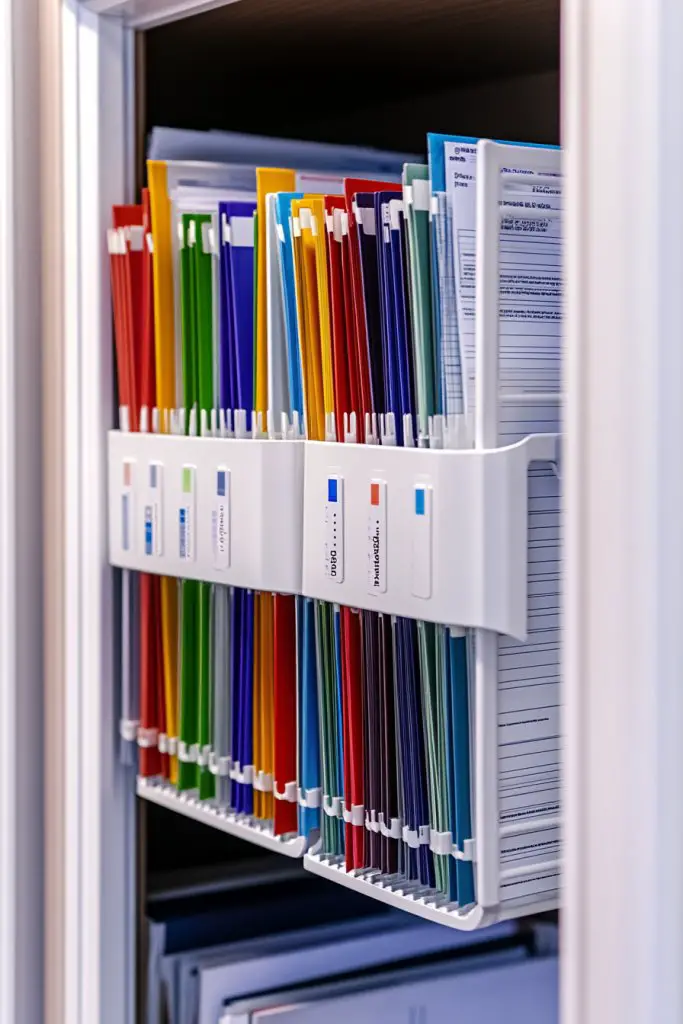
Are important papers, forms, or templates piling up in a chaotic heap? Searching through stacks wastes valuable time and adds to stress. Hanging file organizers turn chaos into order, giving you a dedicated space for crucial documents. Who doesn’t want a simple, accessible system for paperwork?
Recommended Products to replicate this idea
| # | Preview | Product | |
|---|---|---|---|
| 1 |

|
EASEPRES 5 Pocket Mesh Hanging Wall File Organizer, Wall Mounted Mail Paper Document Folder Holder,... | Check Latest Price |
| # | Preview | Product | |
|---|---|---|---|
| 1 |

|
Hanging Wall File Organizer, 5 Pocket, Black Wall Storage Pocket Charts with 2 Hangers, Oxford Cloth... | Check Latest Price |
Imagine a wall-mounted or over-the-door file pocket with multiple sections. Each pocket holds different documents: contracts, invoices, project templates. The fabric or plastic pockets are transparent or labeled clearly, so you see exactly what’s inside. When you need a form, it’s right there, ready and waiting.
Choose between fabric, mesh, or vinyl pockets based on your aesthetic. Use color-coded pockets for quick sorting—red for urgent, green for ongoing projects, blue for reference. Mount the organizer inside your closet, on a door, or on a wall for easy access. Adjust the size and number of pockets depending on your document volume.
Start by gathering all your important documents and sorting them into categories. Attach the hanging organizer securely to a door or wall using hooks or adhesive strips. Insert documents into labeled pockets, ensuring the labels are clear and visible. Regularly review contents to discard outdated papers and keep files current. Use binder clips or tabs for extra organization.
Personalize the organizer with decorative tapes or stickers on the pockets. Incorporate color coding for quick recognition and priority. Add small labels or icons to differentiate document types. Keep a notepad or pen nearby for quick notes or updates.
A hanging file organizer makes paperwork management straightforward, reducing clutter and stress. It keeps essentials within reach, boosting your productivity. Once set up, maintaining order becomes effortless, giving you peace of mind. Ready to streamline your document chaos?
13. Optimize Corner Space with Lazy Susans or Rotating Trays
Corners are the most neglected spots in any closet, often turning into dead zones filled with forgotten supplies. Trying to access items stuck in the back is a hassle. Lazy Susans or rotating trays turn these awkward corners into functional storage. Who doesn’t want to utilize every inch of their space?
Recommended Products to replicate this idea
| # | Preview | Product | |
|---|---|---|---|
| 1 |

|
Copco Basics Non-Skid Lazy Susan for Under Sink and Cabinet Storage, 18 Inch, Crystalline | Check Latest Price |
| # | Preview | Product | |
|---|---|---|---|
| 1 |
|
Set of 4, 10 Inch Non-Skid Lazy Susan Organizers - Turntable Rack for Cabinet, Pantry Organization... | Check Latest Price |
Picture a circular tray spinning smoothly on a sturdy base tucked into the corner. It’s filled with tape rolls, stamps, or small containers, all easily accessible with a spin. The rotating mechanism keeps everything within reach without knocking over other items. The space feels organized, efficient, and surprisingly spacious.
Choose between sleek metal or classic wood finishes to match your decor. Use multiple trays stacked vertically or side by side for different categories. For larger spaces, opt for bigger trays or tiered rotating units. Incorporate small dividers inside to segment supplies further. Adapt the size and style based on your needs and aesthetic.
Measure your corner space to select appropriately sized Lazy Susans or trays. Install the base securely into the corner, ensuring stability. Fill the trays with related supplies, grouping similar items together. Regularly rotate and review contents to prevent clutter buildup. Use labels or color coding for quick identification. Keep the mechanism clean for smooth operation.
Add decorative touches like painted edges or patterned trays to match your decor. Incorporate small containers or dividers inside trays for mini-supplies. Use labels or icons for quick recognition. Personalize the look with stickers or custom finishes for a unique vibe.
Corner Lazy Susans make use of neglected space, turning it into productive storage. They simplify access and keep supplies neat and visible. Once installed, you’ll appreciate how much extra space you’ve unlocked. Ready to spin your way to better organization?
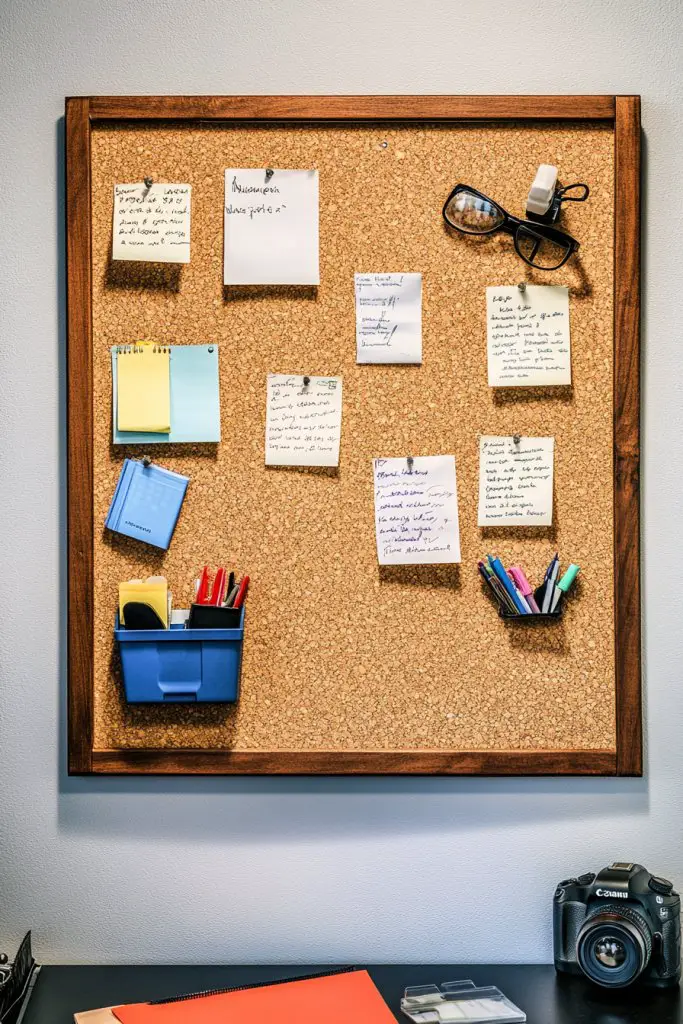
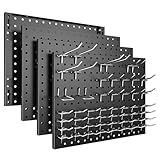
14. Create a Visual Inspiration Board with Corkboard or Pegboard Panels
Sometimes, the biggest inspiration comes from a visual cue right in front of you. If your space feels uninspired or cluttered, a dedicated board for notes, ideas, and motivational quotes can spark creativity. It’s like having a mood board that keeps your energy high and your plans clear. Who says organization can’t be inspiring?
Recommended Products to replicate this idea
| # | Preview | Product | |
|---|---|---|---|
| 1 |

|
Fluxynara Large Felt Bulletin Board 48" x 36" Cork Board Alternative-12 Pack with 70 Safe Removable... | Check Latest Price |
| # | Preview | Product | |
|---|---|---|---|
| 1 |
|
Spampur Peg Board, 4 Pack Metal Pegboard Panels with 50 Hooks, Black Pegboards Wall Organizer, Heavy... | Check Latest Price |
Imagine a large corkboard or pegboard mounted on the wall, filled with colorful clips, notes, and inspirational quotes. Pins and hooks hold everything from reminders to sketches, all arranged in an eye-catching layout. The textured surface adds a tactile element, inviting you to interact with your space. It’s a dynamic visual display that motivates and organizes at once.
Choose natural cork for a rustic look or painted pegboards for a modern touch. Incorporate decorative elements like string lights or fabric accents for added warmth. Use color-coded clips or magnets to categorize notes and ideas. For seasonal updates, switch out quotes or images easily. Mount the board at eye level for maximum impact.
Select a wall space near your workspace for visibility. Mount the cork or pegboard securely, ensuring it’s level. Organize your notes, photos, and motivational quotes with clips or hooks, grouping related items. Regularly update the content to keep the inspiration fresh. Use labels or small containers for supplies like push pins or clips. Keep the area clutter-free for maximum effect.
Decorate the board with washi tape borders or painted accents for personality. Incorporate themed elements that reflect your style or current projects. Use decorative clips or magnets with fun shapes or patterns. Personal touches like handwritten quotes or artwork make the space uniquely yours.
A visual inspiration board keeps your goals and ideas front and center, fueling motivation. It transforms a plain wall into a creative hub that encourages productivity. Regular updates keep your space lively and inspiring. Ready to turn your wall into a source of daily inspiration?
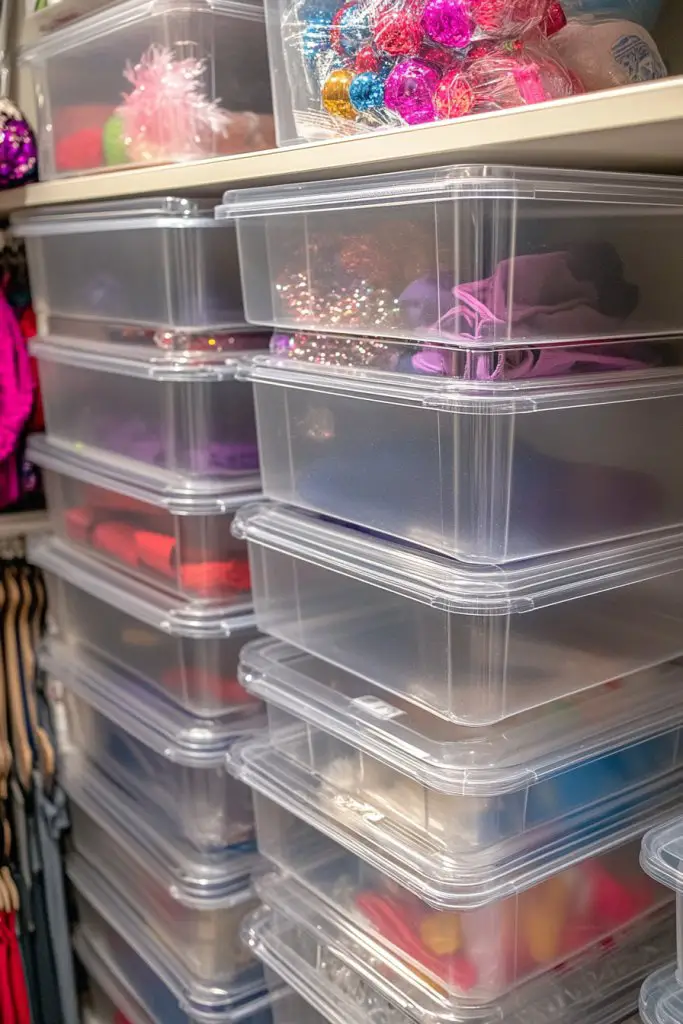
15. Use Stackable Clear Bins with Lid for Seasonal or Bulk Supplies
Do seasonal decorations, bulk supplies, or rarely-used items clutter your space, making it hard to find what you need? Storing these in random boxes or bags leads to chaos and wasted time. Clear stackable bins with lids offer a tidy solution to keep everything protected and visible. Who doesn’t want a clutter-free, organized closet?
Recommended Products to replicate this idea
| # | Preview | Product | |
|---|---|---|---|
| 1 |

|
IRIS USA 4-Pack Storage Bins with Lids, 13 Quart, Made in USA Stackable See-Through Organizing... | Check Latest Price |
| # | Preview | Product | |
|---|---|---|---|
| 1 |

|
IRIS USA 13 QT Plastic Storage Box with Lid and Latches - 6 Pack - BPA-Free, See-Through Organizing... | Check Latest Price |
Imagine transparent bins stacked neatly on shelves, each labeled with contents like ‘Holiday Decor’ or ‘Extra Paper.’ The clear sides let you see what’s inside without opening every box. The lids keep dust, moisture, and pests out, preserving your supplies. When you need seasonal items, you simply lift the top bin, grab what you need, and stack it back.
Opt for colored or frosted bins to add visual interest or match your decor. Use uniform sizes for a streamlined look or mix sizes for versatility. Incorporate labels with icons or text for quick identification. Store larger or bulky items in the bigger bins, and smaller supplies in smaller containers inside the larger ones.
Sort seasonal or bulk items into categories. Purchase clear, stackable bins with sturdy lids and handles for easy transport. Label each bin with waterproof stickers or markers. Stack them on shelves or in corners, leaving space for easy access. Periodically review and rotate items to prevent clutter buildup. Maintain labels and check contents at least seasonally.
Decorate labels with color schemes or icons matching your theme. Use patterned or textured lids for a decorative touch. Incorporate small hooks or tags for additional categorization. Personal touches like custom stickers or themed labels make storage both functional and fun.
Stackable clear bins make your closet look organized and professional, inspiring continued tidiness. They simplify retrieval and storage, saving you time and effort. Over time, maintaining this system becomes second nature, transforming chaos into calm. Ready to stack your way to a more organized space?
16. Incorporate Stylish Baskets or Vintage Containers for a Rustic or Boho Look

Are you tired of sterile, boring storage solutions that lack personality? Want to add warmth and charm to your office closet while staying organized? Stylish baskets and vintage containers do double duty—function and fashion. They bring a cozy, eclectic vibe that makes organization feel less like a chore. Who says storage can’t be pretty?
Recommended Products to replicate this idea
| # | Preview | Product | |
|---|---|---|---|
| 1 |

|
12x12in Storage Baskets Set of 4 Water Hyacinth Baskets,Foldable Handwoven Storage Cubes,Wicker Cube... | Check Latest Price |
| # | Preview | Product | |
|---|---|---|---|
| 1 |

|
LYDWOO8D Wooden Storage Crates Nested Crates Set of 3 (Large,Medium,Small),Farmhouse Decorative... | Check Latest Price |
Picture woven wicker baskets or distressed vintage crates filled with supplies. The textured surfaces and natural tones add warmth and character to your space. Items like notebooks, chargers, or craft supplies sit neatly inside, visible yet contained. The mix of rustic and modern elements creates a welcoming, personalized environment.
Choose baskets in natural fibers like jute, seagrass, or rattan for a rustic look, or opt for shabby-chic painted or distressed finishes for a vintage vibe. Incorporate different sizes for versatility and aesthetic interest. Use decorative labels or fabric liners for added charm. Place baskets on open shelves or inside cabinets for a layered, textured look.
Sort supplies into categories and select baskets or containers that fit your space and style. Arrange items inside, adding liners or dividers if needed. Stack or line up baskets for efficient use of space. Label each container with handwritten tags or branded stickers. Regularly tidy and rotate contents to keep everything fresh and appealing.
Personalize with decorative tags, ribbons, or fabric wraps. Mix materials like wood, metal, and woven fibers for an eclectic look. Incorporate small decorative accents like vintage keys or charms. Use fabric liners or tags to add color and texture, making the space uniquely yours.
Stylish baskets turn storage into a design feature, inspiring you to keep the space neat. They evoke a cozy, inviting atmosphere that encourages ongoing organization. As your closet becomes more attractive, your motivation to maintain order increases. Ready to add warmth and style?
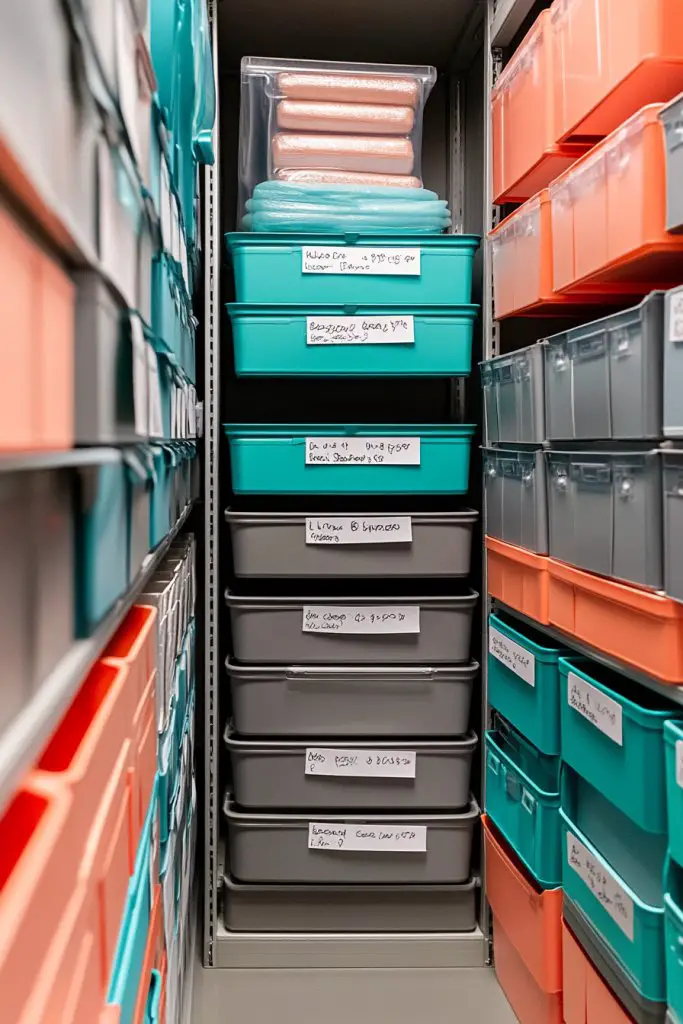
17. Label and Color-Code the Entire Closet for Instant Navigation and Efficiency
Ever spend minutes hunting for a specific supply only to realize it’s hidden in the wrong spot? Without a clear system, clutter and confusion reign supreme. Labeling and color-coding your entire closet creates an instant navigation system. It’s like giving your supplies a map—no more guesswork, just quick access. Who’s up for a highly efficient workspace?
Recommended Products to replicate this idea
| # | Preview | Product | |
|---|---|---|---|
| 1 |
|
Nelko Label Maker Machine with Tape, P21 Bluetooth Label Printer, Wireless Mini Label Makers with... | Check Latest Price |
| # | Preview | Product | |
|---|---|---|---|
| 1 |

|
1400 PCS Colored Dot Stickers Round Color Coding Labels Classroom Must Haves, Circle Dots Labels... | Check Latest Price |
Envision a closet where each section or container sports a bold color and a clear label. Blue for writing tools, red for adhesives, green for tech accessories—each category is instantly recognizable. The labels are large, legible, and durable, ensuring clarity. When you need something, you know exactly where to look, saving time and reducing frustration.
Use colored tape, labels, or stickers to assign categories. Opt for a consistent color scheme that matches your decor for a cohesive look. Incorporate labels with icons or symbols for quick recognition. Adapt the system seasonally or as needs change, swapping colors or labels for fresh updates. The goal is a system that’s easy to understand and maintain.
Start by categorizing your supplies and choosing a color scheme. Label each container, shelf, or drawer with large, clear tags or stickers. Use colored tape or labels directly on storage units for visual cues. Arrange items according to your system, and keep a master list if needed for reference. Regularly review and update labels to reflect changing needs.
Add decorative elements like washi tape borders or themed icons to make labels engaging. Use different font styles or handwriting for a personal touch. Incorporate matching storage bins or containers with coordinating colors. This system not only speeds up finding supplies but also makes your space look vibrant and intentional.
A well-labeled, color-coded closet boosts your confidence in your organizational skills. It encourages ongoing maintenance and helps establish good habits. The instant recognition of items makes your workspace more efficient, less stressful, and more enjoyable. Ready to color your closet into a well-oiled machine?
Conclusion
With a diverse range of office supply closet organization ideas, you now have the tools to transform your space into an efficient and inspiring area. Trying out these solutions can lead to a more organized, stress-free workspace that boosts productivity. Don’t wait—start implementing these ideas today and turn your closet into a model of order and accessibility. Your ideal organized office awaits!