
17 Painted Ceiling Bathroom Ideas for Updated Style
A painted ceiling can instantly transform the mood and style of a bathroom, making it a bold and creative design choice that’s gaining popularity. From subtle hues to vibrant statements, painted ceilings add depth, personality, and a touch of luxury to an often-overlooked space.
In this article, you’ll discover a variety of inspiring ideas to elevate your bathroom’s aesthetic. Whether you prefer calming neutrals, playful patterns, or dramatic dark tones, these painted ceiling concepts will help you craft a truly unique and stylish retreat that reflects your personality and taste.
1. Soft Pastel Hues for a Calm, Spa-Like Atmosphere
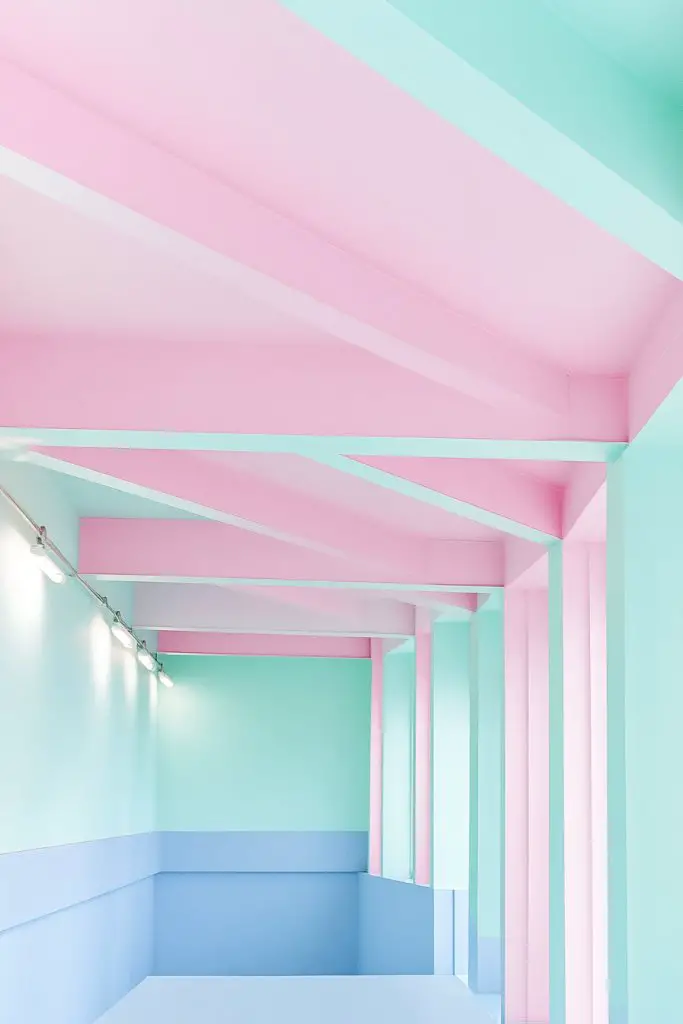
Ever wish your bathroom felt more like a relaxing retreat than a hectic pit stop? Soft pastel hues can transform that space into a calming sanctuary. They evoke serenity and make mornings a little more bearable. Who wouldn’t want a spa vibe right in their own home?
Recommended Products to replicate this idea
| # | Preview | Product | |
|---|---|---|---|
| 1 |

|
Zinnser 03688 Covers Up Stain Sealing Ceiling Paint, White | Check Latest Price |
| # | Preview | Product | |
|---|---|---|---|
| 1 |
|
Homax 41072024174 Roll On Wall Texture White, Sand, 2 gal, 256 Fl Oz (Pack of 1) | Check Latest Price |
Imagine a ceiling painted in blush pink, complemented by light mint green accents around the edges. The gentle, powdery tones reflect soft natural light, creating an ethereal glow. Textured paint adds a subtle depth, reminiscent of a gentle sunrise or a cloud-filled sky. This soothing palette instantly relaxes anyone stepping inside.
You can swap pastel shades depending on your mood or season, like icy blue for winter or warm peach in summer. For a slightly more dramatic effect, pair pastels with matte white moldings or trim. Small accent colors, such as soft lavender or buttery yellow, can enhance the overall calmness. Don’t forget to balance brighter accents with neutral walls for harmony.
Start by choosing high-quality matte pastel paints suitable for humid environments. Use painter’s tape to create crisp edges or subtle gradients. A primer helps the colors pop and last longer. For a textured effect, consider sponging or dry brushing techniques. Protect your fixtures and fixtures with drop cloths, and ensure proper ventilation while painting. Multiple thin coats will give the best, even finish.
Personalize with soft textiles like plush towels, a cozy bathmat, or a velvet shower curtain in complementary pastel shades. Incorporate scented candles or diffusers with calming aromas. Decorative shelving in soft hues can hold skincare or decorative jars. Keep the overall theme light and airy, avoiding clutter for maximum tranquility.
Pastel ceilings create an instant mood lift and can make small bathrooms feel more spacious. They’re also versatile enough to complement various decor styles, from modern minimalism to shabby chic. Trust that a gentle coat of color can redefine your space into a peaceful haven you’ll love waking up to.
2. Bold Dark Colors for a Dramatic, Modern Look
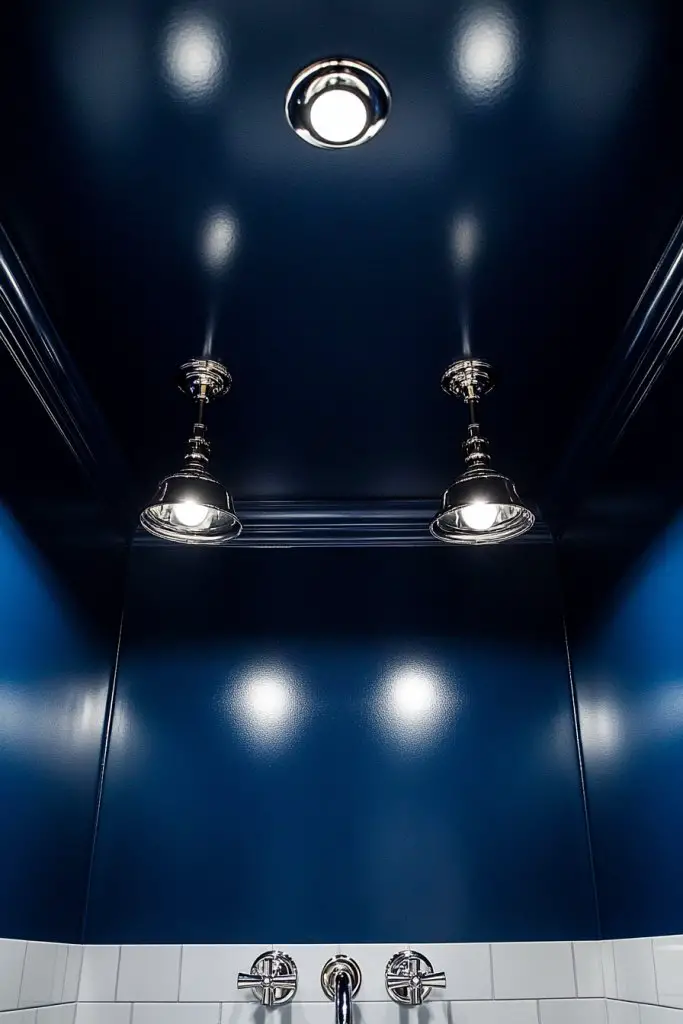
Feeling like your bathroom needs a serious upgrade? Bright whites are nice, but sometimes you crave something bolder. Deep navy, charcoal, or hunter green can turn a dull space into a striking, modern masterpiece. It’s a risk worth taking if you want to make a statement.
Recommended Products to replicate this idea
| # | Preview | Product | |
|---|---|---|---|
| 1 |
|
Zinnser 03688 Covers Up Stain Sealing Ceiling Paint, White | Check Latest Price |
| # | Preview | Product | |
|---|---|---|---|
| 1 |

|
DESIGNERS FOUNTAIN Reedley 2-Lights Flush Mount Ceiling Light, 11 Inch Lighting Fixture for Kitchen,... | Check Latest Price |
Picture a ceiling painted in midnight navy, contrasting sharply with light-colored walls. The dark hue creates a cocooning effect, making the space feel intimate yet sophisticated. Subtle sheen finishes catch the light, adding depth and dimension. Paired with matte black fixtures and minimal decor, it’s a sleek, contemporary vibe.
For a softer approach, opt for dark gray or muted emerald. If your space is small, balance the darkness with plenty of natural light and reflective surfaces. Incorporate metallic accents like brushed gold or chrome to add a touch of glam. You could also experiment with textured finishes for a more dynamic look.
Choose high-quality, moisture-resistant paints in deep shades. Use a roller for even coverage, applying multiple thin coats to avoid streaks. Consider adding a semi-gloss or satin finish for durability and easy cleaning. Proper surface prep is essential—sand and prime for adhesion. Use painter’s tape to ensure sharp edges and avoid splashes on adjacent surfaces. Ventilate well during and after painting.
Add contrast with bright white trim or moldings. Incorporate sleek, modern fixtures and minimalist accessories. Consider a textured shower curtain or towels in complementary jewel tones. Personal touches like sculptural soap dishes or geometric storage units help tie the look together.
Dark ceilings instantly elevate your bathroom’s style, making it feel more luxurious and tailored. They work beautifully in larger spaces or rooms with plenty of natural light. Embrace the drama—this bold choice shows confidence and a keen eye for design, turning your bathroom into a true statement piece.
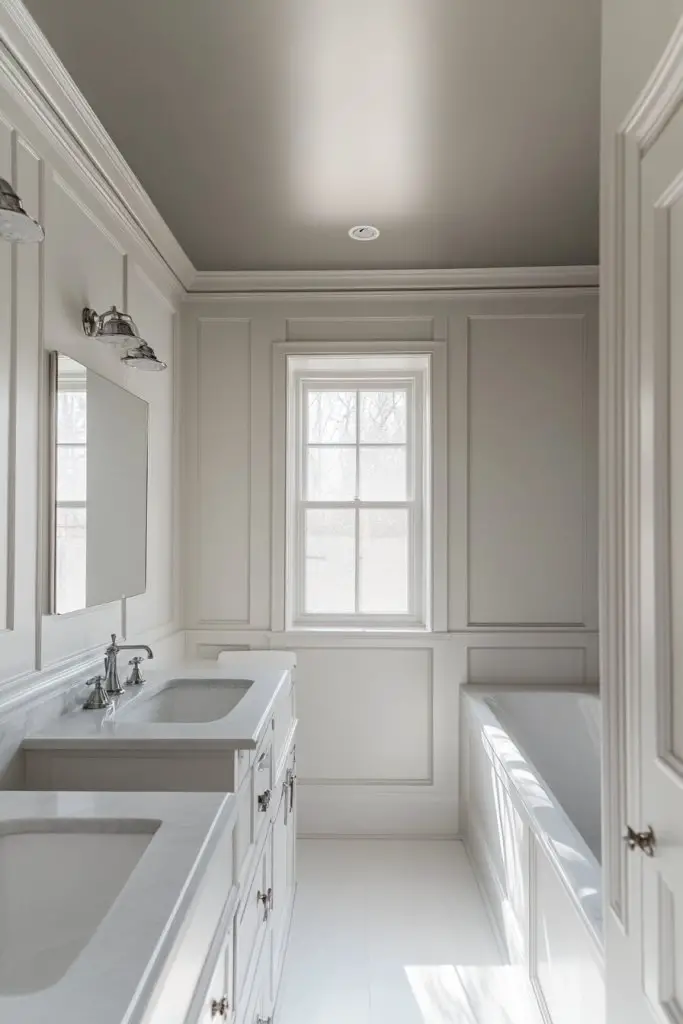
3. Bright White Ceiling with Intricate Decorative Molding

Sometimes, the simplest ideas are the most impactful. A bright white ceiling with detailed molding can add instant elegance without overwhelming the space. It’s perfect if you love classic charm but want a fresh, updated look. Who says traditional can’t be trendy?
Recommended Products to replicate this idea
| # | Preview | Product | |
|---|---|---|---|
| 1 |
|
Zinnser 03688 Covers Up Stain Sealing Ceiling Paint, White | Check Latest Price |
Envision a pristine white ceiling adorned with ornate crown molding painted in a contrasting color like soft gray or gold. The intricate details cast subtle shadows, creating depth and sophistication. The crisp white background amplifies the architectural features, making them pop. It’s like stepping into a vintage-inspired spa with a modern twist.
You can choose simpler molding styles for a minimalist aesthetic or go all out with elaborate designs for maximum impact. Add subtle color accents within the molding for a personalized touch. For a coastal vibe, pair the white ceiling with light, airy curtains and soft blues. In rustic settings, distressed wood or plaster details can complement the clean white background.
Start with a smooth, clean surface, filling any cracks or imperfections. Use painter’s tape to protect moldings during painting. Select high-quality semi-gloss or satin white paint for durability. For the molding, carefully tape and use a small brush or roller to ensure crisp lines. Multiple coats may be necessary to achieve an even, bright finish. For added depth, consider subtle shading or antique finishes on the moldings.
Decorate the space with vintage-style fixtures, like antique faucets or brushed nickel hardware. Keep the walls neutral or lightly textured to let the ceiling shine. Add a plush towel in a soft hue or a small, decorative shelf that doesn’t compete with the moldings. This look balances elegance with understated charm.
A white ceiling with decorative moldings elevates even the simplest bathrooms into luxurious retreats. It blends timeless appeal with contemporary updates, proving that classic details never go out of style. Feel confident experimenting with different molding styles and finishes—you’re creating a space that’s both elegant and uniquely yours.
4. Subtle Metallic Accents for a Touch of Glamour
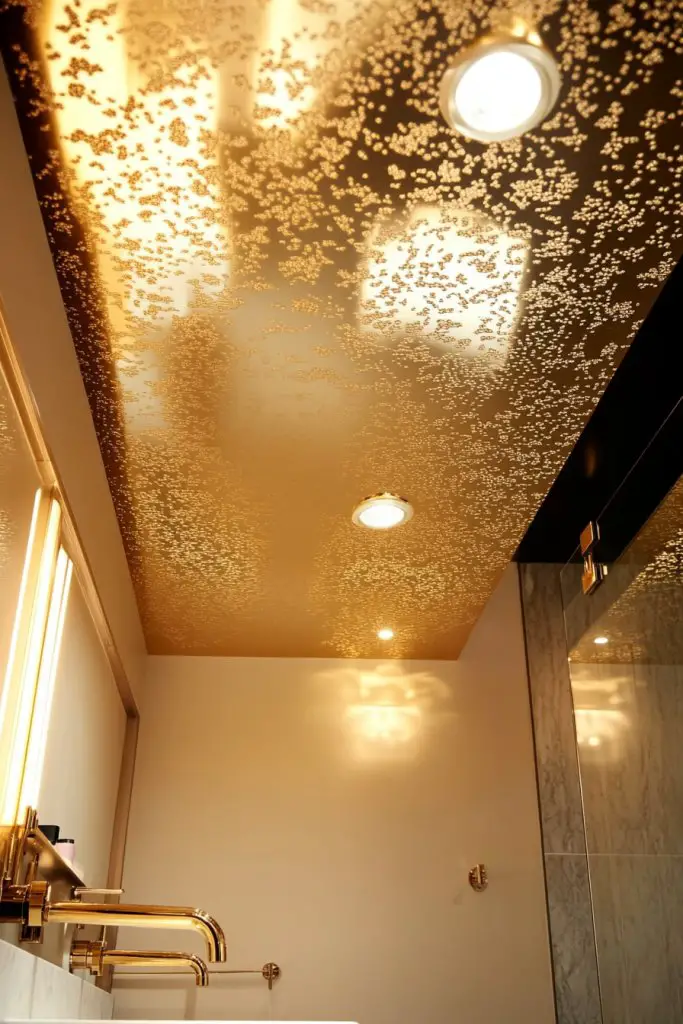
Who doesn’t want a little sparkle in their bathroom? Metallic accents on the ceiling can add a luxe touch without overpowering the space. Gold, silver, or bronze finishes reflect light beautifully, making your bathroom feel more upscale. It’s the perfect way to elevate your decor with minimal effort.
Recommended Products to replicate this idea
| # | Preview | Product | |
|---|---|---|---|
| 1 |

|
JBER Acoustic Panels, Self-Adhesive Soundproof Wall Art Painting with Fiber Optic Starlight... | Check Latest Price |
| # | Preview | Product | |
|---|---|---|---|
| 1 |

|
Decorative Metal Ribbon Border Trim, 10 Feet Roll, Flexible Cutout Pattern for DIY Projects (Silver,... | Check Latest Price |
Imagine a ceiling coated in a soft champagne metallic hue that catches the light with every movement. The shimmer subtly changes depending on the angle, creating a dynamic visual effect. Paired with matte walls and sleek fixtures, it exudes modern elegance. Small reflective details like metal trim or decorative panels amplify the effect.
For a more subdued look, choose matte metallic finishes or brushed textures. Alternatively, go full-on with a shiny, mirror-like surface for maximum impact. Incorporate metallic paint into decorative moldings or inlay details for a cohesive look. In smaller bathrooms, keep the metallic accents limited to prevent overwhelming the space.
Select high-quality metallic paints designed for high-humidity environments. Use a sponge or brush for textured effects, or a foam roller for smooth coverage. Proper surface prep—cleaning, sanding, and priming—is essential for adhesion. Apply multiple thin coats, allowing drying time between layers. Finish with a clear sealant to protect the shine. Consider lighting placement to maximize the reflective quality.
Complement metallic ceilings with accessories like brushed metal fixtures or textured ceramics. Add warm lighting to enhance the shimmer. Incorporate subtle decorative elements like metallic soap dishes or storage baskets. Keep the overall palette neutral to let the metallic glow be the star.
Metallic accents instantly add a sense of opulence and modernity to your bathroom. They work well in contemporary or glam-inspired interiors, providing a touch of sophistication. Trust your eye—metallic finishes are versatile and can be tailored to suit your personal style, making your bathroom uniquely glamorous.
5. Two-Tone Ceiling and Wall Color for Visual Depth
Ever feel like your bathroom looks flat or boring? Two-tone color schemes can add instant depth and dimension. By painting the ceiling a slightly different shade from the walls, you create a layered, interesting visual effect. It’s a simple trick that transforms the entire space.
Recommended Products to replicate this idea
| # | Preview | Product | |
|---|---|---|---|
| 1 |
|
Zinnser 03688 Covers Up Stain Sealing Ceiling Paint, White | Check Latest Price |
| # | Preview | Product | |
|---|---|---|---|
| 1 |

|
Zinsser 02774 PERMA-WHITE Mold & Mildew Proof Interior Paint, Quart, Eggshell White | Check Latest Price |
Picture a soft dove gray ceiling contrasted with warm beige walls. The subtle variation draws your eye upward, giving the illusion of height. When the shades are carefully chosen, it creates a cozy yet expansive feel. Textured or matte finishes on the ceiling can further emphasize this separation, adding richness.
Choose shades within the same color family for a harmonious look, or go bold with contrasting tones. For small bathrooms, lighter shades on the ceiling open up the space, while darker tones add intimacy. Layered color schemes work well with natural or artificial lighting—experiment to see what makes your space pop.
Start by selecting two complementary colors, considering the mood and lighting. Use painter’s tape to delineate the boundary between ceiling and walls. Paint the ceiling with a high-quality, durable paint, allowing it to dry thoroughly. Next, carefully paint the walls, keeping the lines sharp. Multiple coats may be necessary for even coverage. Finish with a protective clear coat if desired.
Add decorative moldings or painted stripes to accentuate the two-tone effect. Incorporate textiles or accessories in matching or contrasting colors to tie the look together. Keep the decor minimal to let the color contrast remain the focus, or add textured wall panels for extra depth.
Two-tone ceilings are an effective way to add personality without a full overhaul. They work beautifully in modern, traditional, or eclectic bathrooms. Embrace the visual trickery—this technique proves that a simple change can make a big impact.
6. Soft Gradient or Ombre Effect for a Trendy Finish
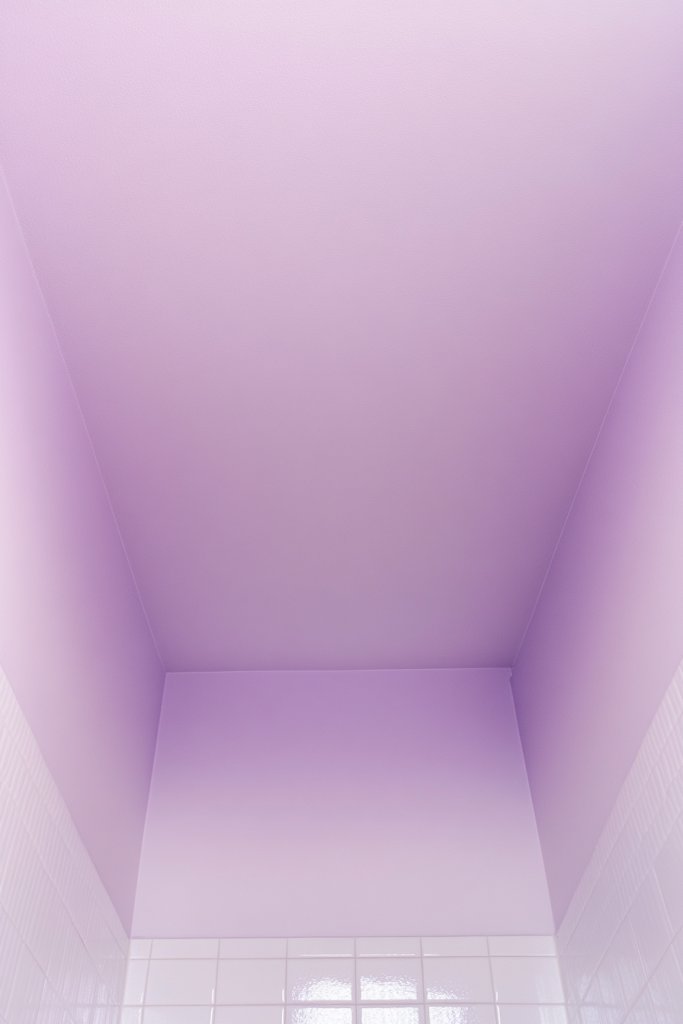
Looking for something more artistic than plain paint? An ombre or gradient ceiling adds a trendy, painterly touch to your bathroom. It creates a soft transition between colors, making the space feel dynamic and lively. Plus, it’s a fun DIY project for the creatively inclined.
Recommended Products to replicate this idea
| # | Preview | Product | |
|---|---|---|---|
| 1 |

|
Rhibak Paint Roller Kit with Extension Pole, 27 Piece Set, 2 to 4 Ft Pole, 4"9" Paint Rollers, Paint... | Check Latest Price |
| # | Preview | Product | |
|---|---|---|---|
| 1 |

|
VONFORN Paint Sprayer, 700W HVLP Spray Gun with Cleaning & Blowing Joints, 4 Nozzles and 3 Patterns,... | Check Latest Price |
Imagine a ceiling blending from a deep twilight purple at the edges to a pale blush at the center. The seamless transition offers a calming, visual flow that draws the eye upward. Using sponges, brushes, or even spray techniques, you can achieve a smooth, natural gradient. The layered hues mimic a sunset or dawn, adding a poetic touch.
Choose colors that complement your overall decor, such as ocean blues or earthy browns. For a more subtle effect, use shades within the same tonal range. In small bathrooms, lighter gradients can brighten the space, while darker tones add intimacy. Incorporate textured or matte finishes to enhance the softness of the transition.
Start with a primer to ensure smooth blending. Paint the edges with the darker shade, then gradually lighten toward the center using a sponge or blending brush. Work in small sections, blending the colors while wet for a seamless effect. Use painter’s tape to protect edges and fixtures. Multiple layers might be needed to deepen the color or smooth out transitions. Finish with a clear matte sealant for durability.
Frame the gradient with decorative moldings or a metallic border for added flair. Choose accessories that pick up the gradient colors—think towels or rugs in similar hues. Keep walls neutral or lightly textured to let the ceiling be the star. This look pairs well with minimalistic or boho decor styles.
A gradient ceiling effortlessly elevates your bathroom’s style and makes a bold statement. It’s perfect for those who want to add an artistic touch without overhauling the entire space. Feel confident experimenting with colors and techniques—your creative flair will shine through.
7. Light Sky or Cloud Motifs for an Airy, Open Feel

Ever wish your bathroom felt more open and breezy? Sky or cloud motifs painted on the ceiling can create an illusion of spaciousness. It’s like bringing a piece of the outdoors inside, perfect for small or dark bathrooms. Who wouldn’t want a bit of sunshine overhead?
Recommended Products to replicate this idea
| # | Preview | Product | |
|---|---|---|---|
| 1 |

|
AOWDIAO Cloud Wall Decals - 40 Peel and Stick Clouds Stickers - Assorted Shapes and Sizes for... | Check Latest Price |
| # | Preview | Product | |
|---|---|---|---|
| 1 |

|
TOKMOCO Custom Ceiling Sky Wall Mural Cloud Self-Adhesive Wallpaper Kids Room Bedroom Living Room... | Check Latest Price |
Visualize a soft blue ceiling dotted with fluffy white clouds, some wispy and others more defined. Light hints of gray or lavender add dimension, mimicking a real sky. The subtle variations in tone and shape evoke a peaceful, open atmosphere. It’s calming, almost meditative, making every shower feel like a retreat.
Adjust cloud density and size based on your room’s size—fewer large clouds for a minimalist look or more for a dreamy effect. For a sunset or sunrise vibe, incorporate warm shades of pink, orange, or yellow. Keep the surrounding decor simple to avoid visual clutter, and use soft lighting to enhance the sky scene.
Begin with a sky-blue base coat using a roller or spray for even coverage. Use a sponge or brush to paint clouds in white, layering and blending for softness and realism. Add shading with a light gray or purple for depth. For a more realistic look, lightly stipple or feather the edges of clouds. Seal with a matte spray to protect your artwork.
Complement the sky theme with airy, light-colored textiles and minimal fixtures. Consider installing a hidden LED strip behind a false ceiling edge to mimic sunlight. Incorporate subtle scent diffusers or calming aromas that evoke fresh air. Keep the rest of the decor simple to emphasize the celestial overhead view.
Sky or cloud ceilings make your bathroom feel larger and more serene. They’re a fun way to express creativity and add a whimsical touch. Trust that a few simple techniques can turn your ceiling into a calming canvas of endless blue horizons.
8. Geometric Patterns or Stripes for a Contemporary Edge
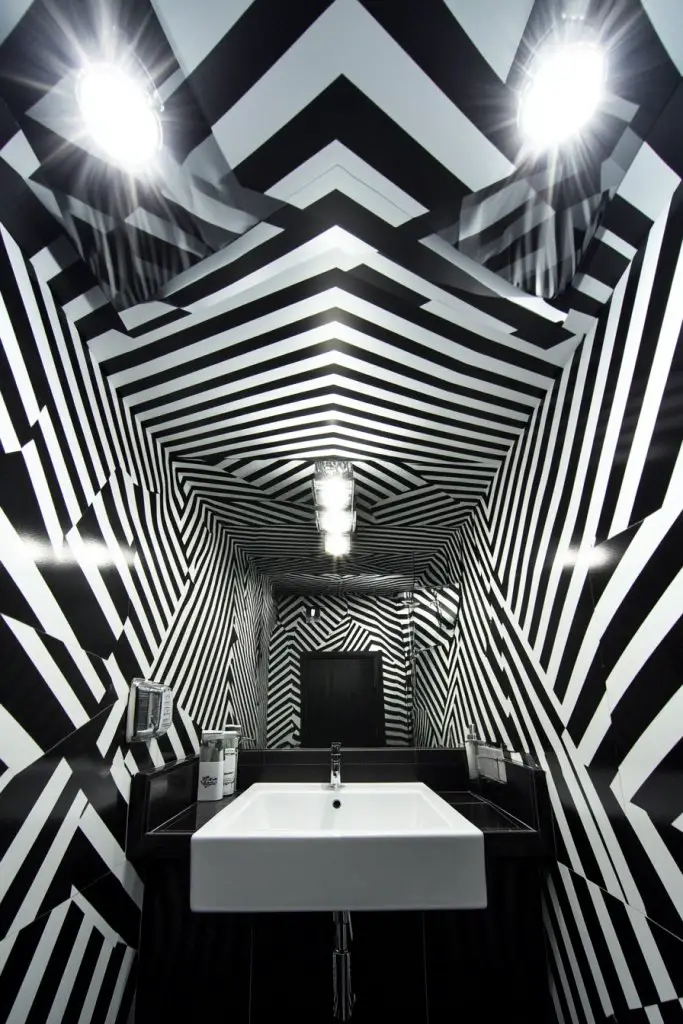
Tired of boring, plain ceilings? Geometric patterns and stripes add a modern, edgy vibe that instantly updates your bathroom. They introduce clean lines and visual interest, making the space look more intentional. Plus, they’re surprisingly easy to DIY if you love a challenge.
Recommended Products to replicate this idea
| # | Preview | Product | |
|---|---|---|---|
| 1 |

|
myforHD Wood Grating Stripe Self-Adhesive Wallpaper - Peel & Stick, Removable, Waterproof, PVC Vinyl... | Check Latest Price |
| # | Preview | Product | |
|---|---|---|---|
| 1 |

|
VViViD 11 Sheets Peel and Stick White Gloss Faux Ceramic Hexagon Wall Tiles, Self Adhesive... | Check Latest Price |
Picture bold black and white stripes running across the ceiling, or intricate hexagon tiles creating a tessellated pattern. Sharp lines and contrasting colors give the room a graphic punch. When paired with minimalist fixtures and neutral walls, these patterns become the focal point. The visual rhythm energizes the entire space.
Use tape and stencils for precision, or experiment with freehand shapes for a more organic look. Choose monochrome for a sleek, contemporary feel, or incorporate metallic accents for a hint of glam. Vary stripe width or shape size based on your ceiling’s dimensions. Smaller rooms benefit from thinner lines to avoid overpowering.
Start with a clean, smooth surface. Measure and mark your pattern with a pencil or chalk. Use painter’s tape for sharp edges, and apply high-quality latex paint in your chosen colors. Multiple coats ensure vibrant, even coverage. Carefully remove tape while the paint is slightly wet to prevent peeling. Finish with a clear sealant for longevity.
Incorporate metallic or gloss finishes to add polish. Coordinate your patterns with wall decor or textiles for cohesiveness. For a softer look, opt for pastel or muted tones while maintaining geometric shapes. Add subtle lighting fixtures or LED strips along the pattern edges for extra impact.
Geometric ceilings are a bold statement that showcases your modern style. They work especially well in small or minimalist bathrooms, providing a sleek, curated look. Don’t be afraid to experiment—your creative vision can turn simple shapes into a stunning focal point.
9. Vintage-inspired Floral or Botanical Designs
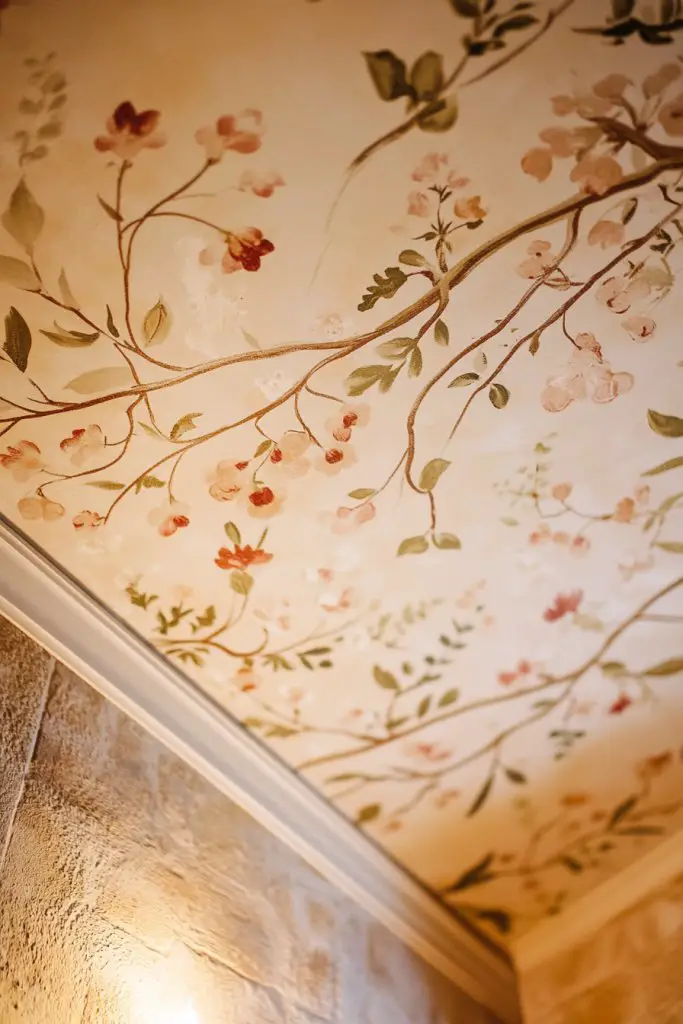
Want to add a touch of timeless charm to your bathroom? Vintage floral or botanical motifs on the ceiling can create a cozy, inviting atmosphere. They bring a hint of nature’s beauty indoors, perfect for rustic, shabby chic, or cottage styles. It’s like a garden party overhead.
Recommended Products to replicate this idea
| # | Preview | Product | |
|---|---|---|---|
| 1 |

|
Eierme Blue Sky and White Clouds Suspended Ceiling Wall Mural Wallpaper for Bedroom | Check Latest Price |
| # | Preview | Product | |
|---|---|---|---|
| 1 |

|
Art3d Drop Ceiling Tiles, 24x48in. White (12-Pack), Polyvinyl Chloride (PVC), Glue Down | Check Latest Price |
Imagine delicate hand-painted roses or leafy vines swirling across a soft cream ceiling. Subtle shading and layering give depth and realism, making the design feel almost three-dimensional. Small, charming details like tiny buds or fluttering butterflies can enhance the scene. The overall effect is warm, charming, and nostalgic.
Choose floral motifs that match your decor—wildflowers for a bohemian vibe or roses for classic elegance. Incorporate soft pastel or muted colors for a gentle look, or bold reds and greens for a more vibrant feel. Complement with vintage fixtures, lace curtains, and antique accessories for a complete aesthetic.
Begin with a smooth, primed surface. Use fine brushes or stencils for detailed painting, or consider wallpaper murals designed for ceilings. For a DIY approach, sketch your design lightly in pencil first. Use water-resistant, matte paints to prevent smudging or fading. Seal with a clear, protective coating to preserve your artwork.
Frame your floral or botanical motif with decorative moldings or painted borders. Add small vintage-inspired accessories or textiles that echo the theme. Use scented candles or floral fragrances to enhance the garden-like ambiance. Keep the surrounding decor simple to let the ceiling be the highlight.
Vintage floral ceilings create a nostalgic, warm environment that invites relaxation. They work beautifully with rustic, shabby chic, or cottage decor styles. Express your personality through color choices and flower types—your ceiling becomes a personal, artistic statement.
10. Monochromatic Shades with Matte Finish for Minimalist Elegance
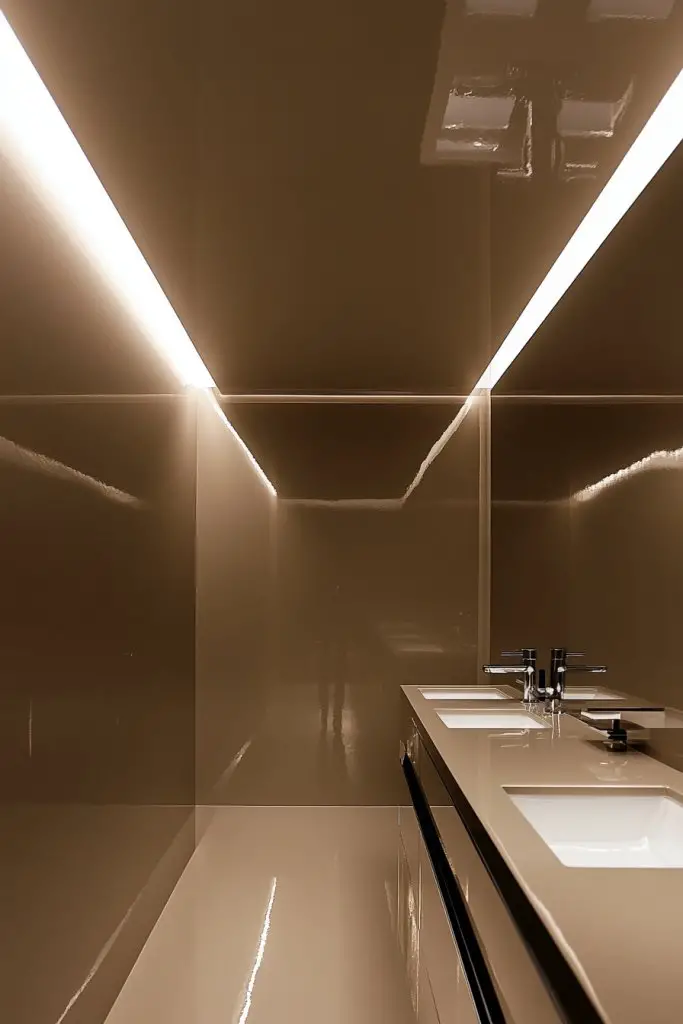
Craving a sleek, understated look? Monochromatic shades in a matte finish can deliver sophisticated elegance without clutter. They create a seamless, calming environment that’s perfect for minimalists or those who prefer a quiet, refined space. Sometimes, less really is more.
Recommended Products to replicate this idea
| # | Preview | Product | |
|---|---|---|---|
| 1 |
|
Rust-Oleum 1990502 Painter's Touch Latex Paint, Quart, Flat White 32 Fl Oz (1 Quarts Pack of 1) | Check Latest Price |
| # | Preview | Product | |
|---|---|---|---|
| 1 |

|
20 oz Homax 4092 Aerosol Texture Water-Based Orange Peel Wall Texture | Check Latest Price |
Visualize a ceiling painted in a soft, warm taupe with a matte finish. The uniform color creates a subtle texture that plays with light and shadow. Paired with matching walls and simple fixtures, it produces a cohesive, harmonious look. Texture can come from subtle paint techniques like sponge or brush strokes, adding depth without color variation.
Choose shades within the same color family for a monochrome effect, or combine matte and textured finishes for added interest. Use different tones of the same hue to create layered depth. Keep fixtures and accessories in neutral tones to maintain the minimalist aesthetic. This approach works well across traditional, modern, or Scandinavian styles.
Select high-quality matte paint suitable for humid environments. Prepare the ceiling by sanding and cleaning, then apply a primer if necessary. Use a roller for even coverage, applying multiple thin coats. For sharp edges, tape carefully along the perimeter. Once dry, inspect for uneven patches and touch up as needed. Seal with a matte protective coating for durability.
Add visual interest with textured textiles, such as a soft linen shower curtain or a plush bathmat. Keep accessories minimal and in matching shades. Incorporate subtle metallic or wood accents that complement the monochrome palette. The goal is a serene, clutter-free sanctuary.
Monochrome matte ceilings exemplify understated elegance and timeless style. They’re perfect for creating a peaceful, clutter-free retreat. Trust in the power of a single hue—your space will look effortlessly polished and modern.
11. Textured Faux Finish with Painted Effects for Depth
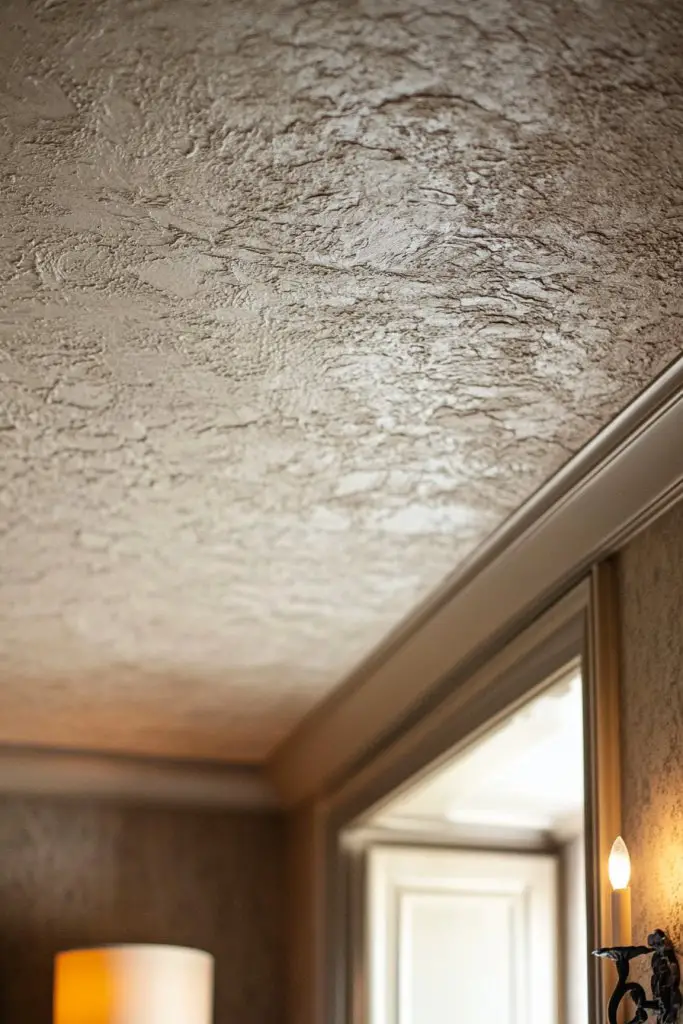
Looking to add visual interest without adding actual texture? Faux finishes can create the illusion of depth and richness on your ceiling. They’re a creative way to elevate your bathroom’s look, making it feel more luxurious and layered. Who says flat paint has to stay flat?
Recommended Products to replicate this idea
| # | Preview | Product | |
|---|---|---|---|
| 1 |

|
Pro Grade Paint Roller Kit, Brush & Roller,10 Piece Set, Wall Painting Naps for Professionals &... | Check Latest Price |
| # | Preview | Product | |
|---|---|---|---|
| 1 |

|
FolkArt Synthetic Sponge Set, Small, Brown | Check Latest Price |
Picture a ceiling that mimics the appearance of plaster, stucco, or wood grain through clever painting techniques. Use sponging, rag rolling, or dry brushing to add subtle variations in color and texture. The result is a rich, tactile surface that catches light differently from every angle. It’s like bringing tactile warmth and character to a flat surface.
Choose a finish that complements your decor—smooth for modern, rougher textures for rustic charm. Combine multiple techniques for a more complex look, such as a base coat with overlaying faux effects. Keep color palettes neutral or earthy for a natural feel. These finishes work in traditional, boho, or industrial styles.
Start with a clean, smooth surface, repairing any imperfections. Apply a base coat and let it dry completely. Use sponges, brushes, or special rollers to add texture, blending colors as you go. Practice on scrap material first to perfect your technique. Seal your finished surface with a matte or satin clear coat to protect against moisture.
Incorporate decorative moldings or painted borders to frame your textured ceiling. Use accent colors sparingly to highlight certain areas or add subtle contrast. Match your textiles, towels, and accessories to the earthy or natural tones for a cohesive look. Keep lighting soft to accentuate the textures.
Faux finishes are a playful, creative way to add depth without physical texture. They allow you to experiment with new techniques and finishes, transforming your bathroom into a tactile masterpiece. Embrace the artistic process—you’ll end up with a truly personalized space.
12. Accent Color Borders for a Framed, Finished Look
Want your bathroom to look polished and complete? An accent color border around the ceiling creates a framed effect that adds instant sophistication. It’s a simple detail that makes your bathroom look like a designer space. Who knew such a small touch could make such a difference?
Recommended Products to replicate this idea
| # | Preview | Product | |
|---|---|---|---|
| 1 |

|
Elvone Wall Corner Protector & Edge Guard, Peel and Stick Wall Trim Moulding Inside & Outside Corner... | Check Latest Price |
| # | Preview | Product | |
|---|---|---|---|
| 1 |

|
Trimold Stainless Steel Wall Molding Trim Peel and Stick, Flexible Self-Adhesive Metal Trim for... | Check Latest Price |
Imagine a crisp white ceiling framed by a narrow band of deep navy or metallic gold. The border defines the space, drawing the eye upward and adding contrast. The effect resembles a picture frame, making the ceiling a focal point. When combined with minimal decor, it elevates the entire room’s aesthetic.
Play with different border widths and colors to match your decor style. Use metallic or gloss paints for a luxe finish, or matte for subtle elegance. For a more playful vibe, try multiple colors or patterns within the border. This technique adapts well to both small and large bathrooms.
Measure the perimeter accurately and tape off the border area with painter’s tape. Use a high-quality, contrasting color paint—preferably semi-gloss or gloss for durability. Carefully paint within the taped area, applying multiple thin coats for even coverage. Remove the tape while the paint is still slightly wet to keep edges sharp. Touch up as needed.
Decorate the border with small decorative elements like metallic accents or textured paint. Match your accessories, such as towels or storage, to the border color for a cohesive look. Keep the rest of the decor simple to let the border stand out. Consider adding a subtle glow with hidden LED strips behind crown molding.
Accent borders add a refined touch that elevates any bathroom design. They’re a subtle way to introduce color and contrast without overwhelming the space. Confidence in this technique allows you to customize your bathroom’s frame with endless color combinations and finishes.
13. Soft Neutral Tones for Versatile, Updated Style
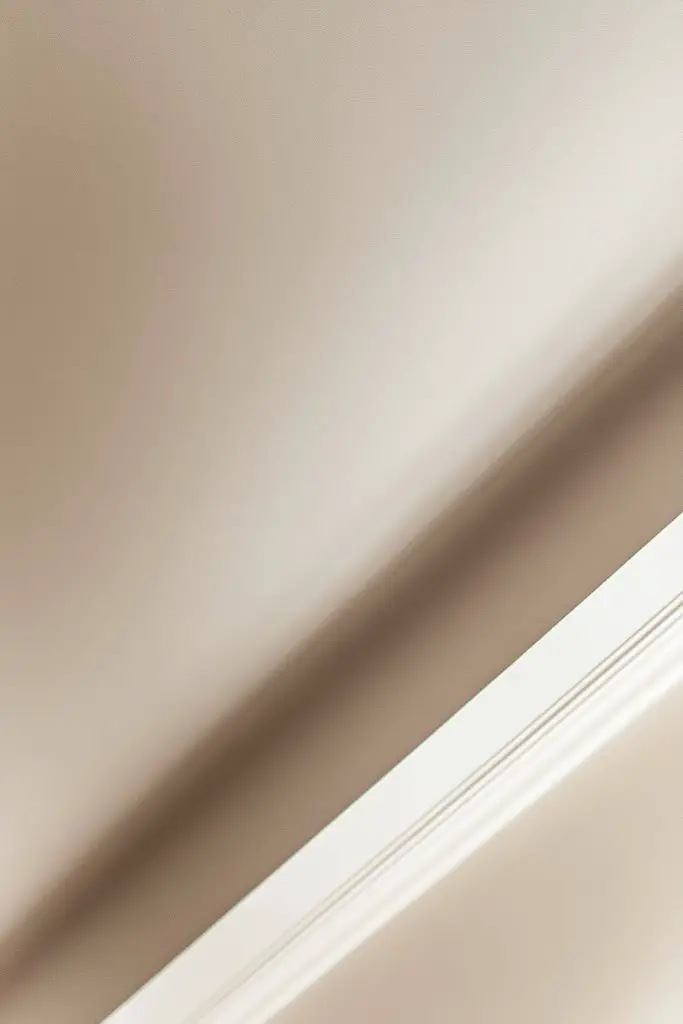
If you want a bathroom that’s easy to update and maintain, soft neutrals are your best friend. Shades like taupe, beige, or greige create a versatile backdrop that complements any decor. They’re perfect for a subtle, sophisticated look that feels current yet timeless. Who says neutrals have to be boring?
Recommended Products to replicate this idea
| # | Preview | Product | |
|---|---|---|---|
| 1 |
|
Zinnser 03688 Covers Up Stain Sealing Ceiling Paint, White | Check Latest Price |
| # | Preview | Product | |
|---|---|---|---|
| 1 |

|
LINSY Fluted Console Table with Storage, Entryway Table Wood Entrance Tables for Front Door, Behind... | Check Latest Price |
Imagine a ceiling painted in a warm greige, softly reflecting ambient light. The muted tone adds a sense of calm and warmth, making the space inviting and cozy. Pair it with white or light wood accents to enhance the understated elegance. The neutral palette acts as a canvas for your personal style.
Layer different textures and finishes—matte, satin, or eggshell—to add dimension. Use textiles and accessories in slightly darker or lighter shades for a monochrome effect. Incorporate metallic or natural materials like wood or stone for a tactile, layered look. This approach is highly adaptable to various decor styles, from modern to rustic.
Select high-quality, moisture-resistant paints in your chosen neutral tone. Prepare the ceiling by cleaning and sanding, then apply a primer if needed. Use a roller for even coverage, applying multiple thin coats. Pay attention to edges and corners for a seamless look. Seal with a protective matte or satin finish to withstand humidity.
Add warmth with textured textiles, soft towels, or a plush bathmat. Keep fixtures in brushed or matte finishes to match the neutral theme. Incorporate natural elements like bamboo or stone accessories. Use lighting that enhances the soft tones, such as warm LED bulbs.
Neutral tones are a timeless choice that exudes calm and sophistication. They’re easy to mix and match with any future updates, making your bathroom adaptable to changing trends. Embrace the simplicity—your space will feel polished and effortlessly elegant.
14. Subtle Stripes or Herringbone Patterns for Visual Interest
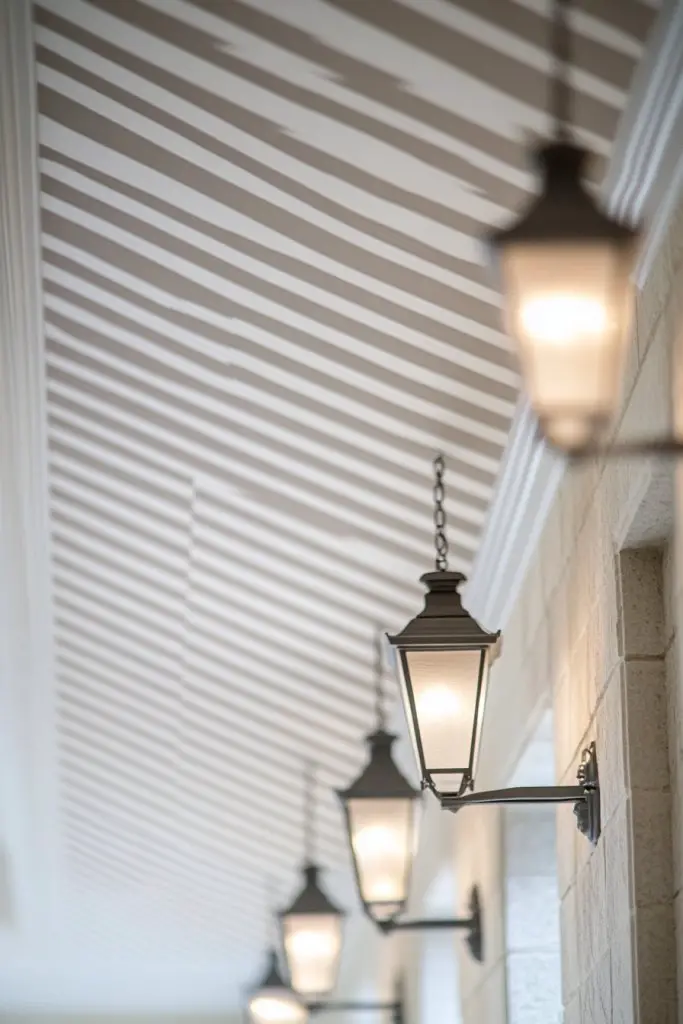
Want to add a touch of elegance without overwhelming your bathroom? Subtle stripes or herringbone patterns can introduce architectural interest while keeping things refined. They’re perfect for adding a modern twist to classic or contemporary decor. Who says patterns are just for walls?
Recommended Products to replicate this idea
| # | Preview | Product | |
|---|---|---|---|
| 1 |
|
REDODECO Elegant Silver Grey Floral Molding Wallpaper Border Peel Stick Home Ceiling Decorative... | Check Latest Price |
| # | Preview | Product | |
|---|---|---|---|
| 1 |

|
Large Damask Stencils for Walls Drawing Corner Border Stencil Reusable Layering Wall Stencils for... | Check Latest Price |
Visualize narrow, soft-colored stripes running across the ceiling, or a delicate herringbone pattern in muted tones. These designs create a sense of movement and depth, drawing the eye upward. When paired with sleek fixtures and minimal accessories, they elevate the overall aesthetic. The pattern adds a subtle sophistication that’s hard to ignore.
Use painter’s tape and stencils to achieve clean, precise lines. For a softer look, opt for low-contrast hues or pastel shades. Try a monochrome palette with different textures or matte finishes. Small bathrooms benefit from narrower stripes to avoid visual clutter, while larger spaces can handle bolder patterns.
Start by measuring and marking your pattern lines carefully. Use painter’s tape to create clean edges and ensure symmetry. Paint with high-quality latex, applying multiple thin coats for even color. Carefully remove tape before the paint dries completely to prevent smudging. Seal with a clear matte or satin topcoat for durability.
Coordinate your pattern with wall decor or textiles that echo the stripe or herringbone motif. Incorporate metallic or gloss accents to add a luxe touch. Keep the rest of the decor simple and in harmony with the ceiling pattern. Use lighting to highlight the geometric design.
Subtle patterns add depth without overwhelming, making your bathroom feel more curated. They’re an excellent choice for those who want architectural detail with minimal fuss. Trust your eye—these classic patterns never go out of style and can be endlessly customized.
15. Playful Chalkboard or Matte Black Ceiling for Edgy Charm
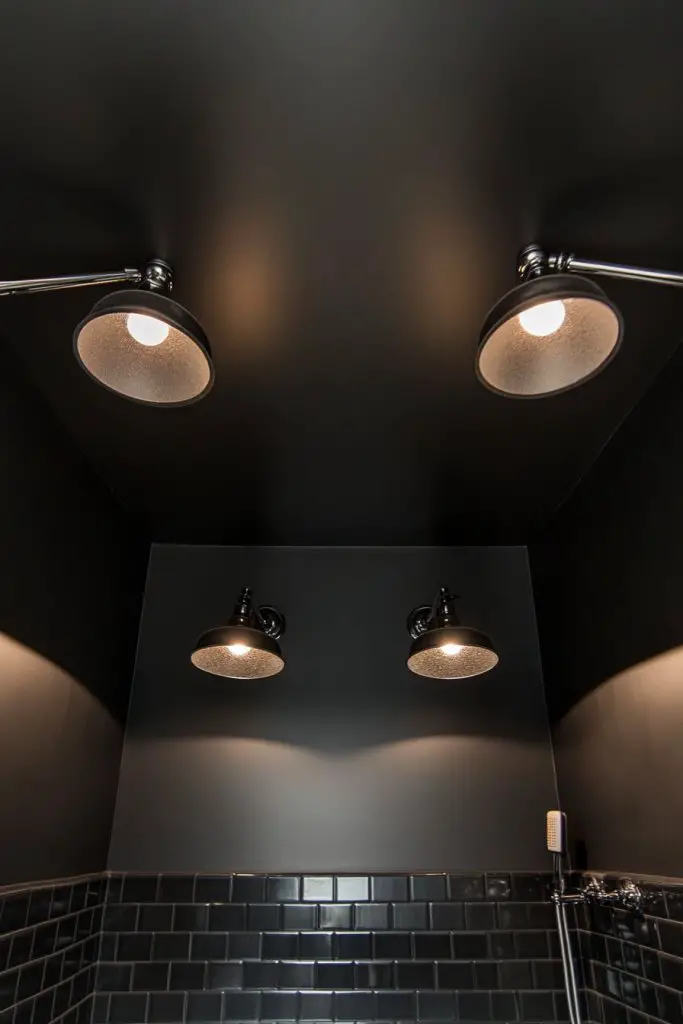
Looking to make a bold statement? A matte black or chalkboard ceiling injects a dose of edgy charm into your bathroom. It’s a daring choice that instantly modernizes the space. Plus, it’s super customizable—write messages or doodles whenever inspiration strikes.
Recommended Products to replicate this idea
| # | Preview | Product | |
|---|---|---|---|
| 1 |

|
Rust-Oleum 206540 Chalkboard Brush-On Paint, 30 oz, Black | Check Latest Price |
| # | Preview | Product | |
|---|---|---|---|
| 1 |

|
DUOFIRE 3D Domed Glow in The Dark Dots Wall or Ceiling Stickers, Glowing Ultra Bright Dots of 202... | Check Latest Price |
Imagine a deep matte black ceiling that absorbs light, creating a cozy, intimate atmosphere. You can add playful chalk doodles or inspirational quotes, making the ceiling an interactive canvas. The contrast with lighter walls and fixtures amplifies the modern, rebellious vibe. It’s a fun way to showcase personality.
Pair the black ceiling with crisp white or metallic fixtures for a sleek look. For a softer approach, use a dark gray or charcoal matte finish. Incorporate chalkboard paint in specific areas to create a functional message board. This style works well in contemporary, industrial, or eclectic bathrooms.
Prepare the ceiling with thorough cleaning and sanding. Use painter’s tape to protect adjacent surfaces. Apply a primer suitable for dark paints, then evenly coat with matte black or chalkboard paint. Multiple coats may be needed for uniform color. Allow ample drying time and protect with a matte sealant. Keep ample ventilation during application.
Decorate with metallic or colored chalks for a pop of color when doodling. Add contrasting accessories, such as bright towels or colorful storage. Incorporate small LED strips to highlight the ceiling or create a gallery of messages. Keep the rest of the decor minimal to focus on the ceiling’s bold personality.
A chalkboard or black ceiling pushes boundaries and demonstrates your daring style. It’s a conversation starter and a fun way to personalize your space. Trust your creativity—this unconventional choice makes your bathroom uniquely yours.
16. Light Aqua or Seafoam for a Coastal Vibe
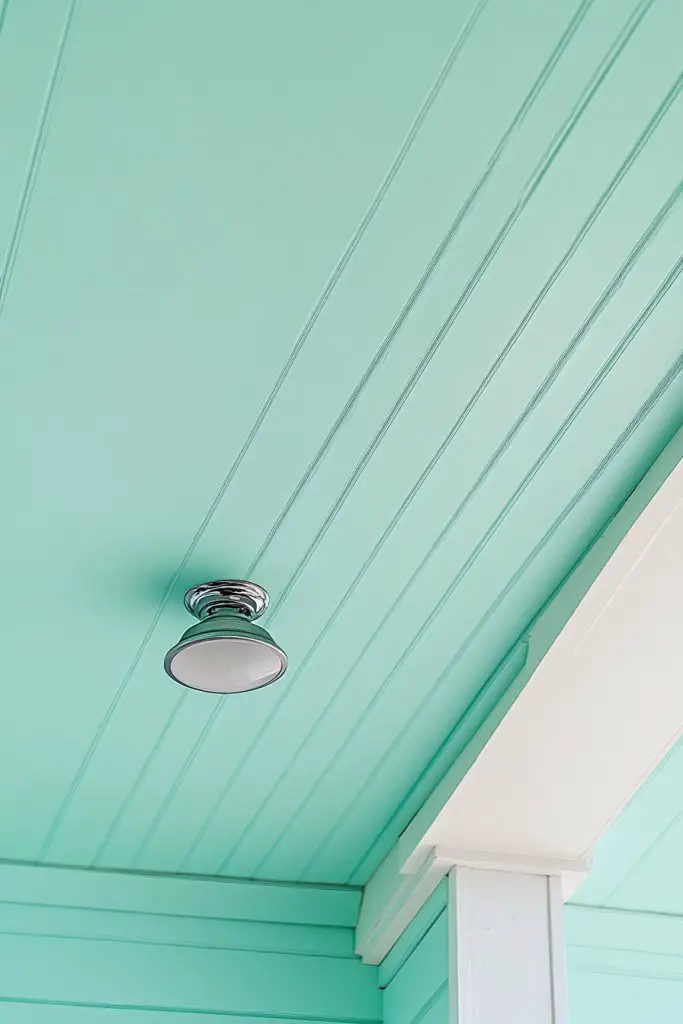
Dreaming of a beach getaway every time you step into your bathroom? Light aqua or seafoam ceilings evoke coastal serenity and freshness. They bring in a calming, refreshing energy that transforms your space into a seaside retreat. Who wouldn’t want a little ocean breeze overhead?
Recommended Products to replicate this idea
| # | Preview | Product | |
|---|---|---|---|
| 1 |
|
Apple Barrel Acrylic Paint, Aqua Sky | Check Latest Price |
| # | Preview | Product | |
|---|---|---|---|
| 1 |

|
White Paint, White Paint for Wall Touch up Paint for Walls, Water Based &Low Odor Wall Paint with... | Check Latest Price |
Picture a ceiling painted in soft aqua, with hints of white streaks resembling gentle sea foam. The color reflects natural sunlight, making the space feel brighter and airier. Pairing it with white or driftwood accents enhances the beachy vibe. Subtle shimmer or gloss finishes mimic the sunlit waves, adding a touch of sparkle.
Mix with sandy beiges, crisp whites, or navy accents for a complete coastal look. For a more vibrant feel, incorporate turquoise or deeper sea greens. Use textured textiles, rattan, or wicker accessories to evoke a beach hut aesthetic. Small bathrooms benefit from lighter shades to maximize openness.
Prepare your surface thoroughly, then apply a moisture-resistant paint in your chosen sea-inspired hue. Use a roller for smooth coverage, applying several thin coats. Consider a semi-gloss or satin finish for a subtle shine that mimics water. Protect the paint with a clear, water-based sealant and ensure proper ventilation during drying.
Decorate with nautical-themed accessories like ropes, shells, or driftwood. Use soft, breezy textiles like linen or cotton in shades of blue and white. Incorporate ambient lighting that mimics sunlight or moonlight. Keep the decor minimal and natural for an authentic coastal feel.
Sea-inspired ceilings instantly refresh your bathroom with a peaceful, vacation-like atmosphere. They’re perfect for creating a calming, restorative space. Embrace the tranquility—your bathroom can be a daily escape to the coast.
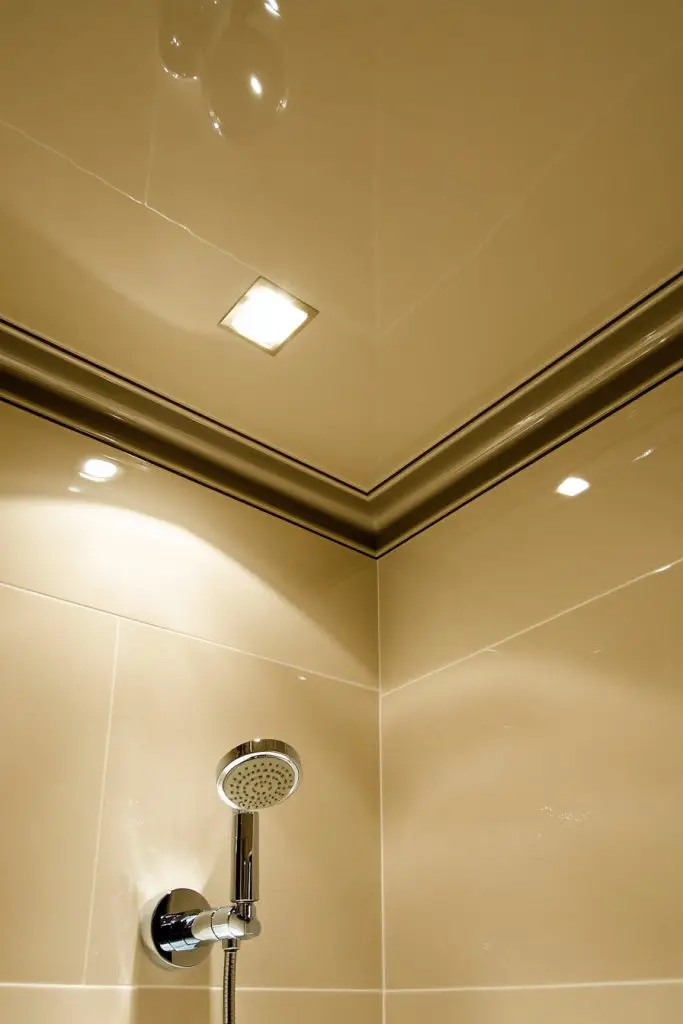
17. Soft Metallic Wash for a Subdued Glam Effect
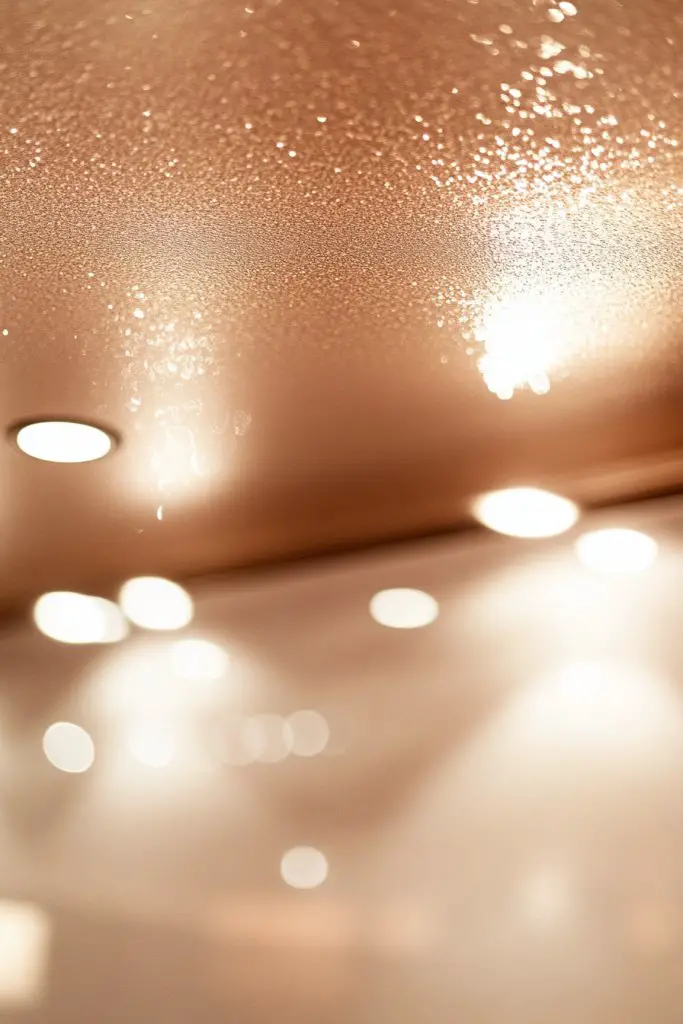
Want a hint of glamour without the overwhelming shine? A soft metallic wash over a neutral or matte base offers understated elegance. It creates a subtle shimmer that catches light beautifully, elevating your bathroom’s style. Fancy, yet low-key—perfect for sophisticated spaces.
Recommended Products to replicate this idea
| # | Preview | Product | |
|---|---|---|---|
| 1 |
![Silver Holographic Glitter for Paint Glitter Paint for Walls, Glitter Paint additive, Paint Glitter for Latex/Acrylic, Flakes for Interior and Exterior Walls, Ceilings [100g / 3.5oz]](https://m.media-amazon.com/images/I/51FWi4hlDoL._SL160_.jpg)
|
Silver Holographic Glitter for Paint Glitter Paint for Walls, Glitter Paint additive, Paint Glitter... | Check Latest Price |
| # | Preview | Product | |
|---|---|---|---|
| 1 |
|
DESIGNERS FOUNTAIN Reedley 2-Lights Flush Mount Ceiling Light, 11 Inch Lighting Fixture for Kitchen,... | Check Latest Price |
Imagine a neutral ceiling lightly infused with a silvery or champagne metallic glaze. The wash creates a luminous effect, adding depth and a hint of luxury. It’s like a soft glow at dusk, quietly glamorous but never gaudy. When paired with minimal decor, it acts as a refined backdrop.
Apply the metallic wash over matte or textured paints for a layered look. Use it subtly in small bathrooms or as an accent in larger spaces. Combine with plush textiles, matte fixtures, or natural materials to balance the shimmer. Experiment with different metallic tones—rose gold, platinum, or bronze—for varied moods.
Start with a clean, dry surface. Mix your metallic glaze or wash according to instructions. Using a sponge or soft cloth, gently apply the wash, working in small sections. Blend the edges to avoid harsh lines, building up layers until the desired glow is achieved. Seal with a matte or satin protective coating. Ventilate well during application.
Pair with textured textiles or soft lighting that enhances the metallic sheen. Incorporate natural or matte-finished fixtures for contrast. Use decorative accessories in matching metallic tones—think soap dishes or towel hooks. Keep the decor simple to let the ceiling’s glow shine.
A metallic wash provides a subtle yet luxurious upgrade, perfect for modern or transitional bathrooms. It’s a versatile technique that quietly elevates the space. Trust your artistic eye—this gentle shimmer adds a layer of sophistication that’s both timeless and trendy.
Conclusion
With a wide range of painted ceiling bathroom ideas, there’s something for every style and preference. These creative touches can turn an ordinary bathroom into a stunning sanctuary filled with character and charm. Don’t hesitate to experiment and incorporate these ideas into your own home—your perfect, updated bathroom awaits to be revealed!