
17 Ribbon Decoration Ideas for Walls for Festive Style
Picture your walls coming to life with vibrant, eye-catching ribbon decorations that add a festive touch to any space. Ribbon decoration ideas for walls have surged in popularity because they effortlessly bring color, texture, and a sense of celebration to your home or event setting.
In this article, you’ll find a variety of creative and easy-to-implement ribbon wall decoration ideas that can transform ordinary walls into stunning focal points. Whether you’re preparing for a holiday, party, or simply want to brighten up your space, these ideas will inspire you to get crafty and have fun decorating!
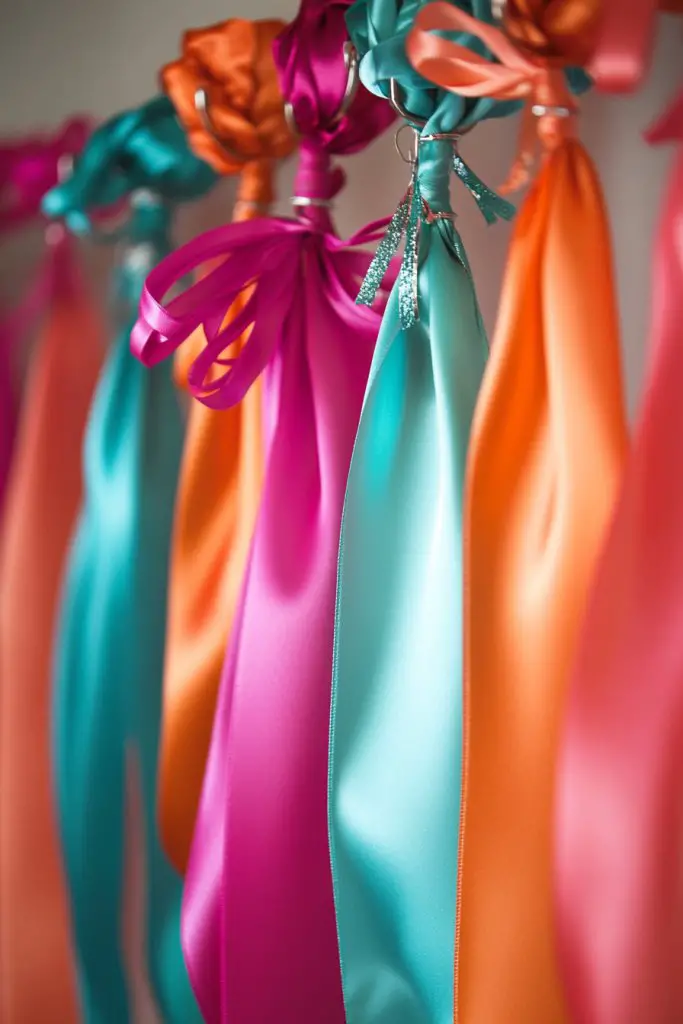
1. Color-Coordinated Ribbon Streamers for a Vibrant Wall Accent
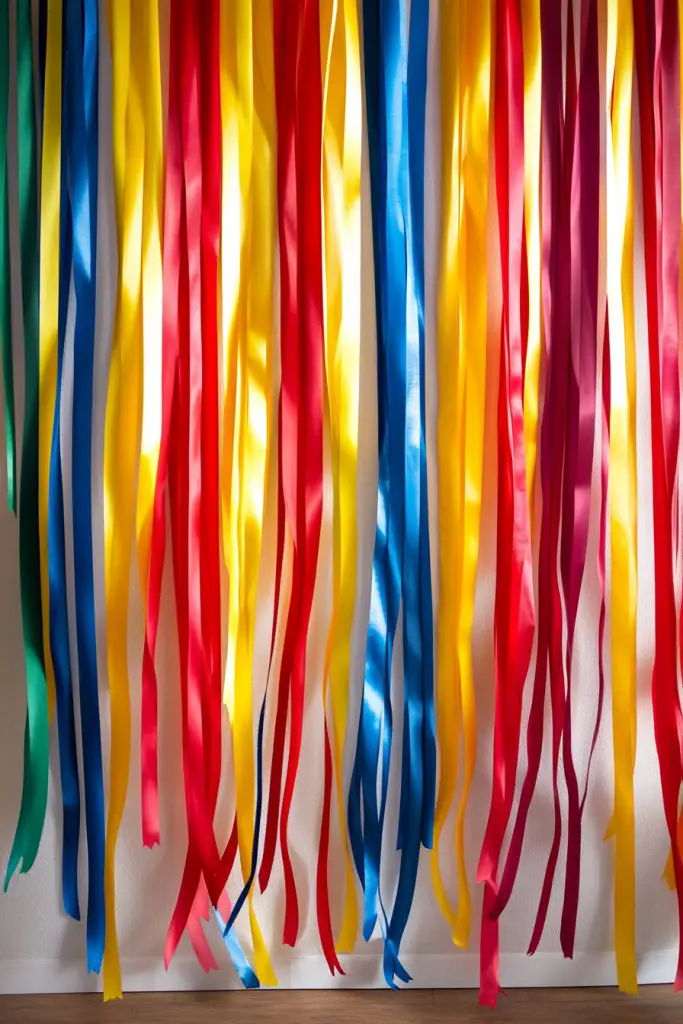
Ever feel like your walls are missing that punch of personality? Maybe your space looks a little dull or uninspired, and you crave a quick, fun fix. Colorful ribbon streamers are a simple way to liven things up without breaking the bank. They add vibrancy and a festive vibe that instantly lifts the mood.
Recommended Products to replicate this idea
| # | Preview | Product | |
|---|---|---|---|
| 1 |

|
Rainbow Satin Ribbon 65.6Yd × 1.97" Wide Colorful Ribbon for Gifts Wrapping DIY Craft Fringe... | Check Latest Price |
| # | Preview | Product | |
|---|---|---|---|
| 1 |

|
FUJAOPS 4-Tier Metal Ribbon Holder Organizer Wall Mount, Ribbon Storage Rack with 5 Hooks, Thread... | Check Latest Price |
Imagine a wall adorned with long, flowing ribbons in bold matching hues—reds, blues, yellows—creating a lively mosaic of color. The ribbons hang vertically or stretch horizontally, catching light and moving gently with the slightest breeze. Their glossy satin finish reflects the room’s ambient light, adding a cheerful glow. It feels like a celebration, even on a regular Tuesday.
You can vary the ribbon colors based on seasons—warm oranges and browns for fall, icy blues and silvers for winter. For a more subdued look, opt for pastel shades or monochrome palettes. Adjust the length of the streamers to suit small nooks or large walls. For a more modern touch, try layering different widths or textures of ribbons.
Start by selecting your ribbon colors and buying enough length to cover your desired wall area. Use adhesive hooks or masking tape to secure the ribbons at the top, letting them cascade down naturally. For a more polished look, create neat loops or twists before attaching. Make sure the ribbons are evenly spaced for symmetry or randomly placed for a more dynamic effect. Trim the ends for a clean finish or let them flutter freely.
Customize by adding small charms, glitter, or metallic accents to the ribbons for extra sparkle. You could also write short messages or names on some ribbons with fabric markers for a personal touch. Incorporate themed ribbons for holidays or special occasions—think red, white, and blue for patriotic celebrations. Changing ribbon colors seasonally keeps the decor fresh and engaging.
Color-coordinated ribbon streamers are an easy, affordable way to transform any wall into a lively focal point. They evoke a feeling of joy and celebration, making your space instantly more inviting. Ready to add a splash of color and personality? It’s a simple project that delivers big visual impact, and your friends will be impressed by your creative flair.
2. Ribbon Wall Garland with Pom-Pom Embellishments
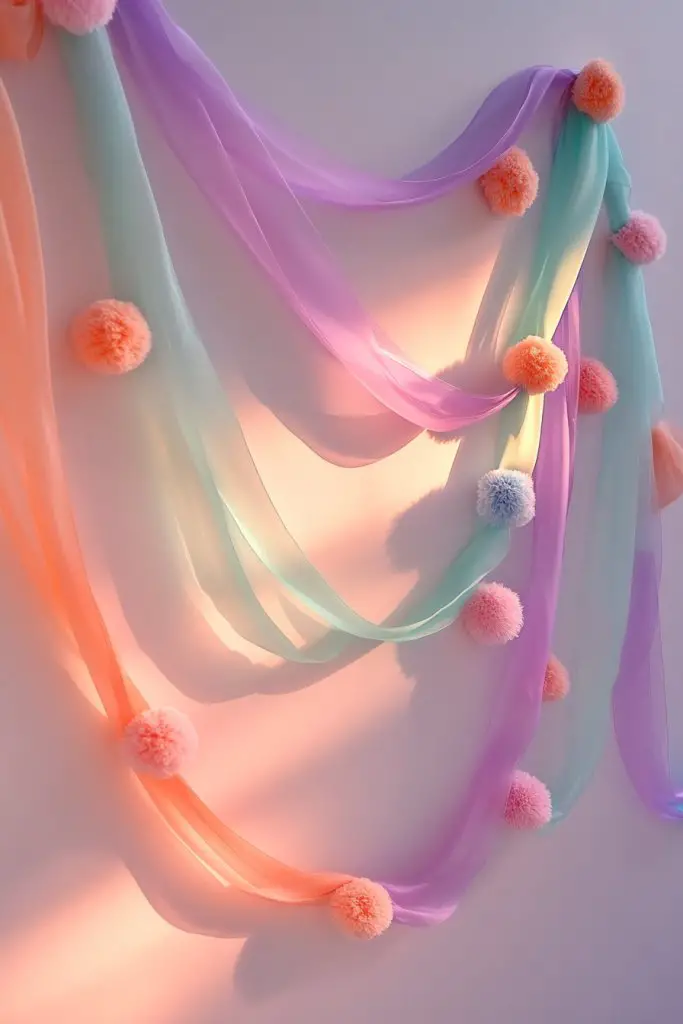
Looking for a playful way to add texture and charm to your walls? Standard decorations can feel dull, but a ribbon garland with pom-poms offers a whimsical touch that’s perfect for parties or everyday fun. It’s a DIY that’s easy and sure to make your space feel more festive.
Recommended Products to replicate this idea
| # | Preview | Product | |
|---|---|---|---|
| 1 |

|
2 Strings of 16PCS Pink Bow Garlands Banner Decoration,Pre-Strung Satin Ribbon Ornaments for... | Check Latest Price |
| # | Preview | Product | |
|---|---|---|---|
| 1 |

|
12 Pcs Paper Pom Poms Kit, Tissue Paper Flowers for Birthday, Party, Fiesta, Classroom, Playroom... | Check Latest Price |
Picture a long, flowing garland made from ribbons in various shades and textures, intertwined with fluffy, colorful pom-poms. The ribbons drape loosely, creating movement and softness, while the pom-poms add bursts of color and dimension. Hung across a mantle, window frame, or wall, it creates a playful, textured backdrop. The tactile appeal invites guests to touch and admire.
Mix different ribbon materials—satin, burlap, metallic—to match your theme. For a boho look, combine earth tones with natural fibers. For a party, choose bright, bold hues with shiny or glittery pom-poms. Shorter garlands work well on small walls, while longer ones suit larger spaces. You can also add other elements like tassels or mini lanterns for more variety.
Cut ribbons into varying lengths, and secure them to a strong string or twine with knots or clips. Attach fluffy pom-poms at intervals using hot glue or sewing stitches. Space the pom-poms unevenly for a natural look or line them up symmetrically. Hang the garland using hooks or adhesive strips, ensuring it’s taut and straight. For extra stability, reinforce attachment points with small clothespins or clips.
Create themed garlands by choosing colors and pom-poms that match your event’s palette. Personalize with initial or message charms attached to the ribbons. Add small faux floral accents for a spring vibe or metallic accents for a glamorous touch. Layer multiple garlands for a more dramatic effect or vary the ribbon lengths for a cascading look.
A ribbon garland with pom-poms is a cheerful, easily customizable decor piece that lends personality to any room. It’s perfect for celebrations or just brightening up a corner. Your friends will love the playful texture and vibrant colors—plus, it’s a project anyone can tackle without fuss. Get creative, and watch your space become an instant conversation starter.
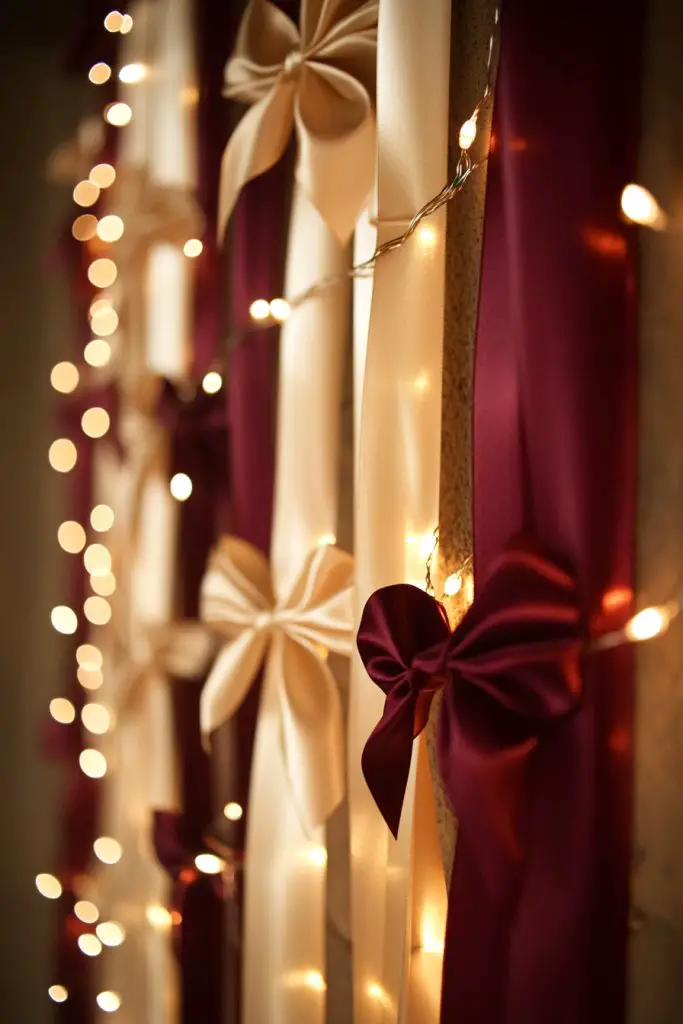
3. Cascading Ribbon Curtains for Elegant Entrance Decor
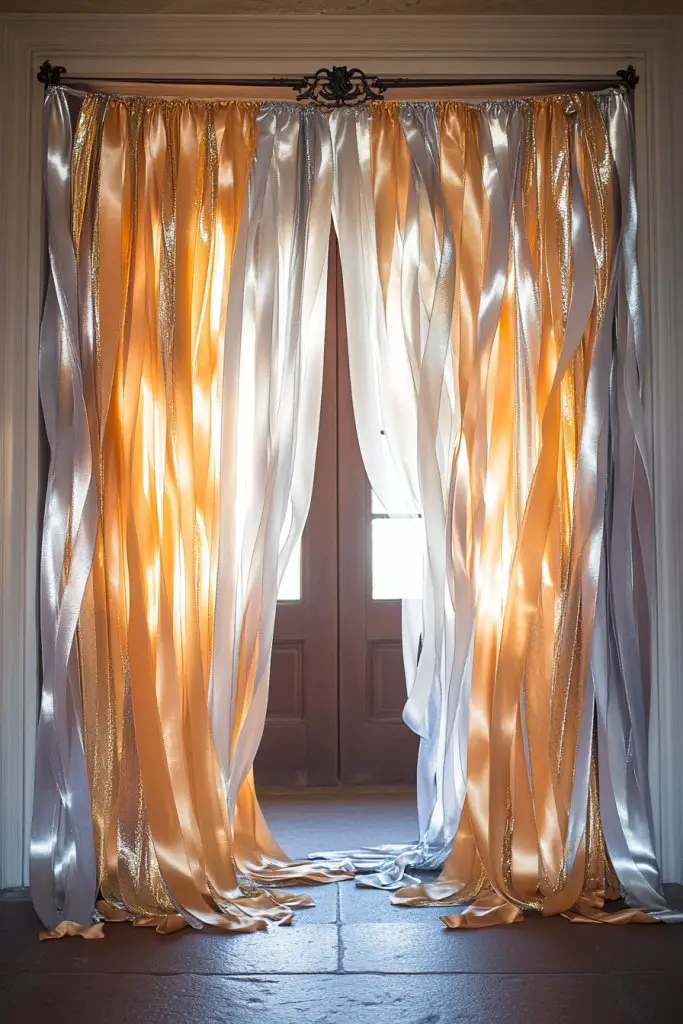
Want to make an entrance that wows guests before they even step inside? A ribbon curtain creates an elegant, inviting vibe that transforms a simple doorway into a statement. It’s a stylish alternative to traditional fabric or bead curtains, giving your space a soft, flowing aesthetic.
Recommended Products to replicate this idea
| # | Preview | Product | |
|---|---|---|---|
| 1 |

|
Mango Gifts Old Silk Sari Multicolor Ribbon Doorway Curtain Hippie Bohemian Room Divider... | Check Latest Price |
| # | Preview | Product | |
|---|---|---|---|
| 1 |
|
FELIDESIGN Curtain Track, Ceiling Curtain Track for Room Divider, Ceiling Mount Rail Set with Roller... | Check Latest Price |
Imagine a series of silky ribbons in shades that match your theme, hanging from the ceiling and gently cascading to the floor. The ribbons sway softly with movement, catching light and adding a shimmering effect. It’s like walking through a wave of color and texture that beckons guests into your space. The layered ribbons create depth while maintaining an airy, graceful appearance.
Adjust the ribbon lengths for different ceiling heights or to create a layered effect. Use metallic, sheer, or matte ribbons to suit your style—classic, boho, or modern. For seasonal themes, swap out colors—deep reds and greens for Christmas or pastels for spring. You can also add small decorative elements at the top, like fabric flowers or bows, for extra flair.
Secure a sturdy rod or wire across your doorway at ceiling level. Attach ribbons evenly spaced using clips, hooks, or sewing loops. Vary the ribbon widths and textures for visual interest. Make sure the ribbons hang at different lengths for a flowing, cascading effect, trimming them neatly at the bottom. To keep everything tidy, double knot the ribbons at the attachment points.
Personalize the curtain with themed ribbons—glittery for celebrations, matte for understated elegance. Incorporate small hanging charms or fabric flowers at the top for a customized touch. For a more dramatic look, layer multiple curtains or add LED fairy lights behind the ribbons. Change the colors seasonally or for special occasions to keep it fresh.
A ribbon curtain adds a touch of sophistication and softness that can elevate any space. It’s a versatile decor element that’s simple to assemble yet impactful. Your guests will feel welcomed by the gentle movement and shimmering colors. It’s an elegant, budget-friendly way to create a memorable entryway.
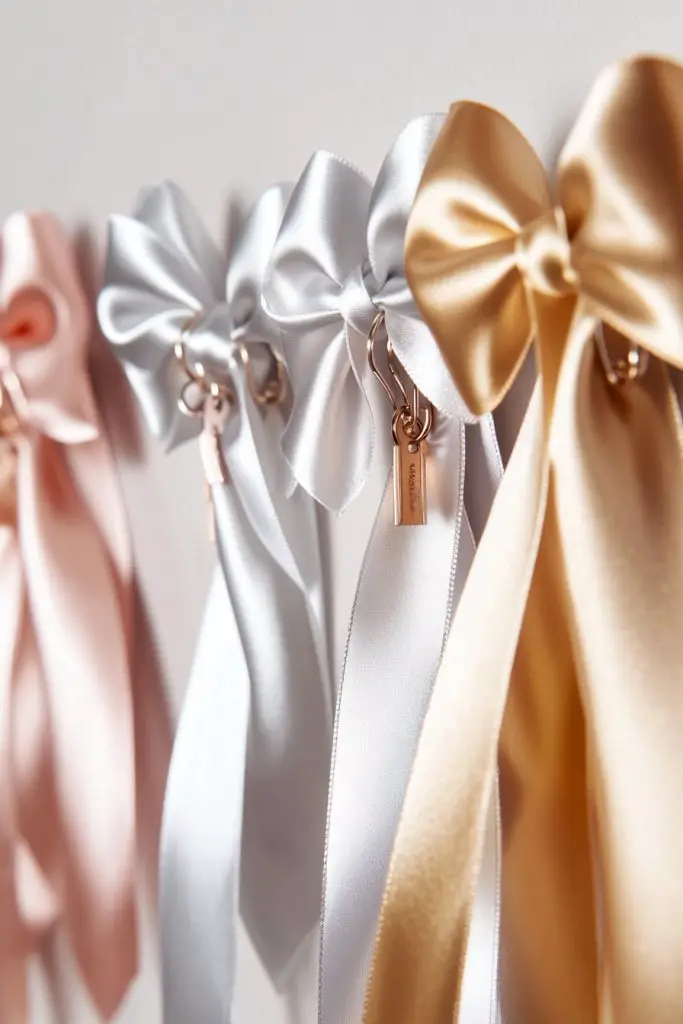
4. Ribbon Bow Wall Art as a Focal Point
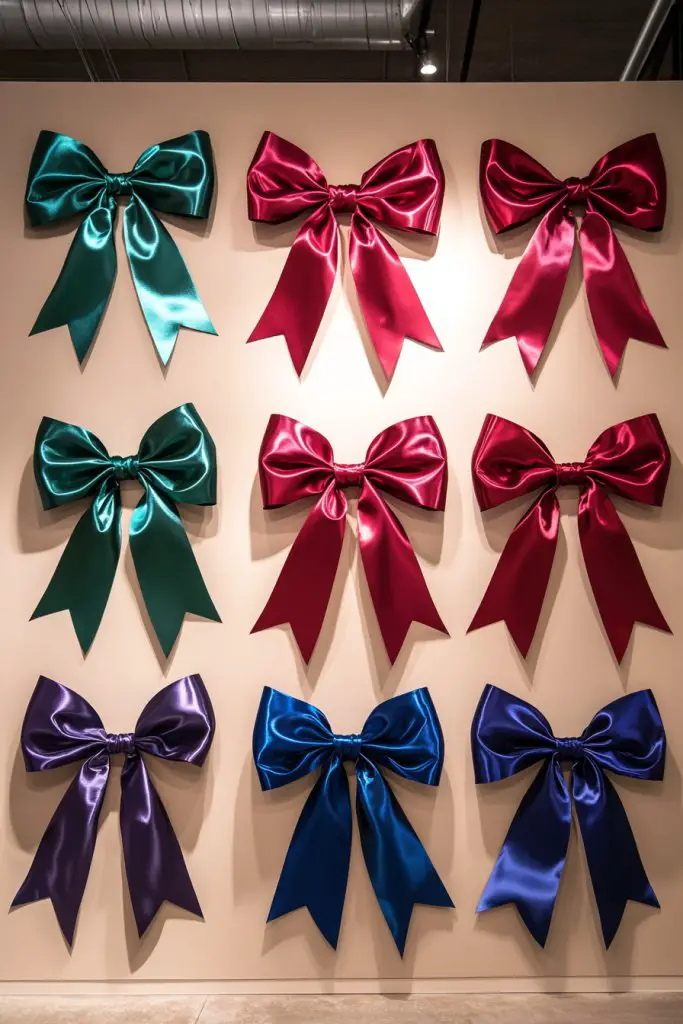
Looking for a unique wall decor idea that’s both eye-catching and easy to make? Ribbon bows can serve as stunning art pieces that add a touch of whimsy and sophistication. They’re perfect for creating a focal point in any room without needing traditional art or expensive frames.
Recommended Products to replicate this idea
| # | Preview | Product | |
|---|---|---|---|
| 1 |

|
40Pcs Pink Bow Wall Decor, DIY Bow Photo Backdrop, Ribbon Bows Garland, Pink Bows Party Decor for... | Check Latest Price |
| # | Preview | Product | |
|---|---|---|---|
| 1 |

|
WOPITUES Wood Floating Shelves Set of 6, Shelves for Wall Decor, Farmhouse Shelf for Bedroom,... | Check Latest Price |
Visualize a large wall adorned with multiple ribbon bows in various sizes and colors, arranged in a pattern or cluster. The glossy satin ribbons catch the light, and the bows’ voluminous shapes add depth and texture. The overall effect is playful yet polished, transforming a blank wall into a lively, artistic display. It’s like a modern take on classic wall decor.
Create a monochrome collection for a sleek, minimalist look, or mix vibrant hues for a lively vibe. Use different ribbon textures—smooth satin, textured grosgrain, or metallic finishes—to add variety. Arrange the bows in a grid, circular pattern, or abstract cluster depending on your style. You can also incorporate smaller bows or loops to add visual interest.
Make large bows by looping ribbons and tying them securely in the center. Use hot glue or sewing to attach bows onto a sturdy backing board, canvas, or directly onto the wall with removable adhesive strips. Space the bows evenly or cluster them for a more dynamic look. For a clean finish, trim the ribbon tails neatly or let them cascade freely. Consider framing the entire arrangement for a more finished appearance.
Add personalized touches by writing initials or short messages on some bows with fabric markers. Incorporate themed ribbons for holidays or special events. Mix textures and sizes for a layered, three-dimensional effect. Change the layout seasonally or for different celebrations to keep the art fresh and engaging.
Ribbon bow wall art is a playful, customizable decor that elevates any space with minimal effort. It’s a creative way to showcase your personality and style. Your friends will be impressed by the bold visual impact and the DIY craftsmanship behind it. Ready to turn ribbons into a stunning masterpiece?
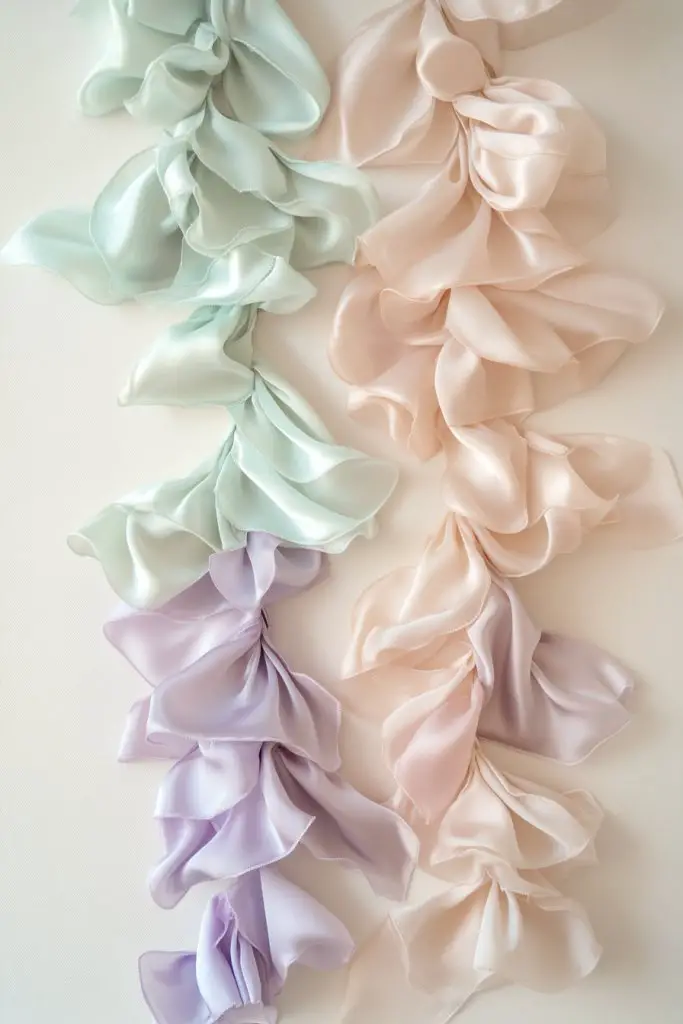
5. Twisted Ribbon Tapestries for a Modern Minimalist Look
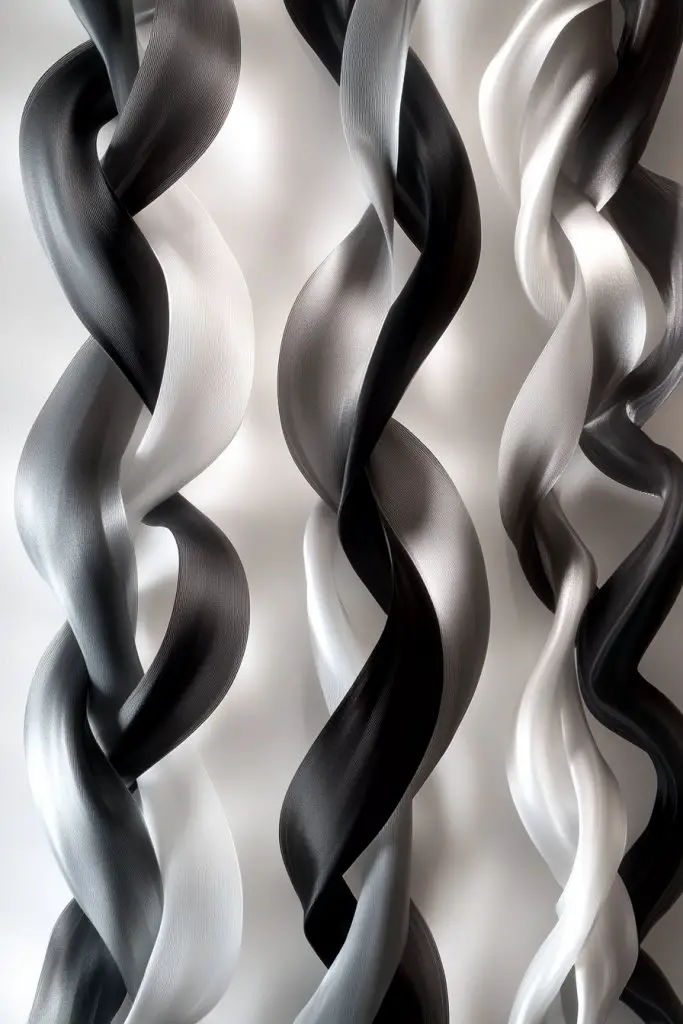
Craving a wall decor that’s sleek, modern, and effortlessly stylish? Twisted ribbon tapestries offer a minimalist aesthetic with a creative twist. They add texture and visual interest without cluttering your space, perfect for contemporary interiors.
Recommended Products to replicate this idea
| # | Preview | Product | |
|---|---|---|---|
| 1 |

|
Deco 79 Metal Sunburst Home Wall Decor Coiled Ribbon Wall Sculpture, Set of 2 Wall Art 22"W, 30"H,... | Check Latest Price |
| # | Preview | Product | |
|---|---|---|---|
| 1 |

|
Umbra Prisma 5x7 Picture Frame, Metal Floating Wall or Desk Photo Display for Pictures, Art,... | Check Latest Price |
Envision ribbons twisted into geometric shapes or flowing abstract patterns, suspended from hooks or mounted on a thin frame. The ribbons’ smooth surfaces and subtle curves create a dynamic, three-dimensional effect. Their monochrome or neutral tones blend seamlessly into modern decor, adding depth without overwhelming the senses. It’s like wearable art for your wall.
Use ribbons of different widths and textures—silk, satin, or matte fabrics—to add subtle variation. For a monochrome theme, stick to shades like black, white, or grey, or choose pastel tones for softness. Twist and weave the ribbons into various shapes—spirals, diamonds, or random abstract forms. Adjust the length depending on wall size, and consider framing for a polished finish.
Cut ribbons into long strips and twist them tightly or loosely depending on the desired texture. Secure the twists with discreet stitches or hot glue. Attach the ribbons to a lightweight backing or directly to the wall using removable adhesive. For a clean look, use a frame or a simple rod to hold the ribbons in place. Play with different directions and overlaps to create visual rhythm.
Incorporate metallic or glitter accents within the twists for a hint of glamour. Personalize by adding small charms or tags at the ends of some ribbons. Change the direction or pattern of twists for different moods—more chaotic or more orderly. Keep the design flexible so you can rearrange or modify it over time.
Twisted ribbon tapestries bring a fresh, artistic touch to minimalist spaces. They’re easy to make but look sophisticated and intentional. Your decor will feel modern and curated, giving your home a professional edge. It’s a creative project that pays off in style and simplicity.
6. Ribbon Wreaths with Festive Accents
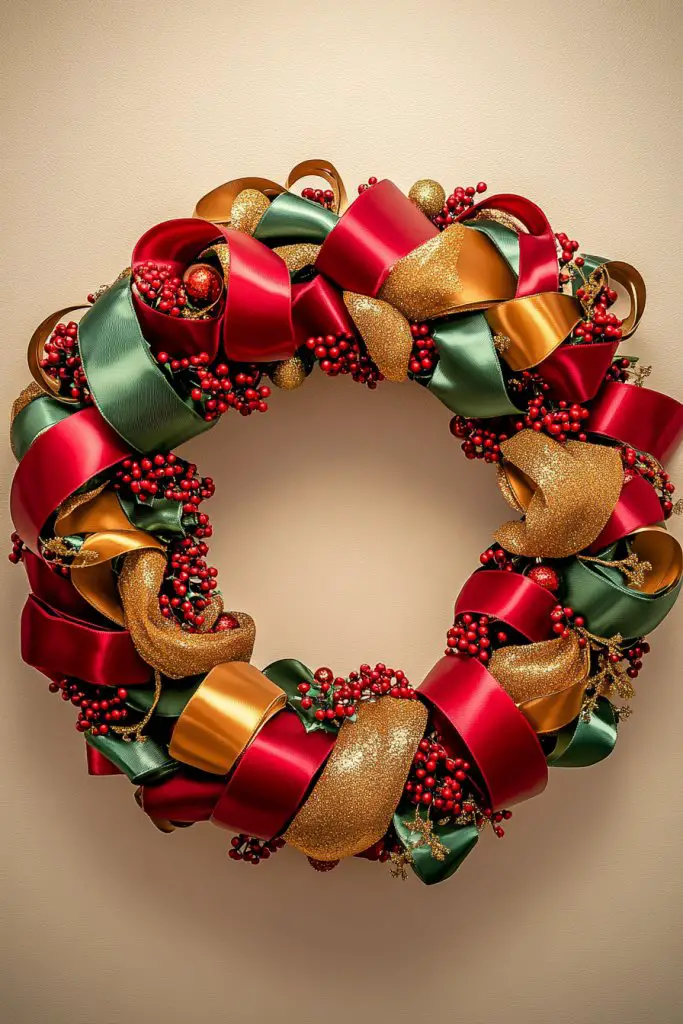
Want a versatile decor piece that can be used year-round but still feels festive? Ribbon wreaths are a charming way to decorate walls, doors, or corners with a personal touch. They’re easy to customize and add a warm, welcoming vibe to any space.
Recommended Products to replicate this idea
| # | Preview | Product | |
|---|---|---|---|
| 1 |

|
Upstout 2-Pack 14 Inch Wire Wreath Frame – Round Metal Wreath Form with Ring Design for DIY... | Check Latest Price |
| # | Preview | Product | |
|---|---|---|---|
| 1 |

|
FULUSODO 60pcs Embellishments Cute Set, Flat Back Bulk Mixed Resin Ornament Scrapbooking Set | Check Latest Price |
Visualize a circular frame wrapped with ribbons in coordinating colors, crisscrossed and layered for fullness. Accentuate with small ornaments, faux florals, or seasonal motifs tucked into the ribbons. The ribbons cascade slightly on the sides, creating a lush, textured look. The wreath’s vibrant colors and layered textures make it a focal point that radiates charm.
Switch between classic and modern styles by choosing traditional reds and greens or sleek metallics and monochromes. Use wide satin ribbons for fullness or narrow grosgrain for a delicate touch. Incorporate seasonal accents—pinecones, berries, or stars—to match holidays. Hang the wreath on a wall or door using a simple ribbon loop or hook.
Create a sturdy circular base from wire or foam. Wrap ribbons around the frame, securing them with hot glue or tying knots at intervals. Layer different ribbon widths and textures to add depth. Attach small accents like faux florals or charms for extra detail. Finish by trimming excess ribbon tails or allowing them to cascade loosely for a relaxed look.
Personalize with initials, messages, or themed embellishments for special occasions. Use ribbons with patterns or textures to reflect your style—lace, metallic, or matte. Change accents seasonally or for birthdays and celebrations. Keep the wreath lightweight for easy hanging and repositioning.
Ribbon wreaths are a timeless decoration that’s simple to craft yet endlessly customizable. They instantly add a festive or cozy touch to your decor. You’ll feel proud creating a piece that’s both beautiful and meaningful. It’s a delightful way to showcase your personal style with minimal effort.
7. Ribbon-Decorated Mirror Frames for a Festive Glow
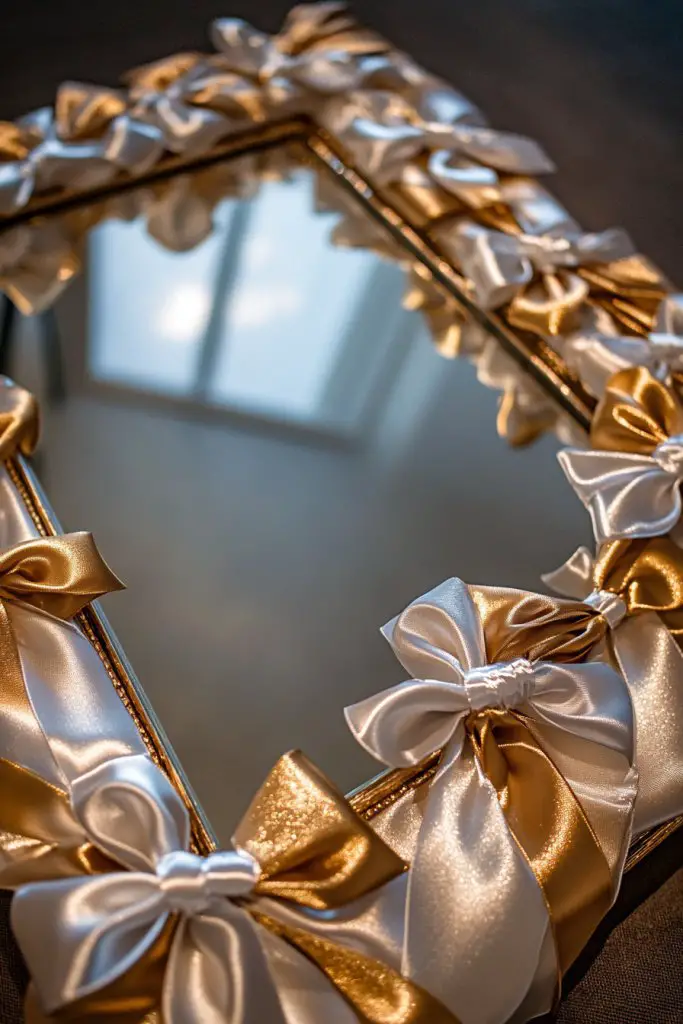
Ever wish your mirrors could do more than reflect? Ribbon decorations can turn plain mirror frames into eye-catching focal points that add a festive touch. It’s a simple way to dress up your mirrors for special occasions or everyday elegance.
Recommended Products to replicate this idea
| # | Preview | Product | |
|---|---|---|---|
| 1 |

|
40Piece 3 Inch Boutique Grosgrain Ribbon Pinwheel Hair Bows Alligator Clips For Girls Babies... | Check Latest Price |
| # | Preview | Product | |
|---|---|---|---|
| 1 |

|
Vitalizart 1" x 27 Yd Chiffon Silk Ribbon Mixed Color Ribbons Set 3 Yd x 9 Rolls Fringe Fabric for... | Check Latest Price |
Picture a mirror surrounded by a lush border of ribbons in coordinating colors, tied into bows or twisted into decorative shapes. The ribbons cascade softly, creating movement and texture that frame the reflective surface beautifully. Light catches on the ribbons’ surfaces, adding a subtle shimmer. The overall effect is charming and sophisticated.
Use satin for a sleek, elegant look or burlap for rustic charm. Wrap ribbons around the entire frame or focus on the corners for a subtle accent. Incorporate seasonal colors or metallics for celebrations. For a layered look, add multiple ribbons of different textures or widths. Keep the ribbons securely attached with hot glue or double-sided tape for long-lasting decor.
Start by cleaning your mirror frame thoroughly. Cut ribbons to lengths that suit your frame’s size, then tie or glue them into bows or decorative loops. Attach the ribbons evenly around the frame using hot glue or double-sided tape, ensuring they’re secure. For a more intricate design, combine different ribbon styles in a pattern. Finish with a neat trim or let the tails hang for a relaxed look.
Personalize with initials, short messages, or themed charms attached to the ribbons. Use matching ribbons for coordinated decor or contrasting colors for a bold statement. Change the ribbons seasonally or for special events to keep the look fresh. Add small faux gems or metallic accents for extra sparkle.
Ribbon-decorated mirrors instantly brighten and personalize your space while reflecting your style. They’re easy to customize for any occasion and add a touch of handmade charm. Your home will feel more inviting, and your guests will love the creative detail. It’s a simple project with a big impact.
8. Ribbon-Tied Wall Shelves for Practical Decor
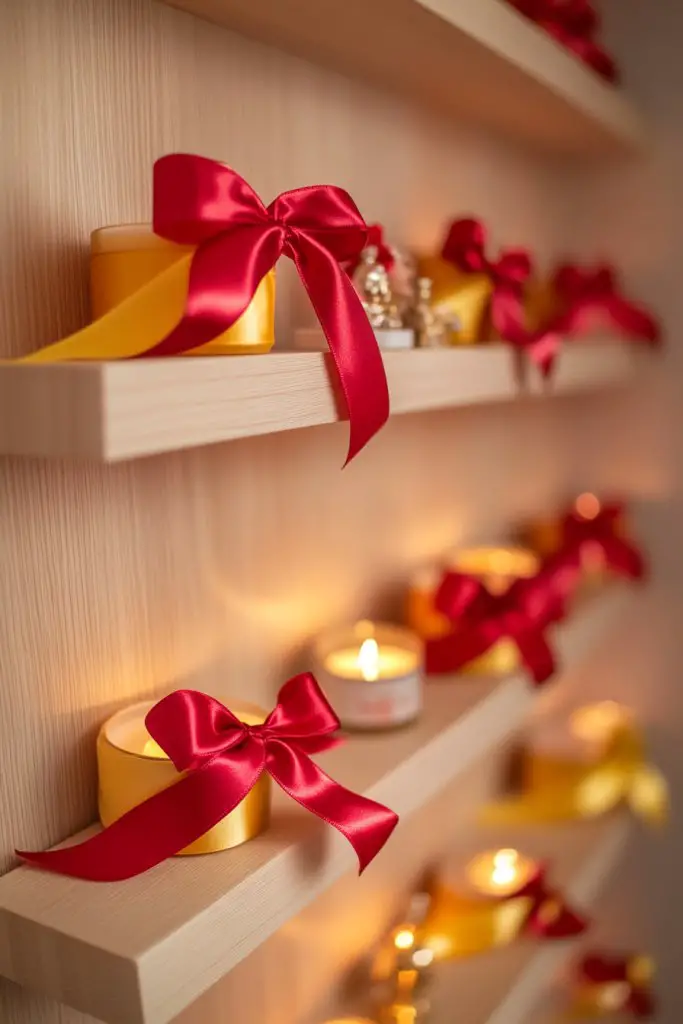
Struggling to combine style with function? Ribbon-tied wall shelves offer a clever way to add storage without sacrificing decor. They’re perfect for displaying small items while adding a festive, handmade touch to your space.
Recommended Products to replicate this idea
| # | Preview | Product | |
|---|---|---|---|
| 1 |
|
ClosetMaid 8033 4-Tier Wall Rack, 18.75" W x 25.75" H x 5" D, White | Check Latest Price |
| # | Preview | Product | |
|---|---|---|---|
| 1 |

|
Decorative Ribbons and Bows: How to Make Bows for Any Occasion | Check Latest Price |
Imagine small floating shelves suspended by colorful ribbons, knotted or tied in decorative bows. The ribbons cascade down, adding movement and softness to the functional shelves. Items like candles, books, or decorative boxes sit neatly on the shelves, framed by the flowing ribbons. The overall look is both practical and charming.
Choose ribbons in colors that match your theme—metallics for glamour, pastels for softness, or bold hues for fun. Vary the ribbon lengths and thicknesses for visual interest, and experiment with knot styles—bows, loops, or simple ties. Use sturdy but lightweight shelves that can be securely hung with ribbon supports. Adjust spacing based on your room’s scale.
Install hooks or nails at the top of your wall. Tie ribbons securely around the shelf’s mounting points or sides, creating decorative knots or bows. Hang the shelves by looping the ribbons over the hooks, ensuring they’re taut and level. For added stability, tie multiple ribbons or create cross-supports. Keep the ribbons tight to prevent swaying or tilting.
Personalize by choosing ribbons with metallic, glitter, or patterned finishes. Add small decorative charms or tassels to the ribbons for extra charm. Use different ribbon colors to match seasons or special events. Incorporate thematic accessories like mini fairy lights or mini lanterns for a festive glow.
Ribbon-tied shelves combine practicality with creative flair, making your decor both functional and beautiful. They’re easy to customize and ideal for showcasing your personality. Your space will feel more curated and festive, and it’s a project you’ll enjoy customizing over time.
9. Ribbon-Trimmed Wall Hangings and Tapestries
Want to add texture and color to your walls without heavy or bulky decor? Ribbon-trimmed wall hangings and tapestries are a lightweight, stylish solution. They bring movement and vibrancy while being easy to update or change.
Recommended Products to replicate this idea
| # | Preview | Product | |
|---|---|---|---|
| 1 |

|
Wonrizon Sun and Moon Tapestry, Aesthetic Black Dark Spiritual Tapestries Mystic Burning Sun with... | Check Latest Price |
| # | Preview | Product | |
|---|---|---|---|
| 1 |

|
20-Yards Artificial Vine Leaf Ribbon Trim, Greenery Garland Vines for Hanging Plants Leaves... | Check Latest Price |
Visualize a fabric wall hanging with a border of ribbons sewn or glued along the edges. The ribbons can cascade slightly, adding layered dimension and a tactile quality. The main fabric can feature patterns, textures, or solid colors, complemented by the ribbons’ sheen or matte finish. The result is a textured, colorful statement piece.
Use ribbons in contrasting or matching colors, and experiment with different widths and textures. For a boho look, incorporate fringed or tassel ribbons; for elegance, choose satin or silk. Attach ribbons neatly along the edges of fabric or create a fringe effect with multiple layers. Change the ribbons seasonally or for different themes to keep it fresh.
Cut ribbons to the desired length and sew or glue them along the border of your fabric or tapestry. For a more organic look, let the ribbons hang freely at the edges. Mount the finished piece on a rod or dowel, then hang it on the wall with hooks or nails. For a cleaner appearance, ensure all ribbons are evenly sewn or glued for a tidy edge. For added durability, reinforce the attachment points.
Add embellishments like sequins, beads, or metallic accents to the ribbons for extra sparkle. Personalize with embroidered initials or messages on the fabric. Use themed ribbons for holidays or special occasions—think metallics for New Year’s or pastel shades for Easter. Change up the ribbons seasonally for a fresh look.
Ribbon-trimmed wall hangings are a creative way to add color and texture without overwhelming your space. They’re easy to craft and highly customizable, turning simple fabrics into art. Your decor will feel more vibrant and inviting, and you’ll enjoy the process of making it your own.
10. Layered Ribbon Ribbons for a Textured 3D Wall Panel
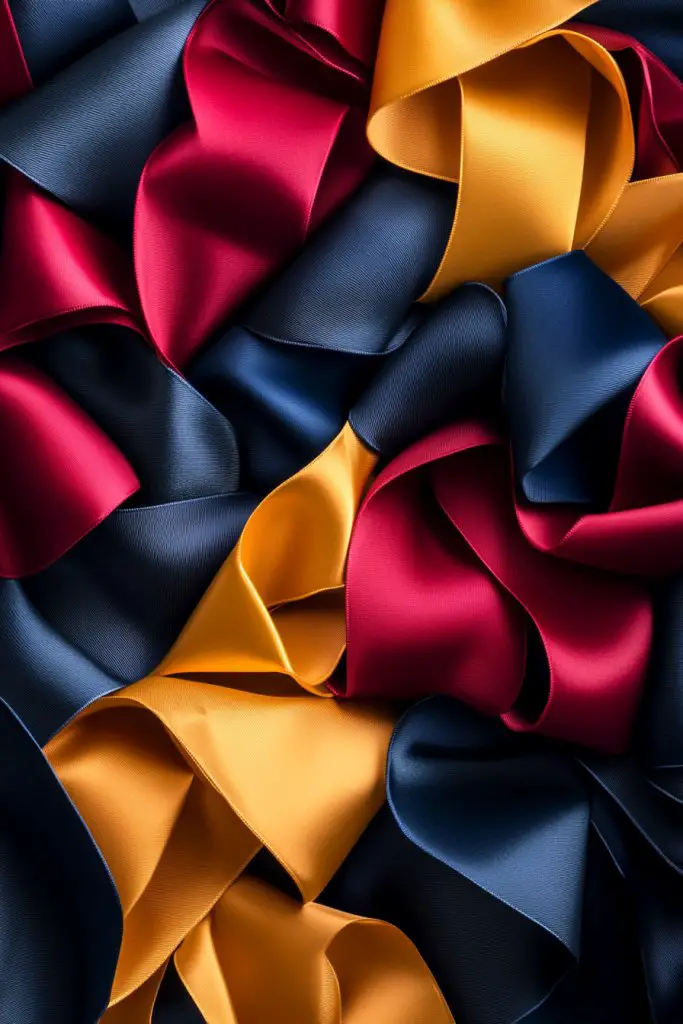
Looking to create a statement wall that’s full of depth and texture? Layered ribbons can give you a dynamic, three-dimensional effect that’s both modern and artistic. It’s a bold way to make your wall pop without heavy or expensive materials.
Recommended Products to replicate this idea
| # | Preview | Product | |
|---|---|---|---|
| 1 |

|
Art3d Premade Board and Batten Paintable Wainscoting Kit, MDF Accent Wall Panel for Kitchen Bedroom... | Check Latest Price |
| # | Preview | Product | |
|---|---|---|---|
| 1 |

|
KGROTE 100PCS Cable Clips, Adhesive Wire Clips Strong Cord Clips Wire Holders, Cable Management... | Check Latest Price |
Imagine ribbons of varying widths and textures layered in overlapping patterns, secured directly onto the wall or mounted on a backing board. The layers cascade, twist, and weave, creating shadows and movement. The mix of matte, satin, or even textured ribbons adds richness to the visual landscape. It’s like a fabric sculpture frozen in time.
Combine different ribbon styles—smooth satin, rough burlap, shiny metallic—to enhance the tactile experience. Play with color gradients or contrasting hues for emphasis. Arrange the ribbons in abstract, geometric, or organic patterns depending on your style. Adjust the layering density for more or less visual impact. Mount on a sturdy backing for easy installation.
Cut ribbons into various lengths and widths, then secure them onto a backing board or directly onto the wall using strong adhesive or staples. Overlap ribbons in an intentional pattern or randomly for a more organic look. Use hot glue for quick attachment or sew for more durability. Play with the placement until you achieve the desired layered effect. Ensure the ribbons stay flat and secure.
Incorporate metallic or glitter ribbons for a glamorous touch. Personalize with small charms or initial tags tucked into the layers. Change colors or ribbon styles for different seasons or mood settings. Keep the design flexible so it can be rearranged or expanded over time. Add LED strips behind for subtle backlighting.
Layered ribbon panels are a stunning, customizable way to add texture and depth to your decor. They’re a statement piece that invites admiration and sparks conversation. Plus, they’re a fun DIY project that transforms fabric into modern art—your wall will thank you.
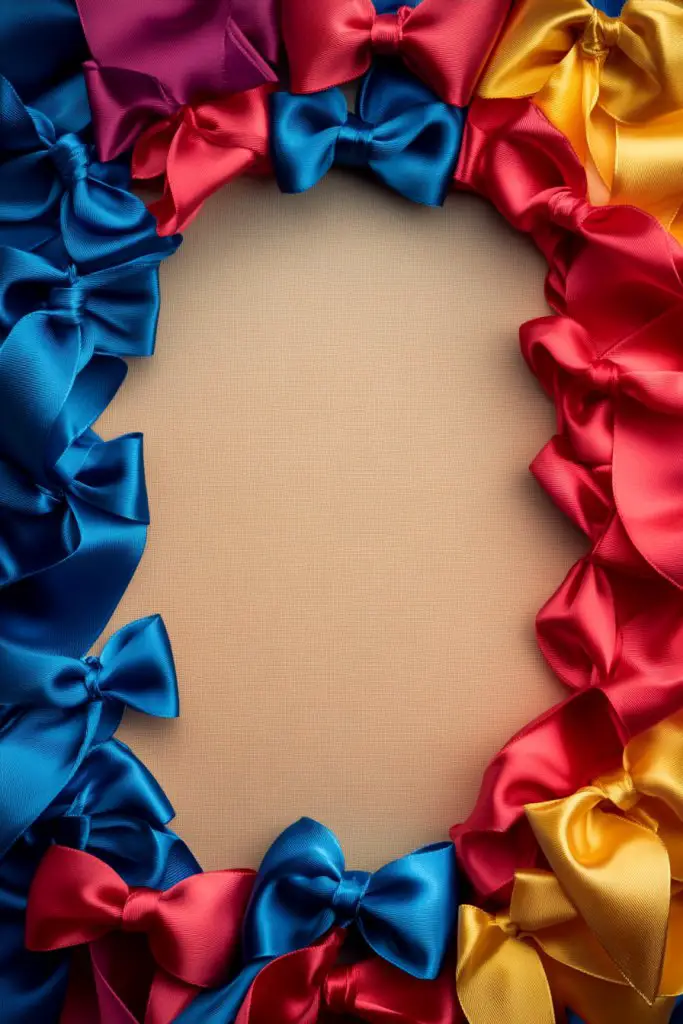
11. Ribbon Bow Clusters as Decorative Wall Accents

Searching for a playful yet stylish way to decorate your walls? Ribbon bow clusters provide a fun, vibrant focal point that’s easy to assemble and customize. They’re perfect for adding a touch of whimsy to any celebration or everyday decor.
Recommended Products to replicate this idea
| # | Preview | Product | |
|---|---|---|---|
| 1 |

|
YGDZ Black Bows 5x7 Inch, Twist Tie Satin Black Bow for Cake, Gift Wrapping, 30PCS Ribbon Bows for... | Check Latest Price |
| # | Preview | Product | |
|---|---|---|---|
| 1 |

|
Grosgrain Ribbon 3/8 inch 20 Colors 5 Yards/Roll, Total 100 Yards Per Package for Christmas Tree,... | Check Latest Price |
Envision bunches of large and small bows grouped together, each made from shiny satin or textured grosgrain ribbons. The bows are arranged in clusters or patterns, creating a lively, textured wall display. The glossy ribbons reflect light, and the varied sizes add visual interest. It’s like a bouquet frozen in time, bursting with color.
Mix ribbon colors and textures to match your theme—metallics for glam, pastels for softness, or bright hues for fun. Arrange the clusters symmetrically or randomly, depending on your style. Use different bow sizes to create depth and dimension. Incorporate additional decorative elements like faux florals or mini banners for extra charm.
Create bows by looping ribbons and tying tightly in the center. Attach the bows to a wall using removable adhesive strips or hooks, clustering them for maximum impact. Space them evenly or in an organic pattern depending on your aesthetic. For stability, reinforce with double knots or hot glue at attachment points. Consider mounting on a backing board for a more uniform look.
Customize by adding initials or messages on the bows with fabric markers. Use themed ribbons—glitter, metallic, patterned—for special occasions. Change the arrangement or colors seasonally to keep the decor fresh. Incorporate small lights or charms to enhance their appeal.
Ribbon bow clusters are a cheerful, eye-catching decor that’s easy to craft and endlessly adaptable. They add a sense of celebration and personality to your space. Your friends will admire your creative touch, and you’ll enjoy the fun of making these charming accents. It’s a playful and stylish way to brighten any wall.
12. Ribbon Bowtie Wall Art for a Chic, Stylish Look
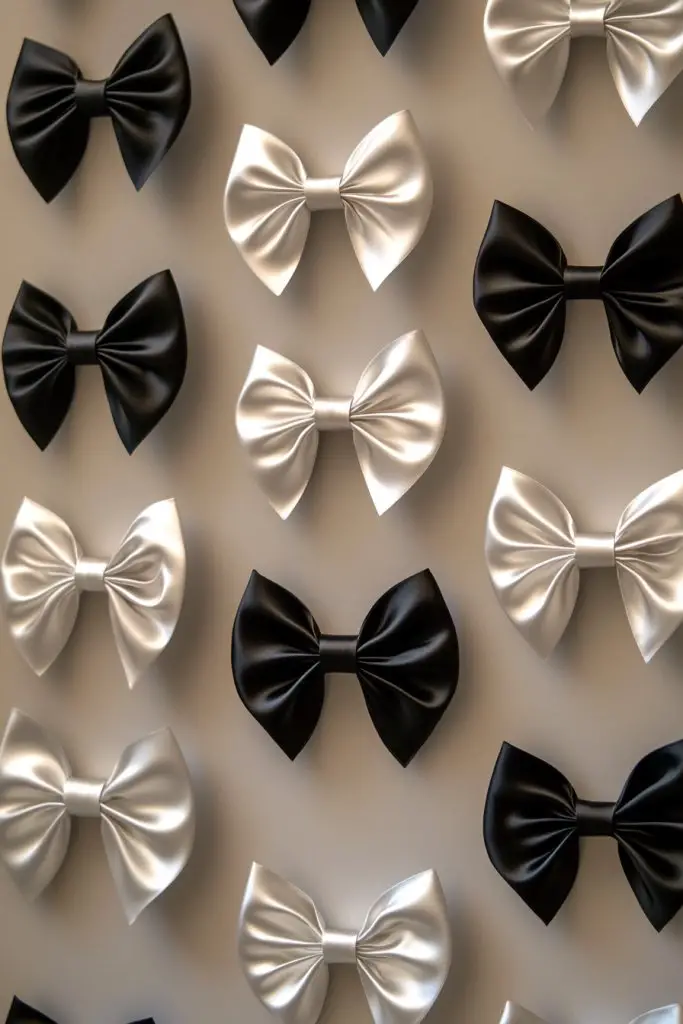
Craving a modern, chic decor element that’s simple yet impactful? Ribbon bowtie wall art combines sleek design with a touch of elegance. It’s perfect for creating a sophisticated focal point that’s easy to assemble and customize.
Recommended Products to replicate this idea
| # | Preview | Product | |
|---|---|---|---|
| 1 |
|
YGDZ Black Bows 5x7 Inch, Twist Tie Satin Black Bow for Cake, Gift Wrapping, 30PCS Ribbon Bows for... | Check Latest Price |
| # | Preview | Product | |
|---|---|---|---|
| 1 |

|
upsimples 11x14 Picture Frame Set of 5, Display Pictures 8x10 with Mat or 11x14 Without Mat, Wall... | Check Latest Price |
Imagine a grid or pattern of neatly tied ribbon bows resembling bowties, arranged symmetrically or in an abstract layout. The ribbons are satin or silk, with a glossy finish that catches the light. The clean lines and uniform shapes give the wall a polished, contemporary vibe, elevating your space instantly.
Use ribbons in monochrome for a minimalist look or mix colors for a playful, modern twist. Vary the size of the bows for visual interest—small for subtle accents or large for statement pieces. Arrange them in geometric patterns or in a random scatter for a more relaxed aesthetic. Incorporate metallic or textured ribbons for added sophistication.
Create bows by looping ribbons and tying neatly at the center, then attach them to a backing board or directly onto the wall using double-sided tape or hooks. Keep the bows evenly spaced in a grid or pattern. For a cleaner look, align the knots and tails precisely. Consider framing the entire layout for a finished, gallery-like appearance.
Add initials or short messages on some bows for a personal touch. Use themed ribbons—glitter, metallic, or patterned—to match your decor style. Change the arrangement over time or for different seasons, keeping it fresh. Incorporate small metallic charms or beads for extra elegance.
Ribbon bowtie wall art is a sleek, stylish decor that adds a modern touch to any room. It’s easy to create but looks highly polished. Your space will feel more curated and sophisticated, and you’ll enjoy the process of designing your own chic wall display.
13. Ribbon-Decorated Light Strings for a Cozy Glow
Want to combine lighting and decor into one cozy package? Ribbon-decorated light strings are perfect for adding warmth and color to your space. They turn simple fairy or string lights into a festive, personalized feature that’s both functional and decorative.
Recommended Products to replicate this idea
| # | Preview | Product | |
|---|---|---|---|
| 1 |

|
Brightown 12 Pack LED Fairy Lights Battery Operated String Lights - 7ft 20LED Waterproof Silver Wire... | Check Latest Price |
| # | Preview | Product | |
|---|---|---|---|
| 1 |

|
Brightown 300 LED Fairy Curtain Lights, 9.8ft x 9.8ft Warm White Curtain String Lights, USB Plug in... | Check Latest Price |
Picture delicate ribbons wrapped around or hanging from a string of warm fairy lights. The ribbons come in coordinating colors or contrasting shades, creating a layered look. The soft glow of the lights shines through the ribbons, casting a warm, inviting ambiance. It’s like wrapping your space in a colorful, glowing hug.
Use ribbons of different textures—sheer, satin, or matte—for variety. Vary the length and layering for a more dynamic effect. For a more casual look, let the ribbons hang loosely; for a polished style, tie them into bows or twists. Incorporate seasonal colors or themes—pastels for spring, reds and golds for holidays.
Wrap ribbons around the light string at regular intervals or tie them into bows directly onto the bulbs or cord. Secure with small clips or knots, ensuring they stay in place. Hang the string across walls, windows, or doorways for maximum impact. Adjust the ribbon length to create cascading or layered effects. Keep the ribbons taut but flexible for a natural look.
Add small charms, tassels, or glitter accents to the ribbons for extra charm. Change ribbon colors seasonally or for special events. Incorporate battery-operated LED strips for extra brightness. Personalize by writing messages or initials on the ribbons with fabric markers.
Ribbon-decorated light strings turn ordinary lighting into a personalized, festive feature. They’re perfect for creating cozy, inviting atmospheres in bedrooms, patios, or parties. It’s a simple DIY that adds warmth and personality, making your space feel uniquely yours.
14. Vertical Ribbon Ties for Hanging Decorative Elements
Want an easy way to hang ornaments, paper lanterns, or lightweight decorations with style? Vertical ribbon ties are a simple yet effective method to add flair to your hanging decor. They’re perfect for celebrations or everyday accents.
Recommended Products to replicate this idea
| # | Preview | Product | |
|---|---|---|---|
| 1 |

|
YYST Gift Wrapping Paper Wall Mount Storage Station, Organizer, Dispensing Rack for Gift Wrapping... | Check Latest Price |
| # | Preview | Product | |
|---|---|---|---|
| 1 |
|
Hummingbird Gifts for Women, Colorful Hummingbird Ornament, Bird Ornaments for Christmas Tree,... | Check Latest Price |
Visualize ribbons tied in elegant knots or bows, dangling vertically from hooks or ceiling fixtures. Small decorative items or lightweight ornaments are suspended along the ribbons, creating a floating, layered effect. The ribbons add movement and a touch of elegance, transforming simple hanging elements into eye-catching decor.
Choose ribbons in colors matching your theme—metallics for glam, pastel for soft vibes, or bold hues for fun. Vary the ribbon lengths for a cascading look, or keep them uniform for symmetry. Use different ribbon textures—satin, grosgrain, or textured fabrics—to add visual interest. Incorporate decorative knots or bows for extra detail.
Tie ribbons securely around the tops of ornaments or lanterns using knots or bows. Attach the ribbons to ceiling hooks, curtain rods, or wall-mounted hooks with loops or clips. Ensure the ribbons are taut enough to hold the decorations steady but loose enough for gentle movement. Space the decorated ribbons at varying heights for a dynamic display.
Personalize by choosing ribbons that match your decor or event theme. Add metallic or glitter accents for extra sparkle. Use ribbon colors to symbolize specific themes or moods—calm blues, energetic reds. Change the decorations or ribbons seasonally for variety and freshness.
Vertical ribbon ties offer a versatile, stylish way to display decorations with movement and elegance. They’re simple to implement but create a big visual impact. Your space will feel more lively and curated, and it’s a creative solution for all kinds of celebrations or everyday decor.
15. Ribbon-Wrapped Wall Hooks for Practical Elegance
Tired of plain, boring wall hooks that do nothing for your decor? Ribbon-wrapped hooks combine practicality with style, turning everyday hangers into charming accents. They’re perfect for hanging banners, small ornaments, or accessories while adding a personalized touch.
Recommended Products to replicate this idea
| # | Preview | Product | |
|---|---|---|---|
| 1 |
|
KYIAANY Gold Bow Hooks for Girls: Cute Triple Bows Hooks Wall Mount for Nursery Bedroom Bathroom for... | Check Latest Price |
| # | Preview | Product | |
|---|---|---|---|
| 1 |
|
Decorative Ribbons and Bows: How to Make Bows for Any Occasion | Check Latest Price |
Picture a simple wall hook wrapped in ribbons in coordinating or contrasting colors, tied into neat bows or decorative knots. The ribbons cascade down, softening the look of functional hardware. When you hang your items—like banners or small decor pieces—they’re framed by the ribbons, creating a cohesive, festive appearance. It’s like giving your hooks a makeover.
Choose ribbons that match your decor style—sleek satin for modern, textured grosgrain for rustic. Wrap the ribbons tightly around the hook’s base or create a decorative bow at the top. Use multiple ribbons layered for a fuller look or single ribbons for minimal elegance. Change colors or styles seasonally or for different occasions.
Secure the ribbons around the hook’s base with hot glue or knots, ensuring they’re tight and neat. Tie or glue decorative knots or bows at the top for a finished look. Hang your banners, keys, or small items from the decorated hooks. For extra durability, reinforce with additional ribbons or adhesive. Keep the ribbons tidy and trimmed for a polished appearance.
Add charms, tassels, or small decorative pieces to the ribbons for a personalized touch. Use themed ribbons—metallics for holidays, pastels for spring. Rewrap or change ribbons periodically to match your decor updates. Coordinate with other ribbon decorations for a unified look.
Ribbon-wrapped hooks turn functional items into decorative elements that elevate your space. They’re easy to customize and perfect for adding color and charm. Your space will look more thoughtful and cohesive, and it’s a simple upgrade that makes a big difference.
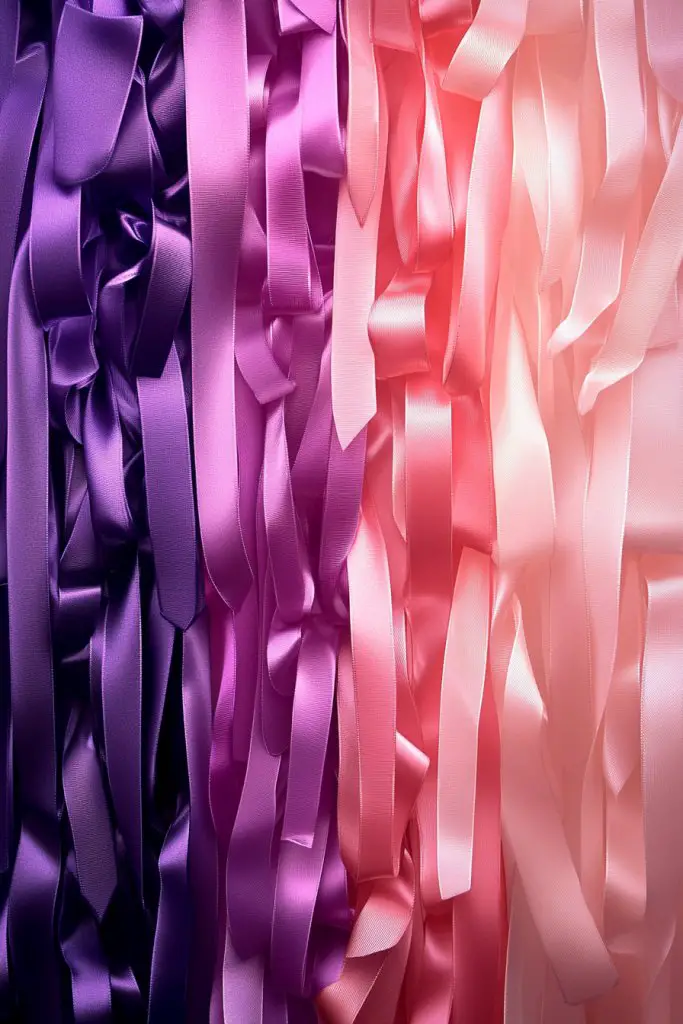
16. Ombre Ribbon Wall Design for a Gradient Effect
Craving a wall design that’s eye-catching but still elegant? An ombre ribbon wall creates a stunning gradient effect that adds depth and modernity. It’s a creative way to introduce color seamlessly into your decor.
Recommended Products to replicate this idea
| # | Preview | Product | |
|---|---|---|---|
| 1 |

|
Mango Gifts Bohemian Door Curtain Made from Recycled Silk Sari Ribbon Orange Rod Pocket Panel for... | Check Latest Price |
| # | Preview | Product | |
|---|---|---|---|
| 1 |
|
KGROTE 100PCS Cable Clips, Adhesive Wire Clips Strong Cord Clips Wire Holders, Cable Management... | Check Latest Price |
Imagine ribbons arranged in a smooth color transition—from deep, rich hues at the bottom to light, airy shades at the top. The ribbons cascade in a flowing gradient, creating a visual wave of color. The subtle shift in shades adds a sophisticated, contemporary aesthetic that draws the eye. It’s like a painted mural made of fabric.
Choose a color palette that matches your room’s theme—monochrome, pastel, or bold contrasts. Vary the ribbon widths and textures for added interest. Arrange the ribbons in a vertical or horizontal pattern depending on your wall’s shape. For seasonal themes, swap out colors to suit the mood or occasion. Keep the gradient smooth for a seamless look.
Select ribbons in a carefully curated color sequence. Secure each ribbon at the top with hooks or adhesive, spacing evenly. Overlap the ribbons slightly to create a gradual transition. Use a ruler or level to ensure straight lines. For a more professional finish, blend the ribbons’ edges with fabric glue or sewing. Adjust the placement until the gradient appears smooth and balanced.
Add metallic or glitter ribbons at key points for extra sparkle. Incorporate small decorative elements like beads or charms that complement the color scheme. Change the color gradient seasonally or for special events. Use lighting—such as LED strips behind the ribbons—to enhance the ombre effect at night.
An ombre ribbon wall is a chic, modern decor that transforms a blank wall into an artful display. It’s customizable and adapts effortlessly to different color schemes. Your space will feel more vibrant and curated, and you’ll enjoy the creative process of building a gradient masterpiece.
17. DIY Ribbon Frame Borders for Wall Art and Photos
Want to make your wall art or photos stand out even more? DIY ribbon frame borders are a simple way to add colorful, textured edges that elevate your displays. It’s an easy project that makes your decor feel personalized and finished.
Recommended Products to replicate this idea
| # | Preview | Product | |
|---|---|---|---|
| 1 |
|
HOMETITUTE Wallpaper Border Peel and Stick Decorative Wall Trim Self Adhesive Embossed Floral Accent... | Check Latest Price |
| # | Preview | Product | |
|---|---|---|---|
| 1 |

|
yeestone 10 Pack Picture Frame Mats, 11x14 Matted to 8x10 Photo Mats, Acid Free Picture Matting for... | Check Latest Price |
Visualize a plain frame or photo with a border of ribbons glued or sewn around the edges. The ribbons cascade slightly over the frame’s surface, adding dimension and a pop of color. The textured borders draw attention to your artwork or photos, making them the star of the wall. It’s a playful, crafty way to personalize your displays.
Use ribbons matching your decor style—sleek satin for elegance or burlap for rustic charm. Mix different widths and textures for visual interest. Create layered borders by stacking ribbons of varying colors and sizes. For a more dramatic look, extend the ribbons beyond the frame edges for a fringe effect. Change the ribbons seasonally or for different themes.
Cut ribbons to length, ensuring they are slightly longer than the frame edges. Attach them securely with glue, double-sided tape, or sewing stitches. Arrange the ribbons evenly around the frame, creating neat corners and smooth edges. For a polished finish, trim excess ribbon tails or let them cascade for a relaxed style. Mount your framed art or photo on the wall.
Add embellishments like beads, sequins, or metallic accents to the ribbons for extra sparkle. Write messages or initials on some ribbons for a personal touch. Incorporate themed ribbons—holly leaves for Christmas, flowers for spring. Rotate and update borders to match seasons or holidays.
DIY ribbon frame borders are a creative way to give new life to your wall art and photos. They’re simple to craft but add a custom, high-end look. Your decor will feel more vibrant and thoughtful, and you’ll love the personalized touch. It’s a fun project that pays off with beautiful results.
Conclusion
From elegant ribbon garlands to playful bow accents, these wall decoration ideas showcase the endless possibilities for using ribbons to enhance your festive decor. Don’t hesitate to try out these creative techniques in your own home—your walls will thank you! Get inspired, gather your ribbons, and start transforming your space into a celebration of style and creativity.
Last update on 2026-03-10 / Affiliate links / Images from Amazon Product Advertising API