
21 Shaker Style Wall Panel Ideas for Timeless Elegance
Imagine transforming your home with timeless charm and understated elegance—shaker style wall panels do just that! Their clean lines, classic simplicity, and versatile appeal make them a favorite among homeowners and designers alike. These panels add warmth and sophistication to any space, creating a cozy yet refined atmosphere.
In this article, you’ll discover a variety of shaker style wall panel ideas that suit different tastes and interiors. Whether you’re aiming for a rustic farmhouse look or a sleek modern vibe, there’s a shaker panel design to inspire your next project. Get ready to explore creative ways to elevate your home’s style with these beautiful, timeless wall treatments.
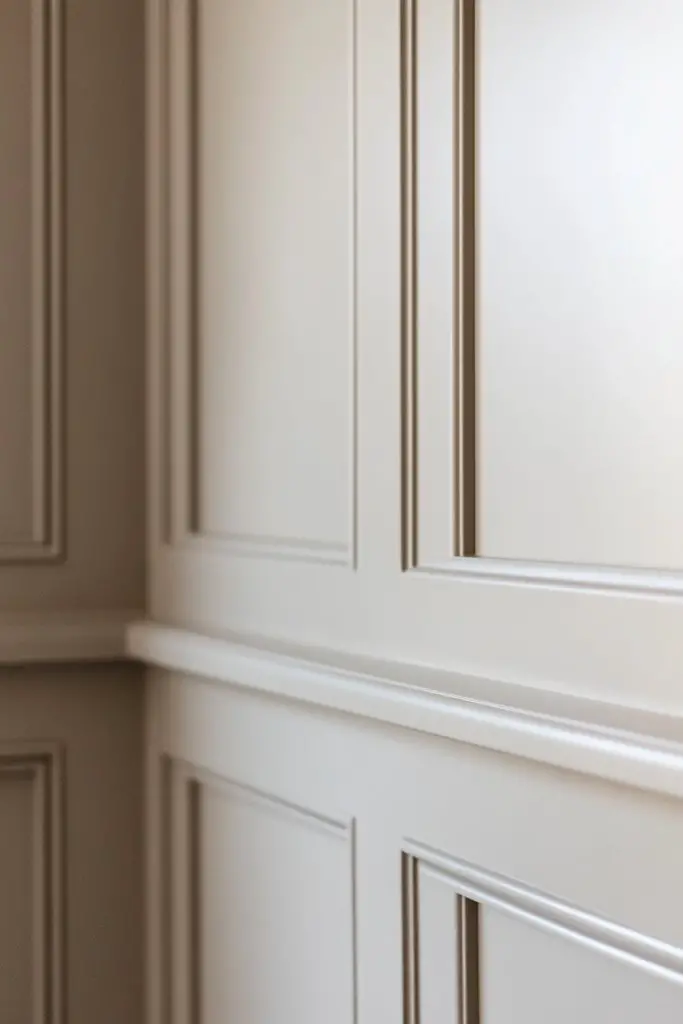
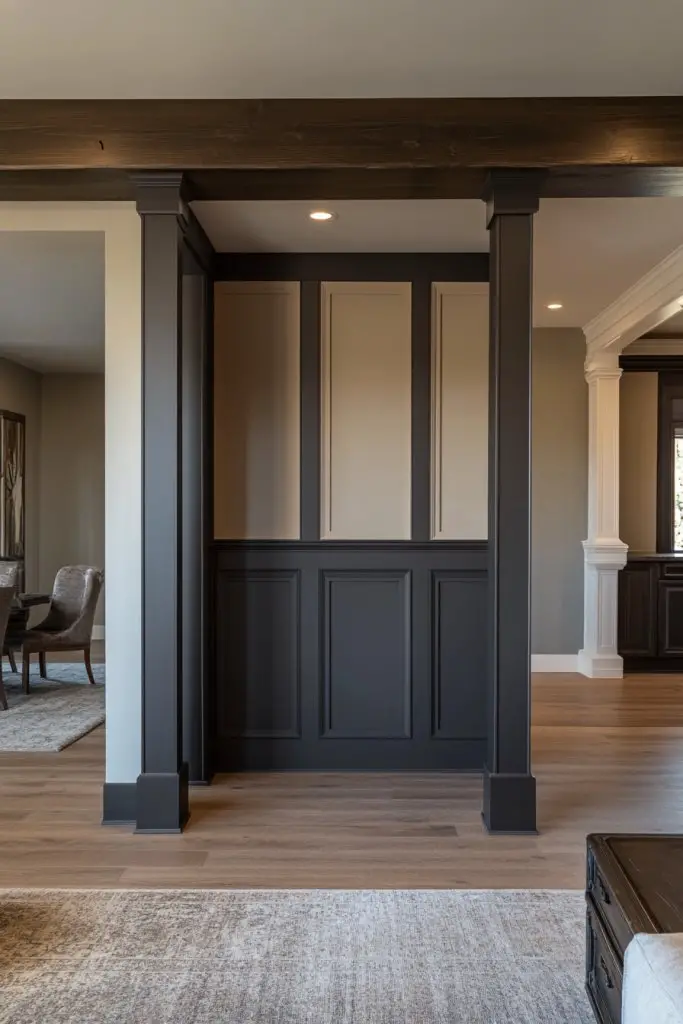
1. Classic Recessed Shaker Wall Panels with Mitered Edges
Ever wish your walls looked like they belonged in a timeless, elegant home? Sometimes, the simplest designs pack the most punch, but achieving that crisp, clean look can seem tricky. Traditional wall paneling offers a classic vibe, but getting perfect corners and symmetry feels intimidating for DIYers. The desire is to bring sophistication without complicated craftsmanship.
Recommended Products to replicate this idea
| # | Preview | Product | |
|---|---|---|---|
| 1 |

|
LED Recessed Lighting Kit for Wall Panels - GloryAir 6pcs Adhesive Wall Strip Lights for Interior... | Check Latest Price |
| # | Preview | Product | |
|---|---|---|---|
| 1 |

|
Peel and Stick Wall Corner Protector & Edge Guard, Self-Adhesive Flexible Trim Molding for Inside &... | Check Latest Price |
Imagine walking into a room where the walls are divided into perfectly recessed panels, each corner mitered with precision. The edges catch the light subtly, highlighting the craftsmanship. The panels are painted in a soft, neutral tone that complements any furniture style. It feels like stepping into a boutique hotel or a heritage home, where every detail whispers quality.
You can vary the size of these panels depending on your ceiling height or room size. For a more modern twist, opt for larger panels with thinner borders. In smaller rooms, narrower panels create a subtle texture without overwhelming the space. Seasonal adaptations include darker shades for winter coziness or lighter hues for spring freshness, keeping your walls versatile.
Start by measuring your wall to determine panel sizes. Use high-quality MDF or wood for durability, and cut miters with a saw for crisp corners. Assemble the panels on the ground with adhesive and nails, then mount them on the wall using a level. Finish with primer and paint for a seamless look. Precise miters take patience but pay off with a polished appearance. Optional decorative molding can add extra flair to the edges.
Add a pop of color to the recessed panels or choose a contrasting finish for the borders. Incorporate decorative corner blocks painted in a different hue for a handcrafted touch. You could also embed subtle textures or patterns within the panels for added depth. Personal touches like custom monograms or initials can make the space uniquely yours.
This classic style elevates any room effortlessly and adds a sense of crafted elegance. Once you see how straightforward the miters are to achieve, you’ll feel empowered to customize your walls further. It’s a proven way to add value and visual interest without breaking the bank. Ready to transform your space into a timeless retreat?
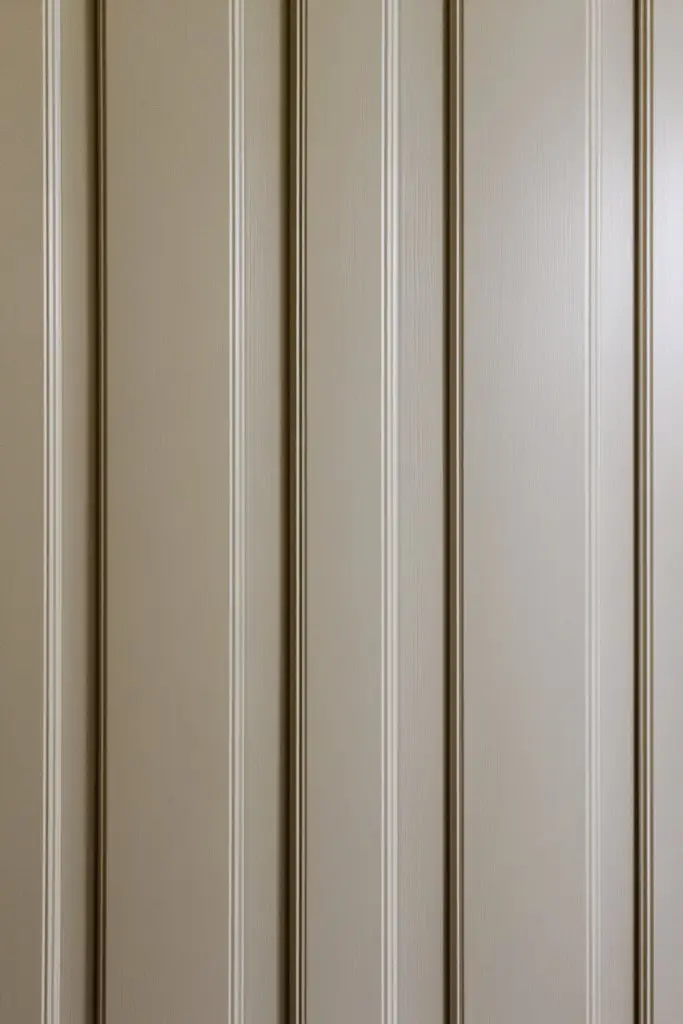
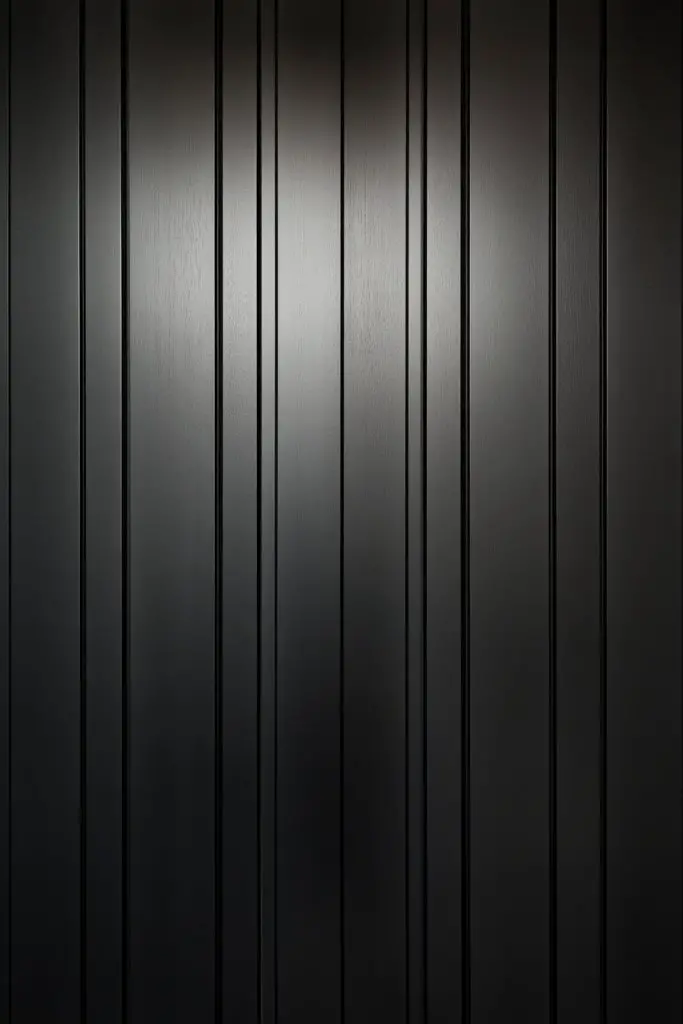
2. Wide Vertical Shaker Panels for Dramatic Height

Do your ceilings feel a bit flat or uninspired? Tall, dramatic rooms often lack that wow factor, making spaces feel smaller or less luxurious. Wide vertical panels can create the illusion of soaring ceilings, adding grandeur without costly renovations. The goal is to make every inch count and elevate your room’s architectural appeal.
Recommended Products to replicate this idea
| # | Preview | Product | |
|---|---|---|---|
| 1 |

|
2-Pack Acoustic Wood Slat Panels - Soundproof Wall Paneling for Interior Decor | Check Latest Price |
| # | Preview | Product | |
|---|---|---|---|
| 1 |

|
Zinsser 02774 PERMA-WHITE Mold & Mildew Proof Interior Paint, Quart, Eggshell White | Check Latest Price |
Picture a living room where the walls are covered with tall, narrow panels that stretch from floor to ceiling, accentuated by contrasting paint. The vertical lines draw your eye upward, emphasizing height and space. The matte finish on the panels absorbs light softly, giving a soothing, expansive feel. The subtle shadows cast by the depth of the panels add dimension, turning simple walls into striking features.
Adjust the width of the panels for different effects—wider panels for a more understated look, narrower for more intricate detail. In rooms with low ceilings, keep the panels lighter in tone to avoid overwhelming the space. For a rustic vibe, pair these with reclaimed wood finishes, or go sleek with smooth, painted surfaces for a contemporary look. Seasonal color swaps, like deep navy or warm taupe, can change the mood effortlessly.
Begin by marking vertical lines at regular intervals with a level and pencil. Use MDF or plywood sheets cut to your desired width, then install with long screws or nails, ensuring they are flush and aligned. For a seamless finish, fill gaps and sand the edges smooth. Prime and paint in your chosen color, focusing on even strokes to enhance the sleekness. Consider adding subtle LED strip lighting behind the panels for a modern glow.
Create visual interest by alternating panel widths or adding decorative molding at the top or bottom. Use contrasting paint or stain for a bold statement or keep everything monochrome for understated elegance. You could also install thin accent strips in a metallic finish for a touch of glam. Personal touches like initials or subtle patterns can make the design more unique.
Dramatic vertical panels instantly boost the perceived height of your space, making it feel more luxurious and spacious. The installation is straightforward and highly customizable, so you can tailor it to your style. Once completed, your room will have a designer look that impresses every guest. Go ahead, give your ceilings the height they deserve!
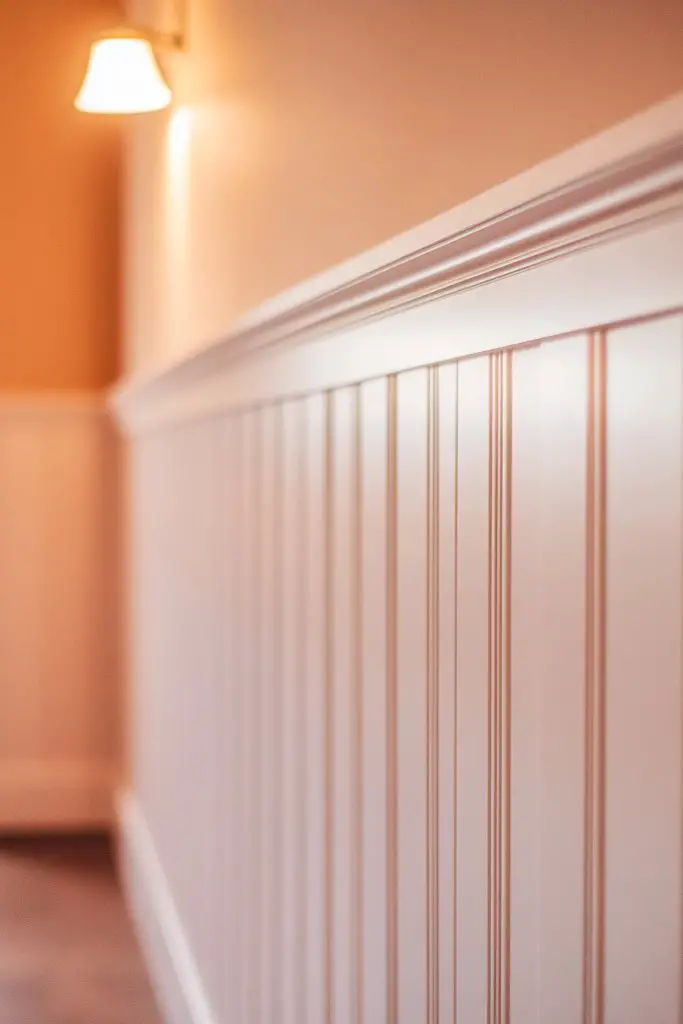
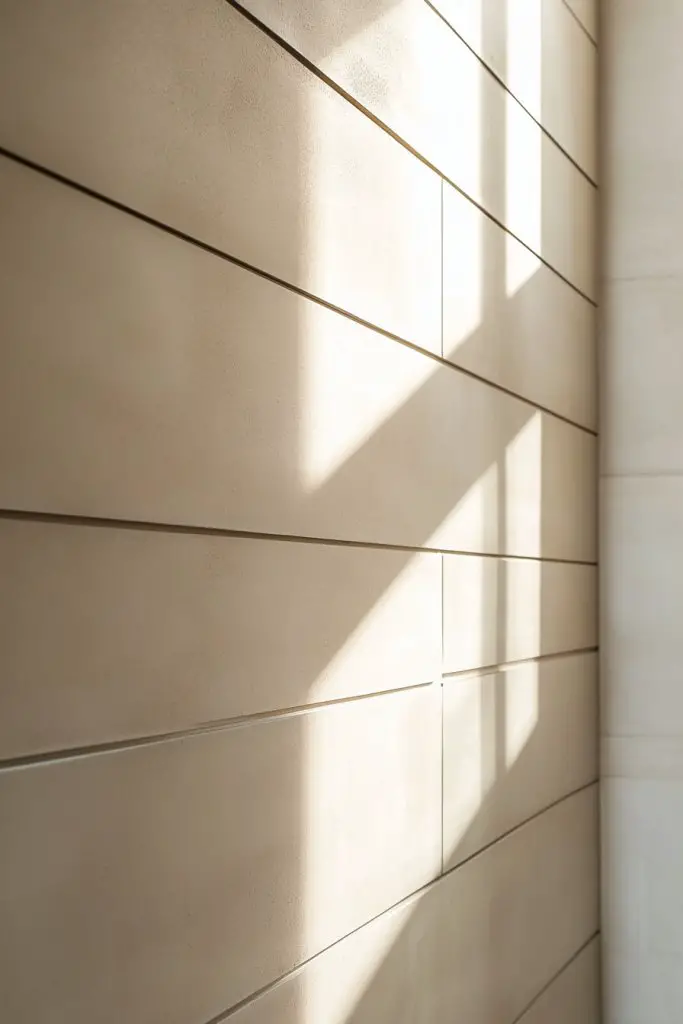
3. Narrow Horizontal Shaker Panel Wainscoting
Are your walls feeling a bit plain or unfinished? Wainscoting is a classic way to add charm and character, but wide panels can sometimes be overwhelming in smaller spaces. Narrow horizontal panels offer a subtle yet stylish solution that elevates your walls without overpowering. The aim is to add sophistication with a minimal footprint.
Recommended Products to replicate this idea
| # | Preview | Product | |
|---|---|---|---|
| 1 |

|
Art3d Pre-Cut Wall Molding Set of 6 pcs, Ready-to-Assemble Wainscoting Panels for Interior Wall... | Check Latest Price |
| # | Preview | Product | |
|---|---|---|---|
| 1 |
|
Zinsser 02774 PERMA-WHITE Mold & Mildew Proof Interior Paint, Quart, Eggshell White | Check Latest Price |
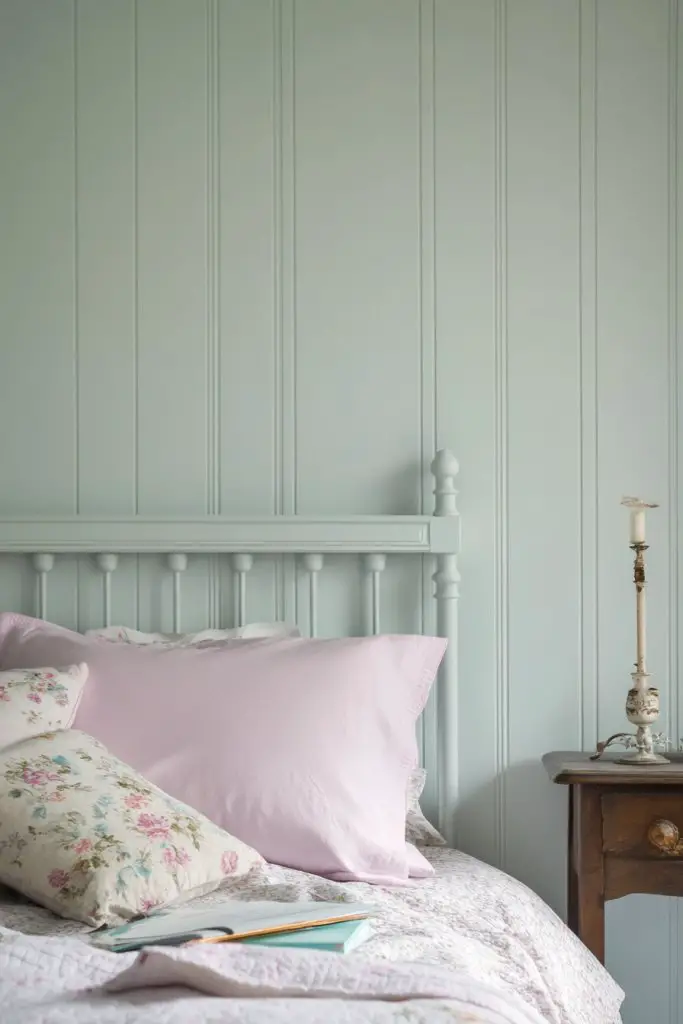
Imagine a cozy dining nook or a bedroom with delicate horizontal strips running around the walls. The narrow panels are painted in a soft pastel, contrasting gently with the crisp white trim. The texture adds depth, and the subtle lines guide your eye across the space. It’s like a gentle embrace for your walls, giving them a refined, tailored look.
Mix and match paint colors for different rooms—dark tones in a formal dining room, or soft neutrals in a restful bedroom. For a more rustic or vintage vibe, pair these with beadboard or shiplap accents. In smaller rooms, keep the panels light-colored to make the space feel open. Seasonal accents include adding a darker hue for fall or a bright, cheerful tone for spring.
Start by measuring the wall height and marking horizontal lines at regular intervals. Use MDF or wood strips, attaching them with a nail gun or adhesive, ensuring even spacing. Sand and fill any gaps for a smooth look, then prime and paint or stain. Finish with a protective topcoat if needed. For a more ornate finish, add decorative molding at the top or bottom edges.
Personalize by choosing bold colors for the panels or a contrasting trim color. You can also add decorative wall hooks or small shelves in the spaces between panels for a functional twist. Incorporate metallic or textured paints to add visual interest. Small decals or stencils can further customize the design.
Narrow horizontal wainscoting adds subtle elegance and can be applied to almost any space. It’s easy to install and customize, making it perfect for DIY enthusiasts. The result is a polished, sophisticated look that elevates your entire room. Don’t be afraid to experiment with colors and finishes—you’re about to create a timeless feature!
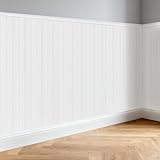
4. Beadboard Shaker Wall Panels for Textural Warmth
Want to add cozy charm and texture to your walls without going overboard? Beadboard is a classic choice that instantly warms up a room with its tactile, cottage-inspired look. It’s perfect for anyone craving a relaxed, inviting atmosphere that still feels polished. The challenge is to incorporate it seamlessly into your existing decor.
Recommended Products to replicate this idea
| # | Preview | Product | |
|---|---|---|---|
| 1 |
|
Pre-Cut Wainscoting Panels Kit, WPC Slats Accent Wall Panel for Home Decor Covers 39 x 79 in, Ready... | Check Latest Price |
| # | Preview | Product | |
|---|---|---|---|
| 1 |

|
Goo-Ki Vintage Retro Antique Brass Zinc Alloy Cabinet Knob - Single Hole Center Affordable Luxury... | Check Latest Price |
Picture a rustic kitchen with beadboard wainscoting up to chair rail height, painted in a soft, creamy white. The vertical lines of the beads catch the light, creating subtle shadows that add depth. Complemented by vintage-style hardware and a farmhouse table, the space feels like a cozy retreat. The textured surface invites touch, making the room feel layered and lived-in.
Choose wider or narrower beadboard panels depending on your aesthetic—wider for a more traditional look, narrower for a sleek, modern feel. For a coastal theme, paint in shades of blue or soft greys, or leave it natural for a rustic vibe. You can also combine beadboard with shiplap or panel molding for added dimension. Seasonal accents include adding a fresh coat of bright paint or a weathered finish.
Start by measuring wall height and marking the placement of your beadboard panels. Attach the panels with nails or adhesive, ensuring the beads are evenly spaced. Fill gaps and sand edges for a seamless appearance. Prime and paint in your preferred color, or stain for a natural wood look. Seal with a clear coat for durability. Consider adding a decorative trim or chair rail for a finished look.
Personalize by painting the beads in contrasting colors or using distressed finishes for a vintage feel. Incorporate decorative hooks or small shelves within the panels for added functionality. Using different paint techniques, such as dry brushing or glazing, can create unique textures. Embellishments like monograms or stenciled patterns add a custom touch.
Beadboard instantly evokes warmth and nostalgia, perfect for creating a homey atmosphere. It’s a versatile choice that works in kitchens, bathrooms, or bedrooms. You’ll gain confidence as you see how straightforward installation can be, especially with pre-cut panels. Get ready to transform your walls into textured works of art!
5. Two-Tone Shaker Panel Design with Contrasting Colors
Tired of plain walls that lack personality? Two-tone designs are a fun way to add depth and visual interest without overwhelming a space. Combining different colors on panels and frames creates a layered, sophisticated look that can brighten or deepen a room’s mood. The trick is balancing contrast without clashing.
Recommended Products to replicate this idea
| # | Preview | Product | |
|---|---|---|---|
| 1 |

|
Rust-Oleum 369384 Advanced Dry Door & Trim Paint, Quart, Satin White | Check Latest Price |
| # | Preview | Product | |
|---|---|---|---|
| 1 |

|
Bates - Paint Tray Set, Paint Rollers, Paint Brushes for Wall, Tray, Roller Brush, 11 Piece Home... | Check Latest Price |
Imagine a dining room where the panels are painted in a soft, warm beige, while the frames are a rich navy blue. The contrast makes the panels pop, drawing attention to architectural details. The matte finish on both tones adds a modern touch, while the clean lines keep it timeless. The interplay of colors creates a lively yet elegant atmosphere that’s perfect for entertaining.
Switch up the color combinations based on your room’s palette—bold and bright in a playful space, or muted and subtle in a more refined setting. For smaller rooms, softer contrasts prevent the space from feeling busy. For a seasonal twist, consider using metallic or textured paints to reflect different moods. You can also experiment with staining the panels in one hue and painting the frame in another.
Start by selecting two complementary or contrasting colors. Paint the panels first, then tape off the edges to paint the frames with a different hue. Use painter’s tape for sharp lines, and ensure paint is fully dry between coats. For a seamless finish, lightly sand edges for a crisp separation. Seal with a clear topcoat for extra durability and easy cleaning. Optional decorative molding can frame the panels further for a more intricate look.
Add decorative accents like gold or silver leafing along the edges for a luxe feel. Incorporate personal touches such as monograms or painted patterns within the panels. Use textured or metallic paints for a richer effect. Changing the colors seasonally or for special occasions keeps the look fresh and exciting.
This design allows you to express your style boldly while maintaining elegance. It’s easy to update or modify over time with new paint or accents. The high-impact visual results will boost your confidence in tackling other DIY projects. Your walls will look curated and custom, making every space feel uniquely yours.
6. Shaker Panel Accent Wall with Subtle Grooves
Looking to add a touch of visual intrigue to your walls without going overboard? Subtle grooves within shaker panels offer just enough texture to catch the eye. They create a modern twist on a classic style, perfect for those who want sophistication with a hint of edge. The goal is to make a statement that’s refined and understated.
Recommended Products to replicate this idea
| # | Preview | Product | |
|---|---|---|---|
| 1 |

|
Art3d Premade Board and Batten Paintable Wainscoting Kit, MDF Accent Wall Panel for Kitchen Bedroom... | Check Latest Price |
| # | Preview | Product | |
|---|---|---|---|
| 1 |

|
Glidden Total Interior Wall Paint & Primer All-in-One, Dresden Dream/Blue, Eggshell, 1 Gallon | Check Latest Price |
Picture a feature wall in a living room where the panels are painted in a soft matte grey. Narrow, shallow grooves run vertically, adding a sense of movement and depth. The grooves catch the light differently at various angles, creating gentle shadows that animate the space. The overall effect is calming and contemporary, elevating the room’s aesthetic.
Vary the groove width or spacing to suit your taste—closer for a delicate pattern, wider for a bolder look. Use contrasting paint or stain to enhance the grooves’ visibility or keep everything monochrome for subtlety. For a more rustic feel, combine grooved panels with distressed finishes or natural wood tones. Seasonal changes can include darker shades for winter or light pastels for spring.
Start by marking vertical or horizontal lines on your wall for groove placement. Use a router or a V-groove bit to carve shallow channels into pre-primed MDF or wood panels. Keep the depth consistent for a professional look. Paint or stain the panels first, then carve the grooves, and seal with a clear finish. For a seamless look, fill any imperfections and sand smooth before finishing.
Highlight the grooves with contrasting paint or metallic accents for a luxe effect. Incorporate LED lighting along the grooves to emphasize depth at night. Personalize by adding decorative motifs within the panels or combining with other textures like fabric or wallpaper. Use different finishes—matte, gloss, or satin—to achieve your preferred style.
Subtle grooves elevate your walls with minimal effort, offering a sleek, modern aesthetic. They are perfect for creating feature walls in any room, from bedrooms to home offices. The customization options empower you to craft a look that’s uniquely yours. Your space will feel fresh, contemporary, and thoughtfully designed.
7. Framed Shaker Panels with Decorative Corner Blocks
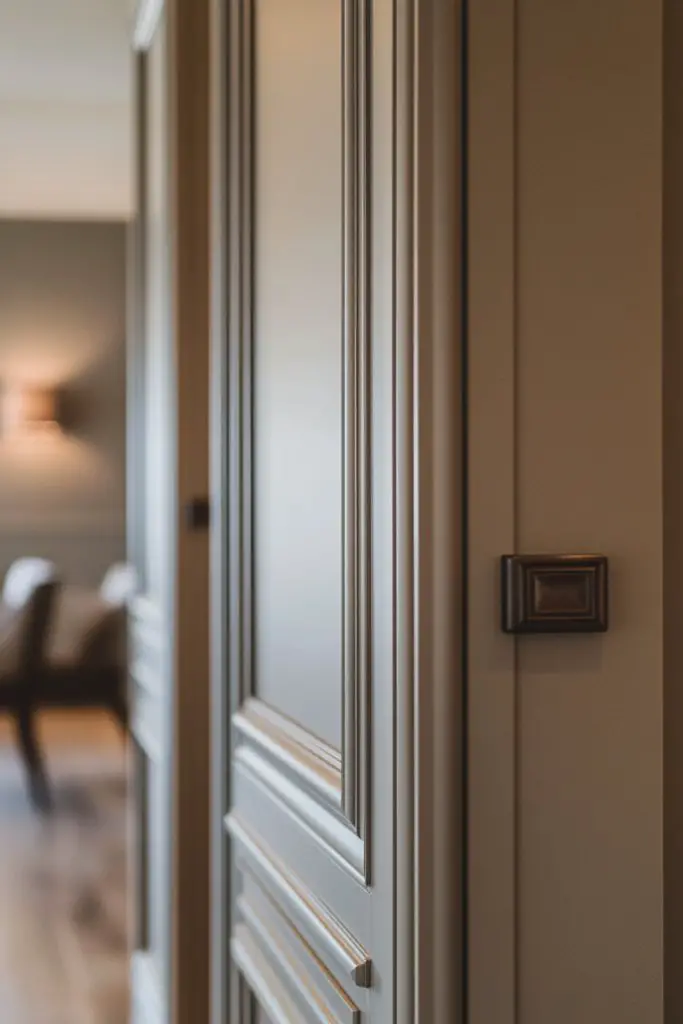
Ever wanted to give your walls a handcrafted, bespoke feel? Framed shaker panels with decorative corner blocks add a layer of craftsmanship and detail that instantly upgrades any room. They combine traditional techniques with a modern touch, making your walls a focal point. The challenge is balancing ornamentation with simplicity.
Recommended Products to replicate this idea
| # | Preview | Product | |
|---|---|---|---|
| 1 |

|
NeatiEase Peel and Stick Wall Molding Kit 6-Frame Premade, Ready-to-Assemble Wall Moulding Panel... | Check Latest Price |
| # | Preview | Product | |
|---|---|---|---|
| 1 |

|
3/4" x 2 1/4" x 6" Poplar (Paint Grade) Outside Radius Corner Base Block Bullnose - Fits 3/4"... | Check Latest Price |
Visualize a hallway where each panel is framed with a thin molding, and the corners feature painted or carved blocks with intricate designs. The contrast between the smooth panels and decorative corners creates a rich, layered look. The color palette is neutral, with the corner blocks painted in a complementary, darker hue. It’s a subtle but striking way to add character.
Experiment with different molding profiles—from simple flat trims to ornate carved designs. For a more contemporary style, keep the corner blocks minimal and painted in a bold color. In traditional settings, opt for carved wood or detailed plaster blocks. Seasonal updates might include metallic finishes or gilding on the corner blocks or moldings.
Start by measuring and marking your panel layout. Attach the main frames with nails or adhesive, ensuring they are level. The corner blocks can be glued or nailed at each corner, then painted or stained to match or contrast. Fill gaps and sand for a smooth, unified appearance. Finish with primer and your chosen paint or stain. For extra durability, apply a clear sealer or varnish.
Customize the corner blocks with personal motifs, monograms, or decorative patterns. Use contrasting colors or metallic accents to highlight the details. You can also add small decorative elements like rosettes or medallions for a more ornate look. Changing the color scheme seasonally keeps the design fresh and lively.
Adding decorative corner blocks transforms simple panels into a handcrafted feature that feels both luxurious and unique. The process is manageable and highly customizable, encouraging creativity. Once complete, your walls will radiate artisanal charm, elevating your entire interior style. You’re about to craft something truly special.
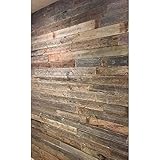
8. Shaker Style Wall Panels with Reclaimed Wood Finish
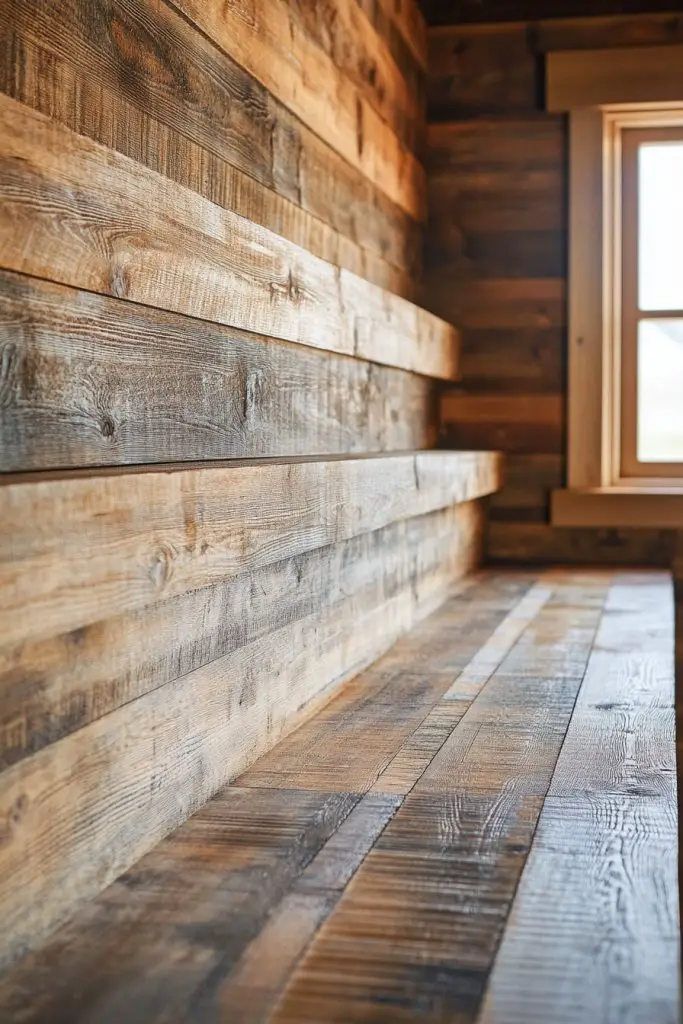
Searching for that perfect rustic, eco-friendly touch? Reclaimed wood panels bring warmth and history into your space, perfect for creating a cozy, sustainable vibe. The challenge is achieving a uniform look while maintaining the character of the wood. This style blends environmental consciousness with timeless charm.
Recommended Products to replicate this idea
| # | Preview | Product | |
|---|---|---|---|
| 1 |

|
Holydecot Peel & Stick Real Wood Planks, Rustic Reclaimed Barn Wood Paneling, Brown Gray... | Check Latest Price |
| # | Preview | Product | |
|---|---|---|---|
| 1 |
|
Rockin' Wood Real Wood Nail Up Application Rustic Reclaimed Naturally Weathered Barn Wood Accent... | Check Latest Price |
Imagine a living room where weathered, reclaimed planks form a feature wall. The wood’s imperfections—knots, nail holes, uneven grains—tell stories of past lives. The finish is matte, enhancing the rustic texture. Complemented by vintage furniture and soft textiles, the space feels inviting and grounded in history.
Use reclaimed wood in various finishes—natural, stained, or whitewashed—to match your decor. Wide planks lend a bold, farmhouse feel, while narrower strips create a more refined look. For different seasons, add a fresh coat of paint or a light sealant to update the appearance. Mixing reclaimed wood with modern elements creates an eclectic, balanced aesthetic.
Source reclaimed wood from reputable suppliers or salvage yards, ensuring it’s free of pests and rot. Cut panels to size and treat with a weatherproof sealant if necessary. Attach panels using nails or screws, leaving some gaps or irregularities for authenticity. Finish with a protective matte or satin sealant to preserve the aged look. Mount panels with spacers for a floating effect or flush for a more integrated feel.
Add personal touches like painted or stained accents, or incorporate metal hardware for an industrial edge. You can also embed LED lighting behind the panels for a subtle glow. Personalize further by adding decorative hooks or small shelves within the reclaimed wood framework. Seasonal accents include adding a fresh coat of paint or a weathered finish.
Reclaimed wood panels bring a sense of history and sustainability that’s increasingly popular. Installing them is straightforward and rewarding, giving your room instant character. The natural textures and imperfections make each piece unique, boosting your confidence in creating authentic, eco-conscious interiors. Your space will feel warm, lived-in, and stylishly timeless.
9. Minimalist Shaker Wall Panels with Sharp Lines
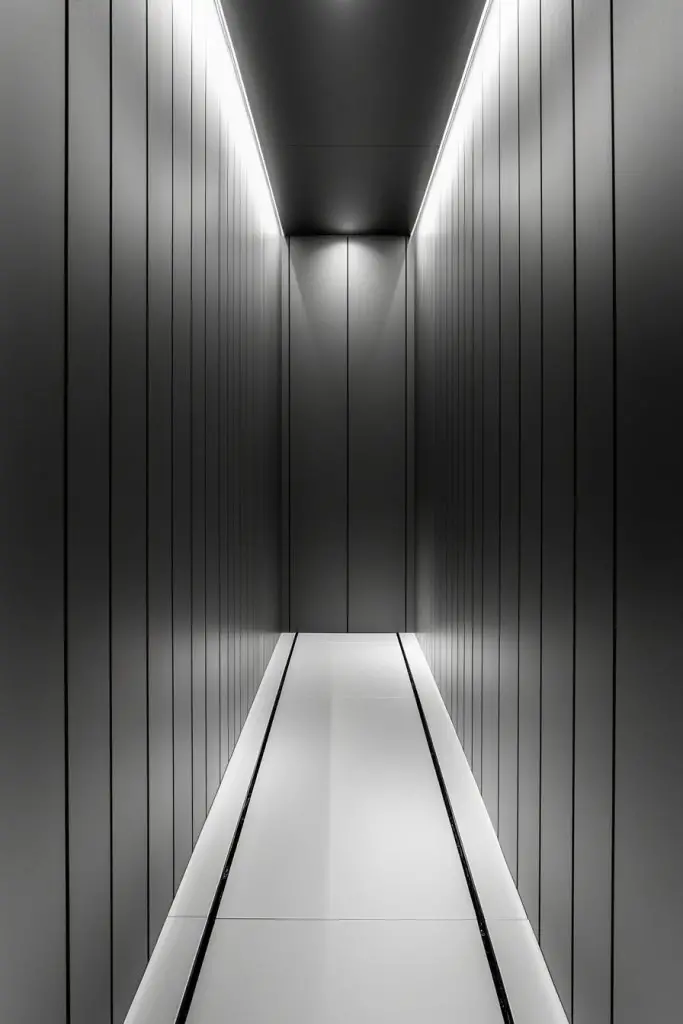
Craving a sleek, clutter-free aesthetic that still feels warm and inviting? Minimalist shaker panels with sharp, clean lines deliver modern elegance without fuss. They’re perfect for contemporary interiors that value simplicity and function. The challenge is achieving a polished look that doesn’t feel sterile or cold.
Recommended Products to replicate this idea
| # | Preview | Product | |
|---|---|---|---|
| 1 |
|
Art3d Premade Board and Batten Paintable Wainscoting Kit, MDF Accent Wall Panel for Kitchen Bedroom... | Check Latest Price |
| # | Preview | Product | |
|---|---|---|---|
| 1 |

|
upsimples 8x10 Picture Frame, Display Pictures 5x7 with Mat or 8x10 Without Mat, Wall Hanging Photo... | Check Latest Price |
Picture a living room with matte black frames surrounding smooth, flat panels painted in a soft off-white. The sharp edges and crisp lines create a geometric rhythm across the wall. The space feels open and uncluttered, with natural light bouncing off the surfaces. It’s a design that’s both calming and striking, emphasizing form and space.
Keep the color palette neutral—think shades of gray, black, or white—to enhance the minimalist vibe. For a warmer touch, add natural textures like linen or wool in cushions and throws. You can also experiment with different panel sizes—small squares or large rectangles—to create visual interest. Seasonal updates include swapping out accessories for more colorful or textured textiles.
Use high-quality MDF or plywood, cutting panels with precision tools for sharp, straight edges. Attach panels directly to the wall with nails or screws, ensuring perfect alignment. Sand edges for a smooth finish and apply primer before painting in your preferred color. For a seamless look, paint the entire wall in one coat, avoiding visible brush strokes. Consider adding a subtle baseboard or trim for a finished appearance.
Personalize with subtle color accents or metallic trims at the edges for a luxe touch. Incorporate textured fabrics or rugs that complement the minimalist color scheme. Adding minimalist wall-mounted shelves or hidden storage keeps the look clean while still functional. Use lighting fixtures with sleek lines to highlight the sharp panel edges.
This minimal style proves that less is more—delivering maximum impact with simple elements. The precise craftsmanship and clean aesthetic boost your confidence in creating modern, elegant interiors. Once installed, these panels serve as a versatile backdrop for any decor style. You’re about to achieve a sophisticated, clutter-free space that feels both fresh and timeless.
10. Shaker Panel Wall with Built-in Shelving Integration
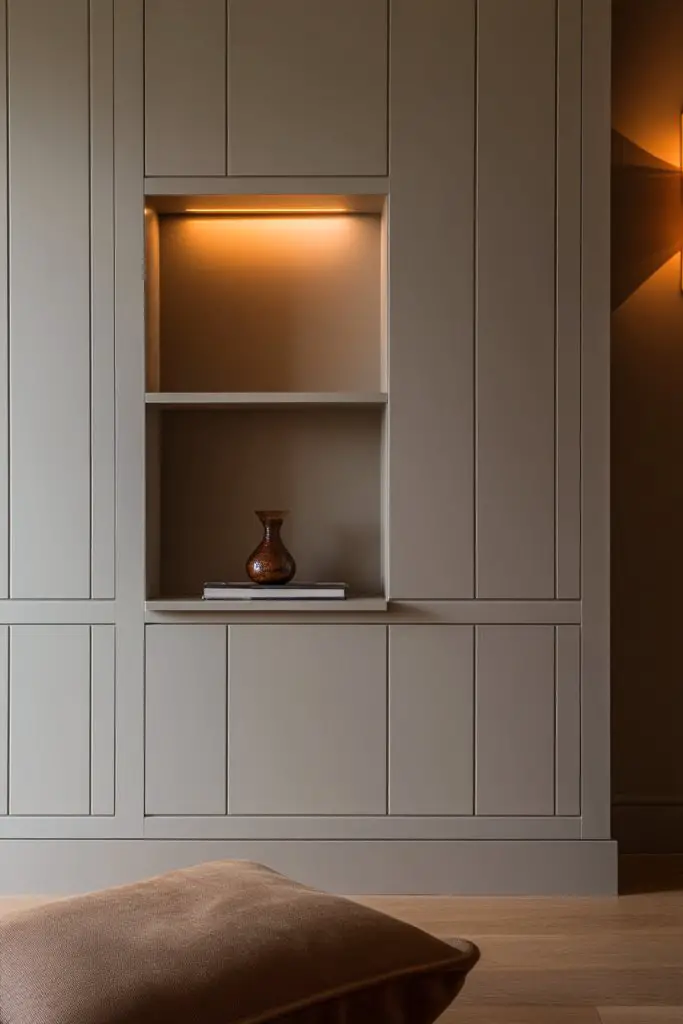
Ever wish your walls could do more than just look good? Integrating shelving within shaker panels combines style with function, giving you storage and display without extra clutter. It’s perfect for small spaces where every inch counts. The trick is balancing practicality and aesthetics seamlessly.
Recommended Products to replicate this idea
| # | Preview | Product | |
|---|---|---|---|
| 1 |

|
WOPITUES Wood Floating Shelves Set of 6, Shelves for Wall Decor, Farmhouse Shelf for Bedroom,... | Check Latest Price |
| # | Preview | Product | |
|---|---|---|---|
| 1 |
|
Art3d Premade Board and Batten Paintable Wainscoting Kit, MDF Accent Wall Panel for Kitchen Bedroom... | Check Latest Price |
Visualize a living room where the lower half of the wall features classic shaker panels, but one section is cut out to hold open shelves. The shelves are painted to match the panels, creating a unified look. Decorated with books, plants, or decorative objects, they add personality while keeping things organized. The overall effect is a polished, functional focal point.
Opt for open shelving or closed cabinets within the panel framework depending on your needs. Use different finishes—painted, stained, or distressed—to match your decor. In kitchens or bathrooms, incorporate waterproof materials or sealed surfaces. Seasonal styling involves swapping items on the shelves to reflect holidays or themes.
Design the layout by measuring wall space and determining shelf placement. Cut shelves from wood or MDF, then attach to the panel framework with brackets or cleats. Reinforce with horizontal supports if needed. Finish with paint or stain, and seal for durability. Mount the panels securely, ensuring the shelves are level and sturdy. Use hidden hardware for a clean look.
Add decorative brackets or corbels for a traditional touch. Incorporate LED lighting underneath shelves for ambiance. Personalize shelves with unique objects that reflect your style—art books, vintage finds, or handcrafted items. Change out decor seasonally to keep the space fresh.
Combining panels with built-in shelving maximizes your wall space in style. It’s a practical upgrade that boosts your confidence in DIY projects, showing how form meets function. Once complete, your walls become both beautiful and highly useful, elevating your entire home.
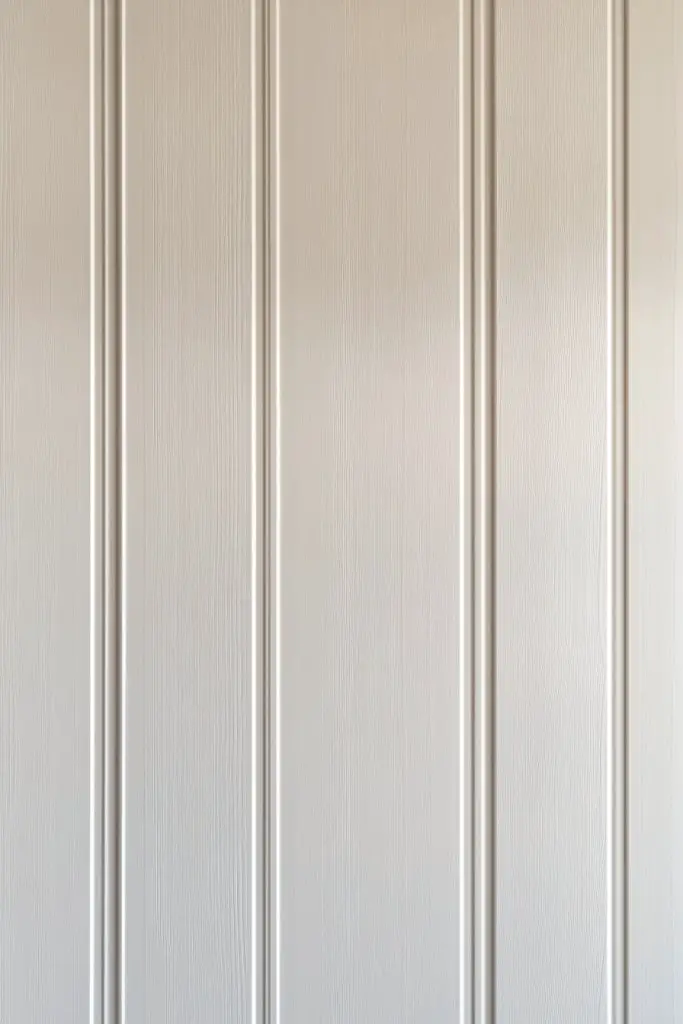
11. Textured Shaker Panels with Vertical Grooves
Looking for a way to add subtle texture and visual interest without overwhelming your space? Vertical grooves within shaker panels create a modern, tactile effect that catches the eye. They’re perfect for updating traditional styles with a contemporary twist. The challenge is keeping the look refined and not too busy.
Recommended Products to replicate this idea
| # | Preview | Product | |
|---|---|---|---|
| 1 |
|
Art3d Premade Board and Batten Paintable Wainscoting Kit, MDF Accent Wall Panel for Kitchen Bedroom... | Check Latest Price |
| # | Preview | Product | |
|---|---|---|---|
| 1 |

|
Art3d 2-Pack 108" x 12" Acoustic Wood Panels for Wall, Soundproof Wood Slat Panel for Wall and... | Check Latest Price |
Imagine a bedroom wall with smooth, matte paint interrupted by narrow vertical grooves running from ceiling to floor. The grooves cast tiny shadows that change as the light shifts, adding depth and movement. The overall aesthetic is sleek, understated, and calming, elevating the room’s ambiance. The textured surface invites a gentle touch, making it more than just a visual feature.
Play with groove spacing—closer for a more delicate pattern or wider for a bolder statement. Use contrasting paint or stain inside the grooves to enhance their visibility. For a natural look, stain the wood and carve the grooves carefully. Seasonal updates can include darker hues for winter or bright pastels for spring, keeping the look fresh.
Start by marking your wall with a level and measuring tape to ensure even spacing. Use a router or a V-groove bit to carve shallow channels into pre-primed MDF or wood panels. Keep the depth consistent for a professional appearance. Paint or stain the panels before carving, then seal the surface with a clear finish. For extra precision, use masking tape to delineate groove areas.
Highlight the grooves with metallic or contrasting paints for a luxe effect. Add accent lighting along the grooves to emphasize depth at night. Personalize by combining with different textures like fabric or wallpaper. Incorporate decorative elements—like monograms or patterns—within the grooved panels for a unique touch.
Vertical grooved panels bring a modern edge to classic shaker style, creating a sophisticated statement wall. They’re surprisingly easy to install with patience and the right tools. The textured surface adds visual interest without clutter, making your space feel thoughtfully designed. You’re now equipped to create stylish, textured walls that impress.
12. Painted Shaker Wall Panels in Soft Pastel Hues
Want to create a calming, inviting space that feels light and airy? Soft pastel hues on shaker panels are perfect for bedrooms, nurseries, or relaxing lounges. They add a gentle splash of color without overwhelming the senses. The challenge is choosing the right shade to complement your decor and lighting.
Recommended Products to replicate this idea
| # | Preview | Product | |
|---|---|---|---|
| 1 |
|
Art3d Premade Board and Batten Paintable Wainscoting Kit, MDF Accent Wall Panel for Kitchen Bedroom... | Check Latest Price |
| # | Preview | Product | |
|---|---|---|---|
| 1 |
|
Art3d Premade Board and Batten Paintable Wainscoting Kit, MDF Accent Wall Panel for Kitchen Bedroom... | Check Latest Price |
Visualize a nursery with powder blue panels, accented by white moldings. The soft paint reflects natural light, making the room feel spacious and serene. Subtle shadows from the panel edges add depth, while the pastel tones foster a peaceful atmosphere. This gentle color palette invites relaxation and comfort, making it a perfect retreat.
Select pastel shades like mint green, blush pink, or lavender based on your mood and decor. Pair with white or light-colored furniture for a cohesive look, or contrast with darker accents for depth. In different seasons, swap out the pastel for richer tones like deep teal or mauve for a cozy feel. Using matte or eggshell finishes enhances the softness of the colors.
Begin by prepping your panels with a primer suitable for your chosen paint. Use a high-quality brush or roller for even coverage, applying multiple thin coats for vibrancy. Sand lightly between coats to smooth out brush strokes. Finish with a clear matte or satin topcoat to protect the paint and make cleaning easier. Ensure all surfaces are dry before mounting.
Add decorative borders or stenciled patterns in white or metallic shades to give extra detail. Incorporate soft textiles—curtains, cushions, or throws—that match or complement the pastel palette. Seasonal or thematic accents like fairy lights or decals can also be added to keep the look fresh and charming.
Pastel-painted shaker panels create a tranquil, stylish ambiance that’s easy to achieve. They’re perfect for expressing a light, cheerful personality or creating a restful environment. The process is straightforward, and the results are stunning. You’re well on your way to a dreamy, inviting space that feels both modern and timeless.
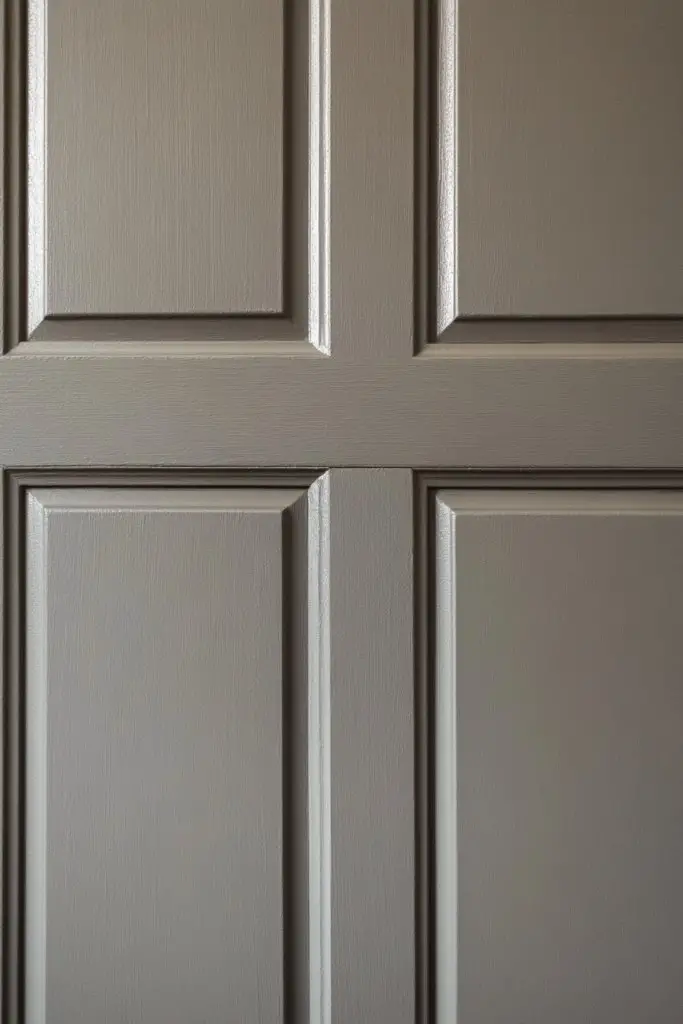
13. Panelled Wall with Contrasting Frame Molding
Looking to add a touch of elegance and sophistication to your walls? Framing panels with contrasting moldings instantly elevates any room. It creates a layered, refined look that feels tailored and high-end. The challenge is choosing the right moldings and color combinations to avoid a busy appearance.
Recommended Products to replicate this idea
| # | Preview | Product | |
|---|---|---|---|
| 1 |
|
Art3d Premade Board and Batten Paintable Wainscoting Kit, MDF Accent Wall Panel for Kitchen Bedroom... | Check Latest Price |
| # | Preview | Product | |
|---|---|---|---|
| 1 |

|
Zefuriam 0.8" x16.4FT Champagne Gold Crown Molding Trim - Peel and Stick 3D Floral Wall Trim for... | Check Latest Price |
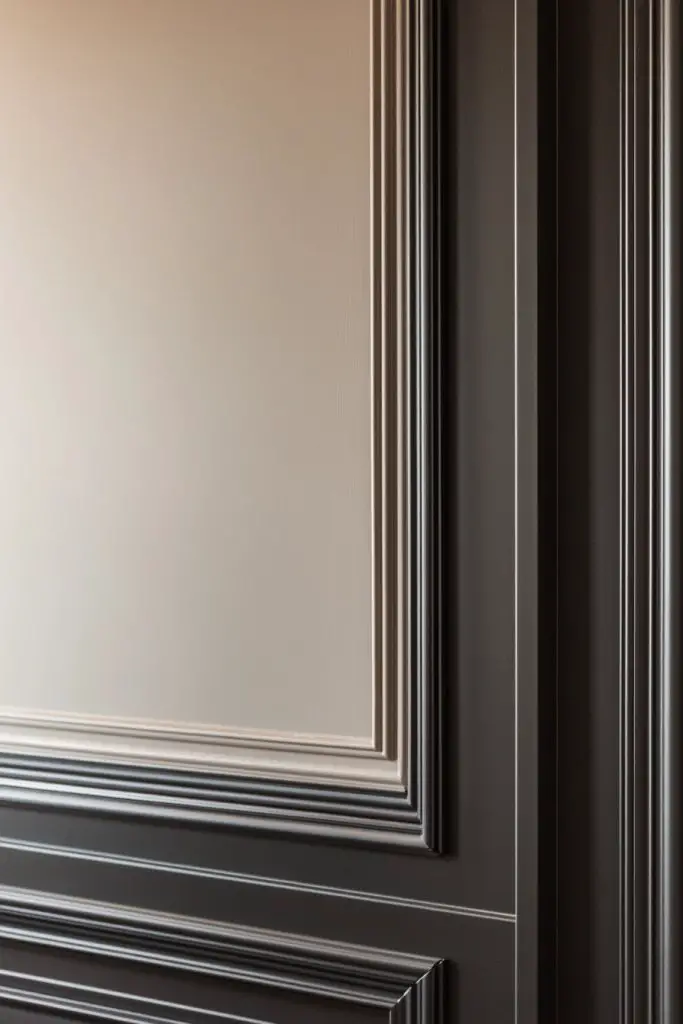
Visualize a formal dining room with white panels framed by dark espresso moldings. The contrast draws attention to the wall detail, making the space feel polished and curated. The framed panels create a grid pattern that adds structure and rhythm. The overall effect is a luxurious backdrop that pairs beautifully with classic or contemporary decor.
Choose moldings that complement your decor style—simple flat trims for modern interiors or ornate profiles for traditional settings. The contrast can be achieved with different paint colors, stains, or even metallic finishes. For a subtle look, keep the frame color close to the panel. For a bold statement, opt for high-contrast colors like black and white.
Start by measuring and marking the panel layout. Attach the moldings with nails or adhesive, ensuring they are perfectly aligned and level. Fill gaps and sand smooth, then prime and paint or stain the moldings and panels separately. Mount the framed panels onto the wall with screws or nails, then touch up the paint. Finish with a clear sealer for durability.
Experiment with decorative moldings—beaded, fluted, or carved—to add texture. Personalize by adding metallic or glitter accents to the moldings. Incorporate a monogram or pattern within the panels for a custom look. Seasonal colors or metallic finishes can make your wall a showstopper year-round.
This layered framing technique instantly upgrades your walls with a chic, tailored appearance. It’s highly customizable and approachable for DIYers with some basic carpentry skills. The finished look will make your walls look like they belong in a magazine. Time to add that touch of luxury!
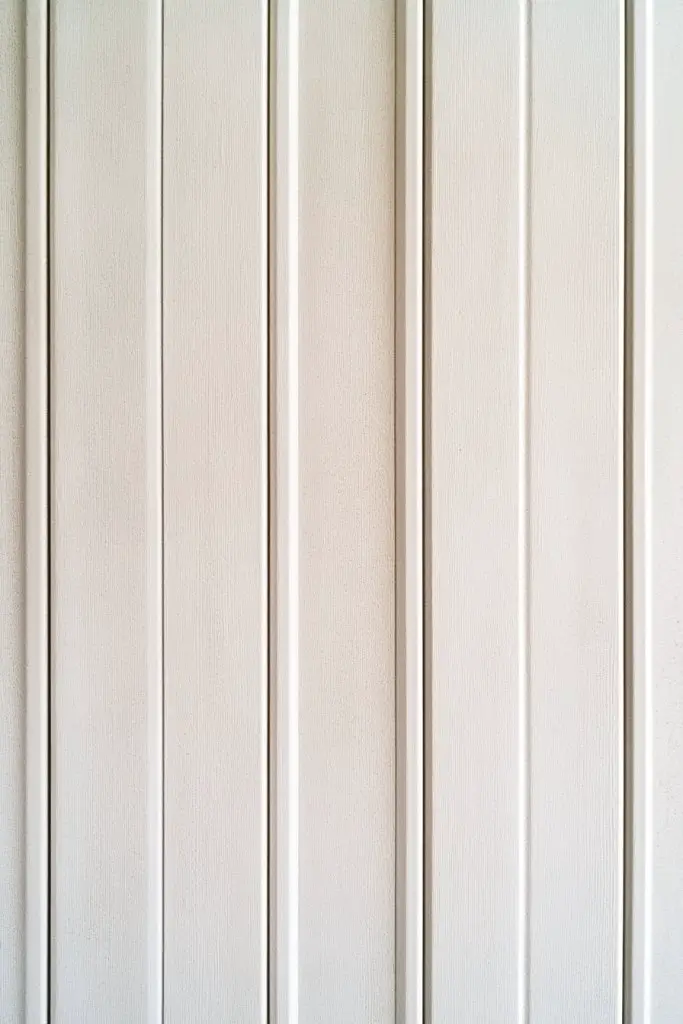
14. Shaker Style Wall Panels with Light-Washed Finish
Dreaming of a breezy, coastal-inspired space? Light-washed shaker panels evoke seaside charm while keeping your decor fresh and relaxed. They brighten up rooms, making even small spaces feel open and airy. The challenge is achieving a natural, imperfect finish that captures that effortless look.
Recommended Products to replicate this idea
| # | Preview | Product | |
|---|---|---|---|
| 1 |
|
Art3d Premade Board and Batten Paintable Wainscoting Kit, MDF Accent Wall Panel for Kitchen Bedroom... | Check Latest Price |
| # | Preview | Product | |
|---|---|---|---|
| 1 |

|
Aipsun Black Modern LED Wall Sconce Indoor Wall Lights 1 Pack Hardwired Up and Down Wall Mount Light... | Check Latest Price |
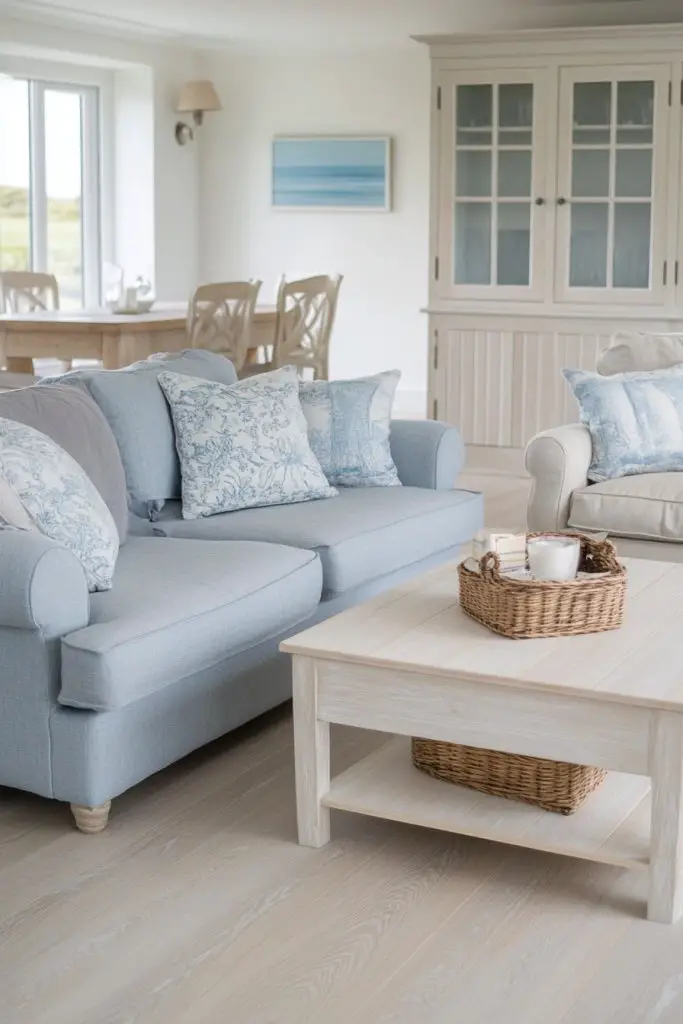
Picture a beach house with pale, almost whitewashed panels that reveal hints of the wood grain beneath. The finish is matte with a soft sheen, reflecting natural light beautifully. Complemented by soft textiles and natural fibers, the space feels like a tranquil retreat. The subtle variation in the wash adds depth and authenticity.
Use white or light gray stains or paints with a diluted application to create a wash effect. For a more rustic look, leave some areas less coated for a distressed appearance. Incorporate weathered or reclaimed wood for added texture. Seasonal updates include adding nautical decor or soft pastel accessories that enhance the coastal vibe.
Start by preparing your panels with a primer suitable for lighter finishes. Apply a diluted stain or paint using a rag or brush for an uneven, hand-washed look. Layer coats gradually, wiping off excess to achieve the desired transparency. Seal with a matte or satin finish to protect while maintaining a natural appearance. Mount the panels securely and touch up as needed.
Add decorative elements like driftwood, shells, or nautical hardware for a thematic touch. Incorporate linen or jute textiles nearby to reinforce the coastal aesthetic. Change up the wash intensity for different seasons—lighter for summer, darker for fall. Personalize with custom carvings or painted motifs that evoke the seaside.
Light-washed panels transform your space into a breezy, relaxed haven, perfect for retreating from busy life. The technique is accessible and endlessly customizable, giving you confidence to experiment. Once finished, your walls will radiate a fresh, inviting spirit that’s both stylish and soothing. Get ready to channel that coastal vibe!
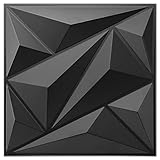
15. Geometric Shaker Panel Patterns for Visual Intrigue
Ever feel like your walls are missing that wow factor? Standard paneling can look dull after a while, and you crave something that sparks interest without going overboard. Geometric patterns bring a modern twist to the classic shaker style, transforming plain walls into eye-catching focal points. It’s all about adding that subtle edge that makes your space memorable.
Recommended Products to replicate this idea
| # | Preview | Product | |
|---|---|---|---|
| 1 |
|
Art3dwallpanels 33 Pack 3D Wall Panel Diamond for Interior Wall Décor, PVC Flower Textured Wall... | Check Latest Price |
| # | Preview | Product | |
|---|---|---|---|
| 1 |

|
3D Wood Textured Large Neutral Abstract Wall Art, Modern Beige Brown Geometric Paintings Artwork for... | Check Latest Price |
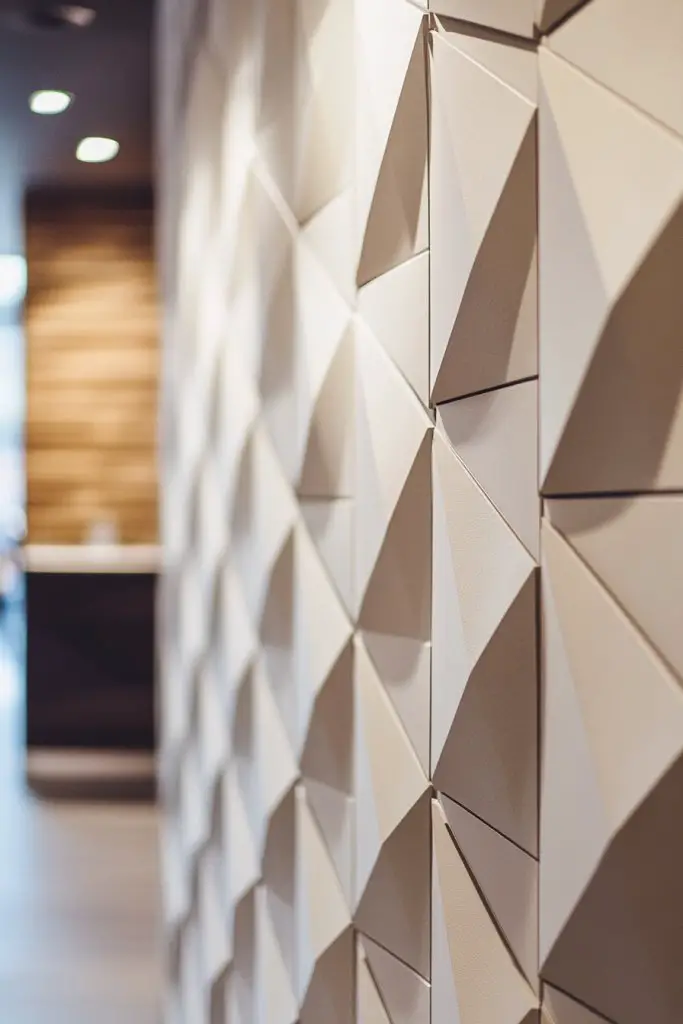
Picture a wall adorned with diamond or chevron-shaped panels, their crisp lines creating dynamic movement. The interplay of light and shadow accentuates the geometric shapes, giving depth to the room. Think of textured paint or contrasting colors highlighting the patterns, making the wall appear almost sculptural. It’s like turning your wall into a piece of modern art.
You can adapt these patterns to suit any room—go for subtle chevrons in a nursery or bold diamond motifs in a contemporary living room. Playing with colors, such as monochrome or contrasting shades, increases visual impact. For smaller spaces, keep the patterns simple to avoid overwhelming the room. Seasonal changes can even be reflected with different color palettes for a fresh look.
Start by sketching your preferred pattern and measuring wall dimensions. Use painter’s tape to outline geometric shapes before painting or applying panels. If you’re feeling ambitious, consider using pre-cut panels with geometric designs for precision. You can also create depth with layered textures—like combining flat and raised panels. Finish with a clear coat or matte paint to protect and enhance the design. Precision tools like a level and straightedge will ensure clean lines.
Personalize the patterns by choosing colors that match your decor or add metallic accents for a luxe feel. Incorporate lighting—like concealed LED strips—to highlight the geometric shapes at night. Incorporating metallic or matte finishes on different panels can add texture and visual interest. Mixing materials, such as wood and painted MDF, offers a tactile experience that elevates the overall look.
Geometric shaker patterns are a bold way to showcase your style while remaining sleek and modern. They can make any space feel curated and sophisticated. With some patience and a steady hand, you can pull off these designs and turn your walls into conversation starters. Now, go ahead—get creative and make those walls pop!
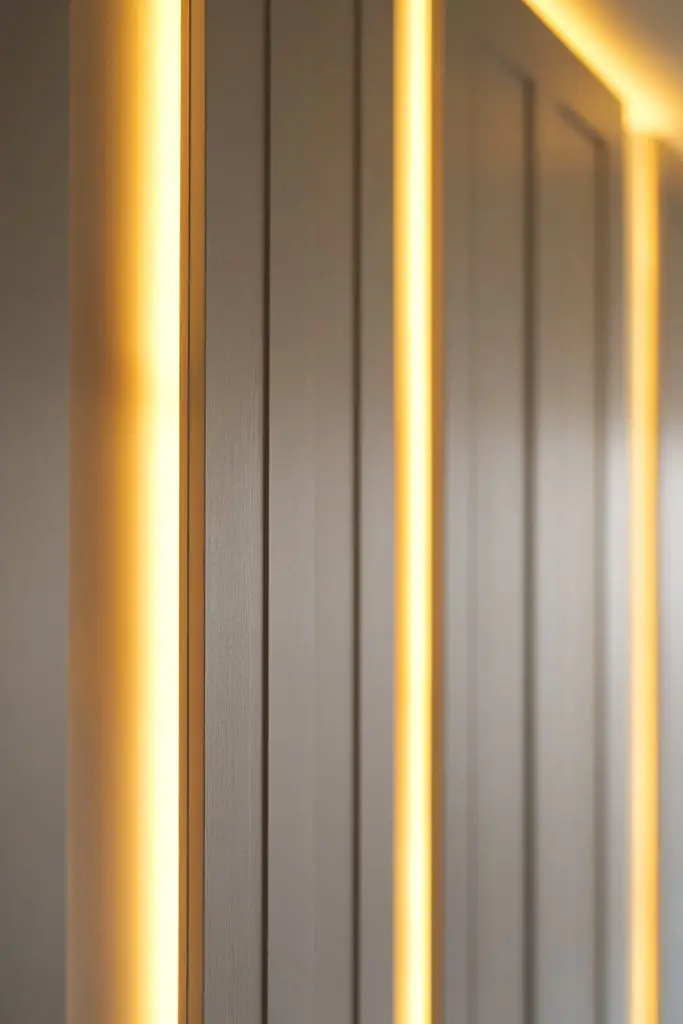
16. Shaker Style Wall Panels with Hidden Lighting Accents
Ever wish your walls could do more than just sit there? Lighting can elevate a simple panel into a stunning feature that adds warmth and ambiance. Hidden lighting accents behind or within shaker panels create a subtle glow that transforms the space after dark. It’s like giving your walls their own personality and mood-setting power.
Recommended Products to replicate this idea
| # | Preview | Product | |
|---|---|---|---|
| 1 |

|
KSIPZE 100ft Led Strip Lights RGB Music Sync Color Changing Led Lights with Smart App Control Remote... | Check Latest Price |
| # | Preview | Product | |
|---|---|---|---|
| 1 |
|
Art3d Premade Board and Batten Paintable Wainscoting Kit, MDF Accent Wall Panel for Kitchen Bedroom... | Check Latest Price |
Imagine soft LED strips tucked behind the panels, casting gentle light that highlights the clean lines and textures. When the lights are off, the panels look sleek and minimalist; when on, they glow with a cozy, inviting atmosphere. The light casts delicate shadows, emphasizing the depth of the shaker design. It’s a low-key way to add drama without overwhelming the room.
You can tailor lighting to match your style—warm white for a cozy vibe or cool white for modern minimalism. Dimmable LEDs give you control over brightness, perfect for different moods or times of day. For a more dramatic look, install color-changing LED strips. This setup works well in living rooms, bedrooms, or even hallways for a subtle yet impactful upgrade.
Decide on the placement of your lighting—either behind the panels or within grooves—then measure carefully. Use LED strip lights with adhesive backing for easy installation. Conceal the wiring within the wall or along the edges of the panels for a seamless look. Connect the lights to a dimmer switch for adjustable ambiance. Ensure your power source is accessible and safe, possibly hiring an electrician for complex setups.
Customize your lighting by choosing color temperatures that suit your space—warm tones for intimacy, cool for energizing. Incorporate smart controls to change lighting scenes via app or voice commands. Add decorative elements like textured trims or metallic accents to complement the lighting effects. These features make your wall panels not just functional but also a statement piece.
Hidden lighting takes your shaker panels from simple to spectacular effortlessly. It’s a subtle upgrade that makes a big difference, perfect for impressing guests or creating a relaxing retreat. With a little planning, you’ll master the art of ambient lighting and turn your walls into a cozy haven or a modern showstopper.
17. Textured Paint Finish on Shaker Panels for Subtle Depth
Feeling bored with flat, one-dimensional walls? Sometimes all it takes is a simple paint technique to add depth and personality. Textured paint finishes can make your shaker panels stand out without adding physical layers or complicated designs. It’s a way to bring tactile richness and visual intrigue to your space with minimal fuss.
Recommended Products to replicate this idea
| # | Preview | Product | |
|---|---|---|---|
| 1 |

|
Zinsser 22616 Roll-A-Tex Sand Texture Additive, 1 Pound | Check Latest Price |
| # | Preview | Product | |
|---|---|---|---|
| 1 |

|
Weysat 1 Set 94.5in x 47.2 in Mdf Board and Batten Wall Panel Kit Premade Wainscoting Panels... | Check Latest Price |
Picture a wall with a soft, velvety texture or a subtle sand-like grain. The textured finish catches the light differently throughout the day, creating dynamic shadows and highlights. It adds a cozy, inviting vibe, perfect for relaxing spaces. The tactile surface invites touch, making the wall not just a visual element but an experience.
Choose from various textures—smooth, gritty, or patterned—to match your decor style. Light-colored textures work well to keep the space airy, while darker, textured finishes add drama. This technique suits both traditional and contemporary settings, especially if paired with matte or satin paints. Seasonal finishes can also be applied, like a chalky look for a rustic feel.
Start by preparing a smooth, clean surface—sanding and priming the panels thoroughly. Use textured paints or apply a base coat and then add a textured topcoat using sponges, brushes, or rollers. Experiment with different tools to achieve your desired effect. Multiple coats may be necessary for a pronounced texture. Seal with a matte or satin topcoat to preserve the finish and protect against damage. Practice on a test panel first to perfect your technique.
Personalize the texture by mixing in metallic or iridescent powders for subtle shimmer. Pair textured panels with sleek hardware or minimalist trims for contrast. You can also add decorative stripes or patterns using stencils to enhance the textured background. This approach allows for endless customization based on your personal style.
Textured paint finishes are a smart way to elevate your decor without a big investment. They provide a tactile element that adds warmth and depth. With a few simple techniques, you can create a unique wall that feels both sophisticated and inviting. Go ahead—embrace texture and give your walls that extra layer of personality.
18. Customized Shaker Panels with Inset Molding Details
Tired of cookie-cutter walls that look like everyone else’s? Custom inset molding can turn plain shaker panels into bespoke masterpieces. It’s the perfect way to add intricate detail and craftsmanship that screams personality. If you’re craving a more refined, handcrafted look, this is your go-to upgrade.
Recommended Products to replicate this idea
| # | Preview | Product | |
|---|---|---|---|
| 1 |

|
Board and Batten Wall Molding Kit – Paintable MDF DIY Trim for Accent Walls, Shaker Style... | Check Latest Price |
| # | Preview | Product | |
|---|---|---|---|
| 1 |

|
1 1/8"W x 6 1/2"H x 1 1/8"P Americraft Solid Paint Grade Wood Universal Baseboard Inside Corner... | Check Latest Price |
Imagine panels framed with delicate inset moldings, creating a layered, architectural effect. The trims catch light at different angles, emphasizing depth and craftsmanship. You can incorporate decorative corner blocks or contrasting paint on the moldings for extra flair. The result is a sophisticated, tailored look that elevates any room.
Use inset molding to frame entire panels or just accent certain sections for visual interest. Mix and match different widths or profiles of moldings to suit your decor style—sleek and modern or ornate and traditional. For a subtle touch, use painted-inset details that blend seamlessly with the panel color. Seasonal color swaps or metallic accents can further personalize your design.
Measure and mark your panel areas carefully before cutting and installing moldings. Use quality miter saws for precise corners, and secure the trims with finishing nails or adhesive. Consider adding decorative corner blocks for a handcrafted touch. Sand and paint or stain the moldings to match or contrast with your panels. Finish with caulk and touch-up paint for a seamless look. Patience and precision are key.
Customize with painted-inset moldings in bold colors or metallic finishes for a contemporary twist. Add subtle textures or patterns within the insets for extra depth. Incorporate decorative corner blocks or rosettes for a vintage vibe. These details let you craft a truly unique statement wall that reflects your style.
Inset molding details transform basic panels into artful focal points. They showcase your craftsmanship and attention to detail. With some patience, you can create a custom look that’s both timeless and personalized. Ready to add that extra touch of elegance to your walls?
19. Two-Level Shaker Wall Panel Design for Dynamic Walls
Feeling like your walls are too flat and predictable? A two-level panel design introduces visual interest and dimension, making your walls truly stand out. It’s a clever way to add depth without cluttering the space. If you want your walls to have a layered, dynamic feel, this approach is perfect.
Recommended Products to replicate this idea
| # | Preview | Product | |
|---|---|---|---|
| 1 |

|
FRAYSCENT Slat Wall Paneling Garage Wall Organizer, Slatwall Panels Garage Tool Organizer Wall Mount... | Check Latest Price |
| # | Preview | Product | |
|---|---|---|---|
| 1 |
|
Glidden Total Interior Wall Paint & Primer All-in-One, Dresden Dream/Blue, Eggshell, 1 Gallon | Check Latest Price |
Visualize a wall with an upper and lower section, each with different textures or colors. The separation creates a natural eye line, guiding viewers through the space. The upper panels might be painted in a soft hue, while the lower can be a darker, contrasting shade or textured finish. This layered approach adds sophistication and a sense of architecture.
Switch up the textures: smooth on top, textured or patterned on the bottom, or vice versa. Use contrasting colors to emphasize the separation, or keep it monochromatic for subtlety. Incorporate different molding styles or materials to differentiate levels further. This design adapts well to both traditional and modern interiors, depending on your choice of finishes.
Start by marking the boundary line where the two levels will meet. Install the lower panels first, ensuring they are level and secure. Then, attach the upper panels, aligning with your markings. Use different paint or finishes to distinguish the levels. Add decorative trims or moldings at the separation for extra detail. Consistency and precision in measurements are crucial for a balanced look.
Personalize by choosing different finishes—matte, gloss, textured—on each level. Incorporate decorative trims or accent colors for a more dramatic effect. Use built-in shelving or ledges in the lower section for functional decor. Long-lasting finishes and careful planning allow you to craft a wall that’s both beautiful and versatile.
A two-level shaker design adds architectural interest and a modern twist to traditional styles. It’s a great way to showcase your creativity and design skills. Once finished, your walls will feel more structured and inviting, elevating the entire room’s vibe. Get inspired and start layering your walls today!
20. Shaker Wall Panels with Integrated Mirror Inserts
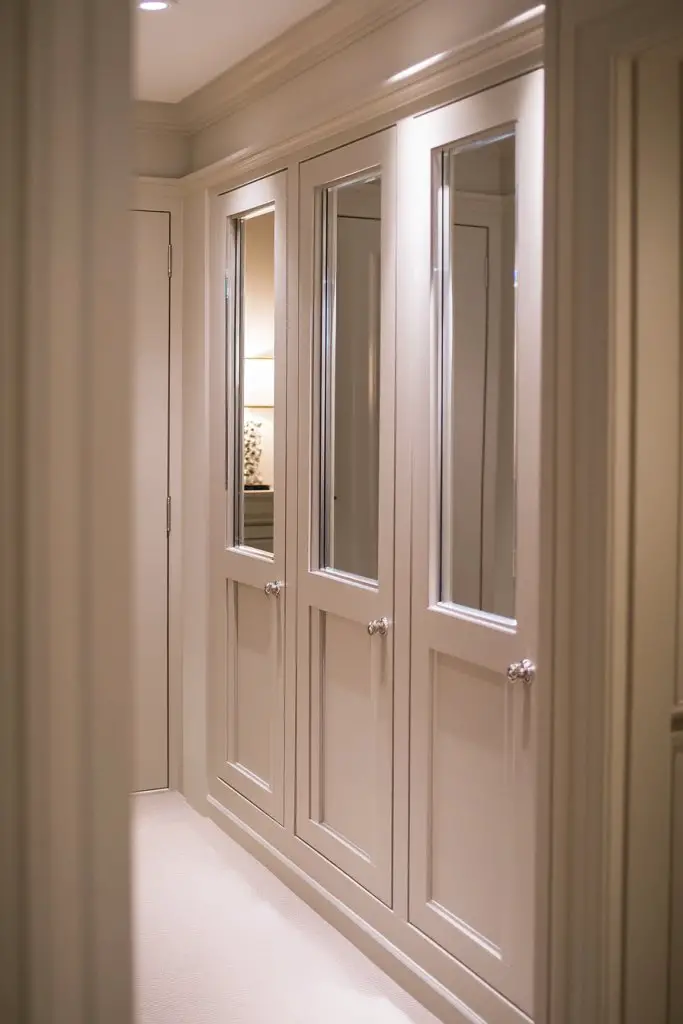
Ever wish your walls could do double duty? Incorporating mirrors into shaker panels offers a stylish way to boost light and space while maintaining a cohesive look. It’s perfect for entryways, bedrooms, or bathrooms where function meets design. Who says you can’t have beauty and practicality in one package?
Recommended Products to replicate this idea
| # | Preview | Product | |
|---|---|---|---|
| 1 |

|
Ruomeng Home Gym Mirrors 12 Inch x 12Pcs Wall Mounted Mirror Glass Frameless Full Length Mirror... | Check Latest Price |
| # | Preview | Product | |
|---|---|---|---|
| 1 |

|
WallPops Narrow Paintable Shaker Wall Panels, WPWP6345 | Check Latest Price |
Imagine sleek, framed mirror inserts seamlessly integrated into your shaker panels, reflecting the room’s beauty. The mirrors catch and diffuse natural light, making the space appear larger and brighter. The surrounding panels add texture and depth, creating a balanced visual that’s both functional and elegant. It’s like having art and utility rolled into one.
Choose frameless or decorative-framed mirrors depending on your style—minimalist or ornate. You can also vary the size and shape of the inserts for visual interest, from rectangular to circular. Incorporate frosted or tinted glass for privacy or style. Seasonal or color-tuned framing can add a customized touch that complements your decor.
Plan your mirror placement carefully, ensuring proper spacing for a balanced look. Use a mirror adhesive or secure with brackets, depending on weight and size. Frame the mirrors with your shaker panels, either flush or inset, for a streamlined appearance. Seal edges with caulk or trim for a clean finish. Ensure wiring or mounting hardware is hidden or concealed for a neat look.
Personalize by choosing mirror finishes—antique, modern, or textured. Add decorative trims or painted borders to enhance the framing. Incorporate LED lighting around the mirrors for added brightness and drama. These touches create a custom, luxe feel that elevates your entire decor.
Mirror-integrated panels are a clever way to add both style and function. They brighten the space and provide a practical full-length mirror or decorative element. With some planning, you can craft a feature wall that feels personalized and polished. Time to reflect on your design possibilities!
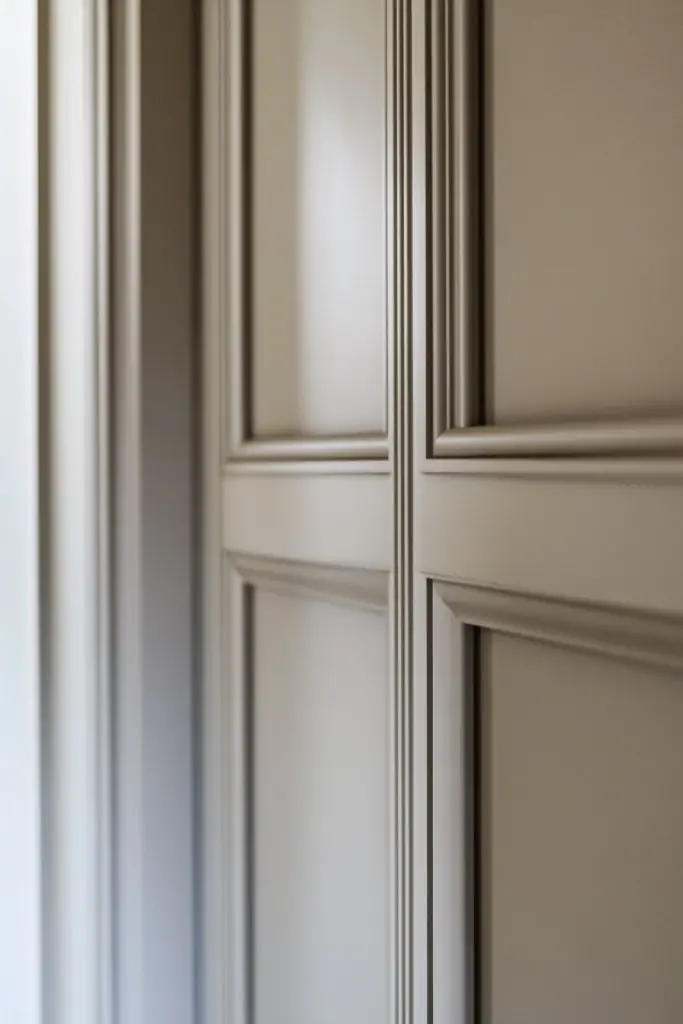
21. Monochrome Shaker Panel Wall with Subtle Shadow Lines
Tired of walls that fade into the background? A monochrome shaker panel wall with subtle shadow lines creates a sophisticated, cohesive look that adds depth without visual chaos. It’s a sleek way to elevate your space and make a statement with minimal color fuss. Ready for a timeless upgrade?
Recommended Products to replicate this idea
| # | Preview | Product | |
|---|---|---|---|
| 1 |
|
Art3d Premade Board and Batten Paintable Wainscoting Kit, MDF Accent Wall Panel for Kitchen Bedroom... | Check Latest Price |
| # | Preview | Product | |
|---|---|---|---|
| 1 |
|
Nuanchu 10 Pack 3.3 Ft/1 M T Shape LED Aluminum Channel Plaster in Recessed White LED Strip Light... | Check Latest Price |
Visualize a wall painted in a single soft hue—beige, gray, or navy—with shadows cast by the panel edges creating natural lines of contrast. The subtle shadow lines emphasize the panel divisions, giving a layered, three-dimensional effect. The monochrome palette keeps the look unified, elegant, and easy to accessorize.
Opt for matte or satin finishes to keep reflections minimal and shadows prominent. Slight variations in tone—like a slightly darker shade on the panel edges—can enhance the shadow effect. This style pairs well with minimalist decor, allowing architectural details to shine. You can also experiment with textured paint for added interest.
Begin by selecting your monochrome color palette and preparing a smooth, primed surface. Use painter’s tape to create clean lines around each panel, then paint with quality brushes or rollers. To achieve subtle shadow lines, consider using a slightly darker shade on the panel edges or adding a light wash. Finish with a protective topcoat for durability. Patience with tape and painting precision ensures a seamless look.
Add depth by incorporating different textures or sheen levels within the same color family. Use decorative trims or painted-in shadow lines for an even more dramatic effect. Complement with monochrome accessories like textiles or furniture to reinforce the cohesive look. Keep the decor simple to truly let the wall shine.
A monochrome shadow-lined wall exudes quiet confidence and modern elegance. It’s perfect for those who appreciate subtle sophistication and want an easy-to-maintain backdrop. With some patience, you’ll craft a feature wall that’s both understated and impactful, elevating your entire space.
Conclusion
With this diverse collection of shaker style wall panel ideas, you now have plenty of inspiration to enhance your home’s aesthetic. From classic beadboard to contemporary designs, these ideas can be adapted to fit your unique space and style preferences. Don’t hesitate to try out these concepts and bring a touch of timeless elegance to your walls. Start transforming your home today and enjoy the enduring beauty of shaker style!
Last update on 2026-02-11 / Affiliate links / Images from Amazon Product Advertising API