
17 Short Backsplash Ideas for Updated Kitchens
A stylish backsplash can be the perfect finishing touch for any kitchen, and short backsplash ideas are gaining popularity for their ability to add charm without overwhelming the space. They offer a sleek, manageable way to introduce color, texture, and personality, especially in smaller or open-concept kitchens where every inch counts.
In this article, you’ll find a variety of creative and practical short backsplash ideas that can easily elevate your kitchen’s look. From bold tiles to subtle accents, these ideas are designed to inspire your next makeover and help you create a space that’s both functional and fabulous.
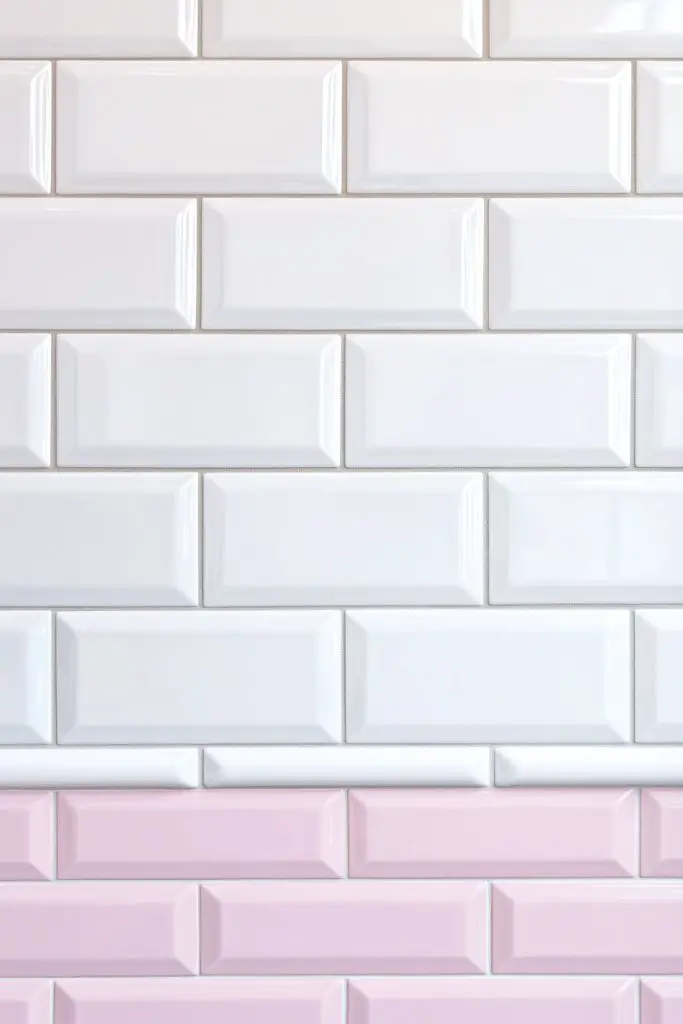
1. Sleek Subway Tiles in Classic White for a Timeless Look
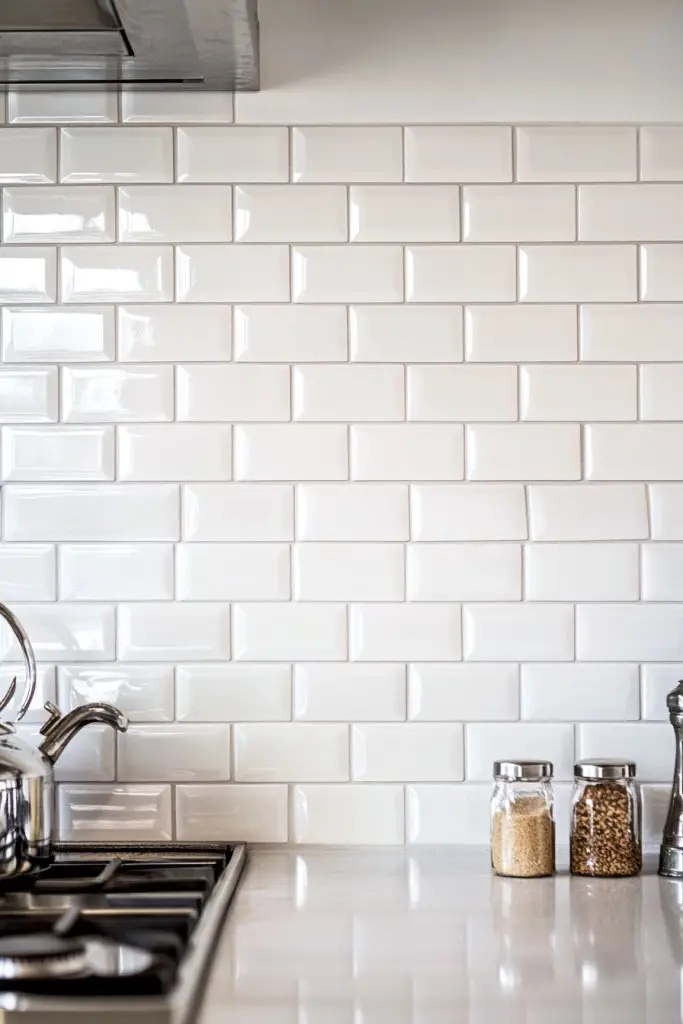
Ever wish your kitchen backsplash could be both elegant and effortless? Classic white subway tiles are the go-to choice for anyone craving a clean, timeless vibe that never goes out of style. They’re perfect if you want a look that works with any decor and can stand the test of time without feeling outdated. Plus, they hide minor splashes and stains better than lighter or more intricate patterns.
Recommended Products to replicate this idea
| # | Preview | Product | |
|---|---|---|---|
| 1 |

|
Art3d 102-Piece Peel and Stick Wall Tile for Kitchen Backsplash, Bathroom, Fireplace, 3in. × 6in.... | Check Latest Price |
| # | Preview | Product | |
|---|---|---|---|
| 1 |

|
Custom Building Products 4000 Acrylic Ceramic Tile Mastic, 1-Gallon | Check Latest Price |
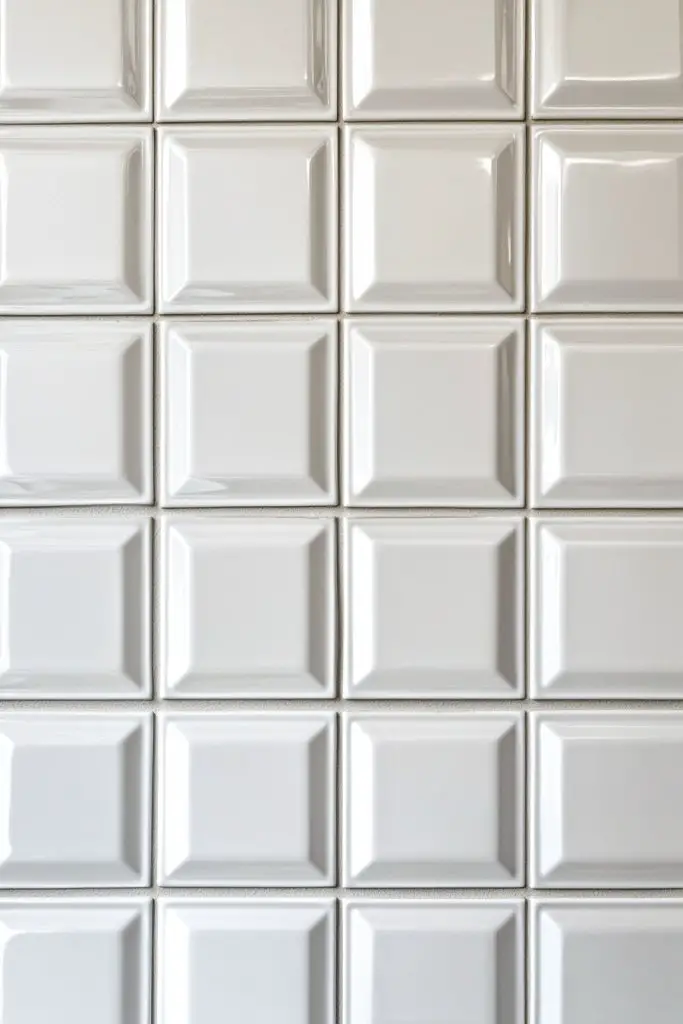
Imagine small rectangular tiles laid in a straight or brick pattern, creating a sleek, uniform surface that reflects light beautifully. The matte or glossy finish enhances the simplicity, while the white hue brightens the space, making your kitchen feel larger and more inviting. The subtle grout lines add texture without overwhelming the eye, giving your backsplash a polished yet understated presence. It’s like a blank canvas that complements any style.
You can switch things up by choosing textured, matte, or high-gloss finishes, depending on your preference. For a more vintage feel, install them in a herringbone pattern, or keep it classic for a modern look. In smaller kitchens, these tiles help maximize brightness, while in larger spaces, they create a cohesive, clean backdrop. They also pair well with natural wood, stainless steel, or bold-colored accessories, making styling flexible.
Begin by measuring your wall space to determine tile quantity. Opt for high-quality ceramic or porcelain tiles for durability and ease of cleaning. Prepare the surface by cleaning it thoroughly and applying a primer if needed. Use a level to ensure straight lines and a notched trowel for even adhesive application. Lay the tiles in your chosen pattern, pressing firmly and using spacers for consistent grout lines. Once set, apply grout with a rubber float, wipe excess, and seal if necessary.
Personalize your backsplash by choosing different grout colors—gray for a subtle contrast or black for a bold statement. Add a decorative border or accent tiles at the top or bottom for visual interest. You could also install LED strip lighting underneath cabinets to highlight the tiles’ texture and brightness. Incorporating textured or patterned grout lines can subtly elevate the overall look, giving it a custom feel.
This classic choice proves that simplicity is timeless. Whether you prefer a sleek modern kitchen or a cozy farmhouse vibe, white subway tiles adapt beautifully. They’re a safe bet for a quick upgrade that adds value and style, making your space look fresh and inviting. Ready to embrace the timeless charm of subway tiles?
2. Matte Black Glass Tiles for a Modern Edge
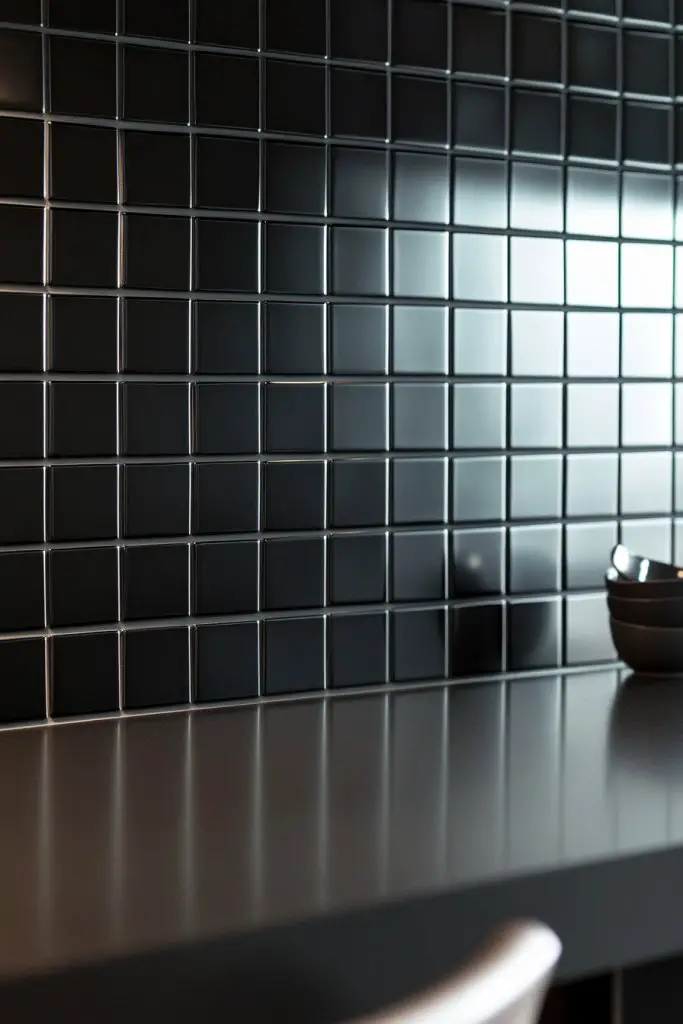
Looking to add a dash of drama and sophistication to your kitchen? Matte black glass tiles are the perfect way to make a bold statement without overwhelming the space. They bring a contemporary edge that’s sleek, stylish, and slightly rebellious. If you’re tired of the typical white or neutral backsplashes, these tiles offer a fresh, modern alternative.
Recommended Products to replicate this idea
| # | Preview | Product | |
|---|---|---|---|
| 1 |

|
Adedeo Glass Subway Tile Black 3 x 6 Inch Glass Backsplash for Kitchen Backsplash Bathroom Shower... | Check Latest Price |
| # | Preview | Product | |
|---|---|---|---|
| 1 |
|
Custom Building Products 4000 Acrylic Ceramic Tile Mastic, 1-Gallon | Check Latest Price |
Picture a wall of deep matte black tiles with a soft, velvety finish that absorbs light rather than reflecting it. The glass surface adds a subtle sheen, giving the backsplash a luxurious glow when illuminated. The dark hue creates a striking contrast against lighter cabinetry or countertops, making every detail pop. Their smooth, uniform appearance provides a sleek backdrop that commands attention.
You can opt for large tiles for a minimalist look or smaller mosaic pieces for more texture. Mixing matte black tiles with metallic accents, like brushed gold or silver fixtures, enhances the modern vibe. These tiles work well in open-plan kitchens with ample natural light or in darker, moody spaces for a dramatic effect. You can also add a subtle pattern or linear arrangement to break up the monotony.
Start by selecting high-quality glass tiles designed for wet areas, ensuring durability. Prepare your wall surface by cleaning and leveling it, then apply a suitable adhesive with a notched trowel. Carefully place the tiles, maintaining consistent gaps with spacers for even grout lines. Use a silicone float or a soft cloth to gently press the tiles into place, avoiding fingerprints or smudges. Grout with a dark or matching color to maintain the sleek look, then clean excess grout for a flawless finish.
Personalize your backsplash by adding metallic or textured grout lines for extra depth. Incorporate LED lighting or under-cabinet lighting to highlight the tiles’ matte finish and subtle sheen. For a creative twist, combine black glass tiles with a strip of textured or patterned tiles at focal points. You could also install sleek, minimalist shelving or storage units nearby to keep the look uncluttered.
Black glass tiles are a bold choice that screams modern sophistication. They turn your kitchen into a statement piece, perfect for entertaining or everyday elegance. With proper lighting and styling, they create a high-end look that’s surprisingly easy to maintain. Ready to level up your kitchen with a touch of dark luxury?
3. Patterned Hexagon Tiles for Visual Interest
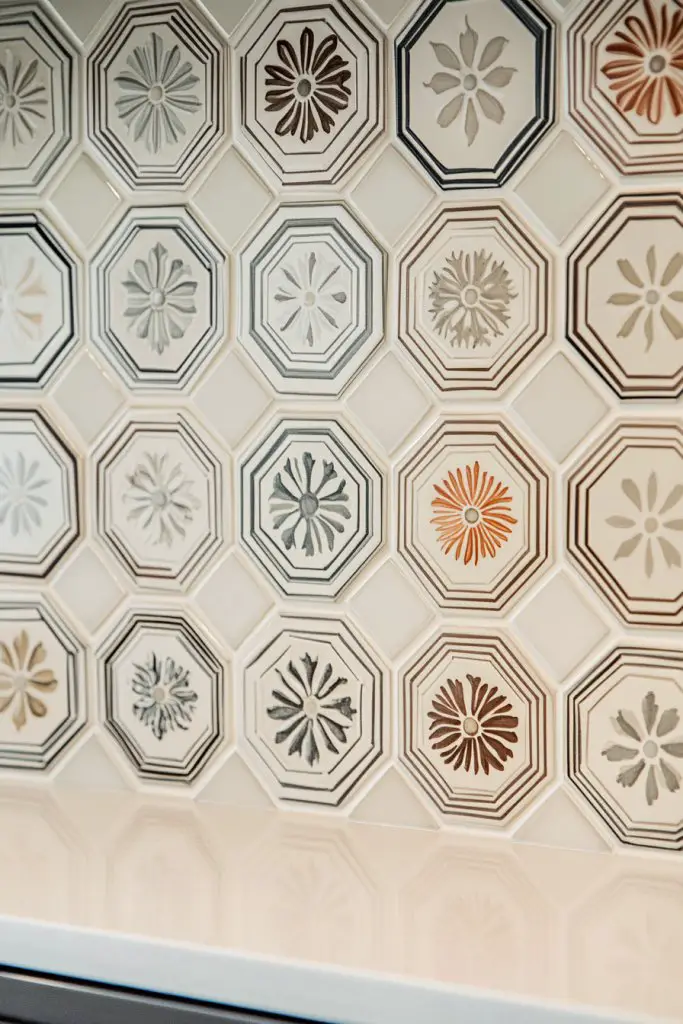
Ever feel like your kitchen needs a splash of personality? Hexagon tiles with intricate patterns are the perfect way to inject visual interest without overwhelming the space. They add a modern geometric touch that’s both playful and sophisticated. If you’re bored with plain surfaces, patterned hexagons offer a fun, eye-catching alternative.
Recommended Products to replicate this idea
| # | Preview | Product | |
|---|---|---|---|
| 1 |

|
In Home InHome NH2359 Hexagon Marble Peel Stick Backsplash Tiles, White & Off-White | Check Latest Price |
| # | Preview | Product | |
|---|---|---|---|
| 1 |

|
432 pcs Glass Mosaic Tiles, 12 Colors 10mm Mosaic Glass Pieces with Storage Box, Transparent Mosaic... | Check Latest Price |
Imagine small hexagonal tiles arranged in a repeating pattern, each with unique designs—floral motifs, geometric lines, or colorful accents. The irregular shapes create a dynamic mosaic that draws the eye and adds depth to your wall. Mix and match different patterns or colors to customize the look, creating a patchwork of personality. The textured surface provides a tactile element, inviting touch and curiosity.
Choose vibrant, patterned tiles for a lively, eclectic vibe, or go for subtle monochrome designs for a more subdued elegance. These tiles work well in small kitchens as a feature wall or as an accent strip within a larger tiled area. They pair beautifully with neutral cabinetry or bold-colored walls, giving you flexibility in your decorating style. Seasonal variations could include adding metallic or matte finishes for different moods.
Start by selecting a pattern style that suits your taste and measuring your wall carefully. Use a high-quality adhesive suitable for textured tiles and plan your layout beforehand. Lay the tiles in a dry run to see how the patterns align and adjust as needed. Apply adhesive evenly with a notched trowel, then press each tile into place, ensuring consistent spacing. Use a tile cutter or nippers for custom cuts around outlets or edges. Finish by grouting with a color that enhances the pattern, and seal for durability.
Create a unique look by incorporating metallic or glitter accents within some tiles for extra sparkle. Frame certain patterned tiles with a border of plain tiles for a polished effect. Add decorative trims or moldings to frame the feature wall or transition into other areas. Personal touches like custom color palettes or combining patterns can make the space uniquely yours.
Patterned hexagon tiles turn a plain wall into a conversation starter. They’re perfect for creative homeowners eager to showcase personality while maintaining style. With endless pattern options, you can tailor your backsplash to match your mood or season. Ready to make your kitchen unforgettable?
4. Metallic Tile Accents for a Touch of Glam
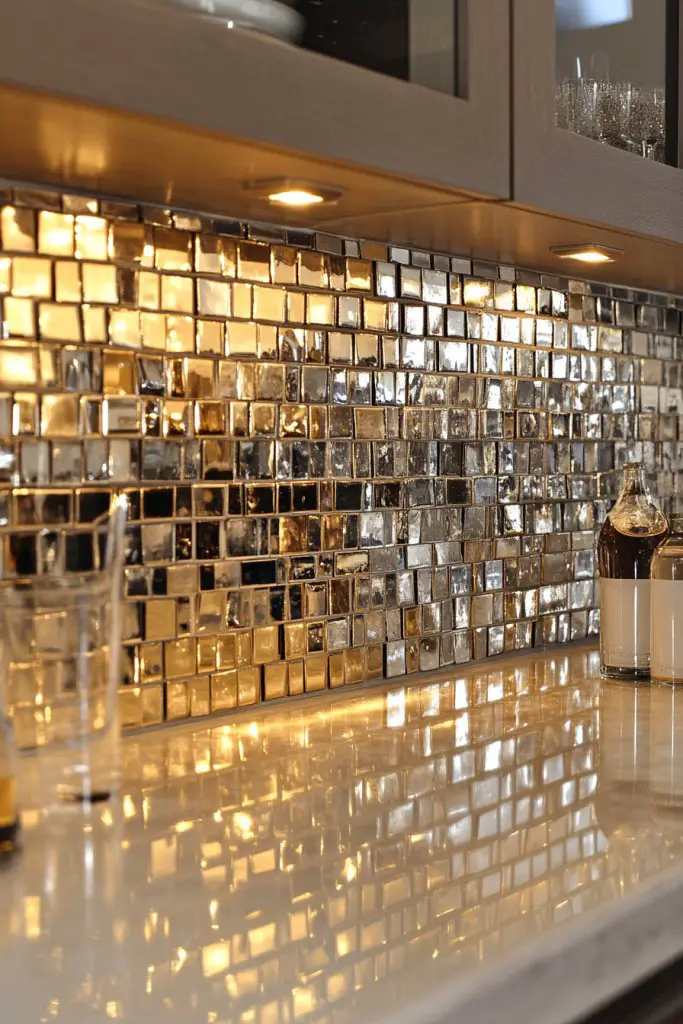
Sometimes your kitchen just needs a little sparkle to elevate the entire look. Metallic tiles or accents bring a luxurious, glamorous vibe that’s perfect for making a statement. Whether you prefer copper, gold, or silver, these touches add richness and depth that transform ordinary into extraordinary. Who said functionality can’t be fabulous?
Recommended Products to replicate this idea
| # | Preview | Product | |
|---|---|---|---|
| 1 |

|
Blujellyfish Metallic Glass Mosaic Tiles Silver Gray 100% Glass Tile Water Resistant for Kitchen... | Check Latest Price |
| # | Preview | Product | |
|---|---|---|---|
| 1 |

|
SUNWINGS 10-Pack 12 Inch Peel and Stick Aluminum Tile Trim, Decorative Backsplash Trim Edge, Self... | Check Latest Price |
Picture a few strips or small tiles of shimmering metallic finishes nestled among matte or glazed tiles. The reflective surfaces catch and bounce light, creating a glow that enhances the overall ambiance. Metallic accents work beautifully in contemporary kitchens, especially when paired with sleek appliances or dark cabinetry. They add a layer of sophistication and a hint of decadence, elevating even the simplest design.
Use metallic tiles as a focal feature, like a strip behind a stove or sink, or scatter small accents throughout a tiled wall for a subtle shimmer. Mix metals for an eclectic look or stick to one for uniformity. Incorporate metallic mosaic tiles or strips with textured surfaces to add dimension. They work well with both neutral and bold color schemes, offering versatility in styling.
Choose high-quality metal or metal-look tiles that resist corrosion and tarnishing. Prepare your wall surface thoroughly to ensure adhesion, then plan your layout for maximum visual impact. Use a suitable adhesive designed for metallic surfaces and press tiles firmly into place. For mosaics, apply with a notched trowel and ensure alignment. Finish with a clear sealant if needed to protect the surface, then clean excess adhesive carefully.
Add personalization by combining different metallic tones—mix gold with silver or copper for an eclectic effect. Pair metallic accents with matte or textured tiles to create contrast. Consider framing your metallic strip with simple trim or molding for a clean finish. Incorporate lighting fixtures that highlight the metallic sheen, making your backsplash a true showstopper.
Metallic tiles instantly boost the glam factor of any kitchen, making it feel upscale and modern. They’re a bold choice that pays off in visual drama and style. With careful placement and lighting, you can create a luxurious environment that feels both inviting and chic. Ready to add a touch of metallic magic?
5. Chalkboard Paint for a Functional and Fun Surface
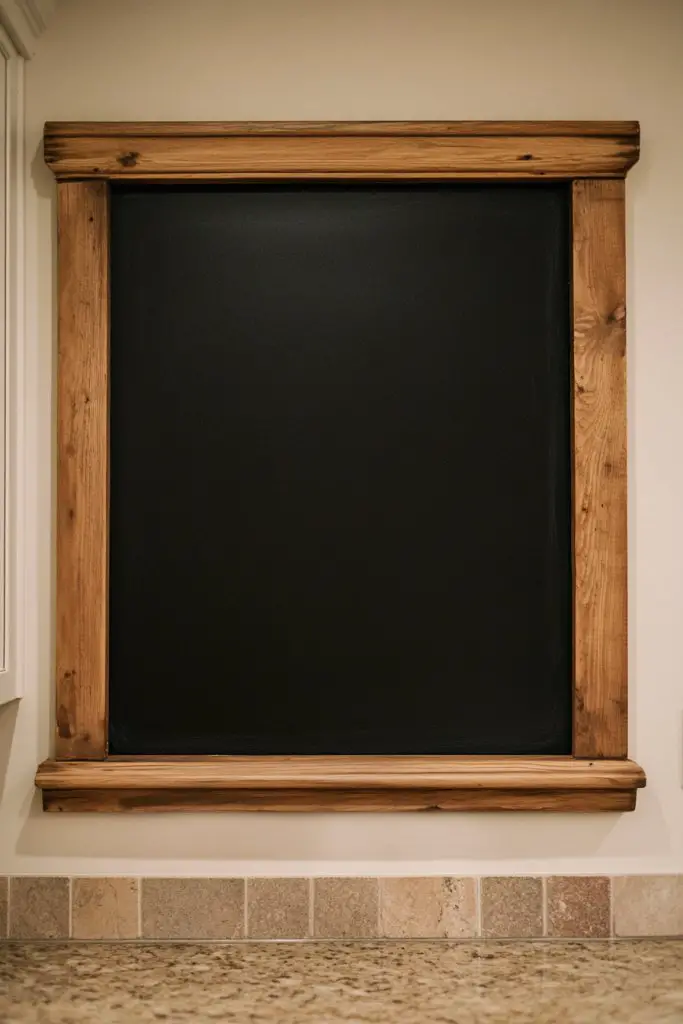
Ever wish your kitchen could be more interactive or playful? Chalkboard paint offers a practical yet fun solution for creating a writable surface that doubles as decor. It’s perfect for moms, teachers, or anyone who loves jotting down notes, recipes, or doodles. Plus, it adds a quirky personality that’s easily changeable.
Recommended Products to replicate this idea
| # | Preview | Product | |
|---|---|---|---|
| 1 |

|
Rust-Oleum 206540 Chalkboard Brush-On Paint, 30 oz, Black | Check Latest Price |
| # | Preview | Product | |
|---|---|---|---|
| 1 |

|
Liquid Chalk Markers for Blackboards - Bold Color Dry Erase Marker - Chalk Markers for Chalkboard... | Check Latest Price |
Imagine a short section of wall painted with matte black chalkboard paint, framed with colorful trim or decorative molding. The surface invites spontaneous sketches, grocery lists, or inspirational quotes. Over time, it becomes a dynamic canvas, constantly evolving with your mood. Adding chalk or chalk markers enhances the tactile experience, making your kitchen lively and interactive.
You can opt for a small dedicated area or extend it across an entire wall for maximum impact. Colorful chalks and erasers add vibrancy and ease of use. Decorate the edges with washi tape, decals, or a decorative frame to match your style. Seasonal themes, like holiday messages or motivational quotes, keep the space fresh and engaging.
Start by choosing a suitable wall section that’s easy to access and won’t be obstructed. Clean the surface thoroughly to remove dust and grease. Apply multiple coats of chalkboard paint, allowing proper drying time between layers. Once dry, prime the surface with chalk to prevent ghosting. Use high-quality chalk or chalk markers for writing and erase regularly to keep it fresh.
Personalize your chalkboard with decorative borders, magnetic strips for notes, or small hooks for accessories. Incorporate themed chalks for holidays or special occasions. Use colorful or metallic chalks for added flair. You can also pair it with a small ledge or shelf for holding chalk and erasers, keeping everything tidy.
A chalkboard wall turns your kitchen into a hub of creativity and practicality. It’s a simple upgrade that adds charm and function, making everyday tasks more fun. Plus, it’s easy to change as your style or needs evolve. Who wouldn’t want a splash of whimsy in their daily routine?
6. Peel-and-Stick Backsplash for Easy Installation
Tired of messy, time-consuming backsplash installations? Peel-and-stick tiles offer a quick, budget-friendly alternative for transforming your kitchen. They’re perfect for renters, DIY enthusiasts, or anyone who wants a stylish upgrade without the hassle of grout and mortar. Plus, they come in a variety of patterns and textures to suit any taste.
Recommended Products to replicate this idea
| # | Preview | Product | |
|---|---|---|---|
| 1 |
|
Art3d 102-Piece Peel and Stick Wall Tile for Kitchen Backsplash, Bathroom, Fireplace, 3in. × 6in.... | Check Latest Price |
| # | Preview | Product | |
|---|---|---|---|
| 1 |

|
MusselBound® Adhesive Tile Mat with Spacers (15 sq ft per roll), a Strong Double-Sided Adhesive mat... | Check Latest Price |
Picture a wall covered in adhesive-backed tiles with a textured or patterned surface, instantly adding character. The tiles cling securely yet peel away easily if needed, making changes a breeze. They’re available in designs mimicking real ceramic, glass, or stone, giving you a high-end look without the weight or cost. The result? A vibrant, personalized space that looks professionally installed.
Choose from peel-and-stick options that mimic subway tiles, mosaics, or geometric patterns. Mix different patterns or colors for a custom, eclectic look. These tiles are ideal for small areas, backsplashes, or accent walls. Seasonal updates are easy: peel off old tiles and replace with fresh patterns or colors to match your decor refresh.
Start by thoroughly cleaning and drying your wall surface. Measure and plan your layout to avoid cutting tiles in awkward places. Peel off the backing and carefully press each tile onto the surface, smoothing out bubbles or wrinkles. Use a utility knife for clean cuts around outlets or edges. No grout needed—simply enjoy your new, stylish backsplash.
Add decorative borders or contrasting tiles at edges to frame your project. Incorporate peel-and-stick decals or metallic accents for extra flair. For a more cohesive look, coordinate your backsplash with cabinet hardware or countertops. Periodically update your design to keep the space feeling fresh and fun.
This DIY-friendly option makes updating your kitchen achievable for everyone. It proves that a stylish, personalized space is just a peel away. No special skills required—just a little patience and a sense of adventure. Ready to give your kitchen a quick, stunning facelift?
7. Natural Stone Slips for Rustic Charm
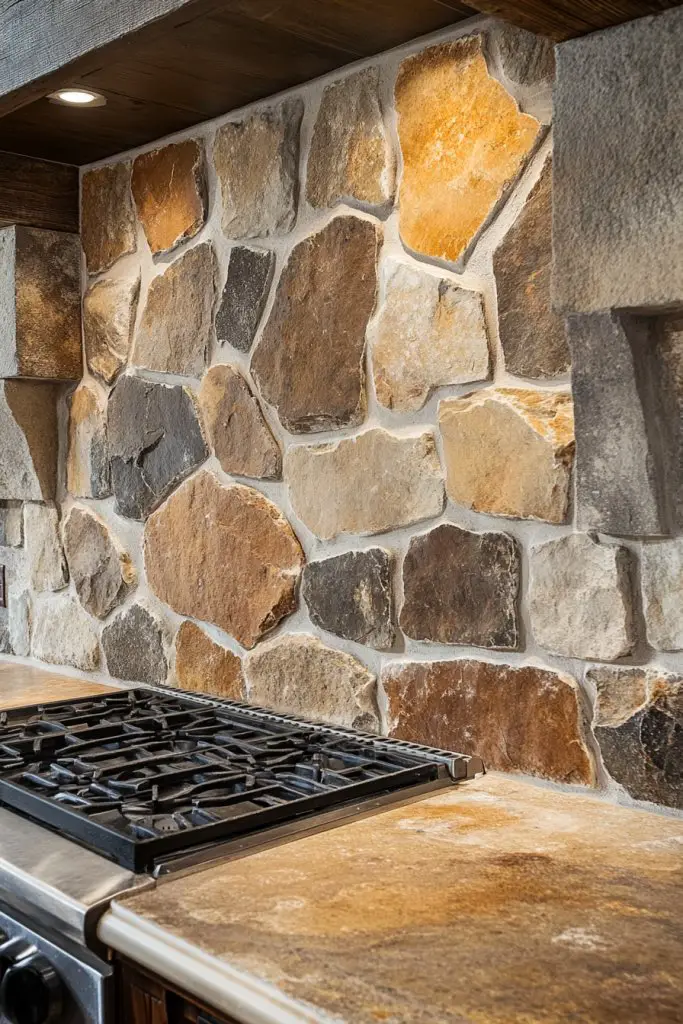
Craving a warm, earthy feel in your kitchen? Natural stone slips can instantly add rustic charm and texture that feels both authentic and durable. They’re perfect for creating a cozy, farmhouse style or adding a touch of nature to modern decor. If you love the idea of an organic, textured surface, this is your go-to solution.
Recommended Products to replicate this idea
| # | Preview | Product | |
|---|---|---|---|
| 1 |

|
AULIGET 100 Piece Black Slate Peel and Stick Backsplash Wall Tiles, 3" x 6" PVC Faux Stone Stick on... | Check Latest Price |
| # | Preview | Product | |
|---|---|---|---|
| 1 |

|
10-Sheet Beige Travertine Natural Clay Mosaic Tile, 12" x 24" Subway Flexible Stone Wall Tiles for... | Check Latest Price |
Imagine irregularly shaped slate or travertine pieces layered together, showcasing their natural variations in color and texture. The rough, tactile surface invites touch and adds depth to your walls. The stones’ earthy tones—grays, beiges, and browns—warm up the space and work beautifully with wood, metal, and other natural materials. They create a layered, organic look that feels relaxed yet refined.
Choose larger slabs for a more streamlined, modern rustic look, or smaller pieces for a traditional, mosaic effect. Mix different stone types or finishes—polished, honed, or tumbled—for variety. These slips can be installed behind a stove or sink, or as a feature wall. Pair with open shelving or vintage fixtures for a complete rustic aesthetic.
Start by selecting natural stone slips suited for wet areas and easy cleaning. Prepare your wall by cleaning thoroughly and applying a stabilizing primer if needed. Use a high-quality mortar and apply it with a notched trowel, then press the stones into place, maintaining consistent spacing. Fill gaps with matching grout or mortar, and seal the stones to protect against stains. Regular maintenance keeps the natural beauty alive.
Enhance the rustic appeal by incorporating reclaimed wood shelves or vintage hardware. Use contrasting grout or mortar colors to highlight the stones’ natural variation. Consider adding LED accent lighting to showcase the textures at night. Personalize by choosing stones with unique patterns or colors that reflect your style.
Natural stone slips bring a handcrafted, timeless vibe that elevates any kitchen. They’re a durable, long-lasting investment that ages beautifully. With the right care, this look can become a cherished part of your home’s character. Ready to embrace rustic charm?
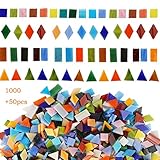
8. Colorful Glass Mosaic Tiles for Vibrant Accents

Want to add a pop of color and energy to your kitchen? Colorful glass mosaic tiles are an eye-catching way to make your backsplash stand out. They infuse vibrancy and personality, turning a functional area into a focal point. If your space feels dull or uninspired, these tiles could be the splash of fun you need.
Recommended Products to replicate this idea
| # | Preview | Product | |
|---|---|---|---|
| 1 |
|
Lanyani 1050 Pieces Mixed Shapes Glass Mosaic Tiles for Crafts, Colorful Stained Glass Pieces for... | Check Latest Price |
| # | Preview | Product | |
|---|---|---|---|
| 1 |

|
Parrotile Antique 2'' x 2'' Glass Squared Tile Glazed Red Grey Grid Mosaic Wall Backsplash Tile PT31... | Check Latest Price |
Imagine tiny, shimmering glass pieces arranged in a mosaic pattern, with hues ranging from bright reds and blues to soft pastels. The reflective surfaces catch the light, creating a lively, dynamic effect that changes with the angle and time of day. Combining different colors and finishes offers endless customization options, from subtle gradients to bold, contrasting designs. The glossy surface adds a lively sparkle, energizing your entire kitchen.
Use vibrant mosaics as a full backsplash in smaller kitchens or as an accent strip in larger spaces. Mix and match colors for a gradient effect or create a themed mosaic—like ocean, garden, or fiesta. These tiles pair well with neutral cabinets or bold-colored walls, giving you flexibility to match your decor. Seasonal or festive themes can be incorporated for special occasions.
Choose high-quality glass mosaic tiles with a durable backing. Prepare the wall by cleaning and smoothing the surface thoroughly. Apply a suitable adhesive with a small notched trowel, then carefully lay the tiles, pressing firmly and ensuring no air bubbles. Use tile spacers for uniform gaps, and cut tiles as needed with a glass cutter. Grout with a color that complements or contrasts your tiles, then clean excess grout to reveal the vibrant mosaic.
Customize your mosaic with metallic or iridescent tiles for extra shimmer. Incorporate themed designs or patterns that reflect your personality or interests. Add LED accent lighting or under-cabinet lighting to make the colors pop. You could also frame the mosaic with a decorative border for a polished look.
Vibrant glass mosaics turn your kitchen into a lively, artistic space. They’re perfect for creative souls eager to showcase bold taste. With the right lighting, they become a mesmerizing feature that draws admiration. Ready to splash some color?
9. Corrugated Metal Sheets for Industrial Style
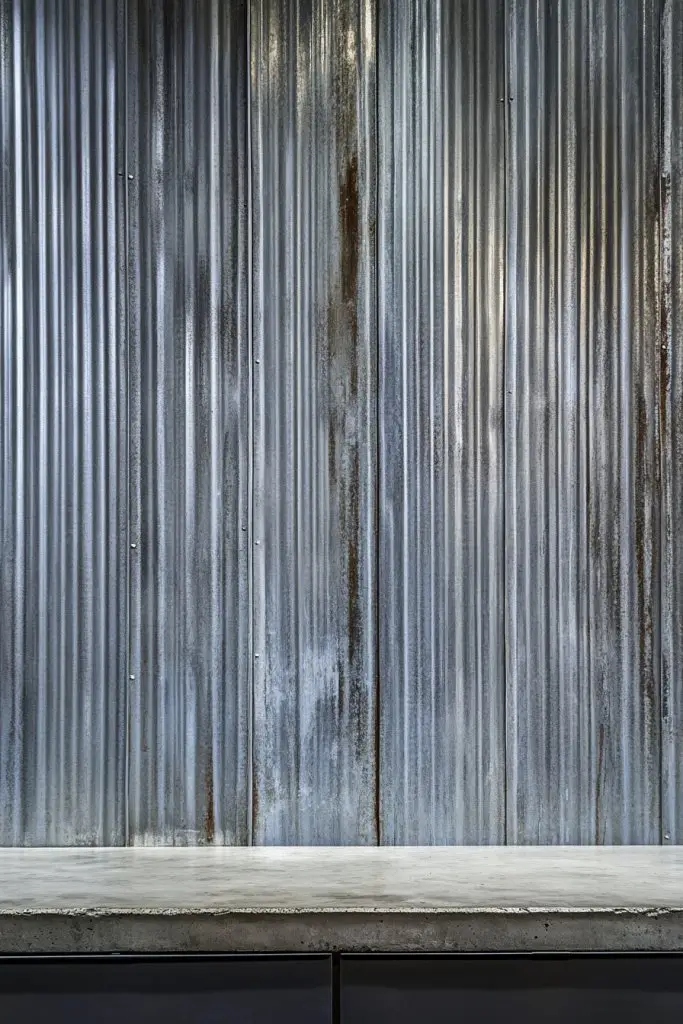
Craving an edgy, industrial vibe in your kitchen? Corrugated metal sheets are a bold choice that instantly adds texture and character. They’re perfect if you want a space that feels raw yet stylish, combining form and function with a touch of urban grit. Who says metal can’t be beautiful?
Recommended Products to replicate this idea
| # | Preview | Product | |
|---|---|---|---|
| 1 |
|
CeilingConnex Corrugated Metal Wainscoting (Antique - 10 Foot Roll) | Check Latest Price |
| # | Preview | Product | |
|---|---|---|---|
| 1 |

|
Niubid 30 Pack 1/2 Inch Cast Iron Pipe Fittings (10 Elbows, 10 Tees, 10 Flange), DIY Steampunk... | Check Latest Price |
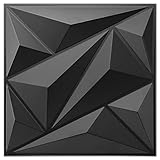
Visualize a wall clad in textured, corrugated metal panels with a weathered or painted finish. The rippled surface adds depth and movement, catching light in interesting ways. The metallic sheen contrasts beautifully with warm wood or matte cabinetry, creating a balanced, industrial aesthetic. You might even incorporate exposed piping or vintage fixtures to enhance the theme.
Opt for painted or rusted finishes for a vintage look, or sleek brushed metal for a more modern feel. Use large panels for a seamless effect or smaller pieces for a patchwork look. These sheets work well behind stoves, sinks, or as a feature wall. Combine with open shelving or metal brackets to complete the industrial vibe.
Start by measuring your wall and selecting the appropriate metal sheets, ensuring they’re suitable for interior use. Prepare the wall by cleaning thoroughly; some panels require a backing board for easy mounting. Use heavy-duty adhesive or screws with washers for secure attachment. Seal edges and fasteners with weatherproof or protective sealant to prevent corrosion. Regular cleaning with a damp cloth maintains the look.
Add warmth with reclaimed wood accents or vintage hardware. Use contrasting paint or decals for a personalized touch. Incorporate lighting fixtures that highlight the metallic texture, like industrial pendant lights or wall sconces. Personalize further with stenciled designs or logos for a custom industrial statement.
Corrugated metal sheets turn a plain wall into a statement piece full of character. They’re durable, easy to maintain, and age beautifully over time. Perfect for creating an urban loft feel or a modern industrial kitchen. Ready to embrace the raw, edgy aesthetic?
10. Wooden Backsplash Panels for Warmth and Texture
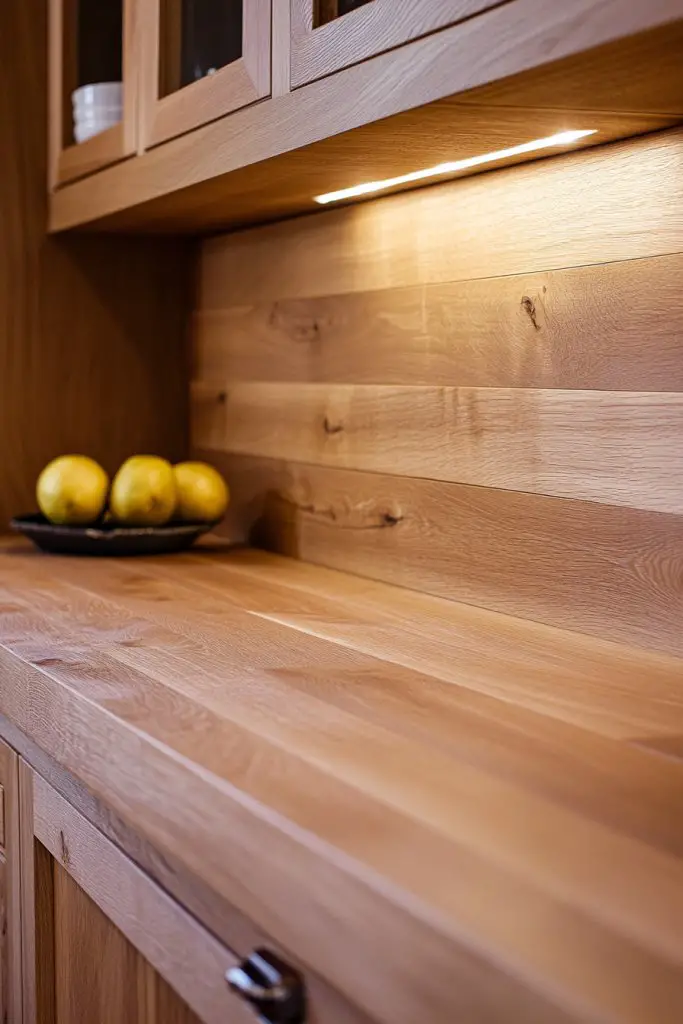
Looking to add warmth and a natural touch to your kitchen? Wooden backsplash panels give you that cozy, inviting vibe that feels like home. They’re perfect for rustic, farmhouse, or Scandinavian styles, creating a textured focal point that’s both functional and beautiful. Want a space that feels warm enough to hug?
Recommended Products to replicate this idea
| # | Preview | Product | |
|---|---|---|---|
| 1 |

|
Wall!Supply 3D Wall Panels – Reclaimed Modern Asian Teak Wood – Home Decor Wallpaper Alternative... | Check Latest Price |
| # | Preview | Product | |
|---|---|---|---|
| 1 |

|
NeatiEase Wood Panels for Wall, 4-Piece 96" x 12.6" Soundproof Wood Slat Wall Panel for Interior... | Check Latest Price |
Envision horizontally laid reclaimed wood planks or panels with visible grain and knots, adding texture and character. The natural variations in color—from light oak to dark walnut—bring depth and richness. When paired with soft textiles and warm lighting, the wood creates a welcoming, organic atmosphere. The textured surface also adds visual interest that’s tactile and inviting.
Choose between wide, flat panels for a sleek look or narrower, shiplap-style boards for a more rustic charm. Finish with natural oils, stains, or paints to match your decor. These panels work well with open shelving, vintage fixtures, or modern minimalist designs. Adapt the color and finish seasonally by changing stains or adding decorative accents.
Start by selecting durable, water-resistant wood panels suited for kitchen environments. Prepare the wall by cleaning and leveling it, then attach panels using nails, screws, or adhesive, depending on the material. Seal the wood with a protective finish to prevent moisture damage. Maintain with periodic cleaning and re-sealing for longevity. Consider adding a decorative trim or molding for a finished look.
Personalize with painted or stained finishes, or add decorative carvings or inlays. Incorporate hooks or small shelves to maximize functionality without cluttering the natural beauty. Use seasonal textiles or decorative accents to refresh the look. Pair with matching wooden countertops or accents for a cohesive style.
Wooden backsplashes bring a timeless, handcrafted feel that elevates your kitchen’s warmth. They’re versatile and can be styled to suit anything from rustic to modern decor. With proper care, they age beautifully, adding character over time. Ready to bring natural warmth into your space?
11. Bright Ceramic Tiles in Bold Colors
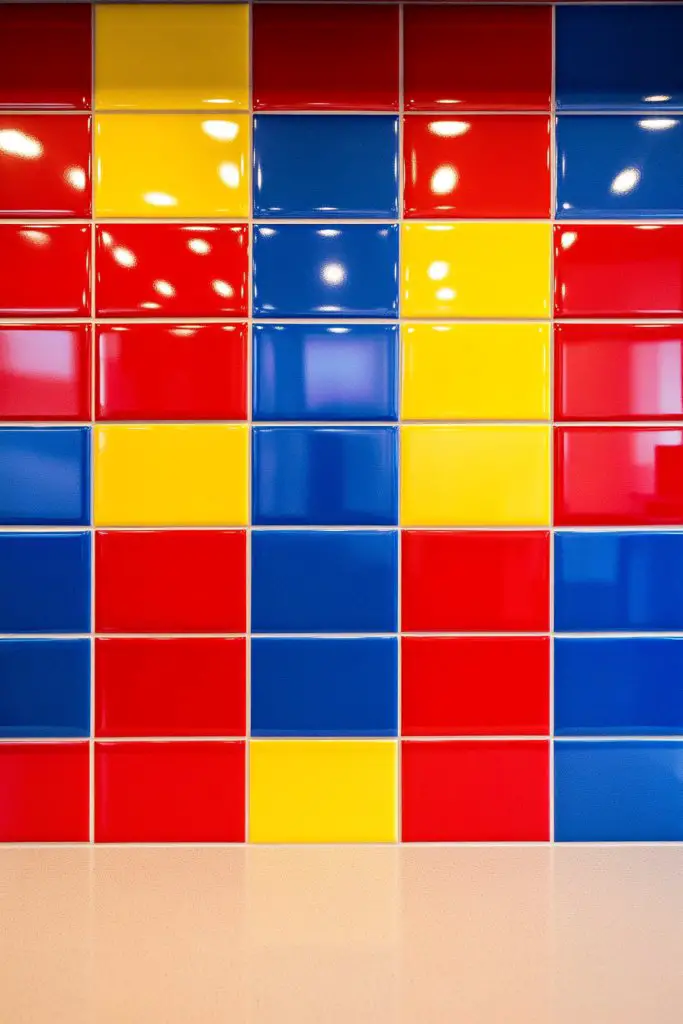
Want to inject fun and personality into your kitchen? Bright ceramic tiles in bold colors are the perfect way to energize your space. They turn a dull wall into a lively, cheerful focal point that reflects your vibrant style. If subtlety isn’t your thing, these tiles deliver instant personality.
Recommended Products to replicate this idea
| # | Preview | Product | |
|---|---|---|---|
| 1 |

|
COYMOS 24 Pcs Ceramic Tiles for Crafts Ceramic Coasters for Crafts Blank White Unglazed Ceramic Tile... | Check Latest Price |
| # | Preview | Product | |
|---|---|---|---|
| 1 |

|
BEACON Mosaic Glue - Non-Toxic & Water Resistant, Ideal for All Tiles & Surfaces, 2-Ounce | Check Latest Price |
Imagine small, brightly colored ceramic tiles arranged in a simple grid or playful pattern. The glossy surface catches light, creating a lively, dynamic effect. Bright reds, blues, yellows, or greens contrasted with neutral cabinetry make the space pop. You can also mix colors in a pattern or gradient for a customized, energetic look.
Use bold ceramic tiles as a splash of color behind your stove or as a full backsplash in smaller kitchens. Pair them with white or neutral cabinets to make the colors stand out. For a more subdued approach, incorporate a single color into a mosaic or border. Seasonal or thematic color schemes can be swapped out easily for holidays or moods.
Choose durable, glazed ceramic tiles with vibrant pigments. Prepare your wall by cleaning and smoothing it, then apply adhesive with a notched trowel. Lay tiles in your chosen pattern, ensuring consistent spacing with spacers. Cut tiles with a tile cutter for edges and around outlets. Grout with a matching or contrasting color, then wipe clean for a bright, flawless finish.
Add decorative borders or accents in a contrasting color or pattern for extra visual interest. Incorporate seasonal or themed tiles to keep the design fresh. Use LED lighting or under-cabinet lights to enhance the brightness and colors. Personalize further with custom mosaics or initials embedded in the design.
Bright ceramic tiles prove that bold colors can be sophisticated and fun. They transform your kitchen into a lively, inviting space that reflects your personality. With proper placement and lighting, they create a cheerful environment perfect for cooking and entertaining. Ready to brighten things up?
12. Mirrored Tiles to Reflect Light and Expand Space
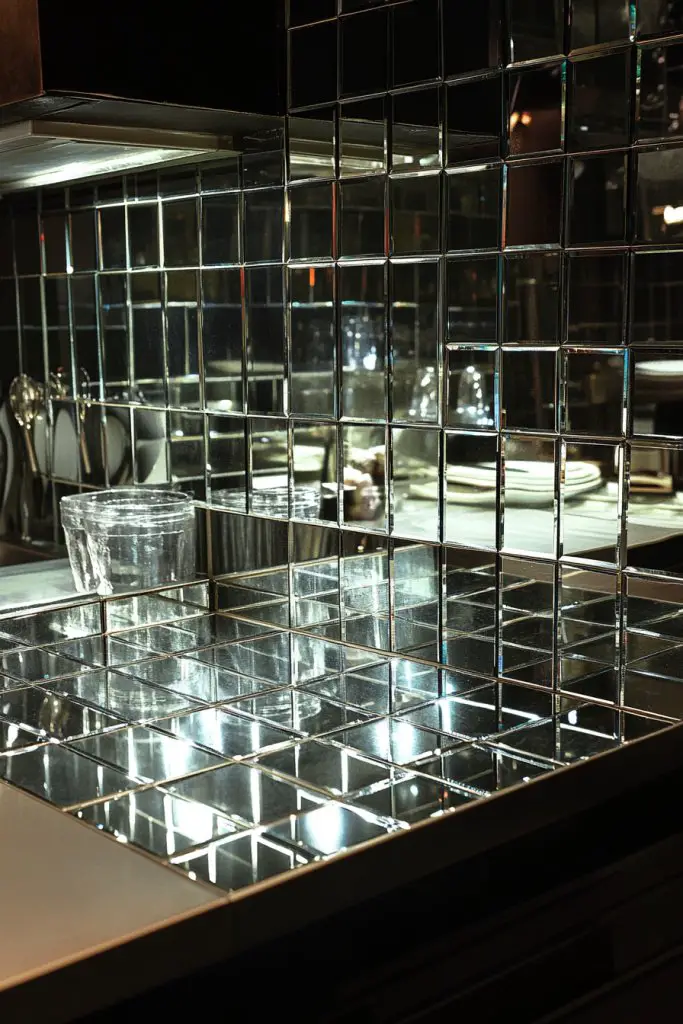
Feeling like your kitchen is cramped or dark? Mirrored tiles can help reflect light and create the illusion of more space. They add a sleek, glamorous touch that’s perfect for small or dimly lit rooms. Want to make your kitchen feel brighter and bigger without knocking down walls?
Recommended Products to replicate this idea
| # | Preview | Product | |
|---|---|---|---|
| 1 |

|
Ruomeng Home Gym Mirrors 12 Inch x 12Pcs Wall Mounted Mirror Glass Frameless Full Length Mirror... | Check Latest Price |
| # | Preview | Product | |
|---|---|---|---|
| 1 |
|
Adhesive Mirror Sheet 6 x 9 Inches Flexible Mirrors Sheets (4 pack) | Non-Glass Self Adhesive Stick... | Check Latest Price |
Imagine a wall lined with small, reflective tiles that bounce light from your fixtures and windows around the room. The mirrored surfaces amplify natural light, making the space feel airy and open. The glossy finish adds a high-end, modern vibe, especially when paired with minimalist cabinetry or metallic accents. The reflection also creates depth, visually expanding your space.
Use mirrored tiles as a full backsplash or as a decorative strip to highlight focal areas. Mix them with matte or textured tiles to add contrast and prevent reflections from becoming overwhelming. They work well in contemporary spaces and can be combined with sleek cabinetry or glass-front cabinets for a cohesive look. Seasonal decor can include adding colored or frosted glass panels.
Select high-quality mirrored ceramic or glass tiles designed for interior use. Prepare your wall by cleaning thoroughly, then carefully apply adhesive, ensuring no air bubbles or smudges. Lay the tiles with precise spacing, and cut around outlets or edges with a glass cutter or tile saw. Use a clear sealant if needed, to prevent moisture damage. Regular cleaning with a glass cleaner keeps the reflective surface pristine.
Frame sections with decorative trim or LED lighting to highlight the reflective surfaces. Combine with clear or frosted glass panels for variety. Decorate nearby with metallic or minimalist fixtures to enhance the modern look. Incorporate a mirror-like backsplash in small nooks or behind open shelves for extra depth.
Mirrored tiles significantly boost light and space perception, making small kitchens feel expansive. They add a luxurious, contemporary flair that impresses guests. With proper placement and maintenance, they remain stunning and functional. Ready to reflect your style and brighten your space?
13. Textured Concrete Look Tiles for Urban Chic

Craving an urban, minimalist vibe that exudes cool sophistication? Concrete-look tiles offer an edgy yet sleek aesthetic that’s both modern and low-maintenance. They’re perfect if you want a stylish backdrop that’s easy to clean and versatile enough to match various decor themes. Want the industrial feel without the mess of real concrete?
Recommended Products to replicate this idea
| # | Preview | Product | |
|---|---|---|---|
| 1 |

|
Dumawall+ Waterproof Wall Tiles, Easy-to-Install, Tongue & Groove System, UV Resistant, Strong &... | Check Latest Price |
| # | Preview | Product | |
|---|---|---|---|
| 1 |

|
Maitys 7 Pcs Sensory Mat for Autistic Children Massage Game Mats Orthopedic Puzzle Play Mats... | Check Latest Price |
Visualize tiles with a matte, textured surface resembling poured concrete, with subtle variations in tone and texture. The finish adds depth and a raw charm that pairs well with metal, wood, or colorful accents. They create a subtle, understated background that lets other design elements stand out. When illuminated, the textured surface casts gentle shadows, enhancing the urban feel.
Choose large format tiles for a seamless look or smaller mosaic pieces for more texture. Pair with sleek modern cabinetry, exposed piping, or vintage fixtures for a layered industrial vibe. These tiles work well in open kitchens and are compatible with both light and dark color schemes. Seasonal styling can include adding warm textiles or metallic accessories.
Select high-quality concrete-look tiles with a durable, stain-resistant surface. Prepare your wall by cleaning it thoroughly and applying a primer if necessary. Use a high-quality adhesive suitable for textured surfaces, then lay the tiles carefully, maintaining consistent spacing. Use spacers for straight lines, and cut tiles with an angle grinder or tile cutter. Finish with a matching grout, then seal for longevity and stain resistance.
Add warmth with wood or metal accents, or incorporate colorful accessories to soften the industrial edge. Use lighting to highlight the textured surface, creating shadows and depth. Mix with other materials like glass or polished metals for contrast. Personal touches like stenciled patterns or painted sections can add character.
Concrete tiles bring a contemporary, urban edge that’s both stylish and practical. They’re easy to maintain and age beautifully, adding character over time. Perfect for modern, minimalist, or industrial-inspired kitchens. Ready to embrace the chic, raw aesthetic?
14. Subway Tile with Colored Grout for a Subtle Twist
Looking to keep the classic subway tile but want a little extra flair? Using colored grout creates a subtle yet eye-catching twist that adds depth and personality. It’s a simple update that transforms a familiar pattern into something uniquely yours. Ready to make the classic tile pop without replacing it?
Recommended Products to replicate this idea
| # | Preview | Product | |
|---|---|---|---|
| 1 |

|
StyloVue 100 Pieces Peel and Stick Backsplash for Kitchen, 3" x 6" PVC Subway Tile 2025 Upgraded... | Check Latest Price |
| # | Preview | Product | |
|---|---|---|---|
| 1 |

|
Red Devil 042260 Pre-Mixed Tile Grout - Professional Quality, Excellent Adhesion, Ideal for Wall &... | Check Latest Price |
Imagine crisp white subway tiles with contrasting or matching colored grout lines that highlight the pattern. The colored grout can be bold or muted, depending on your style, providing a nuanced visual interest. The grout’s hue can complement your cabinetry, countertops, or accessories, tying the look together seamlessly. The slight variation in grout color adds a layer of complexity and sophistication.
Opt for a monochrome scheme with a contrasting grout color for subtle drama, or choose a tone that matches your overall palette for a more cohesive look. This technique works well in small kitchens or as an accent in larger spaces. You can also experiment with multiple grout colors in different sections for a patchwork effect. Seasonal updates can include swapping grout colors for a fresh look.
Start by thoroughly cleaning the tiles and preparing your grout. Mix the grout according to the manufacturer’s instructions, choosing a color that enhances or contrasts with your tiles. Apply the grout with a rubber float, pressing it into the joints. Wipe off excess with a damp sponge before it dries, then seal the grout for durability. Proper curing time ensures the color stays vibrant and the joints stay sealed.
Use different grout colors to create patterns, borders, or accents within the tile layout. Pair with matching or contrasting caulk around edges for a seamless finish. Incorporate decorative trims or moldings to frame the tile area. Seasonal or mood-based color updates can keep the look fresh and engaging.
A small change like colored grout breathes new life into classic subway tiles. It’s an affordable way to refresh your kitchen and showcase your personal style. When styled thoughtfully, it offers a sophisticated, understated twist that impresses. Ready to add subtle depth and character?
15. Recycled Glass Tiles for Eco-Friendly Style
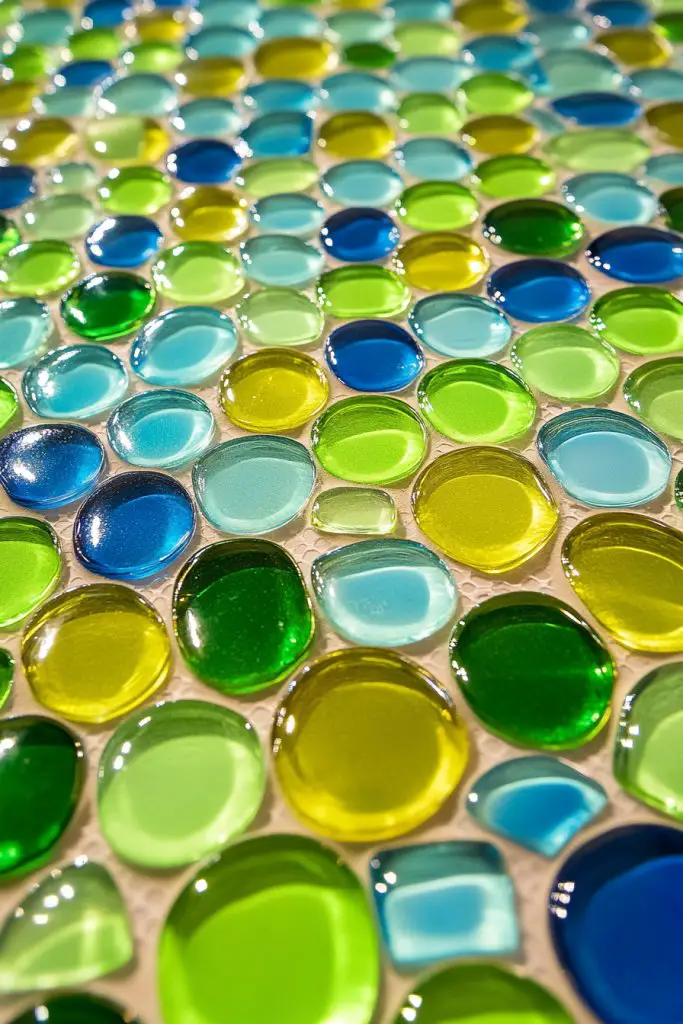
Want to make your kitchen more sustainable without sacrificing style? Recycled glass tiles offer an eco-friendly option that’s vibrant, modern, and planet-conscious. They bring a unique shimmer and color that’s hard to match with other materials. Plus, choosing recycled helps reduce waste and supports green living.
Recommended Products to replicate this idea
| # | Preview | Product | |
|---|---|---|---|
| 1 |
|
BEACON Mosaic Glue - Non-Toxic & Water Resistant, Ideal for All Tiles & Surfaces, 2-Ounce | Check Latest Price |
| # | Preview | Product | |
|---|---|---|---|
| 1 |

|
Art3d 4 Sq Ft Glass Backsplash Tiles, 32-Piece Glass Peel and Stick for Kitchen or Bathroom, 3" x 6"... | Check Latest Price |
Picture tiny shards of recycled glass arranged in a mosaic or grid pattern, reflecting light in a kaleidoscope of colors. The glossy, translucent surfaces create a luminous effect, especially when illuminated by natural or artificial light. The variety of colors—from ocean blues to earthy greens—adds a lively, sustainable touch to your space. Their textured surface also adds visual depth.
Use colorful glass tiles as a full backsplash or combine them with neutral materials for a balanced look. They work well in modern or coastal decor styles, and their reflective qualities brighten smaller kitchens. Mix different shades or shapes for a custom mosaic. Seasonal styling can include pairing with natural materials like cork or reclaimed wood.
Choose high-quality, recycled glass tiles from reputable suppliers. Prepare your wall by cleaning and smoothing it, then apply a suitable adhesive. Lay the tiles carefully, pressing firmly to avoid air pockets. Use spacers for even joints and cut tiles with a wet saw or tile cutter. Grout with a clear or matching color, then clean excess grout and seal if needed for longevity.
Incorporate metallic or iridescent glass tiles for extra shimmer. Add decorative borders or accents with different colors or finishes. Pair with natural textures like stone or wood for a balanced eco-friendly aesthetic. Use lighting to enhance the reflective qualities and highlight the colors.
Recycled glass tiles demonstrate that style and sustainability can go hand in hand. They add a vibrant, modern touch that’s eco-conscious and beautiful. With proper care, they’ll continue to sparkle and inspire for years. Ready to support the planet while upgrading your kitchen?
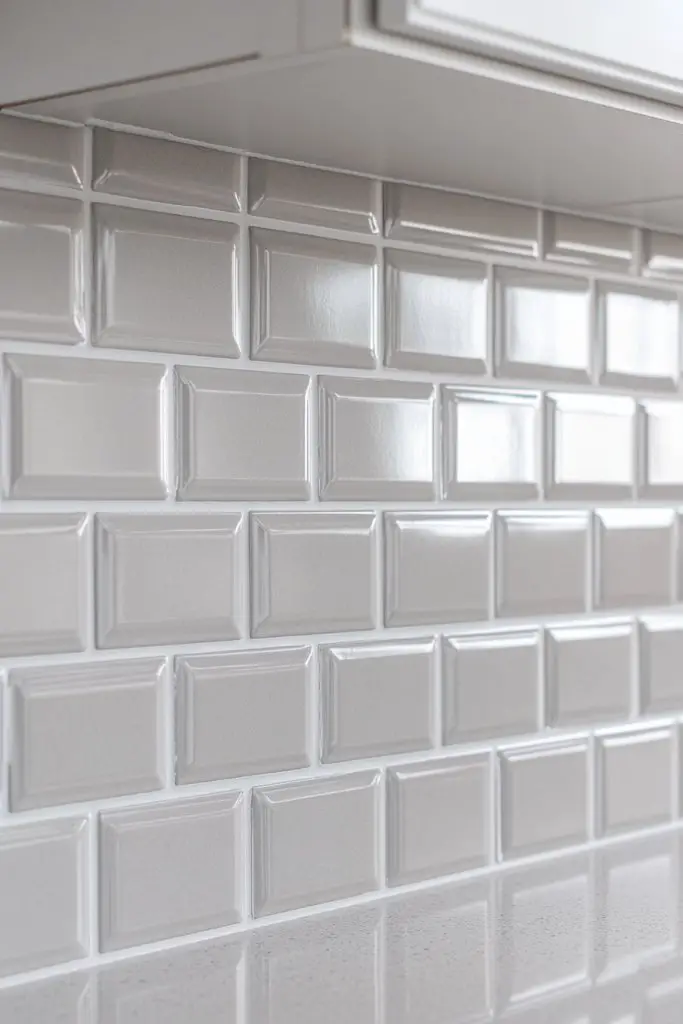
16. Beveled Edge Tiles for Subtle Depth
Looking to add a touch of luxury without overwhelming your space? Beveled edge tiles create a subtle sense of depth and dimension that elevates your backsplash. They offer a refined look that’s perfect for both traditional and modern kitchens. Want a little luxury that’s understated but impactful?
Recommended Products to replicate this idea
| # | Preview | Product | |
|---|---|---|---|
| 1 |

|
3x6 White Glossy Finish Beveled Ceramic Subway Tile Shower Walls Backsplashes | Check Latest Price |
| # | Preview | Product | |
|---|---|---|---|
| 1 |

|
Red Devil 0425 Pre-Mixed Tile Grout Squeeze Tube, 5.5 oz., White | Check Latest Price |
Imagine small tiles with angled, beveled edges that catch light and create gentle shadows. The slight bevel adds a tactile quality and visual depth, making the surface more interesting than flat tiles. Whether in a glossy or matte finish, these tiles reflect light differently, adding sophistication and texture. They subtly catch the eye without dominating the space.
Choose larger tiles for a cleaner, contemporary look or smaller mosaics for intricate patterns. Use contrasting grout colors to emphasize the beveled edges or match the tile color for a seamless appearance. They work well in elegant kitchens with high-end fixtures or in more casual settings with textured accents. Seasonal changes can include different finishes or grout colors.
Select high-quality beveled tiles suited to kitchen environments. Prepare the wall surface by cleaning and leveling it thoroughly. Apply adhesive with a notched trowel, then lay the tiles carefully, ensuring the bevels are aligned. Use spacers for even lines and cut tiles as needed with a tile cutter. Grout with a color that highlights the beveled edges or blends for a softer look. Seal the grout for durability.
Highlight beveled edges with contrasting grout or metallic fillers for additional depth. Incorporate lighting to accentuate the bevels, creating subtle shadows. Frame the area with decorative molding or trim to enhance the luxurious feel. Personalize with custom patterns or layouts that emphasize the beveled detail.
Beveled tiles add a luxurious, crafted feel that enhances any kitchen style. They’re a subtle upgrade that creates visual interest and depth. When well-lit, they become a focal point of understated elegance. Ready to add depth with a touch of refinement?
17. Artistic Painted Tile Panels for Custom Flair
Want a truly unique backsplash that reflects your personality? Painted tile panels allow you to customize designs, patterns, or artwork directly on tiles. They transform your space into a personal gallery and add an artistic touch that’s impossible to find elsewhere. Ready to turn your backsplash into a statement piece?
Recommended Products to replicate this idea
| # | Preview | Product | |
|---|---|---|---|
| 1 |

|
Set of 9 Decorative Ceramic Tiles – Hand Painted Indoor & Outdoor – Spanish Artisan Top Kitchen... | Check Latest Price |
| # | Preview | Product | |
|---|---|---|---|
| 1 |
|
Art3dwallpanels 33 Pack 3D Wall Panel Diamond for Interior Wall Décor, PVC Flower Textured Wall... | Check Latest Price |
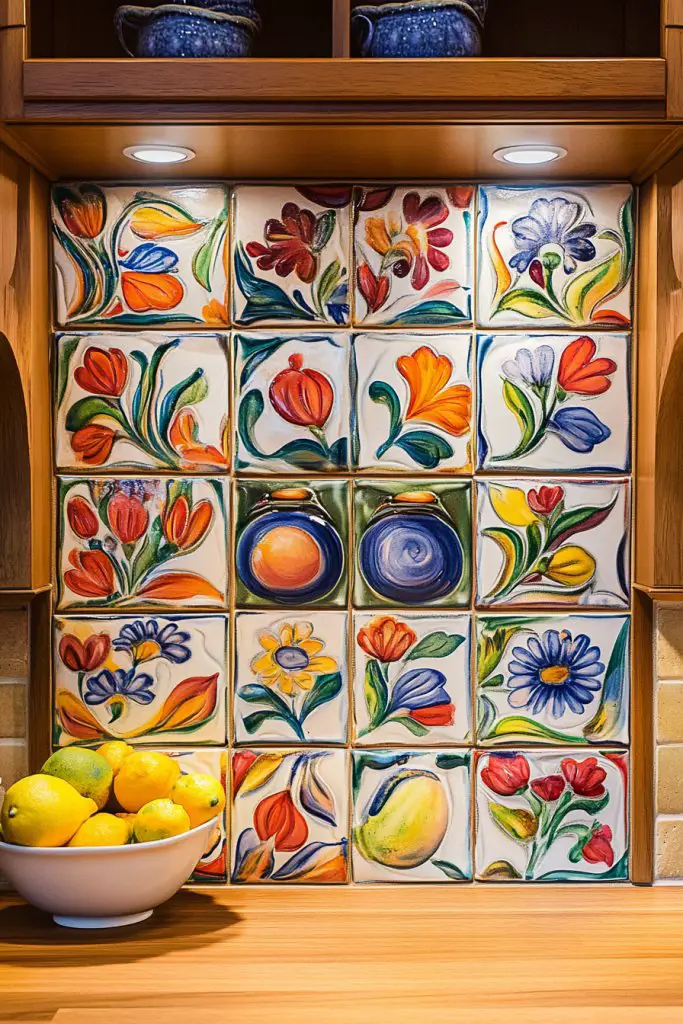
Picture a short section of wall decorated with hand-painted or stenciled tiles featuring geometric patterns, abstract art, or whimsical designs. The painted surface adds a layer of personal expression, creating a one-of-a-kind focal point. The vibrant colors or subtle monochromes can be tailored to match your decor, making your kitchen truly yours. The textured surface of painted tiles offers both visual and tactile appeal.
Use painted tiles as a border, focal strip, or full wall feature. Combine different artistic styles—modern abstract, traditional motifs, or playful doodles—to suit your personality. Pair with plain tiles or neutral cabinetry to let the artwork shine. Seasonal themes, personal initials, or custom illustrations can be incorporated for special occasions.
Start by selecting high-quality, glaze-compatible tiles. Sketch your design or pattern before painting, then use ceramic or glass paints suitable for tile surfaces. Carefully paint your design with fine brushes, sealing each layer with a clear, heat-resistant varnish or sealant. Allow ample drying time between coats. Optional: hire a professional artist for intricate designs. Protect your artwork from moisture and wear with proper sealing.
Frame painted tiles with decorative borders or complementary tiles. Incorporate metallic or glitter accents for extra flair. Change your designs seasonally or for special events. Use lighting or subtle fixtures to highlight the artwork’s details. Personal touches like initials, quotes, or custom motifs make the backsplash uniquely yours.
Artistic painted tiles turn your kitchen into a canvas of creativity. They showcase your personality and style, making the space truly original. With a bit of effort, you can create a stunning, personalized feature that’s both functional and artistic. Ready to unleash your inner artist?
Conclusion
Exploring these short backsplash ideas reveals just how much style and personality you can add within a compact space. Whether you prefer modern, rustic, or eclectic designs, there’s a perfect option to suit your taste. Don’t hesitate to try out these ideas and transform your kitchen into a stunning, personalized haven. Your dream kitchen is just an inspiring backsplash away!