
19 Small Covered Outdoor Kitchen Ideas for Functional Cooking
Imagine transforming your backyard into a cozy culinary haven without taking up too much space—that’s the magic of small covered outdoor kitchens! These clever setups are gaining popularity because they maximize functionality while fitting seamlessly into even the tiniest outdoor areas, making outdoor cooking more accessible and enjoyable.
In this article, you’ll discover a variety of inventive small covered outdoor kitchen ideas that combine style and practicality. From compact grilling stations to clever storage solutions, these ideas will inspire you to create your own outdoor retreat, perfect for gatherings or peaceful evenings under the stars.
1. Compact Modular Countertop Stations with Built-In Storage
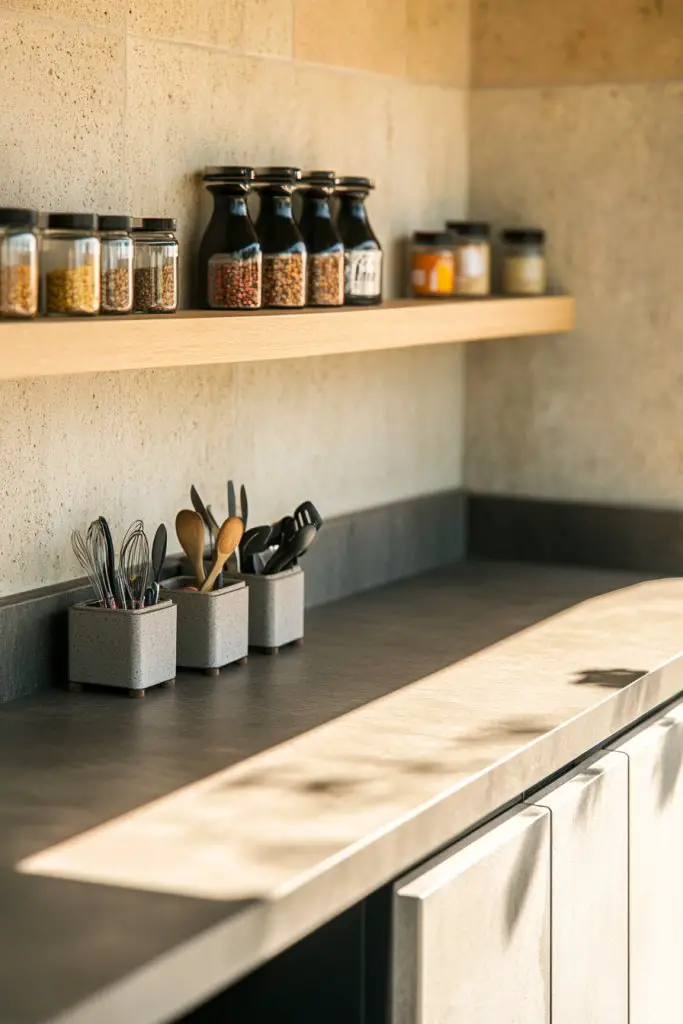
Ever feel like your outdoor kitchen is a chaotic mess, with utensils and spices scattered everywhere? Space is limited, but you still want a functional cooking area that feels organized and stylish. Modular countertop stations are the perfect way to maximize every inch without sacrificing style or convenience. They promise a clutter-free zone that makes outdoor cooking less stressful and more enjoyable.
Recommended Products to replicate this idea
| # | Preview | Product | |
|---|---|---|---|
| 1 |

|
Ikee Design Wooden Countertop Storage Cabinet with Wavy Magnetic Door, Adjustable Shelves, Removable... | Check Latest Price |
| # | Preview | Product | |
|---|---|---|---|
| 1 |

|
Gritin 10.2inch Under Cabinet Lighting Rechargeable -84 LED Super Bright,3-Color& 5 Level... | Check Latest Price |
Imagine sleek, rectangular modules with smooth, weather-resistant surfaces in shades of gray or warm wood tones. Each station features built-in cabinets and drawers, neatly tucked away for utensils, spices, and cookware. The modular units form a compact, cohesive work area, with a textured countertop that resists spills and stains. Soft LED under-lighting highlights the storage while creating a cozy ambiance as evening falls. It’s a clean, organized look that invites you to cook with ease.
Choose minimalist metal frames for a modern feel or warm wooden finishes for rustic charm. Adjust the size and number of modules based on your space—small patios might opt for a single station, while larger setups can expand with additional modules. Incorporate open shelves for easy access or hide everything behind sleek sliding doors. For seasonal changes, swap out hardware or add colorful textiles to customize the look. This system adapts effortlessly to your aesthetic and functional needs.
Start by measuring your available space carefully. Select modular components that fit comfortably without crowding. Use weatherproof materials like stainless steel, treated wood, or composite to withstand outdoor elements. Assemble the units using durable hardware, ensuring they are level and stable. Integrate built-in storage with adjustable shelves or removable trays for flexibility. Finish with a resilient countertop surface—quartz, granite, or concrete—that’s both attractive and easy to clean. A drill, level, and some basic tools are all you need for assembly.
Add personalized touches like custom drawer handles, color-coordinated accessories, or decorative hardware. Incorporate a fold-down cutting board on one module for extra prep space, or install magnetic strips inside drawers for knives. Use weatherproof fabric or textured mats on top for added comfort and grip. Consider installing a small, portable spice rack on the side for quick access. These tweaks make your station truly yours, combining function with your unique style.
With modular stations, you get a professional-grade setup that’s easy to expand or reconfigure. It transforms your outdoor cooking experience into something more organized and enjoyable. Plus, it’s a testament to how smart design can turn even small spaces into culinary havens. Ready to take control of your outdoor kitchen? Your perfect, clutter-free cooking zone is just a few modular pieces away.
2. Pergola with Concealed Lighting and Ventilation
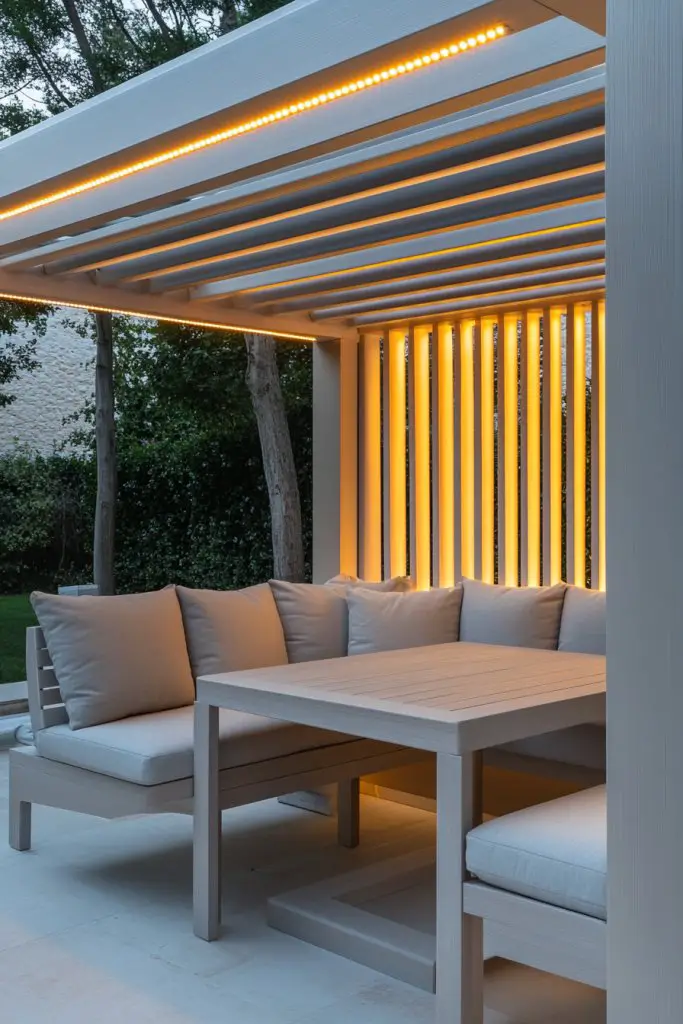
Ever wished your outdoor cooking nook felt a little more like an intimate retreat? A simple pergola can do wonders, but adding ambiance and ventilation turns it into a true haven. It’s not just about shade; it’s about creating a cozy yet functional space for evening meals and gatherings. With concealed lighting and smart ventilation, your pergola becomes the ultimate outdoor kitchen sanctuary.
Recommended Products to replicate this idea
| # | Preview | Product | |
|---|---|---|---|
| 1 |

|
Govee Smart Outdoor String Lights 2, 144ft Outdoor Lights with Dimmable Warm White LED Bulbs, 47... | Check Latest Price |
| # | Preview | Product | |
|---|---|---|---|
| 1 |

|
DEWENWILS 2 Pack 120V AC Fan, Waterproof Exhaust Fan 120mm, 18W 2850RPM 90CFM, DIY Cooling Fan for... | Check Latest Price |
Picture a sturdy wooden or metal pergola with sleek, hidden vents integrated into the beams, allowing airflow without exposing fans or ducts. Soft, warm LED string lights are tucked discreetly along the rafters, casting a gentle glow over the cooking and dining area. The space feels open yet inviting, with textured fabric curtains or weatherproof shades that can be drawn for privacy or sun protection. The ambient lighting flickers softly, blending seamlessly with the natural surroundings. It’s a stylish, comfortable space that beckons you to cook and relax.
Choose natural materials like cedar or reclaimed wood for a rustic look, or go sleek with painted aluminum or steel for a modern vibe. Add decorative elements such as woven textiles or sculptural metal accents to elevate the style. Adjust the height and coverage of the pergola to suit your climate—higher for breezes, lower for shade. Incorporate removable shades or wind screens for seasonal adaptability. This design can be customized to match your outdoor aesthetic, from boho chic to contemporary minimal.
Begin by planning your pergola’s size, ensuring enough clearance for cooking and dining. Use weather-resistant framing materials suited for outdoor use. Conceal ventilation vents within the beams, connecting them to hidden ducting or passive airflow systems. Install concealed LED wiring along the structure, attaching string lights or integrated fixtures. Add weatherproof shades or curtains that can be rolled or drawn to control sun and wind. Finish with a durable, textured flooring that complements your pergola’s style and withstands outdoor elements.
Personalize with decorative canopy fabrics, patterned curtains, or even hanging lanterns for extra charm. Incorporate a small built-in bench or table beneath the pergola for casual seating. Upgrade lighting with dimmable or color-changing options to suit mood or occasion. Consider mounting a weatherproof speaker system for music or installing a small outdoor heater for chillier evenings. These touches make your pergola feel uniquely yours, blending comfort with style.
This setup transforms a simple structure into an elegant outdoor kitchen retreat that’s perfect for entertaining. It combines functionality with aesthetic appeal, making every meal feel special. The concealed lighting and ventilation ensure a seamless look that impresses guests and elevates your outdoor living game. Are you ready to turn your backyard into a stylish escape? Your pergola paradise awaits, complete with cozy ambiance and fresh air.
3. Fold-Down Barbecue and Prep Station
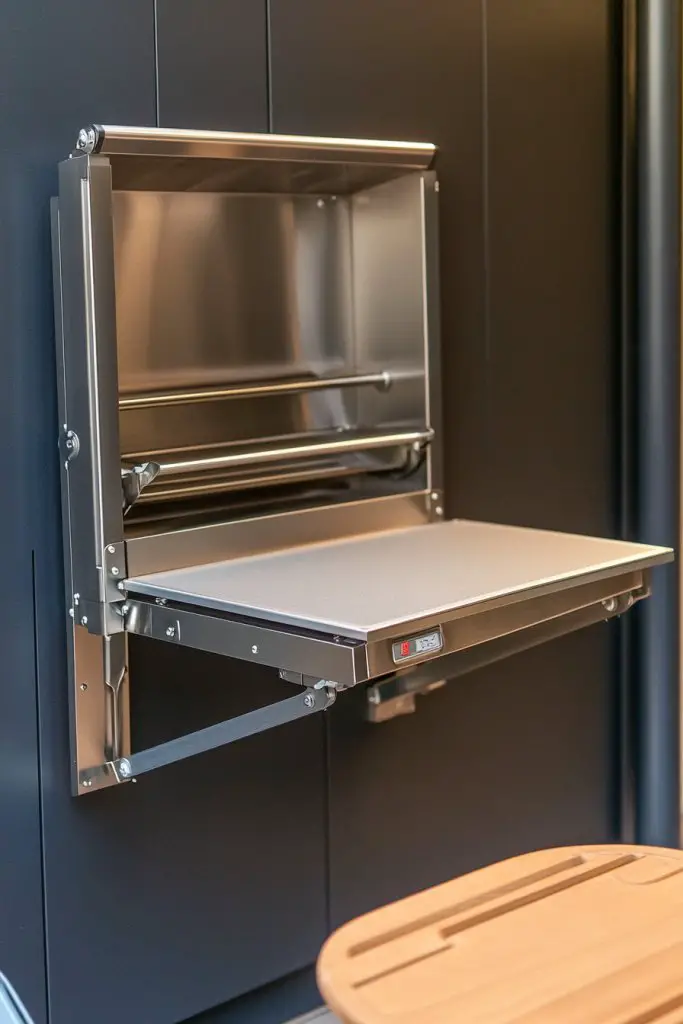
Limited space doesn’t mean you have to sacrifice your grilling dreams. A fold-down barbecue and prep station offers a compact solution that hides away when not in use but opens up for serious cooking. It’s perfect for small patios or balconies where every inch counts. If you crave a functional outdoor kitchen without cluttering your yard, this idea is your new best friend.
Recommended Products to replicate this idea
| # | Preview | Product | |
|---|---|---|---|
| 1 |

|
GRILL DEPOTS Propane Gas Grill with Folding Side Tables, 3-Burner Gas Grill with Cast Iron Grates... | Check Latest Price |
| # | Preview | Product | |
|---|---|---|---|
| 1 |

|
12"x12"x0.5" Stained Glass Supplies - Heat Resistant Work Surface, Cutting Mat, Starter Kit, Tools... | Check Latest Price |
Imagine a sleek countertop mounted on the side of your wall, with a grill that folds down smoothly into a sturdy, weatherproof casing. When folded up, it becomes a seamless surface for prepping ingredients or serving drinks. The station features a textured work surface, with hidden compartments for utensils and tools. When opened, a sturdy, built-in grill pops out, ready for action. The entire setup blends into your outdoor decor, keeping your space looking tidy and modern.
Opt for stainless steel for a contemporary look or treated wood for a rustic vibe. Choose a design with adjustable height or extendable prep surfaces for added versatility. This concept works well with small built-in shelves or magnetic strips for tools, avoiding clutter. Seasonal adaptations could include adding weatherproof covers or protective screens for winter use. You can customize the aesthetic with colorful handles or patterned panels to match your style.
Start by selecting a sturdy, weatherproof wall or corner to mount your station. Use heavy-duty brackets and anchors for secure installation. Choose a fold-down grill with a reliable locking mechanism, ensuring it stays firm when in use. Attach a textured, heat-resistant countertop surface with weatherproof sealant. Incorporate hidden drawers or wall-mounted racks for utensils, spices, and tools. Ensure all electrical or gas connections meet safety standards, and test the folding mechanism thoroughly before regular use.
Add custom touches like colorful handles, patterned panels, or decorative hardware. Install a small fold-out shelf or hooks for extra utensils or condiments. Consider a built-in cutting board that folds out from the side for quick prep. Use weatherproof fabrics or mats to add a splash of color and comfort. These small tweaks make your fold-down station both practical and uniquely yours.
This clever setup turns a tiny space into a fully functional outdoor kitchen zone. It’s a smart way to maximize your yard’s potential while keeping things simple and stylish. Plus, you’ll impress friends with your innovative, space-saving design. Ready to fold out your culinary dreams? Your compact outdoor kitchen is just a fold away.
4. Multi-Use Island with Sink and Seating Area
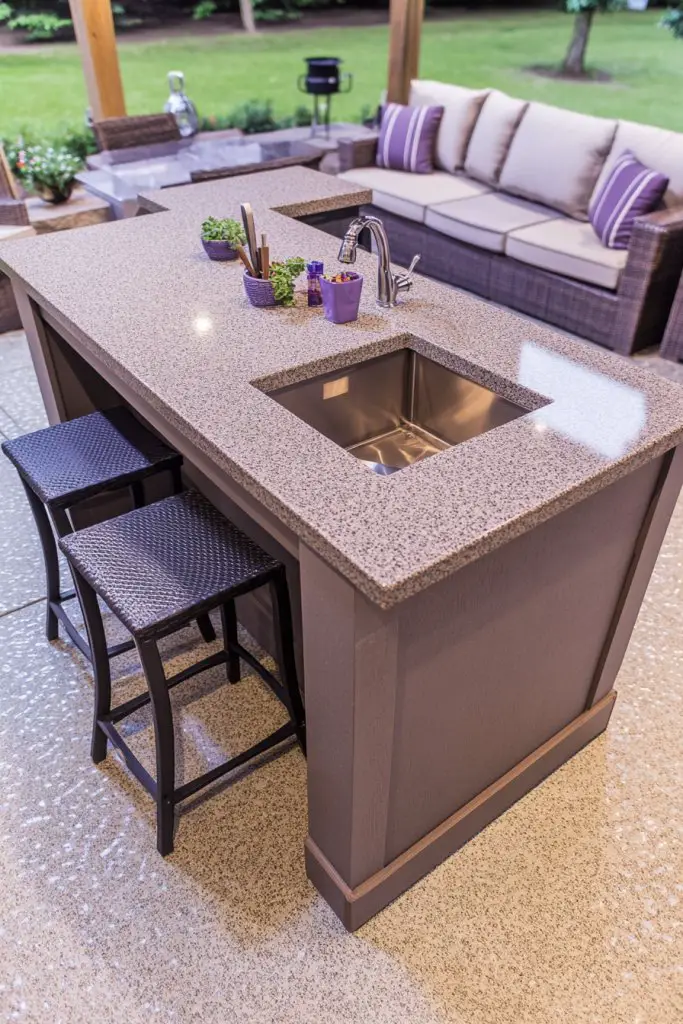
Ever wished your outdoor kitchen could do double duty? A multi-use island with a sink and seating area combines prep, cleanup, and dining into one compact, versatile piece. It’s perfect for small patios where space is tight but functionality is king. If you’re tired of running back and forth between different stations, this idea will make your outdoor cooking experience smoother and more social.
Recommended Products to replicate this idea
| # | Preview | Product | |
|---|---|---|---|
| 1 |

|
ARTLINE Black Kitchen Sink, Stainless Steel Single Bowl Sink, Drop In/Topmount Workstation Sink with... | Check Latest Price |
| # | Preview | Product | |
|---|---|---|---|
| 1 |

|
Nalupatio Modern Bar Stools Set of 2, Adjustable Faux Leather Upholstered Swivel Bar Stools, Counter... | Check Latest Price |
Picture a sturdy, weatherproof island made from treated wood or composite materials, with a smooth, textured countertop. One side features a built-in sink with a splash guard, while the other extends into a bar-height seating area. The island’s surface hosts a cutting board, prep bowls, and a small built-in cooler. Underneath, storage cabinets keep utensils and cookware out of sight. The seating area has comfortable, weather-resistant stools, inviting friends to gather around while you cook.
Choose materials that match your outdoor decor—rustic wood for a cozy vibe or sleek stone for a modern look. Adjust the size based on your space, making it wider or narrower as needed. Add decorative elements like textured panels or colorful cushions on the stools. Seasonal changes can be made by swapping out cushions or adding weatherproof textiles. For winter, consider installing a retractable canopy or windbreaks to keep the space usable year-round.
Begin by measuring your available outdoor area carefully. Select a durable, weather-resistant base material like treated cedar, composite, or stone. Incorporate a high-quality, easy-to-clean sink with plumbing that’s suited for outdoor use. Use a seamless, textured surface for the countertop to prevent spills and stains. Install storage cabinets or shelves underneath for utensils, pots, and pans. Finish with weatherproof seating and a sturdy base that can handle regular use and exposure to the elements.
Personalize with colorful cushions, decorative trim, or custom hardware. Add a built-in spice rack or knife holder for efficiency. Incorporate a small fold-out table or extra surface for additional prep space. Use textured or patterned outdoor fabrics to add visual interest. These small touches make your island a unique, functional centerpiece that fits your lifestyle perfectly.
A multi-use island elevates outdoor living, transforming your yard into an all-in-one culinary hub. It encourages gathering and makes cooking a group activity. The seamless blend of prep, cleanup, and dining boosts efficiency and enjoyment. Ready to create your outdoor kitchen powerhouse? Your multifunctional island is the centerpiece your backyard deserves.
5. Vertical Herb Garden Wall for Fresh Flavors

Craving fresh herbs for your outdoor cooking but tired of cluttered pots taking up valuable space? A vertical herb garden wall offers a compact, stylish solution that keeps your flavors within arm’s reach. It’s perfect for small covered patios and adds a splash of greenery without sacrificing functionality. Plus, fresh herbs elevate every dish and make your outdoor kitchen feel vibrant and alive.
Recommended Products to replicate this idea
| # | Preview | Product | |
|---|---|---|---|
| 1 |

|
VECELO 5 Tier Vertical Garden Planter, Self Watering Stackable Planters with Wheels for... | Check Latest Price |
| # | Preview | Product | |
|---|---|---|---|
| 1 |

|
Bonviee Drip Irrigation System, 230FT Garden Watering System with Quick-to-Connect Fittings,... | Check Latest Price |
Visualize a sleek, modular wall-mounted system with small, weatherproof planters arranged in a grid pattern. The containers are filled with lush herbs like basil, thyme, and mint, their leaves bursting with color. The textured wall behind them adds visual interest, perhaps finished with neutral-toned tiles or treated wood panels. The herbs sway gently in the breeze, their fragrance blending with the aroma of grilled food. A small watering system or drip irrigation keeps everything thriving with minimal effort. It’s a living, breathing centerpiece that combines beauty and utility.
Choose geometric metal holders for a modern look or rustic wooden boxes for farmhouse charm. Adjust the height and arrangement to suit your space and style preferences. Incorporate additional elements like small chalkboard labels or decorative stones. Seasonal adaptations include swapping out herbs or adding edible flowers for visual appeal. This wall can also double as a decorative backdrop for your outdoor dining area, tying the space together.
Start by selecting a durable wall surface and planning your layout. Use weatherproof planters with drainage holes to prevent water buildup. Install sturdy brackets or hooks to hold the containers securely. Fill the planters with high-quality soil suited for herbs, and choose varieties that thrive in your climate. Set up a simple drip irrigation system or hand-water regularly. Regular pruning keeps herbs healthy, and harvesting fresh leaves boosts flavor and aroma for your dishes.
Label your herbs with customized markers or painted wooden tags for a charming touch. Add decorative stones or pebbles in the planters for visual interest. Incorporate a small chalkboard or marker board nearby to jot down recipes or garden notes. Use colorful planters or textured wall panels to complement your outdoor decor. Personal touches like fairy lights or decorative accents make the wall a lively focal point.
A vertical herb garden wall brings freshness and vitality to your outdoor kitchen, turning it into a chef’s paradise. It offers a sustainable way to enjoy homegrown flavors and enhances your culinary creativity. Plus, it’s a beautiful, functional feature that shows how smart design can maximize even small spaces. Ready to start growing your own flavor-filled oasis? Your garden wall is waiting to thrive.
6. Weatherproof Rattan or Metal Seating with Cushions
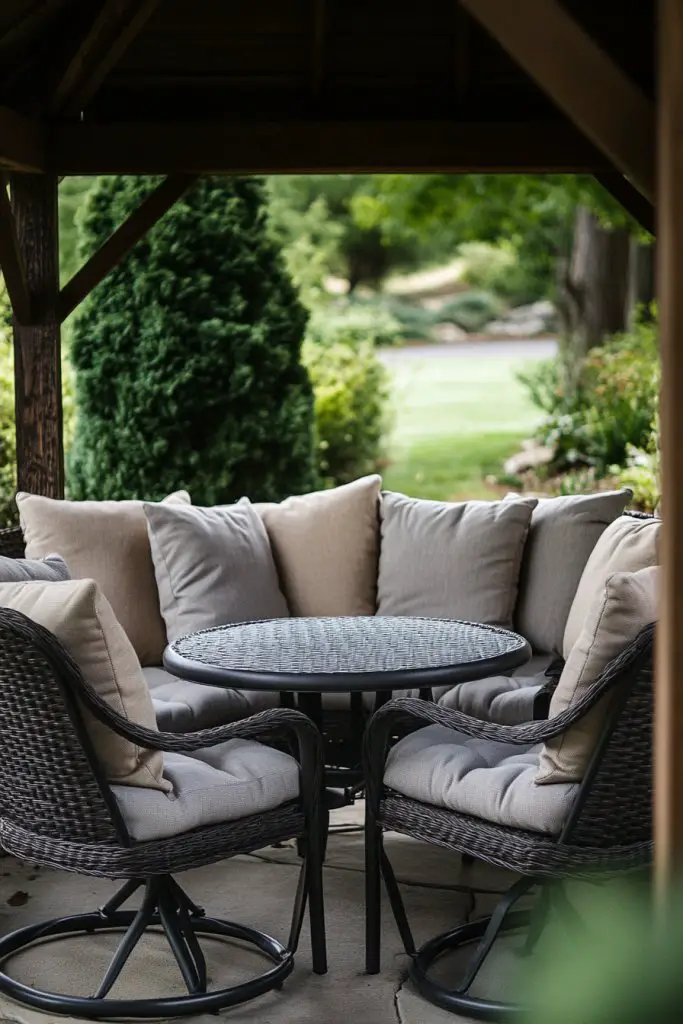
Tired of flimsy plastic chairs that crack or blow away at the slightest breeze? Durable outdoor seating that’s both stylish and weatherproof is a must-have for any small covered outdoor kitchen. Rattan or metal options with cushions offer a perfect blend of comfort and resilience. They transform your space into an inviting lounge where you’ll want to spend every free minute.
Recommended Products to replicate this idea
| # | Preview | Product | |
|---|---|---|---|
| 1 |

|
FDW | Metal Dining Chairs | Set of 4 | Black | Stackable Tolix Side Chairs with Backrest |... | Check Latest Price |
| # | Preview | Product | |
|---|---|---|---|
| 1 |

|
KCVV Outdoor Chair Cushions Set of 4,Patio Cushions for Outdoor Furniture,Waterproof Patio Chair... | Check Latest Price |
Picture sleek, curved metal chairs with a matte finish or woven rattan seats in earthy tones. Each chair is topped with plush, weather-resistant cushions in vibrant or neutral colors, adding comfort and style. The seating surrounds a compact outdoor table, ideal for casual meals or drinks. The textured cushions contrast beautifully with the sturdy frames, creating an inviting yet durable setting. Ambient lighting or a cozy fire pit nearby completes this picture of relaxed outdoor living.
Select metal frames with powder coating for corrosion resistance or natural rattan for a warm, textured look. Mix and match cushion colors and patterns to reflect your personality. For smaller spaces, opt for stackable or foldable chairs that can be tucked away when not needed. Seasonal cushions or weatherproof textiles can be swapped out to match holidays or moods. This flexible setup ensures your outdoor seating remains fresh and functional year-round.
Choose weatherproof materials like powder-coated aluminum, stainless steel, or synthetic rattan. Select cushions made from quick-drying, UV-resistant fabrics to handle outdoor conditions. Arrange the chairs around a small table with a textured, non-slip surface. Secure cushions with ties or velcro to prevent blowing away. Regularly clean frames with mild soap and water, and store cushions indoors during harsh weather for longevity. Add decorative throws or pillows for extra comfort.
Customize cushions with embroidered initials or vibrant patterns. Incorporate decorative elements like woven throws or textured seat pads to add visual interest. Use weatherproof covers to protect cushions during rain or snow. Consider adding small side tables or storage ottomans for convenience. Personal touches like string lights or a weatherproof sculpture can make your seating area uniquely yours. Comfort, style, and durability come together effortlessly.
Investing in quality outdoor seating elevates your entire outdoor kitchen experience. It creates a welcoming space for family and friends to gather and enjoy good food and conversation. Weatherproof options ensure your investment lasts through seasons, making your outdoor oasis sustainable. Ready to sit back, relax, and entertain? Durable seating transforms your yard into an outdoor living haven.
7. Built-In Charcoal or Gas Grill with Side Shelves
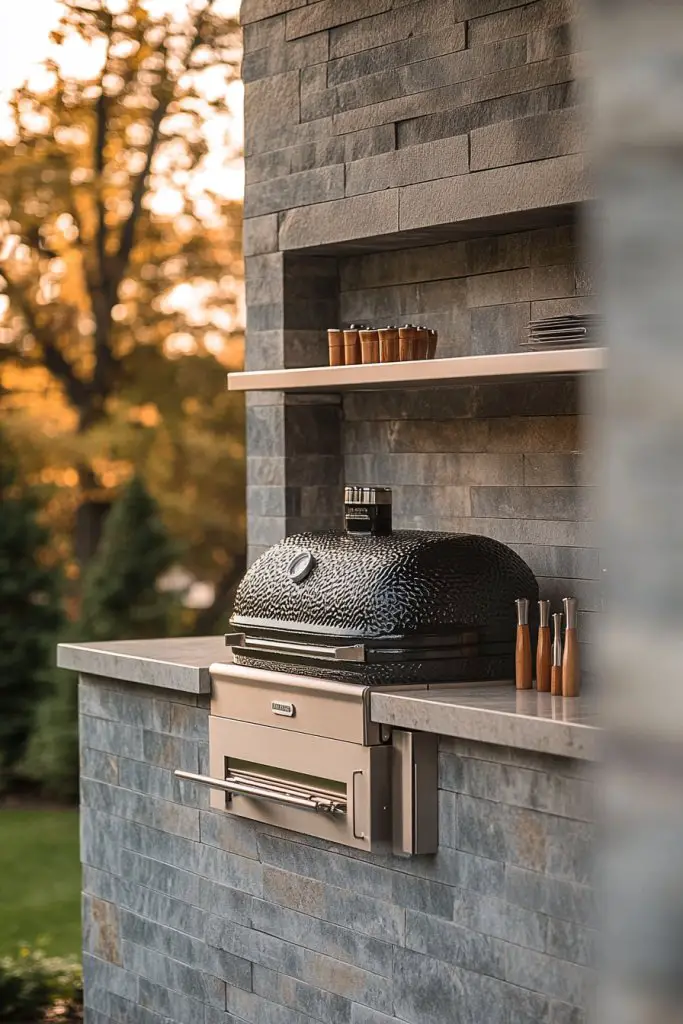
Cooking outside is great, but cluttered, makeshift grills can ruin the vibe. A built-in grill with side shelves offers a sleek, space-efficient way to elevate your outdoor cooking game. It’s ideal for small spaces where you want a professional look without sacrificing functionality. If you’re serious about grilling, this upgrade turns your yard into a culinary hotspot.
Recommended Products to replicate this idea
| # | Preview | Product | |
|---|---|---|---|
| 1 |

|
Spire Premium 5 Burner Built In Gas Grill Island Head, Stainless Steel 30 Inch Propane Grill with... | Check Latest Price |
| # | Preview | Product | |
|---|---|---|---|
| 1 |

|
SPACELEAD Slim Storage Cart 4 Tier,Bathroom Organizer Rolling Utility, Mobile Shelving Unit Slide... | Check Latest Price |
Envision a compact, stainless steel or black matte built-in grill seamlessly integrated into your counter. Flanking side shelves provide ample space for utensils, marinade bottles, or tools, all within easy reach. The grill’s sleek finish complements textured stone or tile accents, creating a modern, cohesive look. The setup includes a small work surface, perfect for prep or plating, with a sturdy base that withstands outdoor elements. It’s a streamlined, stylish focal point for your outdoor kitchen.
Opt for gas models with electronic ignition for ease or traditional charcoal for flavor. Add decorative tile or stone around the grill for a personalized touch. Incorporate fold-down or extendable side shelves for extra prep space when needed. Seasonal adaptations include weatherproof covers or retractable shades. You can also add a small, built-in smoker box or warming rack for advanced grilling options. The design can be tailored to match your aesthetic, from rustic to contemporary.
Start by selecting a durable, heat-resistant surface for the base—stone, concrete, or tile. Install the grill securely, ensuring proper ventilation and gas or charcoal connections. Attach side shelves with weatherproof brackets, making sure they are sturdy enough for heavy tools or dishes. Seal all joints with high-quality outdoor sealant to prevent water infiltration. Test the system thoroughly, checking for leaks or operational issues. Finish with a protective cover or canopy for year-round use.
Add custom hardware, like brushed nickel handles or decorative tile inlays. Incorporate built-in storage drawers or cabinets underneath for utensils and supplies. Use color-coordinated accessories or heat-resistant mats to enhance visual appeal. Consider installing a small, integrated prep station or cooler nearby for convenience. These upgrades make your grilling station both functional and stylish.
A built-in grill with side shelves not only boosts your outdoor cooking prowess but also elevates the overall look of your backyard. It’s a statement piece that combines form and function seamlessly. Once installed, you’ll enjoy effortless grilling sessions and stylish gatherings. Ready to cook like a pro? Your sleek outdoor kitchen is just a build away.
8. Overhead Storage Racks for Cooking Essentials
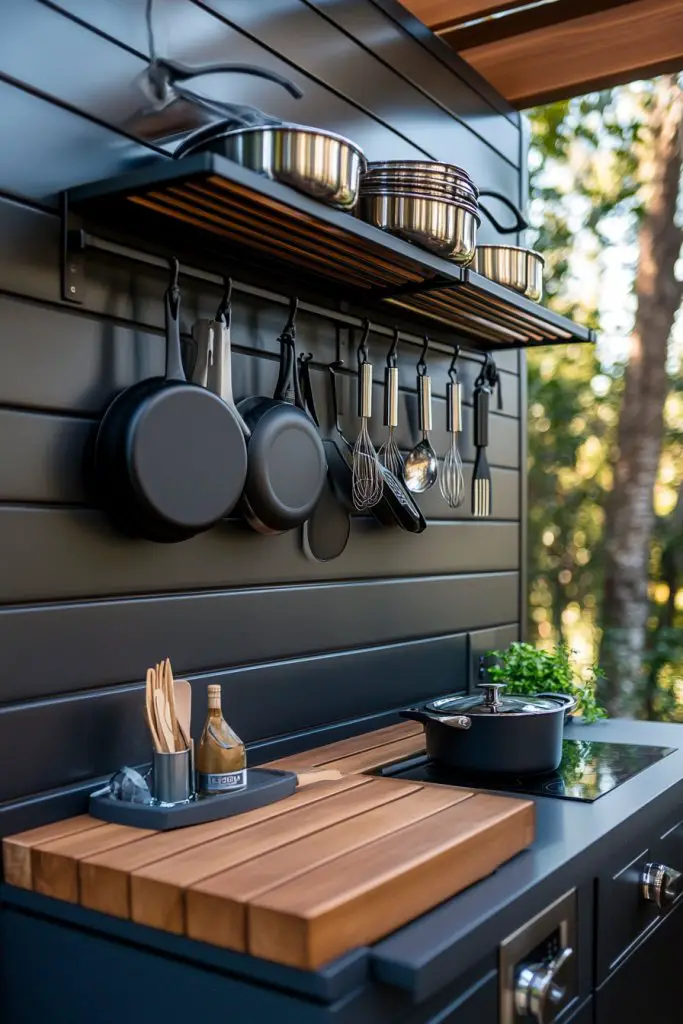
Cluttered countertops make outdoor cooking frustrating and inefficient. Overhead storage racks solve this problem by providing a dedicated space for pots, pans, and utensils. They free up valuable counter space and keep your essentials within easy reach. If you want a tidy, organized outdoor kitchen that feels effortless, this idea is a game-changer.
Recommended Products to replicate this idea
| # | Preview | Product | |
|---|---|---|---|
| 1 |

|
Cooks Standard Wall Mounted Wooden Pot Rack, 36 by 8-Inch | Check Latest Price |
| # | Preview | Product | |
|---|---|---|---|
| 1 |

|
OROPY 23 Inch Wall Mounted Pot Rack Storage Shelf with 2 Tier Hanging Rails 12 S Hooks included,... | Check Latest Price |
Picture sturdy metal or wooden racks mounted high on the wall or under the pergola beams. These racks hold hanging pots, pans, and utensils, all arranged neatly and visually appealing. Hooks and rails keep everything accessible, while a textured wall or tile backdrop adds visual interest. The storage system is streamlined, with a minimalist look that complements your outdoor decor. It’s a functional yet stylish way to keep your tools organized and ready for action.
Choose between sleek stainless steel, rustic wrought iron, or painted wood for a personalized look. Incorporate adjustable hooks or removable baskets for versatility. For seasonal changes, swap out hooks or add decorative elements like string lights or small planters (avoiding the restricted categories). Mount the racks at different heights to suit your height and reach. Combining open shelving with closed cabinets creates a balanced, adaptable setup.
Begin by selecting a sturdy wall or beam to mount your racks securely. Use weatherproof brackets and heavy-duty screws, ensuring they can support the weight of your cookware. Arrange hooks and rails in a pattern that suits your cooking style, with taller items hung higher for easy visibility. Install the racks with a level to keep everything aligned. Regularly check and tighten hardware, and clean the racks with mild soap and water to maintain their appearance. This setup enhances organization and efficiency.
Add decorative hooks painted in vibrant colors or with custom designs. Incorporate small magnetic strips or mini shelves for spices or small tools. Use weatherproof decals or labels for easy identification of utensils. Hang decorative elements like textured banners or fabric strips for a pop of color. Personal touches like these turn a functional space into a reflection of your style.
Overhead storage racks make your outdoor kitchen look professional and well-organized. They simplify cooking and cleanup, making outdoor entertaining easier and more enjoyable. Plus, they add a sleek, modern touch that impresses guests and elevates your backyard vibe. Ready to upgrade your storage game? Your clutter-free outdoor kitchen awaits.
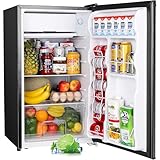
9. Compact Refrigerator and Beverage Cooler
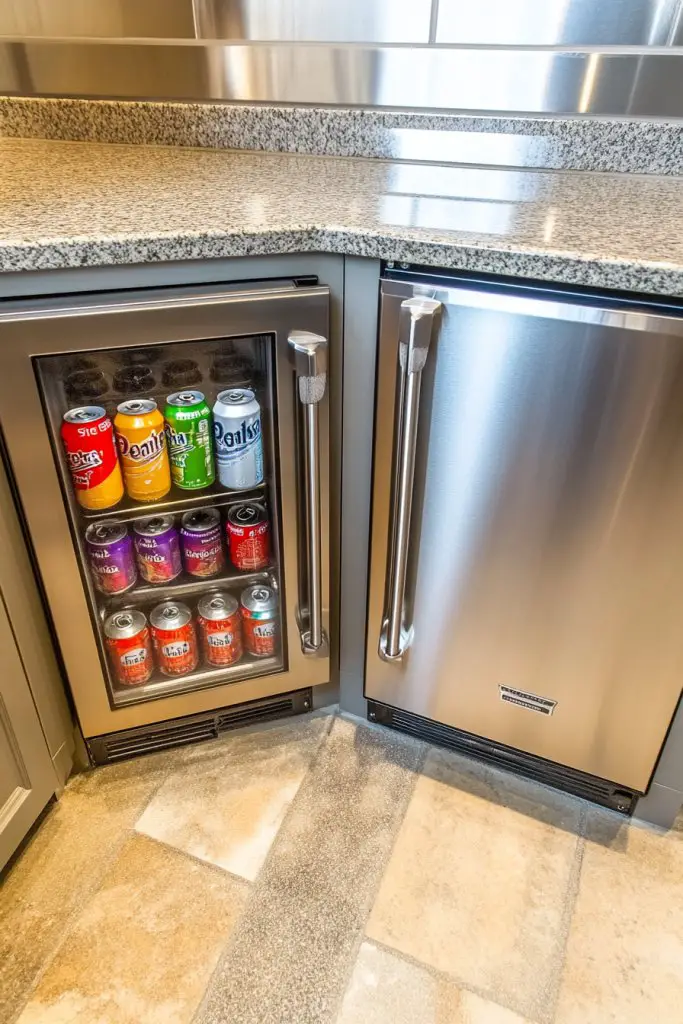
Running inside for drinks or ingredients during outdoor cookouts disrupts the vibe. A compact refrigerator or beverage cooler keeps everything chilled and accessible right outside. It’s a small addition that makes a big difference, especially when space is tight. If effortless refreshment is your goal, this idea is a must-have.
Recommended Products to replicate this idea
| # | Preview | Product | |
|---|---|---|---|
| 1 |
|
Upstreman 3.2 Cu.Ft Mini Fridge with Freezer, Single Door Mini Fridge, Dorm Fridge, Adjustable... | Check Latest Price |
| # | Preview | Product | |
|---|---|---|---|
| 1 |

|
Coleman Chiller 16qt Insulated Portable Cooler with Ice Retention & Large Carry Handle, Made in USA,... | Check Latest Price |
Visualize a weatherproof, sleek mini-fridge nestled into your outdoor kitchen cabinetry or beneath your island. It’s filled with chilled drinks, fresh ingredients, and perishable items, all within arm’s reach. The fridge’s exterior complements your overall style—stainless steel, matte black, or wood-paneled. Its compact size fits seamlessly into tight spaces, and transparent doors allow for quick selection. A small cooler on wheels nearby adds extra capacity for ice or overflow items, ensuring your setup is both functional and stylish.
Choose from built-in units for a seamless look or portable models for flexibility. Match the exterior finish to other appliances or cabinetry for a cohesive aesthetic. Seasonal adaptations include adding a weatherproof cover or insulating the unit for winter use. For larger gatherings, pair with a dedicated ice maker or additional cooling options. The design can be customized to fit your space and style preferences.
Start by measuring your available space and selecting a weatherproof, energy-efficient model. Install the fridge into your cabinetry or on a stable, level surface with proper ventilation. Ensure electrical connections are outdoor-rated and meet safety standards. For built-in units, create a flush fit with surrounding cabinetry, sealing all edges. Keep the inside organized with bins and dividers for efficient use. Regularly defrost or clean the unit to maintain optimal performance.
Add magnetic or decorative panels to match your outdoor decor. Incorporate a small, portable ice maker for continuous fresh ice. Use labels or color-coding to organize contents inside. Place a textured mat underneath to reduce noise and protect the surface. Personal touches like custom handles or LED lighting inside can elevate the look and functionality of your cooler.
Having a dedicated cooling station keeps your outdoor kitchen organized and efficient. It saves trips inside and ensures your ingredients and drinks stay fresh throughout your gathering. Plus, it adds a touch of luxury that elevates your outdoor space. Ready to chill in style? Your compact cooling setup is just a step away.
10. Durable, Slip-Resistant Flooring with Textured Finish
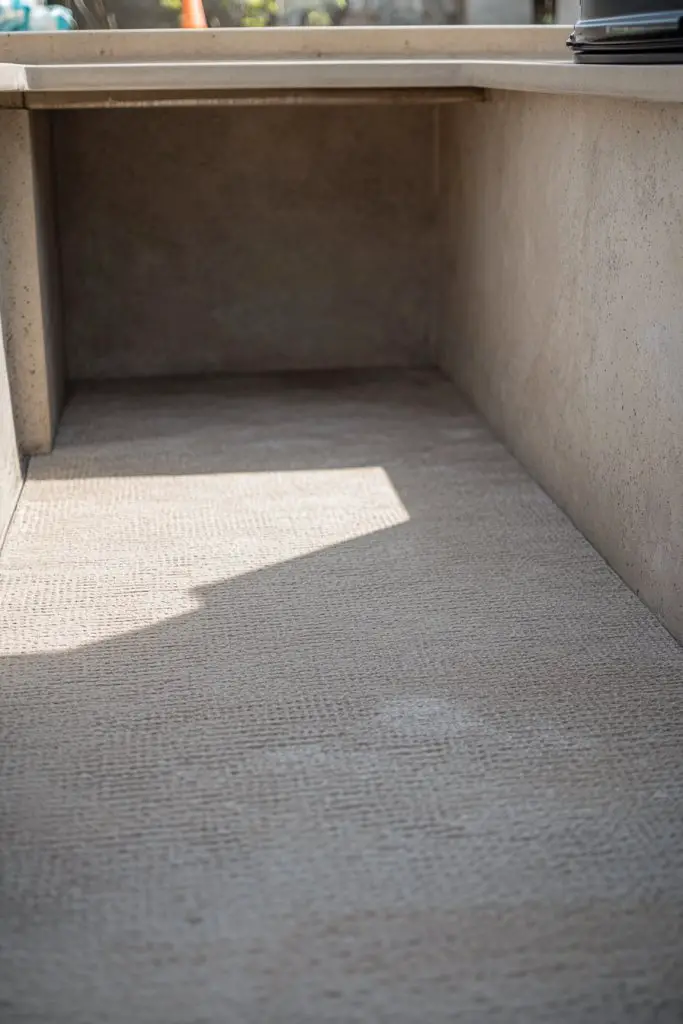
Slippery, uneven outdoor surfaces can turn cooking and socializing into a safety hazard. Durable, slip-resistant flooring ensures safety without sacrificing style. It’s especially important for small covered kitchens where spills and moisture are common. If you want a practical, attractive base for your outdoor space, textured flooring is the way to go.
Recommended Products to replicate this idea
| # | Preview | Product | |
|---|---|---|---|
| 1 |

|
Midwest Products Traditional Letters and Numbers Stepping Stone Stamps (905-20510) | Check Latest Price |
| # | Preview | Product | |
|---|---|---|---|
| 1 |

|
Gyykzz 500 Pack Hidden Deck Fasteners for Composite Decking Board, Composite Decking Clips with... | Check Latest Price |
Imagine textured concrete stamped with a pattern that mimics stone or wood planks, offering both visual interest and grip. Alternatively, textured composite decking provides a warm, natural feel underfoot, resisting fading and cracking. The surface’s finish creates a subtle tactile pattern—perhaps a herringbone or grid—that adds depth and dimension. The flooring’s color palette complements your outdoor decor, whether earthy tones or sleek neutrals. It’s a safe, stylish foundation that invites barefoot relaxation and easy cleaning.
Choose from stamped concrete for a custom look or textured pavers for a more traditional feel. Select anti-slip coatings or mats for added safety in high-traffic areas. Seasonal adaptations include adding textured outdoor rugs or rubber mats during colder months. For a seamless look, coordinate flooring with your outdoor furniture and cabinetry. The key is combining durability with aesthetic appeal, tailored to your climate and style.
Begin by preparing the sub-base—excavate, level, and compact the ground. Pour a reinforced concrete slab or lay interlocking textured pavers, ensuring proper drainage. Use textured finishes or stamped overlays to add grip and visual interest. Seal the surface with a weatherproof, anti-slip coating to enhance safety and longevity. Regular cleaning with gentle soap and water maintains the textured surface’s appearance and safety. Professional installation ensures a smooth, durable finish.
Add decorative borders or contrasting patterns for a custom look. Incorporate textured outdoor rugs that complement your decor. Use weatherproof sealants to maintain slip resistance and color vibrancy. Consider adding subtle lighting along pathways or embedded in the surface to highlight texture at night. These details turn functional flooring into a standout feature of your outdoor kitchen.
Smart, textured flooring creates a safe, stylish foundation for all your outdoor culinary adventures. It boosts confidence in hosting gatherings, knowing your space is both beautiful and secure. With the right finish, your outdoor kitchen will withstand weather and wear for years. Ready to step up your outdoor flooring game? Your safe, textured surface is just a decision away.
11. Weather-Resistant Cabinetry with Quartz or Stone Countertops
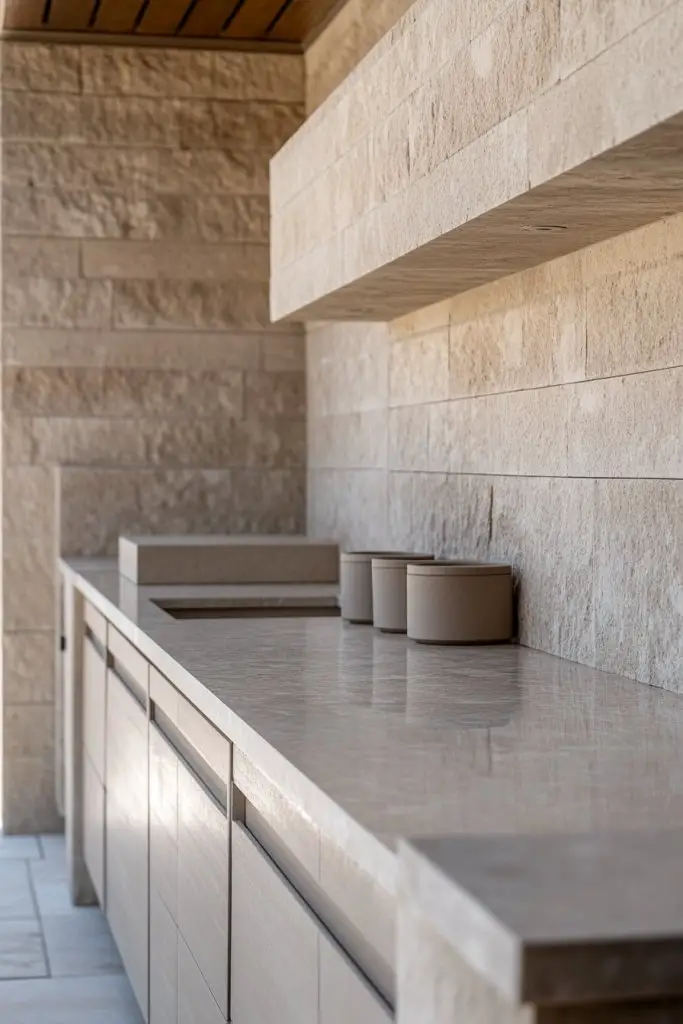
Weather can turn outdoor cabinets into a soggy, grimy mess if they aren’t built to last. Investing in weather-resistant cabinetry with durable countertops keeps your outdoor kitchen looking sleek and functioning well for years. It’s especially important if you love hosting and want a low-maintenance setup. If you’re tired of replacing or repairing outdoor furniture, this is your upgrade.
Recommended Products to replicate this idea
| # | Preview | Product | |
|---|---|---|---|
| 1 |

|
Keter Unity XL Portable Outdoor Table with Stainless Steel Top for Kitchen Prep and Outdoor Storage... | Check Latest Price |
| # | Preview | Product | |
|---|---|---|---|
| 1 |

|
Weiman Quartz Countertop Cleaner and Polish (2 Pack w/Micro Towel) Clean and Shine Your Quartz... | Check Latest Price |
Picture streamlined, sleek cabinets made from treated wood, composite, or metal with a matte or gloss finish. The countertops are smooth, resilient quartz or natural stone, resistant to stains and scratches. The cabinetry features minimalist hardware and weatherproof seals, blending seamlessly with your outdoor decor. They’re designed to handle rain, sun, and wind while maintaining a polished, modern aesthetic. The entire setup exudes durability and style, perfect for any small outdoor kitchen.
Choose between sleek modern designs with flat-front panels or textured finishes for a rustic touch. Opt for built-in or freestanding cabinets based on your space. Incorporate adjustable shelving or drawers for maximum organization. Seasonal adaptations include adding weatherproof covers or sealing edges with protective coatings. The design can be tailored with color choices and hardware to match your overall outdoor look.
Select cabinetry made from weatherproof, high-quality materials like treated plywood, aluminum, or composite panels. Install with corrosion-resistant hardware, ensuring a tight seal against moisture. Use a professional for precise cuts and secure mounting, especially for built-in units. Pair with quartz or stone countertops that are cut to size and sealed to prevent water infiltration. Regular cleaning with non-abrasive cleaners maintains their appearance. Ensure all edges and joints are sealed for maximum longevity.
Add decorative hardware or custom paint finishes to match your outdoor style. Incorporate open shelves or glass-front cabinets for visual interest (avoiding wall art). Use textured or patterned countertop accessories for a personalized touch. Consider installing a small, built-in wine rack or spice drawers for added utility. These details make your cabinetry both functional and uniquely suited to your taste.
Durable cabinetry with quality countertops elevates your outdoor space into a year-round culinary retreat. It combines elegance with resilience, making maintenance a breeze. With the right materials, your outdoor kitchen remains stunning through seasons and weather changes. Ready to upgrade to lasting style and function? Your weatherproof outdoor cabinetry awaits, built to impress and endure.
12. Solar-Powered String Lights and Task Lighting
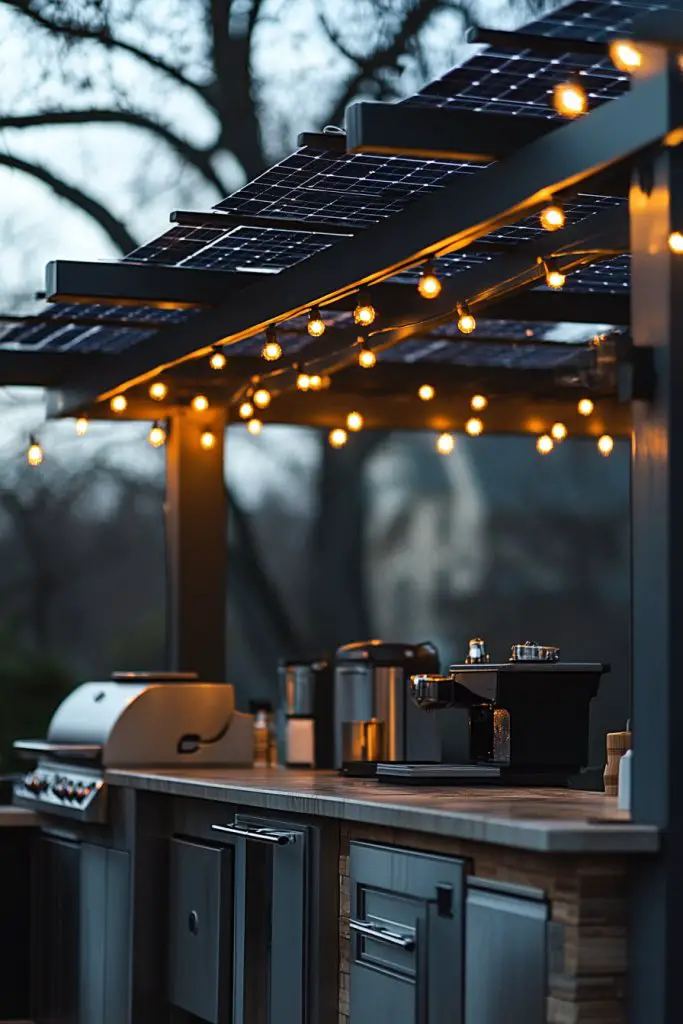
Nothing kills the outdoor vibe faster than harsh, inadequate lighting. Solar-powered string lights and task lighting create an inviting atmosphere while providing essential illumination for cooking and entertaining. They’re eco-friendly, easy to install, and perfect for small covered kitchens where electric wiring is a hassle. If you want your outdoor space to glow effortlessly, this is a simple, effective upgrade.
Recommended Products to replicate this idea
| # | Preview | Product | |
|---|---|---|---|
| 1 |

|
addlon 54(48+6) FT Solar String Lights Waterproof,Patio Lights Solar Powered with Remote & USB Port... | Check Latest Price |
| # | Preview | Product | |
|---|---|---|---|
| 1 |
|
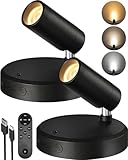
EZVALO Spotlights Indoor with Remote, 5500mAh Rechargeable Picture Lights, Wireless LED Uplighting... | Check Latest Price |
Imagine warm, amber string lights draped along pergola beams or wrapped around cabinetry, casting a soft glow over your outdoor kitchen. Solar-powered fixtures blend seamlessly into the decor, with minimalist designs and weatherproof finishes. Task lighting, such as adjustable LED spotlights or portable lamps, illuminates key work areas without overwhelming the space. The overall effect is cozy, functional, and inviting, perfect for after-dinner drinks or late-night chats. It’s a subtle yet impactful way to elevate your outdoor experience.
Choose string lights with Edison bulbs for vintage charm or sleek, modern LED strands for a contemporary look. Install solar panels discreetly on the roof or nearby structures to power everything sustainably. Use weatherproof coverings or shades for added protection against the elements. For seasonal flexibility, opt for rechargeable or removable fixtures that can be stored indoors during harsh weather. This lighting setup adapts easily to your outdoor decor style, from boho to modern minimal.
Begin by selecting outdoor-rated solar lights and task fixtures suitable for your space. Mount string lights along beams, pergola edges, or under cabinets using hooks or clips. Position solar panels where they receive maximum sunlight during the day. Connect lights with weatherproof wiring, ensuring all connections are sealed. For task lighting, choose adjustable fixtures that can be directed precisely where you need illumination. Test all lights thoroughly, and consider adding dimmers or switches for ambiance control. Regularly clean solar panels for optimal performance.
Customize with color-changing LED strands or vintage-style bulbs for ambiance. Add decorative lanterns or solar-powered stake lights around your space to create layers of light. Use dimmable fixtures to set the mood, from bright for cooking to soft for relaxing. Incorporate fairy lights or small accent lights on shelves and walls for visual interest. Personal touches like these make your outdoor kitchen feel warm, welcoming, and uniquely yours.
Eco-friendly solar lighting adds both beauty and practicality, making your outdoor space usable after sunset. It’s a simple upgrade with a big impact, turning your yard into a magical gathering spot. Plus, you’ll enjoy energy savings and easy installation—no wiring needed. Ready to light up your outdoor kitchen? Your glowing oasis is just a few solar fixtures away.
13. Compact Outdoor Sink with Splash Guard
Ever struggled with messy cleanup or rinsing ingredients in a cramped outdoor space? A compact outdoor sink with a splash guard offers a practical solution that keeps your area tidy. It’s perfect for small covered kitchens where space is limited but functionality can’t be compromised. If quick cleanup and easy access are priorities, this idea will change the game.
Recommended Products to replicate this idea
| # | Preview | Product | |
|---|---|---|---|
| 1 |

|
kitchen Single Bowl Utility Sink, Kitchen Wall-Mounted Sink 16.9 x 12.8 Inch With 1.26 inch faucet... | Check Latest Price |
| # | Preview | Product | |
|---|---|---|---|
| 1 |

|
WEWE Single Handle High Arc Brushed Nickel Pull Out Kitchen Faucet,Single Level Stainless Steel... | Check Latest Price |
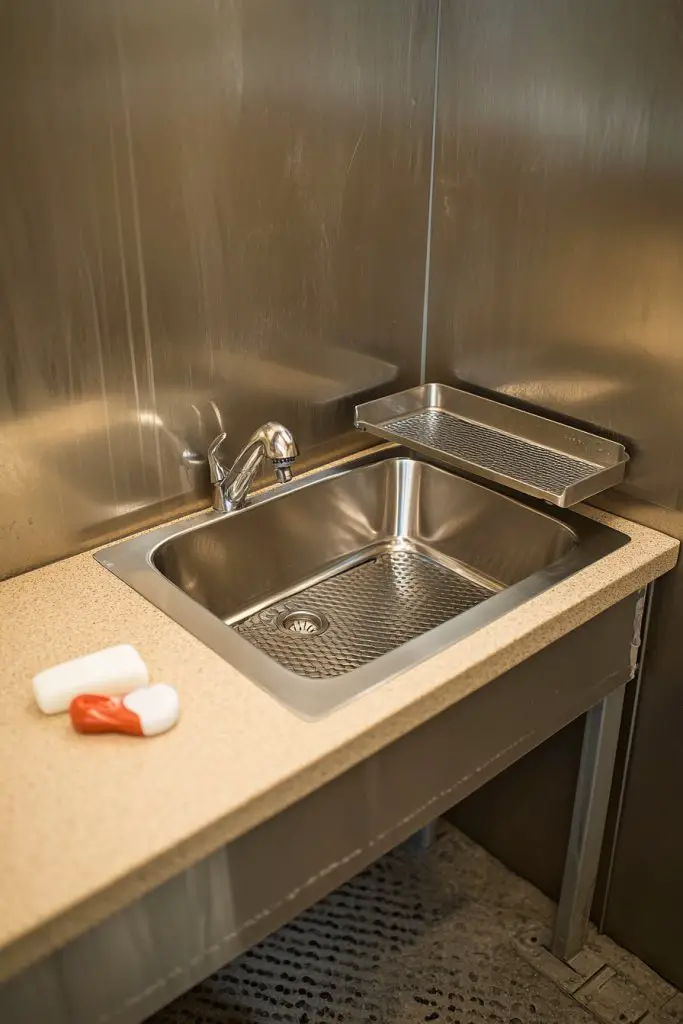
Visualize a small, sturdy sink made from weatherproof materials like stainless steel or composite, integrated into your countertop or wall. A splash guard extends around the edges to contain water and prevent splashes onto nearby surfaces. The sink’s design is minimal but functional, with a simple faucet and perhaps a small drainboard or shelf above for drying or prep. It’s a neat, efficient feature that looks sleek and feels seamless within your outdoor decor. Plus, the sound of running water adds a calming ambiance.
Choose wall-mounted or freestanding models depending on your space. Incorporate a fold-down or extendable faucet for added convenience. For seasonal changes, add weatherproof covers or protective shields. Opt for a textured, slip-resistant surface around the sink to prevent accidents. You can also customize the finish—matte, gloss, or textured—to match your overall outdoor aesthetic. The setup can be scaled up or down to fit your specific needs.
Start by selecting a weatherproof, durable sink with a reliable faucet. Install into a sturdy wall or base using corrosion-resistant hardware. Ensure proper drainage and water supply connections, following safety standards. Seal all joints with weatherproof sealant to prevent leaks. Attach a splash guard or shield that fits your sink’s dimensions, securing it firmly in place. Test for water flow, drainage, and splash containment. Regular cleaning and maintenance keep it looking new and functioning well.
Add custom hardware or labels for a personalized touch. Incorporate a small extendable or fold-down shelf for drying or prep. Use textured mats or non-slip surfaces around the sink area for safety. Consider additional features like a soap dispenser, small built-in trash bin, or water filtration system. These upgrades enhance utility and make your outdoor cleanup effortless.
A compact outdoor sink turns messy chores into quick, easy tasks, elevating your outdoor cooking experience. It keeps your space neat and prevents water from pooling or splashing onto furniture. With a durable, well-designed setup, you’ll enjoy years of worry-free use. Ready to upgrade your outdoor cleaning station? Your tidy, functional sink is waiting to make life easier.
14. Hidden Trash and Recycling Bins for Cleanliness

Trash cans and recycling bins can clutter up your outdoor kitchen, making it look messy and unorganized. Hidden waste stations solve this problem by keeping bins out of sight but still easily accessible. They maintain a clean, sleek aesthetic while simplifying cleanup. If you hate seeing waste bins in plain view, this idea will keep your space looking sharp.
Recommended Products to replicate this idea
| # | Preview | Product | |
|---|---|---|---|
| 1 |

|
64 Gallon Garbage Cans Trash Cans 2 Rugged Wheels Ergonomic Handle and Lid Heavy Duty Construction... | Check Latest Price |
| # | Preview | Product | |
|---|---|---|---|
| 1 |

|
Rubbermaid Commercial Products BRUTE Heavy-Duty Round Trash/Garbage Can, 20-Gallon, Blue, Outdoor... | Check Latest Price |
Imagine a built-in cabinet with a discreet door or pull-out drawer integrated into your outdoor cabinetry. Inside, sturdy, weatherproof bins are labeled for trash and recyclables. The cabinet’s exterior matches your decor—perhaps with textured panels or sleek paint—so it blends seamlessly into the overall design. When open, the bins are easy to access for quick disposal, but when closed, they’re hidden from view. It’s a simple, elegant solution that keeps your outdoor kitchen tidy.
Choose from pull-out drawers, sliding doors, or hinged compartments based on your space and aesthetic preferences. Use durable, weatherproof materials like composite or stainless steel to withstand the elements. Label bins clearly with eco-friendly decals or engraved plaques. Seasonal adaptations include adding a protective cover or wind latch to prevent spillage. The system can be customized to fit your outdoor decor, from modern minimal to rustic charm.
Begin by designing or purchasing a weatherproof cabinet with the right dimensions for your waste bins. Install the cabinet at a convenient height, ensuring easy access. Use corrosion-resistant hardware for smooth operation. Insert sturdy, leak-proof bins that are easy to remove and clean. Seal all joints with weatherproof sealant to prevent water ingress. Regularly empty and clean the bins to prevent odors and maintain hygiene. This hidden station keeps your outdoor kitchen looking pristine.
Add decorative labels or custom colors to differentiate waste types. Incorporate small ventilation holes or charcoal filters to control odors. Use textured or patterned cabinet doors to match your decor. Consider adding a small countertop or prep area nearby for quick waste disposal or sorting. Personal touches like these make waste management effortless and visually appealing.
A hidden waste station elevates your outdoor kitchen’s appearance and functionality. It simplifies cleanup, keeps your yard tidy, and impresses guests with its seamless design. Plus, it encourages eco-friendly habits by clearly defining recycling and trash areas. Ready to tidy up your outdoor space? Your discreet waste station is just a build away.
15. Minimalist Weatherproof Windbreaks or Screens
Wind can turn your outdoor cooking into a gusty, messy affair. Minimalist weatherproof windbreaks or screens provide a sleek solution that shields your space while maintaining an open feel. They’re essential for small covered kitchens where wind can disrupt your plans. Want a cozy, functional outdoor area that’s protected yet airy? This idea is perfect.
Recommended Products to replicate this idea
| # | Preview | Product | |
|---|---|---|---|
| 1 |
|
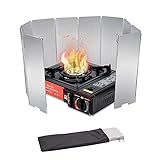
10 Plates Stove Windscreen, Aluminum Stove Windshield with Drawstring Bag, for Camping, Butane... | Check Latest Price |
| # | Preview | Product | |
|---|---|---|---|
| 1 |

|
Alera ALEPP6518 65 in. x 18 in. Polycarbonate Privacy Panel - Silver | Check Latest Price |
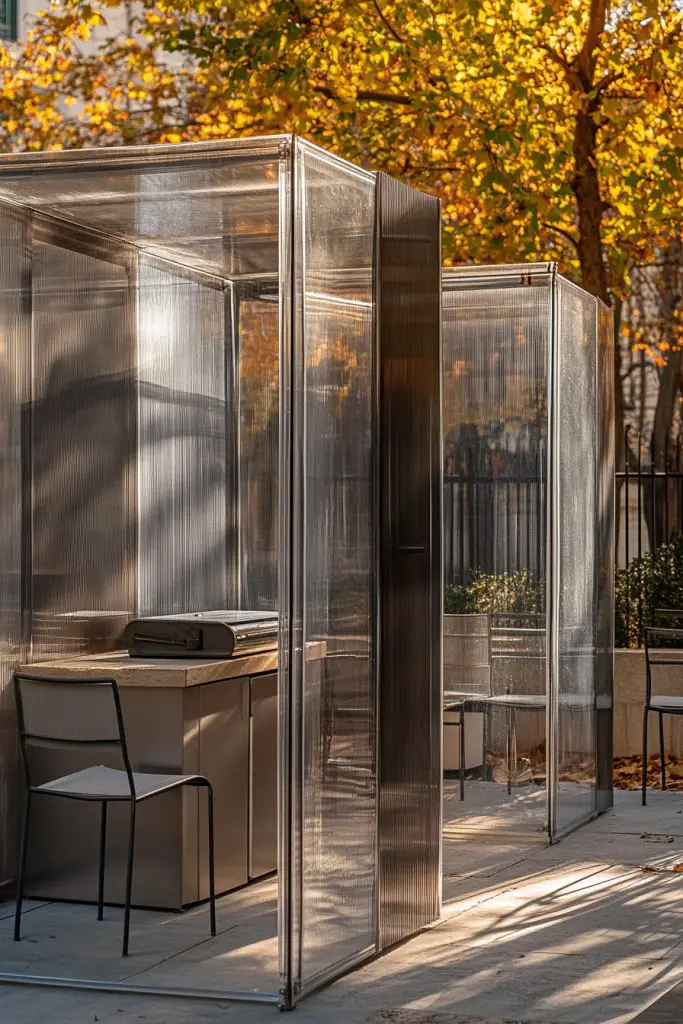
Picture slim, modern panels made from weatherproof materials like aluminum, treated wood, or polycarbonate. They stand upright, creating a seamless barrier that blocks wind without closing off the space. The screens can be plain or textured, adding visual interest through slatted designs or perforations. They’re installed along the edges of your cooking or dining area, subtly blending into your outdoor decor. The result is a protected, stylish space that invites you to linger.
Choose sleek, monochromatic panels for a modern look or textured panels for a more natural vibe. Adjust height and placement based on prevailing wind directions. Seasonal adaptations include removable panels or adjustable height features. Incorporate decorative elements like planters or lightweight fabrics (avoiding restricted items) for added privacy or aesthetic appeal. These screens can be customized to match your outdoor style, from minimalist to eclectic.
Begin by assessing wind patterns and determining optimal placement. Use weatherproof brackets and anchors to secure the panels firmly to the ground or existing structures. Ensure panels are made from durable, UV-resistant materials. For adjustable setups, incorporate hinges or sliding mechanisms. Seal all connections to prevent water intrusion. Regularly inspect and clean the panels to maintain their appearance and function. Proper installation creates a calm, protected outdoor zone.
Add decorative touches like textured finishes or custom colors to match your decor. Install small LED lights or solar-powered accents along the panels for added ambiance. Use lightweight, weatherproof fabrics or curtains on the side to enhance privacy (avoiding restricted items). Incorporate small planters or sculptures near the screens for visual interest. These details personalize your windbreaks and make your outdoor kitchen uniquely yours.
Stylish windbreaks combine function with finesse, making your outdoor cooking space more comfortable and inviting. They protect you from gusts while preserving an open, airy atmosphere. Well-designed screens boost confidence in hosting outdoor meals regardless of weather. Ready to create a calm, protected outdoor oasis? Your sleek windbreaks are the finishing touch.
16. Neutral-Toned, Textured Wall Panels for a Modern Look
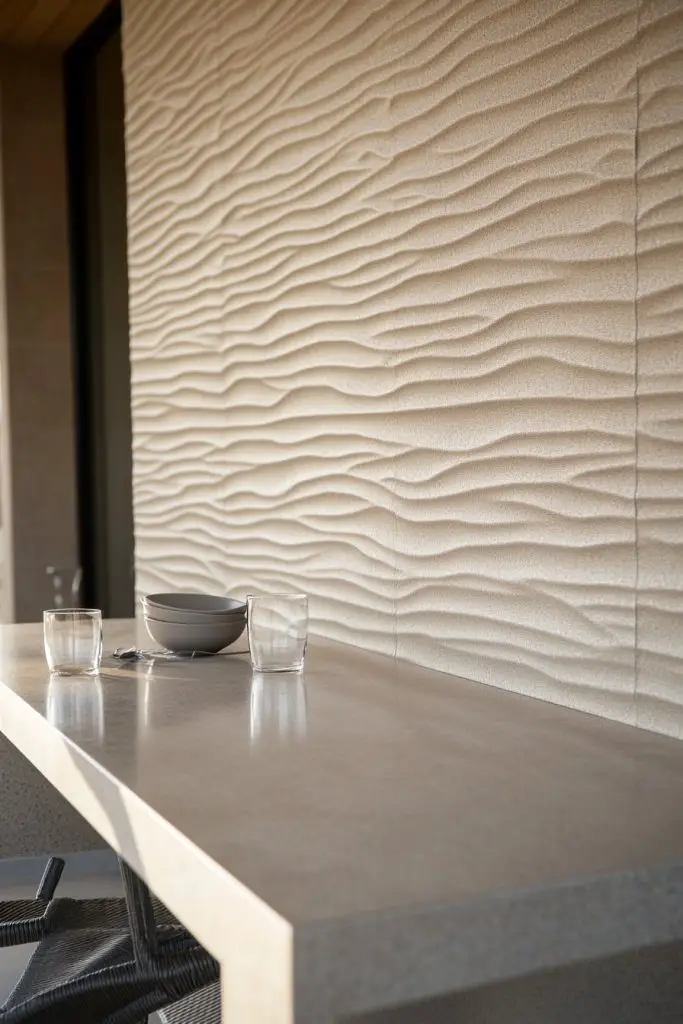
A plain, boring wall can make your outdoor kitchen feel uninspired. Neutral-toned, textured wall panels add visual interest and modern elegance without overwhelming the space. They’re perfect for small covered kitchens where simplicity and style go hand in hand. Want a backdrop that’s both sleek and captivating? This idea delivers.
Recommended Products to replicate this idea
| # | Preview | Product | |
|---|---|---|---|
| 1 |
|
10pcs Marble Peel and Stick Waterproof Wall Panels,Heat-Resistant Backsplash Tile, 23.6"x11.8" PVC... | Check Latest Price |
| # | Preview | Product | |
|---|---|---|---|
| 1 |
|
Art3dwallpanels 33 Pack 3D Wall Panel Diamond for Interior Wall Décor, PVC Flower Textured Wall... | Check Latest Price |
Imagine large, textured panels in shades of soft gray, beige, or taupe, arranged neatly on your wall. The panels feature subtle textures—such as linear grooves, geometric patterns, or embossed designs—that catch the light and create depth. The neutral palette blends effortlessly with your outdoor furniture and cabinetry, providing a sophisticated backdrop. The textured surface adds a tactile dimension, inviting touch and visual exploration. It’s a clean, modern look that elevates the entire space.
Choose panels in different textures—smooth, ridged, or patterned—to suit your style. Mix materials like fiber cement, textured metal, or treated wood for variety. Incorporate vertical or horizontal layouts to influence the perceived size of the space. Seasonal updates include adding weatherproof artwork or decorative elements (avoiding restricted categories). Keep the color palette neutral for a timeless appeal or add subtle accent colors to personalize.
Begin by preparing a clean, flat wall surface. Attach panels using weatherproof fasteners, ensuring they are securely mounted. Seal all joints and edges with weatherproof sealant to prevent water infiltration. Use a level to ensure even alignment. Finish with protective coatings if needed, especially in harsh climates. Regular cleaning with mild detergent and avoiding abrasive tools will keep the textured surface looking pristine. This setup requires minimal maintenance but offers maximum style.
Add decorative trims or contrasting textures around the panels for visual interest. Incorporate subtle lighting along the edges to highlight textures at night. Use weatherproof decals or adhesive accents for a personal touch. Incorporate textured outdoor fabrics or cushions nearby to complement the wall’s tactile feel. These accents make your outdoor kitchen a contemporary, inviting space.
Modern textured wall panels provide a chic, durable backdrop that enhances your outdoor cooking environment. They add depth and sophistication, making your space feel larger and more refined. With minimal upkeep, they keep your outdoor kitchen looking fresh and stylish for years. Ready to upgrade your wall game? Your modern, textured backdrop awaits to impress.
17. Small Exterior Shelving for Decor and Essentials
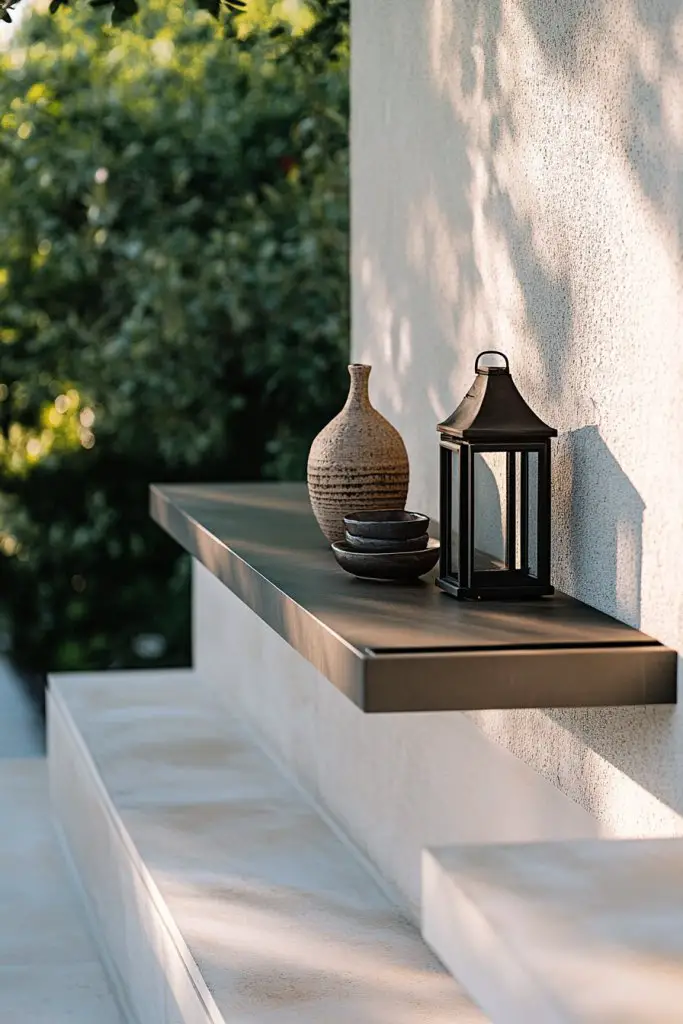
Cluttered surfaces and lack of storage can make outdoor kitchens look chaotic. Small exterior shelving offers a practical solution that adds charm and utility without taking up much space. It’s perfect for displaying essentials or decorative touches that make your outdoor space feel complete. Want a tidy, personalized kitchen that’s both functional and stylish? This idea is your answer.
Recommended Products to replicate this idea
| # | Preview | Product | |
|---|---|---|---|
| 1 |

|
WOPITUES Wood Floating Shelves Set of 6, Shelves for Wall Decor, Farmhouse Shelf for Bedroom,... | Check Latest Price |
| # | Preview | Product | |
|---|---|---|---|
| 1 |

|
Sterilite 4 Shelf Cabinet, Lockable Utility Storage w/ Adjustable Shelves, Gray - Plastic Shelving... | Check Latest Price |
Visualize weatherproof shelves made from treated wood or metal, mounted neatly on your wall or under your pergola. They hold small potted herbs, spice jars, or decorative ceramic pieces—avoiding restricted categories—adding visual interest and utility. The textured wall behind the shelves creates a layered, inviting look. The shelves are arranged asymmetrically or symmetrically for aesthetic balance, with decorative elements that reflect your style. It’s a charming, compact display that personalizes your outdoor kitchen.
Choose minimalist floating shelves for a modern vibe or rustic open wood shelves for farmhouse charm. Adjust the size and number based on your space and needs. Incorporate hooks or small baskets underneath for additional storage, always avoiding the restricted categories. Seasonal updates include swapping out decor or adding string lights for evening ambiance. This flexible approach lets you refresh your space easily and affordably.
Start by selecting weatherproof, durable materials and marking where to mount your shelves. Use corrosion-resistant anchors and screws to secure them firmly. Arrange decorative or functional items thoughtfully, balancing aesthetics and practicality. Seal all joints and hardware with weatherproof sealant. Regularly clean and maintain to prevent water damage or mold. Add small decorative elements like textured planters or colorful containers for a personalized touch.
Paint or stain shelves in colors that complement your decor. Incorporate decorative hooks or small, textured baskets for extra utility. Hang small, weatherproof signs or labels for a charming, organized look. Add textured textiles or cushions nearby to enhance visual appeal. These small upgrades turn simple shelves into a focal point that reflects your personality and style.
Small exterior shelves make your outdoor kitchen more organized and inviting, encouraging you to cook and entertain with ease. They add personality and charm, transforming a plain wall into a curated display. With minimal effort and cost, you can create a space that feels warm and personalized. Ready to elevate your outdoor decor? Your charming, functional shelves are just a few steps away.
18. Foldable or Compact Outdoor Dining Set for Small Spaces
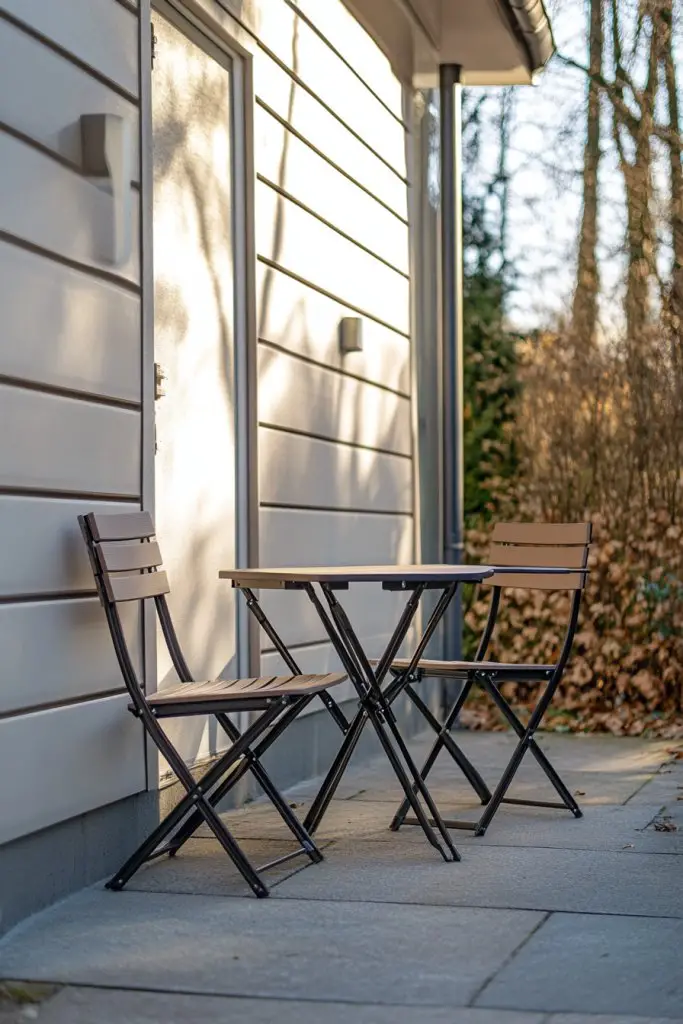
Limited space often means sacrificing outdoor dining, but not anymore. Foldable or compact dining sets make it easy to enjoy meals outside without cluttering your yard or patio. They’re perfect for small covered kitchens where every inch counts. If you love outdoor meals but hate the clutter, this idea will change your dining game.
Recommended Products to replicate this idea
| # | Preview | Product | |
|---|---|---|---|
| 1 |

|
6 Feet Foldable Table with Built in Handle & Steel Legs | 6FT Heavy Duty Folding Portable | Perfect... | Check Latest Price |
| # | Preview | Product | |
|---|---|---|---|
| 1 |

|
Nazhura 4 Pack Folding Chairs with Padded Cushion and Back, Khaki Metal Chairs with Comfortable... | Check Latest Price |
Picture a sleek, lightweight table with fold-down leaves and matching chairs that nest or fold flat. When closed, it becomes a neat, space-saving unit that tucks into a corner or against a wall. When opened, it comfortably seats four to six guests, with textured, weatherproof surfaces and ergonomic, foldable chairs with cushions. The set’s minimalist design complements your outdoor decor, whether modern or rustic. It’s a versatile, stylish solution that adapts to your needs.
Choose materials like treated wood, composite, or powder-coated metal for durability. Customize with colorful cushions or textured fabrics to add personality. For seasonal use, include weatherproof covers or store the set indoors during harsh weather. The design can be scaled down for two people or expanded for larger gatherings. Incorporate additional foldable accessories like side tables or serving trays for convenience. This flexible setup maximizes usability in small spaces.
Start by measuring your space and selecting a lightweight, weatherproof set suitable for your yard. Use wall hooks or brackets to store chairs when not in use, freeing up space. Ensure the table and chairs are sturdy and easy to fold or unfold, with locking mechanisms for safety. Place the set on a textured, non-slip surface that resists weathering. Regularly clean with mild soap, and fold everything away during storms or winter months to prolong life. Easy to set up and store, it’s perfect for spontaneous outdoor dining.
Add colorful cushions or textured throws to make seating more inviting. Incorporate decorative placemats or textured table runners for visual interest. Use weatherproof storage containers nearby for tableware and accessories. Personalize with small, decorative elements like string lights or textured wall art (avoiding restricted items), enhancing the overall vibe. These touches turn a simple set into a stylish, functional centerpiece.
A foldable outdoor dining set maximizes space without sacrificing style or comfort. It encourages more outdoor meals and social gatherings, making your yard more inviting. The convenience of folding and storing means your outdoor space stays clutter-free and ready for spontaneous fun. Want a versatile, space-saving solution? Your perfect outdoor dining setup is within reach.
19. Durable Weatherproof Curtains or Shades for Privacy and Sun Control
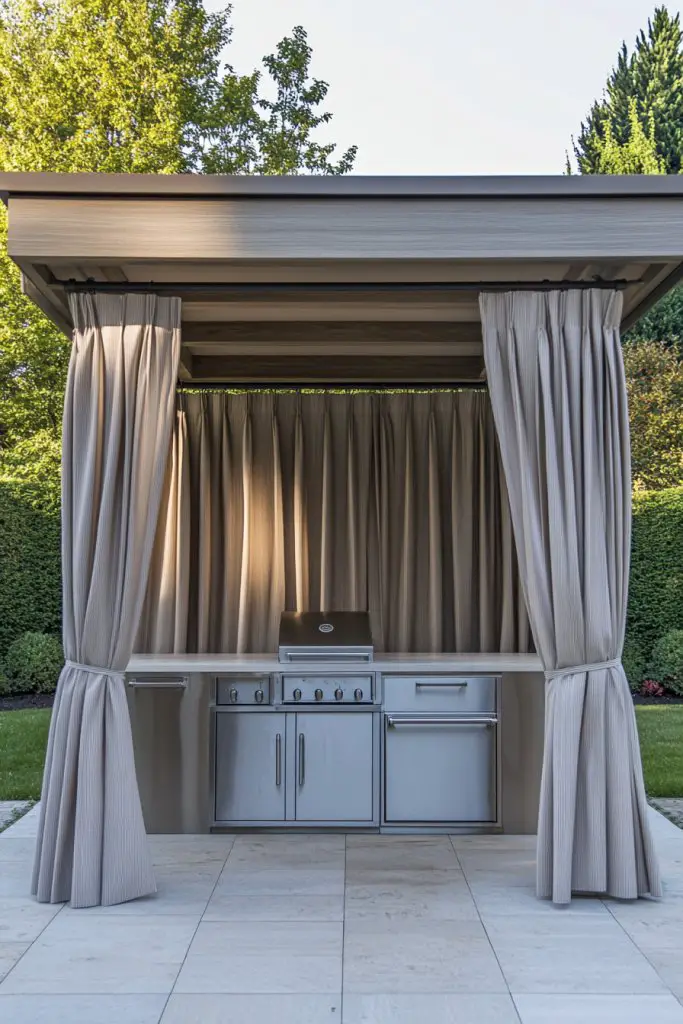
Sun glare, wind, and lack of privacy can ruin outdoor cooking and lounging. Durable weatherproof curtains or shades offer a simple, stylish way to control sunlight and create a private, cozy atmosphere. They’re perfect for small covered kitchens where you want to feel sheltered but not closed off. If you crave a versatile, adjustable outdoor space, this idea is your answer.
Recommended Products to replicate this idea
| # | Preview | Product | |
|---|---|---|---|
| 1 |

|
BONZER Waterproof Outdoor Curtains for Patio, Premium Thick Privacy Weatherproof Grommet Outside... | Check Latest Price |
| # | Preview | Product | |
|---|---|---|---|
| 1 |

|
Tension Curtain Rod, Extra Long Outdoor Curtain Rod 43-131 Inch Adjustable, 1.1 Inch Diameter Thick... | Check Latest Price |
Imagine sleek, textured fabric curtains in neutral tones or bold colors, hanging from weatherproof rods or tension wires. When drawn, they create a soft, flowing barrier that blocks harsh sunlight and wind while adding visual softness. When open, they reveal your beautiful outdoor space, inviting the breeze and natural light. The textured fabrics catch the light subtly, adding depth and warmth to the overall ambiance. It’s a flexible way to customize your outdoor environment, day or night.
Choose from roll-up shades, panel curtains, or tension-wire drapes based on your aesthetic preferences. Use weatherproof, UV-resistant fabrics for longevity and easy cleaning. Seasonal adaptations include swapping fabrics or adding decorative tiebacks and trims. Incorporate decorative curtain rings or textured edging for a personalized touch. These shades can be adjusted to suit your mood, weather, or privacy needs, making your outdoor kitchen more functional and beautiful.
Install sturdy, weatherproof rods or tension wires along your covered area. Use heavy-duty hooks or brackets to secure the curtains or shades. Attach the fabric using grommets, rings, or clips for easy opening and closing. Ensure the fabric is UV-resistant and easy to clean—machine washable or wipeable. For added durability, reinforce seams and edges. Regularly check for wear and tear, and replace or clean the fabrics seasonally. Proper installation ensures longevity and ease of use.
Add decorative tiebacks, textured trims, or contrasting colors to match your outdoor decor. Incorporate small hooks or clips for decorative elements like textured tassels or fabric embellishments. Use LED string lights or lanterns hung above or beside the shades for night-time ambiance. Personalize with custom fabric patterns or monograms for a unique touch. These enhancements turn simple shades into a stylish, functional feature.
Durable curtains and shades elevate your outdoor space by providing privacy, sun control, and style. They make your yard more comfortable and inviting, encouraging longer, more relaxed outdoor gatherings. With easy operation and maintenance, they’re a smart investment for year-round outdoor living. Ready to add a touch of elegance and practicality? Your customizable outdoor shade solution is waiting to transform your yard into a cozy retreat.
Conclusion
With a diverse range of small covered outdoor kitchen ideas, you now have the inspiration to craft a functional and stylish space tailored to your needs. Whether you prefer a minimalist setup or a cozy, fully-equipped nook, these concepts can turn your outdoor area into a culinary paradise. Don’t wait—start transforming your backyard today and enjoy the endless outdoor cooking adventures that await!