
23 Splitting a Bedroom in Two Ideas for Space Optimization
Looking to maximize your living space without sacrificing style? Splitting a bedroom into two separate areas is becoming a trendy and practical solution for many homeowners. Whether you need an extra guest room, a cozy home office, or a private retreat, dividing a space offers flexibility and a fresh vibe. It’s a popular choice for those who want to make the most of their square footage while maintaining a sense of privacy and organization.
In this article, you’ll discover a variety of creative and functional ideas to transform your bedroom into two distinct zones. From clever furniture arrangements to innovative design tricks, these ideas cater to different tastes and needs. Get ready to be inspired and learn how you can turn a single bedroom into a versatile, beautiful space that works perfectly for your lifestyle.
1. Installing a Half-Wall Divider for Clear Separation
Ever feel like your bedroom is just a big open space that doesn’t quite serve two people well? Maybe you want privacy without sacrificing the airy feel. A half-wall divider offers a simple yet effective way to create distinct zones. It’s perfect if you crave separation but still want a sense of openness.
Recommended Products to replicate this idea
| # | Preview | Product | |
|---|---|---|---|
| 1 |

|
Maasechs 2 Pcs Rounded Doorway Arch Kit DIY Interior Doorway Precurved Drywall Full Half Circle Top... | Check Latest Price |
| # | Preview | Product | |
|---|---|---|---|
| 1 |

|
Leeleberd Led Lights for Bedroom 100 ft (2 Rolls of 50ft) Music Sync Color Changing RGB Led Strip... | Check Latest Price |
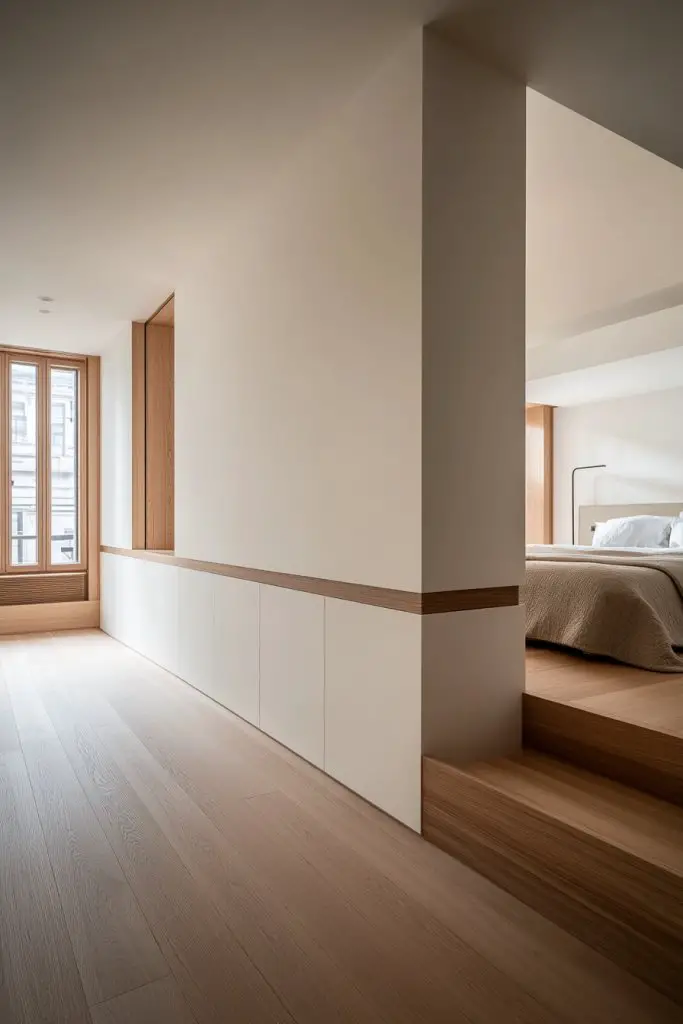
Picture a sleek, low half-wall painted in a warm neutral tone. On one side, a cozy sleeping nook, while the other transforms into a mini workspace or dressing area. The textured surface of the wall adds subtle depth, and its height allows light to flow freely. It’s like dividing your room with a stylish architectural feature that feels intentional.
This idea can be customized with different materials—painted drywall, wood panels, or even decorative tiles. For a modern vibe, opt for a clean, straight-edged design; go rustic with reclaimed wood. You can also vary the height depending on privacy needs—higher for more seclusion, lower for an open feel. Seasonal accents like cozy throws or textured fabrics can soften the look.
Start by measuring your space to determine the ideal height and length of the wall. Use sturdy materials like drywall or wood panels, attaching them securely to the existing structure. You may need basic carpentry tools, a level, and screws. Finish with paint, wallpaper, or texture to match your decor. Consider adding a cap or molding for a polished look. Ensure it’s stable and flush for safety and style.
Add built-in shelves or niches on the half-wall for personal touches—books, decorative boxes, or candles. Use contrasting paint colors or textured finishes to highlight the division. Incorporate LED strip lighting along the top edge for ambient glow. You can also integrate a small corkboard or magnetic paint for notes and photos.
A half-wall divider makes your bedroom feel both spacious and intimate, perfect for shared spaces. It’s a DIY-friendly project that instantly elevates your room’s style. Once installed, you’ll wonder how you ever lived without that subtle boundary. Ready to carve out your own private zone?
2. Hanging Curtains for a Soft, Flexible Partition
Looking for a quick, affordable way to split your bedroom? Curtains are the go-to solution—light, easy, and endlessly customizable. They soften the space and add a cozy vibe, perfect if you want privacy without permanent changes. Plus, they’re super budget-friendly.
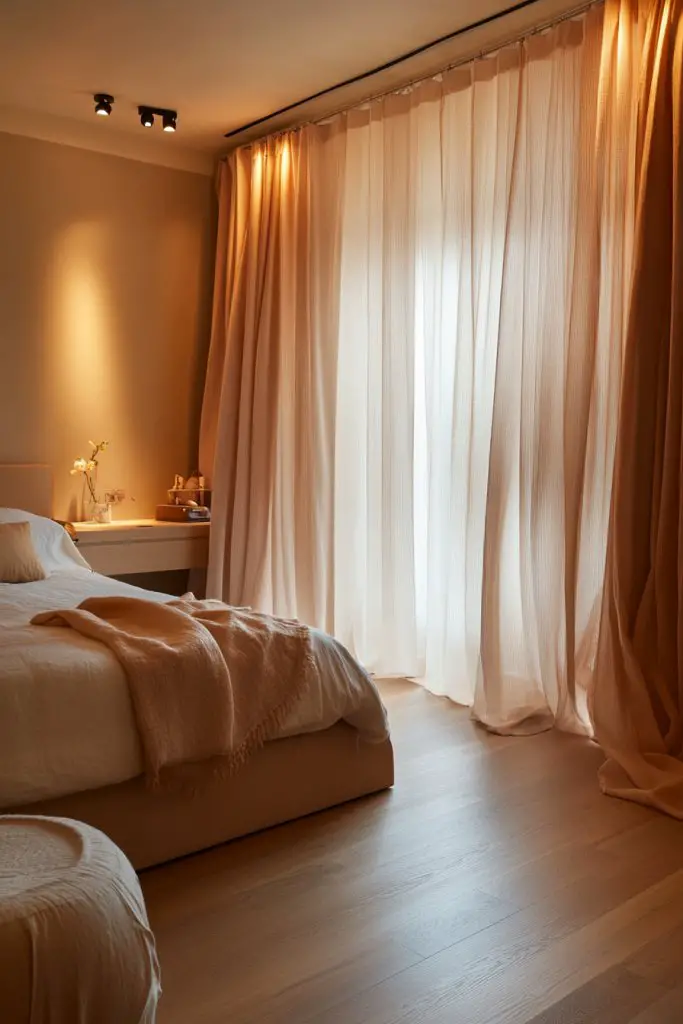
Visualize flowing fabric panels in a neutral or bold hue hanging from a ceiling-mounted rod. The fabric catches the light, creating a gentle glow that invites relaxation. When pulled aside, the space opens up, revealing your entire room. The soft folds add texture and movement, making the room feel inviting yet organized.
Choose from lightweight voile, linen, or blackout fabrics depending on your privacy needs. For a boho look, opt for textured fabrics with tassels or pom-poms; for a sleek modern vibe, go for smooth, matte materials. You can also layer curtains for depth or add decorative trim for extra flair. Adjust the length and fullness to suit the space and style.
Install a sturdy rod across the ceiling or wall using brackets designed for heavy fabrics. Measure carefully to ensure the curtains reach the desired length—floor-length for elegance or mid-wall for a casual look. Use rings or hooks to hang the fabric, making sure they slide smoothly. Choose a fabric that’s easy to clean and maintain. For added durability, reinforce the rod brackets if needed.
Layer different fabrics or add decorative tiebacks to switch up the look. Incorporate contrasting colors or patterns for visual interest. For seasonal updates, swap out fabrics or add embellishments like embroidery or appliqués. You can also attach small decorative elements like feathers or beads for a personalized touch.
Curtains are a simple way to create privacy and style without major renovations. They add softness and warmth, making your bedroom feel more intimate. With endless fabric choices, you can tailor the look to match your personality and mood. Ready to drape your way to a cozier space?
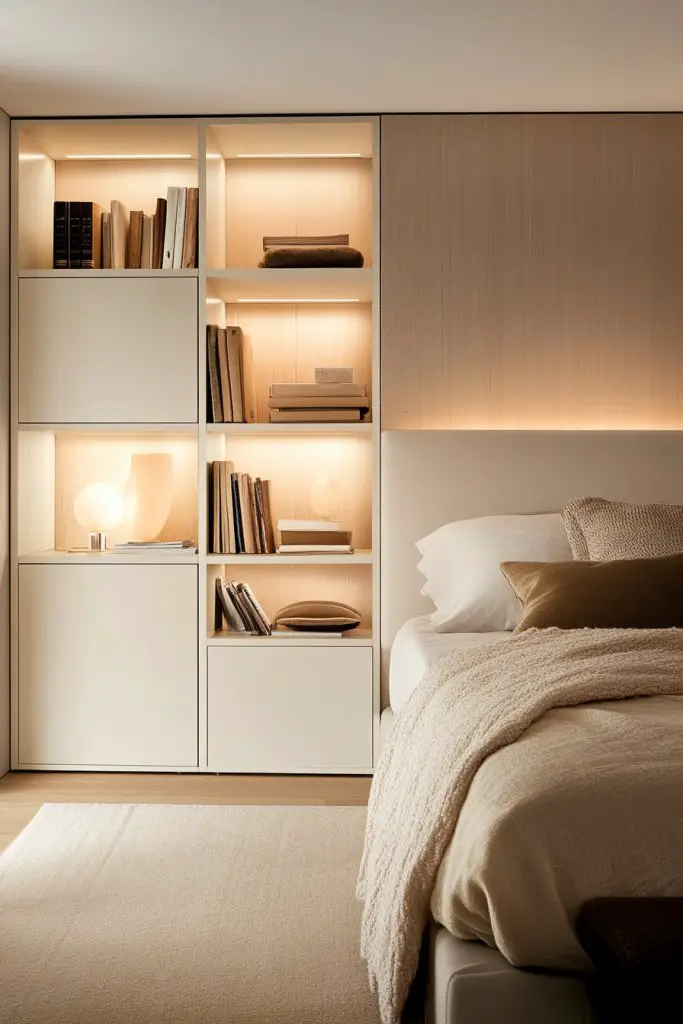
3. Incorporating Built-in Shelving Units as a Divider
Ever wish you could kill two birds with one stone? Built-in shelving units serve as room dividers and storage in one elegant package. They keep your space organized while subtly carving out zones. Ideal for those who love a tidy, stylish environment without clutter.
Recommended Products to replicate this idea
| # | Preview | Product | |
|---|---|---|---|
| 1 |

|
MXCSE Wall Mounted Bookshelves, Floating Shelves for Wall, Wood Hanging Book Shelves for Room,... | Check Latest Price |
| # | Preview | Product | |
|---|---|---|---|
| 1 |

|
Maxuni 3-Pack Small Storage Baskets for Organizing | Woven Shelf Toy Basket | Rope Baskets for Gifts... | Check Latest Price |
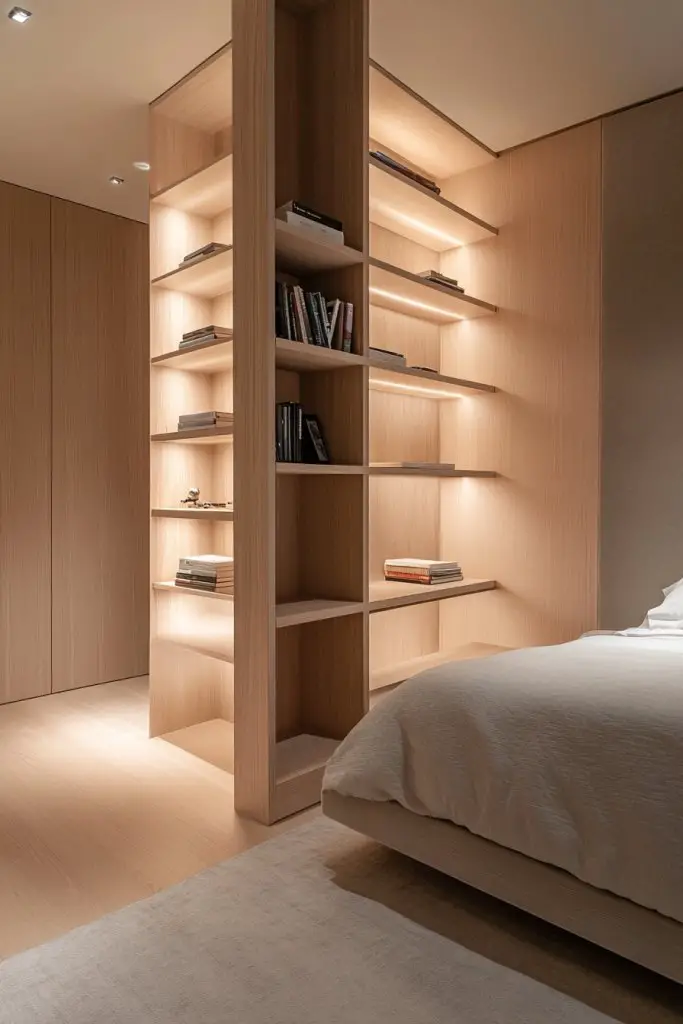
Imagine a tall, open shelving unit made of warm wood or sleek metal, placed strategically to separate sleeping and living areas. The shelves display books, decorative boxes, or personal mementos, adding personality. The open design allows light to pass through, maintaining a bright, airy feel. It’s a functional piece that doubles as art.
Customize with adjustable shelves or closed cabinets for varied storage needs. Use contrasting materials—metal framing with wooden shelves for industrial chic or painted MDF for a softer look. Incorporate decorative baskets or boxes for hidden storage. Taller units work well in spacious rooms; smaller shelves suit more compact spaces. You can also add LED lighting for a dramatic effect.
Plan your layout by measuring available wall space and choosing a style that complements your decor. Build or purchase a shelving unit that fits those dimensions. Secure it firmly to the wall to prevent tipping—especially important in shared spaces. Arrange items thoughtfully to balance functionality and aesthetic appeal. Finish with paint or stain that matches your room’s color scheme. Regularly dust and organize for lasting beauty.
Decorate shelves with a curated mix of items—art books, small sculptures, or framed photos (avoid wall art, as per restrictions). Use decorative storage boxes for clutter, and add a touch of greenery in containers if desired. Change up the accessories seasonally or for special occasions. This keeps the space dynamic and inviting.
Built-in shelves turn functional storage into a design statement, making your room look curated and intentional. They help maximize vertical space and keep things tidy. With a little planning, you can create a versatile zone that adapts to your lifestyle. Who knew a simple shelf could redefine your entire bedroom?
4. Creating a Lofted Bed with Underneath Workspace or Storage
Struggling with limited space? A lofted bed can free up precious floor real estate, giving you room for a workspace, seating, or extra storage. It’s a clever way to maximize vertical space while keeping your sleeping zone cozy. Perfect for small bedrooms or shared spaces.
Recommended Products to replicate this idea
| # | Preview | Product | |
|---|---|---|---|
| 1 |

|
Mirightone Full Size Loft Bed with Stairs and Storage, Metal Loft Bed Frame with Bedside Shelf and... | Check Latest Price |
| # | Preview | Product | |
|---|---|---|---|
| 1 |

|
Budding Joy 90L Under Bed Storage Containers, Closet Organizers and Storage Bins, Foldable Underbed... | Check Latest Price |
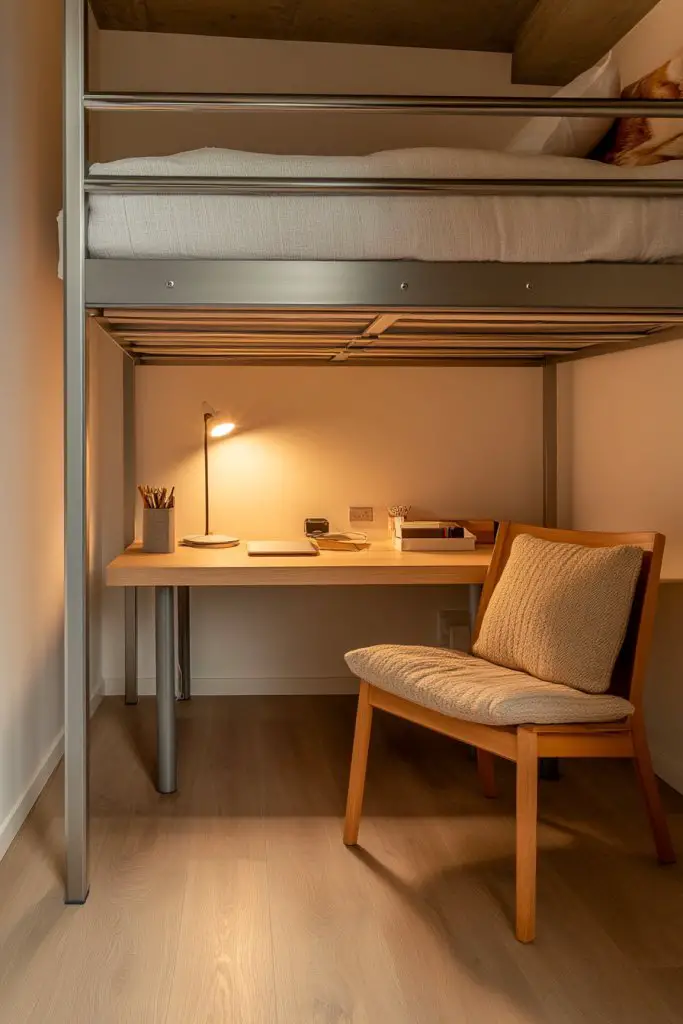
Picture a sturdy wooden or metal frame lifting your bed high enough for a desk or seating area underneath. The bedding is plush with soft throws and pillows, inviting rest. Underneath, a compact desk with a task lamp or a cozy reading nook with cushions creates a multi-functional zone. The entire setup feels like a mini apartment within your room.
Choose materials that match your style—industrial metal, rustic wood, or sleek painted finishes. The height of the loft depends on ceiling clearance and personal preference; some prefer a low, cozy feel, others want maximum headroom. Incorporate curtain panels or fold-down screens underneath for privacy or visual separation. Use multi-purpose furniture—like storage ottomans or filing cabinets—to enhance functionality.
Start by measuring your ceiling height and selecting a sturdy, weight-rated frame. Install the loft securely to the wall or ceiling joists for safety. Make sure the ladder or staircase is stable and easy to access. Decorate the sleeping area with cozy bedding and pillows, and furnish the space underneath with your choice of desk, seating, or storage. Use organizers to keep the space tidy. Regular checks for stability are recommended.
Add personal touches with decorative textiles—soft rugs, layered blankets, or colorful cushions. Use wall-mounted hooks or baskets underneath for additional storage. Paint or stain the wood in a color that pops or blends seamlessly. Seasonal accessories like fairy lights or fabric curtains can change the vibe when desired.
A lofted bed is a smart, stylish solution for small spaces, giving you more room to breathe and work. It’s a DIY project that pays off immediately, transforming your room into a multi-use haven. Once done, you’ll wonder how you ever managed without this vertical upgrade. Embrace the change and enjoy your new space!
5. Using Glass Partitions for an Elegant, Light-Filled Divide

Want to define separate zones without sacrificing natural light? Glass partitions offer a sleek, elegant way to divide your bedroom while keeping the space bright and airy. They’re perfect if you love openness but crave some privacy or separation. Plus, they look incredibly modern.
Recommended Products to replicate this idea
| # | Preview | Product | |
|---|---|---|---|
| 1 |

|
4ft 4pcs Aluminum L-Track Rail, 48" L Track Rails, Include (8) Black O-Ring,(8) Black End Caps and... | Check Latest Price |
Imagine transparent or frosted glass panels stretching from floor to ceiling, framing a cozy nook or sleeping area. The glass reflects light, making the room feel larger and more open. Frosted or textured glass provides privacy without blocking light, creating a soft, diffused glow. The clean lines and reflective surfaces add a sophisticated touch.
Select from clear, frosted, or tinted glass depending on your privacy needs and aesthetic preferences. Frames can be minimal metal or sleek aluminum for a contemporary look. Consider sliding or hinged options to open up or close off zones. You can incorporate decorative etching or patterns for extra style without compromising transparency.
Measure your space carefully to determine panel size and placement. Choose tempered glass for safety and durability. Install a sturdy frame or track system—either floor-mounted or ceiling-mounted—to hold the panels securely. Seal edges properly to prevent drafts and ensure stability. Finish with a professional installation for a flawless look. Regular cleaning keeps the glass sparkling.
Add decorative film or subtle etching for a personalized touch. Incorporate built-in shelving or LED lighting along the edges for a luminous effect. Use curtains or blinds on the glass for extra privacy when needed. Keep the overall design minimal to enhance the room’s openness.
Glass partitions elevate your space into a studio-like, modern retreat. They combine function and aesthetics effortlessly, making your room feel more spacious. With a little planning, you can enjoy a seamless blend of privacy and openness that’s both stylish and practical. Ready to make your bedroom glow?
6. Building a Freestanding Bookcase as a Room Divider
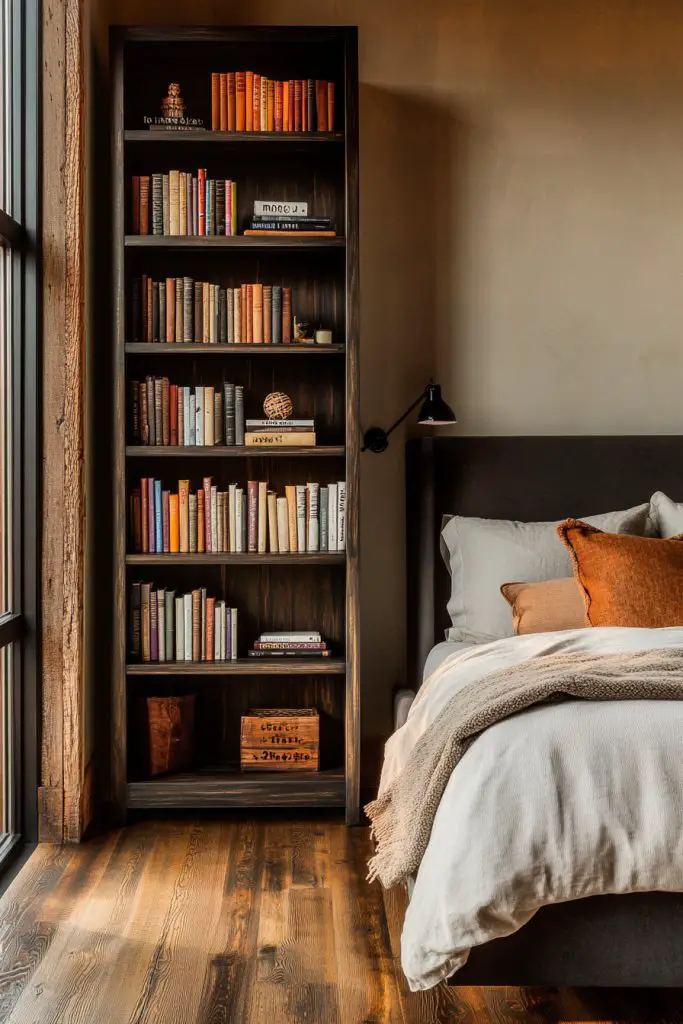
Looking for an easy way to carve out zones without permanent construction? A tall freestanding bookcase can do double duty—as storage and a visual barrier. It’s perfect if you want flexibility and style in one piece. Plus, it’s a quick DIY or affordable purchase.
Recommended Products to replicate this idea
| # | Preview | Product | |
|---|---|---|---|
| 1 |

|
Sauder 5-Shelf Split Bookcase/ Book shelf, Oiled Oak finish | Check Latest Price |
| # | Preview | Product | |
|---|---|---|---|
| 1 |

|
4 Pack Large Closet Storage Baskets Bins for Shelves | Fabric Closet Organizers and Storage with... | Check Latest Price |
Picture a robust wooden or metal bookcase placed perpendicular to your bed, filled with books, baskets, and decorative objects. It creates a cozy, semi-private nook while adding personality. Its open design allows light to flow through, keeping the room feeling bright. The varied heights and textures of stored items add visual interest.
Choose a style that matches your decor—industrial pipes with wood shelves, painted MDF in bold colors, or minimalist metal frames. Adjust the width and height based on your space. You can also add baskets or boxes on the shelves for hidden storage. For a softer look, layer with textiles or decorative fabric covers.
Select a sturdy, tall bookcase that fits your space and style. Position it carefully to create a division, ensuring stability on level flooring. Fill with a mix of books and decorative objects—avoid clutter for a cleaner look. You can anchor it to the wall if extra stability is needed. Regularly dust and reorganize for a fresh feel.
Decorate with your favorite books, framed photos, or small sculptures (avoiding wall art). Use decorative storage bins for a tidy appearance. Change the arrangement seasonally or for special occasions to keep things lively. Incorporate textiles like throws or cushions on top for added softness.
A freestanding bookcase doesn’t just divide space—it adds character and functionality. It’s a flexible, stylish solution that’s easy to move and adapt. Once set up, your room will feel more organized and inviting, ready for any mood or need.
7. Using a Plant Room Divider with Tall Indoor Plants
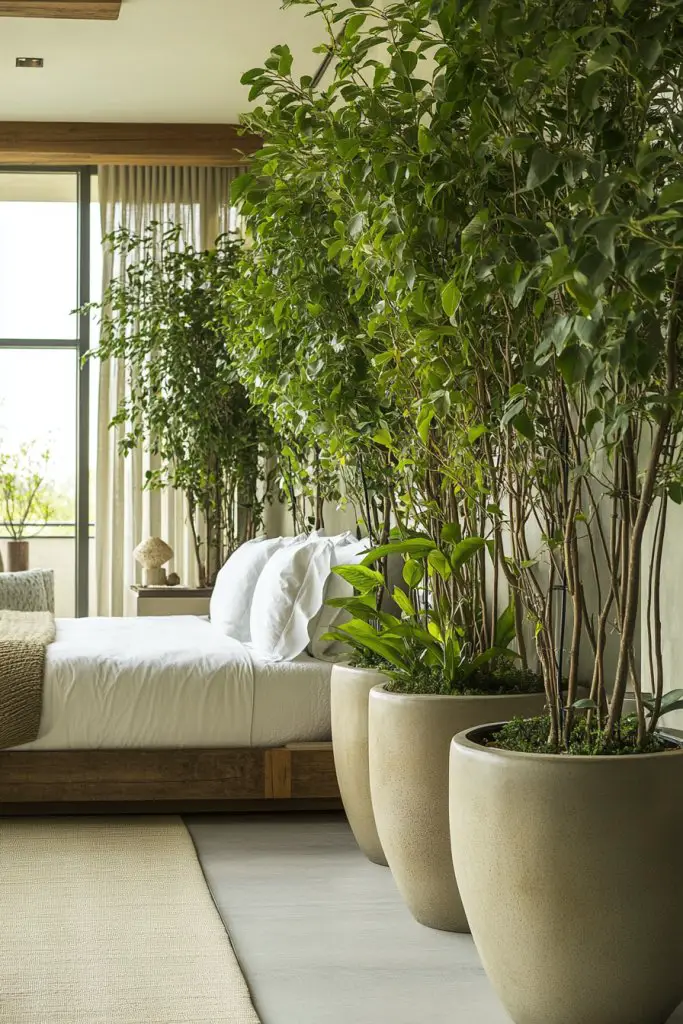
Ever wish your room could feel lush and alive while still being functional? Tall indoor plants can act as natural dividers, adding greenery and privacy at the same time. They’re ideal for creating a calming oasis without heavy construction. Plus, plants boost mood and air quality—win-win.
Recommended Products to replicate this idea
| # | Preview | Product | |
|---|---|---|---|
| 1 |

|
Nearly Natural 48in Dracaena Silk Plant (Real Touch) Green | Check Latest Price |
| # | Preview | Product | |
|---|---|---|---|
| 1 |
|
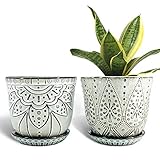
Gepege 6 Inch Beaded Ceramic Planter Set of 2 with Drainage Hole and Saucer for Plants,... | Check Latest Price |
Visualize a row of vibrant, tall plants in decorative pots lining one side of your room. Their lush foliage creates a natural barrier that feels organic and inviting. The plants reach towards the ceiling, adding height and texture, while their leaves soften the hard lines of walls and furniture. It’s like bringing the outdoors inside.
Choose plants suited to your light conditions—fiddle leaf figs, snake plants, or tall dracaenas work well indoors. Use decorative pots that match your decor style—ceramic, woven, or minimalist metal. Arrange them in clusters or a single line, depending on your space and aesthetic. Incorporate decorative gravel or mulch for a polished look.
Select healthy, tall plants that thrive indoors with your light exposure. Place them in sturdy pots with good drainage. Position them strategically to delineate zones—near a window or in a corner. Regular watering, pruning, and cleaning the leaves keep them healthy and vibrant. Rotate plants periodically for even growth.
Decorate pots with paint, fabric wraps, or labels to add personality. Use plant stands or decorative containers to elevate some plants for variety. Incorporate small hanging or trailing plants for additional layers. Seasonal plant swaps keep the space fresh and lively.
Using plants as room dividers brings a lively, natural vibe that’s both stylish and healthy. It’s an eco-friendly, customizable way to partition your space. Once you see how vibrant and peaceful your room becomes, you’ll wonder why you didn’t start this green journey sooner.
8. Creating a Foldable Screen Divider for Versatile Separation
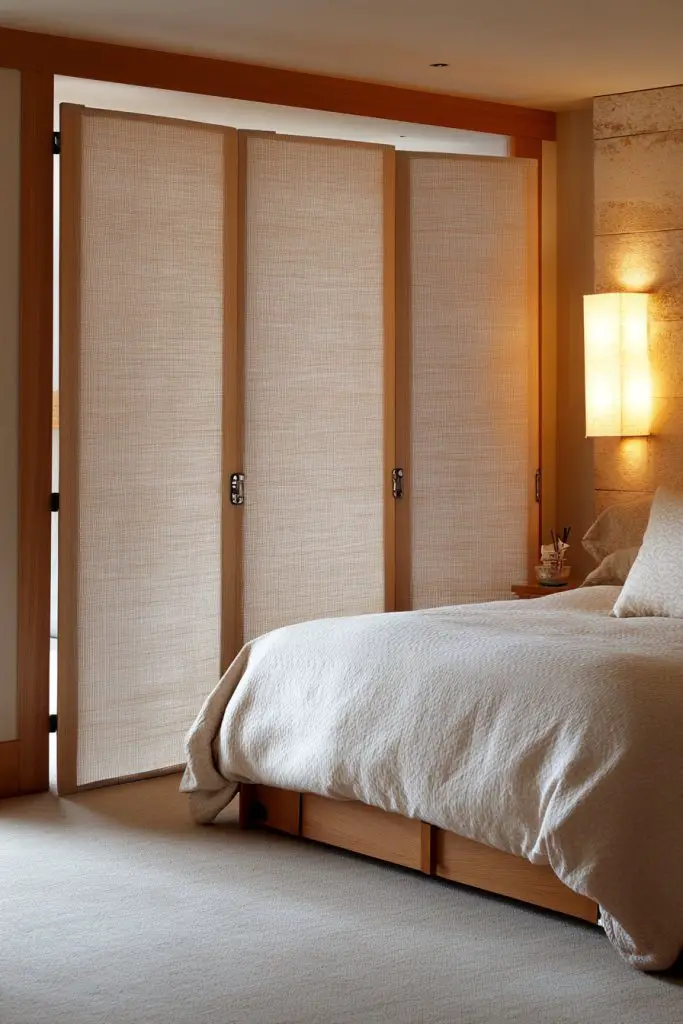
Need a flexible way to divide your bedroom that can vanish when not in use? Foldable screens are your best friends—they’re portable, easy to store, and come in endless styles. Perfect if you want privacy on demand or a way to change your room’s layout quickly.
Recommended Products to replicate this idea
| # | Preview | Product | |
|---|---|---|---|
| 1 |

|
MAYOLIAH 6 Panel Folding Privacy Screen 9ft Wide, 6ft Tall Partition Room Divider Portable Office... | Check Latest Price |
| # | Preview | Product | |
|---|---|---|---|
| 1 |

|
TABKEER 3 Inch Industrial Heavy Duty Swivel Caster Wheels with Brake,Set of 4 Safety Locking... | Check Latest Price |
Picture a lightweight, fabric or wooden screen with multiple panels, sleekly folding away when not needed. It stands freely in the middle of the room, creating a cozy sleeping nook or study area. When you want open space, simply fold and tuck it away into a corner or closet. The screens come in various patterns and textures, from Asian-inspired to modern minimal.
Choose from fabrics like linen, canvas, or silk for softness and style. Wooden panels can be painted or stained to match your decor—think dark walnut or crisp white. Some screens feature decorative cutouts or intricate latticework. Adjust the number of panels based on space and privacy needs, with options for lightweight or heavy-duty materials.
Pick a foldable screen that fits your room size, ensuring stability and ease of movement. Position it where you want the zone to be—near the bed or in a corner. Unfold the panels when needed, and fold away when not in use. Some screens come with wheels, making them even easier to reposition. Keep the hinges clean and check for wear periodically.
Decorate the panels with fabric dyes or paint for a custom look. Add decorative trims or tassels for extra flair. When folded, store the screen behind furniture or inside a closet. Change the fabric or design seasonally to refresh the vibe. Use lightweight, foldable furniture alongside it for a cohesive look.
A foldable screen offers endless flexibility, making your space adaptable to any occasion. It’s a DIY-friendly solution that instantly adds privacy and style. Once you see how easy it is to shift your room layout, you’ll wonder how you ever managed without this versatile tool. Embrace the freedom to change on a whim!
9. Installing a Curtain Wall with Track for Seamless Flexibility
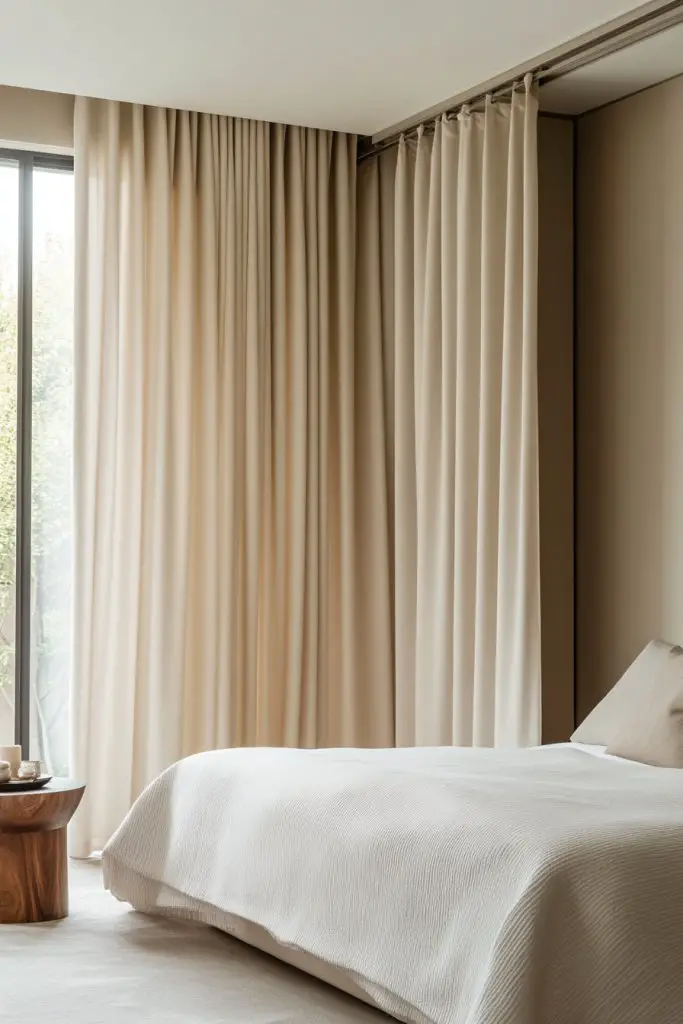
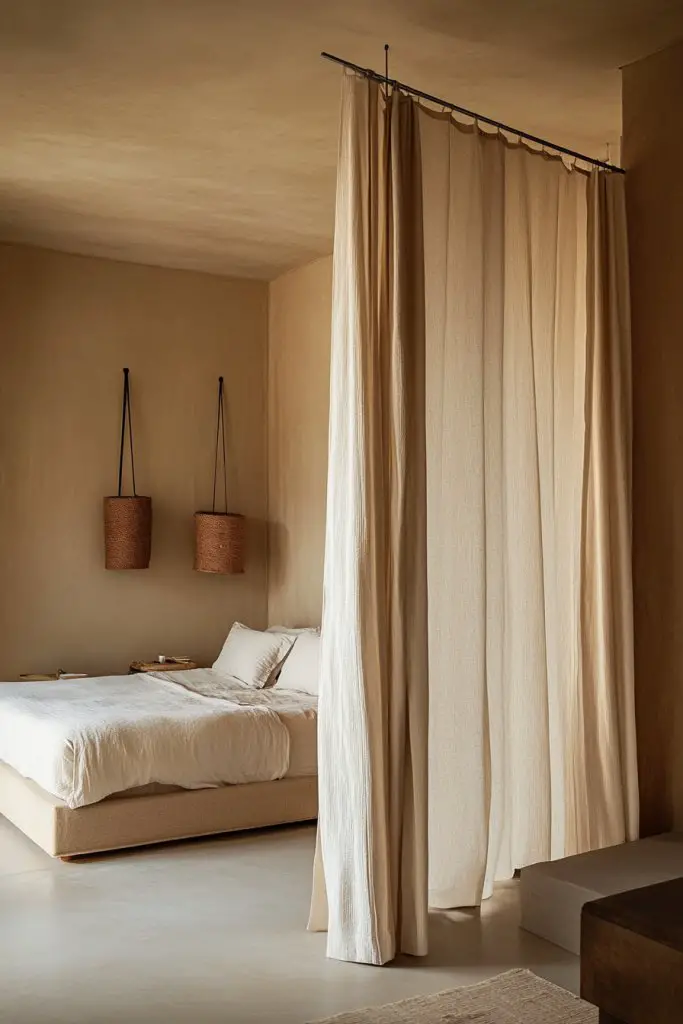
Craving a room divider that’s sleek, easy-to-open, and doesn’t block light? A curtain wall with a track system offers a clean, modern solution. You can effortlessly reconfigure your space whenever needed. It’s perfect for those who want a flexible, minimalist aesthetic.
Recommended Products to replicate this idea
| # | Preview | Product | |
|---|---|---|---|
| 1 |

|
UrbanRed Flexible Bendable Ceiling Curtain Track, 16.4 ft (5 m), Mount for Rail with Curtain Tracks... | Check Latest Price |
| # | Preview | Product | |
|---|---|---|---|
| 1 |

|
OWENIE Sheer Curtains 84 inches Long 2 Panels Set for Living Room/Bedroom, Rod Pocket Voile Sheer... | Check Latest Price |
Imagine a row of lightweight curtains hanging smoothly from a ceiling-mounted track. When closed, they create a soft, flowing barrier that adds texture and movement. When opened, they disappear into a corner, revealing your entire room. The fabric catches the light, adding a gentle glow to your space. It’s like a curtain of calm and privacy.
Choose from sheer, blackout, or textured fabrics depending on your privacy and style preferences. Tracks can be discreet or statement pieces—metal, wood, or painted to blend seamlessly. Use color and pattern to match your decor or create contrast. Consider adding tiebacks or decorative holdbacks for a polished look.
Install the ceiling track securely using anchors, ensuring it’s level for smooth operation. Attach the curtains with rings or clips designed for sliding. Measure carefully to ensure the fabric covers the desired area and drapes nicely. Regularly clean the track and inspect for wear. You can also add weights at the bottom of the curtains for better hang and movement.
Layer with decorative trims or embroidery for a custom touch. Use multiple fabrics or colors for a layered, textured effect. Change curtains seasonally or for different moods—light and airy for summer, cozy and thick for winter. Add decorative tassels or ties for extra flair.
A curtain wall with track turns a plain room into a dynamic space that adapts to your needs. It’s a simple upgrade that offers instant privacy and style. Once installed, you’ll love how easy it is to create zones or open up your room in seconds. Your space just got smarter.
10. Using Modular Cubes or Storage Units as a Divider
Want a flexible, customizable way to split your bedroom? Modular cubes or storage units are perfect—they can be arranged, reconfigured, and adapted as your needs change. Plus, they add a modern touch to your decor while offering practical storage.
Recommended Products to replicate this idea
| # | Preview | Product | |
|---|---|---|---|
| 1 |

|
C&AHOME Cube Storage Organizer, 16-Cube Shelves Units, Plastic Storage Cubes, DIY Closet Organizer,... | Check Latest Price |
| # | Preview | Product | |
|---|---|---|---|
| 1 |

|
IRIS USA 72 QT Plastic Storage Box with Lid and Latches - 4 Pack - BPA-Free, See-Through Organizing... | Check Latest Price |
Visualize a grid of colorful or neutral-toned cubes stacked into a tall or wide partition. Some cubes hold books, while others hide clutter behind doors. The open cubes display decorative items, adding personality. The varying heights and arrangements create an interesting visual barrier that’s both functional and stylish. It’s like building with giant Lego blocks.
Choose cubes in materials like wood, metal, or plastic to match your decor style. Mix and match colors for a playful look or keep them uniform for a sleek modern vibe. You can stack them high or arrange them in staggered patterns. Incorporate wheels for mobility or add fabric bins for hidden storage. Use lighting to highlight certain sections.
Start by selecting a set of modular cubes that fit your space and style. Arrange them into a configuration that creates your desired zone—either a full-height partition or a low divider. Secure the units if needed for stability, especially if stacking high. Fill them with your essentials and decorative objects. Regularly reorganize for a fresh look.
Decorate with fabric covers, paint, or wallpaper on the visible sides. Use labels or tags for easy organization. Change the arrangement seasonally or for special occasions. Incorporate lighting or string lights around the units for added ambiance. Personal touches turn a simple divider into a feature.
Modular storage units make your space adaptable and stylish. They’re easy to expand or reconfigure as your needs evolve. Once set up, they help keep your room organized and visually appealing. It’s a DIY-friendly, budget-conscious way to define zones with flair.
11. Constructing a Minimalist Wooden Slat Screen for Subtle Separation
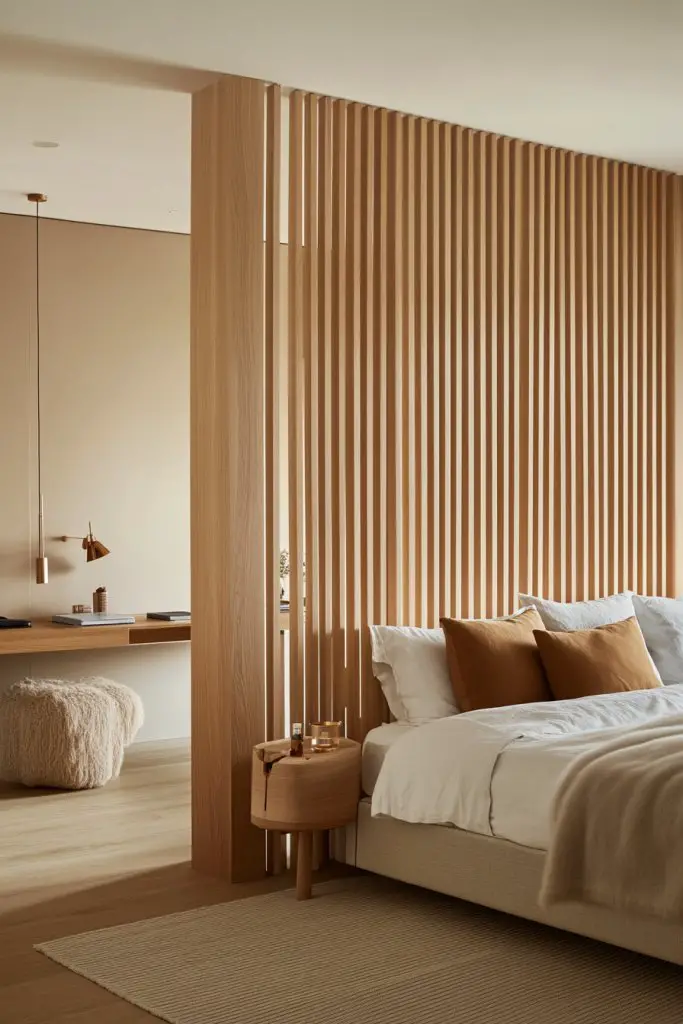
Looking for a subtle way to separate your sleeping area without closing off the room? A minimalist wooden slat screen offers a sleek, airy division that adds texture without overwhelming. It’s perfect for modern or Scandinavian interiors that favor simplicity.
Recommended Products to replicate this idea
| # | Preview | Product | |
|---|---|---|---|
| 1 |

|
VEVOR Wood Room Divider, 4 Panel Wood Folding Privacy Screen, 66.9 Inches Tall Indoor Louvered... | Check Latest Price |
| # | Preview | Product | |
|---|---|---|---|
| 1 |
|
Leeleberd Led Lights for Bedroom 100 ft (2 Rolls of 50ft) Music Sync Color Changing RGB Led Strip... | Check Latest Price |
Picture a series of evenly spaced, slender wooden slats standing vertically or horizontally. They’re mounted on a simple frame, creating a semi-open partition. The natural wood grain adds warmth and depth, while the spacing allows light and air to pass through. It’s a refined way to zone your space without sacrificing openness.
Select wood types—oak, bamboo, or painted MDF—to match your aesthetic. Adjust the thickness and spacing for different visual effects—closer for more privacy, wider for more openness. You can make the slats curved or angled for a custom touch. Pair with textiles or soft furnishings nearby for contrast.
Construct or purchase a modular slat screen that fits your measurements. Mount it securely to the ceiling or floor using brackets or anchors. Ensure the slats are evenly spaced and aligned for a clean look. Finish with natural oil or paint to protect the wood and enhance its appearance. Regular dusting keeps it looking sharp.
Add decorative accents like carved patterns or contrasting paints on select slats. Incorporate LED lighting behind or along the edges for a subtle glow. Use textiles or soft curtains nearby for added softness. Change finishes or arrangements seasonally for fresh appeal.
A wooden slat screen elevates your room’s style with minimal fuss, offering a perfect balance of function and aesthetics. It’s a simple DIY project that can be customized endlessly. Once installed, it creates a calm, organized zone that feels thoughtfully designed. Your space will thank you.
12. Incorporating a Convertible Murphy Bed with Sliding Panel
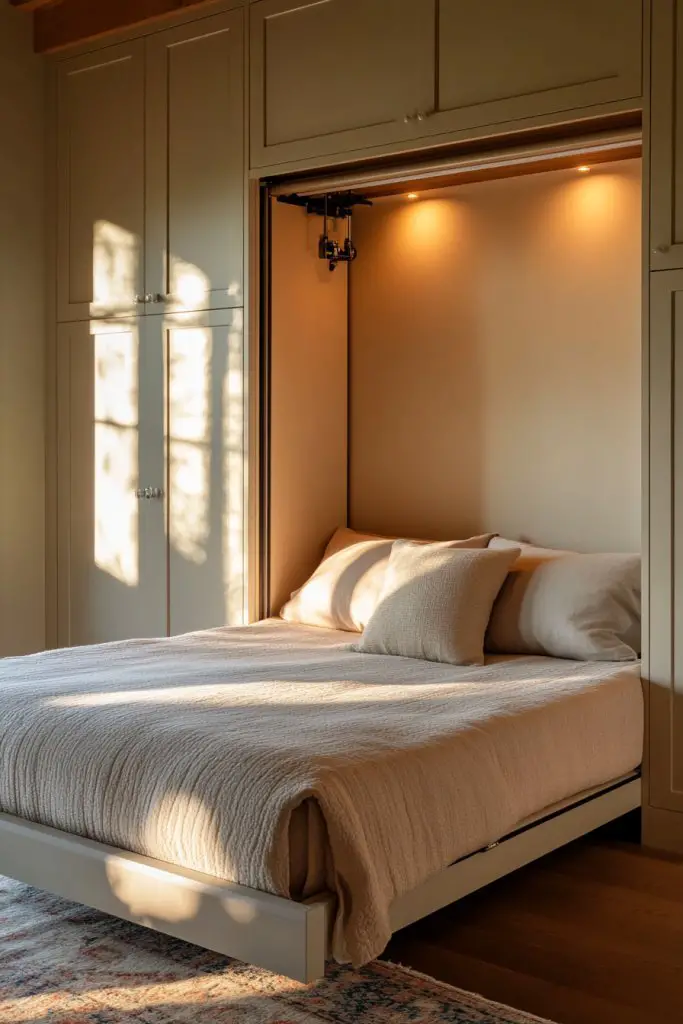
Limited space but still want the comfort of a real bed? A Murphy bed that folds into the wall is a space-saving hero. When not in use, it disappears, freeing up your room for other activities. It’s a game-changer for multi-purpose rooms.
Imagine a sleek wall panel that slides or folds down to reveal a plush bed. When stowed away, the wall looks like a piece of modern art or cabinetry, blending seamlessly into the room’s design. The bed folds out easily, turning your space into a cozy bedroom in seconds. It’s like magic in furniture form.
Choose from various finishes—wood veneer, painted MDF, or laminate—to match your decor. Some models include built-in shelves or desks for added functionality. You can also customize the size—single, double, or even queen—based on your needs. The wall panel can incorporate artwork or textured finishes for extra style.
Start by selecting a Murphy bed system that fits your space and budget. Hire a professional or follow detailed instructions for installation, ensuring structural support and safety. Attach the wall panel securely, and test the folding mechanism. Finish with paint or veneer, and add any decorative features. Regular maintenance ensures smooth operation.
Decorate the wall panel with paint, wallpaper, or textured finishes. Incorporate small shelves or pegboards for accessories when the bed is folded away. Use bedding and cushions that coordinate with your room’s theme. When folded, it’s a sleek, clutter-free wall.
A Murphy bed transforms a small or multifunctional room into a cozy retreat without sacrificing style. It’s a smart investment that increases your space’s versatility and value. Once installed, you’ll love how effortlessly it adapts to your lifestyle. Sleep in style, even in tight quarters.
13. Hanging a Decorative Rope or Fabric Divider for Artistic Flair
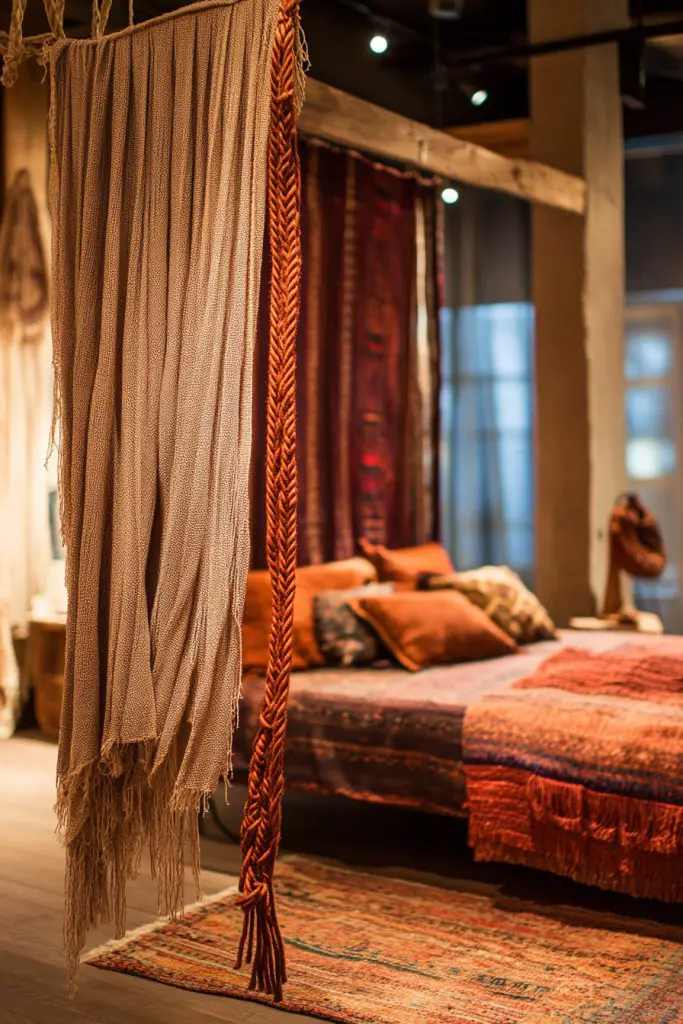
Want an artistic, unconventional way to partition your bedroom? Rope or fabric hangings add texture and personality without the rigidity of walls. They create a boho-chic vibe and can be as simple or as elaborate as you like. Perfect for creative souls who want a unique touch.
Recommended Products to replicate this idea
| # | Preview | Product | |
|---|---|---|---|
| 1 |

|
PINE & LINEN 2 Pcs Large Loop Wall Plate Metal Post Queue Line Barrier Hanging Circle Hook Rope... | Check Latest Price |
| # | Preview | Product | |
|---|---|---|---|
| 1 |

|
Room Divider 6FT Portable Room Dividers and Folding Privacy Screens, 88'' W Fabric Divider for Room... | Check Latest Price |
Imagine thick, decorative ropes or colorful fabrics hanging from ceiling hooks or a rod. They sway gently with air movement, creating a relaxed, inviting atmosphere. Tassels, beads, or fringes add detail and movement, making them more than just dividers—they’re art pieces. When pulled aside, the space opens up, maintaining flow.
Choose natural fiber ropes like jute or hemp for a rustic look, or opt for vibrant textiles in bold patterns for a lively feel. Mix textures—smooth fabrics with chunky ropes—to add depth. Use different lengths and layering techniques for visual richness. Tie with decorative knots or add embellishments for a personalized touch.
Install ceiling hooks or tension rods sturdy enough to hold the weight of fabric or rope. Measure for the desired length, allowing for movement and flow. Securely attach the hanging elements, ensuring they don’t sway or tangle. For added stability, use decorative hooks or clips. Regularly check for wear or fraying.
Decorate with colorful tassels, beads, or charms for extra flair. Change fabrics or ropes seasonally for a fresh look. Incorporate LED fairy lights or small lanterns for ambiance. Personalize with hand-painted patterns or initials on the fabric or rope ends.
Rope or fabric hangings are an affordable, artistic way to define zones with personality. They’re easy to install, remove, or swap out—perfect for renters or those who love changing things up. They add a laid-back, creative vibe that makes your bedroom uniquely yours. Go ahead, make it artsy!
14. Using a Tension Rod with Hanging Storage or Curtains
Looking for a quick, no-damage way to divide your space? A tension rod can hold lightweight curtains or hanging storage, creating an instant partition. It’s perfect for renters or anyone who hates drilling holes. Plus, it’s super budget-friendly and adaptable.
Recommended Products to replicate this idea
| # | Preview | Product | |
|---|---|---|---|
| 1 |

|
CorkLatta Black Shower Curtain Rod 31 to 80 Inch,1 Inch Diameter Adjustable Spring Tension Stainless... | Check Latest Price |
| # | Preview | Product | |
|---|---|---|---|
| 1 |
|
BOOMIBOO Hanging Closet Organize and Shelves,5-Hanging Shelf with 2 Side Pockets,Storage... | Check Latest Price |
Picture a slender tension rod stretched between two walls or ceiling points, holding up fabric panels or hanging pockets. The fabric softly drapes, creating a cozy, semi-private zone. Hanging storage pockets can hold accessories, clothes, or essentials—keeping things tidy and accessible. When you want open space, just slide or remove the curtains.
Choose lightweight fabrics like linen or sheer for a breezy look; heavier materials for more privacy or sound absorption. Use colorful or patterned fabrics to add personality. For hanging storage, select fabric pockets or woven baskets with hooks. Adjust the length and fullness depending on your room’s dimensions.
Install the tension rod at the desired height, making sure it’s tight enough to stay in place. Hang curtains with rings or clips; use fabric that’s easy to slide. For storage, hang fabric pockets or organizers with hooks or loops. Regularly check the tension to prevent slipping or falling. Keep the hardware clean for smooth operation.
Decorate the curtains with trims, tassels, or fabric paint for a personal touch. Change out fabrics seasonally or for different moods. Use colorful or themed storage pockets for a fun vibe. Add fairy lights or small ornaments to the hooks for extra charm.
A tension rod setup is a simple, effective way to carve out zones without permanent alterations. It’s a DIY project anyone can tackle—no tools required. Once you see how much it transforms your space, you’ll wonder why you didn’t do it sooner. Flexibility has never looked so good.
15. Building a Compact Desk or Vanity as a Functional Divider

Need a clear separation between your sleeping and dressing areas? A compact desk or vanity can serve as a stylish divider while also offering functional use. It’s perfect for small rooms where every inch counts. Plus, it keeps your essentials within reach.
Recommended Products to replicate this idea
| # | Preview | Product | |
|---|---|---|---|
| 1 |

|
Vanity Mirror with Lights,Lighted Vanity Mirror with 9 Dimmable Bulbs for Dressing Room & Bedroom,3... | Check Latest Price |
| # | Preview | Product | |
|---|---|---|---|
| 1 |

|
Huuger 47 Inch Computer Desk with 8 Fabric Drawers, Office Desk Work Desk for Home Office, Study,... | Check Latest Price |
Imagine a sleek desk with a mirror and neat organization, positioned to divide the room subtly. It’s topped with personal accessories, makeup, or stationery—adding personality. When you’re not using it, it blends seamlessly into the decor. When needed, it becomes both a work surface and a dressing station.
Choose a style that matches your decor—minimalist, vintage, or industrial. Use a small desk with drawers for hidden storage or a vanity with a glass or wood top. Decorate with a stylish mirror, a small lamp, or decorative trays. Adjust size to fit your space and needs, and consider fold-away or extendable designs for versatility.
Select a sturdy, appropriately sized piece that complements your room. Position it at the boundary of your zones, ensuring enough clearance for movement. Add organization accessories—trays, containers, or small shelves—to keep essentials tidy. Secure to the wall if necessary for stability. Finish with paint, stain, or decorative hardware matching your style. Regular cleaning keeps it looking fresh.
Decorate the surface with personal items—jewelry stands, candles, or framed photos (avoiding wall art). Change accessories seasonally or for different moods. Use decorative drawer pulls or knobs for a customized look. Add a small plant or decorative box to enhance the aesthetic.
A dedicated desk or vanity doubles as a stylish room divider, making your space functional and beautiful. It’s a clever way to organize your daily routines while defining zones. Once in place, it elevates your room’s style and utility. Who says practicality can’t be pretty?
16. Creating a DIY Pallet Wall for a Rustic Room Split
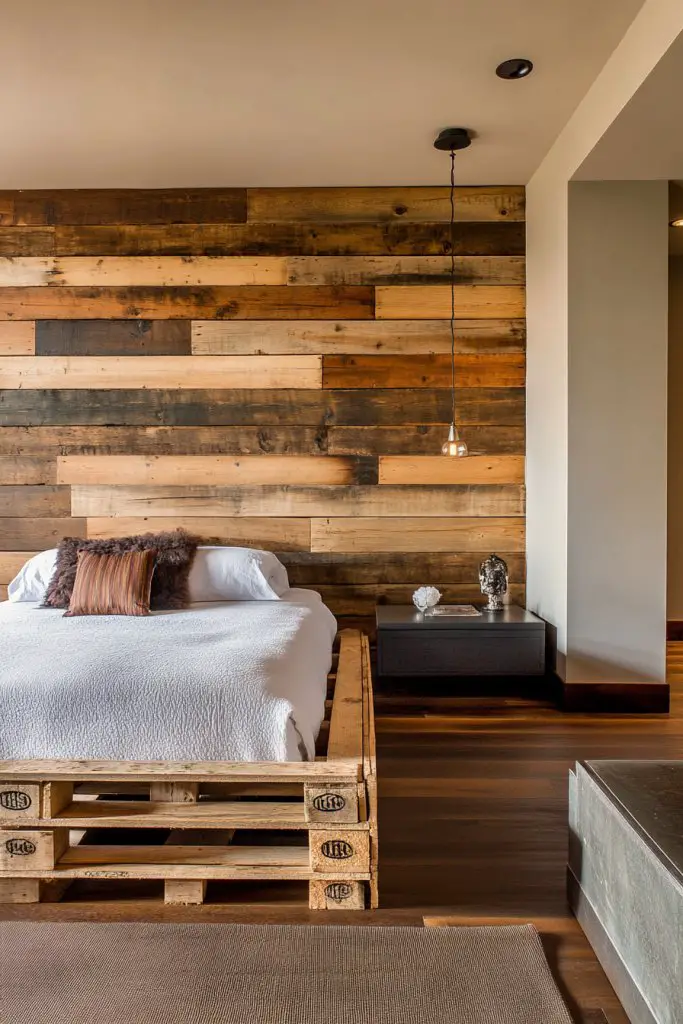
Craving a rustic, handcrafted look that also divides your space? A pallet wall offers an affordable, eco-friendly option to create a warm, textured partition. It’s perfect for DIY lovers and those wanting a cozy, farmhouse vibe.
Picture a wall made from weathered wooden pallets arranged horizontally or vertically. The rough texture and natural knots add character, transforming the room into a rustic retreat. When placed strategically, the pallet wall frames a sleeping nook or workspace, creating visual separation without walls. Light filters through the gaps, adding charm.
Use reclaimed wood, painted pallets, or stained varieties for different effects. Add decorative elements like vintage signs or hooks for hanging items—always avoiding wall art. For a more polished look, sand and seal the wood to smooth rough edges. Vary the pallet widths and spacing for a custom, layered appearance.
Source pallets from local suppliers or salvage yards, ensuring they’re clean and safe. Arrange them in your desired pattern, securing with nails or screws to a sturdy frame or directly to the wall. Seal or paint the pallets to protect against wear. Use spacers for gaps or a continuous surface, depending on your style. Regular maintenance involves cleaning dust and inspecting for loose boards.
Decorate with added elements like vintage metal accents, small shelves, or hooks. Change the color stain or finish to match seasons or decor updates. Incorporate string lights or LED strips behind for a warm glow. Personal touches like painted patterns or initials add charm without wall art.
A DIY pallet wall provides a hearty, rustic backdrop that also functions as a room divider. It’s an affordable project that adds texture and warmth to your space. Once completed, your room will radiate charm and personality—proof that DIY can be both functional and fabulous.
17. Using a Rope or Chain Divider with Hanging Accessories
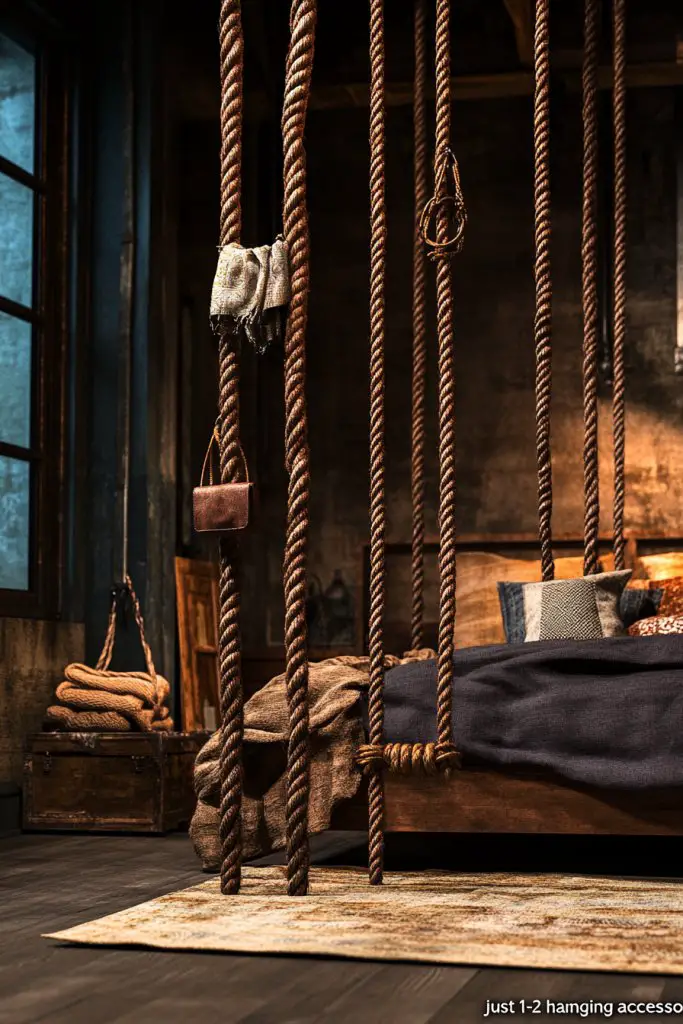
Want an industrial, artsy way to partition your bedroom that’s also a display? Ropes or chains can serve as stylish dividers, especially when adorned with accessories or textiles. It’s a creative, budget-friendly solution that adds character and function.
Recommended Products to replicate this idea
| # | Preview | Product | |
|---|---|---|---|
| 1 |

|
Aidoclip 2PCS Ceiling Hooks for Hanging Plants,Heavy Duty Plant Swag Hooks,Hanging Planter Wall... | Check Latest Price |
| # | Preview | Product | |
|---|---|---|---|
| 1 |

|
10 Feet SUS304 Stainless Steel Chain, Hanging Chain Link Light Duty Chain, Heavy Duty Hanging Chain... | Check Latest Price |
Imagine thick ropes or metal chains hung from ceiling hooks or wall mounts, stretched to create a semi-permanent barrier. Drape decorative fabrics, hang jewelry or lightweight accessories from the ropes or chains, turning them into display racks. The textured elements add depth and an edgy vibe, transforming your room into an industrial chic space.
Choose from natural fibers, hemp, or jute for a rustic look; metallic chains for an industrial vibe. Use decorative knots, tassels, or charms to embellish the ropes or chains. Attach hooks or clips to hang accessories, small pouches, or lightweight decor items. Adjust length and tension for the desired visual effect.
Secure ceiling hooks or wall anchors capable of supporting weight. Attach the ropes or chains, ensuring they are taut and stable. Use decorative elements like beads or charms to add detail. Regularly check for wear or fraying, and tighten or replace as needed. For added style, incorporate matching hardware or paint.
Decorate with personalized charms, painted wooden pieces, or wrapped fibers. Change accessories seasonally or for special events. Use the hanging elements to showcase jewelry, lightweight art, or small decorative objects. Keep the hardware clean and rust-free for longevity.
Rope and chain dividers add an edgy, artistic touch while defining space. They’re easy to install and customize, making your room uniquely yours. Once set, you’ll enjoy a display that’s both functional and fashionable—proof that simple materials can make a big impact.
18. Crafting a Vertical Garden Wall as a Natural Barrier
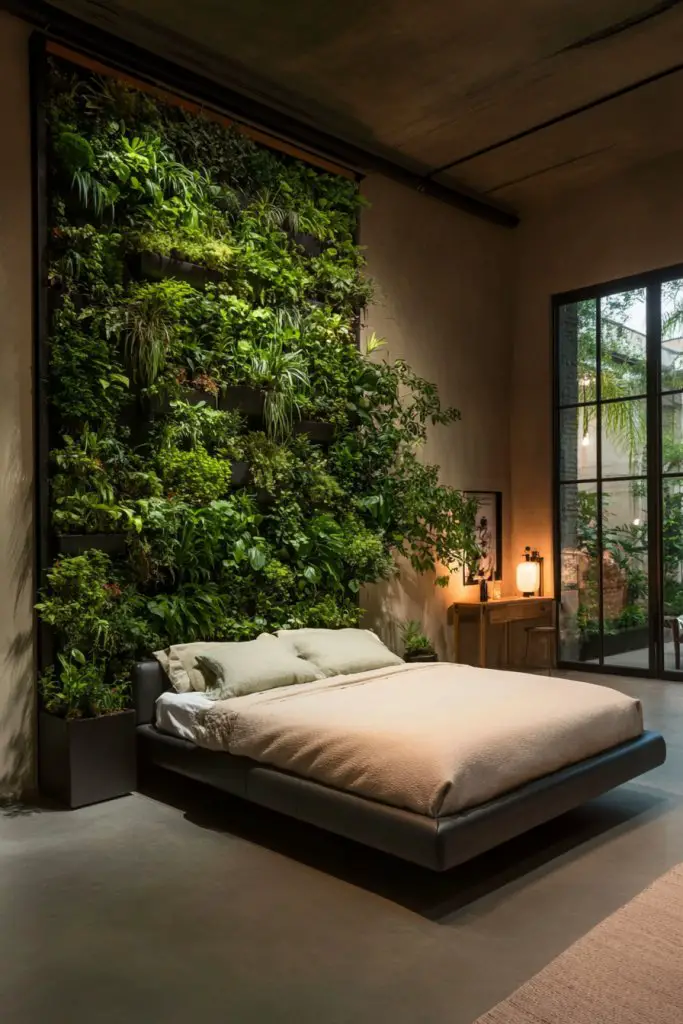
Dream of a lush, green bedroom that also defines zones? A vertical garden wall offers a natural, calming divider that brings life into your space. It’s perfect if you love nature-inspired decor and want a living partition that’s both functional and beautiful.
Recommended Products to replicate this idea
| # | Preview | Product | |
|---|---|---|---|
| 1 |
|
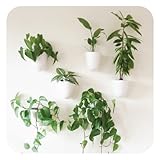
Make Good PlantPod Luxe - Self-Watering Wall Planters (Set of 6) - Easy to Water and Install -... | Check Latest Price |
| # | Preview | Product | |
|---|---|---|---|
| 1 |
|
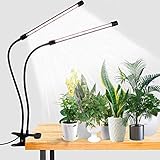
GooingTop LED Grow Light,6000K Full Spectrum Clip Plant Growing Lamp with White Red LEDs for Indoor... | Check Latest Price |
Picture a wall filled with wall-mounted planters, featuring tall, leafy plants or succulents. The greenery creates a vibrant, textured barrier that separates your sleeping area from a workspace or dressing zone. The plants add color, scent, and a sense of tranquility, turning your room into a mini indoor garden.
Use wall-mounted pockets, modular planters, or hanging baskets for flexibility. Select plants suited for indoor environments—ferns, pothos, or snake plants. Incorporate decorative pots or containers that match your overall decor. Change plants seasonally or add flowering varieties for extra color. Use trellises or vertical grids for climbing plants.
Install sturdy wall mounts or trellises, ensuring they can support the weight of the planters. Choose a location with sufficient light or supplement with grow lights. Water regularly, and use a drainage system to avoid water damage. Regular pruning and cleaning keep the plants healthy. Use waterproof sealant on the wall if necessary.
Decorate pots with paint, fabric wraps, or decals for a personalized touch. Incorporate fairy lights or small decorative elements around the plants. Change plant arrangements seasonally for a fresh look. You can also add small sculptures or stones to create a garden-like aesthetic.
A vertical garden wall creates a peaceful, natural vibe that elevates your entire room. It’s a living, breathing feature that’s both eco-friendly and visually stunning. Once established, it becomes a source of pride and a conversation starter—proof that you can combine style with sustainability.
19. Building a Low Bookcase or Bench as a Divider with Seating
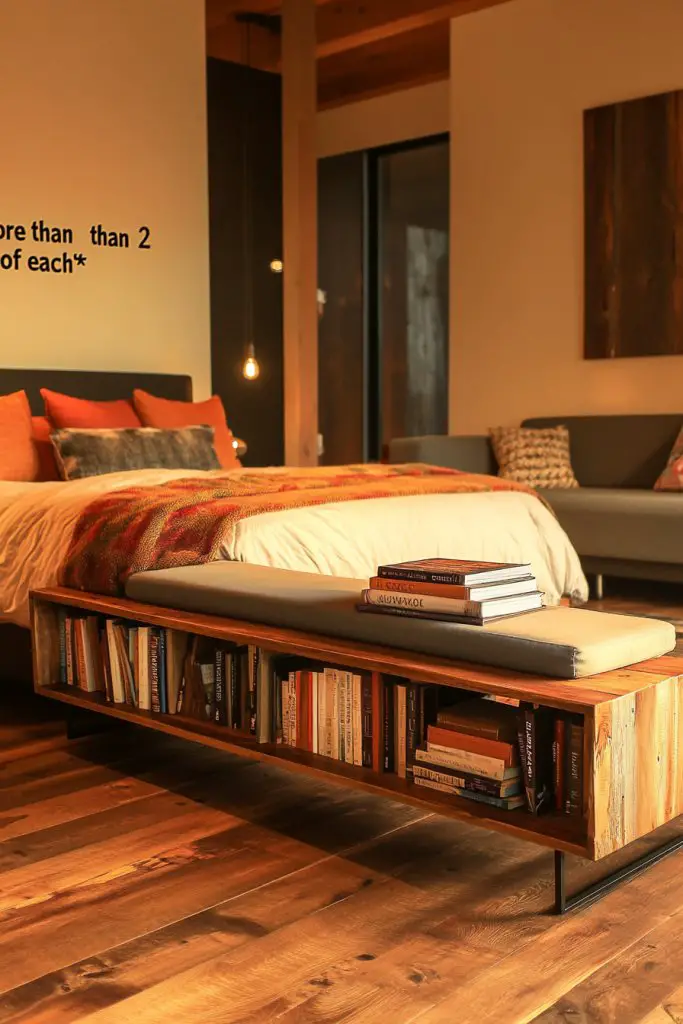
Need a practical yet stylish way to carve out a zone? A low bookcase or bench can serve as a barrier and a seating spot at the same time. It’s a versatile piece that adds function without overwhelming your space. Perfect for small rooms or open layouts.
Recommended Products to replicate this idea
| # | Preview | Product | |
|---|---|---|---|
| 1 |

|
Furinno LUDER Book Shelf, 5-Cube Bookshelf, Reversible Bookcase, 9.4 x 19.5 x 31.5, for Living Room,... | Check Latest Price |
| # | Preview | Product | |
|---|---|---|---|
| 1 |

|
Yaheetech Ottoman with Storage, 52" Storage Ottoman Bench with Safety Hinge, Upholstered Bench with... | Check Latest Price |
Imagine a sturdy, low-profile piece made of wood or metal, placed at the edge of your sleeping area. It’s topped with cushions or throws, transforming it into a cozy bench. Books and decorative objects fill the shelves, adding personality and interest. The piece subtly separates zones while inviting relaxation and conversation.
Choose materials that match your decor—rustic wood, painted MDF, or sleek metal. The height should be low enough to serve as a barrier but comfortable for sitting. Add soft cushions or pillows to enhance comfort. You can also incorporate hidden storage inside for extra practicality. Decorate with a mix of books and decor objects for visual appeal.
Build or buy a sturdy, low-height unit that fits your space. Position it where you want the zone to be—along the room’s width or at the foot of the bed. Add cushions or a fabric top for comfort. Secure the piece if needed for stability. Use decorative accessories to personalize and soften the look. Regularly clean and reorganize for freshness.
Decorate with throw pillows or textured fabric covers. Change the arrangement of books and decor to reflect seasons or moods. Use decorative trims or painted details for a custom look. Incorporate small plants or candles nearby for ambiance. Keep the design simple but meaningful.
A low bookcase or bench is a functional, stylish way to define spaces without walls. It encourages a cozy, inviting atmosphere. Once you see how it transforms your room, you’ll appreciate the blend of practicality and aesthetic appeal. It’s a simple upgrade with big impact.
20. Installing a Fabric-Backed Art Panel for Visual Interest
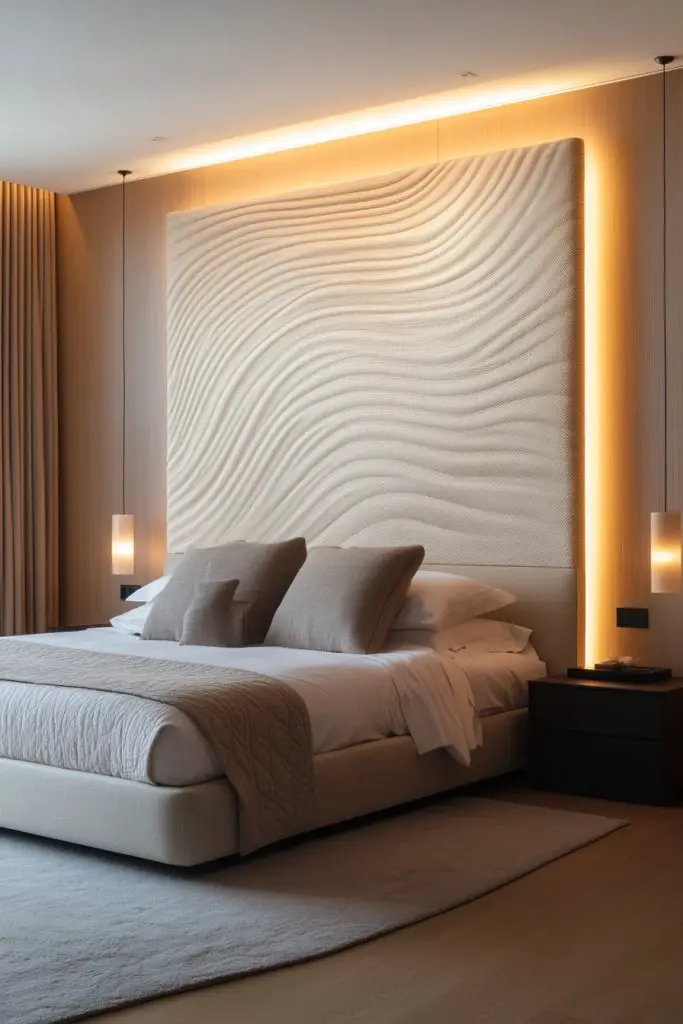
Looking to add color and texture to your room without wall art? A fabric-backed panel offers a soft, stylish way to create a visual divider. It’s perfect if you want to introduce pattern or warmth without heavy or permanent features. Plus, it’s easy to swap out for different looks.
Recommended Products to replicate this idea
| # | Preview | Product | |
|---|---|---|---|
| 1 |
![Ekkogo Acoustic Panels 12-Pack Soundproof Wall Panels 12'X10.4'X0.4' Sound Panels High Density Sound Dampening Panels - [Light Turquoise Hexagon]](https://m.media-amazon.com/images/I/51fcGFHNliL._SL160_.jpg)
|
Ekkogo Acoustic Panels 12-Pack Soundproof Wall Panels 12"X10.4"X0.4" Sound Panels High Density Sound... | Check Latest Price |
| # | Preview | Product | |
|---|---|---|---|
| 1 |

|
MAPVOLUT 120ft 1/16" Stainless Steel Wire Rope Kit - Durable Vinyl Coated Turnbuckles for... | Check Latest Price |
Picture a large textile panel mounted on a lightweight frame or directly on the wall. The fabric features bold patterns, textures, or neutral tones—whatever suits your style. It acts as a calming backdrop that subtly separates zones, adding depth and softness. When you want a different vibe, just change the fabric.
Select fabrics such as linen, velvet, or woven textiles for different textures. Use frames or mounting systems that are easy to install and remove. Incorporate decorative trims, embroidery, or dyeing for a personalized touch. Size and shape can vary—rectangular, square, or even circular for a distinctive look.
Mount a lightweight frame or track system on the ceiling or wall. Attach the fabric panel with clips, hooks, or tension fittings. Ensure it hangs evenly and securely. Choose fabrics that are easy to clean and maintain. Change or wash the fabric periodically to keep the look fresh and inviting.
Decorate with painted or embroidered details, or add appliqué for extra flair. Layer with other textiles like throws or cushions nearby. Use different fabrics for seasonal updates or to match your decor themes. Incorporate subtle lighting behind or around the panel for added visual interest.
A fabric-backed art panel adds a layer of softness and personality to your space. It’s an affordable, customizable way to define zones with style. Once you see how it transforms your room, you’ll love how versatile and easy it is to refresh. Your space, your way.
21. Using a Modular Partition System with Interchangeable Panels

Want a room divider that can grow and change with you? Modular systems with interchangeable panels offer endless flexibility. You can customize the look and function over time, making your space adaptable and stylish. Ideal for renters or those who love to switch things up.
Recommended Products to replicate this idea
| # | Preview | Product | |
|---|---|---|---|
| 1 |

|
SUNALLY Room Divider Curtain Rod, No Drilling Room Separator for Space Partition Adjustable... | Check Latest Price |
| # | Preview | Product | |
|---|---|---|---|
| 1 |

|
Klutch Interchangeable Metal Forming Kit | Check Latest Price |
Imagine a sleek frame with removable panels in different textures, colors, or finishes—wood, fabric, or acrylic. You can slide panels in and out easily, creating a new look whenever you desire. When closed, it forms a solid barrier; when open, it reveals your space. It’s like a customizable puzzle for your room.
Choose panels with different patterns, textures, or transparency levels for visual interest. Mix materials—wood, fabric, frosted acrylic—to match your decor. Adjust the size and number of panels to fit your space and privacy needs. Some systems allow for adding storage or display elements within the panels.
Install a sturdy frame or track system that supports easy panel swapping. Secure panels with clips, magnets, or sliding mechanisms. Measure carefully to ensure panels fit perfectly and slide smoothly. Regularly check for wear and replace panels as needed. Keep the system clean and well-maintained for longevity.
Customize panels with paint, fabric covers, or decals for a personal touch. Change panels seasonally or for special occasions—think festive or calming themes. Incorporate small shelves or hooks into panels for added functionality. Keep your design fresh and reflective of your mood.
A modular partition system offers a creative, adaptable way to define your space. It’s a fun DIY project that grows with your style. Once set up, it provides a dynamic backdrop that’s as unique as you are. Embrace the freedom to reconfigure anytime!
22. Creating a Raised Platform with a Partial Barrier for Zoning
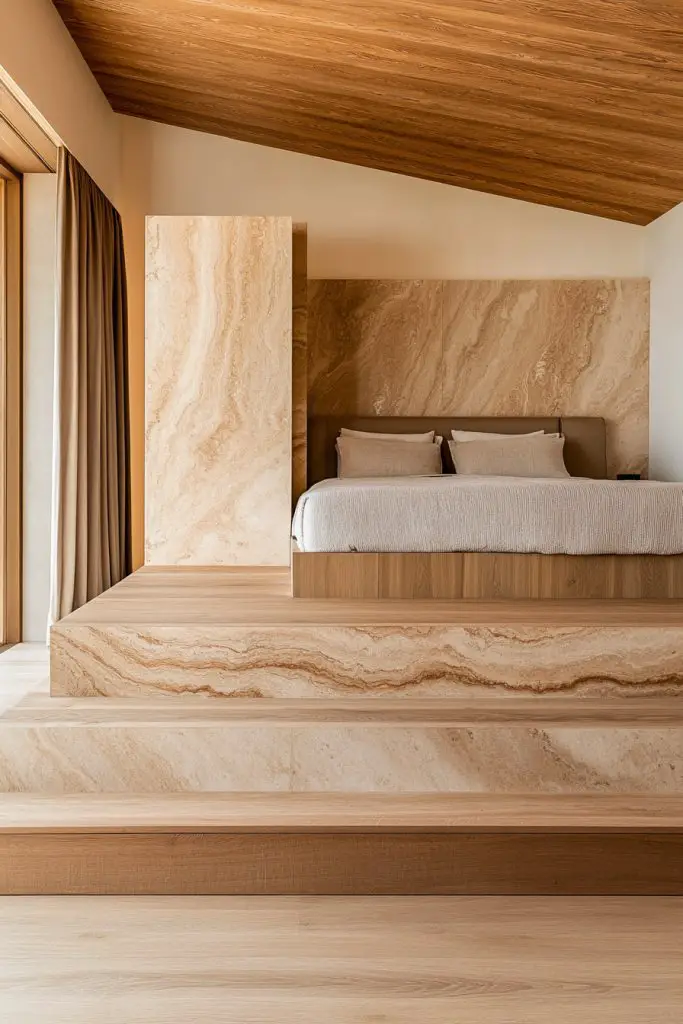
Looking to subtly zone your bedroom without walls? A raised platform can define a cozy zone while adding architectural interest. Pair it with a partial barrier or step for a layered, sophisticated look. It’s a clever way to create distinct areas in a small or open-plan space.
Visualize a low, wooden or carpeted platform slightly elevating your bed or seating area. A partial barrier—like a short wall, bookshelf, or decorative screen—adds separation without closing off the space completely. The layered levels and textures create visual depth, making your room feel more curated.
Choose materials like wood, carpet, or tiles for the platform, depending on your style. The partial barrier can be a built-in wall, a row of storage cubes, or a decorative fence. Incorporate lighting underneath or along the edge for a cozy glow. Adjust the height based on ceiling clearance and design goals.
Build your platform with sturdy framing and appropriate flooring material. Install it securely to prevent wobbling or shifting. Add a partial barrier—securely anchored and decorative—that complements your decor. Finish with paint, stain, or carpet to match your aesthetic. Use rugs or cushions to soften the look.
Decorate the barrier with paint, fabric, or textured finishes. Add lighting or small shelves for practicality. Use cushions or throws to enhance comfort and style. Change the barrier’s look seasonally or for different occasions—painted designs, fabric covers, or decorative panels.
A raised platform with a partial barrier elevates your room’s style and zoning potential. It’s a subtle, elegant way to create distinct zones that feel intentional. Once finished, it transforms your space into a layered, architectural retreat—proof that small details make a big difference.
23. Incorporating a Multi-Purpose Room Divider with Storage and Decor
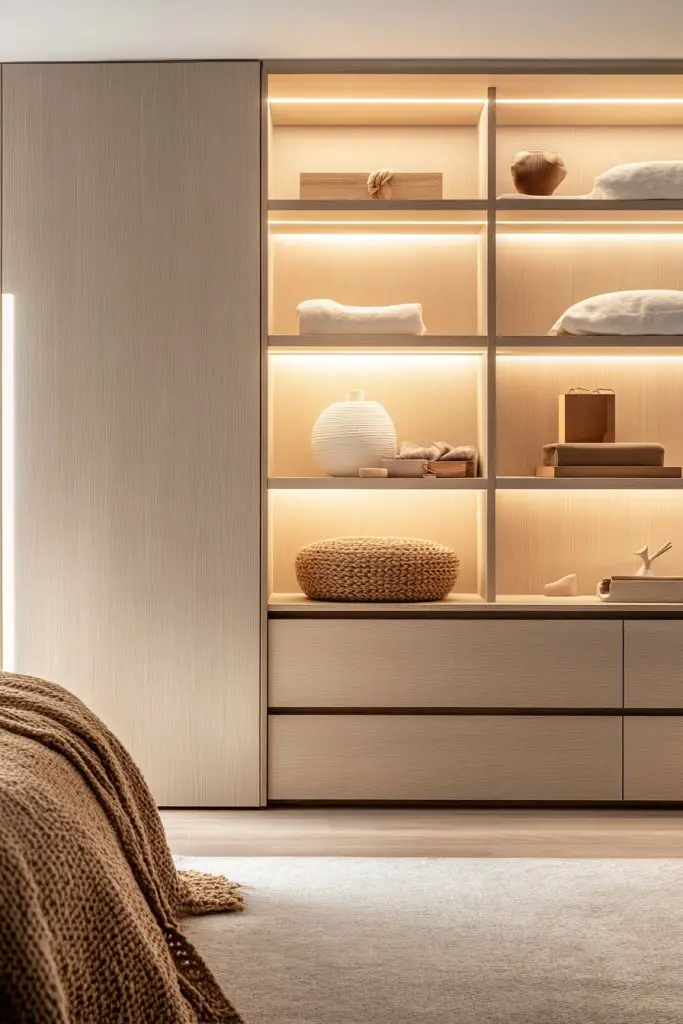
Want a single piece that does it all? A multi-purpose room divider with storage and decor combines function and style effortlessly. It defines zones, hides clutter, and adds personality—all in one sleek package. Perfect for maximizing small spaces or creating a personalized sanctuary.
Recommended Products to replicate this idea
| # | Preview | Product | |
|---|---|---|---|
| 1 |

|
Room Divider with Shelves, Wall Room Divider Bookshelf, Freestanding Wood Privacy Screen with... | Check Latest Price |
| # | Preview | Product | |
|---|---|---|---|
| 1 |

|
INTERGREAT Black Metal Storage Cabinet, 72" Locking Steel Cabinets with 2 Door and 4 Adjustable... | Check Latest Price |
Imagine a tall, versatile unit with open shelves, cabinets, and decorative surfaces. It separates your sleeping area from your workspace with ease. The combination of functional storage and decorative elements creates a balanced focal point. It’s like having a custom-built wall that’s also a display gallery.
Choose from materials like wood, metal, or laminated finishes for durability and style. Incorporate open shelves for books and decor, closed cabinets for hidden clutter, and flat surfaces for display or work. Customize with colors, textures, or finishes that match your decor theme. Add hooks or rods for hanging clothes or accessories.
Select a sturdy, tall piece that fits your space and style. Position it where you want to zone your bedroom. Securely assemble and anchor to the wall if necessary for safety. Organize items thoughtfully—use baskets, containers, and labels to keep everything tidy. Regularly update the decor and storage to keep it fresh.
Decorate with personal items—photo frames, keepsakes, or decorative boxes—while avoiding wall art. Change the arrangement seasonally, adding new accessories or rearranging shelves. Use decorative hardware or paint to customize the unit’s look. Keep it functional yet stylish for long-term use.
A multi-purpose divider with storage transforms a cluttered, chaotic space into an organized haven. It’s a smart, stylish investment that boosts your room’s functionality and look. Once set up, you’ll appreciate having everything in one place—beautifully displayed and easily accessible. Your room’s new heart.
Conclusion
Error generating conclusion.