
14 Wall Panelling for Bathrooms Ideas for Updated Style
Imagine stepping into a bathroom that instantly feels more stylish and inviting — that’s the magic of wall panelling! These ideas have surged in popularity because they add texture, warmth, and a touch of luxury to even the simplest bathrooms, transforming them into stunning retreats.
In this article, you’ll uncover a variety of wall panelling ideas that cater to different tastes and design preferences. Whether you love classic wood, sleek modern finishes, or bold patterns, there’s something here to inspire your next bathroom makeover and elevate your space to a whole new level of chic.
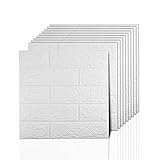
1. Classic White Shiplap Paneling for Clean, Bright Walls

Ever feel like your bathroom needs a quick refresh but you’re overwhelmed by options? Classic white shiplap offers an easy way to brighten up the space without a full remodel. It’s perfect for those who crave a clean, timeless look that never goes out of style. Plus, it adds texture and depth that plain paint just can’t match.
Recommended Products to replicate this idea
| # | Preview | Product | |
|---|---|---|---|
| 1 |

|
The Millwork Outlet Primed Nickel Gap Shiplap, 8 Pieces, 5" x 72", Real American Wood | Check Latest Price |
| # | Preview | Product | |
|---|---|---|---|
| 1 |

|
1 Quart Bulls Eye 1-2-3 Primer Sealer Stain Killer | Check Latest Price |
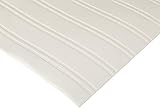
Imagine walking into a bathroom with crisp white horizontal planks running along the walls, catching the light and reflecting a soft glow. The texture of the overlapping boards creates subtle shadows that add warmth and dimension. The sleek, uniform appearance makes even small bathrooms feel larger and more inviting. It’s like giving your space a fresh coat of charm with minimal effort.
You can easily customize shiplap with different finishes—painted, stained, or distressed—to suit your style. For a coastal vibe, pair it with light blues and sandy neutrals. For a more modern look, keep it glossy white and add metallic fixtures. Seasonal updates could include adding soft textiles or decorative accessories that complement the crisp backdrop.
Start by measuring your wall areas and choosing high-quality plywood or MDF boards designed for moisture resistance. Use a level and spacers to ensure even installation, and secure the planks with waterproof nails or adhesive. Sand any rough edges and apply a primer before painting or sealing. For a seamless finish, consider installing tongue-and-groove panels for a tight fit. Regular sealing with a waterproof topcoat keeps it looking pristine.
Add personal touches by painting accent stripes or creating a faux beadboard look with molding details. Incorporate decorative trims or corner beads for a polished finish. Textured or matte paint options can create different effects, from sleek modern to rustic charm. Complement with subtle hardware or fixtures that blend into the white backdrop for a cohesive feel.
Classic white shiplap is a fail-safe choice that boosts brightness and adds timeless style. It’s a DIY-friendly project that can dramatically uplift your bathroom’s ambiance. With just a few tools and supplies, you can achieve a stunning transformation. Ready to give your bathroom that fresh, bright update everyone will notice?
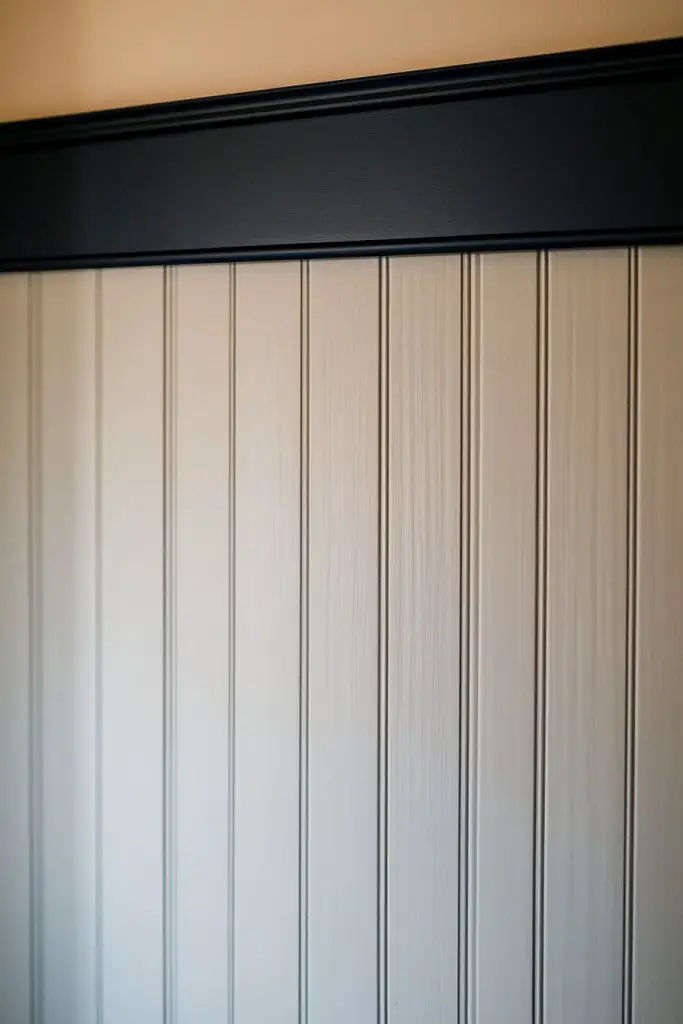
2. Vertical Beadboard Paneling for Classic Charm and Height

Feeling cramped in your bathroom? Sometimes all it takes is a visual trick to make a space feel larger. Vertical beadboard paneling draws the eye upward, creating an illusion of height and openness. It combines old-world charm with fresh, modern appeal—perfect for small bathrooms craving character.
Recommended Products to replicate this idea
| # | Preview | Product | |
|---|---|---|---|
| 1 |
|
Graham & Brown Paintable Pre-Pasted Beadboard Wallpaper | Check Latest Price |
| # | Preview | Product | |
|---|---|---|---|
| 1 |

|
Art3d 10-Pack 47Ft White Ceiling Crown Molding Trim, High Impact Polystyrene Decorative Ceiling... | Check Latest Price |
Picture tall, narrow panels running from floor to ceiling, painted in soft pastel or crisp white. The vertical lines emphasize height, making the ceiling seem higher and the room more expansive. The beadboard’s ridged texture adds a tactile element that invites touch and adds cozy charm. It’s like wrapping your bathroom in a cottage-inspired hug that feels warm and inviting.
Mix beadboard with contrasting trims or darker paint on the upper wall for a layered look. For a vintage feel, opt for distressed finishes or aged wood. In contemporary spaces, keep it smooth and monochromatic, pairing with sleek fixtures. Seasonal style swaps can include adding textured textiles or decorative towels to enhance the classic vibe.
Begin by measuring wall sections and selecting tongue-and-groove beadboard panels made from moisture-resistant MDF or PVC. Attach panels with waterproof nails or adhesive, ensuring alignment and tight joints. Sand and prime before painting in your chosen color. For a seamless look, install trim molding at the top and bottom to frame the panels beautifully. Regular sealing or repainting maintains the fresh appearance.
Consider adding decorative molding or beadboard with intricate patterns for a tailored effect. Use contrasting colors to highlight the paneling or add a faux vintage touch with distressed paint techniques. Incorporate small built-in shelves or niches between panels for functional storage. Personal touches like custom hardware or subtle stenciling can elevate the design.
Vertical beadboard instantly elevates your bathroom’s style while creating an illusion of space. It’s a classic choice that suits various decor themes, from rustic to modern. DIY installation is straightforward, making it accessible even for beginners. Transform your bathroom into a charming retreat that feels bigger and more inviting.
3. Textured Wood-Look Vinyl Panels for Warmth and Ease of Maintenance
Looking for the warmth of wood without the hassle of maintenance? Textured wood-look vinyl panels give you that rustic charm combined with waterproof, easy-to-clean surfaces. They’re perfect for humid bathrooms where real wood might warp or decay. Plus, they’re budget-friendly and quick to install.
Recommended Products to replicate this idea
| # | Preview | Product | |
|---|---|---|---|
| 1 |

|
Art3d 44 Square Feet (Pack Of 30) Wall Panel Foam, White | Check Latest Price |
| # | Preview | Product | |
|---|---|---|---|
| 1 |

|
Abyssaly Wood Panel for Wall Paper Peel and Stick Wallpaper, Brown Striped Wood Slat Contact Paper,... | Check Latest Price |
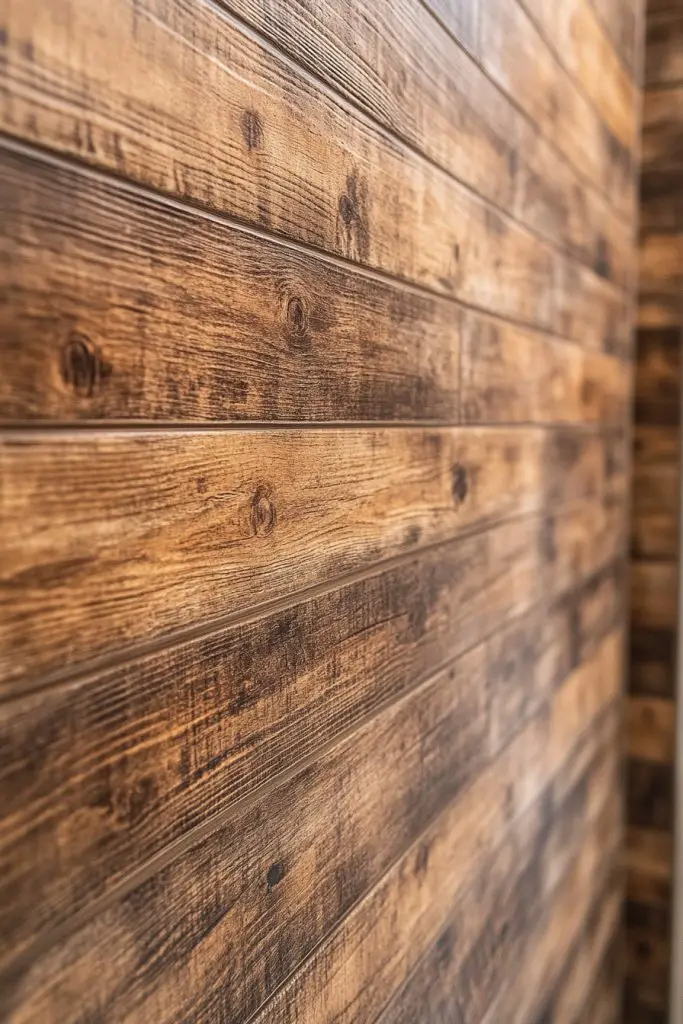
Envision panels with a rich, natural wood grain in warm tones, textured to mimic the feel of real timber. The surface catches the light differently depending on the angle, adding depth and richness. These panels can be arranged horizontally or vertically, depending on your style preference. The textured surface adds tactile appeal, inviting touch and creating a cozy, inviting ambiance.
Use darker wood tones for a moody, sophisticated vibe or light shades for a breezy, beach-inspired look. Combine with matte or satin fixtures to enhance the rustic feel. Seasonal accessories like woven baskets or linen towels can complement the natural aesthetic. The panels also work well with both modern and traditional decor.
Select high-quality vinyl panels with textured woodgrain patterns. Measure wall areas carefully and cut panels to size with a utility knife, ensuring clean edges. Attach using waterproof adhesive or interlocking systems designed for vertical installation. Seal seams with waterproof caulk for a seamless look. Wipe down regularly to maintain the textured surface and prevent mold buildup.
Incorporate decorative trims or molding to frame the panels for a finished look. Layer with textured textiles or embroidered towels to add coziness. You can also paint some panels in contrasting shades for a modern, eclectic vibe. Using different wood tones creates visual interest and depth.
Wood-look vinyl panels offer the warmth and charm of wood with none of the upkeep. They’re a practical choice that looks great and lasts long. DIY installation is simple, making it accessible for most. Transform your bathroom into a rustic retreat with ease and style.
4. Bold Colored Wall Panels for a Dramatic, Stylish Statement
Want to turn your bathroom into a statement space? Bold colored panels give your walls personality and punch. They’re perfect for those who love vibrant, energetic environments or want to add a pop of color without repainting entire walls. It’s an easy way to express your style boldly.
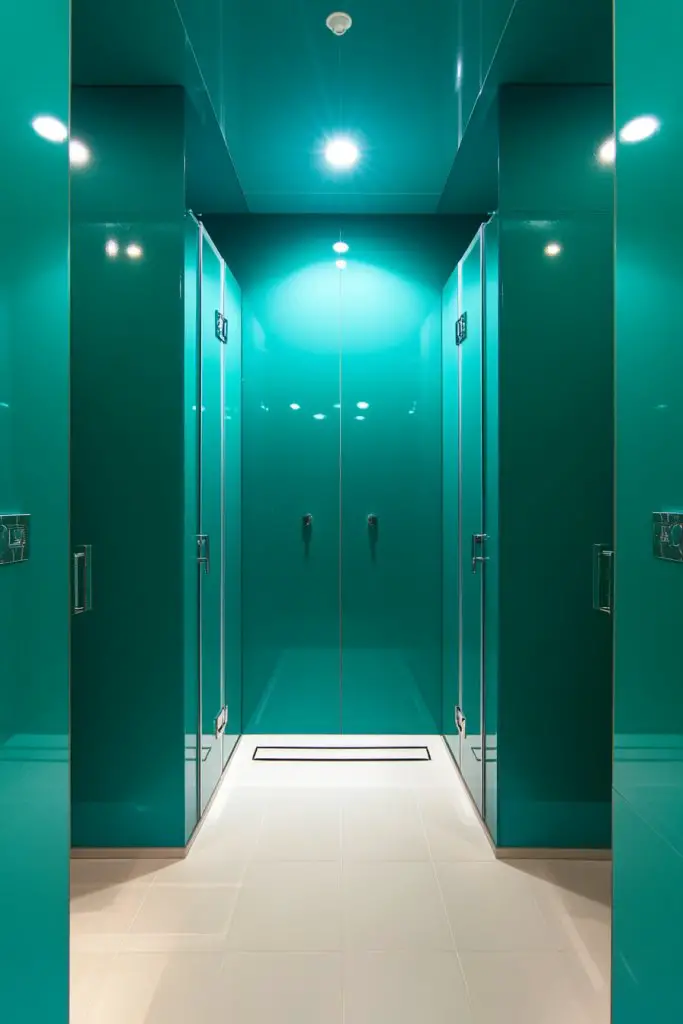
Imagine deep emerald or striking navy panels that command attention. The rich hues contrast beautifully with neutral fixtures, creating a focal point that’s impossible to ignore. The smooth or subtly textured surface enhances the intensity of the color, making the space feel lively and modern. Accentuate with metallic or matte fixtures to complement the bold backdrop.
Pair bright colors with neutral or metallic accents for a balanced look. Use contrasting colors in different sections to create visual interest or try a monochrome palette for a sophisticated vibe. Seasonal updates could include adding textured textiles or decorative trim to soften or amplify the color impact. These panels suit contemporary, eclectic, or even boho styles.
Choose high-quality, moisture-resistant panels in your preferred bold color. Prepare your walls by cleaning and smoothing the surface. Attach panels using waterproof adhesive or interlocking systems, ensuring even spacing and alignment. Seal all edges with waterproof caulk to prevent moisture penetration. Finish with a protective matte or satin topcoat for longevity and easy cleaning.
Add decorative trims or painted accents to highlight certain areas or create a mural effect. Incorporate textured textiles or patterned towels to complement the vibrant walls. You can also install floating shelves or hooks in matching or contrasting colors for functional decor. Personal touches like custom hardware make the space uniquely yours.
Bold colored panels instantly energize your bathroom and showcase your personality. They’re a fun, creative way to update your space with minimal effort. DIY installation is straightforward, making it an achievable project. Embrace the power of color and redefine your bathroom’s style today.
5. Mirrored Wall Panelling for Illusion of Space and Light
Feeling like your bathroom is too small or dull? Mirrored wall panels can instantly create the illusion of space and reflect light, making even cramped bathrooms feel open and airy. It’s a clever trick that doubles as a stylish feature. Who says you need a window to brighten a room?
Recommended Products to replicate this idea
| # | Preview | Product | |
|---|---|---|---|
| 1 |

|
Ruomeng Home Gym Mirrors 12 Inch x 12Pcs Wall Mounted Mirror Glass Frameless Full Length Mirror... | Check Latest Price |
| # | Preview | Product | |
|---|---|---|---|
| 1 |

|
Trimold Stainless Steel Wall Molding Trim Peel and Stick, Flexible Self-Adhesive Metal Trim for... | Check Latest Price |
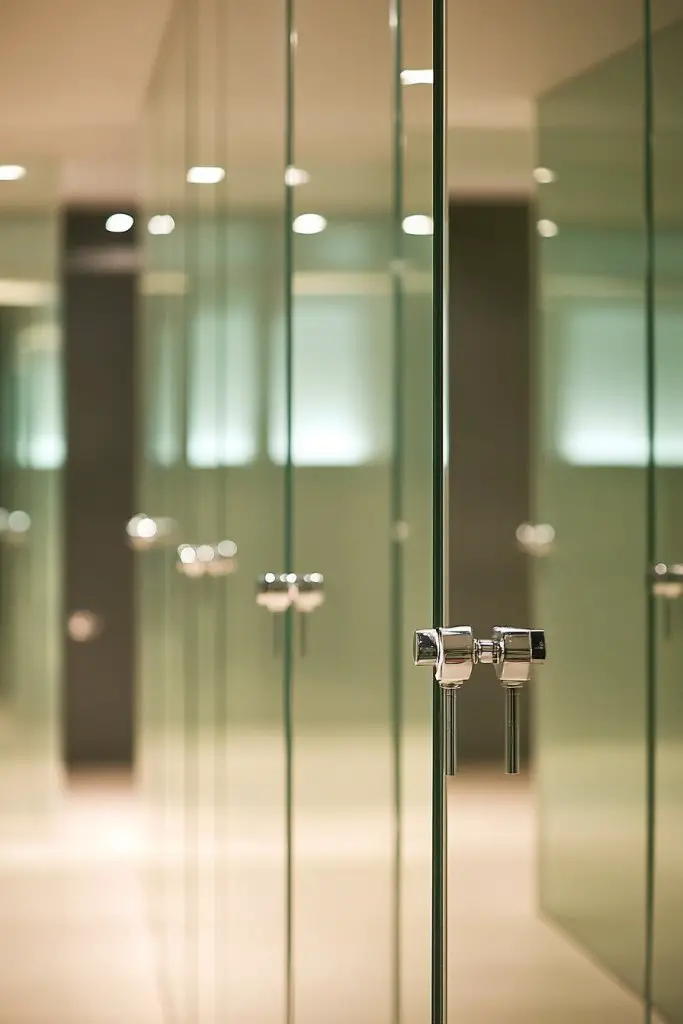
Picture expansive mirrors running from floor to ceiling, reflecting the entire room and bouncing natural or artificial light around. The mirrored surface adds depth, creating a sense of endless space. Frames or borders in sleek metals or subtle trims enhance the look, turning your walls into functional art pieces. The reflective quality invites brightness and liveliness.
Combine mirrored panels with matte or textured finishes for contrast. For a modern look, opt for frameless or minimal frame options. Seasonal touches could include adding decorative lighting or textured textiles that complement the reflective surfaces. Use large panels in small bathrooms or multiple smaller mirrors in larger spaces for varied effects.
Choose high-quality, shatter-resistant mirrored panels suitable for humid environments. Measure your wall carefully and plan for precise cuts. Attach panels with waterproof adhesive or specialized mirror clips, ensuring a flat, bubble-free finish. Seal edges with waterproof caulk for durability. Regular cleaning with glass cleaner keeps reflections crystal clear.
Frame your mirrors with decorative trim or LED lighting for added flair. Incorporate frosted or tinted sections to soften reflections or add privacy. Installing small shelves or niches around the mirrors provides functional storage or display without cluttering the space. Personalize with unique hardware or finishing touches.
Mirrored wall panels are a smart, stylish upgrade that transforms your bathroom’s atmosphere. They’re easy to install and maintain, giving you a high-end look on a budget. With reflective surfaces, your space feels bigger and brighter—perfect for everyday routines or special occasions. Go ahead, reflect your style with confidence.
6. Reclaimed Wood Panels for Eco-Friendly, Rustic Elegance
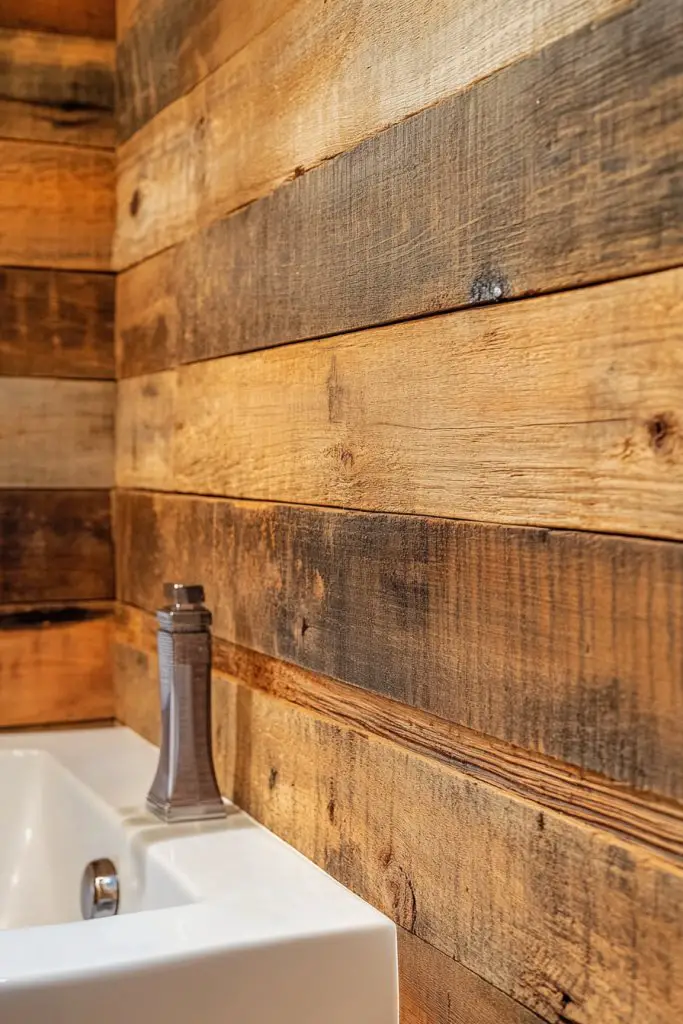
Craving a warm, organic vibe in your bathroom? Reclaimed wood panels bring rustic charm and eco-conscious style together. They add character and texture, making your space feel cozy and inviting. Plus, choosing reclaimed materials helps reduce waste—talk about style with a conscience.
Recommended Products to replicate this idea
| # | Preview | Product | |
|---|---|---|---|
| 1 |

|
Holydecot Peel & Stick Real Wood Planks, Rustic Reclaimed Barn Wood Paneling, Brown Gray... | Check Latest Price |
| # | Preview | Product | |
|---|---|---|---|
| 1 |

|
Rok Hardware Pair of Panel and Frame Push-in Fastener, Plastic Press Fit Furniture Panel Clips,... | Check Latest Price |
Visualize weathered, textured panels with visible grain and knots, giving your bathroom a storybook feel. The varied tones—from light driftwood to deep, aged hues—create visual interest that’s both casual and refined. These panels can be installed vertically or horizontally, depending on your aesthetic preference. Their natural imperfections add authenticity and charm.
Pair reclaimed wood with modern fixtures for a balanced look or mix with metal accents for an industrial edge. Keeping the color palette neutral allows the wood’s natural beauty to shine. Seasonal updates might include cozy textiles or vintage-inspired hardware. These panels suit farmhouse, rustic, or eclectic styles.
Source reclaimed wood from reputable suppliers or salvage yards, ensuring it’s treated for moisture and pests. Prepare the wall surface by cleaning and smoothing. Attach panels with waterproof adhesive or nails, making sure to secure the uneven surfaces properly. Seal with clear, matte protective coating to preserve the wood’s natural look while protecting it from water and humidity.
Create focal points by adding decorative metal or vintage hardware, or carve personalized initials or patterns into the wood. Incorporate open shelving or niches to display functional or decorative items. Use contrasting paints or stains to highlight grain and texture. Keep maintenance simple with periodic sealing.
Reclaimed wood panels offer a unique, eco-friendly way to add warmth and texture. They’re a conversation starter and a reflection of sustainable style. DIY installation is feasible with some patience and prep. Transform your bathroom into a rustic retreat that feels both timeless and responsible.
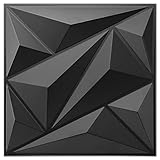
7. Geometric Patterned Wall Panels for Visual Interest
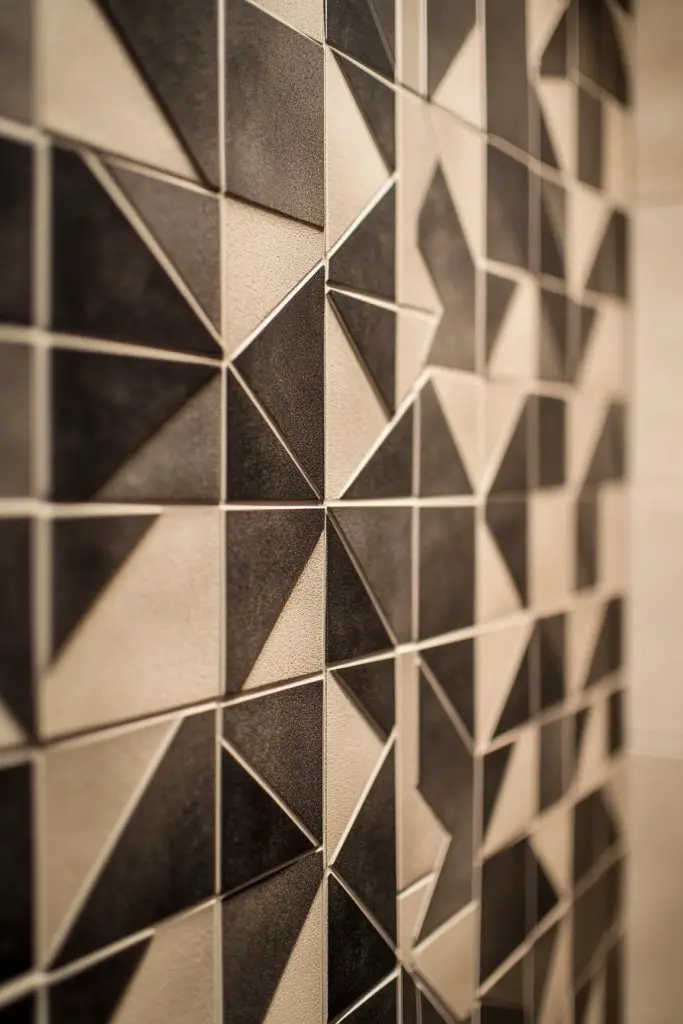
Bored with plain walls? Geometric patterned panels inject energy and modernity into your bathroom. They add a layer of visual intrigue that elevates even the simplest design. It’s a subtle way to make your space stand out without overwhelming the senses.
Recommended Products to replicate this idea
| # | Preview | Product | |
|---|---|---|---|
| 1 |
|
Art3dwallpanels 33 Pack 3D Wall Panel Diamond for Interior Wall Décor, PVC Flower Textured Wall... | Check Latest Price |
| # | Preview | Product | |
|---|---|---|---|
| 1 |
|
Art3dwallpanels 33 Pack 3D Wall Panel Diamond for Interior Wall Décor, PVC Flower Textured Wall... | Check Latest Price |
Imagine panels with bold triangles, chevrons, or interlocking shapes in a mix of matte and gloss finishes. The patterns create a dynamic play of light and shadow, making the walls come alive. The design can be monochrome or colorful, depending on your mood. These panels turn static walls into a captivating focal point.
Use contrasting colors or different textures within the patterns to add depth. Pair geometric panels with minimalist fixtures for a sleek look, or combine with textured textiles for more warmth. Seasonal updates could include changing color schemes or adding decorative accessories that emphasize the geometric theme. They suit modern, eclectic, or art deco styles.
Select panels with pre-cut geometric shapes or customizable designs. Measure wall areas precisely and cut panels with a utility knife for perfect fit. Attach using waterproof adhesive or interlocking systems designed for vertical surfaces. Seal edges with waterproof caulk to prevent moisture seepage. Regular cleaning and gentle maintenance keep the sharp lines crisp.
Customize panels with metallic or colored accents, or add metallic foil overlays for extra shine. Incorporate small, geometric-shaped shelves or hooks for functional decor. Layer with textured towels or mats that echo the geometric motif. Personal touches like metallic hardware complete the modern aesthetic.
Geometric patterned panels are a bold choice that adds personality and sophistication. They’re an easy DIY upgrade that makes your bathroom look custom-designed. Play with patterns, colors, and textures to craft a space that’s uniquely yours. Be confident—they’re a guaranteed conversation starter.
8. Tile-Effect Wall Panels for a Water-Resistant, Low-Maintenance Finish
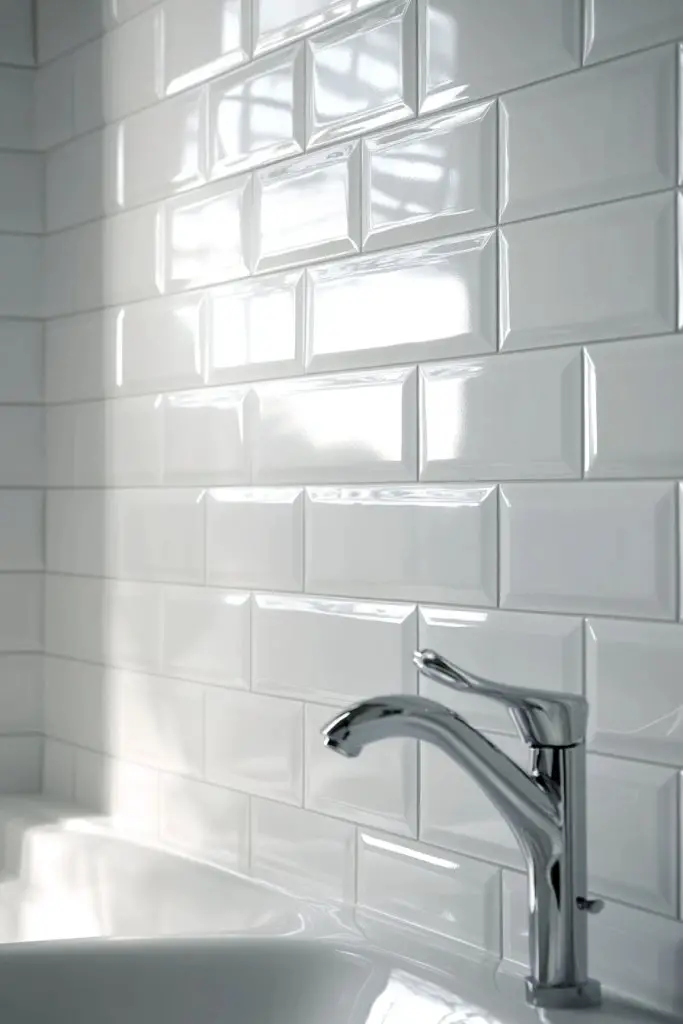
Hate scrubbing grout lines or dealing with cracked tiles? Tile-effect wall panels mimic the authentic look of ceramic or subway tiles but with less hassle. They’re waterproof, easy to clean, and perfect for humid bathrooms. Plus, they save time and money on installation.
Recommended Products to replicate this idea
| # | Preview | Product | |
|---|---|---|---|
| 1 |

|
10pcs Marble Peel and Stick Waterproof Wall Panels,Heat-Resistant Backsplash Tile, 23.6"x11.8" PVC... | Check Latest Price |
| # | Preview | Product | |
|---|---|---|---|
| 1 |
|
Sodeno 3D Wall Panels Peel and Stick, 14.5 Sq Ft Coverage,Printable Faux Brick Wallpaper Sticker... | Check Latest Price |
Picture sleek panels with patterns resembling classic subway or hex tiles, available in gloss or matte finishes. The realistic grout lines and textured surfaces create an authentic tile appearance without the upkeep. The seamless look lends a polished, professional vibe, making your bathroom feel upscale and clean. It’s like having a custom tile job without the mess.
Combine different tile-effect patterns for a unique backsplash or feature wall. Use contrasting grout colors or add decorative borders for extra flair. Pair with modern fixtures or vintage-inspired fittings for a versatile look. Seasonal updates could involve changing the color palette or adding textured textiles.
Choose panels with realistic tile patterns in waterproof PVC or acrylic. Measure and cut panels to fit your wall dimensions with a utility blade. Attach using waterproof adhesive or interlocking clips designed for wet areas. Seal all seams and edges with waterproof caulk to prevent water infiltration. Regular cleaning with non-abrasive cleaners keeps the surface looking fresh.
Accent with contrasting grout colors or metallic foil options for a contemporary twist. Add decorative trims or beading to frame the panels. Incorporate functional accessories like towel bars or shelves that complement the tile pattern. Personalize with subtle color accents that enhance the overall look.
Tile-effect panels deliver the authentic aesthetic with minimal effort. They’re durable, water-resistant, and perfect for busy bathrooms. DIY installation is straightforward with basic tools. Elevate your space with a luxurious tile look that’s easy to maintain and built to last.
9. Beadboard with Contrasting Trim for a Cottage-Inspired Look
Want a charming, cottage-inspired bathroom? Beadboard with contrasting trim adds character and a cozy feel that’s both timeless and stylish. It’s perfect for creating a warm, inviting space that feels like a retreat. Plus, it’s easy to customize for your personal taste.
Recommended Products to replicate this idea
| # | Preview | Product | |
|---|---|---|---|
| 1 |
|
Graham & Brown Paintable Pre-Pasted Beadboard Wallpaper | Check Latest Price |
| # | Preview | Product | |
|---|---|---|---|
| 1 |

|
A-Pillar Molding Trim Kit Outer and Inner Trim Set Replacement for 2011-2019 Ford Explorer 4 Door... | Check Latest Price |
Visualize white or pastel beadboard panels topped with darker or bold-colored trim and molding. The contrast highlights architectural details, giving your bathroom a handcrafted, vintage vibe. The vertical grooves add texture and depth, making the walls a focal point. It’s like wrapping your bathroom in a classic, storybook aesthetic.
Experiment with different color combinations—soft pastels with dark trims or monochromatic schemes with textured details. Add decorative moldings or scalloped edges for extra charm. Seasonal updates could include changing the color of the trim or adding decorative hardware. It suits shabby chic, cottage, or traditional styles.
Install tongue-and-groove beadboard panels on prepared walls using waterproof nails or adhesive. Carefully measure and cut panels to fit, ensuring tight joints. Attach decorative trim or molding with nails or adhesive, then sand and paint in your chosen color. Seal all seams with waterproof caulk to prevent moisture damage. Regular touch-ups keep the finish fresh.
Add decorative corner beads or crown molding to elevate the look. Incorporate vintage-style hardware or painted embellishments for a handcrafted touch. Create visual interest by alternating panel orientations or adding stenciled patterns. Personalize with custom colors or distressed finishes for a unique, cozy atmosphere.
Beadboard with contrasting trim transforms your bathroom into a charming, cottage-inspired retreat. It’s a classic look that’s easy to install and maintain. DIY-friendly, it offers a personalized touch that elevates your space. Get ready for compliments on your timeless style.
10. Slim Vertical Panels for a Contemporary, Vertical Line Effect
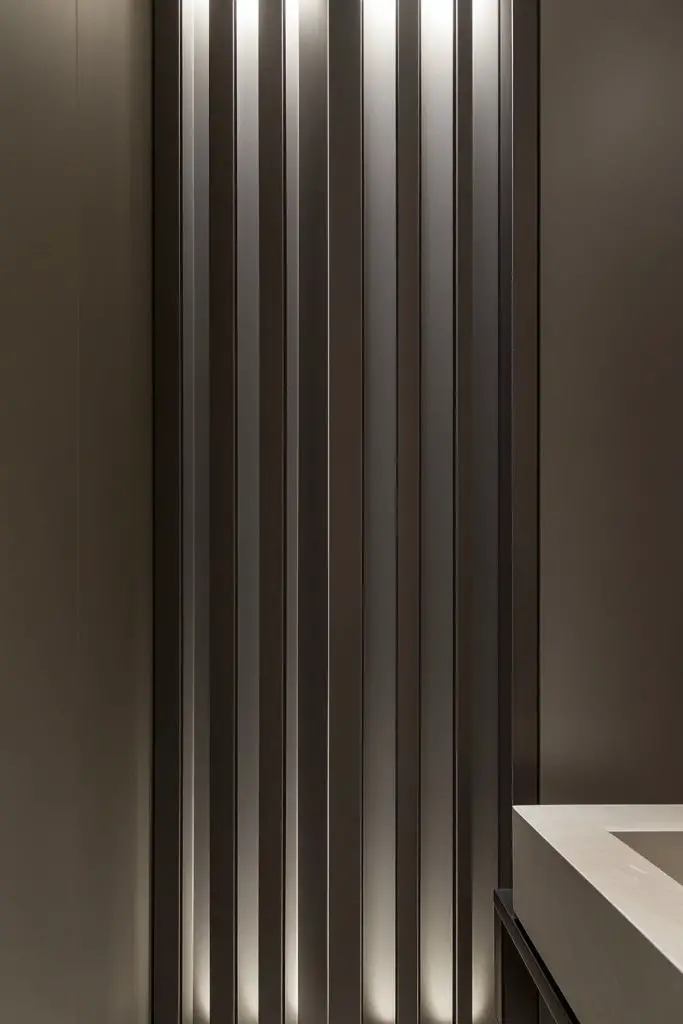
Craving a sleek, modern vibe in your bathroom? Slim vertical panels create a striking vertical line effect that emphasizes height and sophistication. They make small spaces feel taller and larger while maintaining a clean and contemporary aesthetic. It’s a simple trick with big visual impact.
Recommended Products to replicate this idea
| # | Preview | Product | |
|---|---|---|---|
| 1 |

|
NeatiEase Wood Panels for Wall, 4-Piece 96" x 12.6" Soundproof Wood Slat Wall Panel for Interior... | Check Latest Price |
| # | Preview | Product | |
|---|---|---|---|
| 1 |

|
MHMYDZ 1000 lb Capacity Heavy Duty Hammock Hanging kit Ultra Durable Hooks Carabiners for Hammock... | Check Latest Price |
Imagine narrow, seamless panels running from floor to ceiling, painted in neutral or bold shades. The slender lines draw the eye upward, elongating the walls and ceiling. The smooth surface reflects light subtly, adding brightness and clarity. This minimalist approach transforms your bathroom into a sleek, streamlined sanctuary.
Combine with contrasting trims or metallic accents for a high-end look. Use darker colors to add drama or lighter shades for airy freshness. Seasonal updates could include changing accessories or adding textured textiles that complement the sleek panels. Perfect for modern, minimalist, or Scandinavian-inspired decor.
Select narrow, moisture-resistant panels designed for vertical installation. Measure carefully and cut panels to fit, ensuring even spacing. Attach with waterproof adhesive or concealed mounting clips for a clean look. Seal edges with waterproof caulk and inspect regularly. Keep surfaces spotless with gentle cleaners that won’t scratch or dull the finish.
Incorporate metallic or colored trims to frame the panels. Add decorative hardware or small functional shelves that blend into the sleek lines. Use textured textiles or rugs to add warmth without disrupting the minimalist aesthetic. Personal touches like custom fixtures complete the vibe.
Slim vertical panels deliver a bold, modern look that’s easy to achieve and maintain. They make a small bathroom feel taller and more open. DIY installation is accessible for most homeowners. Embrace sleek sophistication and elevate your space effortlessly.
11. Faux Brick or Stone Wall Panels for Industrial or Rustic Vibe
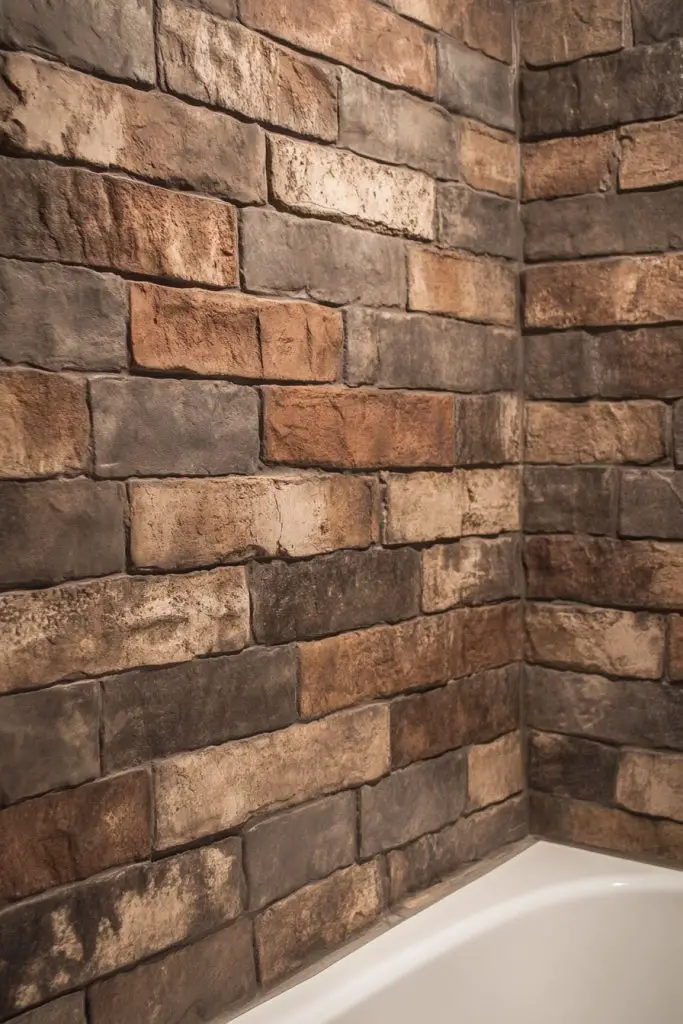
Looking to add texture and a touch of rugged charm? Faux brick or stone panels bring an industrial or rustic vibe without the weight and expense of real materials. They create a bold statement wall that adds depth and personality to your bathroom. Who says you can’t have exposed brick indoors?
Recommended Products to replicate this idea
| # | Preview | Product | |
|---|---|---|---|
| 1 |

|
Art3d 20-Pack 105 Sq.Ft Faux Brick 3D Wall Panels Peel and Stick in Red Brown, Self Adhesive... | Check Latest Price |
| # | Preview | Product | |
|---|---|---|---|
| 1 |

|
CONCORD WALLCOVERINGS ™ Retro-Art 3D Faux Stone Wall Panels, Pack of 10, Grey Beige Brown Wild... | Check Latest Price |
Visualize panels with realistic brick or stone textures, complete with varied colors and rough surfaces. The tactile quality invites touch, while the layered appearance adds dimension. These panels can be installed as an accent wall or to transform the entire space. The rustic or industrial look pairs well with metal fixtures, reclaimed wood, or vintage accessories.
Choose from a range of colors—from classic red brick to weathered gray stone—to match your decor. Pair with industrial lighting or vintage hardware for authentic charm. Complement with textured textiles or distressed furniture for a cozy, lived-in feel. These panels suit loft, farmhouse, or eclectic styles.
Select lightweight, durable panels made from resin or PVC with realistic textures. Prepare walls by cleaning and smoothing surfaces. Attach panels with waterproof adhesive or interlocking clips, ensuring they are level and well-sealed. Seal the edges with waterproof caulk to prevent water infiltration. Regular cleaning with a soft brush maintains the textured surface.
Add decorative elements such as vintage pipes, industrial fixtures, or metal accents to amplify the rustic or industrial aesthetic. Use complementary paint or stain to enhance the textured surface. Incorporate functional shelves or hooks that blend into the design. Personal touches like custom lighting or unique hardware elevate the look.
Faux brick or stone panels provide a stylish, durable, and low-maintenance way to add character. They’re an instant upgrade that gives your bathroom a distinctive personality. DIY installation is straightforward with the right tools. Turn your space into an industrial or rustic haven you’ll love showing off.
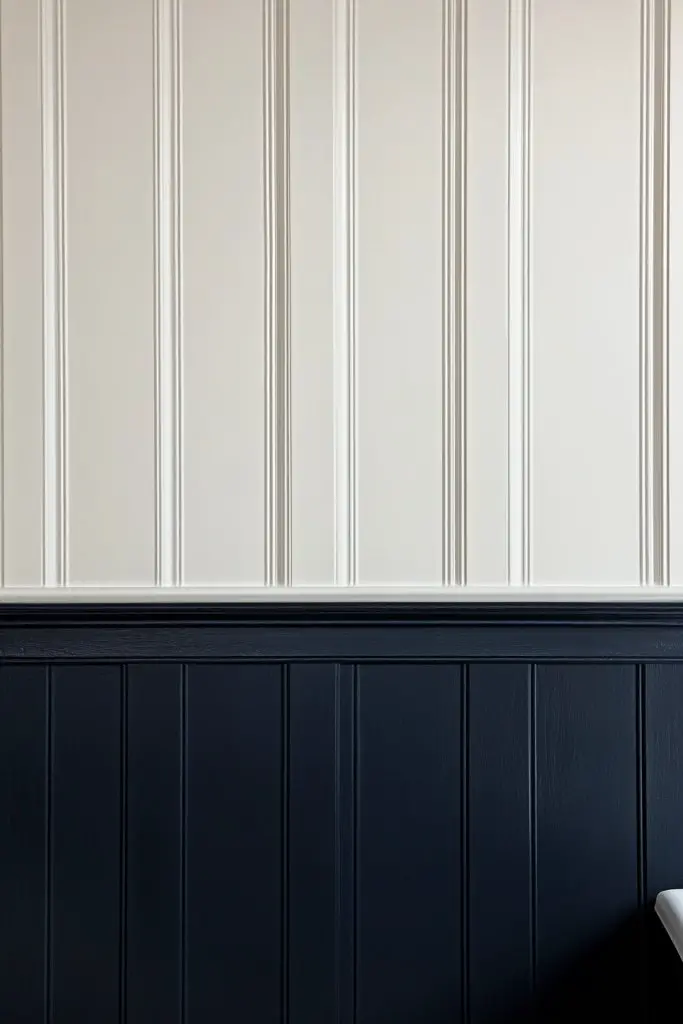
12. Two-Tone Paneling with Top and Bottom Contrast for Visual Depth
Want to add dimension and visual interest to your bathroom walls? Two-tone paneling is a clever way to break up monotony and create a layered look. It’s ideal for adding depth without cluttering your space. Plus, it allows you to showcase two colors or textures in one cohesive design.
Recommended Products to replicate this idea
| # | Preview | Product | |
|---|---|---|---|
| 1 |

|
Art3d Premade Board and Batten Paintable Wainscoting Kit, MDF Accent Wall Panel for Kitchen Bedroom... | Check Latest Price |
| # | Preview | Product | |
|---|---|---|---|
| 1 |

|
moonoom 20 Ft x 1.6''Wall Decoration Molding Trim,Self-Adhesive 3D Chair Rail Panel Molding,... | Check Latest Price |
Visualize a bathroom where the lower half features darker, textured panels, while the upper half is painted in a light, smooth finish. The contrast highlights architectural details and grounds the space visually. Decorative trims or chair rails accentuate the division, adding a polished touch. The dual tones create a sophisticated, well-designed atmosphere.
Choose complementary colors—dark and light shades, matte and gloss finishes—for maximum impact. Use textured panels on the bottom and smooth paint above for contrast. Seasonal updates might include changing the color combination or adding decorative accessories that match the contrast theme. It suits traditional, transitional, or modern decor.
Begin by measuring and dividing your wall into two sections. Install panels on the lower half using waterproof adhesive or nails, ensuring alignment and sealing seams. Paint or add wall coverings on the upper section, coordinating with the lower panels. Install a decorative trim or chair rail to hide the joint and add a finished look. Seal all joints with waterproof caulk to prevent moisture ingress.
Add decorative molding or stenciled accents along the transition for extra flair. Incorporate textured textiles or rugs that tie both tones together. Personalize with hardware or accessories that complement the contrasting colors. Play with different textures to create a layered, curated aesthetic.
Two-tone paneling offers a smart, stylish way to elevate your bathroom’s design. It’s adaptable to various decor styles and easy to update seasonally. DIY installation is straightforward with some planning. Create a space that’s visually rich and uniquely yours.
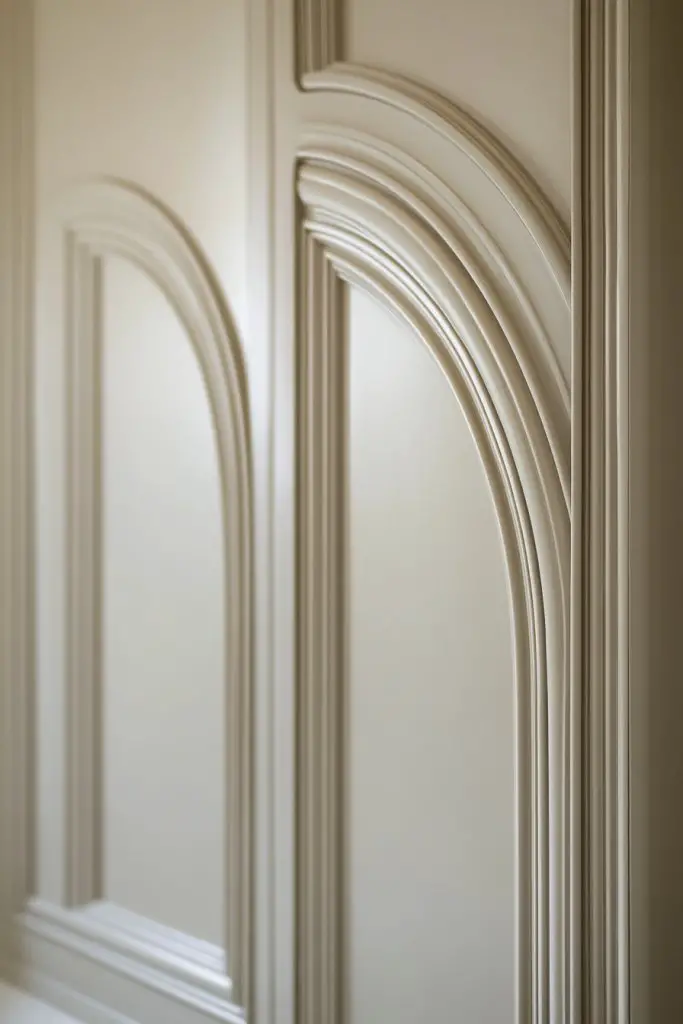
13. Curved or Arched Wall Panels for Architectural Elegance
Looking to soften sharp lines and add architectural interest? Curved or arched wall panels bring a touch of elegance and sophistication to your bathroom. They create a focal point that feels both timeless and unique. It’s a statement that elevates your space beyond the ordinary.
Recommended Products to replicate this idea
| # | Preview | Product | |
|---|---|---|---|
| 1 |

|
Nuanchu 4 Set Arch MDF Wall Molding Kit 118 x 31.5 Inch Pre-Cut Arch Wainscoting Panel Board and... | Check Latest Price |
| # | Preview | Product | |
|---|---|---|---|
| 1 |

|
20 oz Homax 4092 Aerosol Texture Water-Based Orange Peel Wall Texture | Check Latest Price |
Visualize gracefully curved panels framing a vanity or shower niche, gently arching from wall to ceiling. The soft lines contrast with angular fixtures, adding visual harmony. The textured surface or painted finish accentuates the curves, turning plain walls into artistic statements. The design exudes luxury and refined craftsmanship.
Combine with classic or contemporary fixtures depending on your style. Use contrasting colors or textures to highlight the curves. Seasonal updates could include accent lighting or decorative textiles to enhance the arch’s softness. These panels suit Mediterranean, Art Deco, or modern luxe styles.
Construct curved panels using flexible materials like MDF or specialized composites. Measure carefully and cut to fit the arched shape. Attach using waterproof adhesive or specialized mounting brackets. Sand and paint to match your decor, emphasizing the curvature. Seal all joints and edges thoroughly to prevent water damage.
Add decorative moldings or trim that follow the arch shape for a seamless look. Incorporate subtle lighting or textured finishes to emphasize the curves. Personalize with contrasting colors or metallic accents to heighten the architectural effect. Use textured textiles or accessories that complement the elegant design.
Curved or arched panels provide a distinctive, artistic touch that makes your bathroom memorable. They are a high-impact feature that combines craftsmanship with style. DIY installation requires precise measurements and some skill, but the result is a space that feels truly refined. Embrace architectural elegance and elevate your bathroom’s ambiance.
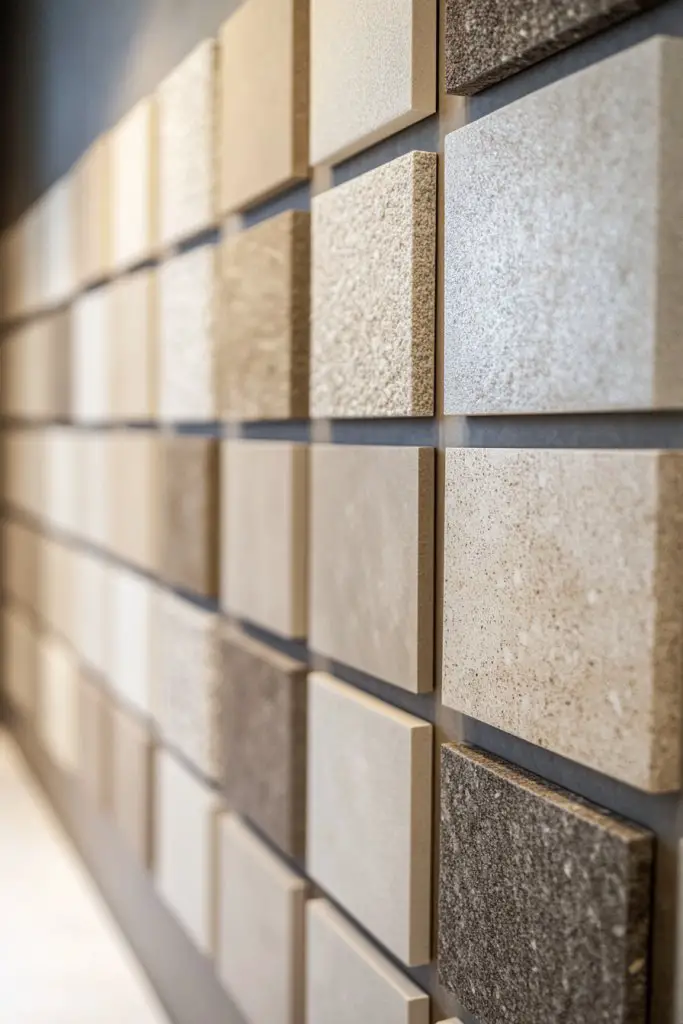
14. Modular Panel Systems for Customizable and Versatile Design
Want a flexible, easy-to-update wall solution? Modular panel systems let you customize your bathroom walls with interchangeable pieces. They’re perfect for those who love changing styles or want to create unique patterns effortlessly. Plus, they simplify installation and future updates.
Recommended Products to replicate this idea
| # | Preview | Product | |
|---|---|---|---|
| 1 |
|
Art3dwallpanels 33 Pack 3D Wall Panel Diamond for Interior Wall Décor, PVC Flower Textured Wall... | Check Latest Price |
| # | Preview | Product | |
|---|---|---|---|
| 1 |

|
BOXOB 12pcs Cubicle Clips for Fabric Walls, Stainless Steel & Plastic Push Pin Clips, Cubicle Hooks... | Check Latest Price |
Picture a wall composed of geometric or rectangular panels that can be rearranged or replaced. The modular design allows you to experiment with different colors, textures, or patterns over time. The panels snap or clip into place, creating a seamless, cohesive look. This adaptable approach keeps your space fresh and personalized.
Mix and match textured and smooth panels for contrast, or use a monochrome palette with different finishes for depth. Seasonal updates could include swapping out panels for new colors or patterns. Combine with adjustable shelves or storage modules for added functionality. It suits contemporary, eclectic, or minimalist styles.
Select high-quality, lightweight panels with a modular system that’s easy to assemble. Measure your wall space and plan the pattern layout. Attach panels with clip-in mechanisms or waterproof adhesive, ensuring alignment. Regularly check connections and clean panels with gentle products. The system allows for easy replacement or reconfiguration whenever you feel like a change.
Personalize with color accents, textured finishes, or decorative trims. Add functional modules like shelves or hooks that fit into the system. Use contrasting colors or materials to create visual interest. Incorporate your favorite textures or patterns for a truly unique look.
Modular systems empower you to design and redesign your bathroom walls with ease. They’re a practical, stylish choice that adapts to your evolving tastes. DIY installation is straightforward once you understand the system. Enjoy a space that’s as versatile as your style.
Conclusion
Exploring these wall panelling ideas unlocks a world of creative possibilities to refresh your bathroom. From timeless wood panels to contemporary textured designs, each option can dramatically enhance your space’s style and personality. Don’t hesitate to try these ideas in your own home — your perfect bathroom transformation is just a panel away. Embrace your design vision and create a space that truly reflects your style!