How to Install a Sump Pump
A sump pump is a vital component of any home’s plumbing system, particularly for those with a basement. Sump pumps are designed to remove excess water from a sump pit located in the lowest point of a home, typically in the basement (or even crawl space), and prevent flooding and water damage.
Installing a sump pump can seem like a daunting task, but with proper planning and some DIY know-how, it can be a relatively straightforward process. This comprehensive guide will walk you through the steps of choosing and installing a sump pump, as well as provide tips for maintaining and troubleshooting your new system.
Choosing the Right Sump Pump
Before you start the sump pump installation process, it’s important to choose the right sump pump for your needs. Here are some factors to consider when selecting a sump pump:
- Size: The size of your sump pump should be based on the volume of water that needs to be removed and the size of your sump pit. As a general rule, a sump pump should be able to remove at least 2,500 gallons of water per hour.
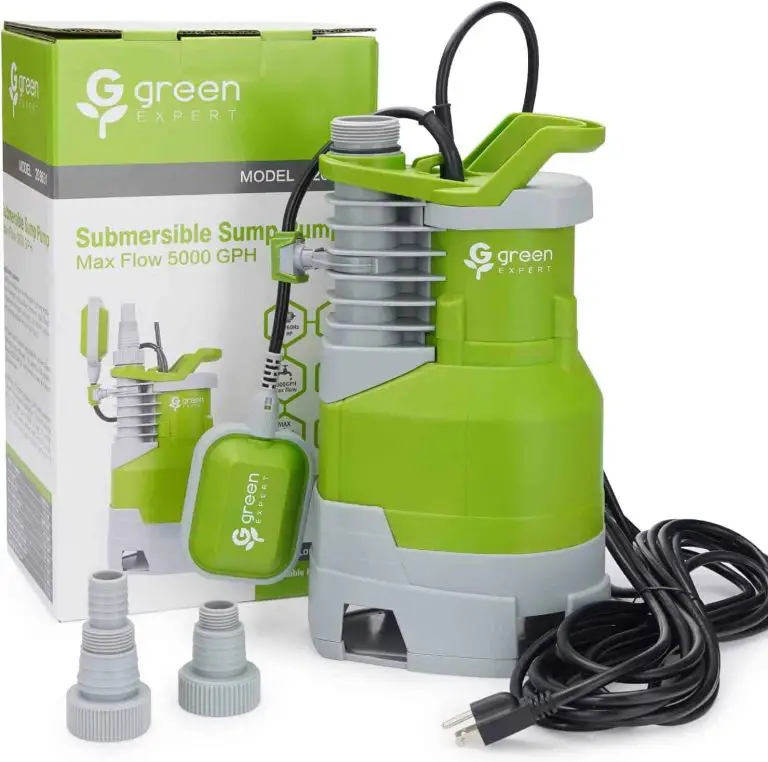
- Type: There are two main types of sump pumps: submersible pumps and pedestal pumps. Submersible sump pump is designed to be fully submerged in water, making them more efficient and quieter than pedestal pumps. Pedestal pumps, on the other hand, are mounted above the sump pit and are typically more affordable.
- Horsepower: The horsepower of a sump pump should be based on the size of your sump pit and the volume of water that needs to be removed. A larger sump pit or a high volume of water will require a higher horsepower pump.
- Flow rate: The flow rate of a sump pump refers to the amount of water it can move per minute. A higher flow rate will be more effective at removing excess water from your sump pit.
Preparing for Installation
Before you start the sump pump installation process, it’s important to gather all the necessary tools and materials. You’ll need a drill, a hole saw, a PVC cutter, a hammer, a screwdriver, a pipe wrench, a PVC glue, a hose clamp, and, of course, your sump pump.
You’ll also need PVC pipes, a check valve, and a flexible discharge hose. Make sure to also get a 90-degree elbow for the discharge pipe.
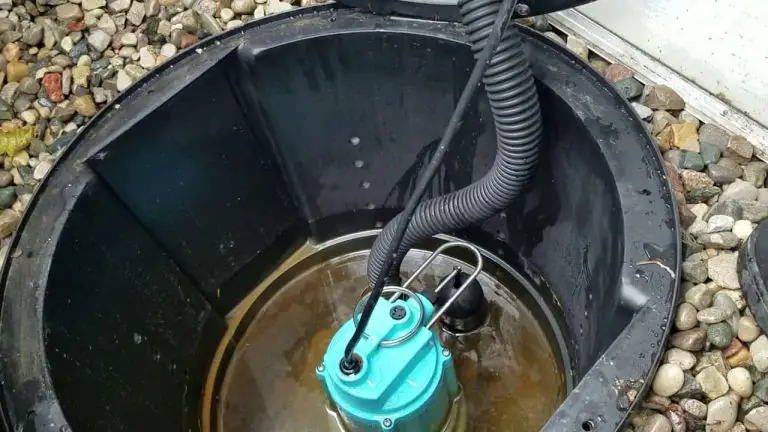
Once you have everything you need, the next step is to locate the sump pit. The sump pit is typically located in the lowest point of the basement, near the basement walls.
It should be large enough to hold a sump basin and should be close to a power outlet and a plumbing connection. Before you start the installation process, it’s also important to check for any plumbing leaks or other issues that might affect the sump pump’s performance. If you find any problems, it’s best to address them before proceeding with the installation.
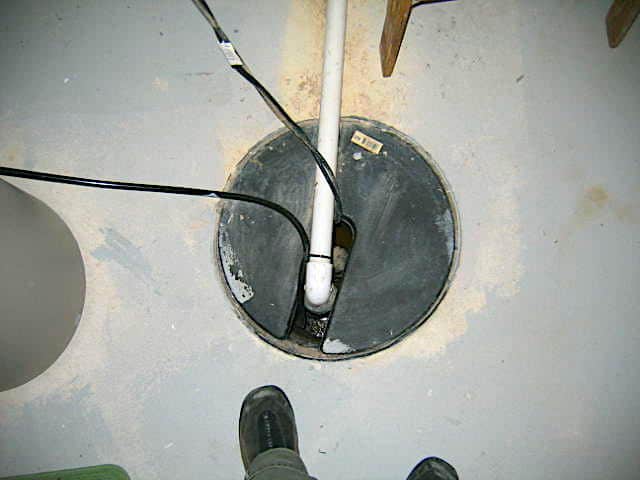
Installing the Sump Pump
Once you’ve prepared the sump pit and gathered all the necessary tools and materials, it’s time to start the sump pump installation process. Here are the steps to follow: Installing a sump pump can seem intimidating, but with the right tools and some patience, it’s a relatively straightforward process. Here are the steps to follow:
- Begin by preparing the sump pit. If the pit is dry, fill it with several inches of gravel to create a stable platform for the sump pump. If the pit is already filled with water, skip this step.
- Next, attach the check valve to the discharge pipe. The check valve is a one-way valve that prevents water from flowing back into the sump pit once it has been pumped out.
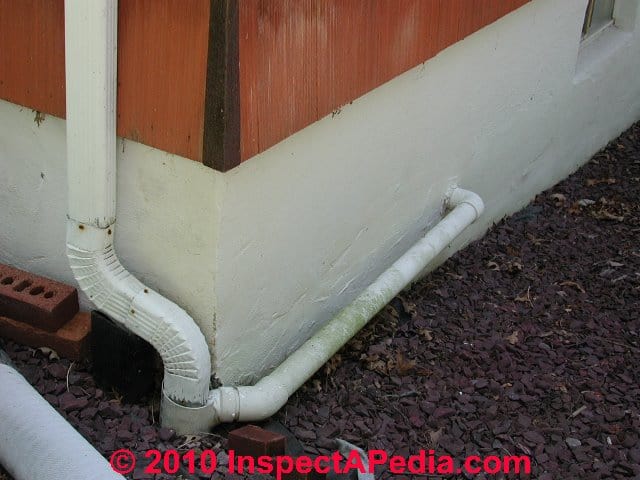
- Connect the flexible discharge hose to the check valve and run it to the desired location for the water to be discharged. The discharge hose should be long enough to reach the desired location, but not so long that it creates unnecessary resistance for the pump.
- Connect the PVC pipes to the sump pump and the check valve, using PVC glue to secure the connections. After that, use a 90-degree elbow to connect the discharge pipe to the check valve. Make sure the pipes are properly sealed to prevent leaks.
- Place the sump pump in the sump pit, making sure it sits on top of the gravel bed. If the sump pit is already filled with water, lower the sump pump into the pit using a rope or other device.
- Attach the float switch to the sump pump. The float switch is a device that activates the sump pump when the water level in the sump pit reaches a certain point.
- Connect the sump pump to the power source using an extension cord or other appropriate means. Make sure the sump pump is plugged into a properly grounded outlet.
- Test the sump pump to make sure it’s working properly. Fill the sump pump pit with water using a bucket or hose, and observe the sump pump as it pumps the water out of the pit.
- If the sump pump is working properly, proceed with the installation by securing the sump pump in place using a hose clamp or other device. Make sure the sump pump is level and stable to prevent it from vibrating or tipping over.
- Finally, test the sump pump to make sure it’s working properly. Add water to the sump pit until the float switch activates the pump. The pump should start running and should be able to remove the water from the sump pit within a few minutes. If the pump is working properly, seal the sump pit with an airtight sump pump lid to prevent any odors or pests from entering the pit.
Maintenance and Troubleshooting
Proper maintenance is key to ensuring the longevity and effectiveness of your sump pump. Here are some tips for maintaining your sump pump:
- Clean the sump pit and pump regularly to remove any debris or sediment that may clog the system. This can be done by manually removing any visible debris or by using a hose to flush out the pit.
- Inspect the sump pump and all connections regularly to ensure they are in good working order. Look for any leaks, cracks, or other signs of wear and tear.
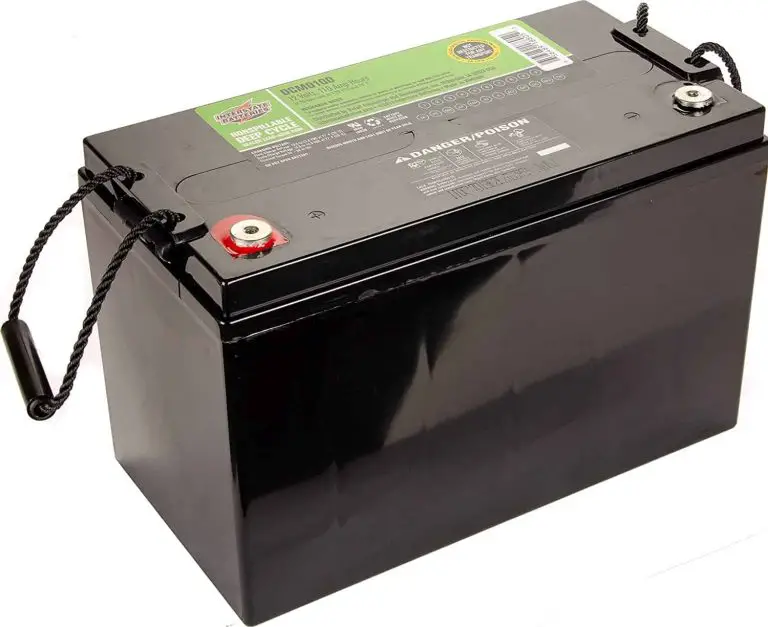
- Consider installing a battery backup sump pump in case of a power outage. This can help prevent basement flooding in the event of a power failure during heavy rains.
- Consider installing a water-powered backup sump pump as an additional layer of protection against basement flooding. These pumps use your home’s water supply to power the pump, so they don’t require electricity and can still operate during a power outage.
- Replace the sump pump every 5-10 years, or sooner if it begins to fail.
If you experience any problems with your sump pump, here are some common issues and solutions:
- Sump pump isn’t turning on: Check if the sump pump is plugged in and the float switch is working properly. If the problem persists, the sump pump may be damaged and may need to be replaced.
- Sump pump is making noise: Make sure the sump pump is stable and level. If the problem persists, the sump pump may be damaged and may need to be replaced.
- Sump pump is overflowing: Ensure the discharge pipe is properly sealed and not clogged. If the problem persists, the sump pump may be damaged and may need to be replaced.
- Sump pump is not removing water: Check if the sump pump is properly sized for your sump pit and the volume of water that needs to be removed. If the problem persists, the sump pump may be damaged and may need to be replaced.
Conclusion
Installing a sump pump is an important step in protecting your home from water damage and basement flooding. By following the steps outlined in this comprehensive guide, you can ensure that your sump pump is installed properly and is able to effectively remove excess water from your sump pit.
Proper maintenance and troubleshooting are also key to ensuring the longevity and effectiveness of your sump pump. If you’re not comfortable with the DIY sump pump installation process, it’s always a good idea to seek the help of a professional.
A licensed plumber or basement waterproofing specialist will be able to guide you through the process and ensure that your sump pump is installed correctly. Remember, the cost of a sump pump installation is a small price to pay to protect your home from water damage and basement flooding. With the right sump pump and proper installation and maintenance, you can enjoy peace of mind and a dry, healthy living space.