How to Clean a Sump Pump
Is your sump pump sluggish or making unusual noise when cycling? It could mean that stuff from floodwater in the pump is causing some type of blockage. Particles of debris, gravel, paper, and other objects that clog the parts may cause the sump pump to malfunction. Cleaning your sump pump will help keep it free of objects that may prevent your sump pump from working during emergencies.
Tools you will need:
- Bucket, basin or other containers
- Sandpaper
- Face mask
- Gloves
- Plastic scraper
- Garden hose
- Plastic
- Shop vacuum
- Putty knife
Keep it safe
Safety is the first rule when trying to clean your sump pump. First, cut the current by switching off the breaker or unplugging the electric cable. Wear safety gloves when dealing with stagnant water. Stop operating any household machines that may send water into the sump basin.
Here’s how to clean a sump pump.
- Turn off the pump and detach it from the discharge line.
- Lay the pump on a sheet of plastic to help minimize dripping while carrying it away from the area.
Clean the sump walls
- Wash down any silt, sludge, or dirt on the pump with a garden hose.
- Chip away any debris or material on the pump with a putty knife or plastic scraper.
- Let the pump dry off.
- Use a shop vac to suck up any stagnant water remaining in the sump basin.
- When all the water is out, remove any debris from the pump with a shovel or scraper. Have a trash can or bag nearby to store the stuff.
- If there’s any sludge or other liquid inside, use a container to dip it out. If the fluid is smelly or reeks of gas or rust, wear a dust mask to protect your face.
- Leave the sump pit walls to dry out thoroughly. When it is dry, use a scraper or sheet of sandpaper to file down any hard particles sticking to the pump.
- At this stage, you may also use some kind of disinfectant to remove any odors inside the pump.
Clean the sump body
- Use some sandpaper to file down any debris on the surface of the pump.
- Apply some type of lubricant to the pump surface to help protect it from rust or corrosion.
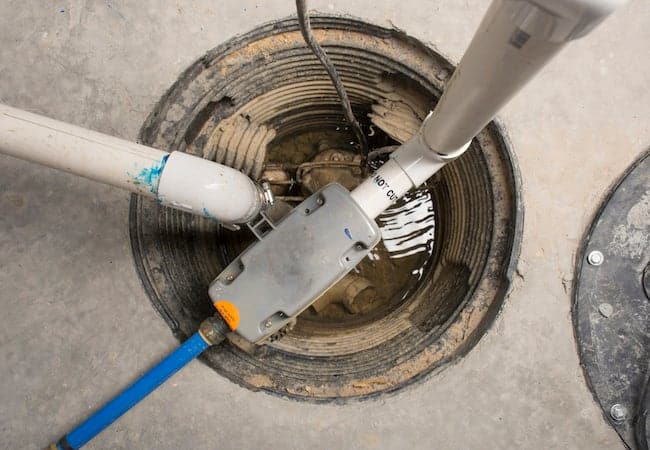
Clean the check valve
If your pump has a check valve, disconnect the parts and pour off any water that may be inside. Take the valve out, wash it carefully with water, and put it back together.
Clean the impeller
Wipe away any stuff from the around the impeller blades and leave them to dry. Clear away any particles with a leaf blower to remove any remaining bits of leaves or dust.Use a putty knife to scrape any hard to move particles on the surface if necessary.Let some air pass through the blades to clear away any remaining dust. Examine the sump parts for any cracks or potential leaks and do the necessary repairs if you can.
- Put the sump back into the basin.
- Reconnect the discharge attachments.
- Reconnect the power supply.
- Test the pump with some water to ensure its back up to full speed.
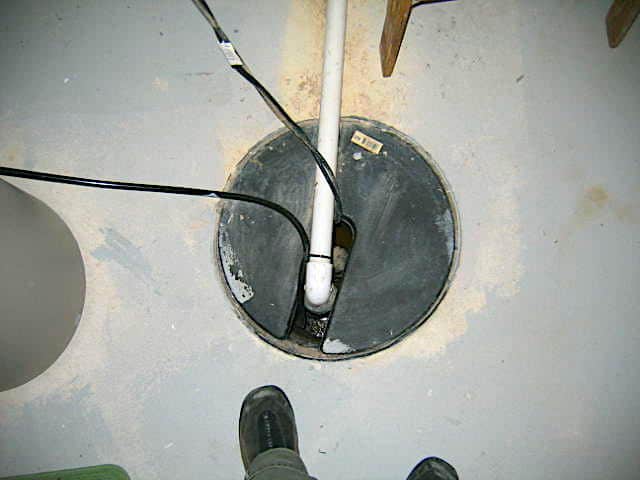
How to clean a sump basin
Shut the pump off from any connecting services that drain water into the sump basin. Have torchlight handy to see inside the pit. Unplug the current from the sump pump and detach it from the discharge line. Rest the sump pump in a basin or bucket and clean it before putting it back into the pit. Drain out all of the water from the sump basin with a dry vacuum. Wash down the pump and reattach it to the discharge line. Reconnect the power supply and enable the drain mechanism.
Conclusion
Regularly cleaning your sump pump will help ensure it is free of any defects, damage, debris, sludge, or silt. For your pump to work effectively, clean it often to ensure it will provide the maximum pumping power in times of need. Some of these particles can jam the pump, clog the discharge line, and cause the pump to slow down or stop. Cleaning each part of the pump helps the system to activate when responding to rising water levels.
Also, frequent cleaning helps keep the sump pump in good condition and can help extend its lifespan. And it is always cost effective to keep your sump pump clean to make it running smoothly rather than buying a new one.