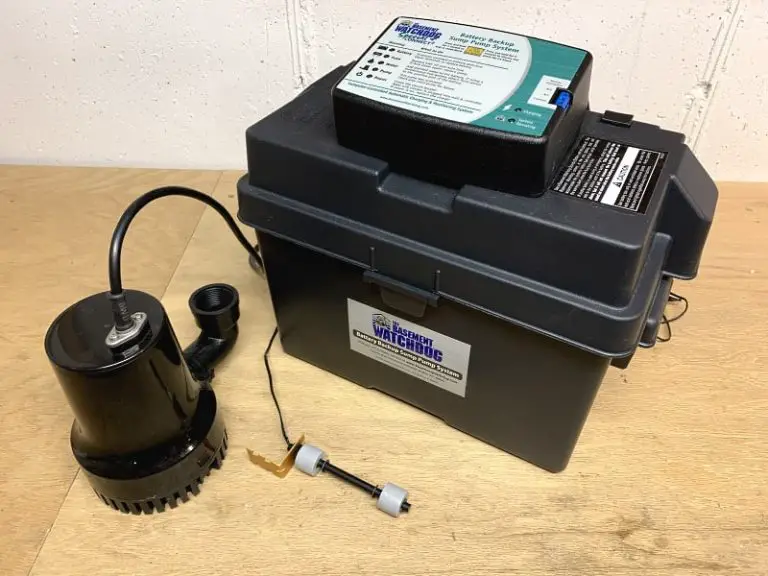
How To Replace A Submersible Sump Pump
Your submersible sump pump may need replacing for a few reasons. Old age or parts that continue to fail may also mean replacing your pump. The sump pump may also be removing less water than usual and can pose a danger in the event there is severe weather. Here’s what you need to know when replacing a submersible sump pump.
Tools
• New pump
• Union connector
• PVC pipe
• Hacksaw
• Check valve
• Bucket or container
• White cement
• Measuring tape
• Primer
Things to consider when buying a new submersible sump pump
There are a few things to consider before you buy a perfect sump pump for you:
• Check the horsepower of the new pump to ensure it has enough power to pump the volumes of water you expect in the basement.
• Look at the discharge lines to see if you need to change any parts or replace the lines altogether.
• Some experts also recommend changing the check valve to match the new submersible sump pump.
Take out the old sump pump
Lift the old pump lid and lay it aside until you install the new pump.
1. Unplug the electric cables leading to the pump and any other parts relating to the pump that requires electricity.
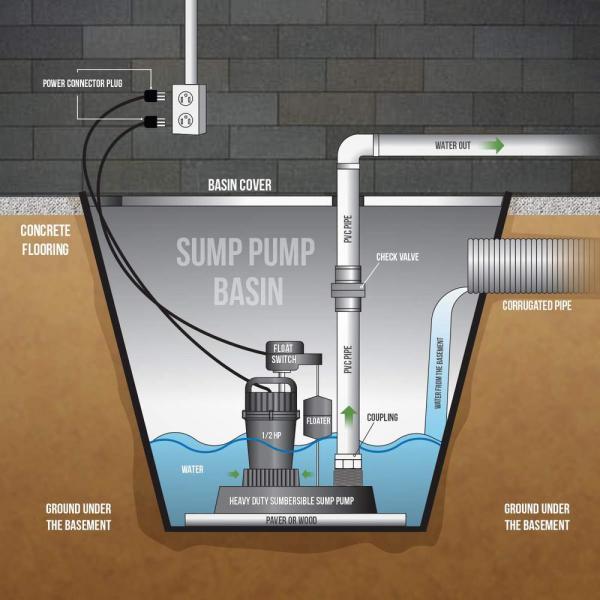
2. Look for the pipe that runs through the sump pump. It is usually a little higher than the other plumbing parts.
3. Cut out the old PVC pipe with a hacksaw in the area where the new pump will rest. About 3 feet of pipe measuring at least 1-1/2-inches in diameter can work.
4. Next, grab the handle of the old sump pump and lift it out of the sump pit and lay it level.
5. Measure the length of the pipe with a measuring tape.
6. Seal the connectors on the pipe with some primer and cement and leave it in the open air to dry.
Inserting the new submersible sump pump
After you cut the PVC pipe, make a second cut where the pipe rests along the top of the sump pump. Lay it aside until later.Attach the PVC pipe to the male connector inside the discharge line in the pump.After the cement dries, put the new pump in a container of water and plug in the power cable.Check to see how the water is running through the PVC pipeline. The water needs to rain down quickly and freely into the bucket.If you notice any blockages in the pipe, use a strip of wire and try to push them out.
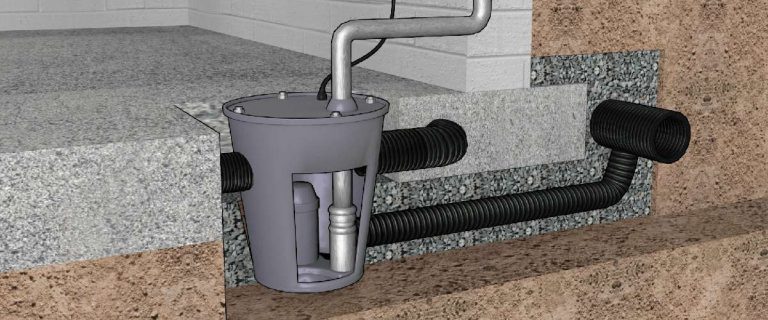
Put the pump in the basin
Insert the pump into the sump liner inside the sump basin.Make sure it is level and also keep the float switch away from the walls of the sump basin.Also, check to ensure the float is not butting against any other parts of the pump.
Connecting the check valve
- The check valve directs the water flowing through the sump pump.
- It also helps reduce the incidence of water running back into the pump when it stops cycling.
- Attach the new valve at the ends of the PVC pipe.
- Make sure the arrow guides are in the correct direction on the valve.
- If the indicators are in the wrong position, the valve may break down and stop the water from flowing out of the pump.
- Next, connect the other length of the PVC pipe to the other tip of the check valve.
Attach the Union Connector
The union connector attaches the two ends of the PVC pipe to the other plumbing line in the crawlspace or basement.
Troubleshoot the new submersible sump pump
- Use a bucket of at least 5 gallons of water.
- Pour it into the new submersible sump pump.
- The water will help jump start the pump as it reaches a certain level in the pump.
- Attach the power cord and any other cables to the power supply.
- Switch on the electric current.
- Check to see how the pump takes the water out of the basin.
Final Words
Replacing a submersible sump pump is a simple process that may not require a plumber if everything is in place for the changeover. Before you begin, make sure you have the correct parts and connections to save time and also make your job hassle-free. Studies show a new submersible sump pump may last up to 10 years. Replacing the pump ensures you always have the equipment necessary to keep away the access water from the flooded basement.